

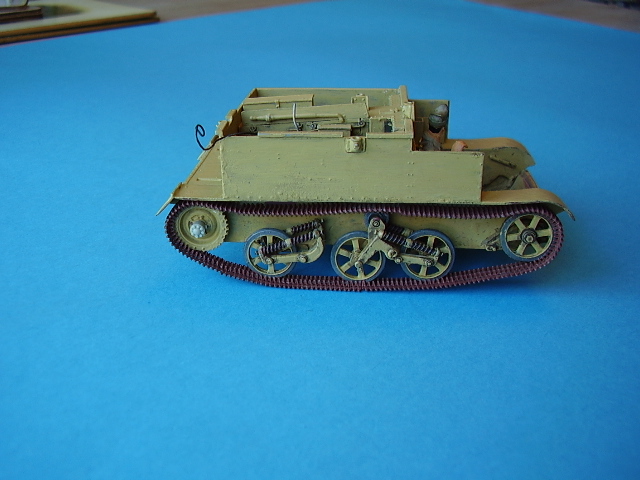
1⁄35Building the Resicast Universal Carrier Mk I
9
Comments
Construction
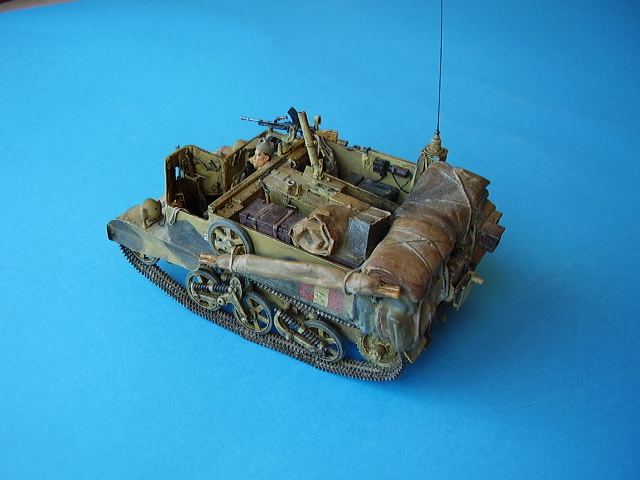
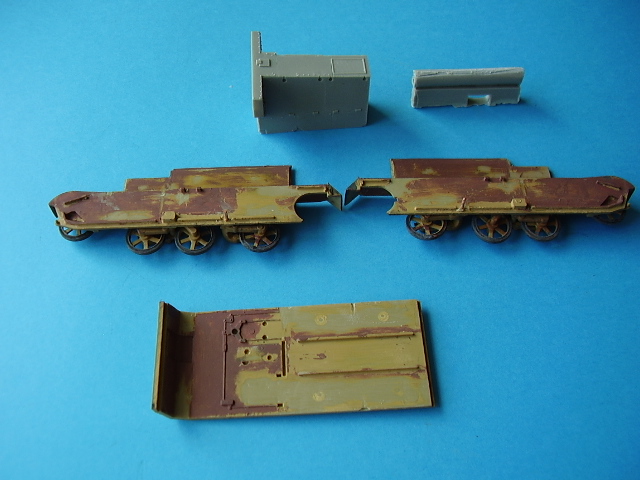
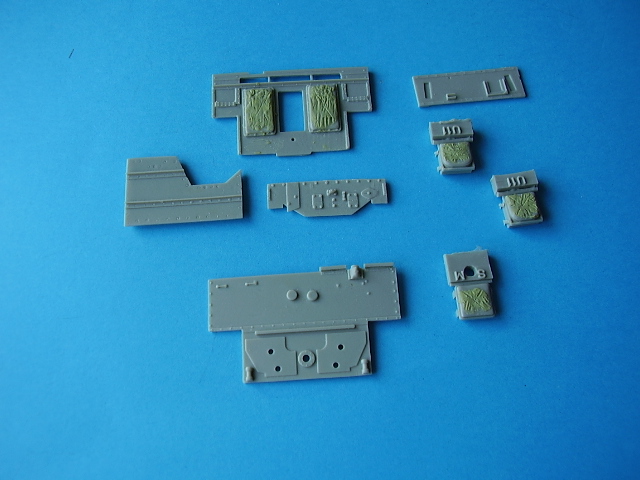
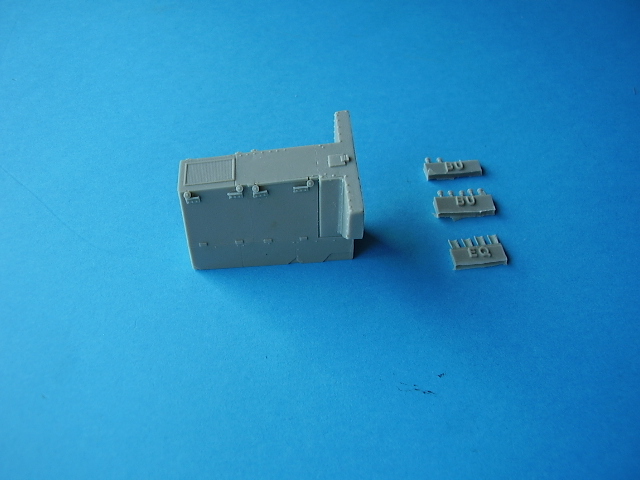
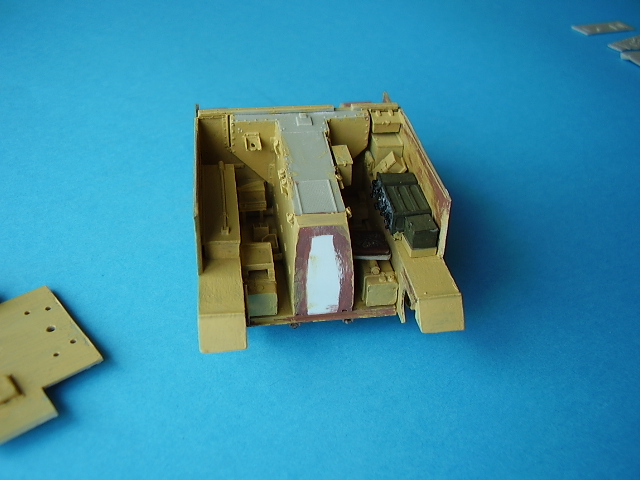
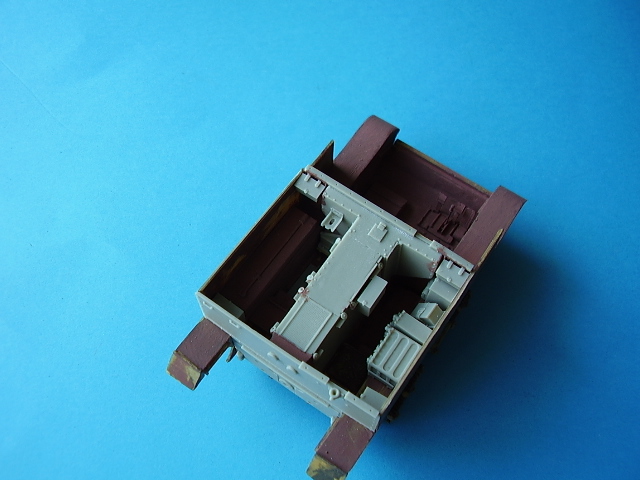
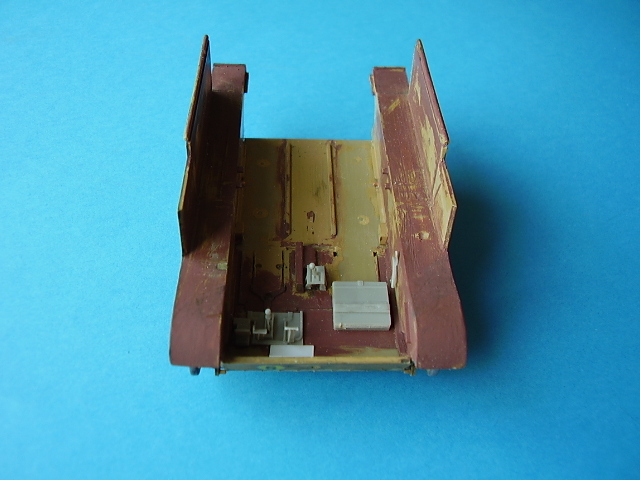
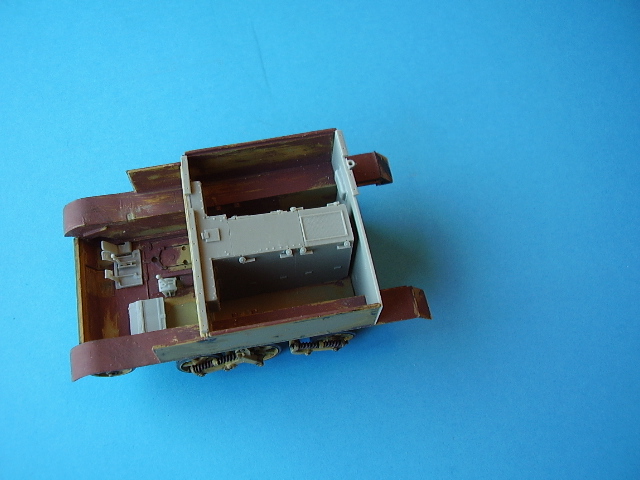
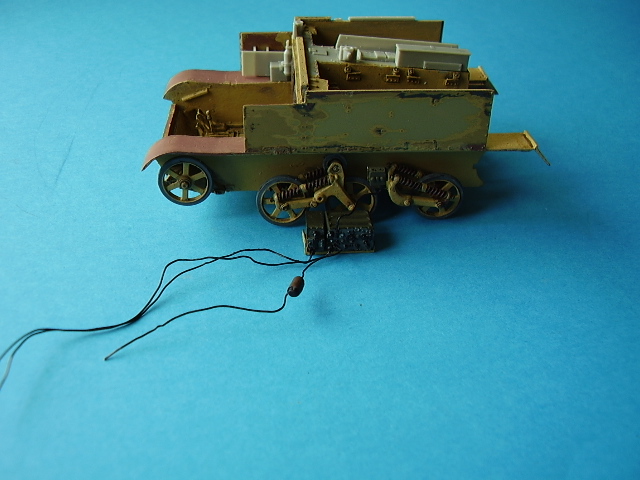
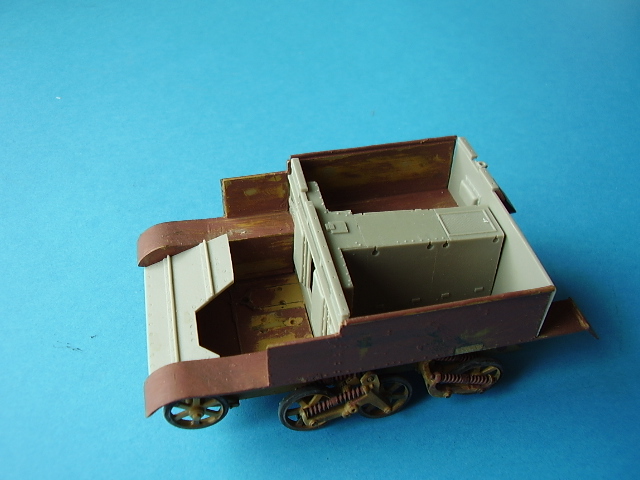
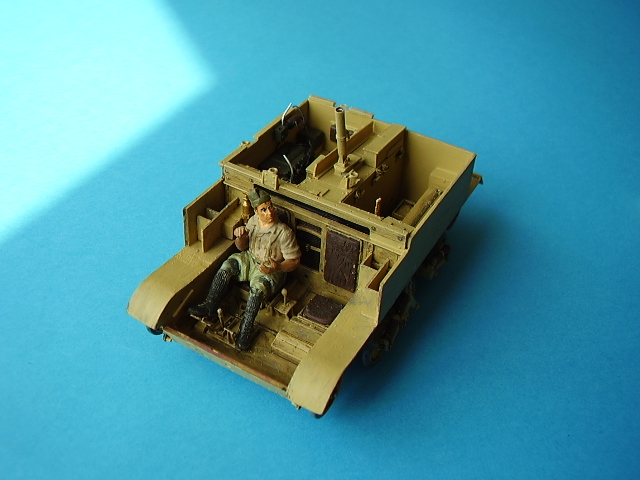
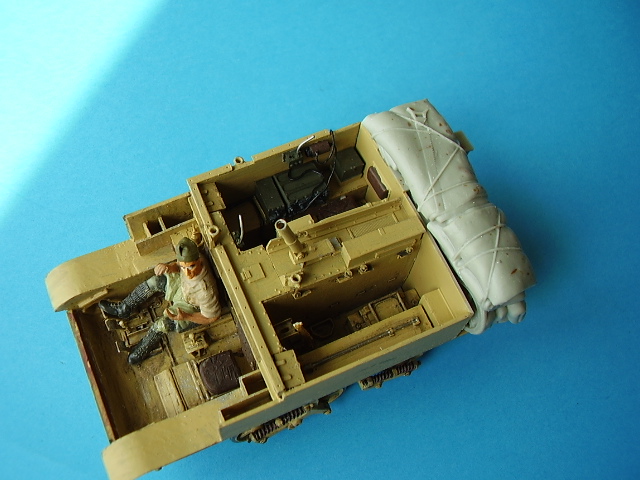
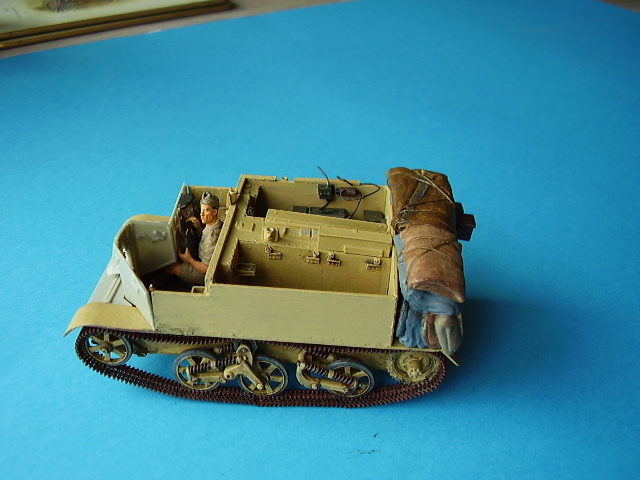
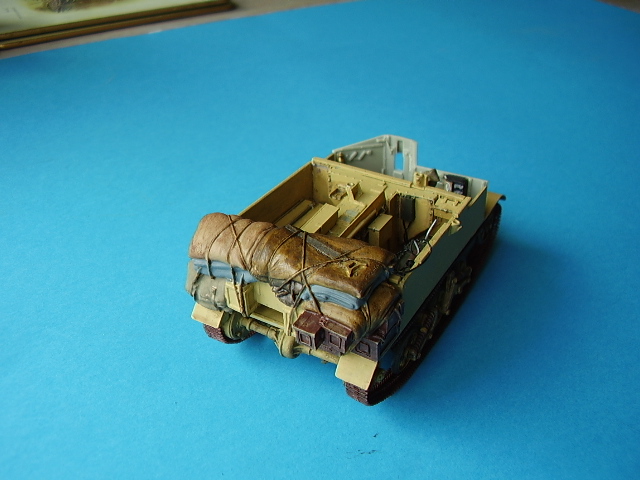
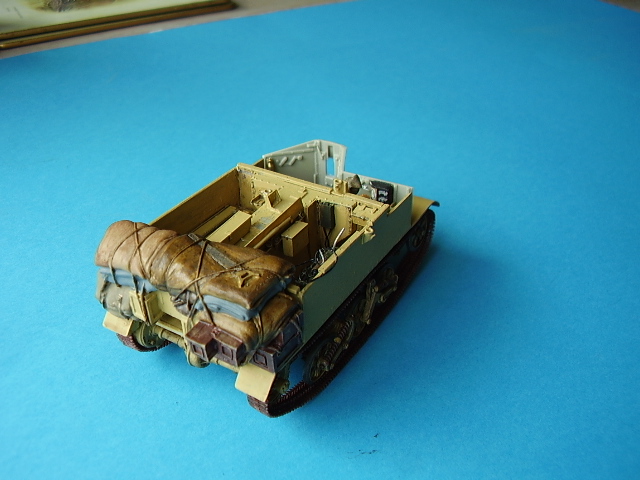
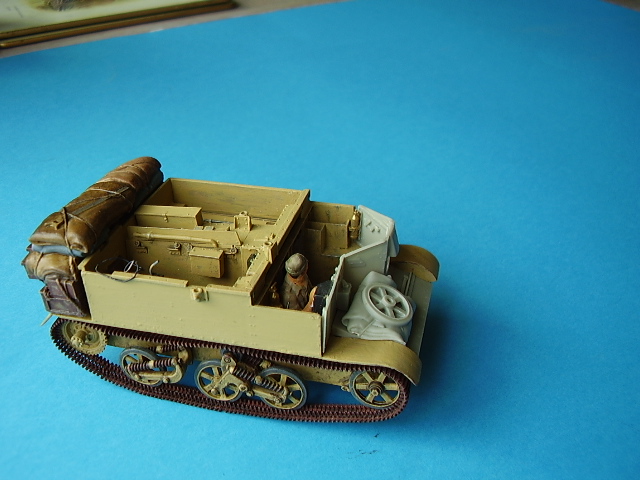
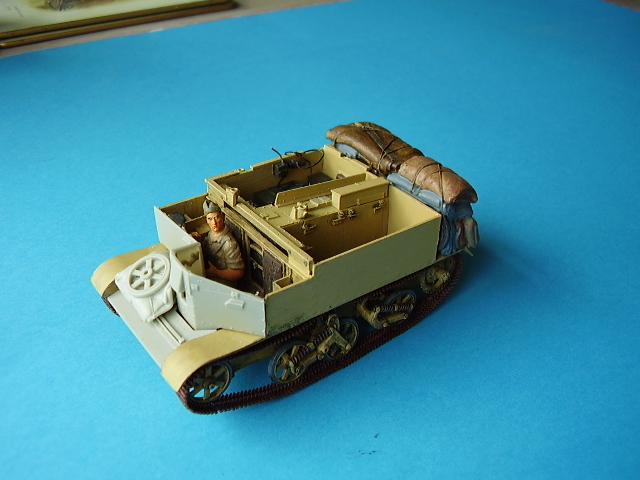
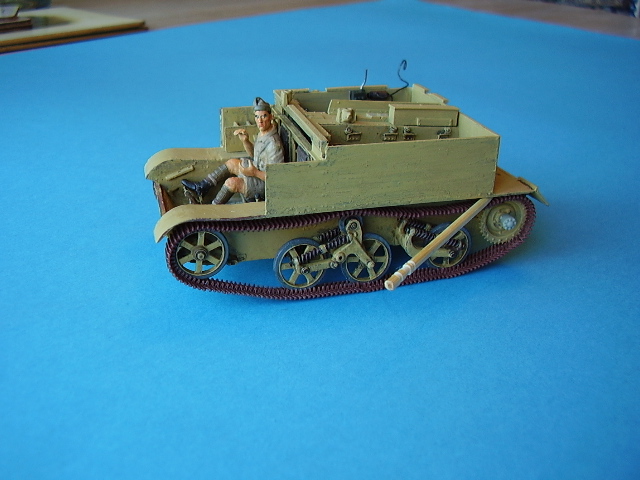
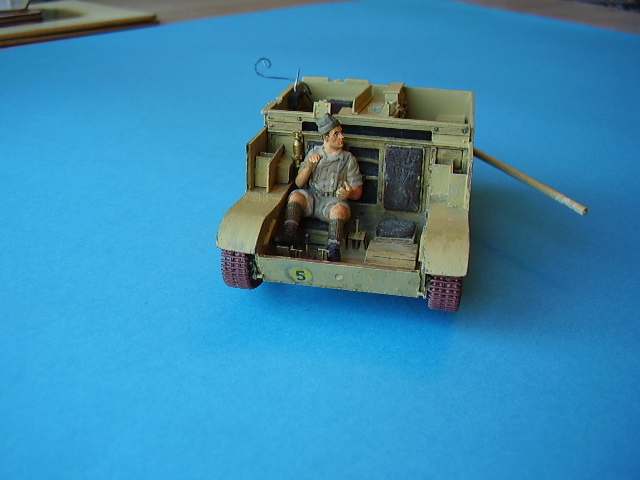
For me construction began by finding all the parts of the old carrier I had disassembled and were scattered around in boxes and on my work area: then putting them into a nice pile. Resicast provide a complete set of replacement build instructions for the kit and it would be a good idea to read these through first as they also provide a list of the parts and it is a good way of getting to know whats what in the vehicle. The first step was to saw off some of the Tamiya kit parts that were not required on the internal and external hull sides and to prepare Part UOO, the replacement Engine Housing and Part UO2 the Rear Drivers Bulkhead. You need to fill in the dip in the front lower hull drivers compartment and this would be a good time to do it. This is a fairly simple operation; just take a little more care when working with the resin parts. I also filed down the front and rear mud guards on the kit parts as theses are quite thick. Then assemble the lower kit hull and sides. If youre a little short sighted like me make sure to also remove the round bars on the top of the kit hull sides as these are not required. I had to do this later as I missed the arrow, not a major problem, but it would have been so much easier had I spotted it in the first place. I also sanded down the internal hull sides a little. The next stage shown in the instructions is to fit the new engine housing, drivers bulk head and rear bulkhead. I left the rear bulk head off at this stage as there is quite a bit of work to do in the rear left and right seating/stowage compartments. Its a good idea to test fit everything before hand, especially when working with resin and when using super glue!!! At this stage I hit a slight problem; the engine housing was too short by about 2/3mm to mate with the rear bulkhead. I check the parts thinking I had missed something and then measured it against the older kit engine housing and sure enough it was short. A moments panic set in, so I contacted Resicast and asked Graham if he could throw any light on the issue sending him a picture of the offending part. He responded almost at once and having looked at the picture I sent and though the problem may have been caused by either shrinkage, but this would have been a sever case, and/or too tight a lock on the mould. Also a casting, of a casting of a casting with a little of each of the above could have caused this. He was going off on holiday the following morning so obviously couldnt do anything about the problem at that moment in time, so I set about fixing the gap. (I should note here that Graham did in fact contact me again directly upon his return to make sure I had managed to resolve the shrinkage issue which I though was good customer service I have no doubt he would have replaced the part had I not fixed the problem. I looked through my bits box and came up with one of the old Tamiya infantry stands they used to issue with their figures. This looked about the right thickness and just slightly wider and longer than I need so I glued it on, and when set, sanded it down to the correct engine shape. I was still a tiny bit short so I added a very thin 0.05mm piece of plastic card and repeated the same process. With the problem fixed I fitted the parts and moved onto cleaning up some of the many fitting for the drivers compartment and rear compartments. I should point out here that I had previously fitted the rear road wheels, these having broken off over the years, been glued and re-glued a number of times. These I drilled and secured with wire prior to the conversion set being available, but I had positioned the rear suspension to allow a slight nose up effect. The conversion kit provides a neat set of pedals and replacement parts for the front drivers compartment along with a suitable floor plate to house them in. These are fairly easy to place so just follow the instructions. I did replace the drive gear stick as I managed to break the end of mine. The conversion comes with a good Type No 22 wireless, and along with the right and left petrol tanks, steering cam shafts, large Bren bin and smaller items. I set to work on the rear area of the carrier. There are a lot of small items to fit in here which was why I had left the rear bulk head off. I also wired in the radio and ran a cable to where it would attach to the antenna. The battery for the radio is stored in the opposite compartment on the Mk I, so I also ran a cable up and over the engine housing and down into the battery box on the LHS. Part SC (Bren bin) is provided with a closed lid. Above it sits one of the 2 grenade boxes Parts SD. The first thing that struck me was that the lid of the Bren bin would not open fully with the grenade box above it. I saw a picture of an early Mk I and this bin was shown as an open one as per the front ammo bins, so I opted for a home made plastic card one, which somehow felt better. Having said that I them proceeded to hang a set of home made webbing over it so it may have been a wasted effort but I know its there!! Next I fitted the small open topped front ammo bins, front grenade box (drivers side) and the fire extinguisher on the drivers bulkhead. The next job was to fit the rear bulkhead and the rear axel and replacement drive sprockets. It was also time to decide if the vehicle was to contain a figure in the drivers seat. The replacement of the new drive sprockets had already taken place earlier when I first started work on the carrier so it just remained to sand down the back of the engine housing fix I had completed earlier for a good fit, add the rear axel and then the top back rear plate. Im not a great figure builder and the addition of the drive peddles meant that I needed to alter the figures legs to sit more appropriately inside the kit. I sawed both off across the hip/crotch and effectively moved them up about 3/4mm. At the same time I alter the angle of the knee joints, so some sawing and filling was required. It took a bit of work to get a reasonably correct and I hope natural position. There isnt a lot of room in there once the front plate goes on. I also added a new head from the Hornet range. Hes not perfect but he does the job. Having reached the point of fitting the top rear plate I also needed to make a decision about whether or not I was going to use one of the bulk rear stowage items that come with the Mk I stowage set. There is enough detail in the kit as it stands to build a perfectly good Mk I carrier, but as I am going to display mine in the desert I wanted it well loaded up, with the kitchen sink and all, so chose item 1 from the stowage set which I felt would work well. If youre fitting the bulk stowage you dont need to build up a number of items on the rear deck, but you do need to build into the stowage the rear section P.O.W. bin and tail light. Having completed this I set it aside to be fitted later. You might look at the conversion as a series of mini builds. Having added the rear drive axel I felt this would be a good point to add the kit tracks so as always I was working across a number of different areas of the kit pretty much at the same time. The tracks although resin are vey flexible, but you still need to be careful not to break anything. They require two long sections, the small section and then the remaining three long sections per side. A little patience and some test fitting and they should not present too much of a problem. Once in place across the top of the drive, return and idler wheels, I used a hair dryer to bend them and pinned them into place to show the sag by inserting some tooth picks to hold them at appropriate points while the super glue set. Dont panic if you snap them, I did this on both one in this build and one of my previous carrier builds and they glued together again fine. Just hurts you ego a bit. Lastly you need to fit the drive wheel hub and replacement front hub if you choose to use it. Then I set about building the front armoured panel and the rear plate that holds the tools. The rear plate is a mixture of small PE parts and resin parts. Im not a big fan of metal but this went together really well and the PE is very easy to work with. You get an excellent set of tools in the conversion set. I had decided to fit the Boys Anti Tank Rifle into the front fighting compartment. The resin weapon had a slight bend in the barrel which would require straightening, but I choose to use one of the old Italeri plastic parts for this, not for any other reason than the possibility of me breaking off the barrel. It is much easier to fit this before you mount the front armour. Also added here were the two small grab handles and the 2nd front fighting compartment fire extinguisher. The instructions show the use of the Tamiya drivers instrument panel. And I fitted that. However, as I was checking through some references I noticed that the actual panel on the Mk I had a somewhat different design, so I removed it and set about changing the dials to give a better representation of the panel. I shaved off the dials I didnt want and added some new ones in the correct place from small plastic rod. Again not perfect, but more representative of the diagram I had. I also added the Bren support bracket to the front armoured panel. Next I fitted the front lights; you get a choice of 2 styles, which in effect gives you 3 choices. The Mk I had a range of front lights fitted so it would be best to check your reference for the vehicle you are building. Had I been slightly braver I would have drilled out one of the lights to show the housing empty with the wires sticking out but I just added the wiring. Then I set to work on the front stowage and the side antenna mount. The side antenna is a mini build in itself and I thought I night have had problems with this part, but I took my time and double checked everything and it worked out fine. There is a small resin square that needs removed from its plug/spur so take care with this part (Part W1) as it holds the key to building the part. One complete page of the instructions is dedicated to build this part, but it is not a difficult as it might first look. Just study the parts and all the pictures in the instruction book and they will guide you. One point to note here is that this was a complex arrangement. Those of you who followed the blog and blog pictures will see that I had bent the antenna to hook it into Part DF the antenna hold down. This arrangement is incorrect (thanks Graham) the early style antenna was a fixed arrangement and the base tilted forward in order for the antenna to be held down. So Ive made the correction in the later pictures and if you want to use the hold down youll need to build the antenna base tilted forward. It does mention this in the instructions but it obviously didnt register at the time. Once I had the antenna mount complete I added some cable from the junction box up through the antenna housing. Then I fitted the small bracket to hold the smoke thrower on the RHS. I also chose to add a smoke thrower from their 2/4 inch bomb throwers set 35.297 and added the small front sand skirts. These are a neat PE item and I added some damage and dents with the aid of a pair of pliers. The final stages involved adding the 2inch mortar and the mounted Bren. There are a range of Bren mounting points on the carrier for you to choose from. Pictures Ive seen also show the .30 cal being mounted in place of the Bren so you have a range of options depending on time frame and location. There are 3 layers to the mortar mount and it took me a while to work this out, but it is s simple construction. The barrel of the tube drilled out easily. Be careful here though, as there is a small carrying handle on the tube and you dont want to break it off. The mounting may look a little odd but this is the correct sighting for the weapon in the earlier carriers. Later it was moved to the front LHS of the front fighting compartment. Alternatively you could leave this part off, again it depends on you references.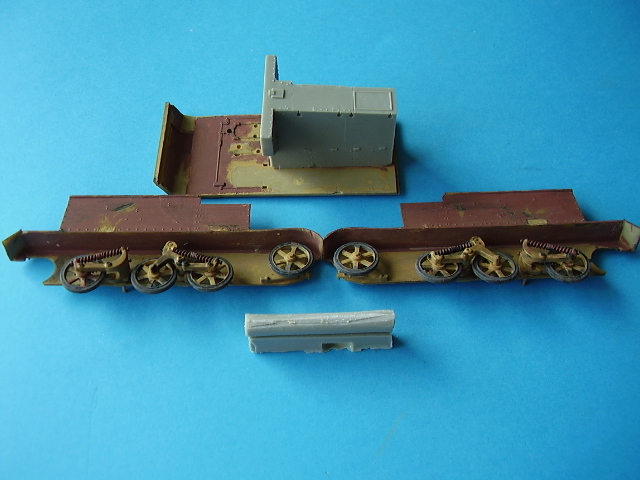


About the Author


FROM: ENGLAND - EAST ANGLIA, UNITED KINGDOM
Greying slightly, but young at heart. I've been teaching adults off and on for most of my life. Left the services in 85 and first started modelling in about 87 for a few years. Then I had a long spell when I didn't build anything (too busy) and really just got started again during the summer of ...
Comments
As usual, Al does great things with a very old kit and some TLC.
Nice job Al !!!!
jjumbo
OCT 13, 2008 - 02:32 PM

Hi Darren,
Thanks for getting the article organised. - Nice Fern.
John,
Thanks, appreciated.
Al
OCT 13, 2008 - 07:20 PM

Great write-up and photos, Al, easy reading with a lot of great pointers. And the Carrier ain't too shabby either!
OCT 13, 2008 - 07:35 PM

Hi Al
Nice resurrection of Tamiya's dodgier moments from the past How long before you add a 9AB Sherman to it??
David
OCT 13, 2008 - 10:03 PM
Hi David,
Thanks, much appreciated. I though you have been very quiet during the build lol, lol - I took that as a 'sign' I was heading in the right direction lol, lol.
The Tasca Shermans are shipping as I write, well I hope, but in the mean time company will be in the form of an M3 Grant and a DIngo Scout Car - well when I get the troops complete and the base finished.
 You'll have noticed I'm very taken with Graham's new carrier sets, very impressive and fun to work with despite the silly glue.
I'm afraid the Sherman's are stacking up, this year seems to have been one of Boats, Carriers and Trucks, well with the odd ARV .
Cheers
Al
You'll have noticed I'm very taken with Graham's new carrier sets, very impressive and fun to work with despite the silly glue.
I'm afraid the Sherman's are stacking up, this year seems to have been one of Boats, Carriers and Trucks, well with the odd ARV .
Cheers
Al
You'll have noticed I'm very taken with Graham's new carrier sets, very impressive and fun to work with despite the silly glue.
I'm afraid the Sherman's are stacking up, this year seems to have been one of Boats, Carriers and Trucks, well with the odd ARV .
Cheers
AlOCT 13, 2008 - 10:44 PM

Alan:
Even though I followed along on your build of this I still enjoyed your review this
morning.
Great review and model
Thanks for letting me watch
...Tony the Mutt...
OCT 14, 2008 - 04:04 AM
Hi Tony,
Glad you enjoyed the blog and the article. Thanks for the support and taking the time to post.
Al
OCT 14, 2008 - 05:57 AM
Copyright ©2021 by Alan McNeilly. Images and/or videos also by copyright holder unless otherwise noted. The views and opinions expressed herein are solely the views and opinions of the authors and/or contributors to this Web site and do not necessarily represent the views and/or opinions of Armorama, KitMaker Network, or Silver Star Enterrpises. All rights reserved. Originally published on: 2008-10-13 00:00:00. Unique Reads: 24195

WEB HOSTING BY


Copyright ©2021 Armorama and Kitmaker Network, a subsidiary of Silver Star Enterprises
All Rights Reserved. Please read our Conditions of Use and Privacy Policy.
All Rights Reserved. Please read our Conditions of Use and Privacy Policy.