

1⁄35Jaws
21
Comments
The plaster sea
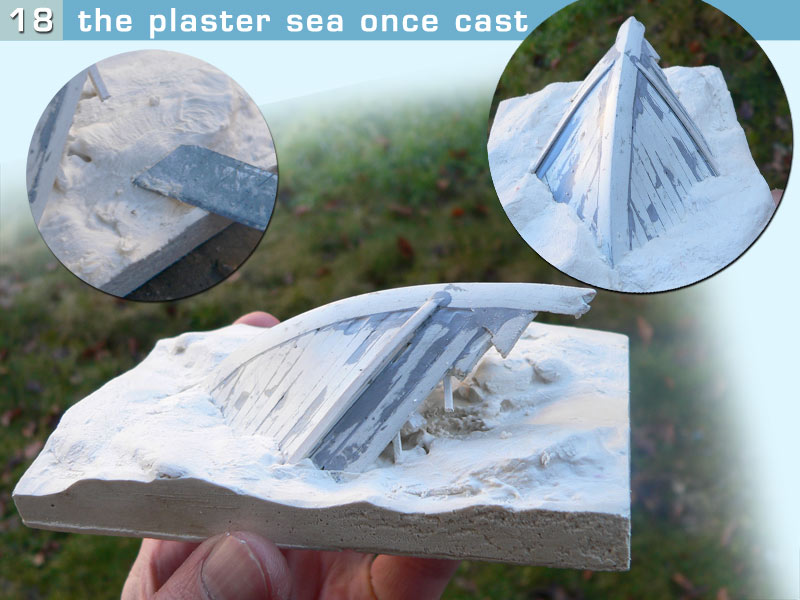
Then I had to take care of the sea straight away. Lets be clear, I would normally end up every building part, every figure sculpting before switching to paint, leaving the sea for the last minute. But then I had an issue with that special bit of sea. Indeed I wanted to create a reasonably agitated sea so that the tip of the waves would sort of echo the triangular shape of the wreck something that just forbid me to just pour some resin layer and then try to raise it with a tool. No, I needed to mould that sea in the same way I did in a number of former dioramas. But then there was some special problem with jaws, indeed the shape of the hull would leave quite a bit of it under the sea in such a way that at first I couldnt see how I would either retrieve the shape of the boat from the sea, or how I would place it again if I used some kind of dummy. But then I found a way doing that.First I did the mould itself which was rather easy: (Image 18.)
I used some balsa walls of the exact size of the diorama that I backed with some modeling paste for kids. I then greased thoroughly both the boat and all the contact surfaces of the future form.
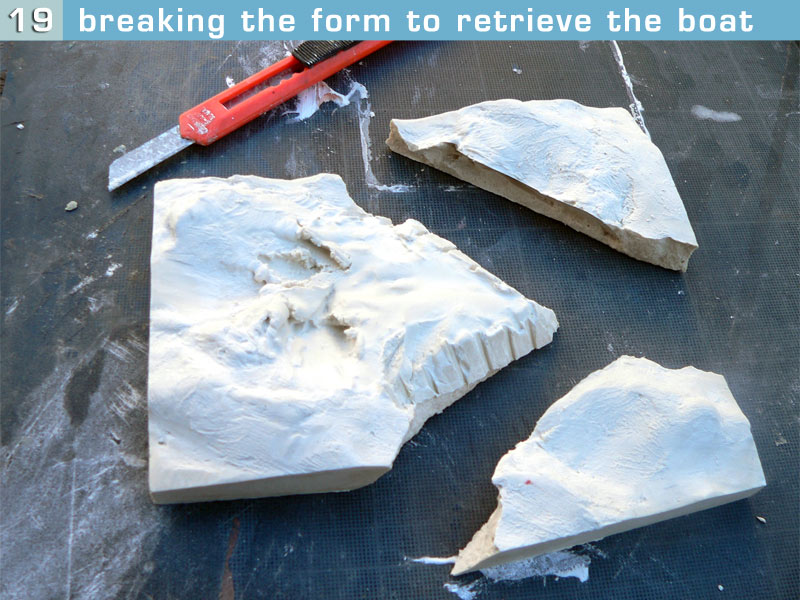
Then in used plaster again, I poured a thick layer and created the shapes of the waves. Then one particular notice about the way I am sculpting them. I heard once the great Russian painter Aivazovski watched the sea for hours and then got back home to paint it that never did he brought his painting material near a sea shore. Thats it, he just tried to capture the true idea of the sea and then tried to paint it. Aivazovski I aint but I realized what worked for him worked for me as well. I indeed realized that if I happened to Google for sea pictures and that I kept an eye on both my computer screen and my plaster bits, I produced dreadful results. So my technique is rather simple: I watch some documentary with boats and sea in it, or I Google for sea pictures, then I empty my mind, have a breather and start the sculpting work while trying to think the less possible. I basically just leave my hands to do the job, and believe me when it works thats just an exhilarating feeling . Honestly thats for those moments when during a fraction of second I just have the feeling that I connect with something way beyond me that keep me doing dioramas after all these years (image 19 and 20.)
Anyway I had a rather good looking sea in the end, thats probably why I broke the form in 3 pieces the only way for me to get my boat back for painting (image 21.)
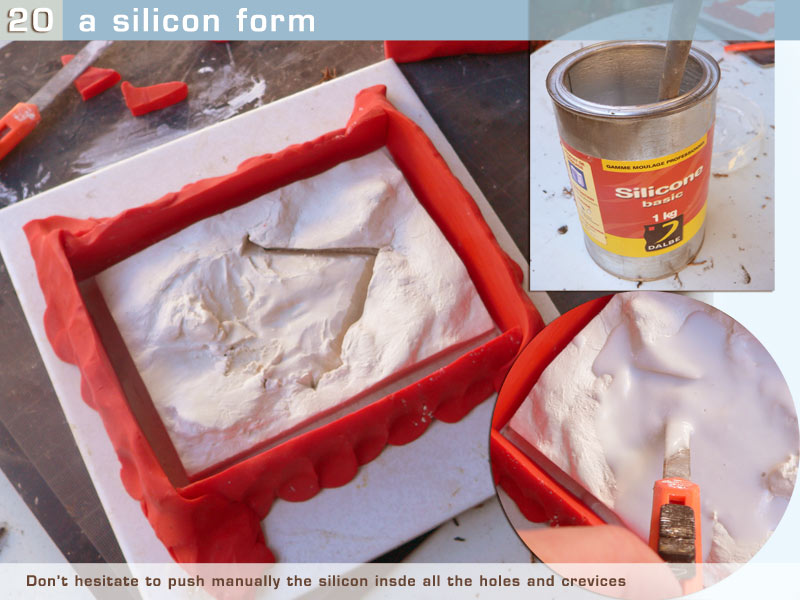
Anyway, i reglued the 3 pieces, using some plaster to hide the joints, made another frame out of modeling paste and used the rest of silicon I had left from my old Koktebel diorama arather good surprise was that the silicon was still usable despite it being written on the pot that the stuff is not usable anymore 6 months after opening. There is nothing worth mentioning at that stage, except that I used an old briush and also my cutter as seen on the picture so that I would be sure that the silicon really gets in every part of the mould especially in the small space where I would end up inserting the hull (image 22.)
Painting in sharky waters
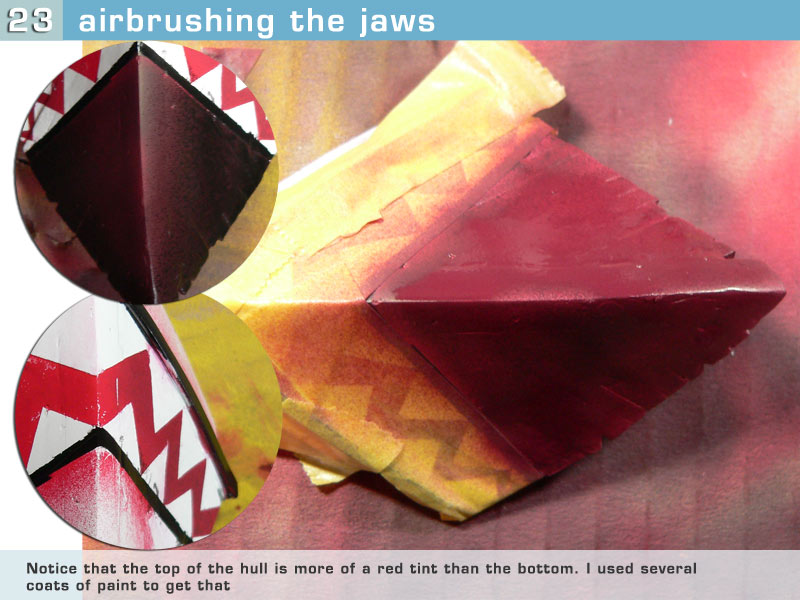
Of course I wiped the grease out of my wreck thoroughly before undercoating it with some White Tamiya primer so that I had a base colour that would be suitable for the teeth.So I went back to the computer in order to draw and then print the right shark head using the few reference I had at my disposal (mainly that shark headed PT boat under restoration I told about earlier) (Image 23.)
I glued some large Tamiya masking tape on a sheet of glass in order to be able to retrieve the mask later without trouble, fixed the sheet of printed paper above, and cut out the teeth with an X-Acto. Yet I had a rather hard time to fix those on the hull despite marking the places with a pen.
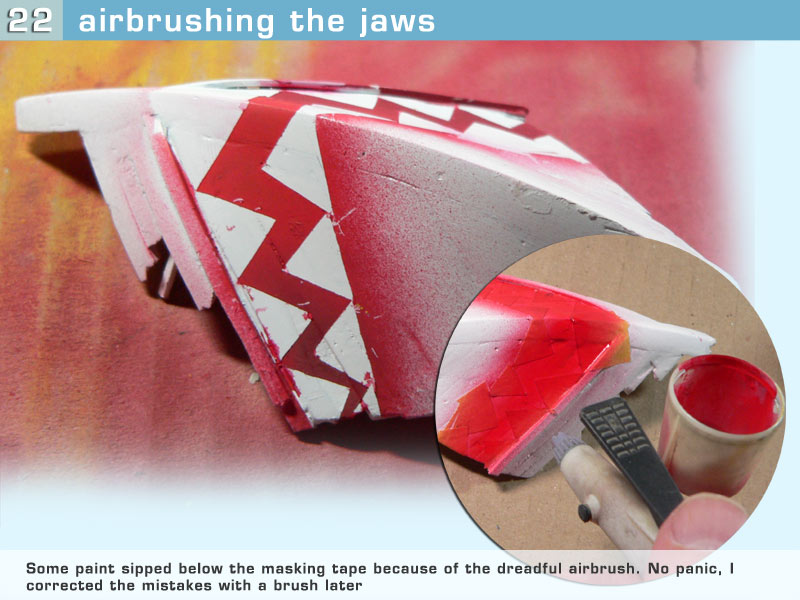
I airbrushed rather clumsily the red mouth as a next step no less because my Aztec is about the poorest airbrush ever, that my compressor doesnt deliver enough air, and the nozzle is mostly broken. Anyway, the use of colour is worth mentioning: indeed if I airbrushed a yellowed red tint on the tip of the keel, I used a slightly darker shade of red below, near the water. I used the same trick for the other painting steps: the reddish underside of the boat is mostly red on the top, and of a much darker brown below, same thing with the green of the upper hull (image 24.)
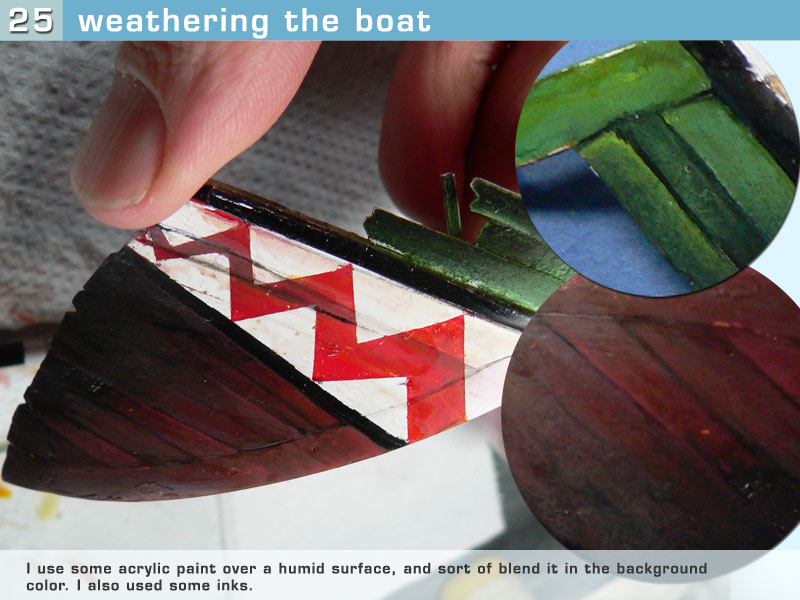
But then of course those were only the undercoats. The real painting came later, with my paint over water technique which ensured that I get the exact tint I want. Indeed its been years I am through with drybrush n washes and other Verlinden era tricks. I basically paint my models just like I would paint an oil framed painting. I first apply a bit of water with a brush on the right places and then apply more or less diluted acrylic paint at the right places, Sometimes I dilute acrylic paint with Citadel inks to get a shinier result the trick being that like with the plaster sea- you have to think the less possible about the way your are painting. I just basically follow my intinct, and am not afraid of spending hours on a few cm². In the end I also realize I can hide quite a lot of small imperfections that would have shine through if I had used some more imprecise ways of weathering like drybrushing for instance.
Finally I added some sort of trail of salt using some undiluted white paint applied with a wet brush, that I more or less blended with the brown of the hull (image 25.)


About the Author


FROM: RHONE, FRANCE
Here are my 10 rules for better dioramas! 1 -The diorama is everything modelling is about, it's the meeting point of the manufactured object that is the model and the human input, you can and have to- tell stories with dioramas. 2 -When doing your diorama you should not be influenced by any tr...
Comments
Jean-Bernard,
My most sincere and generous compliments to you for again presenting a TOTALLY original, and expertly rendered, personally-unique diorama. You are really a shining light of talent and inspiration here.
The hobby advances because of people like YOU, sir!
AUG 07, 2009 - 02:18 PM
hey Alan thanks for your comments as always
I am back for good this time and fortunately my red legs turned brown enough, I would like to be an honorary Brit honestly, if only because you can't find Cumberland Sausages, Bodington lager and decent fish and chips in France
Karl thanks a lot -yet I don't know if this hobby really wants to be advancing as a whole, oh well no matter I am here to stay
Thanks for the kind words guys, I have to outstretch myself to find anything clever to somewhat express that I really am very pleased with your comments
AUG 15, 2009 - 02:14 AM
My friend, I think you should create a new medal, you do not ride alone and give wonderful color but will also provide jobs to your feelings
This is much much more difficult than any technique, which is complicated by
Domi
AUG 15, 2009 - 10:20 AM

Hey Bobby, there is one thing I didn't told in the SBS, it's that I didn't know how to paint the Asian kid properly, so the same day I had to paint it coming back in the tube there was that probably Philippino guy standing near me, and i fear he found me a bit queer
Domi, Always an honour coming from such a creative diorama maker like you
AUG 28, 2009 - 10:30 PM


Hello Jean Bernard,
What a great piece you did. Absolutely outstanding, and so is your story of the process. I totally agree with your thoughts about the modelling scene and especially about competitions.
I wish to be as talented as you to realize all my ideas. But anway, seeing your stunning work encourages me to follw my way. Thank you for that, and thank you you for sharing your standpoints and ideas about modelling. You give great power to these "outlaws".
Your diorama is again as all the others i know from you a masterpiece. I cant stop whatching the pics and i truly hope i will see it once in nature. I bet the impression is much deeper as from the pics.
Maybe that your figure is not perfect what ever that means (I don´t tnink so) but you sculpted it your own. And for me the motion and balance is perfect.
By the way my "Adler" is pretty close to be finshed i hope you will like it.
Many thanks for all
Peter
AUG 29, 2009 - 12:55 PM
That must be an ethnic weakness, but most of the time I find it very hard to do that
Now Peter those are pretty nice things you said, and about my small dio too. You know there are all those posts in forums that say "oh yeah, we model for fun", it's true for a lot of the guys, but for some it simply is not. I mean, they spend the day at their office doing things others tell them to do, and then when they come back home and get into their hobby, they follow the same kind of rules in the hope of earning a golden medal.. oh well, that's none of my business anyway, but it's true I won't be attending one of those shows before a long time.
There are great pictures of the SMS Adler with the front destroyed by a collision I think, now that would be a pretty nice thing to model Good luck with that model of yours, and I hope your originality will be rewarding, commercially too!
AUG 30, 2009 - 10:51 PM

Copyright ©2021 by Jean-Bernard André. Images and/or videos also by copyright holder unless otherwise noted. The views and opinions expressed herein are solely the views and opinions of the authors and/or contributors to this Web site and do not necessarily represent the views and/or opinions of Armorama, KitMaker Network, or Silver Star Enterrpises. All rights reserved. Originally published on: 2009-07-26 00:00:00. Unique Reads: 29248

WEB HOSTING BY


Copyright ©2021 Armorama and Kitmaker Network, a subsidiary of Silver Star Enterprises
All Rights Reserved. Please read our Conditions of Use and Privacy Policy.
All Rights Reserved. Please read our Conditions of Use and Privacy Policy.