_GOTOBOTTOM
Яusso-Soviэt Forum
Russian or Soviet vehicles/armor modeling forum.
T34-85 Dragon Orange box build log
clovis899
#155
Visit this Community
California, United States
Joined: May 05, 2002
KitMaker: 774 posts
Armorama: 605 posts
Posted: Wednesday, October 23, 2013 - 05:41 PM UTC
Hey everyone,

Promised Jim that I would throw down on this T34-85 and here goes. Well, a couple of minor glitches; glitch one, my digital camera suffered permanent meltdown (may she rest in peace) and I had to acquire anew. That was a good week but rather than sit around and surf the web I decided to go ahead and get started; I doubt I would have recorded every step anyhow.
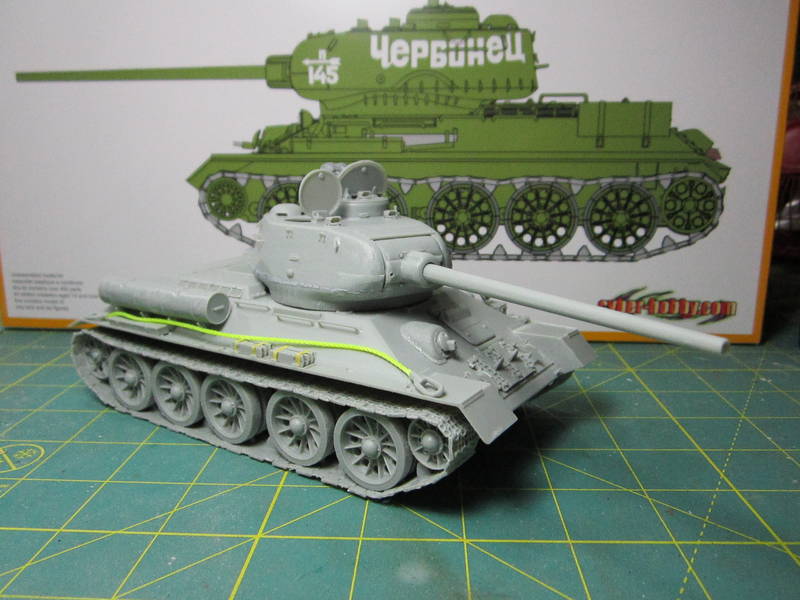
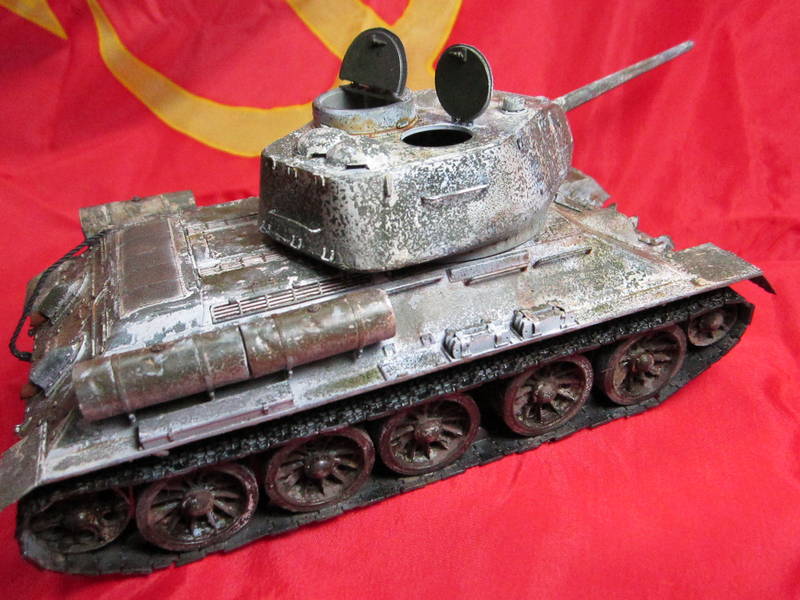
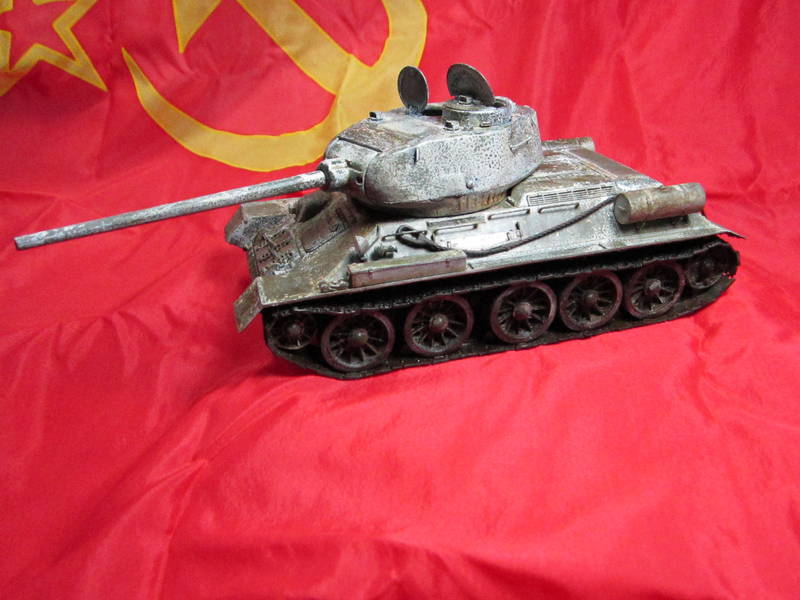
So what you have here is a week or so into the project. The plan is a 4th Tank Army tank operating in the Oder region following the early 1945 operation with a scruffy whitewash. I think I am going to provide a bit of a base with a few figures hitching a ride.
The kit itself seems pretty simple after some of the newer kits with their mighty parts counts. Also the attachment points seem really thick compared to what Dragon is doing now. The drawback with the Orange box kits is the removal of the PE with the screens for the engine intake of the T34 in particular. I decided to go ahead without in order to make this a more true out of the box build and the thought that the infantry would hide most of it anyway, we shall see how it goes.
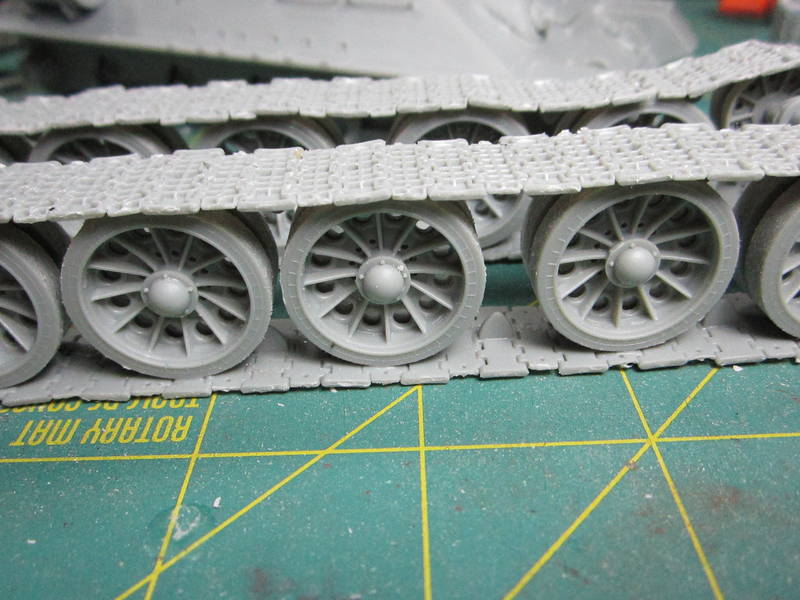
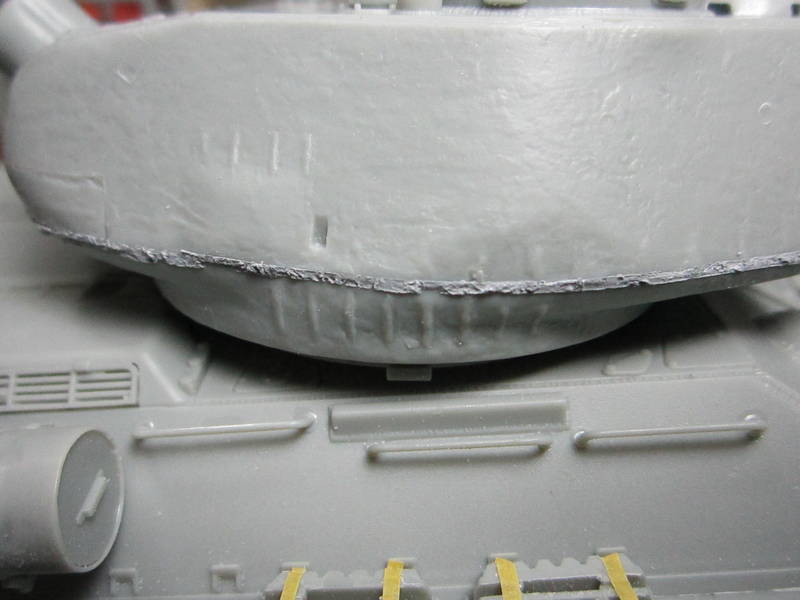
Here is where we are tonight. I love the Christie style wheels and tracks which can be built to be easily removed like I have done. Really makes painting a LOT easier.


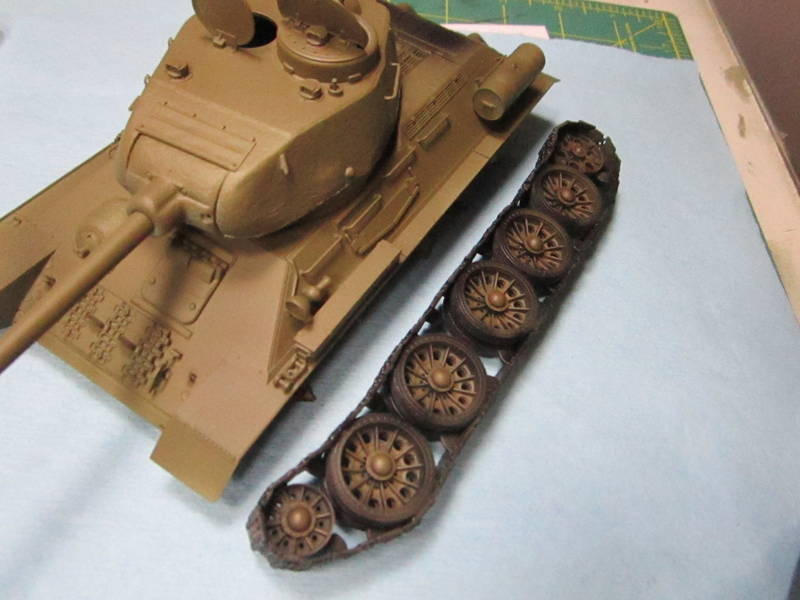
and the tracks removed


and


Cheers,
Rick Cooper
SDavies
Visit this Community
England - South East, United Kingdom
Joined: January 09, 2010
KitMaker: 979 posts
Armorama: 959 posts
Posted: Wednesday, October 23, 2013 - 07:31 PM UTC
Very nice clean build, looking forward to seeing more
clovis899
#155
Visit this Community
California, United States
Joined: May 05, 2002
KitMaker: 774 posts
Armorama: 605 posts
Posted: Saturday, October 26, 2013 - 09:21 AM UTC
Thanks Steven,

Here is the next little bit of work.

Got the rear hull finished off, drilled out one of the bolt heads on the exhaust cover, just my little way of 'stickin' it to the man' (take that Dragon! Ha! Ha!)


And for anyone who really cares here is the left side.


The rest is moving quickly, which is a good thing as I am most looking forward to the painting and weathering process.

Cheers,
Rick
Shermania
Visit this Community
California, United States
Joined: January 30, 2013
KitMaker: 537 posts
Armorama: 531 posts
Posted: Saturday, October 26, 2013 - 09:31 AM UTC

Quoted Text

Thanks Steven,

Here is the next little bit of work.

Got the rear hull finished off, drilled out one of the bolt heads on the exhaust cover, just my little way of 'stickin' it to the man' (take that Dragon! Ha! Ha!)


And for anyone who really cares here is the left side.


The rest is moving quickly, which is a good thing as I am most looking forward to the painting and weathering process.

Cheers,
Rick


Rick,

That's really cool how you built the tracks and wheels to come off like that. How did you manage that?

Also wondering since I don't know squat about t-34, is this the same type used in the Korean War by North Korea? If it is I might pick one of these up.
clovis899
#155
Visit this Community
California, United States
Joined: May 05, 2002
KitMaker: 774 posts
Armorama: 605 posts
Posted: Saturday, October 26, 2013 - 12:02 PM UTC
Pedro,

Thanks for your kind words. building the tracks/wheels to remove is actually pretty easy with a Christie suspension vehicle. I thin down the swing arm axles just so things don't bind up to much, place the road wheels on the axle and a short run of track to rest the wheels on. Then I glue the crap out of the wheel/track connection and let it dry for a full day. After that I add the idler/drive sprocket build up the rest of the tracks and install them all in one shot while adding glue where the top of the wheels meet the track. I find that as long as the axles all stay glue free that it will come off pretty easy if I let the dry for a day or two.

As far as being a Korean War version, I don't know for certain. It 'looks; right, fenders, wheels, all those things that tend to change a bit over time. But, who knows? Maybe someone else has a better answer?

Cheers,
Rick
clovis899
#155
Visit this Community
California, United States
Joined: May 05, 2002
KitMaker: 774 posts
Armorama: 605 posts
Posted: Sunday, October 27, 2013 - 12:48 PM UTC
And now we have crossed the finish line! Well, okay just the finish line for the first lap, but you have to start somewhere.
I added the heavy weld seam around the turret with some Tamiya putty and tape.


and what it looks like after the tape is removed.


And I found after adding a few extra bits and bobs that I was at the end of the build.


Next up some paint. Plan is to finish with a scruffy whitewash and add a few extra figures. Before I get to that I have a couple of reviews that I promised Jim I would get to so if you have any extra information on the 37 Plymouth P5 shoot me an email or message.

Cheers,
Rick
Shermania
Visit this Community
California, United States
Joined: January 30, 2013
KitMaker: 537 posts
Armorama: 531 posts
Posted: Sunday, October 27, 2013 - 01:31 PM UTC

Quoted Text

Pedro,

Thanks for your kind words. building the tracks/wheels to remove is actually pretty easy with a Christie suspension vehicle. I thin down the swing arm axles just so things don't bind up to much, place the road wheels on the axle and a short run of track to rest the wheels on. Then I glue the crap out of the wheel/track connection and let it dry for a full day. After that I add the idler/drive sprocket build up the rest of the tracks and install them all in one shot while adding glue where the top of the wheels meet the track. I find that as long as the axles all stay glue free that it will come off pretty easy if I let the dry for a day or two.

As far as being a Korean War version, I don't know for certain. It 'looks; right, fenders, wheels, all those things that tend to change a bit over time. But, who knows? Maybe someone else has a better answer?

Cheers,
Rick


Rick,

Thanks for the info, did you know there is a "Stalin's Armor Campaign" going on? Since you started after September 1st this one would qualify if you want to transfer over, just though you might want to enlist. Your already building it, you might as well get a ribbon out of it.
clovis899
#155
Visit this Community
California, United States
Joined: May 05, 2002
KitMaker: 774 posts
Armorama: 605 posts
Posted: Sunday, October 27, 2013 - 04:34 PM UTC
Pedro,

Thanks for the heads up, I'll see what I can do!

Rick
MCR
Visit this Community
Arizona, United States
Joined: July 15, 2004
KitMaker: 464 posts
Armorama: 407 posts
Posted: Monday, October 28, 2013 - 04:51 AM UTC

Quoted Text


I added the heavy weld seam around the turret with some Tamiya putty and tape.

Cheers,
Rick


Just some general information here - there is no weld seam around the turret (well, other than the roof )

What you're seeing in photos is a casting seam. T-34 turrets shells were cast as a single piece.

Mark
Tojo72
Visit this Community
North Carolina, United States
Joined: June 06, 2006
KitMaker: 4,691 posts
Armorama: 3,509 posts
Posted: Monday, October 28, 2013 - 04:59 AM UTC
looks real good so far,I have that figure set in my stash,looking forward to seeing yours.
clovis899
#155
Visit this Community
California, United States
Joined: May 05, 2002
KitMaker: 774 posts
Armorama: 605 posts
Posted: Monday, October 28, 2013 - 05:13 AM UTC
Mark and Anthony,
Thanks for taking a look. All this time I just assumed it was a weld seam joining the upper and lower turret, thanks for the heads up. I have seen some really nasty looking casting seams, I guess they weren't to terribly worried about putting a grinder to it and knocking them down, no beauty points awarded in combat!

Cheers,
Rick
clovis899
#155
Visit this Community
California, United States
Joined: May 05, 2002
KitMaker: 774 posts
Armorama: 605 posts
Posted: Monday, November 04, 2013 - 02:01 PM UTC
Well time to put some paint on. I started with a base coat of Wicked Black, in some selected darker areas.
Here is what we looked like before paint..

Then a bit of color..

And the underside..


That is it for a few days, need to clear a few other things of the bench.

Cheers,
Rick
Arizonakid
Visit this Community
Arizona, United States
Joined: October 03, 2012
KitMaker: 89 posts
Armorama: 55 posts
Posted: Monday, November 04, 2013 - 02:44 PM UTC

Hiya Rick:

It looks like a nice little model you have got there. If it weren't for the missing engine deck screens, it looks like this is a really nice kit for the price. Especially considering it comes with some decent figures for an instant diorama.

And Pedro, yes. This kit can be used to make a Korean T-34/85 almost straight out of the box. I think the only thing that you would need that I have seen on just about every Korean vehicle was a set of tracks on the front glacis. Or at the least the mounting studs on the front where they are supposed to go.

Gary
clovis899
#155
Visit this Community
California, United States
Joined: May 05, 2002
KitMaker: 774 posts
Armorama: 605 posts
Posted: Saturday, November 16, 2013 - 06:42 PM UTC
Well, I made it to the finish line, at least so far as I would like to add a few figures to dress it up a bit more. But, the T-34 is done. I have submitted it as a Feature here on Armorama so you may see it again.

Cheers,
Rick


and

 _GOTOTOP