Arizona, United States
Joined: January 18, 2006
KitMaker: 1,866 posts
Armorama: 1,808 posts
Posted: Monday, May 15, 2017 - 02:35 AM UTC
Quoted Text
ANd base coats down, all mocked-up with the tracks on. Tracks were primed black, then hit with a coat of Humbrol's Track color.
Next is detail the guns, paint the red and white ID markings, rust the exhaust and glue it up, then a post-shade with Tamiya's Smoke. Then it'll get sealed and move to weathering!

You are smoking me on this one! I did manage to glue a few pieces last night. I think I'll catch up some time in December.

I found a nifty feature on the forums called HIDE USER.
I was going to try it on myself and go stealth, but it only works on other users.
Oregon, United States
Joined: March 09, 2017
KitMaker: 525 posts
Armorama: 266 posts
Posted: Monday, May 15, 2017 - 04:20 AM UTC
The kit went together REALLY easily, and there's not a lot of parts, so I consider it cheating. I'll make up for it on the finishing work and base. (I suck at basing)
These are great days we're living, bros. We are jolly green giants, walking the Earth with guns.
-C. Earl
Arizona, United States
Joined: January 18, 2006
KitMaker: 1,866 posts
Armorama: 1,808 posts
Posted: Monday, May 15, 2017 - 07:31 PM UTC
Glad your kit was quick. I'm having fits with the T3 body. After a few hours of research and very poor fit with the warped body, and no solutions, I've decided to make some modifications. I plan on cutting the cab down to a 2 door which should make the body a little easier to massage back into shape and turn the thing into a stake bed. The thick part of the rear doors is the problem.
Other than that the model looks nice, even if a little basic.

I found a nifty feature on the forums called HIDE USER.
I was going to try it on myself and go stealth, but it only works on other users.
Oregon, United States
Joined: March 09, 2017
KitMaker: 525 posts
Armorama: 266 posts
Posted: Monday, May 15, 2017 - 08:44 PM UTC
Soak it in hot water? I've got a similar problem with a Sk251 resin conversion. Squashed in a box for 20 years, and now the body is kinda....flat-ish. My 'plan' is to soak it in hot water and see if it works out...
These are great days we're living, bros. We are jolly green giants, walking the Earth with guns.
-C. Earl
Colorado, United States
Joined: September 18, 2006
KitMaker: 28 posts
Armorama: 17 posts
Posted: Monday, May 15, 2017 - 10:24 PM UTC
i have a couple; GEPARD and KING TIGER w/interior may be a bit much for now but the 128mm FLAK and front end loader are possibilities
just because you don't understand it doesn't make me an artist.
Arizona, United States
Joined: January 18, 2006
KitMaker: 1,866 posts
Armorama: 1,808 posts
Posted: Tuesday, May 16, 2017 - 01:04 AM UTC
I didn't have much luck with hot water and plastic over the years. I found this picture and since the model is already beat up will do something like it. Some of the young guys in Arizona take old pick ups, remove the doors, roof and the back of the cab making it look jeepish. That would make an odd looking T3, and solve the body problem.

I found a nifty feature on the forums called HIDE USER.
I was going to try it on myself and go stealth, but it only works on other users.
Oregon, United States
Joined: March 09, 2017
KitMaker: 525 posts
Armorama: 266 posts
Posted: Tuesday, May 16, 2017 - 01:12 AM UTC
Well...I have built 315 scale feet of scratchbuilt barbed wire...I need more. LOTS more:

These are great days we're living, bros. We are jolly green giants, walking the Earth with guns.
-C. Earl
Oklahoma, United States
Joined: September 30, 2015
KitMaker: 2,493 posts
Armorama: 2,344 posts
Posted: Tuesday, May 16, 2017 - 01:17 AM UTC
"Only the dead have seen the end of war." - Plato
Oregon, United States
Joined: March 09, 2017
KitMaker: 525 posts
Armorama: 266 posts
Posted: Tuesday, May 16, 2017 - 01:24 AM UTC
Gonna be more awesome in 1/35 corporeal form on mah DESK!

These are great days we're living, bros. We are jolly green giants, walking the Earth with guns.
-C. Earl
Arizona, United States
Joined: January 18, 2006
KitMaker: 1,866 posts
Armorama: 1,808 posts
Posted: Tuesday, May 16, 2017 - 02:33 AM UTC
Looking good Knuckles.
Well I decided to go all out. I ended up gluing the body to the body tub and deck plate for strength. The left side broke off the cab, but glued in place ok. I still have to fit the doors, but the body is as good as it will get.
The under pan is basic, but not much will show, and it's warped. The only straight piece was the body tub.


I found a nifty feature on the forums called HIDE USER.
I was going to try it on myself and go stealth, but it only works on other users.
Arizona, United States
Joined: January 18, 2006
KitMaker: 1,866 posts
Armorama: 1,808 posts
Posted: Tuesday, May 16, 2017 - 07:48 AM UTC
And with a simple stake bed sides laid out. Just a few bolts and welds to add, and back to the rest of the kit.

I found a nifty feature on the forums called HIDE USER.
I was going to try it on myself and go stealth, but it only works on other users.
Georgia, United States
Joined: August 19, 2009
KitMaker: 347 posts
Armorama: 338 posts
Posted: Thursday, May 18, 2017 - 05:47 PM UTC
Awesome job everyone here is my latest the etch grill screen's for the two large air inlets are to small I had to scratch some plastic card along the edges to make them fit

Now with screen's can not really see the card

Also there are two nasty ejector pin marks in two of the grill covers and one in the starboard rear cover and surprisingly no detail on the inside of that one have not been able to find a photo to be able to say if it is accurate. Well here is how it is shaping up


Hope everyone is getting along well

just be yourself, have fun, and keep it legal
Georgia, United States
Joined: August 19, 2009
KitMaker: 347 posts
Armorama: 338 posts
Posted: Thursday, May 18, 2017 - 05:48 PM UTC
just be yourself, have fun, and keep it legal
Oklahoma, United States
Joined: September 30, 2015
KitMaker: 2,493 posts
Armorama: 2,344 posts
Posted: Friday, May 19, 2017 - 02:05 AM UTC
Looking great fellas! Keep up the great work.
"Only the dead have seen the end of war." - Plato
Georgia, United States
Joined: July 26, 2013
KitMaker: 2,272 posts
Armorama: 1,860 posts
Posted: Friday, May 19, 2017 - 06:05 AM UTC
Quoted Text
And with a simple stake bed sides laid out. Just a few bolts and welds to add, and back to the rest of the kit.
I know it's a bit late, but just so you know on the single cab version the stowage compartment under the front of the bed is actually larger and extends forward more. The single cab came first in VW production, and were modified later to make the double cab - so the compartment got squeezed.
TRIVIA TIME: In fact, the very first VW double cabs were panel vans that were converted at the Binz factory in Germany. They are identified easily by the suicide door on the right rear passenger side.
On the Campaign Trail:
Tank Destroyer 2020
Arizona, United States
Joined: January 18, 2006
KitMaker: 1,866 posts
Armorama: 1,808 posts
Posted: Friday, May 19, 2017 - 06:24 AM UTC
Quoted Text
Quoted Text
And with a simple stake bed sides laid out. Just a few bolts and welds to add, and back to the rest of the kit.
I know it's a bit late, but just so you know on the single cab version the stowage compartment under the front of the bed is actually larger and extends forward more. The single cab came first in VW production, and were modified later to make the double cab - so the compartment got squeezed.
TRIVIA TIME: In fact, the very first VW double cabs were panel vans that were converted at the Binz factory in Germany. They are identified easily by the suicide door on the right rear passenger side.
Thanks for the information. I have seen all three types of VW's first hand, but the older, rounded, versions. As a child I saw a lot of Arizona from the left side window of a 1963 VW van. Talk about slow going, with 2 adults and 6 kids, plus my mother bringing darn near the entire house. Those were good days.
I made the conversion as if someone cut down 4 door. It is hard to see, but I put a non-skid plate at the front, and will add some hinges so the plate could be opened. But, I might be loading it up with cargo from a farm, if I can find the right groceries to load it up with.
I found a nifty feature on the forums called HIDE USER.
I was going to try it on myself and go stealth, but it only works on other users.
Arizona, United States
Joined: January 18, 2006
KitMaker: 1,866 posts
Armorama: 1,808 posts
Posted: Friday, May 19, 2017 - 06:28 AM UTC
Thanks. I also have that T-55 kit. I will be watching to see what other challenges you have with it.
I found a nifty feature on the forums called HIDE USER.
I was going to try it on myself and go stealth, but it only works on other users.
Oregon, United States
Joined: March 09, 2017
KitMaker: 525 posts
Armorama: 266 posts
Posted: Saturday, May 20, 2017 - 05:00 AM UTC
OK, so I re-re-re did the marking stripes, and found a pair of workable decals to use. I applied a brown filter, and then laid down the smoke post-shading along the panel lines.
As it is drying I'm starting the base.


These are great days we're living, bros. We are jolly green giants, walking the Earth with guns.
-C. Earl

#454
Georgia, United States
Joined: July 10, 2016
KitMaker: 1,273 posts
Armorama: 1,138 posts
Posted: Saturday, May 20, 2017 - 06:42 AM UTC
"I can make armored cars, safe and unassailable...and behind these our infantry will be able to follow quite unharmed and without any opposition."
-Leonardo da Vinci, 1487
Oregon, United States
Joined: March 09, 2017
KitMaker: 525 posts
Armorama: 266 posts
Posted: Saturday, May 20, 2017 - 06:44 AM UTC
This thing is going to be more filthy than a fifty-cent Tijuana hooker when I'm done with it.

These are great days we're living, bros. We are jolly green giants, walking the Earth with guns.
-C. Earl
Singapore / 新加坡
Joined: July 10, 2007
KitMaker: 38 posts
Armorama: 37 posts
Posted: Saturday, May 20, 2017 - 03:03 PM UTC
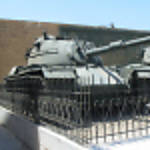
my entry..

Queensland, Australia
Joined: May 16, 2010
KitMaker: 232 posts
Armorama: 218 posts
Posted: Saturday, May 20, 2017 - 03:09 PM UTC
Well i've made a start

Not sure about this etched art at the rear though (the one with the curve in it)

Ashore, it's wine, women and song, aboard it's rum, bum and baccy
Georgia, United States
Joined: August 19, 2009
KitMaker: 347 posts
Armorama: 338 posts
Posted: Saturday, May 20, 2017 - 05:25 PM UTC
hey imransz is that the Tiran t-55
just be yourself, have fun, and keep it legal
Singapore / 新加坡
Joined: July 10, 2007
KitMaker: 38 posts
Armorama: 37 posts
Posted: Saturday, May 20, 2017 - 06:34 PM UTC
Quoted Text
hey imransz is that the Tiran t-55
Yes..
Arizona, United States
Joined: January 18, 2006
KitMaker: 1,866 posts
Armorama: 1,808 posts
Posted: Saturday, May 20, 2017 - 07:18 PM UTC
Quoted Text
Quoted Text
hey imransz is that the Tiran t-55
Yes..
Isn't the new Takom kit the Tiran 4 based on the T-54?
I found a nifty feature on the forums called HIDE USER.
I was going to try it on myself and go stealth, but it only works on other users.