Introduction
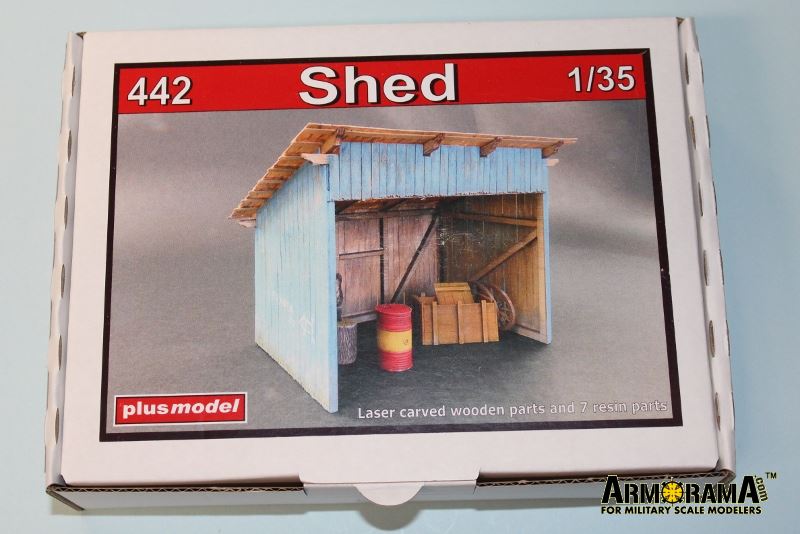
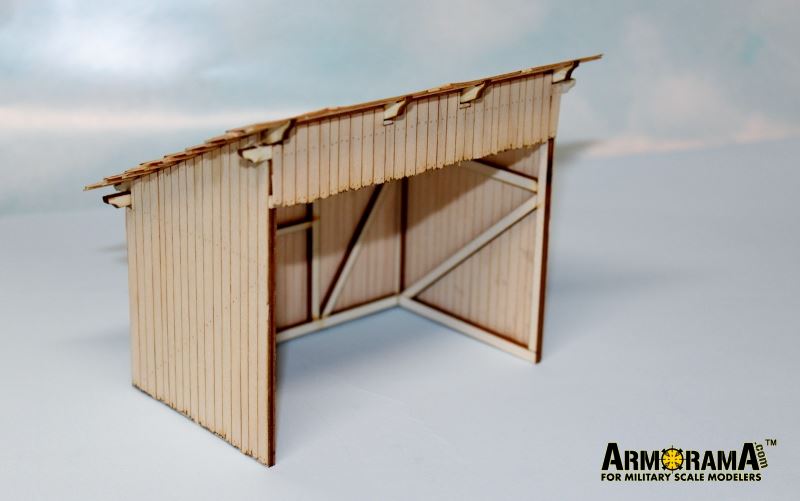
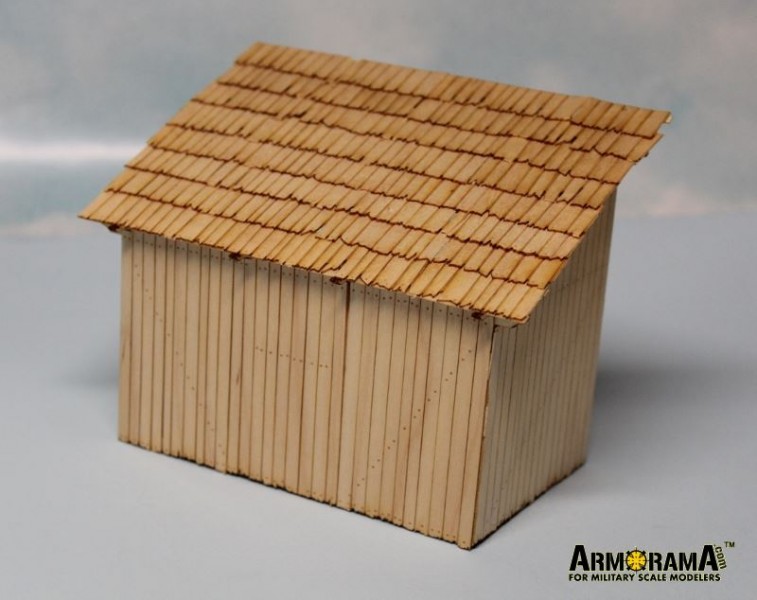
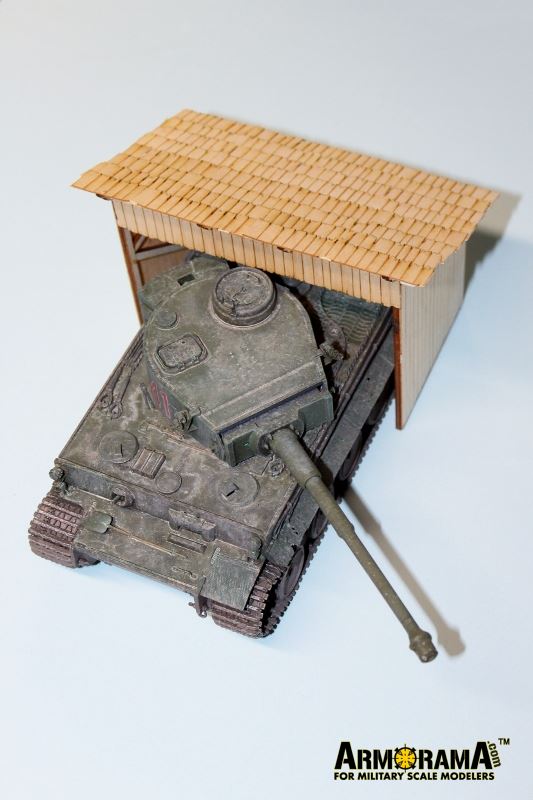
PlusModel has released this 1/35 laser-cut wooden shed for diorama modelers.
Shed is item
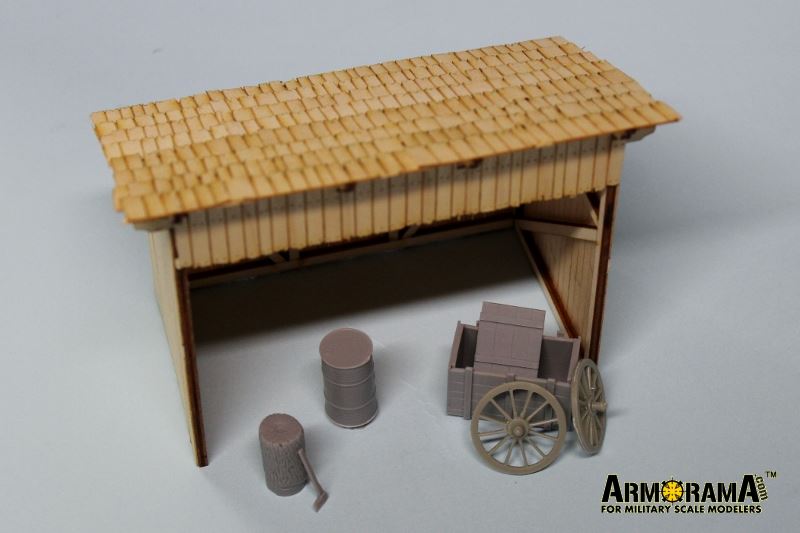
442 and includes resin supplies to store in it.
Shed
Nothing models wood better than wood so what would
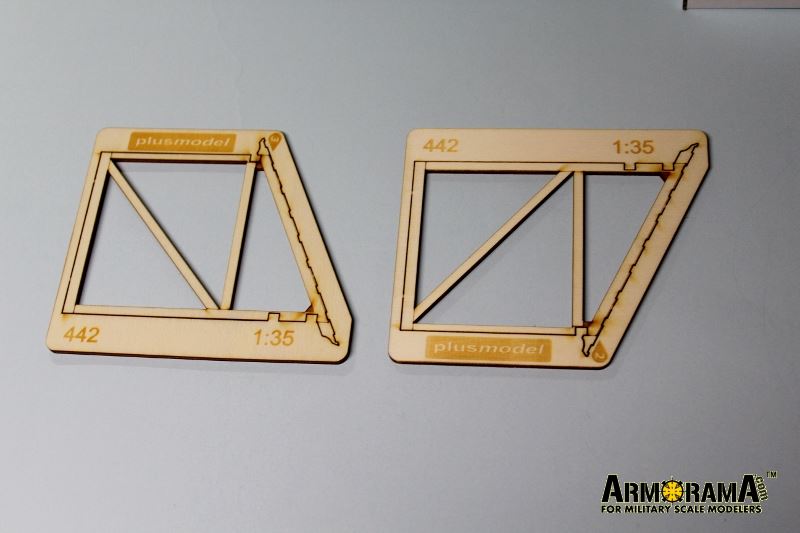
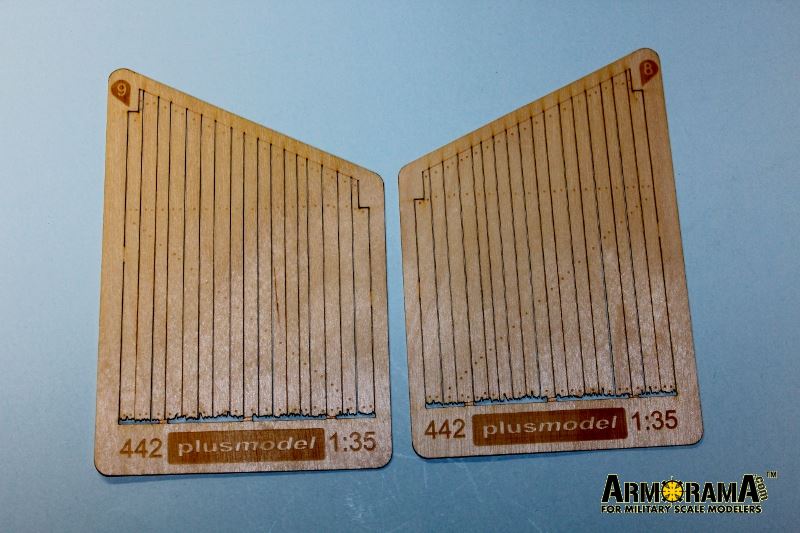
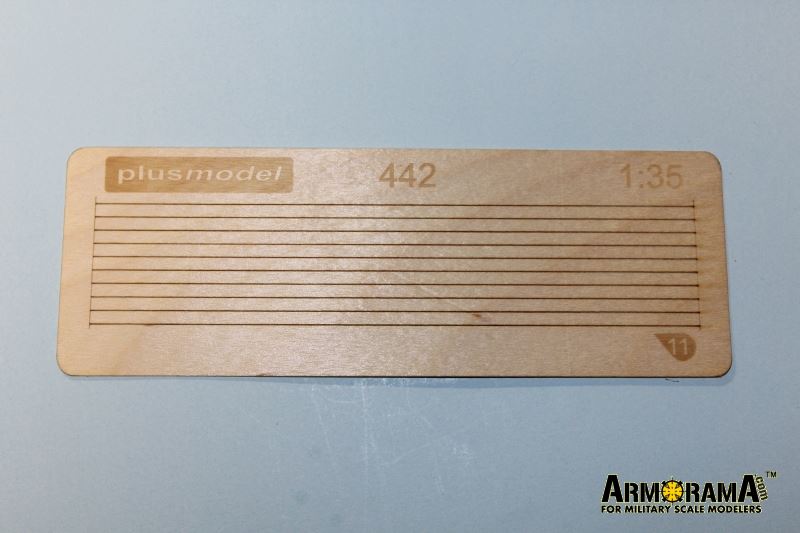
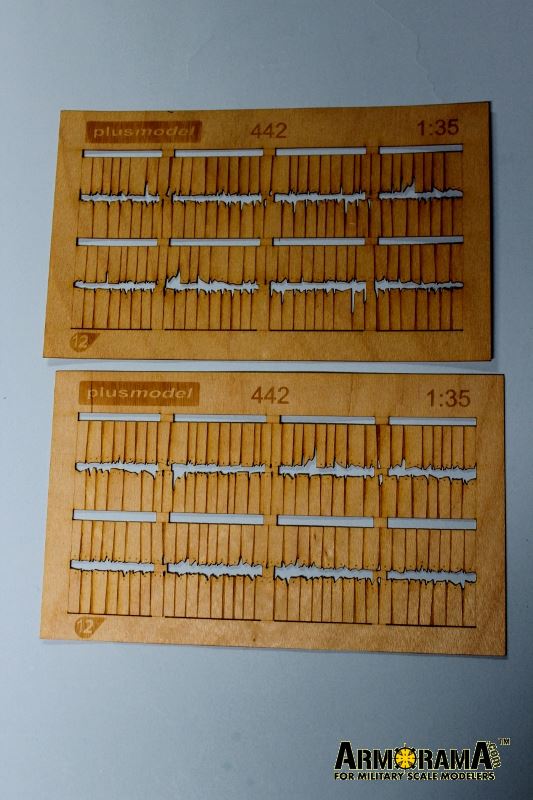
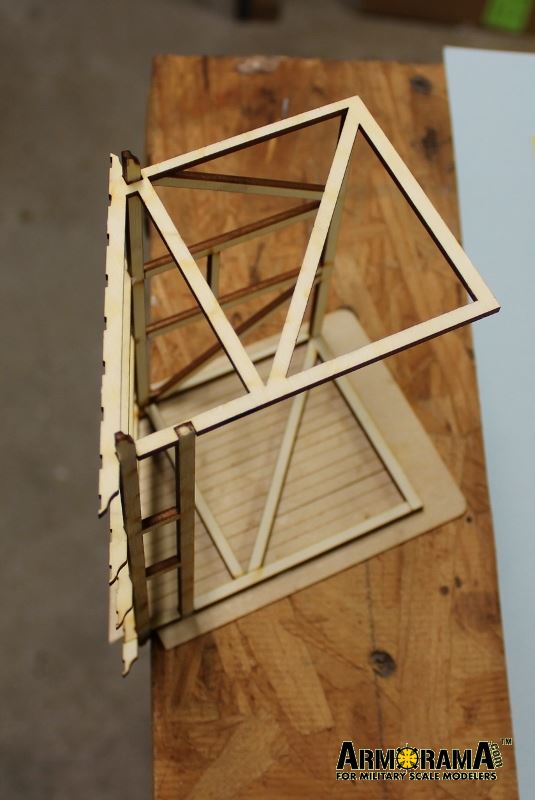
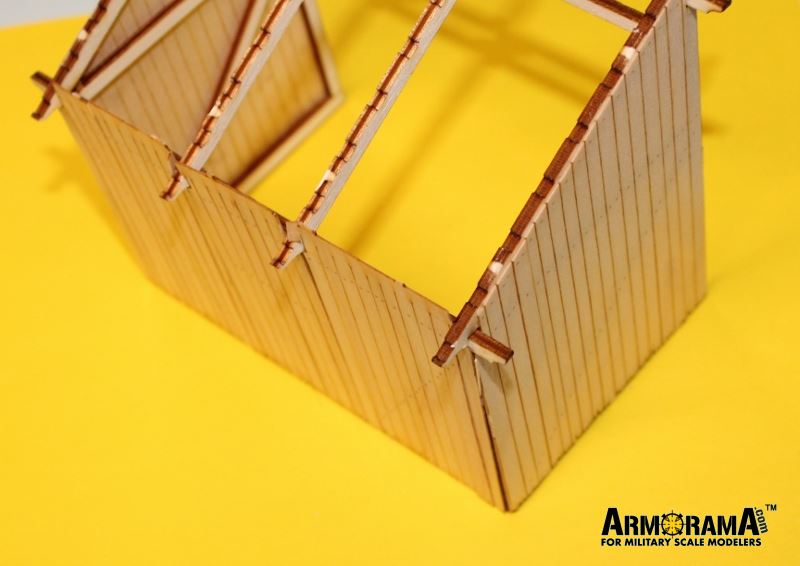
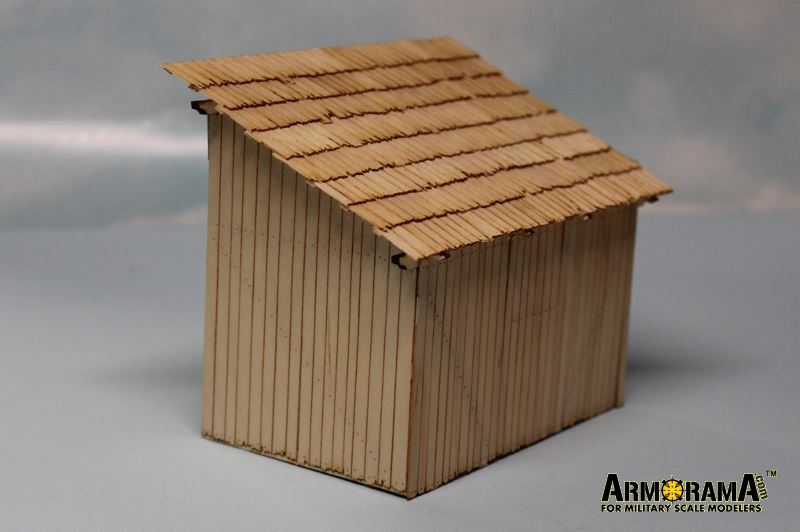
PlusModel make this shed out of other than wood? This is a laser-cut wooden model of an open front shed. The parts are lased from "sprues" - sheets of wood of varying thicknesses, and possibly different types. Each sheet has the sprue number and other information lased into it. There are 10 sheets:
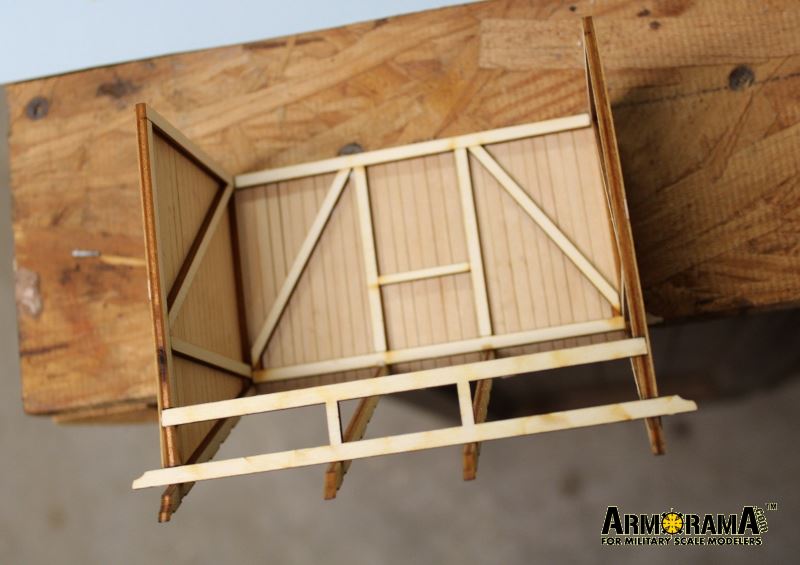
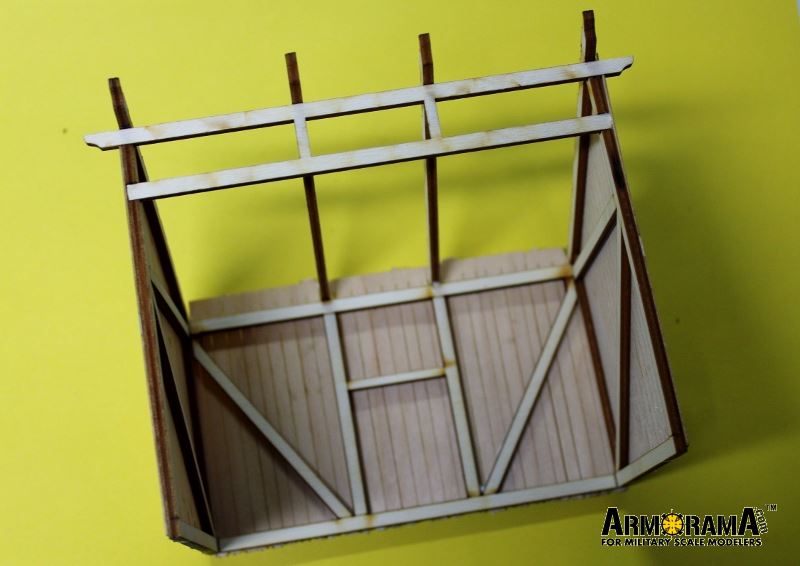
Front frame and rear frame
L. Side frame
R. Side frame
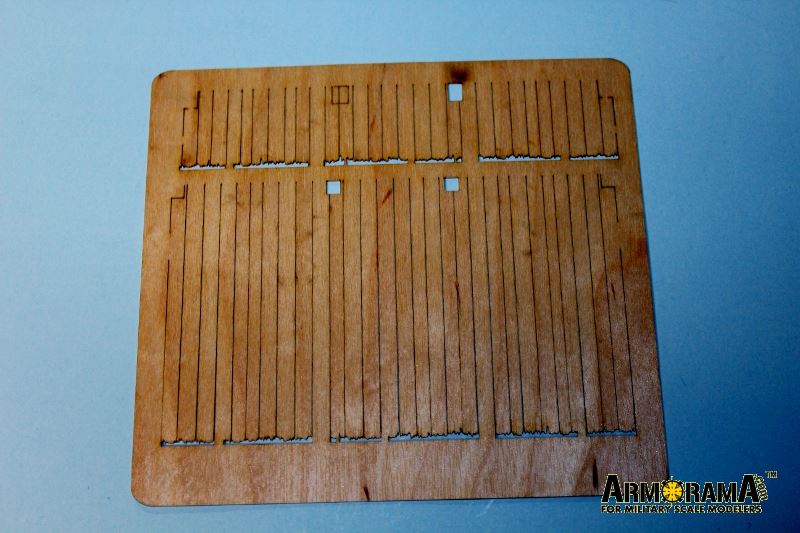
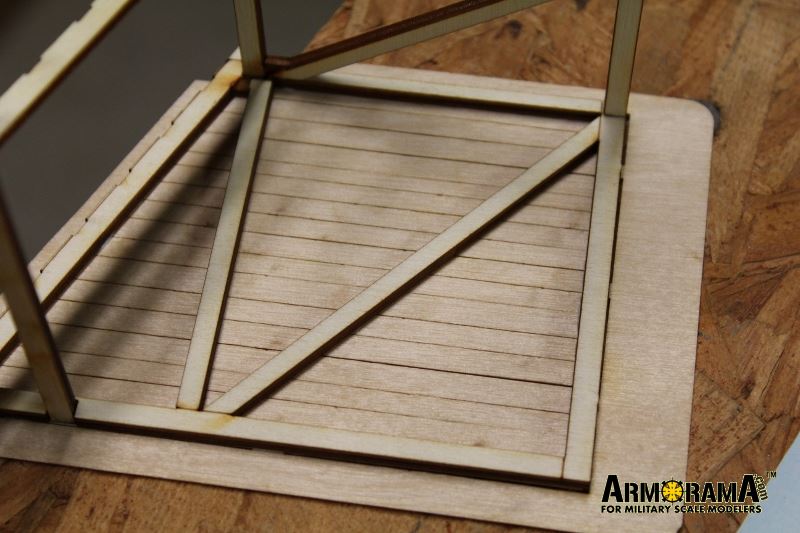
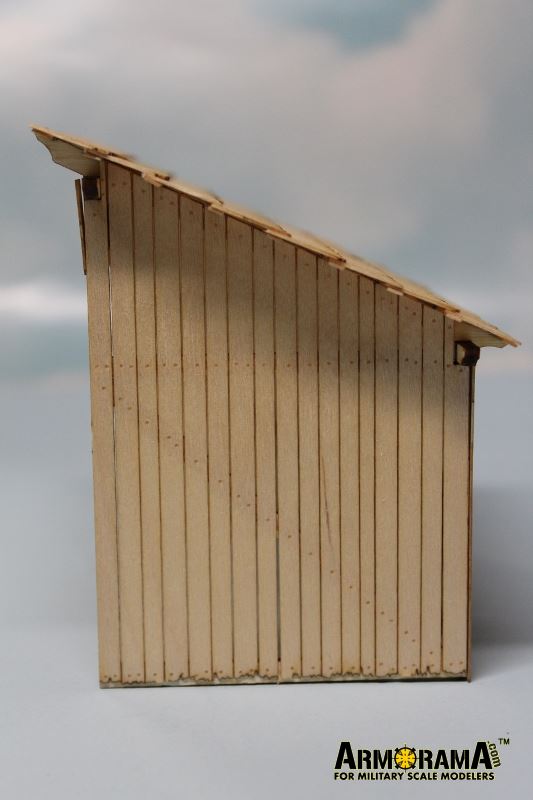
Front and back siding
L. Siding
R. Siding
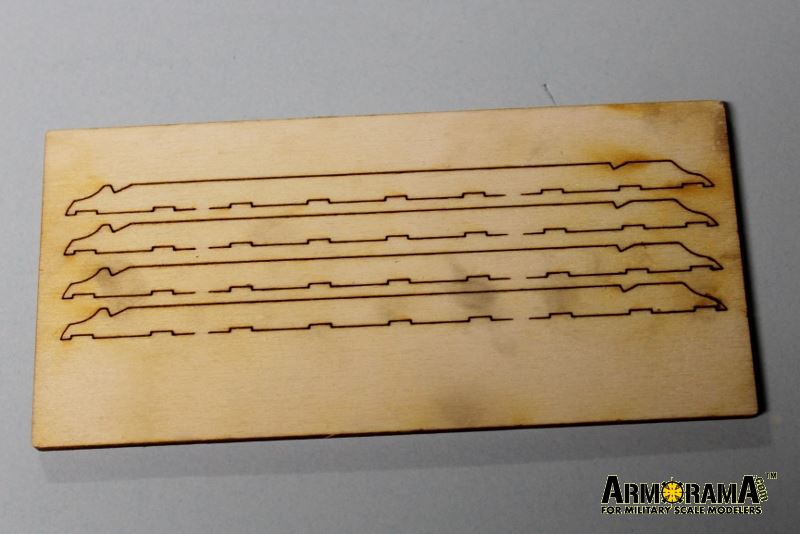
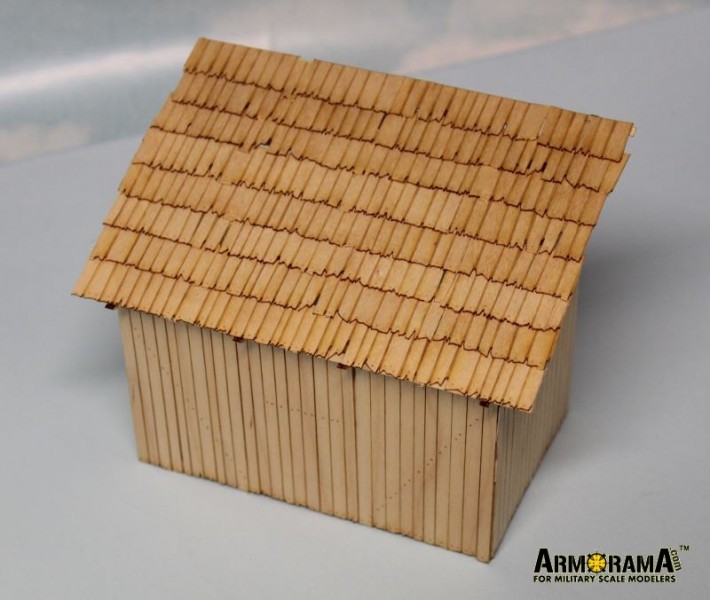
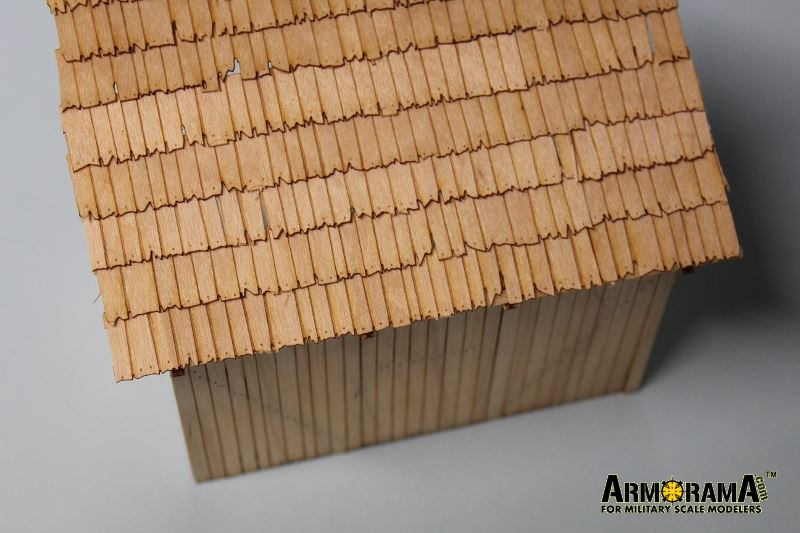
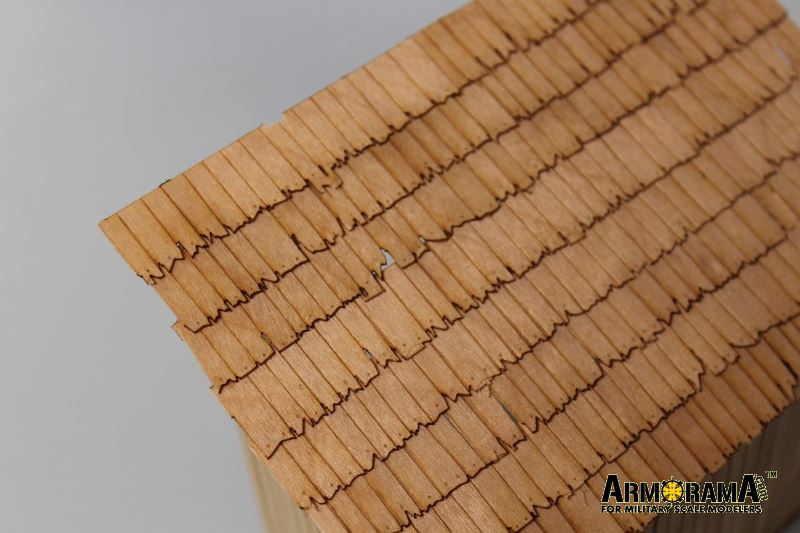
Shingles (4) X 2
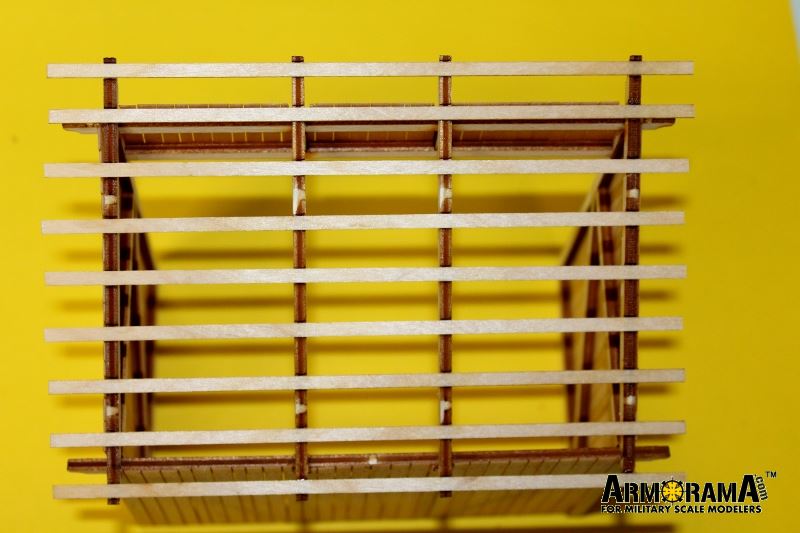
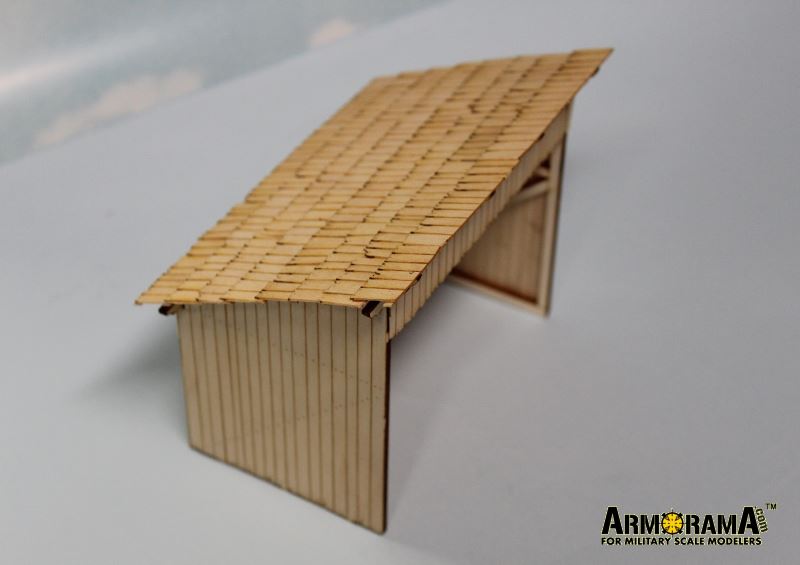
Roof rafters (4)
Purlins (11)
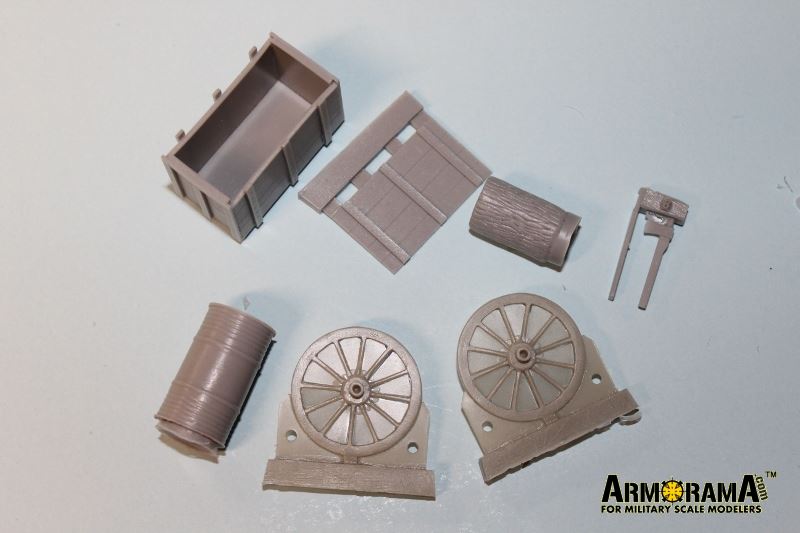
PlusModel also includes 7 resin castings:
Stump
Axe
Oil drum
Wagon wheels X 2
Crate and detached lid
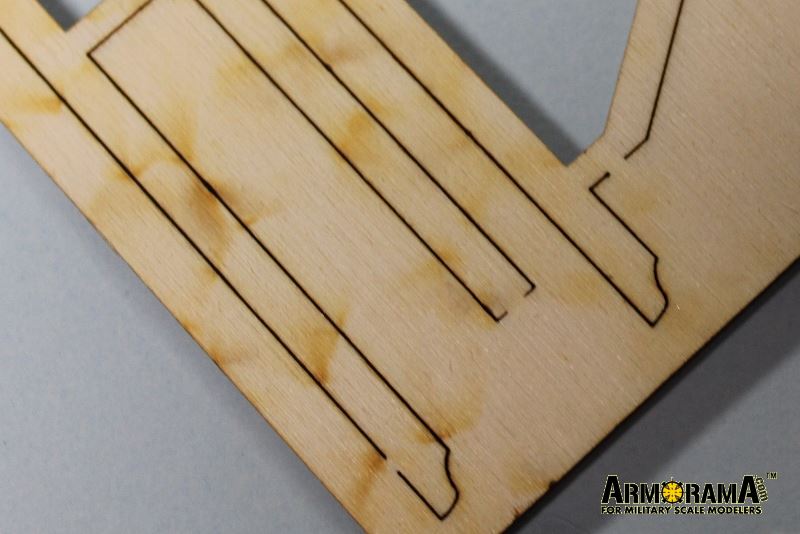
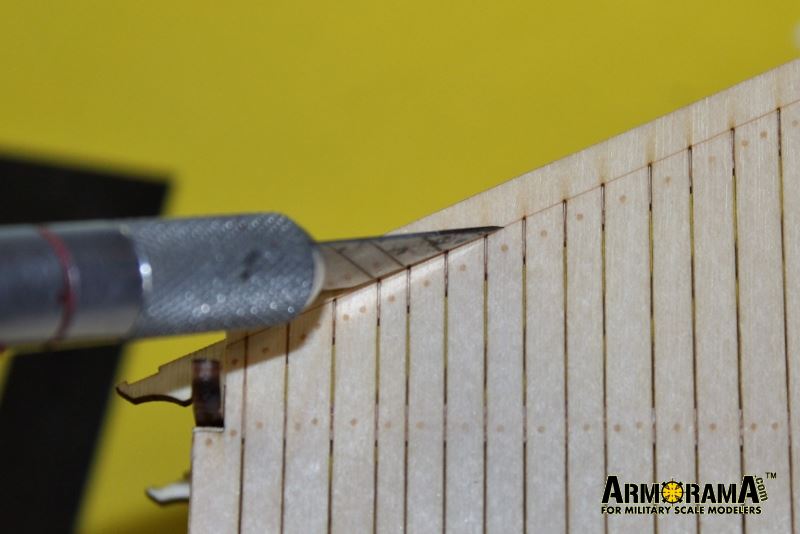
The wood sheets are quality wood without the fuzz common to some milled scale lumber. Use caution handling the siding and shingles as they are thin and fragile. Cutting the parts by laser creates scorched marks although mainly on one side. The cuts are precise.
PlusModel keeps the pieces in their sheets by lasing attachments at intervals. This is not a craftsman kit, i.e., board by board.
PlusModel cut the framing all hammered together; shingles are joined together in long (and fragile) lengths. Each sheet of siding is made with individual planks; those delicate boards are held together at the top and with tabs on the bottom and sides.
The resin pieces are sharply cast yet the spokes of the wheels were filled in with flash. It was thin and easy for me to carve out. The barrel and the stump have prominent amounts of extra resin on one end. The crate is warped inward, making it risky to attach the lid without breaking the crate side stiffeners. Otherwise, the parts are sharply cast and have good detail.
Detail
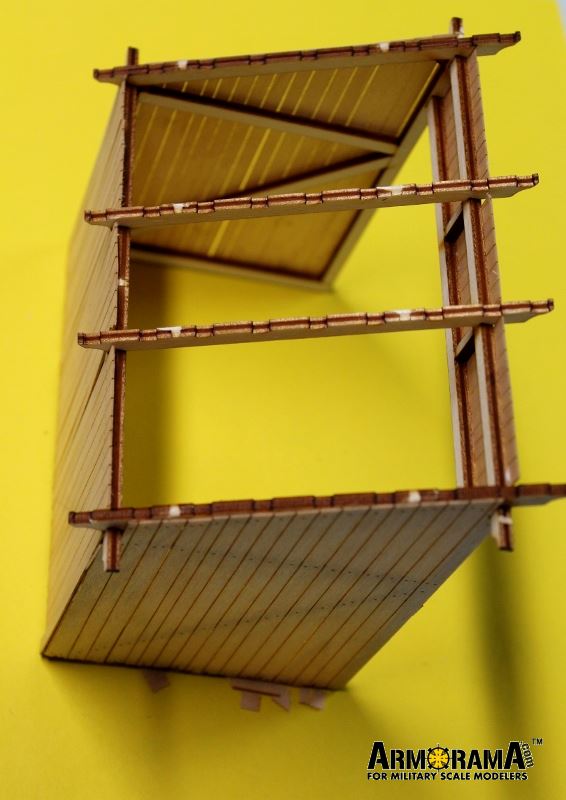
Fine nail heads are lased into the wood. The bottom of each siding and shingle board is formed to simulate rough hewn wood. The resin pieces' detail include good bark texture on the stump, and fine wood grain on the crate.
Instructions
PlusModel includes a several step instruction sheet, illustrated with line art. While the illustrations are sharp and clear, there are no part numbers listed. We are, of course, modelers, so we are smarter than the average bear; if
I figured out which piece is which, so can you.
The only text is
PlusModel's guidance to use tape to hold the shingles and siding together.
No painting guidance is provided. Today there are many paint sets for coloring wood. Or modelers can use the classic IA meathod (India ink and alcohol) to stain the wood. (To see the IA process in action, please see
Click here for additional images for this review, below.)
Keep in mind that unlike plastic, wood will warp if only one side is painted. One must ensure that both sides are wet at the same time. Also, glue will keep paint/stain from coloring the wood. Perhaps one should stain/paint the pieces first, then glue them together.
Assembly
I used Uhu glue from Germany to assemble this model.
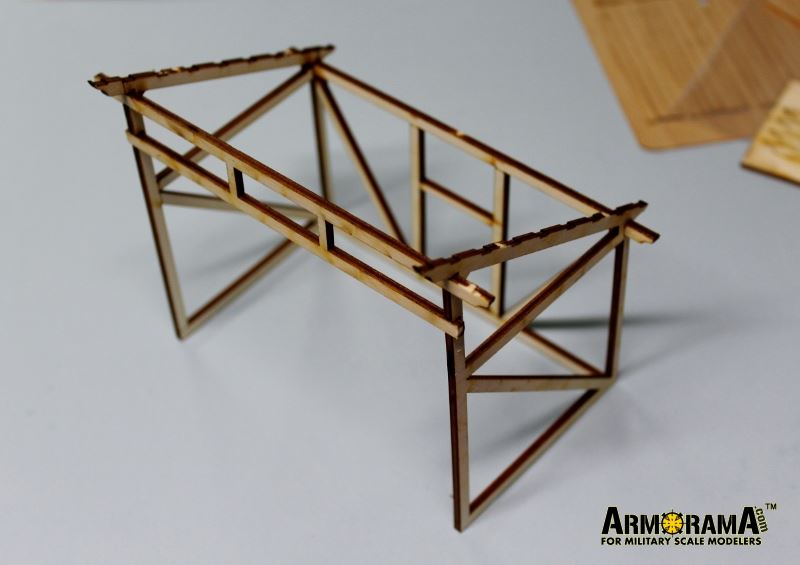
PlusModel cut notches into the framing for easy aligning of the parts. Once the four sides are joined, squared and dry,
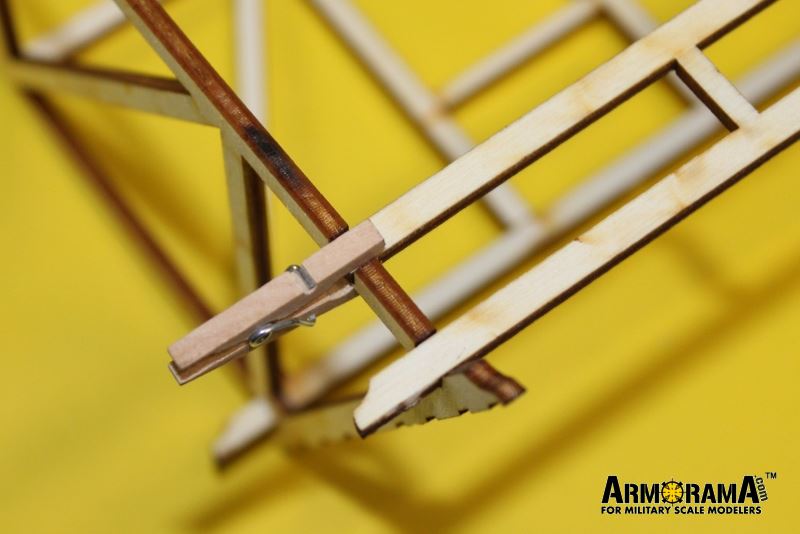
PlusModel directs us to attach the siding. Their way is to tape the siding, cut the siding out of their sprue sheets, and glue it to the framing. When the glue is cured, remove the tape. Considering how thin and delicate the boards are, that seems risky to me. Instead of the tape method, I set the siding along the edge of a flat hard surface. Then I ran a bead of glue along the outside of every framing member. Then I mated the two parts; it is easy to align the framing with the siding. A bit of pressure until the Uhu cures, then on to the next side. When everything was cured, I trimmed the rest of the sheet from the siding boards.
Each rafter has 11 slots to mount the purlins. They are shallow. I set the purlins across the rafters and then secured them with thin Cyanoacrylate Super Glue. Then I attached the shingles. The shingles are very delicate. I failed to preserve a single unbroken row of them. The nice thing about shingles is that they take a beating from the weather, so if some are slightly askew, it looks realistic. Fortunately, shingles are easy to align and butt against other shingles and shed structure. I started shingles from the eaves up to the peak. I glued the shingles to the exposed purlin and also to the edge of the proceeding shingles.
Once one is used to the thin wood, this shed should be easy to assemble. It took me about 3 hours.
Conclusion
This 1/35 shed makes a beautiful structure for your diorama. The extra resin pieces give it something to shelter.
The wood and laser cutting is excellent. However, scorched marks along the edges detract from the otherwise attractive wood. The instructions could be better.
PlusModel should include some tips about coloring the wood.
This shed should build up into an impressive simple structure for dioramas. I recommend it.
Thanks to PlusModel for sending this sample for review here - at Armorama.


Comments