The T-44M was a modernized version of the T-44 tank. (Hence the M designation.) It was an effort to upgrade the old (and not very successful) T-44 using components of the T-54/55. The tank received a new engine and transmission; the ammo capacity was increased from 58 to 61 rounds, it got a new radio, it received the fenders and the running gear from the T-54, an anti-AA gun mount, a heater (somewhat important upgrade for the crew), new headlights and a TVN-2 active IR vision equipment for the driver. The added T-54 style external fuel tanks increased the range of the vehicle to 440 km.
When MiniArt came out with the original T-44 equipped with interior, I was justifiably excited; a rare Russian tank in styrene with interior, no less. (Even though it is not a full one; the drivers compartment is missing, and the engine compartment is mostly empty save for the engine.) This tank even though its almost the same as the T-44 is also a very important; even though strictly speaking it is not an evolutionary step before the T-55, putting the three next to each other we can see how the tank design changed gradually from the war-time T-34 to the incredibly successful cold-war era T-54/55. (The next in line to be issued by MiniArt is the T-54 with full interior ) While the original T-44 looks like a sleeker, more modern T-34, the T-44M looks more like the T-54.
Contents
The model comes in the typical MiniArt cardboard box; the only difference is that the box is bright orange. I think it might be a feature to help people easily distinguish between the T-44 and T-44M models. (Even the cover arts are quite similar.)
Review
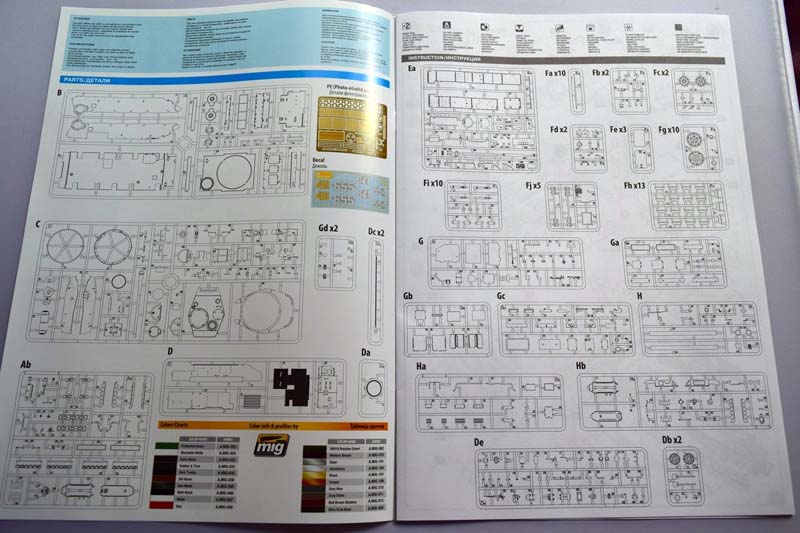
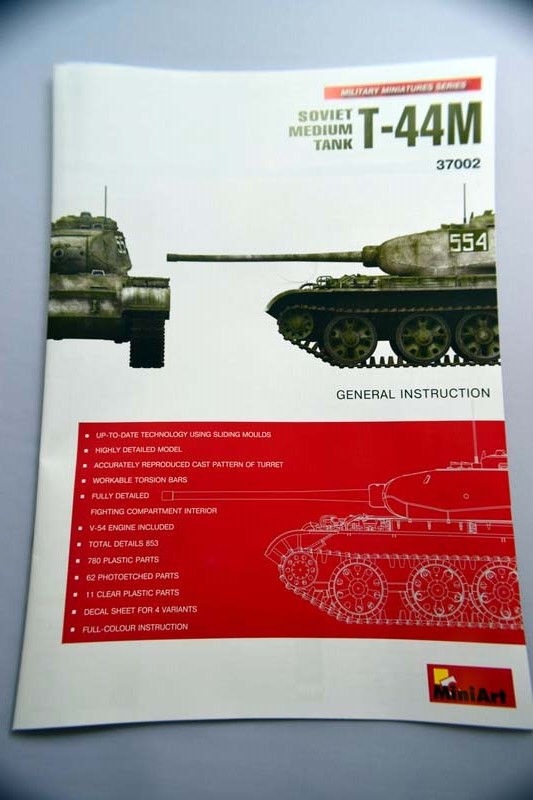
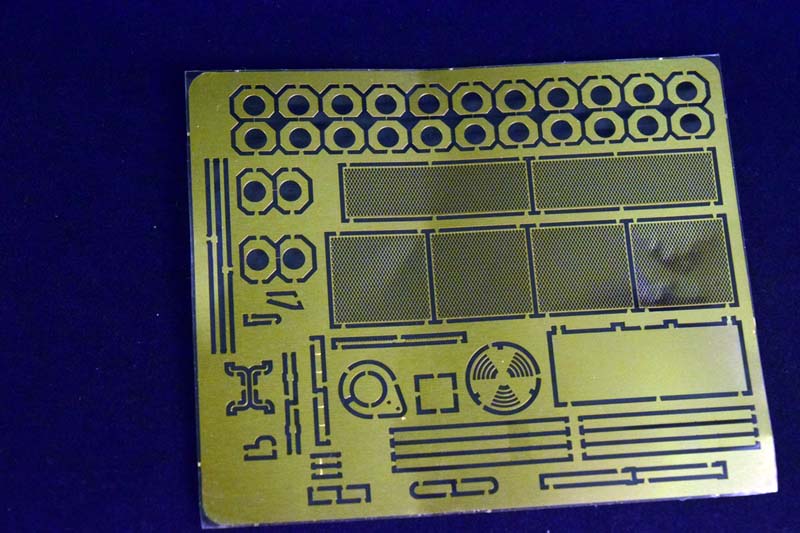
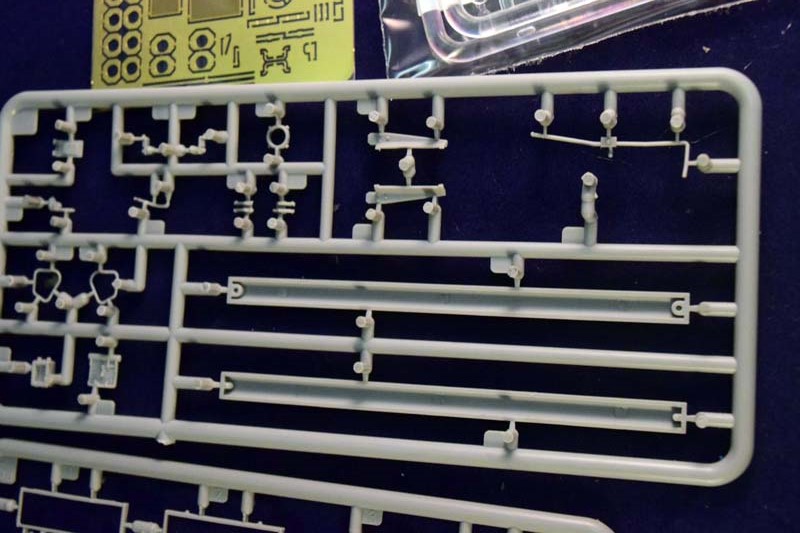
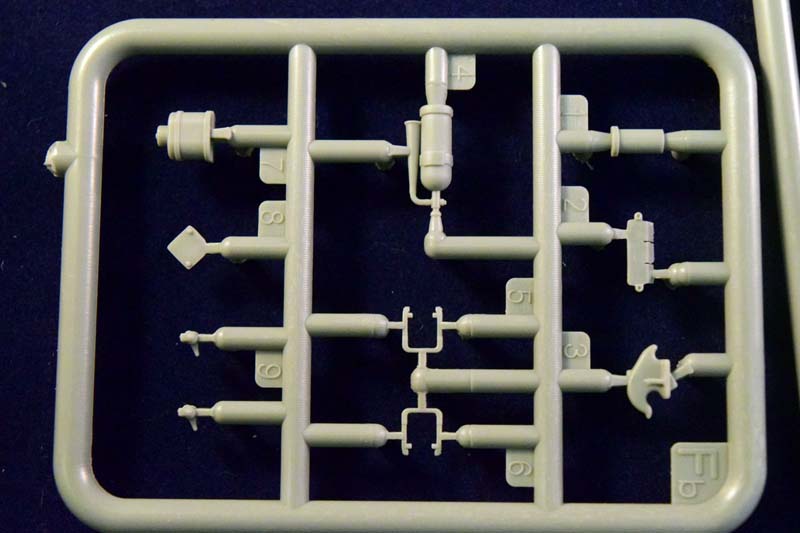
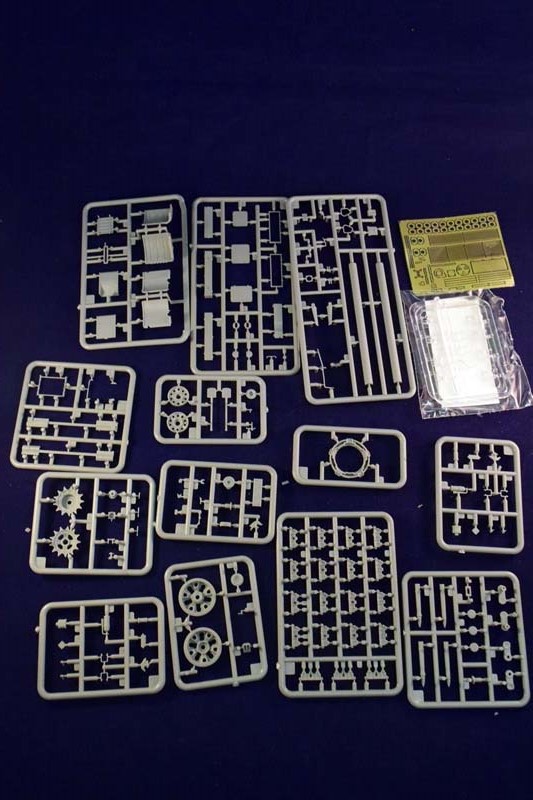
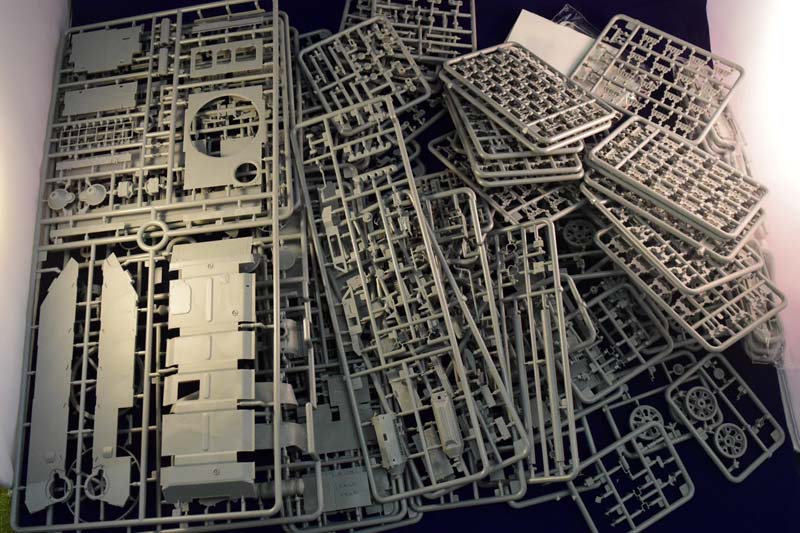
The instructions are also very similar to the booklet that came with the T-44: an A4 booklet, with some pages in color (where color is needed). Unlike the T-44 model, the instructions do not have any introduction, and no short history of the vehicle provided; it starts with the sprue layout immediately. It is a very useful page, as the model comes with the box filled with plastic, and finding parts is a challenge on the several small sprues. I found it great to be able to refer to when you need part Fj2, for example, to see how the sprue looks like. There are 791 plastic parts altogether on more than thirty sprues, so you will need some help finding the right ones. There is a quite nice PE sheet included with 62 parts altogether. (It is protected by a foil in each side, but in my sample it was slightly dented.) I quite like the fact that MiniArt tries to use as little multimedia as possible, and focuses on making most of the plastic, but this is a strictly personal opinion. Im sure AM companies will rush to provide PE fenders, metal barrels and resin replacement fuel tanks. The only exception to this preference is the towing cables, of course, which should have been provided as proper metal cables instead of straight plastic parts. (Or at least they should have been pre-formed to the fender. You are supposed to wrap them around the tool boxes and fuel tanks, which is not exactly easy without breaking them.)
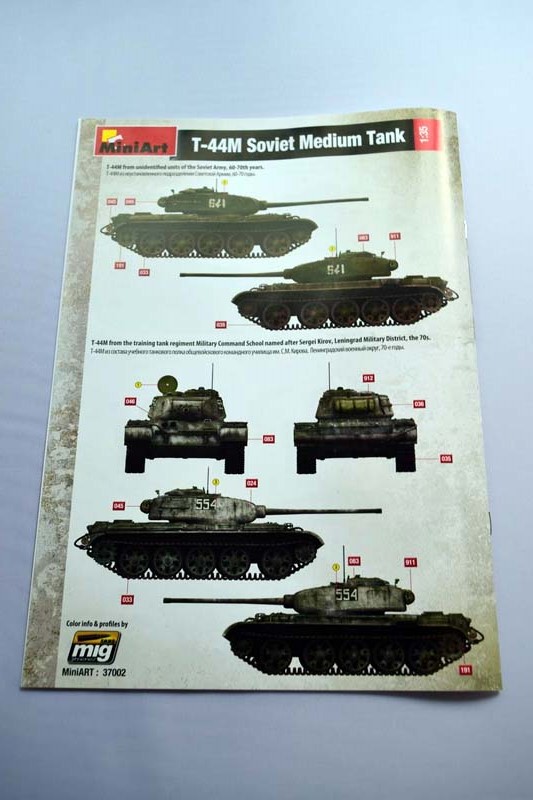
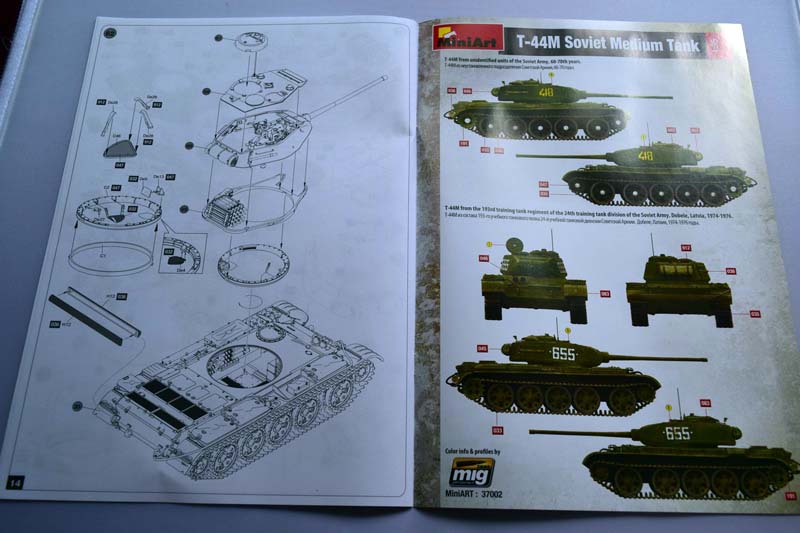
There are considerably fewer painting options for the T-44M gone are the fictional German captured vehicles, and the flamboyant coat-of-arms; we get four Russian green vehicles, one with whitewash applied. The painting guide is provided in Ammo Mig colors- but it should not be a problem converting them to other paint codes. The quality of decals should be great judging from the ones provided for the T-44 -thin, easy to use (and no trimming necessary).
The instruction manual makes some bold claims on the front page: while the torsion bars are indeed workable, the tracks are sadly not. They are held together by very small pins, and will readily fall apart if you dont glue them together. Due to the lack of the drivers compartment Im a bit bothered by the fully detailed fighting compartment interior claims as well, because even though technically its true, in reality the driver is not really separated from the rest of the interior by anything; the gunner or commander could easily kick his backrest which to me it suggests that they are in the same compartment.
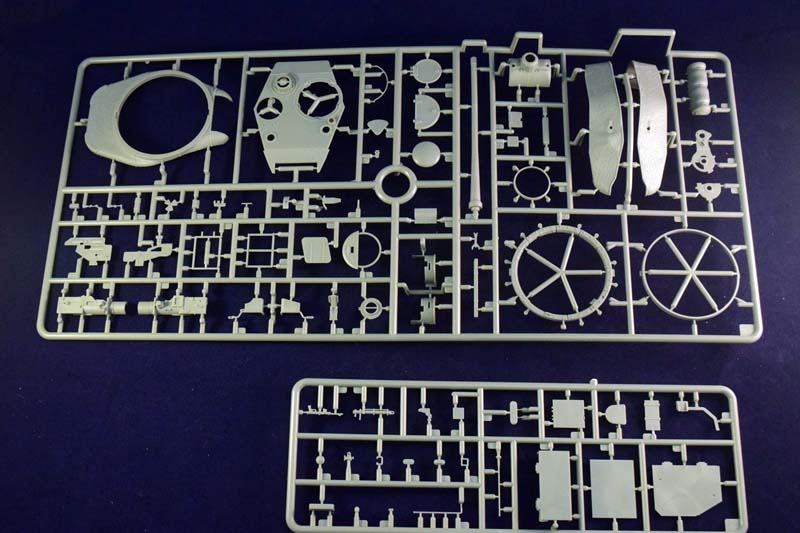
The plastic is very nice, soft to the touch; it is pleasant to work with. MiniArt might be overestimating the possibilities of the injection moulding technology when it comes to small and thin plastic parts; some of them are incredibly fragile, and they break very easily. (The parts for the wire guards for the headlights, or the fuel lines of the external tanks are incredibly thin, for example. It is indeed a challenge to clean the gates off without snapping the parts in two.)
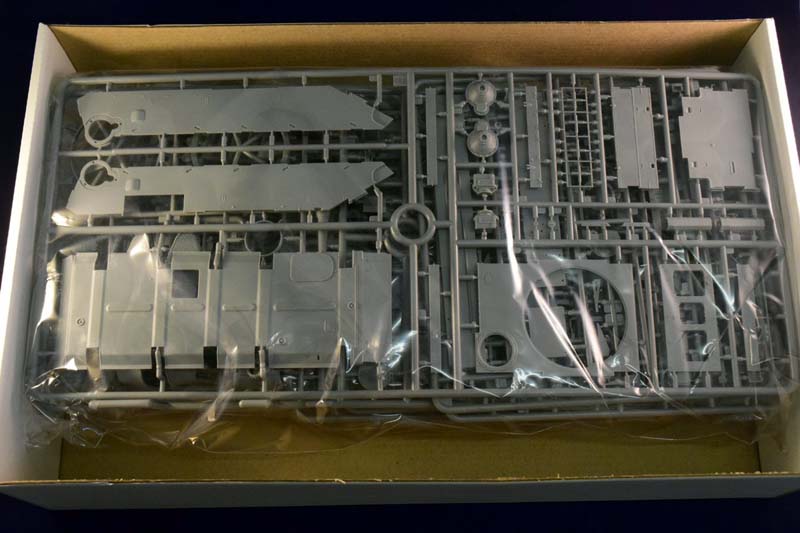
The sprue layout is somewhat similar to the T-44 model: the main parts are the same, however, for obvious reasons there are several differences as well.
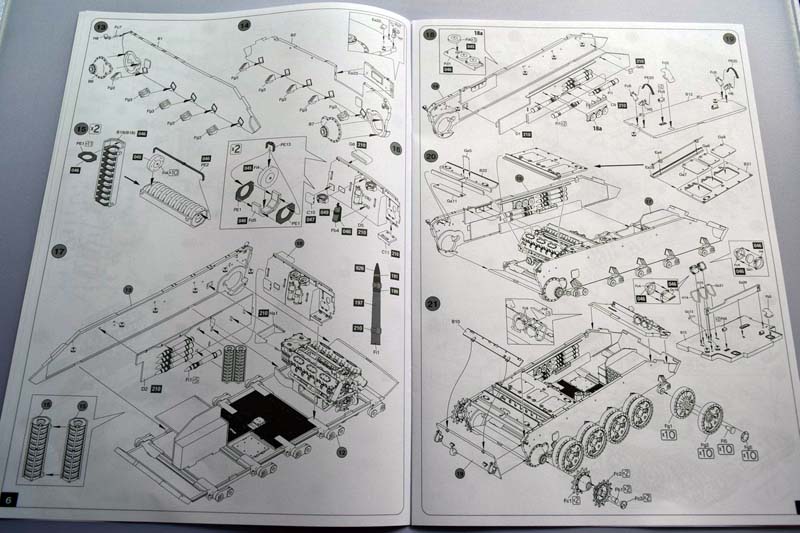
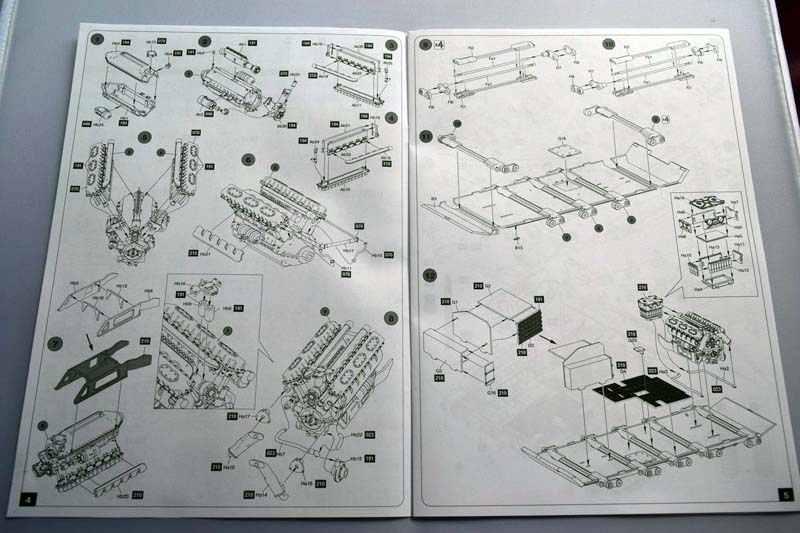
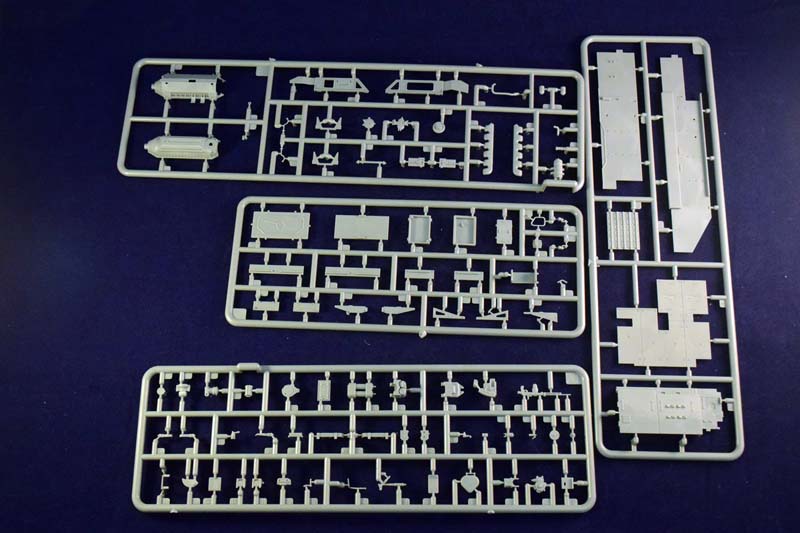
The differences start with the engine compartment. The overall layout is similar: we get a very nicely detailed engine and transmission, but nothing else. The engine is the V-54 12-cylinder 38.88 liter water-cooled diesel engine used on the T-54 which is slightly different from the original engine of the T-44 not much, but the differences are shown accurately. (The cables and wires are not depicted on the instructions, and would need to be built by the modeller using wire/flexible plastic; it is the same for the radios as well. There are drawings and photos online, so putting in the wires should not be a big problem.) The transmission of the T-44M was different from the base models which is also captured in the MiniArt model. The torsion bar assembly, the basic layout of the interior is the same (no drivers compartment provided, unfortunately). Aside from the small differences in the engine-transmission assembly, the steps are essentially the same until step 19. The T-44M did not have grousers mounted on the back of the tank but we get a log, finally... The ubiquitous un-ditching log has finally made its way to the T-44.
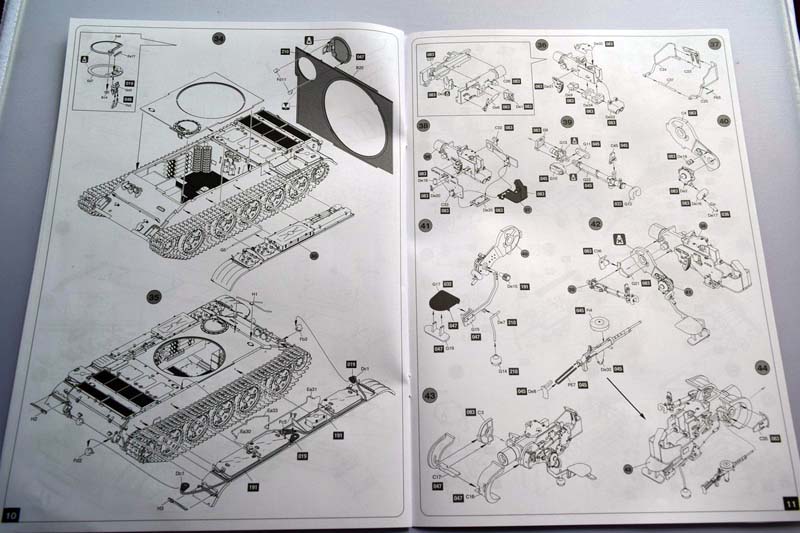
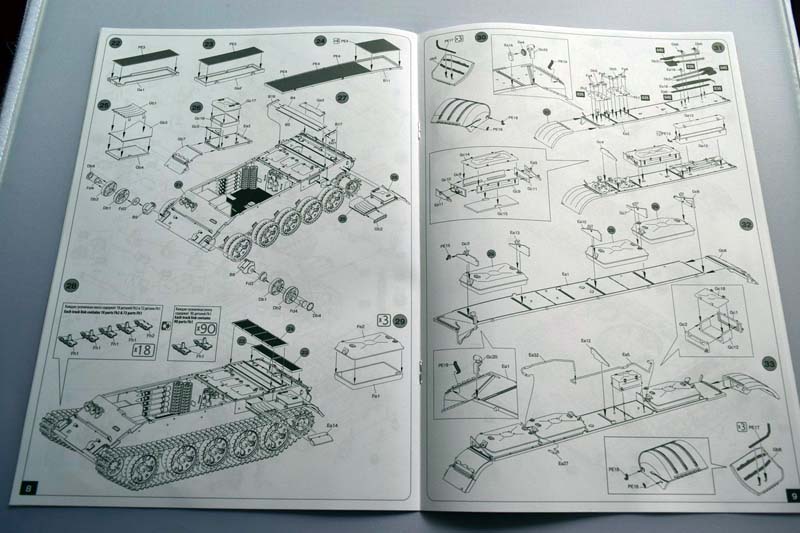
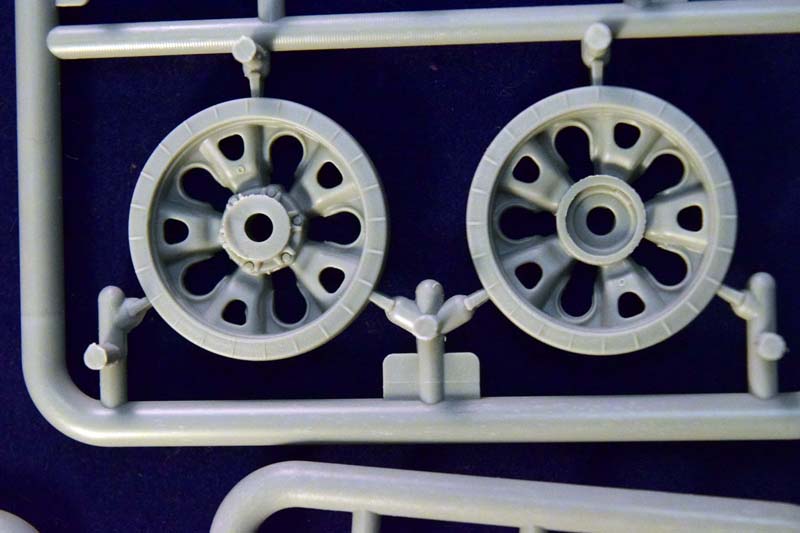
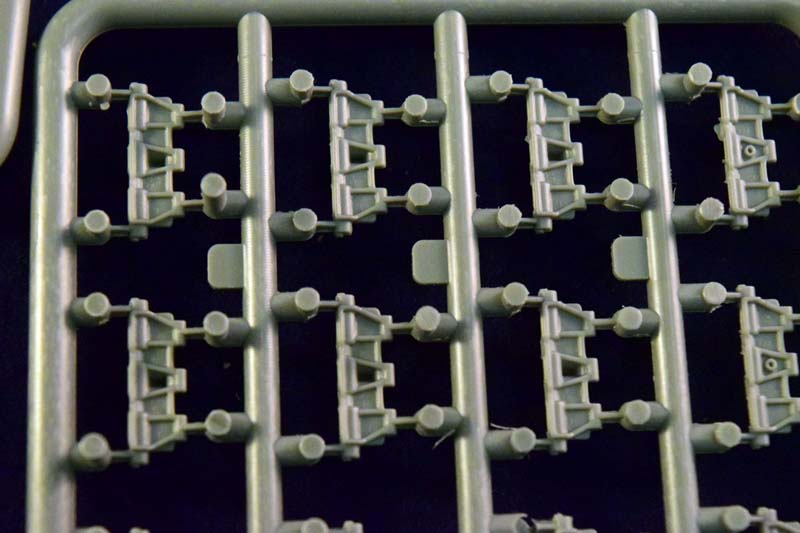
The whole of the running gear was modified to match the one used on the T-54: wheels are the starfish types, not the ones inherited from the T-34, and the tank now has the typical, spiked cold war drive sprocket at the back; the tracks are also changed to the ones used on the T-54. The idlers are also from the T-54. The front glacis plate had a more elaborate headlight assembly than the base model had. (Similarly to the T-54/55 it had a headlight and an IR light mounted side-by-side, protected by a wire frame.) The wire frame assembly is very, very, very delicate; perhaps using styrene rods to replace some of the small parts might be easier than trying to clean them up. (Or just make it from actual metal wire.) The drivers periscope is changed to the one used on the T-54 its lacking the armored cover of the T-44 base model.
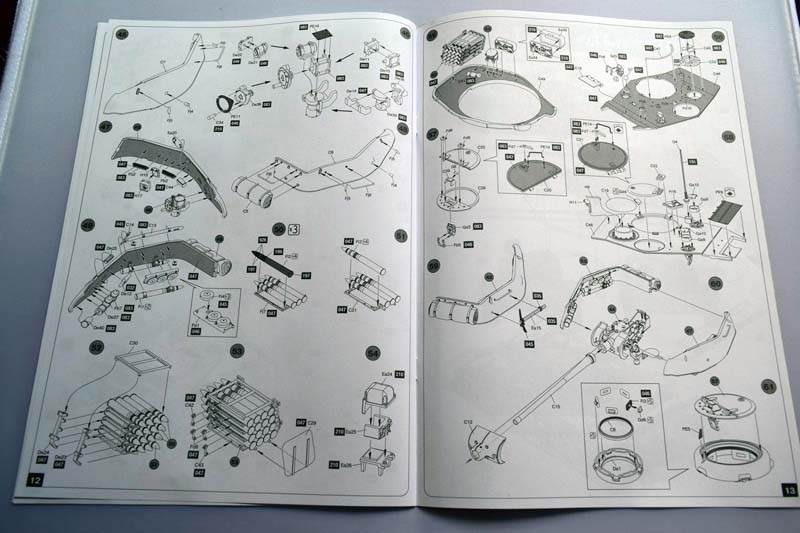
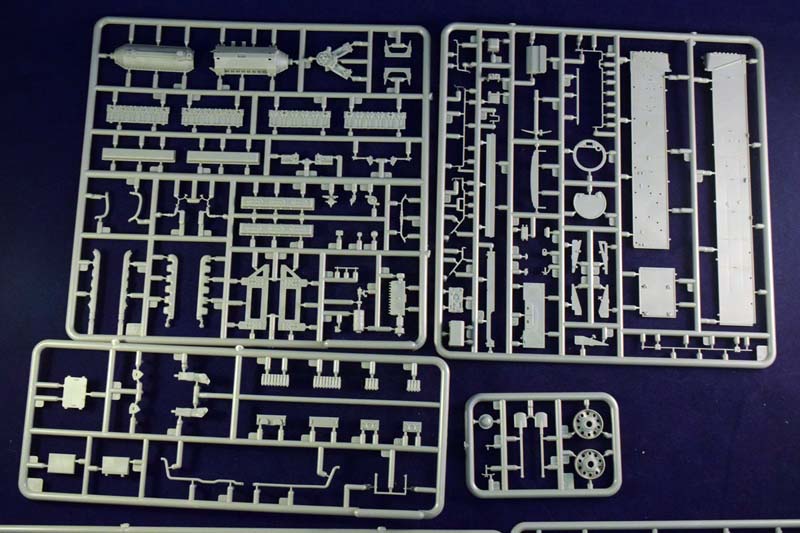
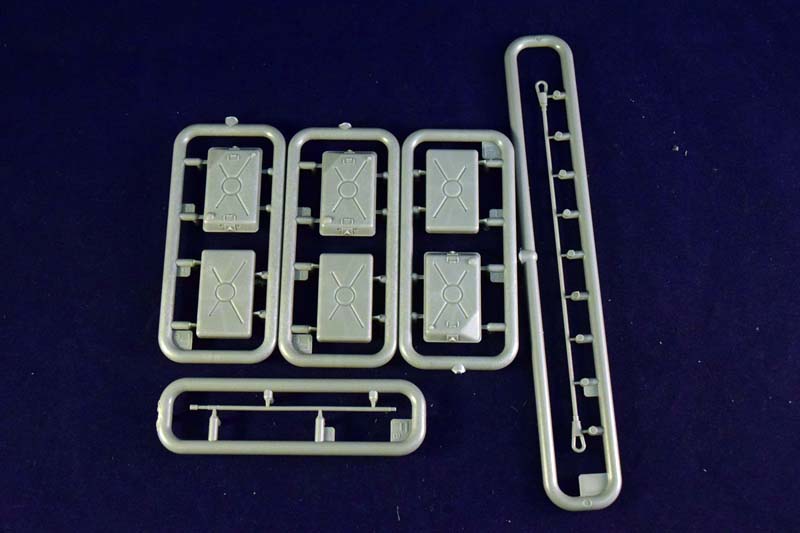
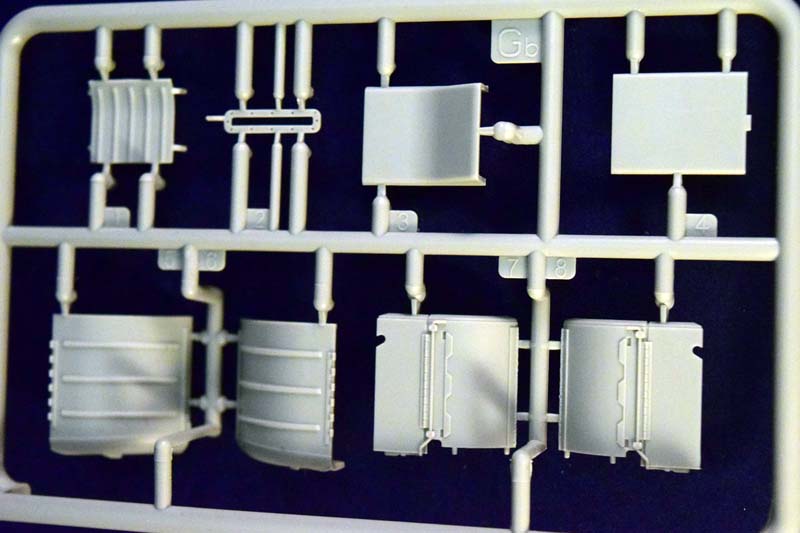
At Step 25 we arrive to the assembly of the mudguards/fenders. These were taken from the T-54 as well: the cold-war style flat, rectangular external fuel tanks replace the old-school cylindrical ones. The storage boxes, tools and their placement change as well. The front part of the fenders is much more elaborate affairs than the original T-44 models. As mentioned the tow cables are still plastic, and Im not really sure how you are supposed to wrap them around the stowage boxes and fuel tanks on the fender without breaking them. Theyd best be replaced by new ones made of picture hanging wires or similar metal cables.
Having built the original T-44 I have a couple of suggestions for assembly. Its worth deviating from the suggested sequence: the model instructions would have you finish the interior parts separately, and assemble the hull from the bottom and sides after. I would suggest to first assembly the tub of the hull (bottom, sides, back), build in the interior details, paint, weather them, and then add the front glacis plate, and finally close it off using the top part of the hull. This way its easier to accurately fit everything together.
The interior of the turret is also very similar to the base T-44. (The mistake on the T-44 instruction where part C3 was labelled as C17, was corrected in the T-44M.) The real change here is the radio sets (the T-44M had the R-113 and R-120 radios). There are some differences on the top of the turret as well, where a different commander cupola was used, and a new rectangular hatch as added. A small light was also installed on the back, and it also should have an anti AA mount- which is missing from the kit. Im not sure if its a mistake, or simply showing a different modernized version after all, there were several types of modifications of the M variant. (Some had T-55 style coaxial machine gun ports, for example.) The pistol port of the T-44 is welded shut in the M (at least in most of them), so even though we get the plugs separately, the interior holding mechanism is missing. Ive seen some reference photos of different types of turrets for the T-44 and T-44M - some had bulges on the sides, some were flat; the gun mantlet could be ridged or smooth circular and in some T-44M variants it was covered with canvas Some turrets had very prominent casting lugs on the bottom, while others were smooth. I am honestly not sure which feature would be appropriate for any given painting option given by the instructions. The turret is essentially the same as the T-44 models.
The rolled-up tarp at the back of the turret is still not very convincing; this would ideally be replaced by an AM item. The T-44M had an increased ammo capacity but Im not sure where the extra three pieces of ammunition would go. The turret and the hull hold the same ammo loadout as in the T-44. (This is obviously a minor issue.) The exterior of the turret has a really nice casting texture, but the rolled homogenous armor in the front glacis plate is completely flat; it would have been nice to include the slight imperfections that are present in these types armor plates. Another minor issue is that we only get one type of ammunition for the tank; Im fairly certain that most of these vehicles were equipped with different kinds (UO-365 Fragmentation Round, UBR-365 Armor-Piercing Round, and UBR-365PK Sub-Caliber Armor-Piercing Projectile).
SUMMARY
Highs: rare subject, great detail, partial interior.Lows: some plastic parts are too thin and delicate to handle without breaking them, plastic tow cable, partial interior.Verdict: All in all, this is a very nice model. Its a shame the drivers compartment is still bare; it would be great to have it included. (I have adopted CKMs T-55 drivers compartment set for my T-44, but I think Ill leave it empty for this model.)
I am a biologist by trade, and as a hobby I've been building scale models for the last twenty years. Recently I started to write reviews of the models I bought. These reviews are written from the point of view of an average model builder; hence the focus is on quality of the model, how easy it is to...
Thank you for the review. Got to say i am disappointed by the lack of driver compartment (also the engine, but to lesser extent). I ordered this kit (hasn't arrived yet) with an idea of making an "explosion" model, but now...
I think it should be relatively easy to scratchbuild one if you only need a "blown-up" tank; alternatively CMK makes a T-55 driver's compartment which can be adopted. (Well, some parts. The instrument panel, and some other parts are not very similar.) If it's only visible from the hatch, it's actually quite convincing... (I've built the T-44 like that; if you're interested, check it out on my blog. There was also an incredibly beautiful build by someone who scratch built it. Unfortunately -and it does not help you much admittedly- I forgot his name...)
On the other hand: the plastic is scale thickness; if you want to show a blown-out top turret or hull, it's easier to do so.


Comments