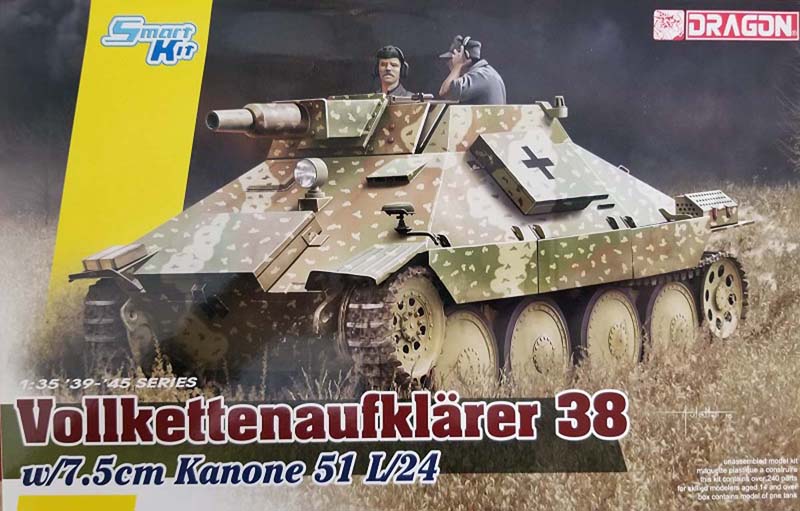
The Vollkettenaufklärer 38(t) was a prototype German late war reconnaissance vehicle that was a variant of the open top Bergepanzer 38. The vehicle never went into production and only a handful were built for testing with a variant mounting the 7.5cm L/24 gun as represented in Kit # 6815 by Dragon. The vehicle is essentially a spinoff the Jagdpanzer 38(t) Hetzer and is one of three Hetzer based prototype vehicles Dragon released in 2016. Given that it was only a prototype not much is known about this vehicle aside from a few photos.
Inside the Box
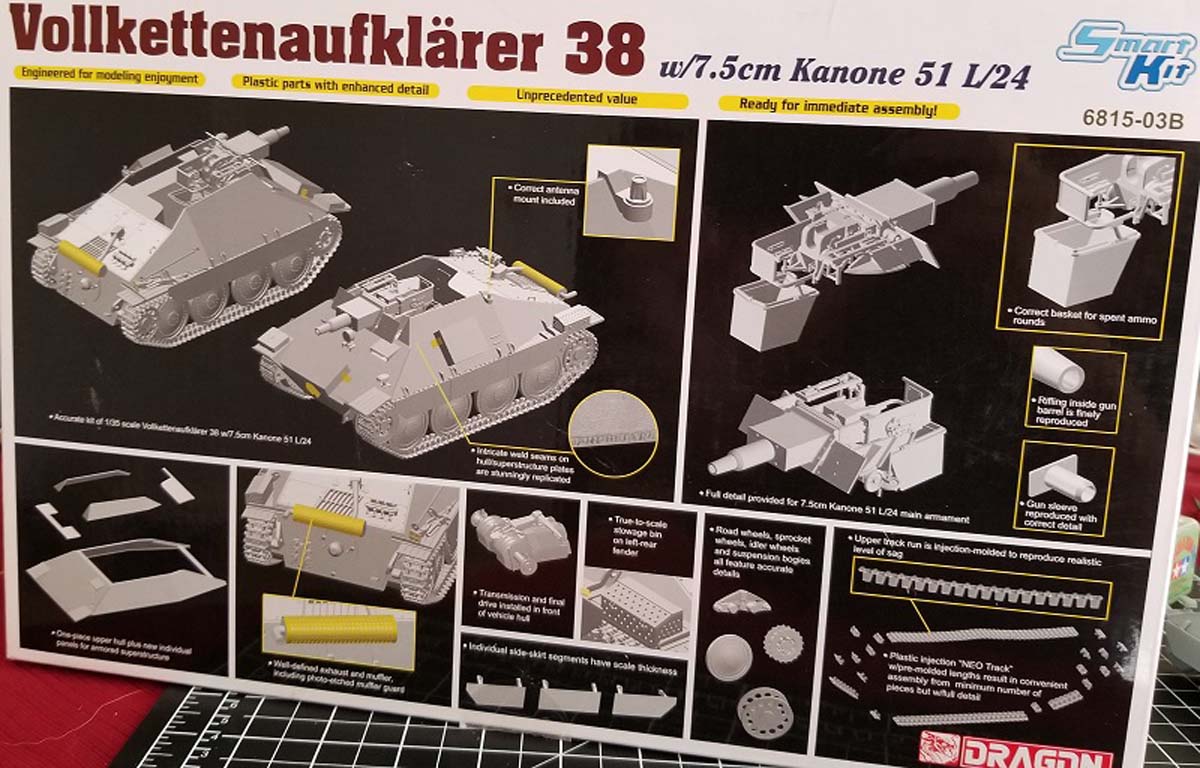
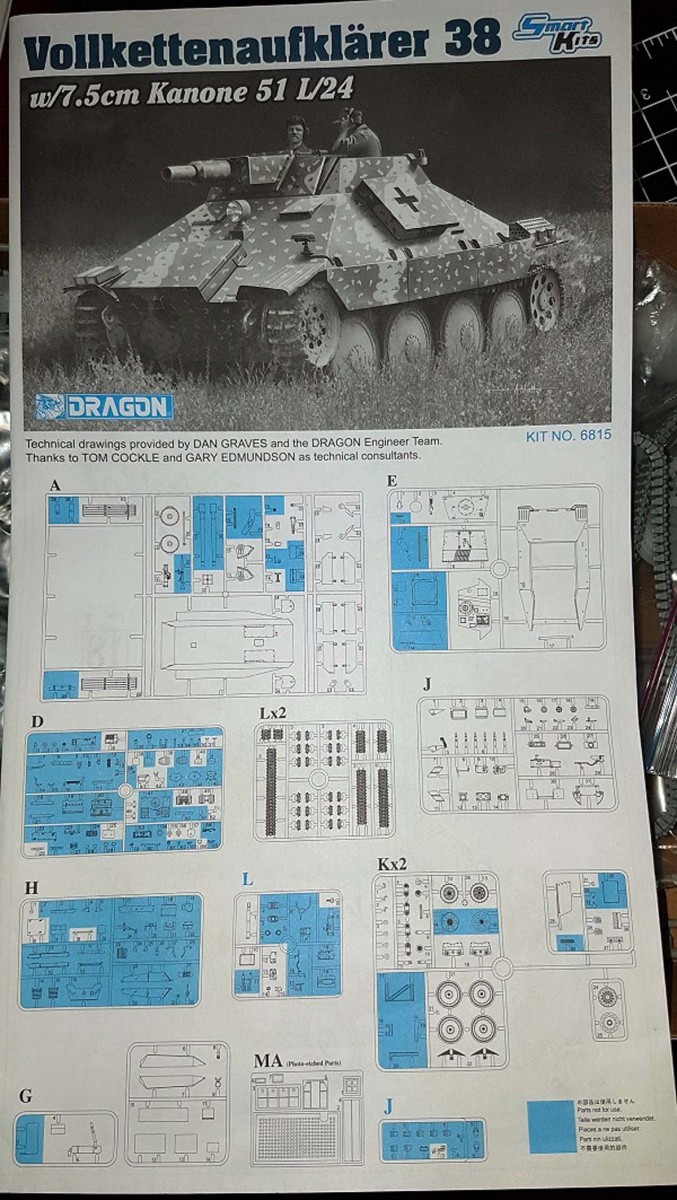
The kit consists of 11 styrene sprues, 1 clear parts sprue, 1 decal sheet, 1 photo etch fret, and 1 build sheet. All the sprues are recycled from Dragon Models older Hetzer and Panzer IV kits, with the exception of the link and length tracks sprue which appear to be new. The decal sheet and photo etch fret are also made specifically for this kit, the decal sheet is very basic and includes only 3 balkenkreuz. The sprue map has quite a number of parts shaded in blue so there will be plenty of spare parts you will be left with. The part count looks to be around the 200 range with only 20 steps to complete the model. The build steps on the instructions sheet are laid out well and are easy to follow. The paint and marking guide has 3 options listed all of which are unidentified units from 1945.
Unidentified unit 1945: Tri-tonal German ambush camo pattern with balkenkreuz makings.
Unidentified unit 1945: Dunkelgelb lower hull and Tri-tonal camo pattern on the upper hull with balkenkreuz makings.
Unidentified unit 1945: All white winter camo pattern with balkenkreuz makings.
The Build
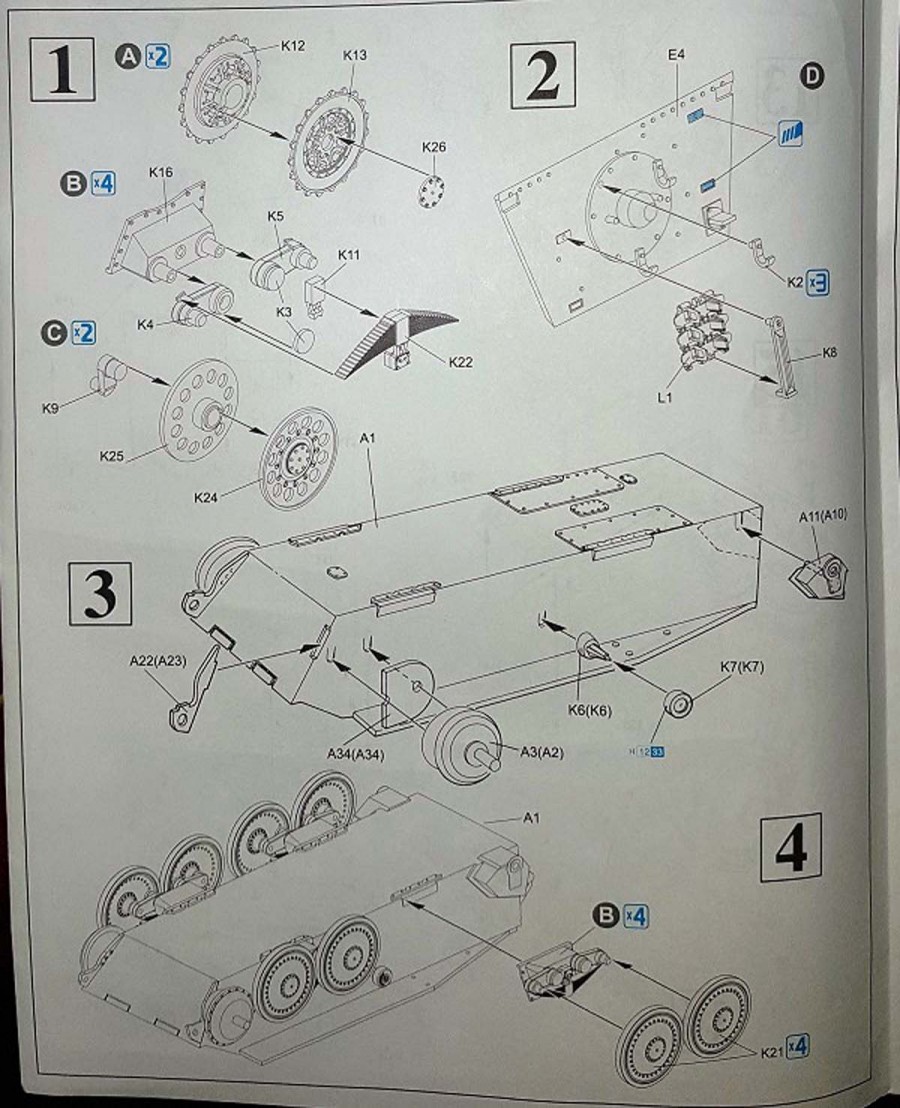
Steps 1 and 4
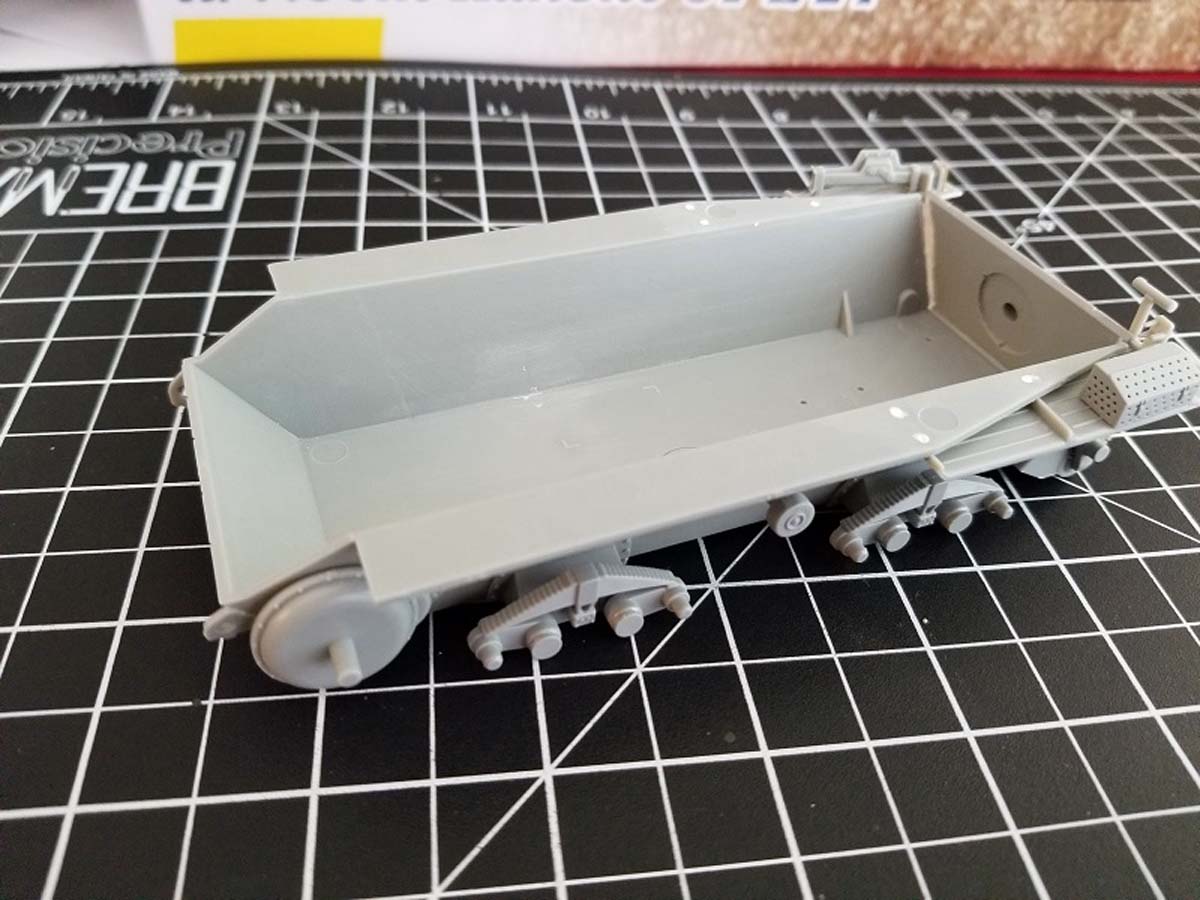
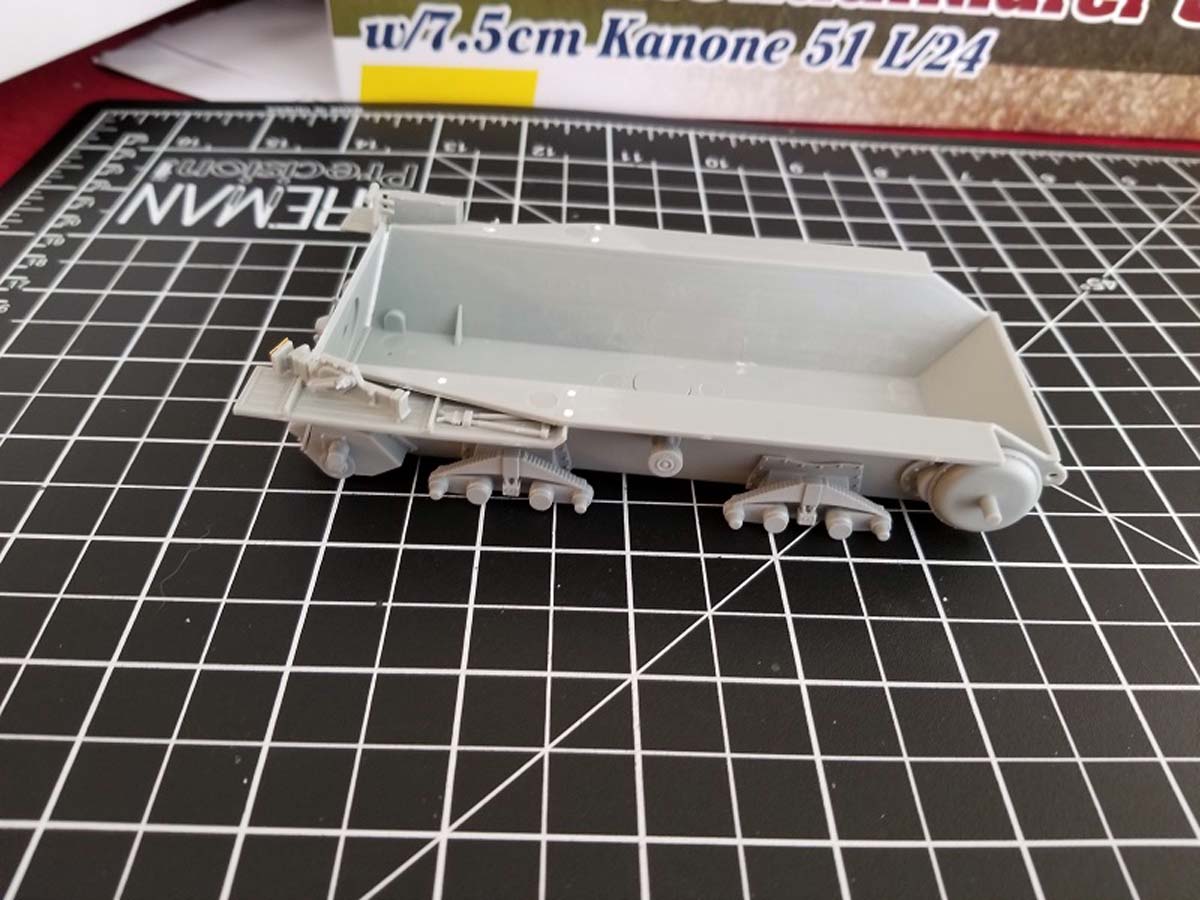
The build starts out with the assembly of the running gear and suspension components. The parts used in step 1 are all nicely molded and fit together perfectly but I did alter the build sequence here. I recommend NOT to glue the suspension pieces together until you have them all ready along with the wheels because you want to make sure all the suspension arms are level when the cement cures. Once you have the all suspension pieces ready glue them all together and attach the suspension bogeys together on the lower with wheels as shown in step 4 to level all the suspension arms.
Steps 2 - 3
Step 2 does require some careful cutting and sanding of 2 mounting brackets on the rear hull plate, I accidentally cut off some of the bolts while removing the mounting brackets so be careful with your hobby knife. Step 3 is pretty straight forward and is where you mount the final drive and idler wheel components to the lower hull.
Step 5
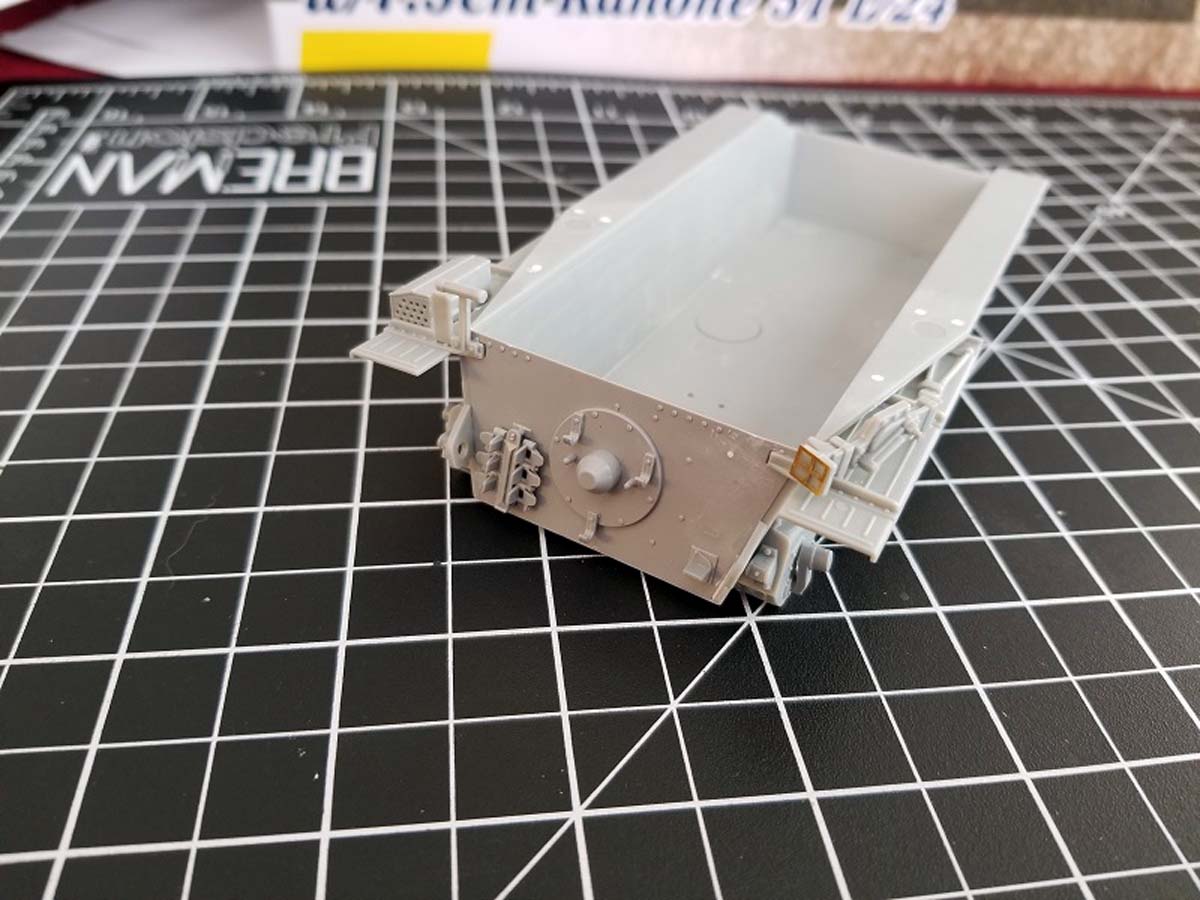
In this step you are attaching the rear wall of the hull and the 2 side fenders along with the crew tools. The rear wall fits in well with the lower hull but the mounting holes for the side fenders on the lower hull tub arent aligned very well. I had to fill in the holes on the lower hull tub and just attached the side fenders using the mounting point on the rear wall as my guide. Another issue I noticed in this step is piece number A14 is called out in one of the sub-assembly images but it is not shown on anywhere on any of the other images in the rest of the build.
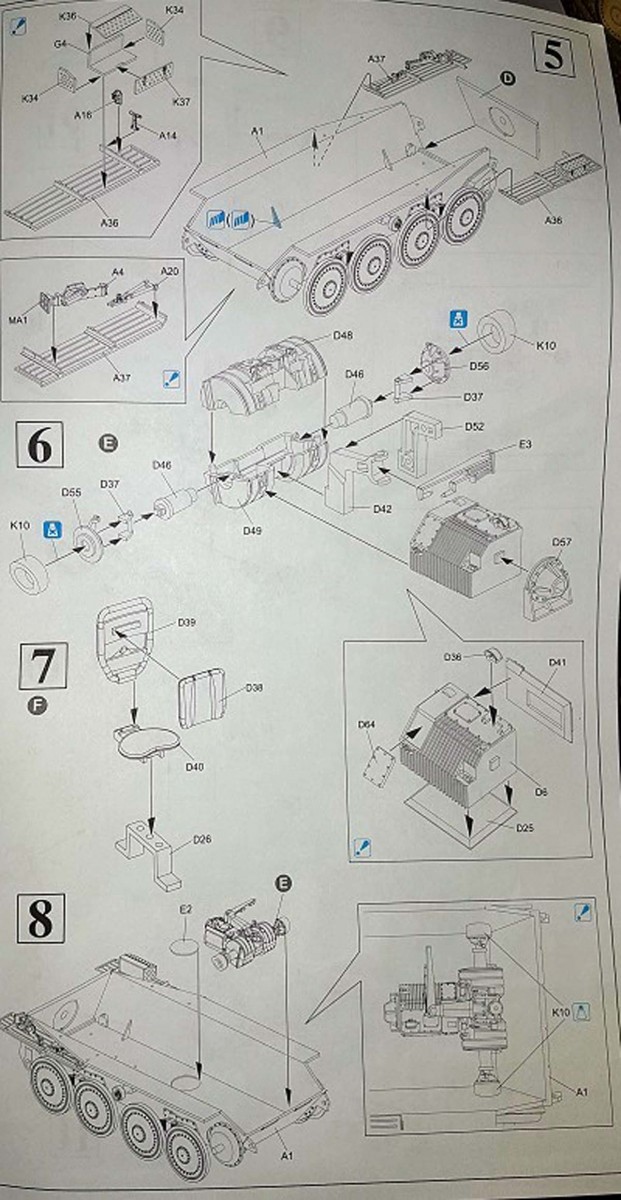
Steps 6 - 8
In step 6 you sub-assemble the transmission and the final drive, the pieces are all nicely molded and fit together well. Make sure you do not cement pieces K10 as you will need to adjust them when you mount the transmission to the rest of the hull in step 8. Step 7 is just the assembly of the driver seat which is very straight forward, there are enough pieces to make 2 seats but the instructions only call for 1.
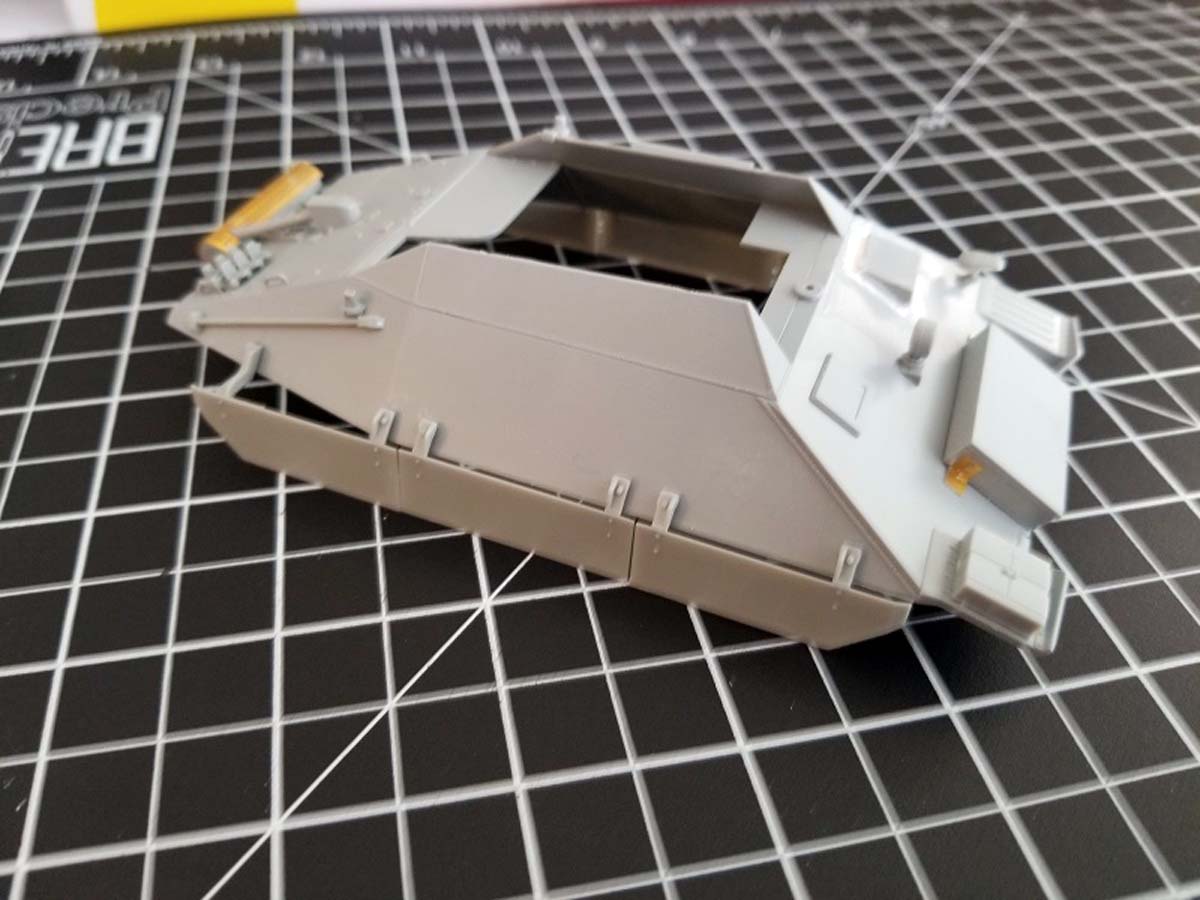
Step 9
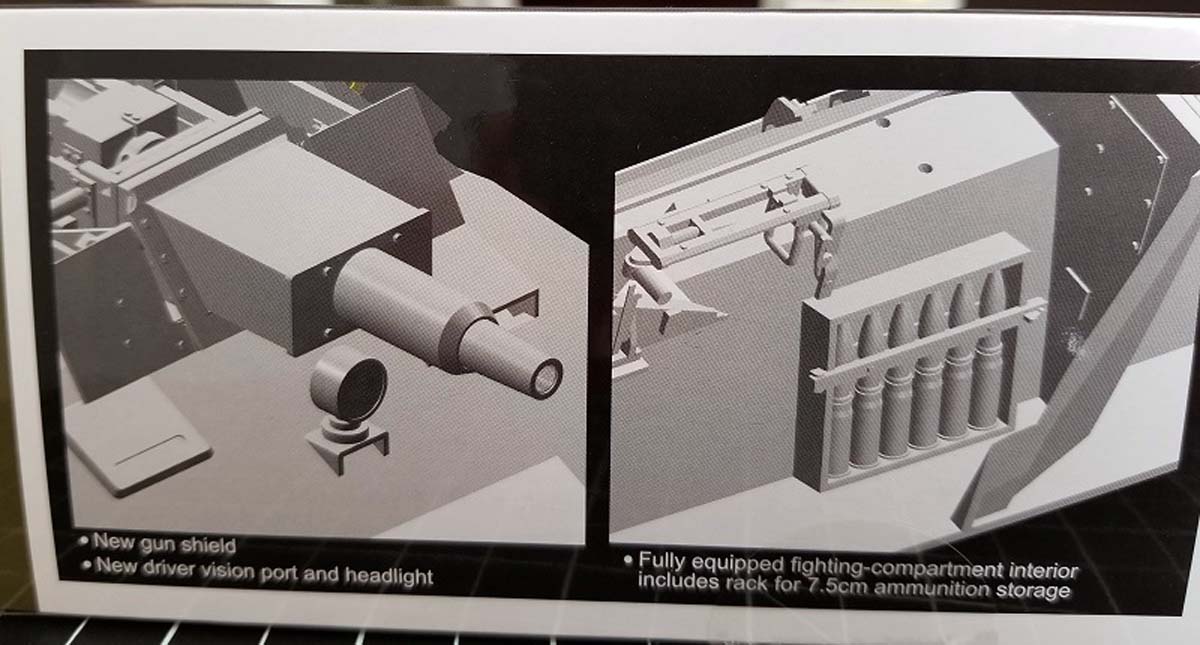
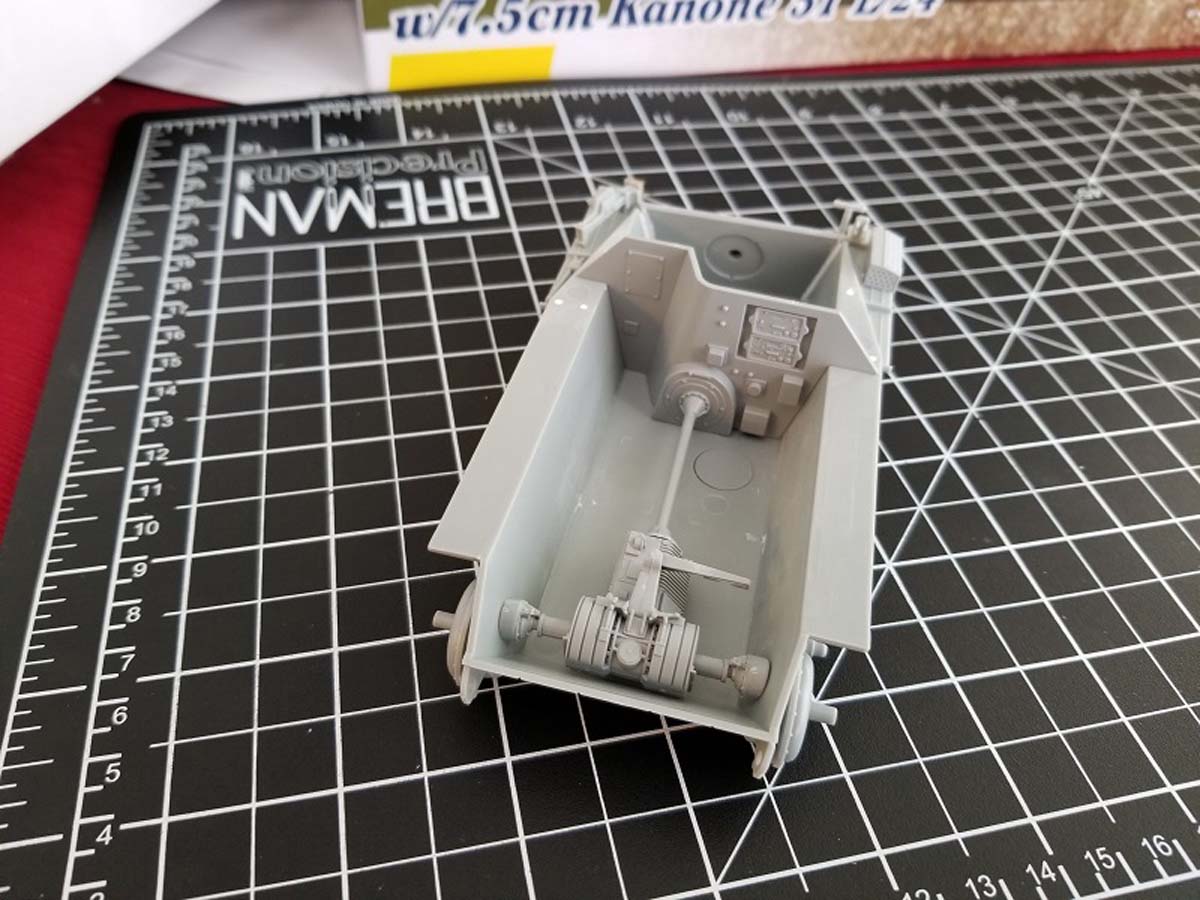
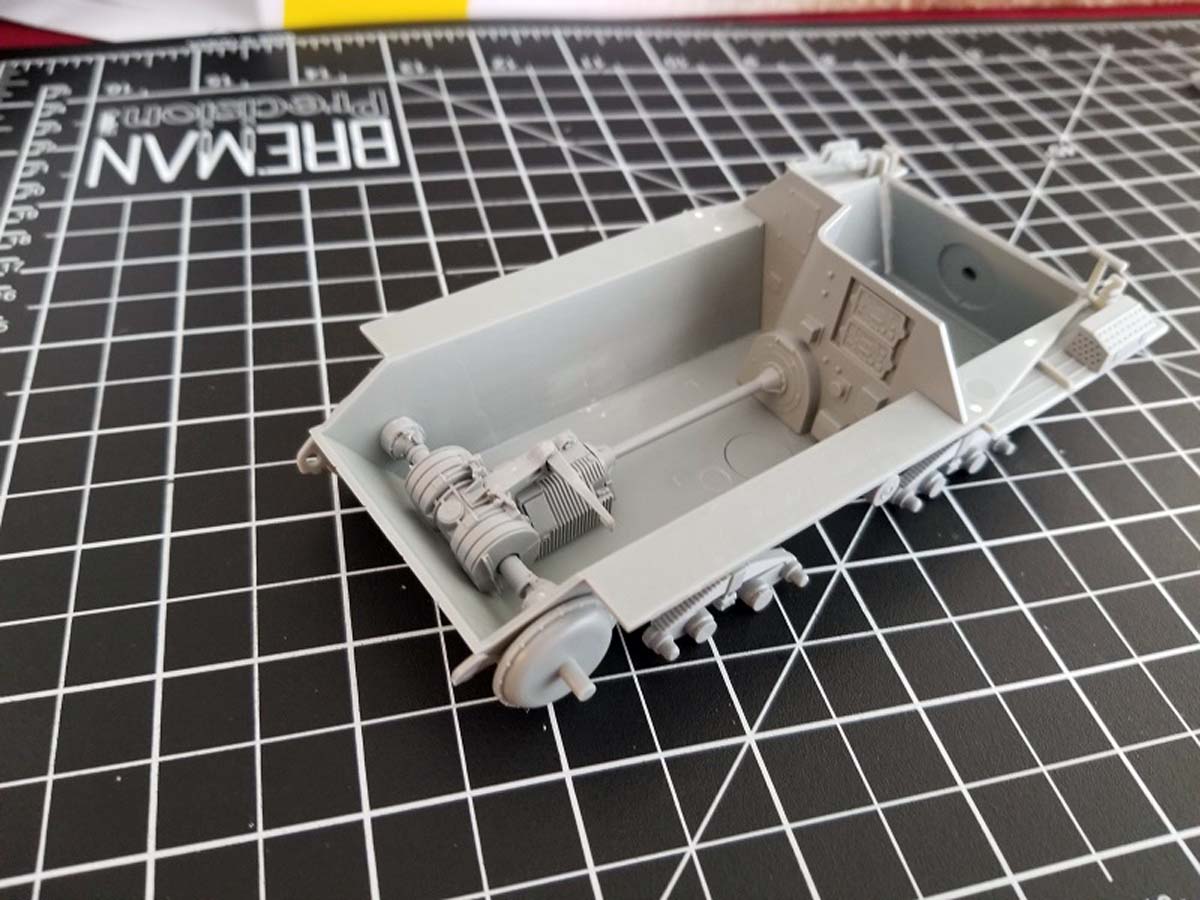
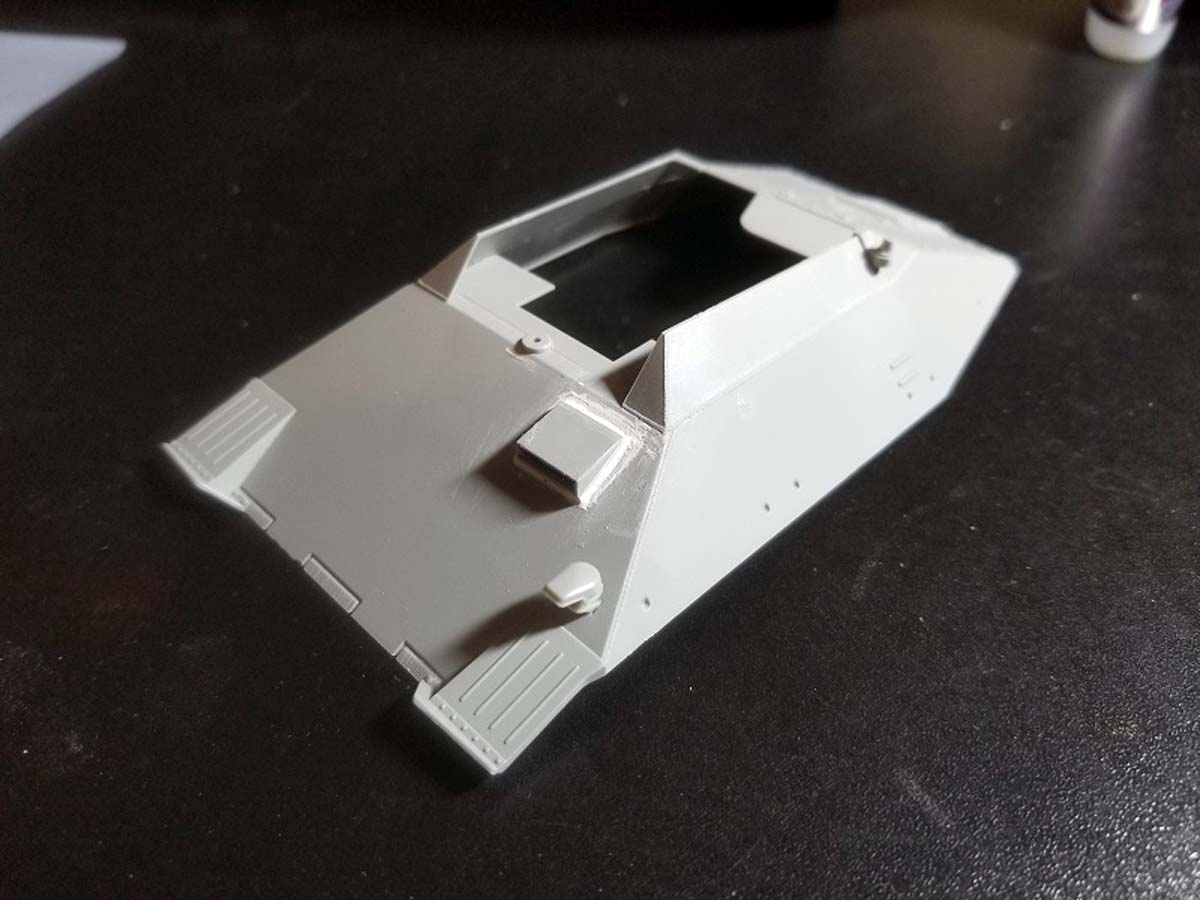
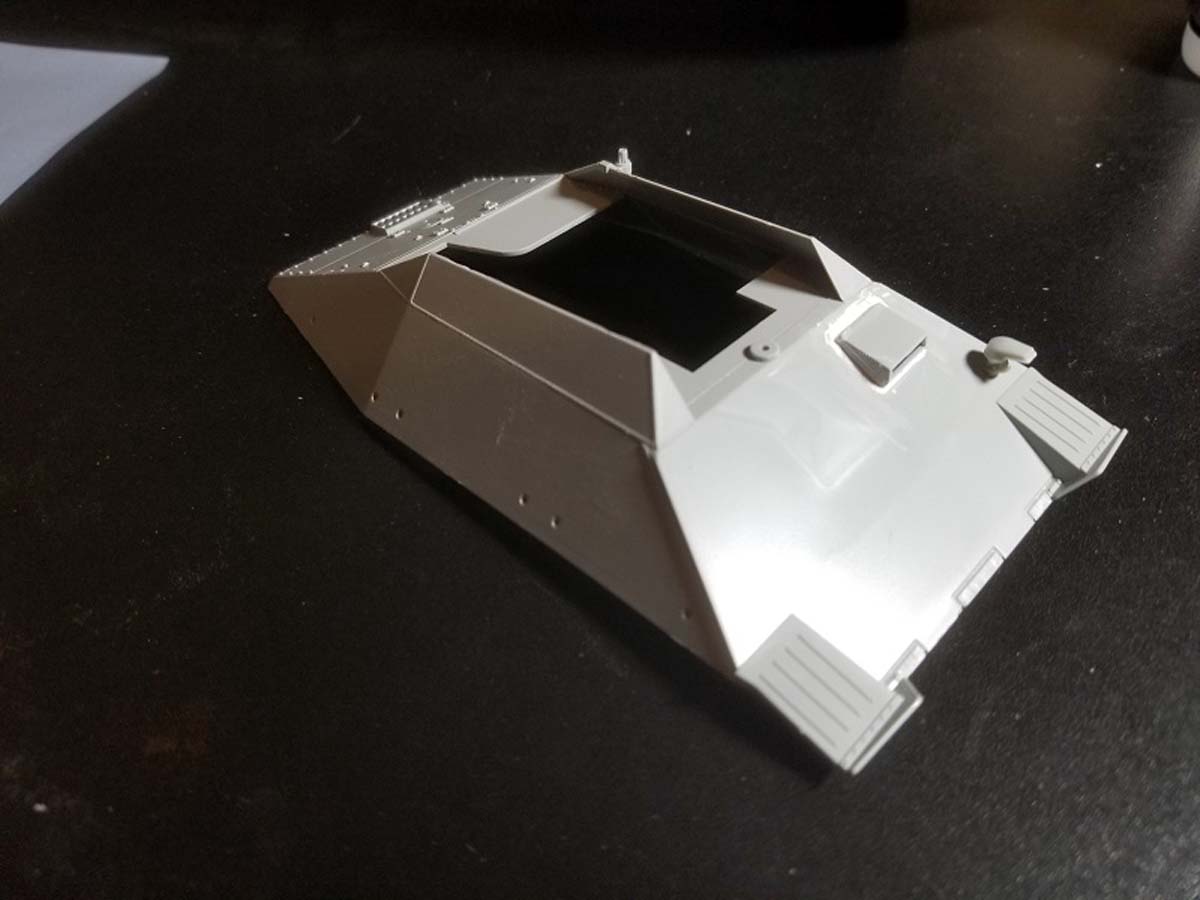
In this step you begin assembly of the upper hull and the rest of the pieces in the fighting compartment. To me this was the most difficult step of the build because of the cutting required to add the drivers vision ports. There isnt much of seam you can use as a guide while you are cutting the upper hull, the cuts I made werent very clean so I used some putty to clean off the edges. Once you get past attaching the vision ports the rest of the steps are straight forward and fit together well.
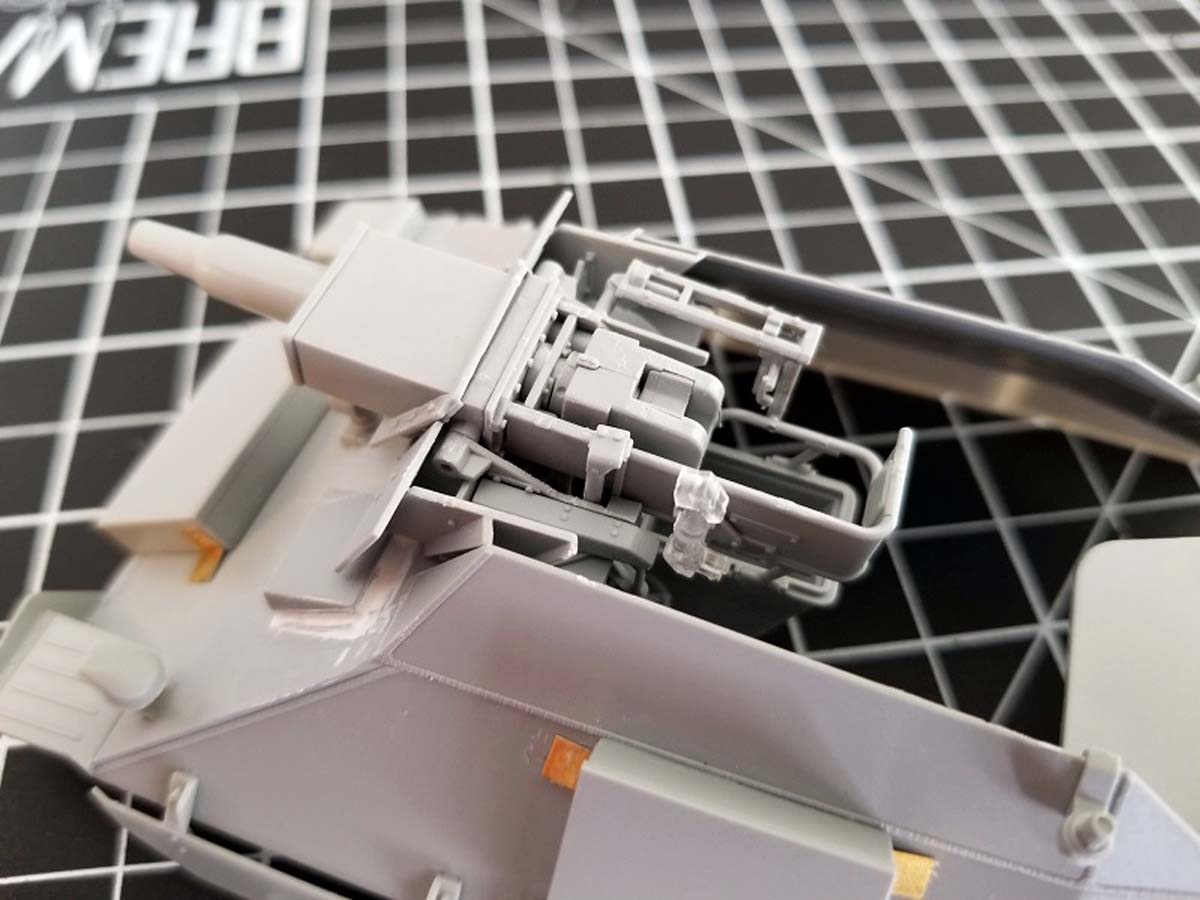
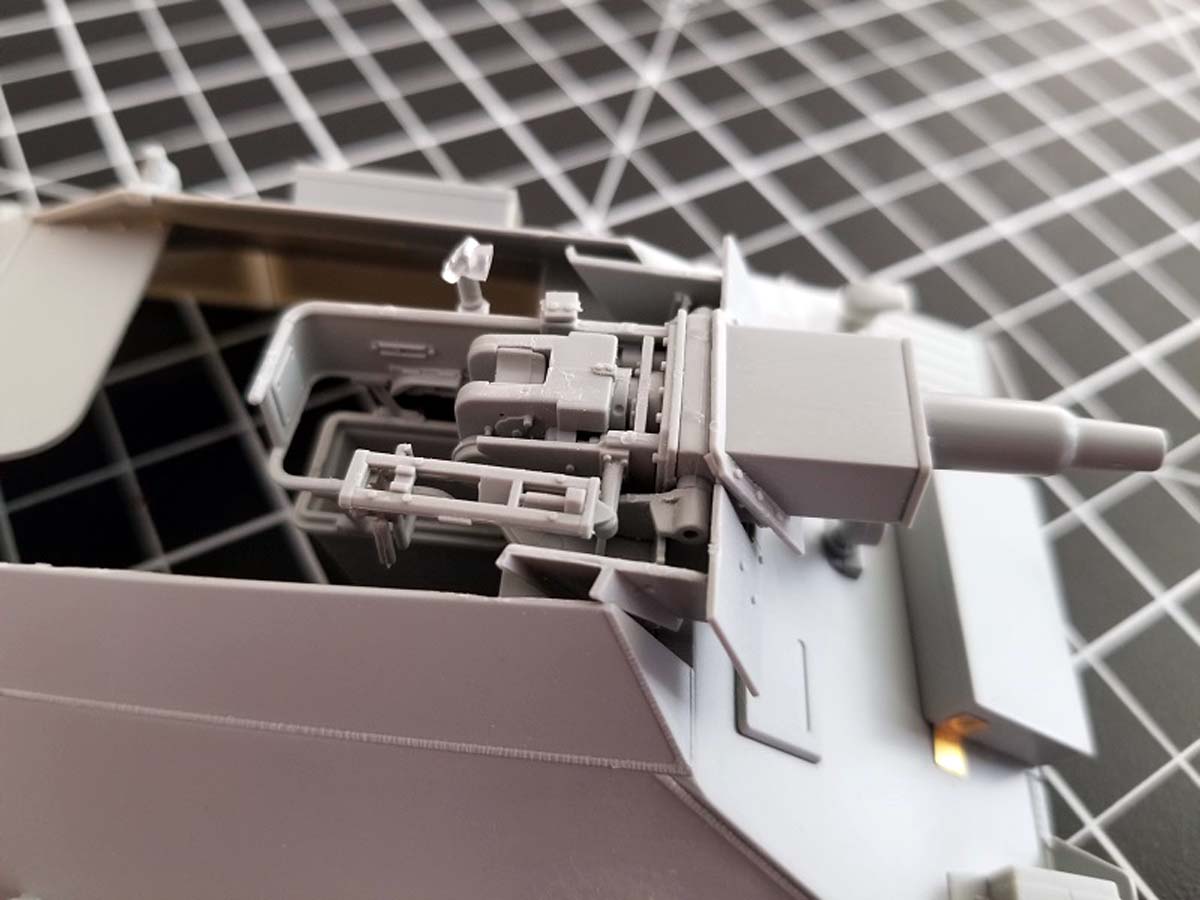
Steps 10 - 16
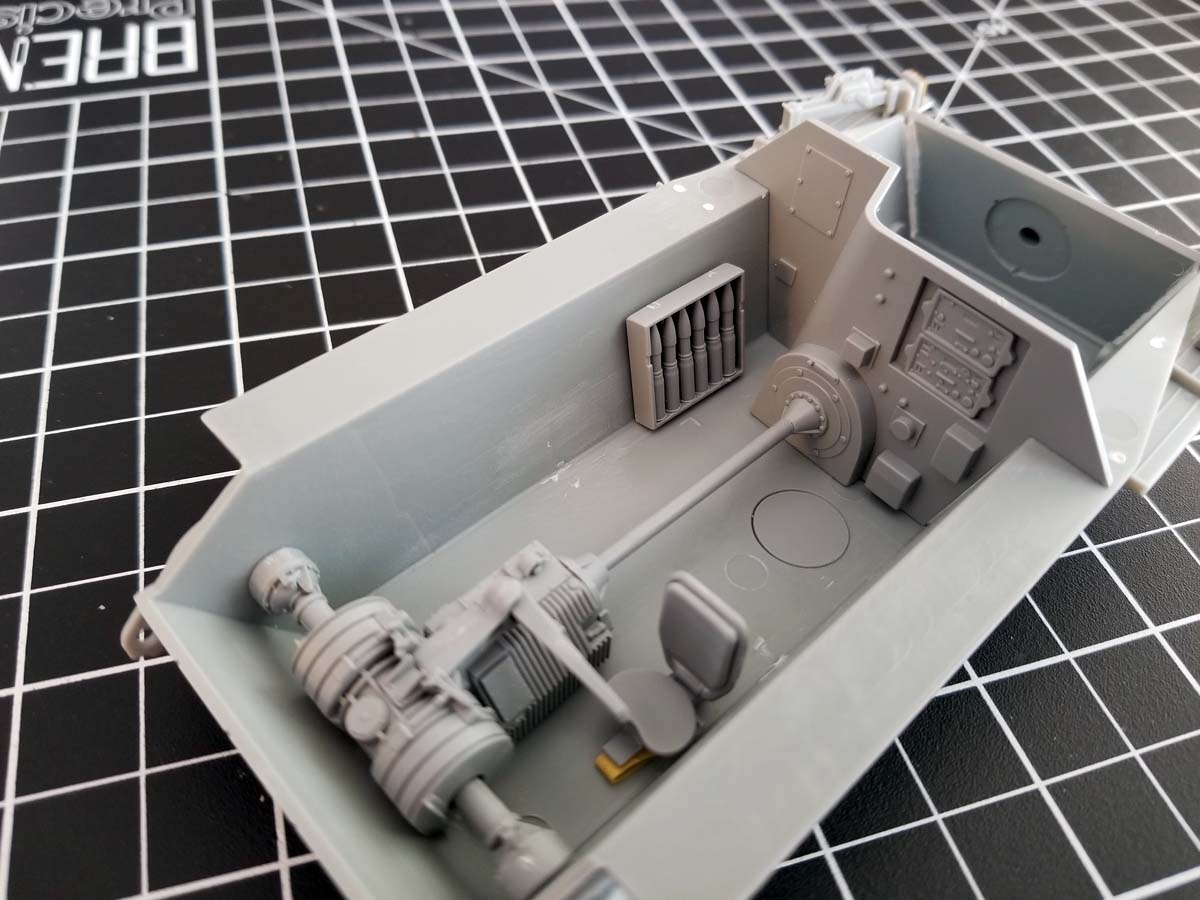
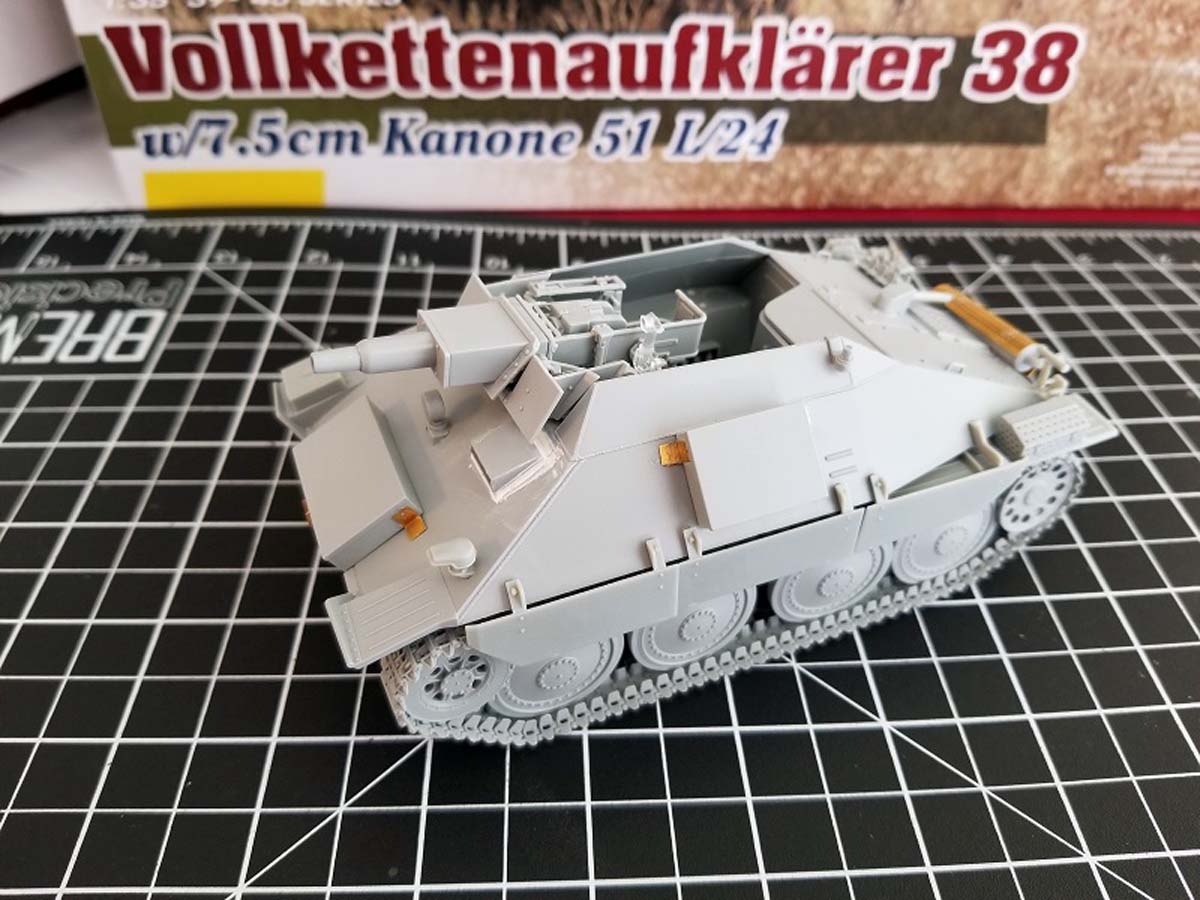
The next 6 steps have you begin the assembly of the 7.5cm Kanone 51 L/24 gun. This is one of the more detailed guns I have worked on and definitely my favourite part of the build. The instructions are easy to follow and you are given options for different breach blocks and elevation control cranks. The gun definitely wont go unnoticed in this vehicle because of its open top design.
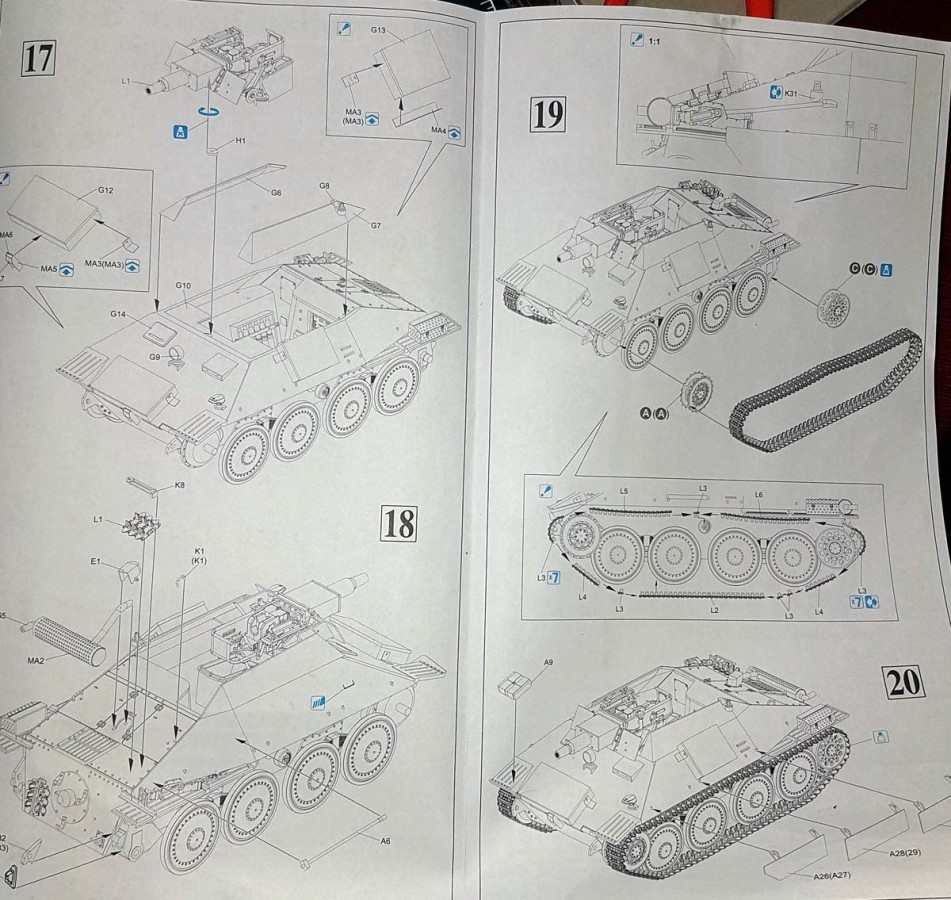
Steps 17 - 18
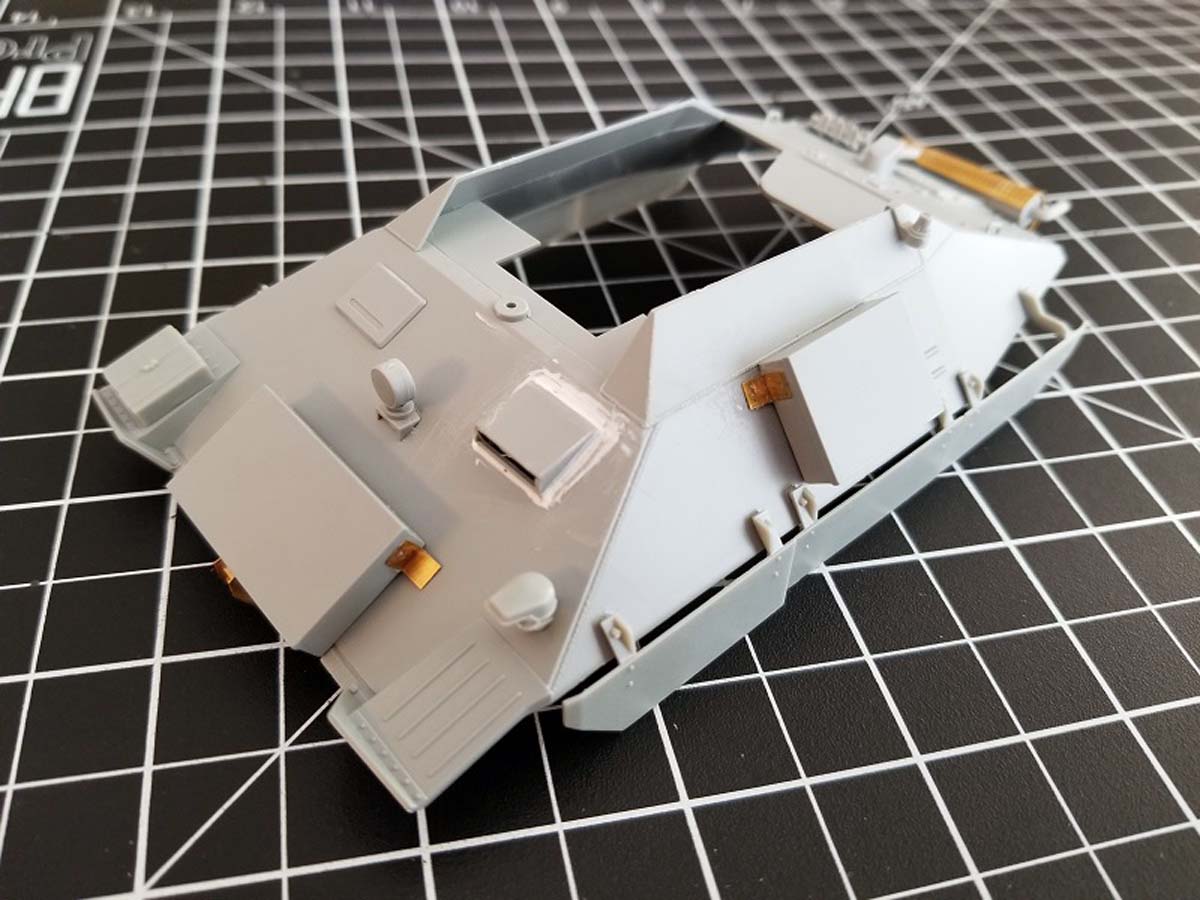
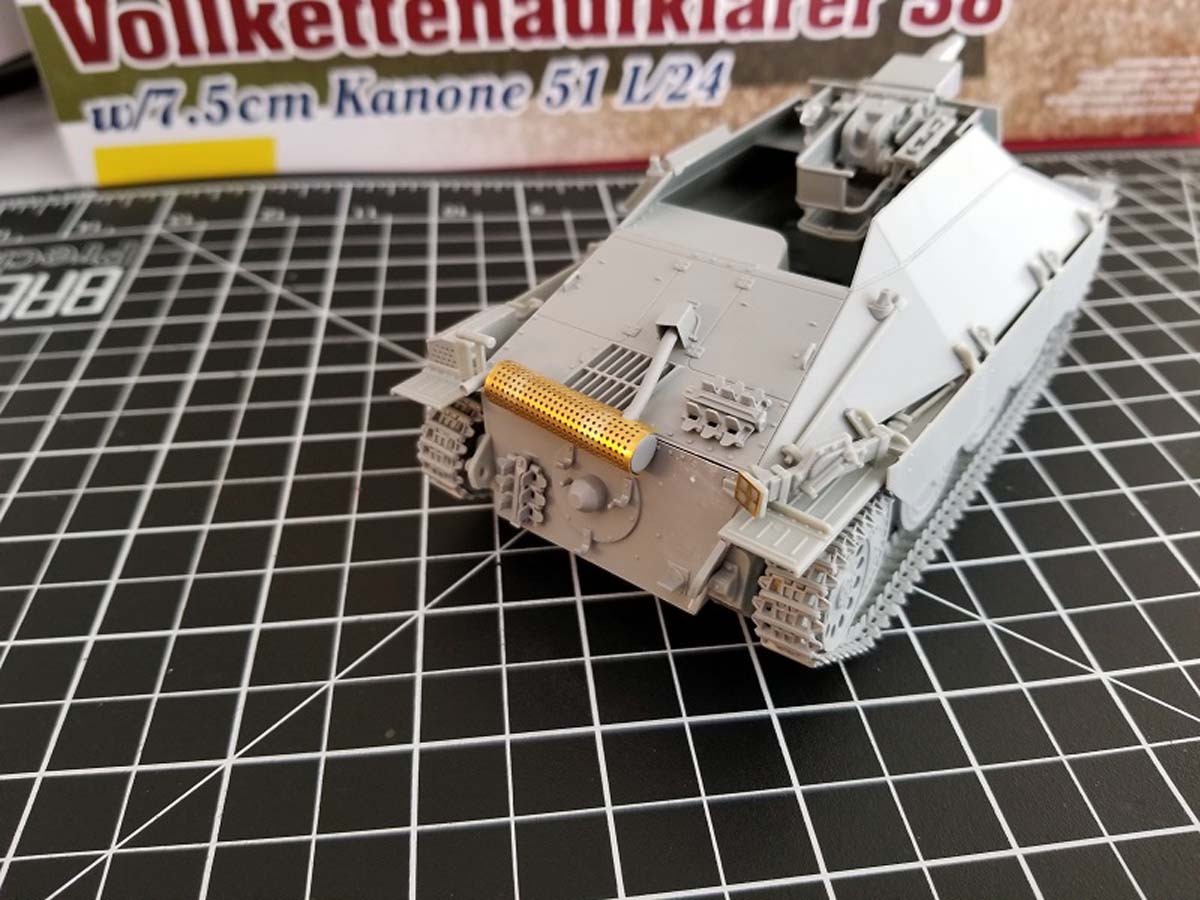
The next 2 steps of the build have you attaching the gun to the rest of the vehicle as well as some other storage boxes, the head lamp, and other accessories on the outside of the vehicle. I was disappointed that the head lamp was a solid piece of regular styrene and that no clear part was provided even though there is a sprue of clear parts in this kit.
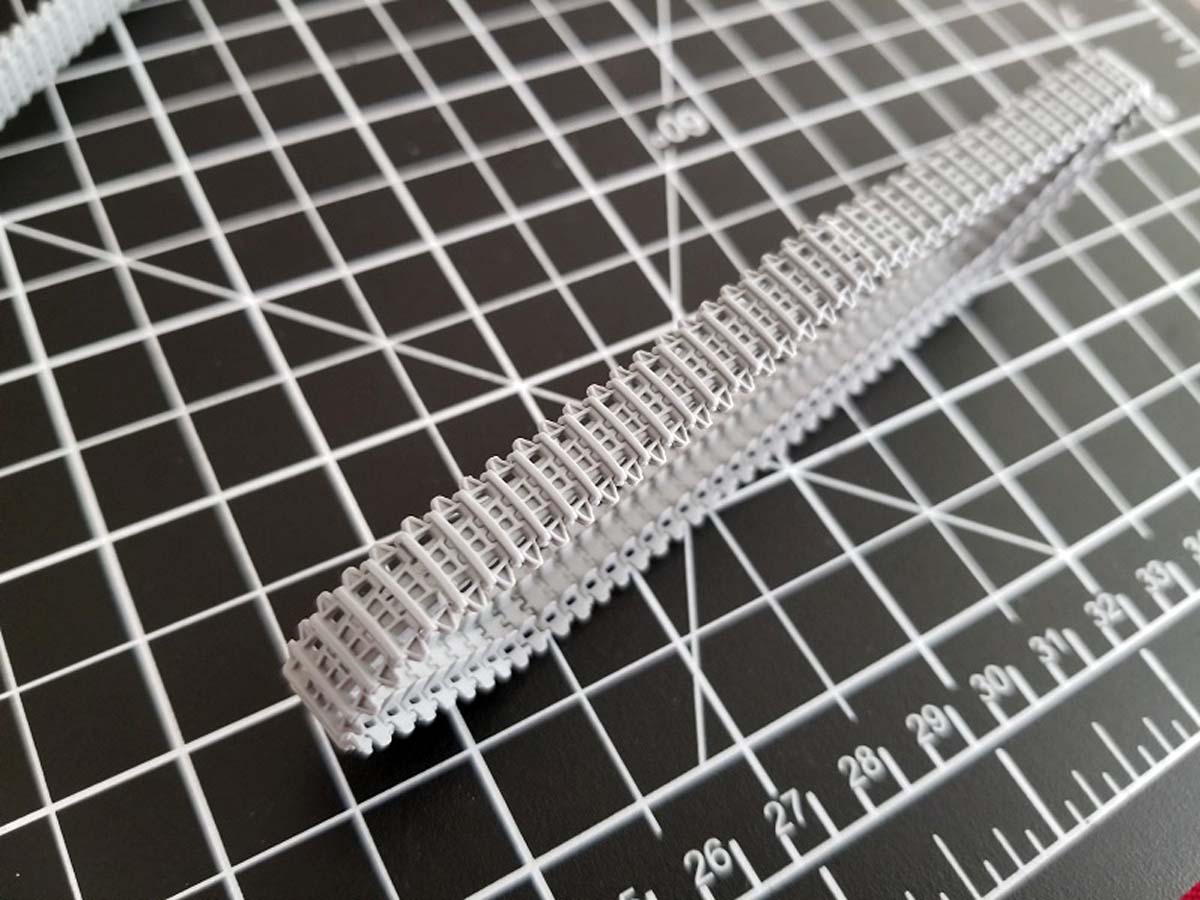
Steps 19 - 20
The assembly of the tracks was the most disappointing part of the build for me, the tracks are the link and length type which I usually like because it saves me construction time but the ones Dragon provides are a disappointment. I built one of Academys Hetzers recently which also had link and length tracks and theirs were of better detail and quality than the Dragon ones. The last step has you assembling the side skirts which are all individually molded and fit nicely on the hull.
Conclusion
Overall this kit builds into a nice model of a rare subject with some good but not great detail. As I mentioned earlier the model is almost entirely made up of sprues from some Dragons older models and you can definitely see the difference in detail from the very old sprues to the more recent ones. Aside from the drivers vision port and the tracks the model was a straight forward build with a very manageable piece count. The fighting compartment is a nice touch though it is definitely not a complete one. From what I see online the kit retails in the $60 range which I think is a bit too high for the level of detail you get especially when you consider Academys Hezter kits which are of equal calibre and retail in the $20 range. With that being said I would like to thank Armorama for providing me this model and giving me a chance a review it.
SUMMARY
Highs: Very nice gun assembly, and decent detail for the fighting compartment.Lows: Not the best assembly method of the vision port and not so great link and length tracks. Verdict: Low parts count model with instructions that are easy to follow. It does have a high price but it might be worth it for fans of the Hetzer/Panzer 38(t) family of vehicles.
Our Thanks to Dragon USA! This item was provided by them for the purpose of having it reviewed on this KitMaker Network site. If you would like your kit, book, or product reviewed, please contact us.


Comments