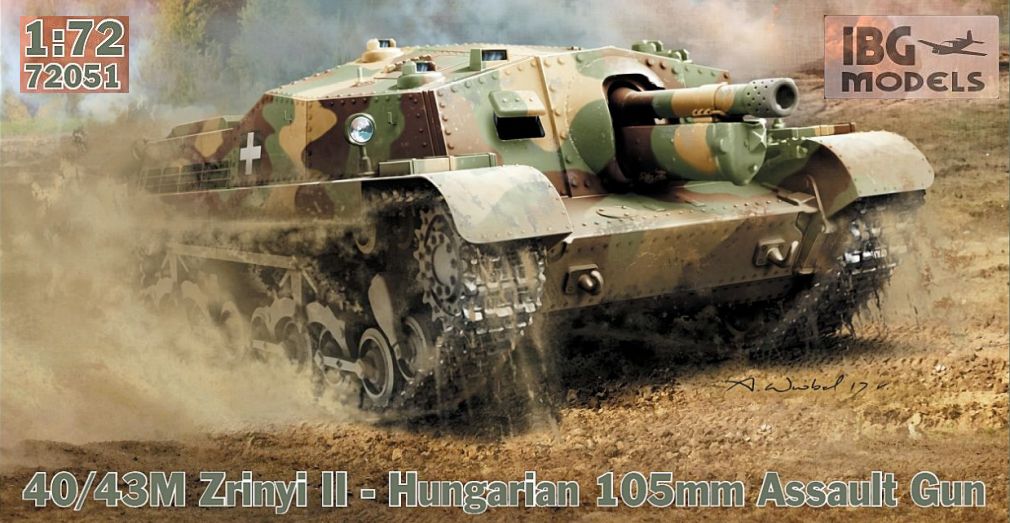
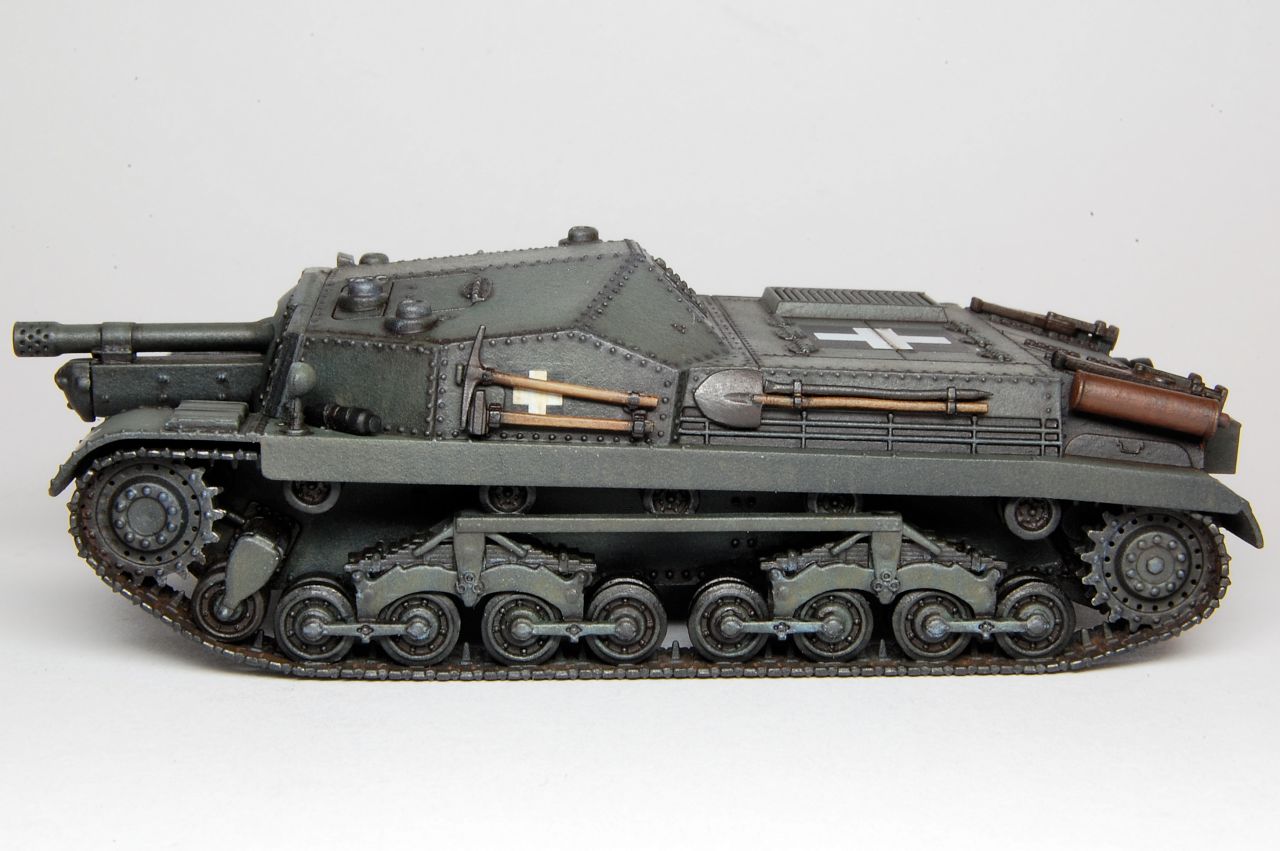
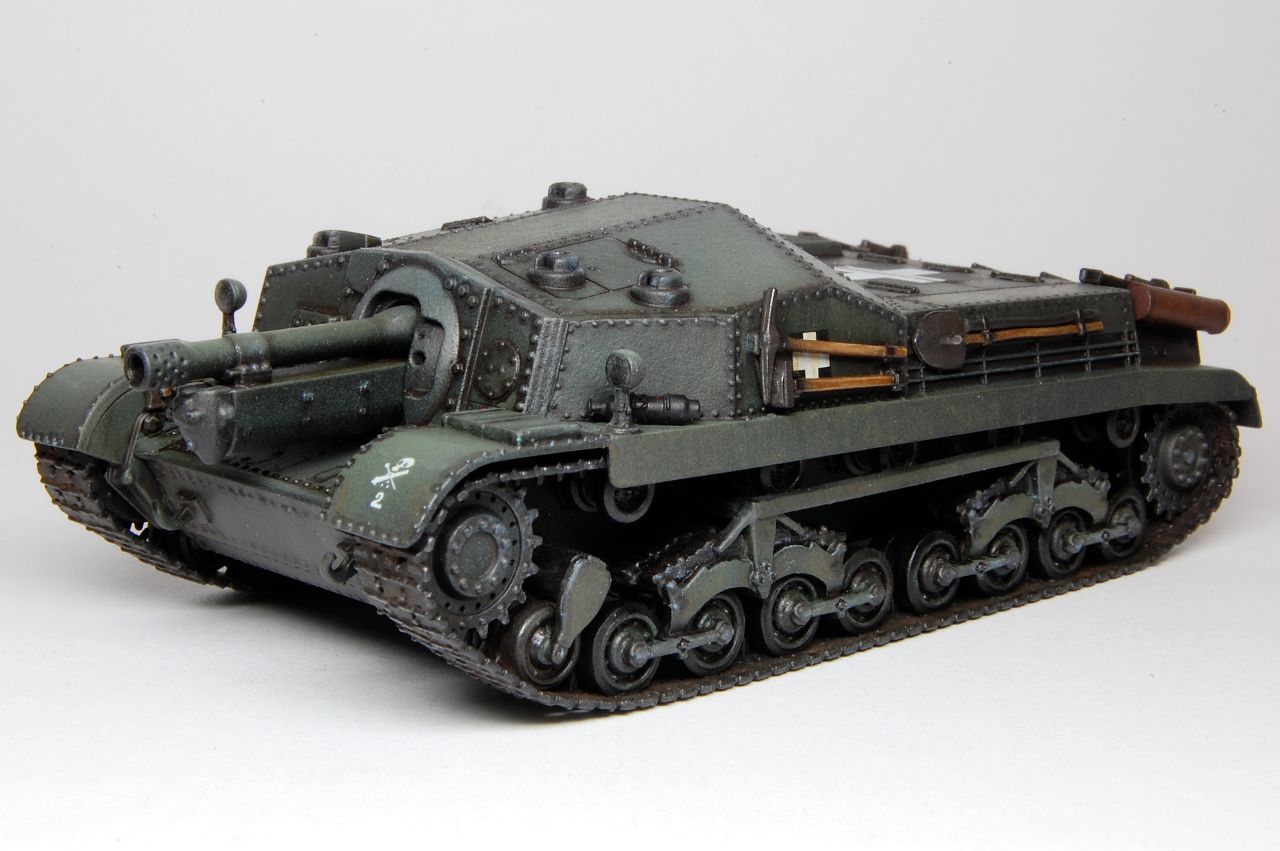
The Zrinyi II was a 105mm assault howitzer based on a modified Turan tank chassis, similar to the German StuH 42. The Turan chassis design was widened from 2.44m to 2.99m, while the replacement of the turret with the fixed superstructure reduced the height slightly from 2.39m to 2.33m. Automotive components of engine and running gear remained the same. Ultimately only 66 would be built before Hungary fell to Soviet forces.
IBG Models have been working their way through WW2 Hungarian armour in 1/72 scale, producing very decent injection moulded kits of vehicles that were previously only to be had in resin. I recently reviewed their Turan I kit on Armorama, and here we will look at how their Zrinyi II kit builds up.
Contents
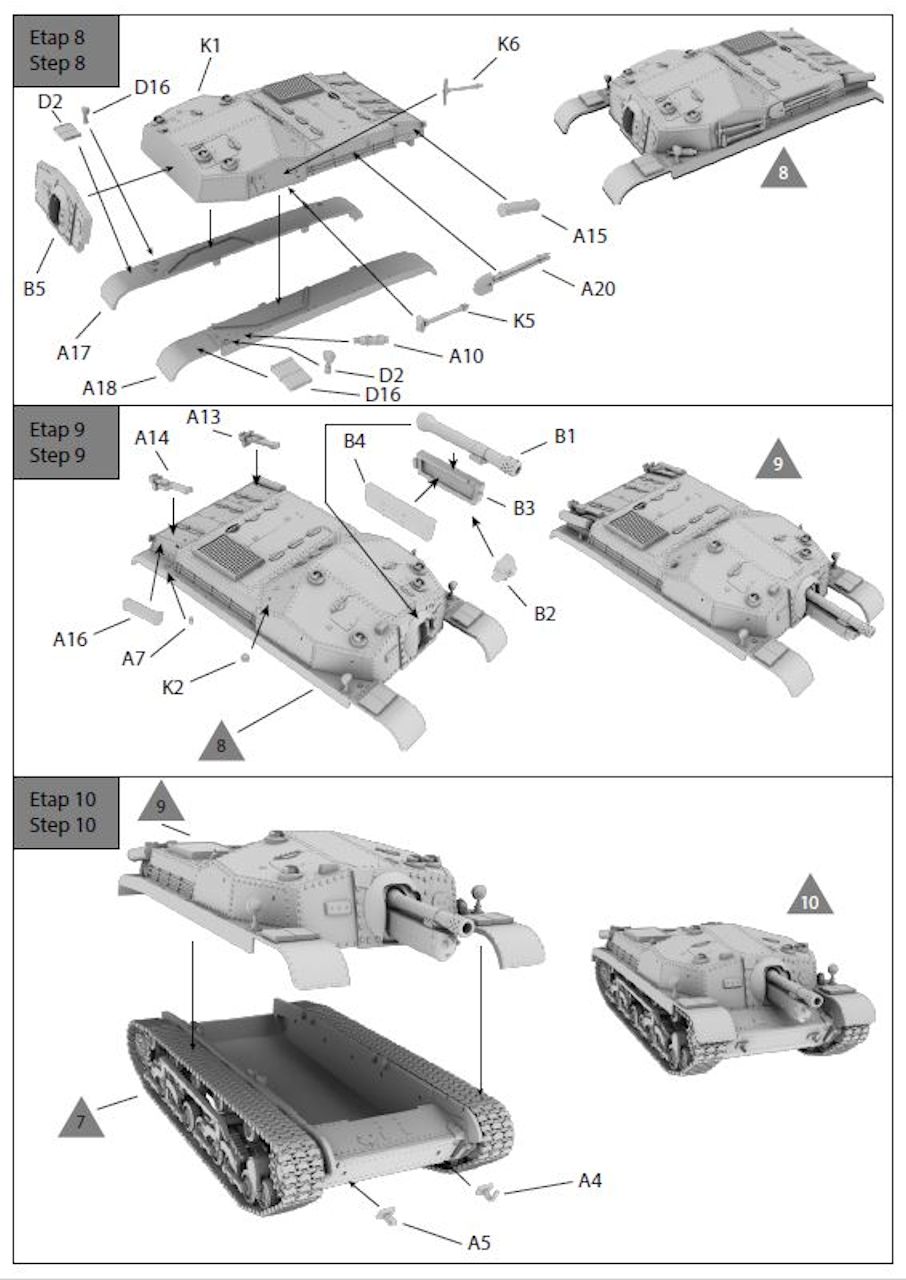
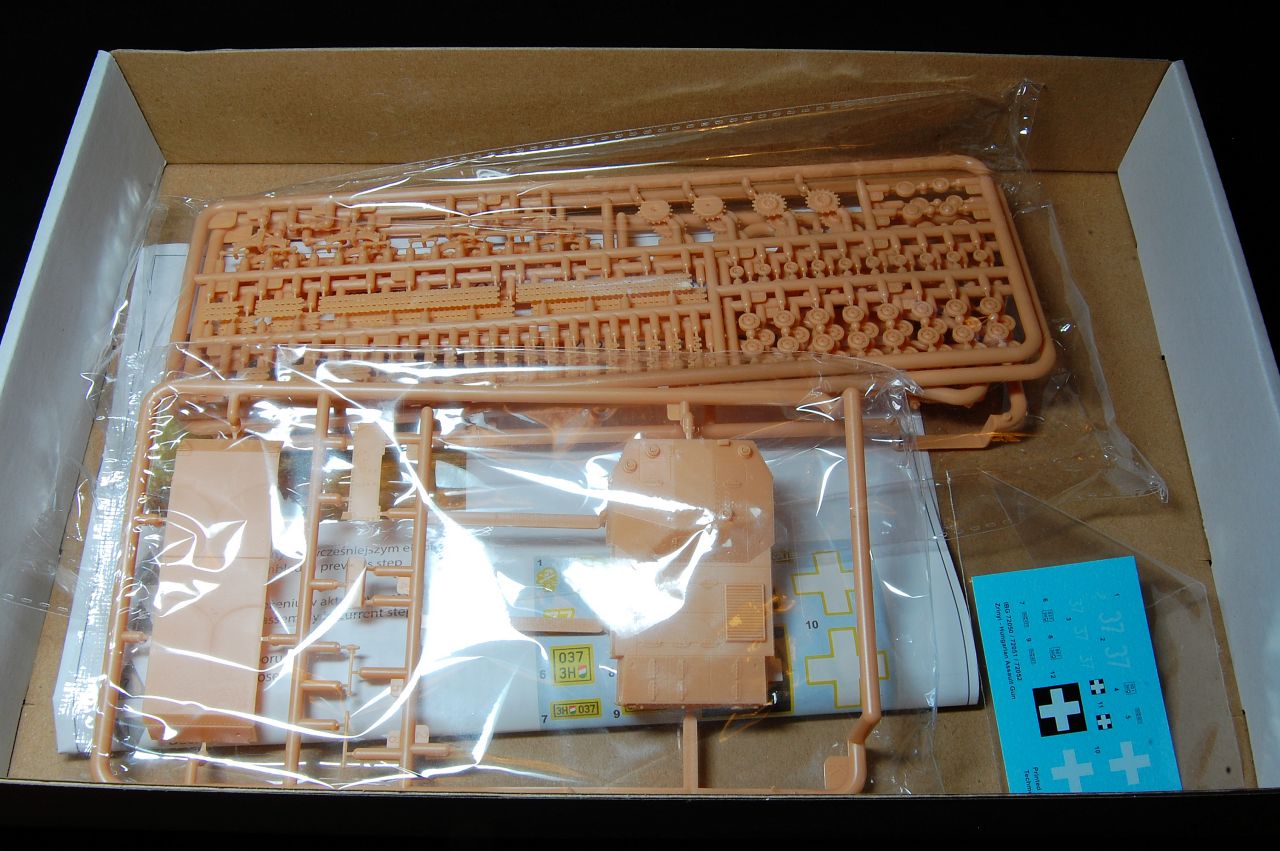
As with the Turan, we get a proper tray and lid box with a top notch A4 colour stapled booklet of instructions, but this time with just five sprues:
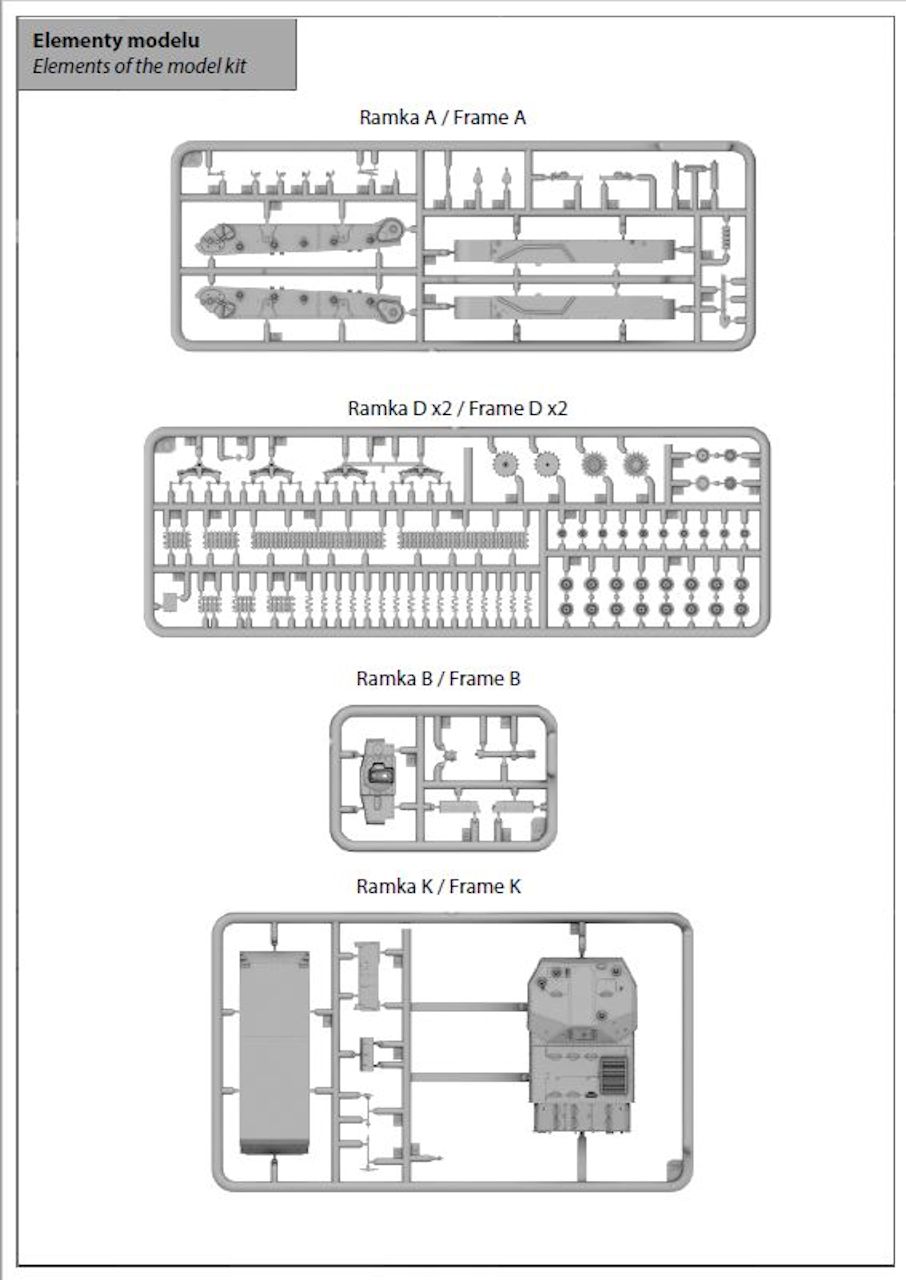
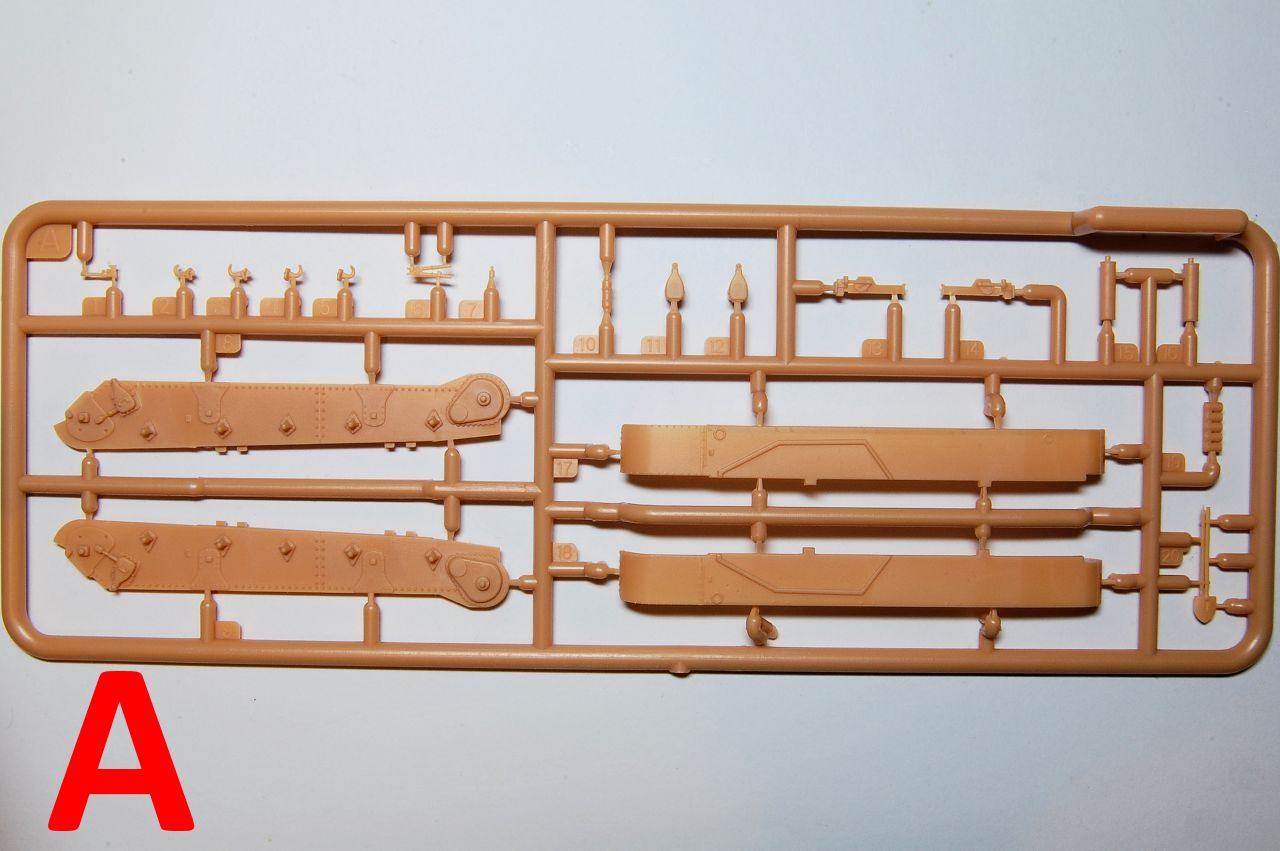
Sprue A: Hull sides and track guards small details, same as the Turan sprue
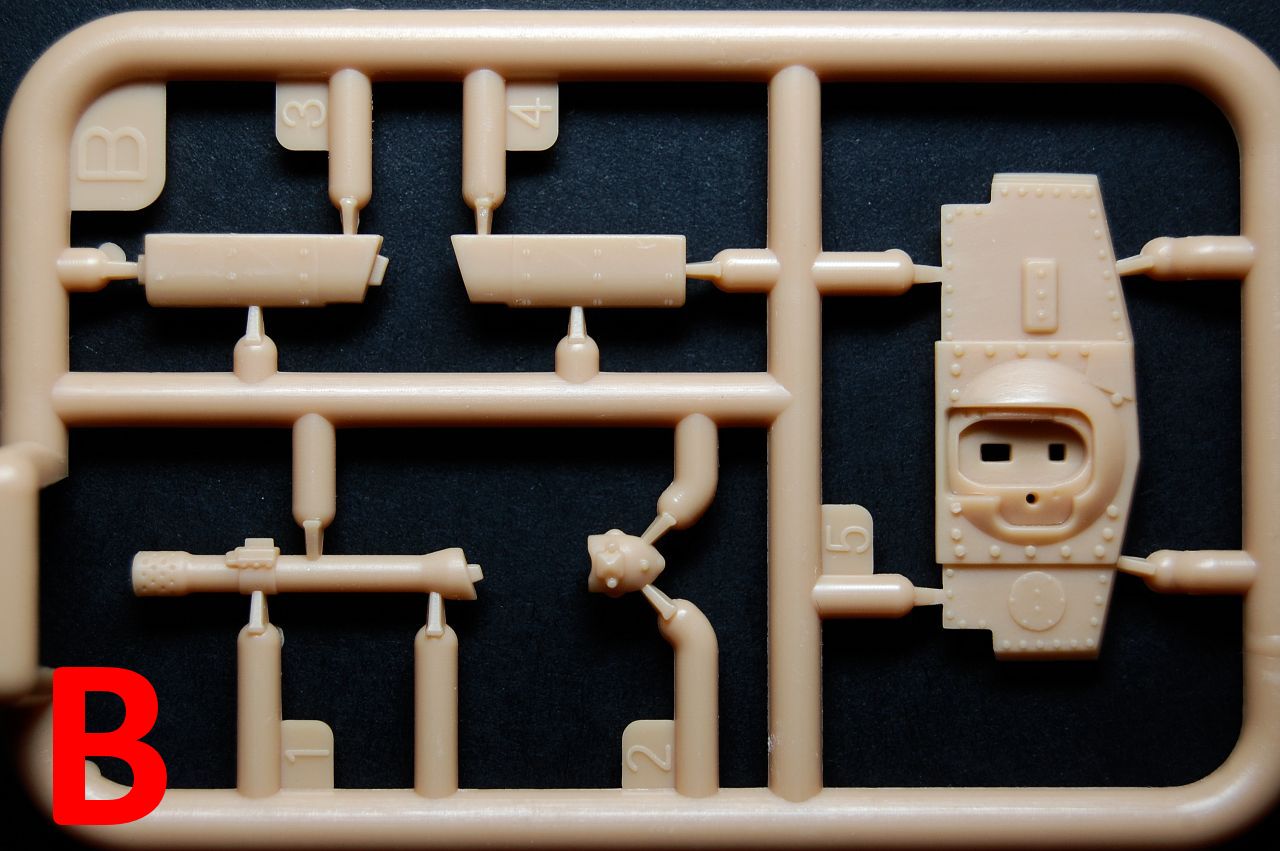
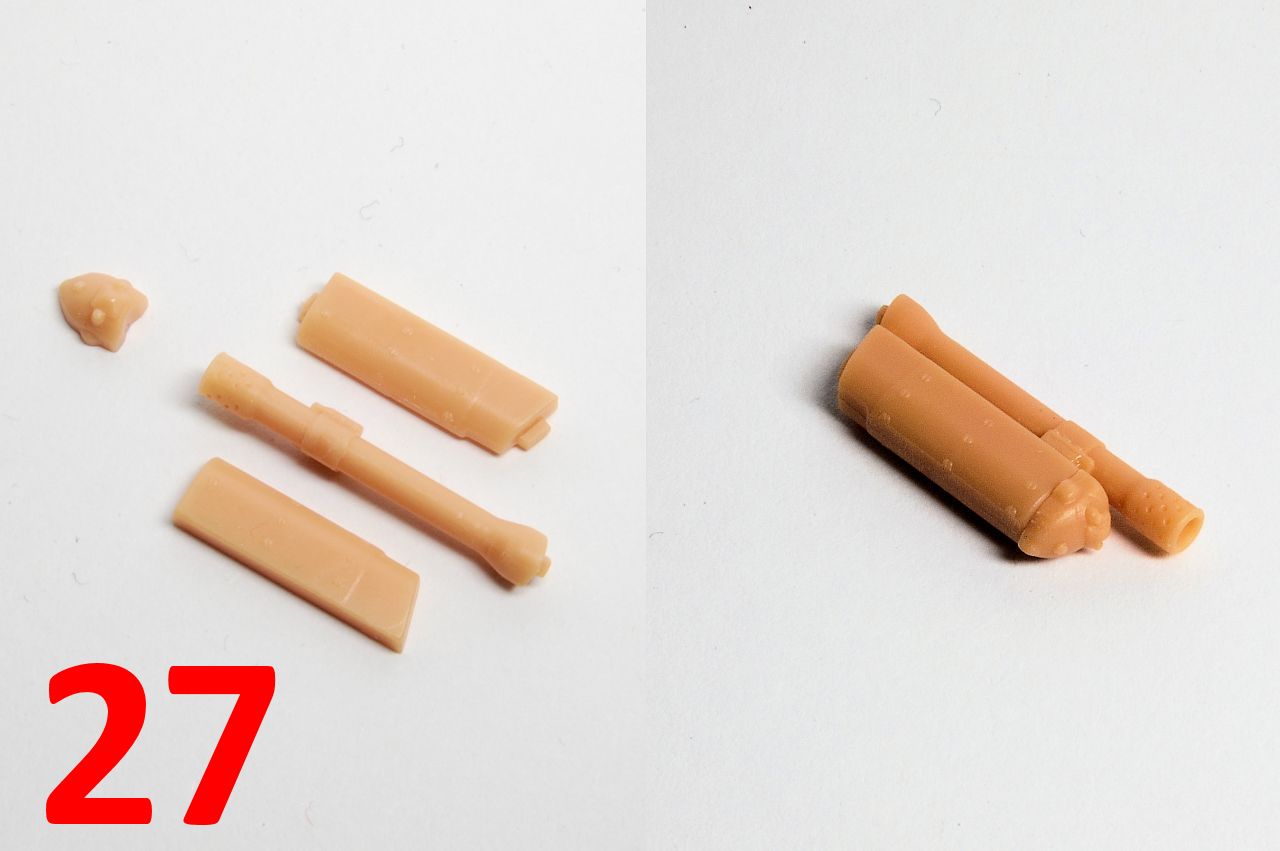
Sprue B: Zrinyi casemate frontal armour and 105mm gun
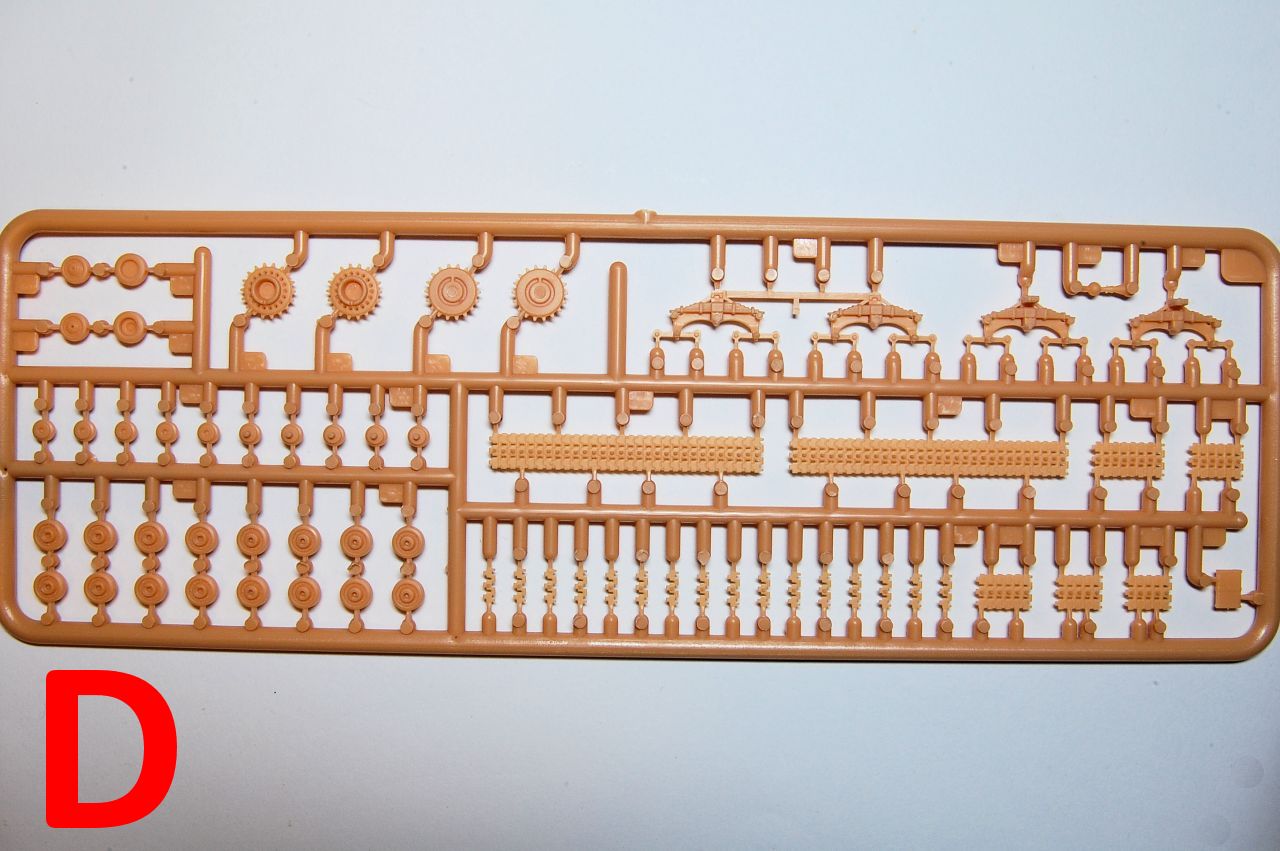
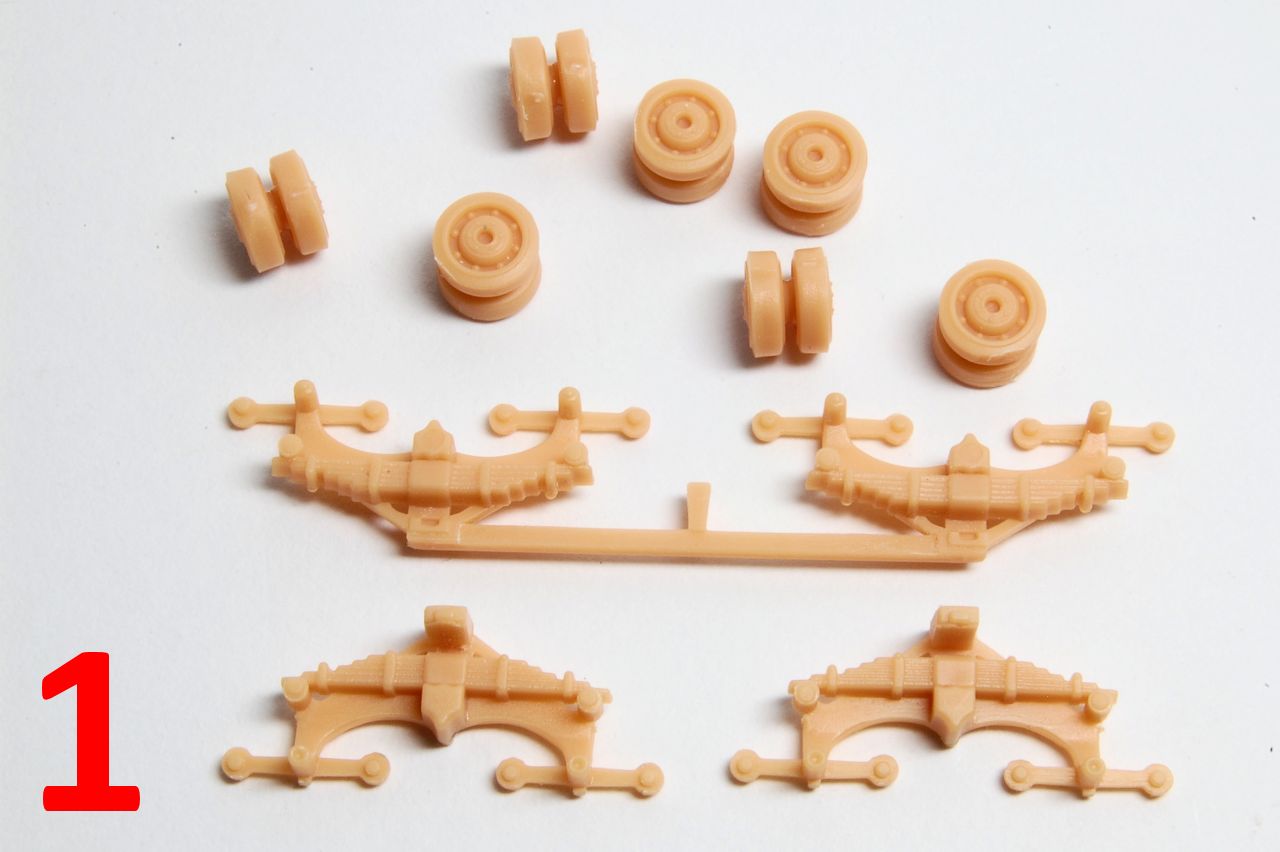
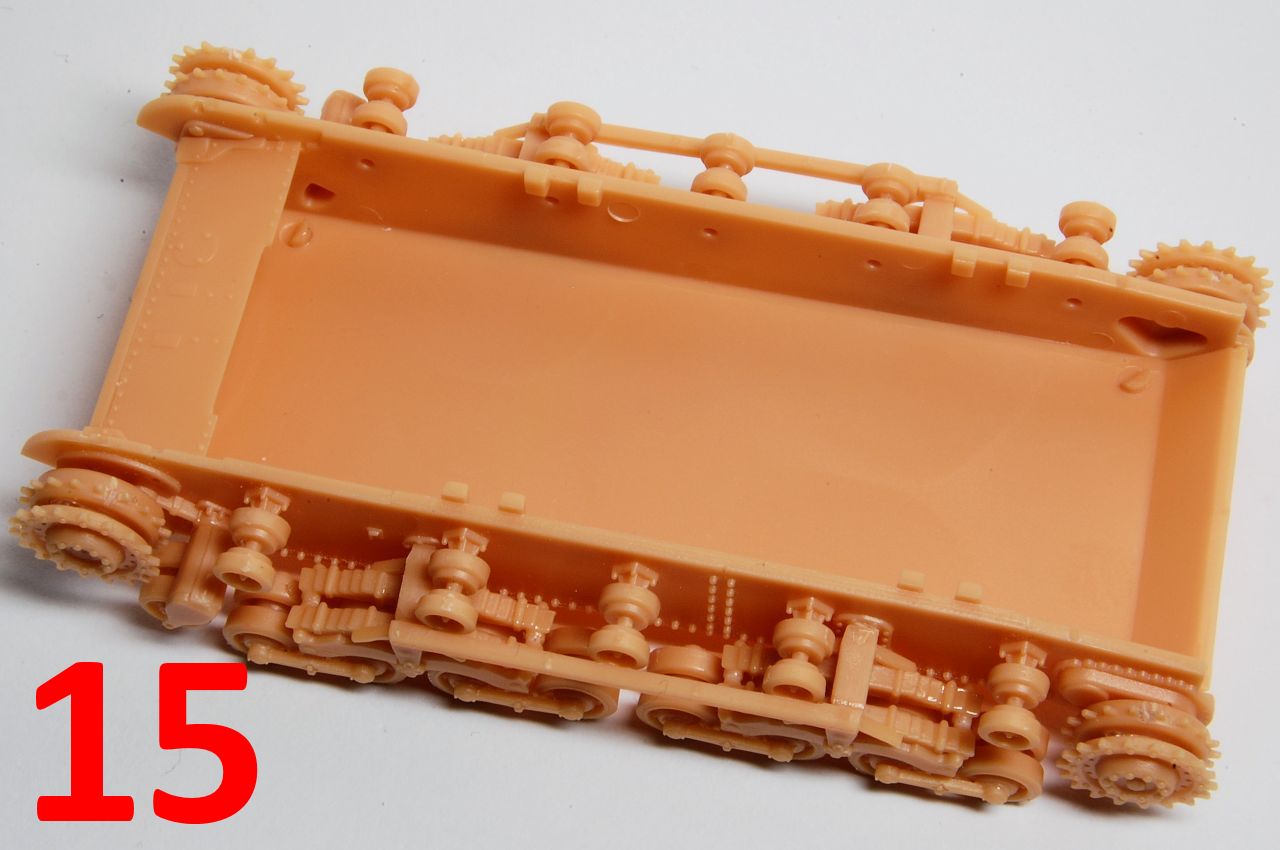
Sprue D x 2: Wheels, bogies, link and length tracks, same as the Turan sprues
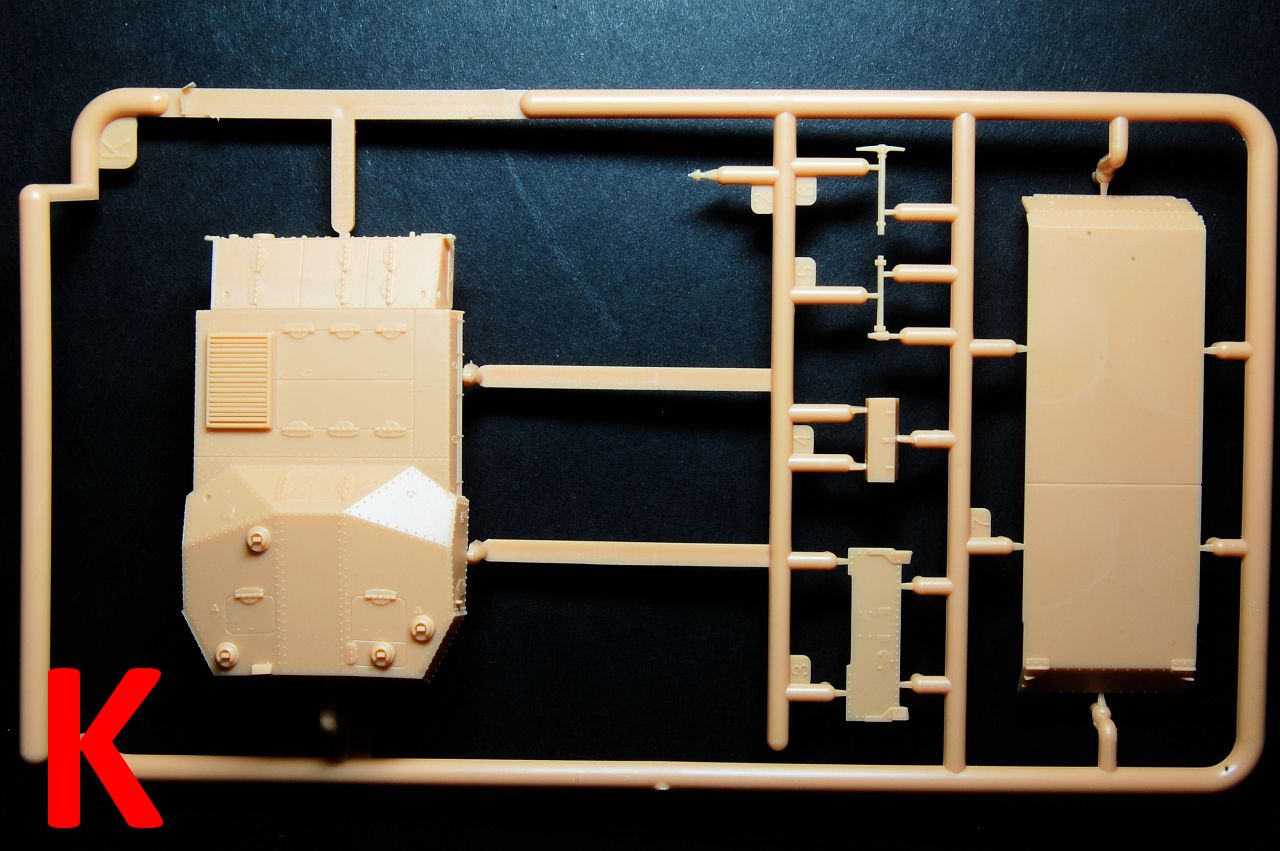
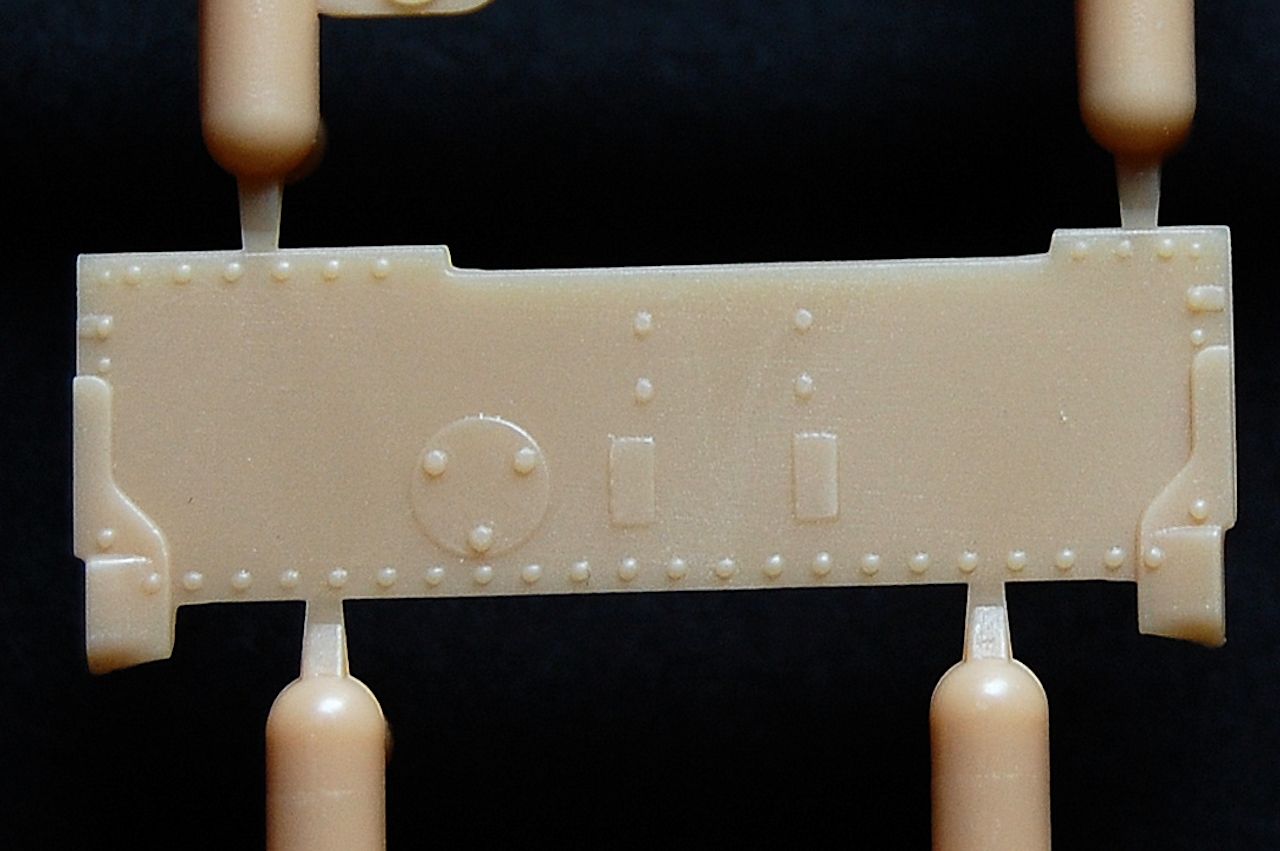
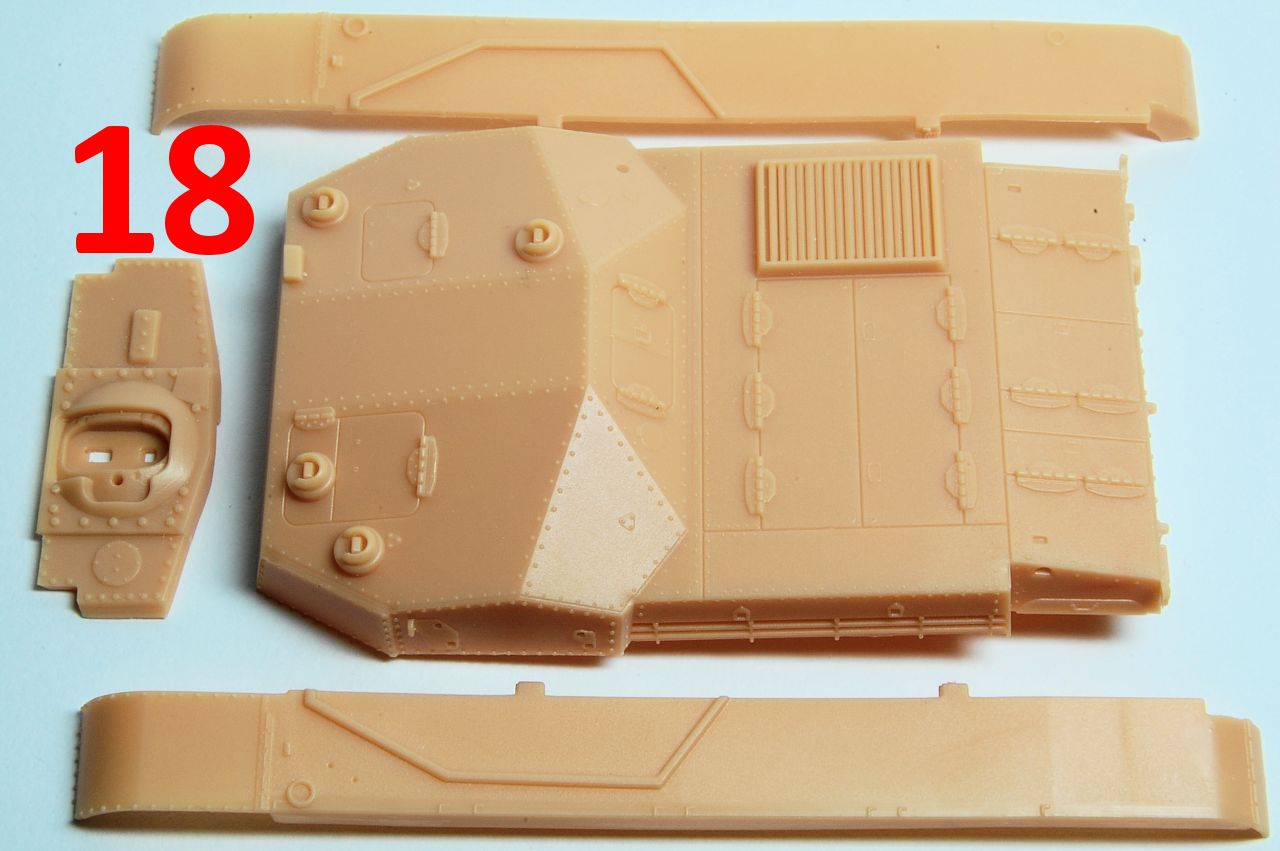
Sprue K: Zrinyi hull top and bottom, plus additional tools.
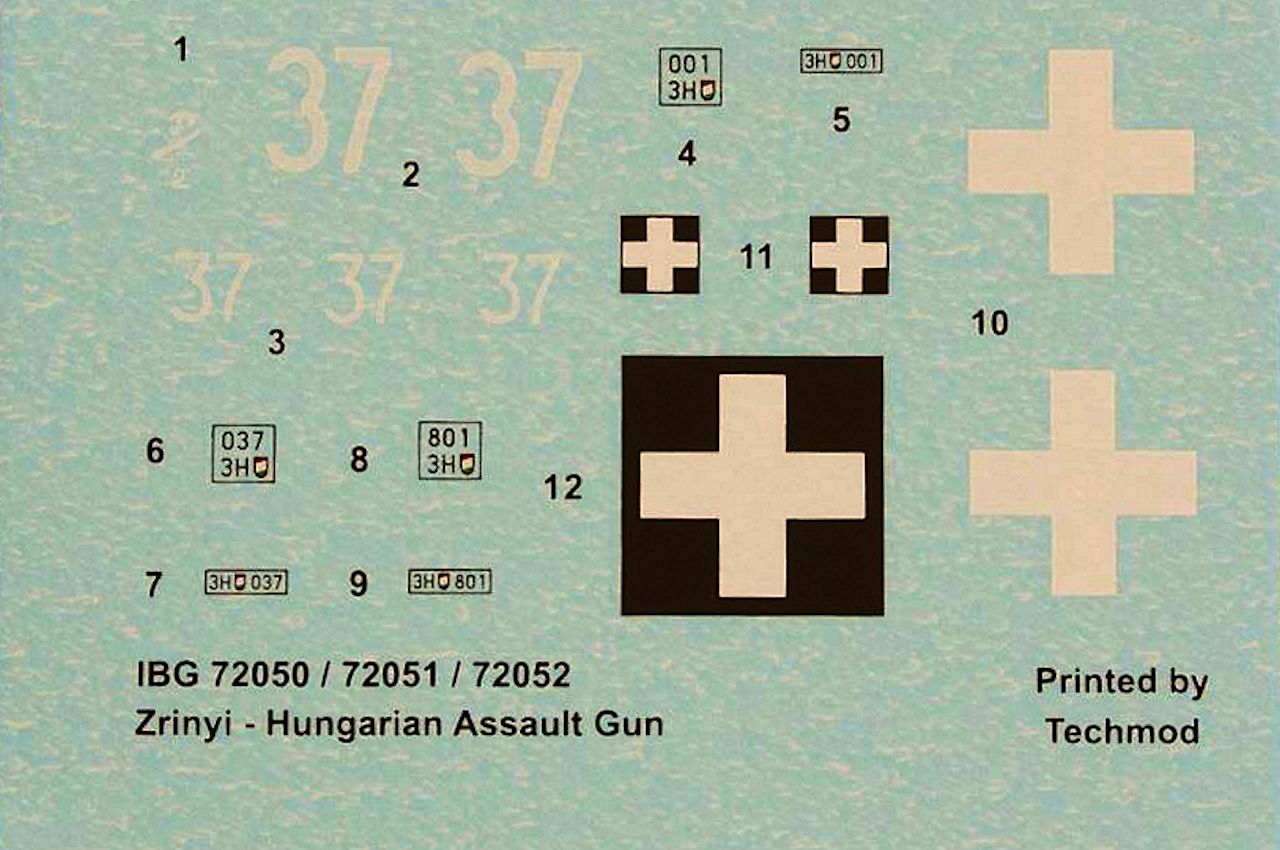
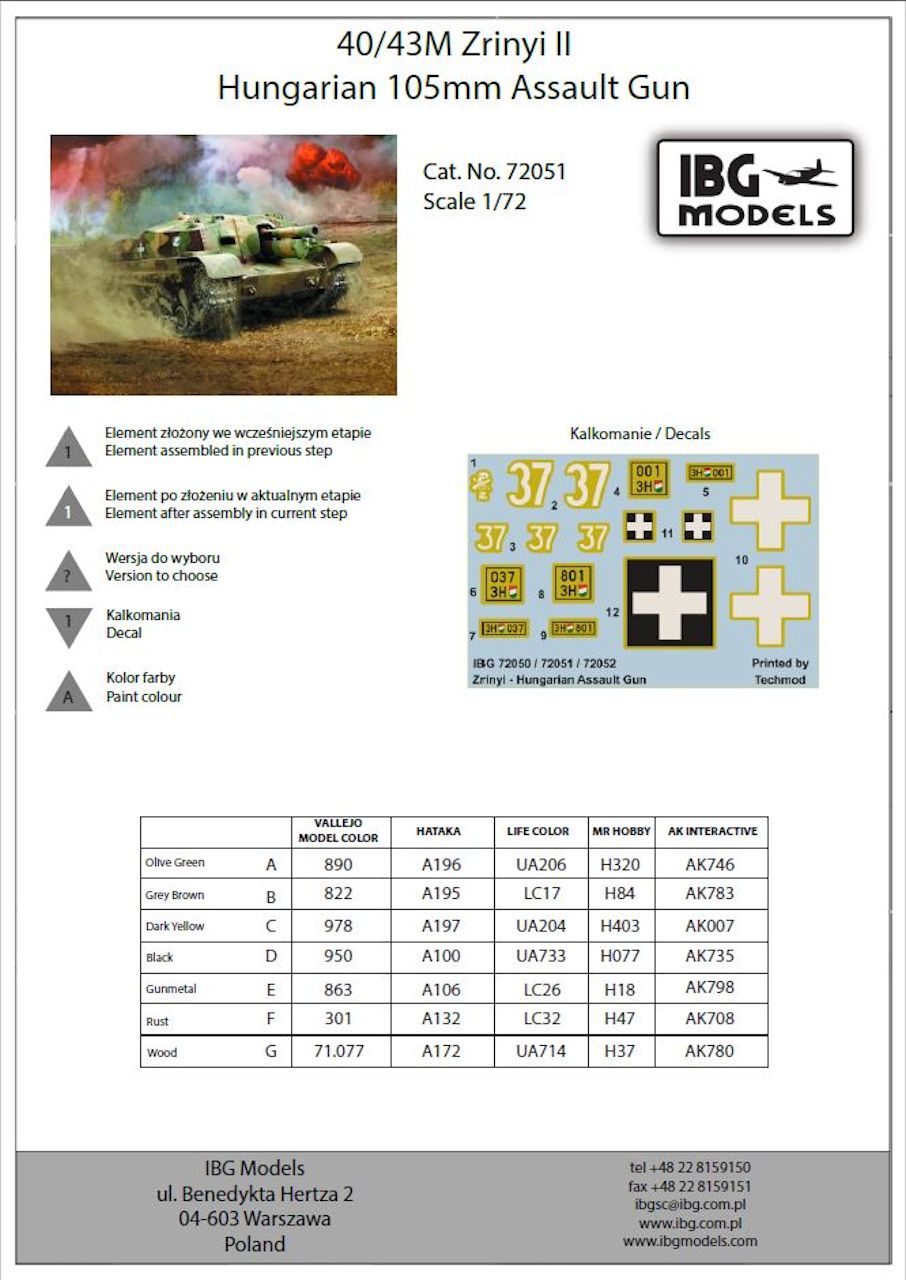
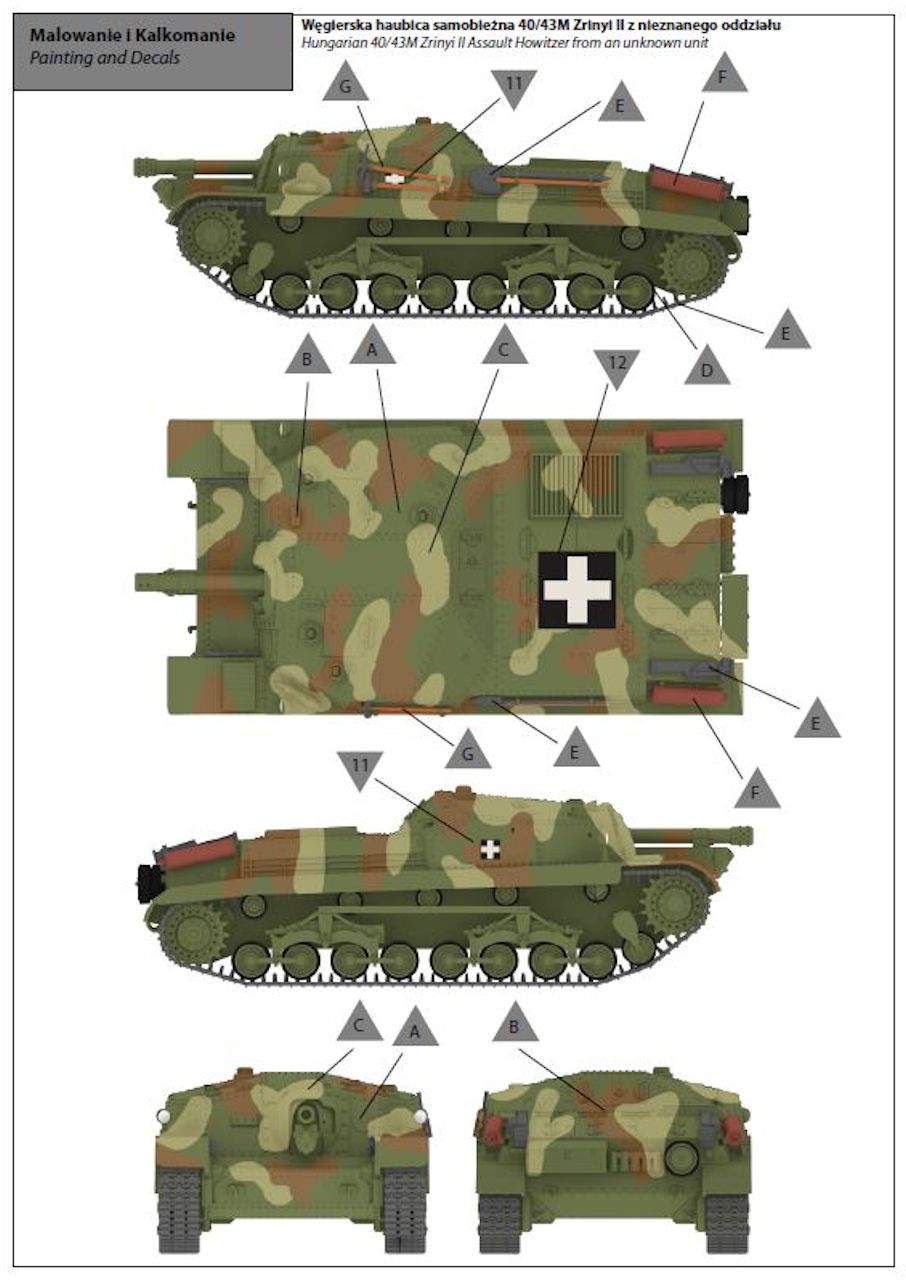
Decal sheet designed for use with all three Zrinyi kits that IBG will produce.
Review
As observed in the Turan review, moulding quality is very good, with reasonably sized and placed sprue gates. The plastic is quite hard, and the kit has a number of small parts which will require careful removal from the sprues to avoid breakage, this especially applies to the single track links. Once off the sprues, clean up however is mostly straightforward, although care will be needed to avoid damaging the many tiny rivets that cover the armour plates.
The rivets look to be accurate in terms of numbers, size and spacing, with seemingly less of a tendency for some of them to be a little undersized as was the case in one or two areas on the Turan. There is however an obvious error in that the front ends of the track guards are bordered with rivets, when they should be plain thin sheet steel. While the one surviving example at Kubinka may have had these items replaced as they have square corners and slightly odd details where they attach to the hull, there are enough wartime photos of the real thing in action to confirm that the rivets shouldnt be there the good news however is that removing them, and perhaps thinning the track guards, should be simple enough (I didnt notice this until Id already started painting).
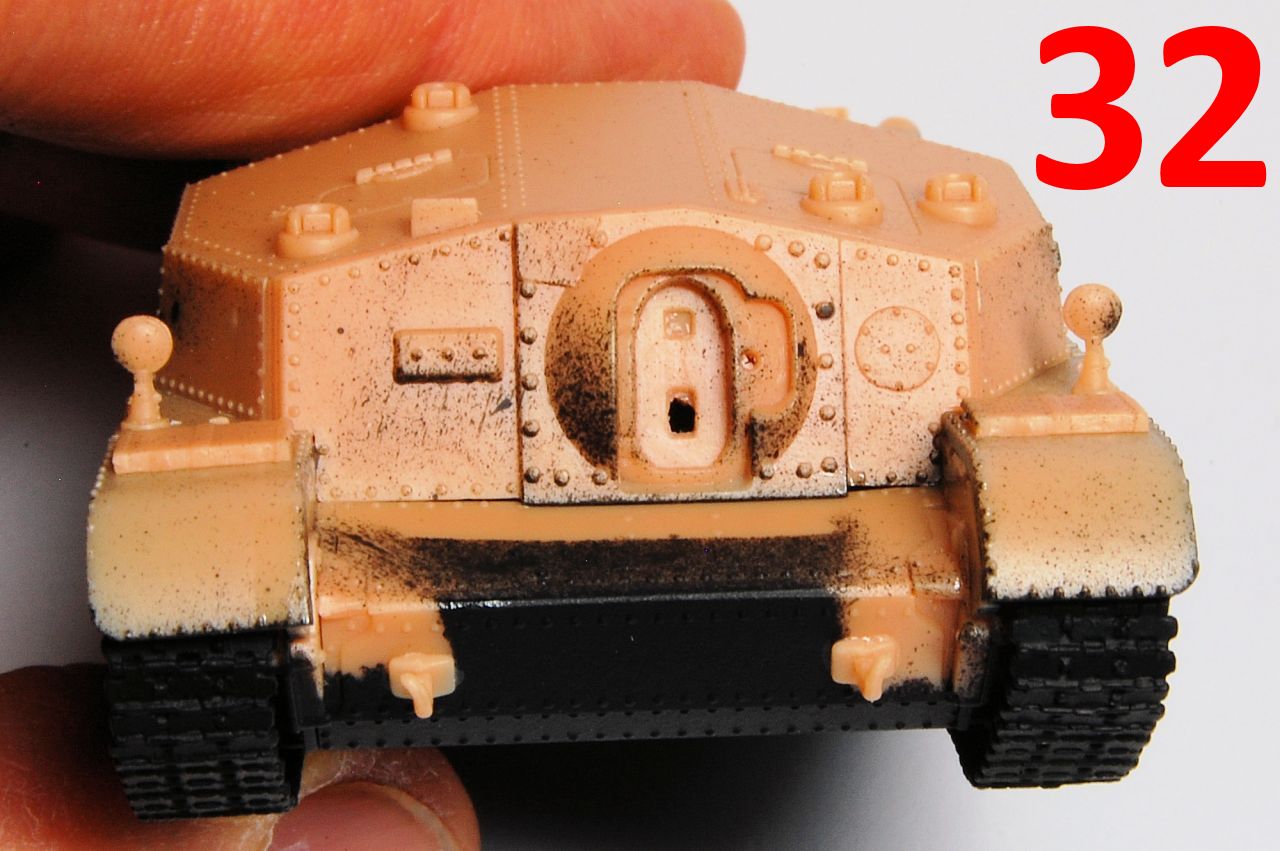
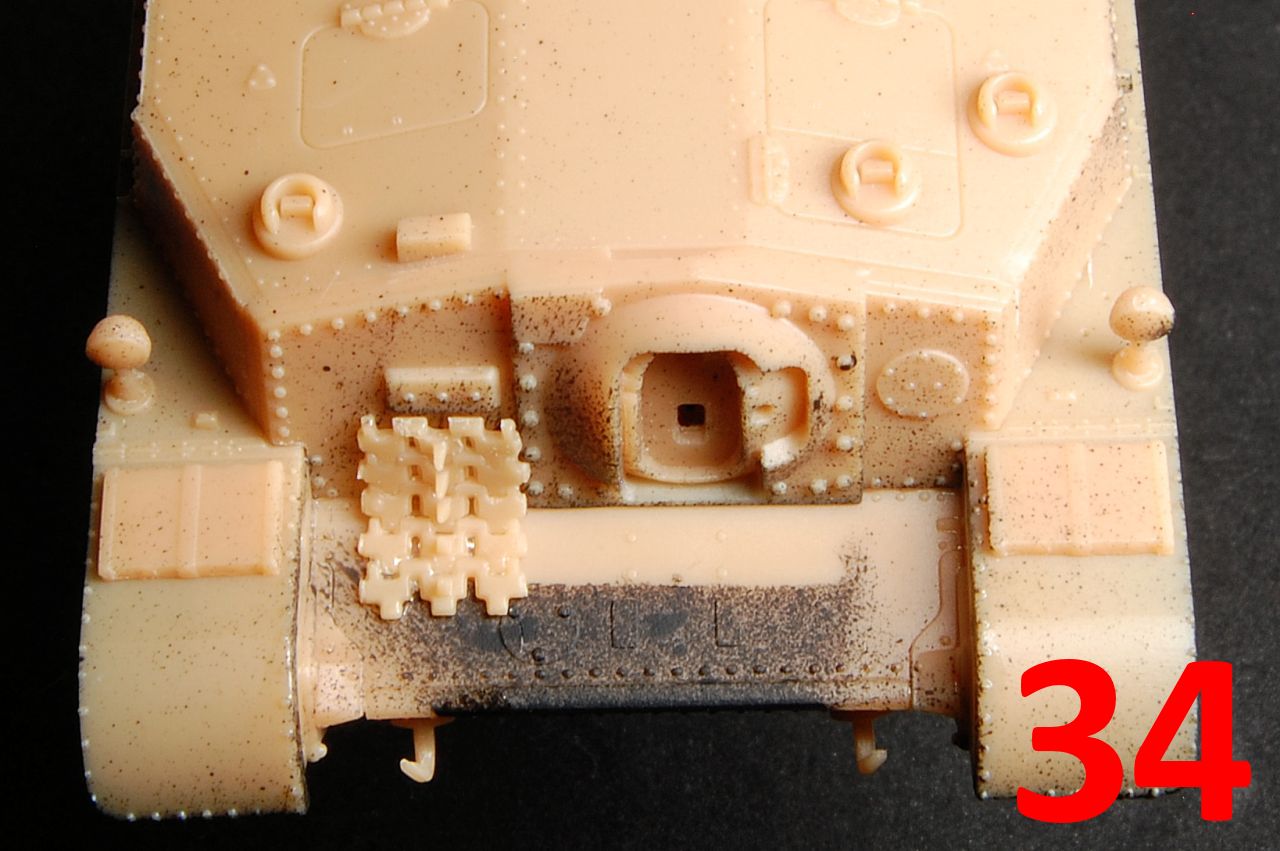
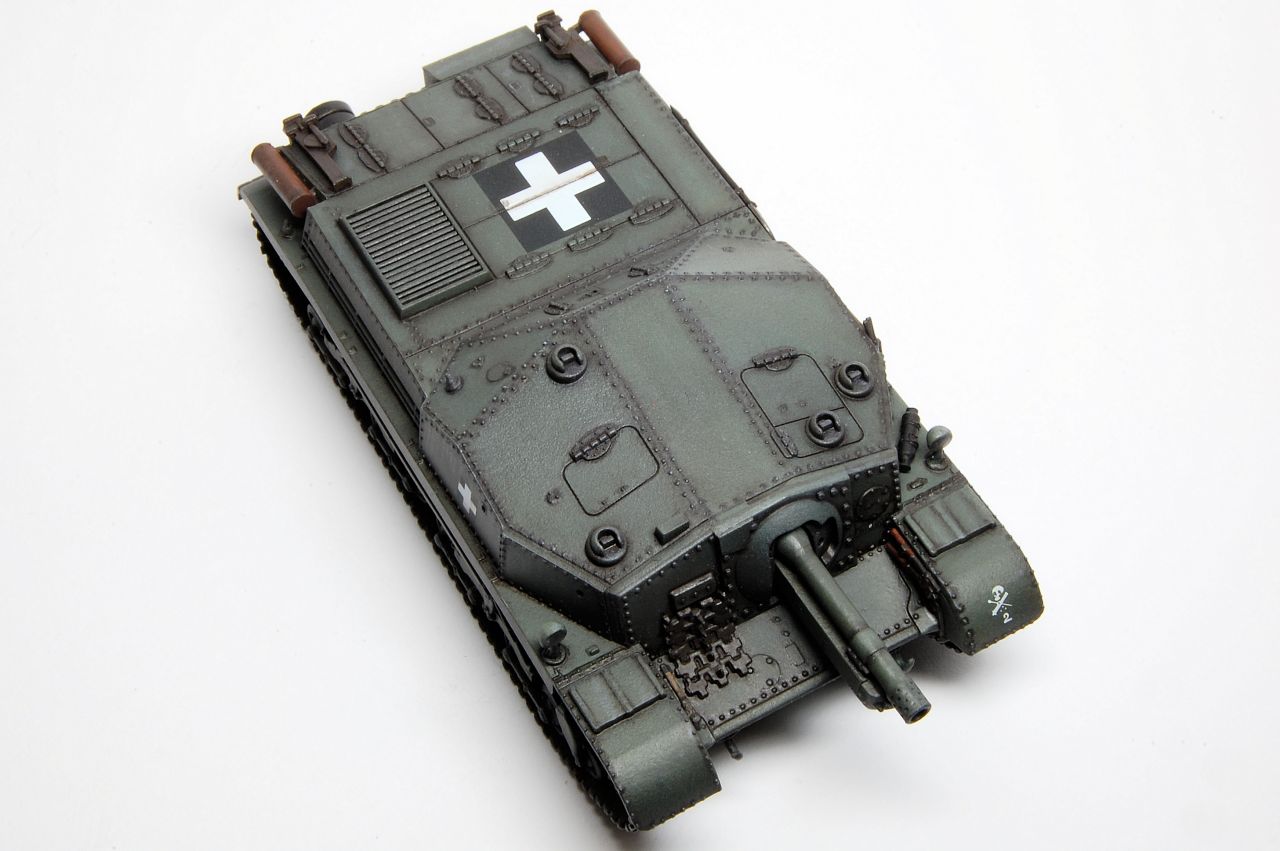
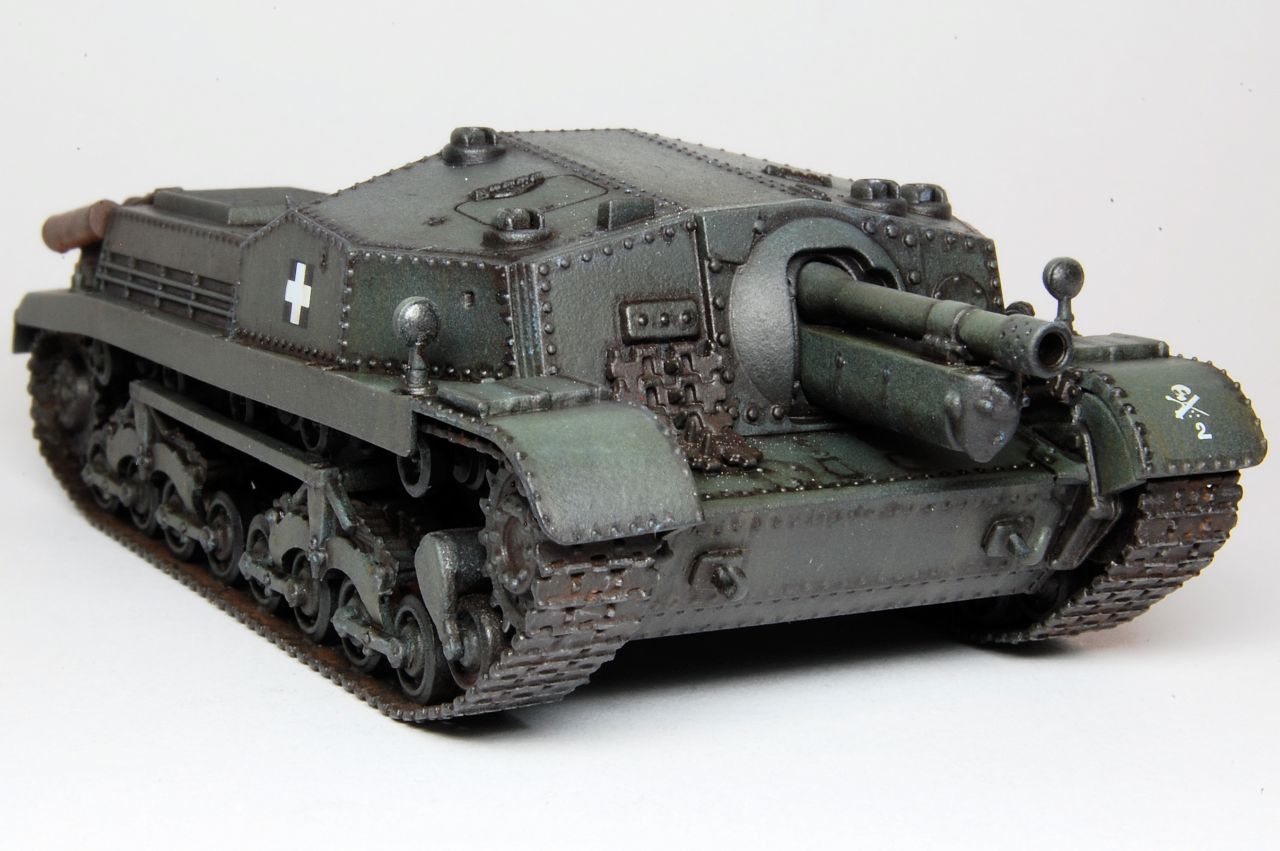
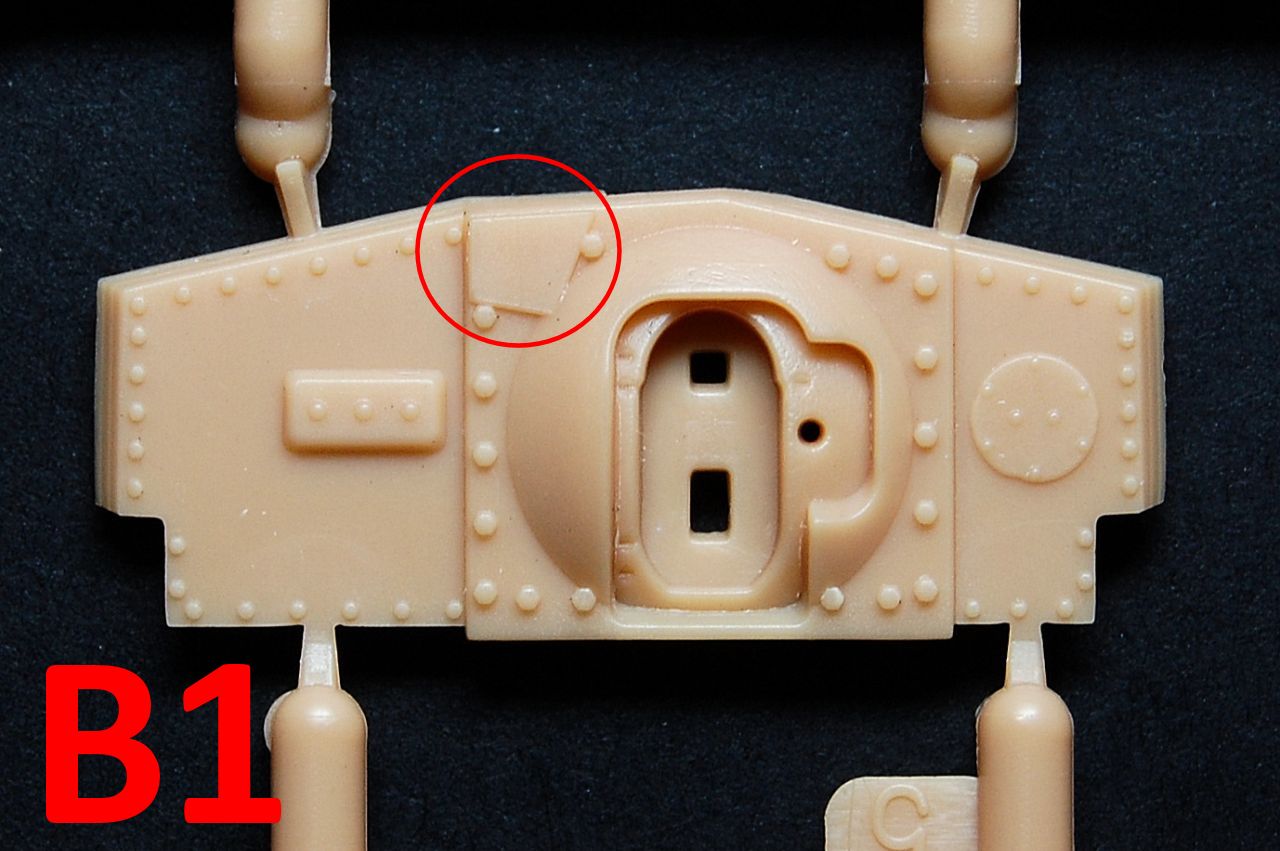
The other aspect that has been questioned elsewhere is the inclusion of the small irregular quadrilateral plate at the top left of the thick armour plate into which the gun mantlet is set (ringed, photo B1). Photos suggest that many, if not most, Zrinyis didnt have this plate; there is at least one photo of a vehicle with it, although that particular example has side skirts. It seems then that there was some variation within the small production run, as some photos appear to show examples with nose plates that look welded rather than riveted, mantlets with slightly inset rivets, plain rather than riveted driver visors, and some other device fitted to the front plate to the left of the visor.
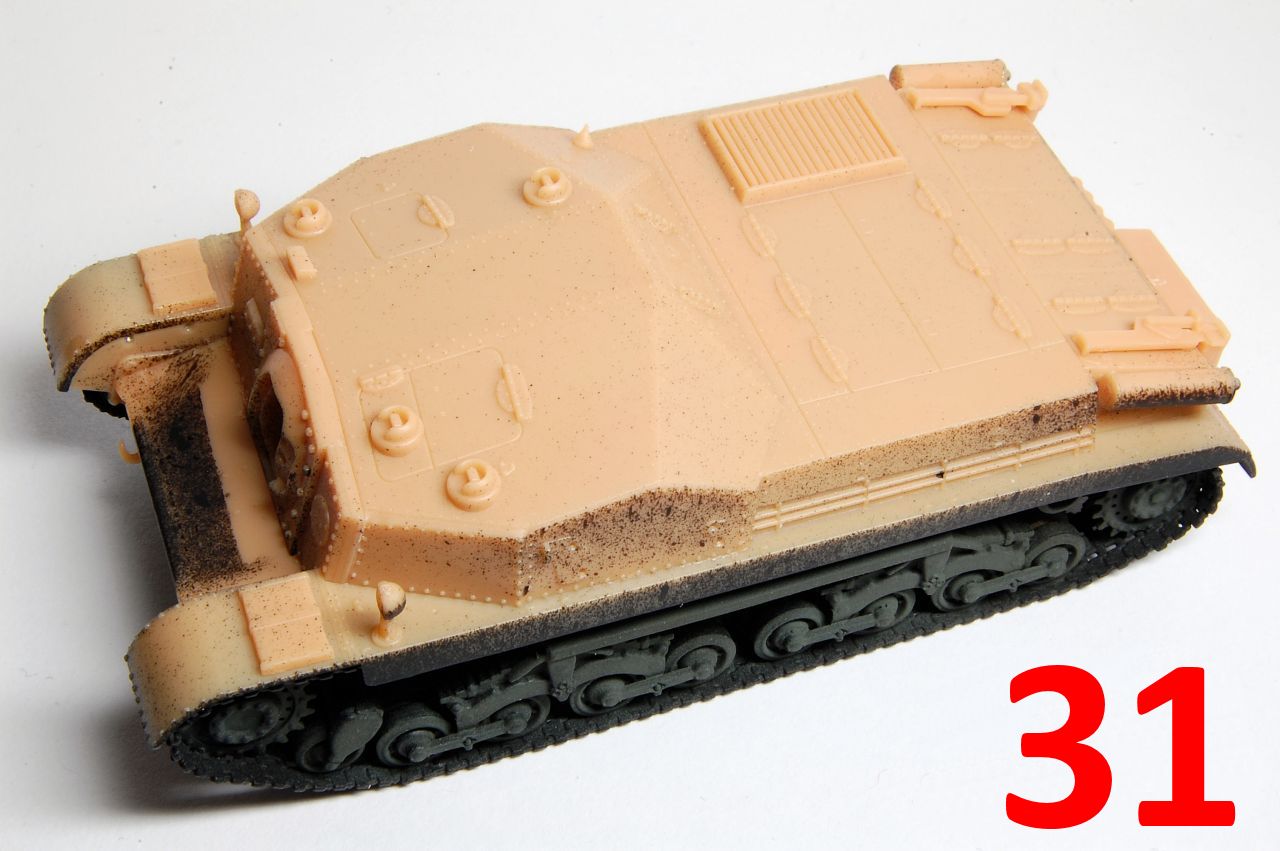
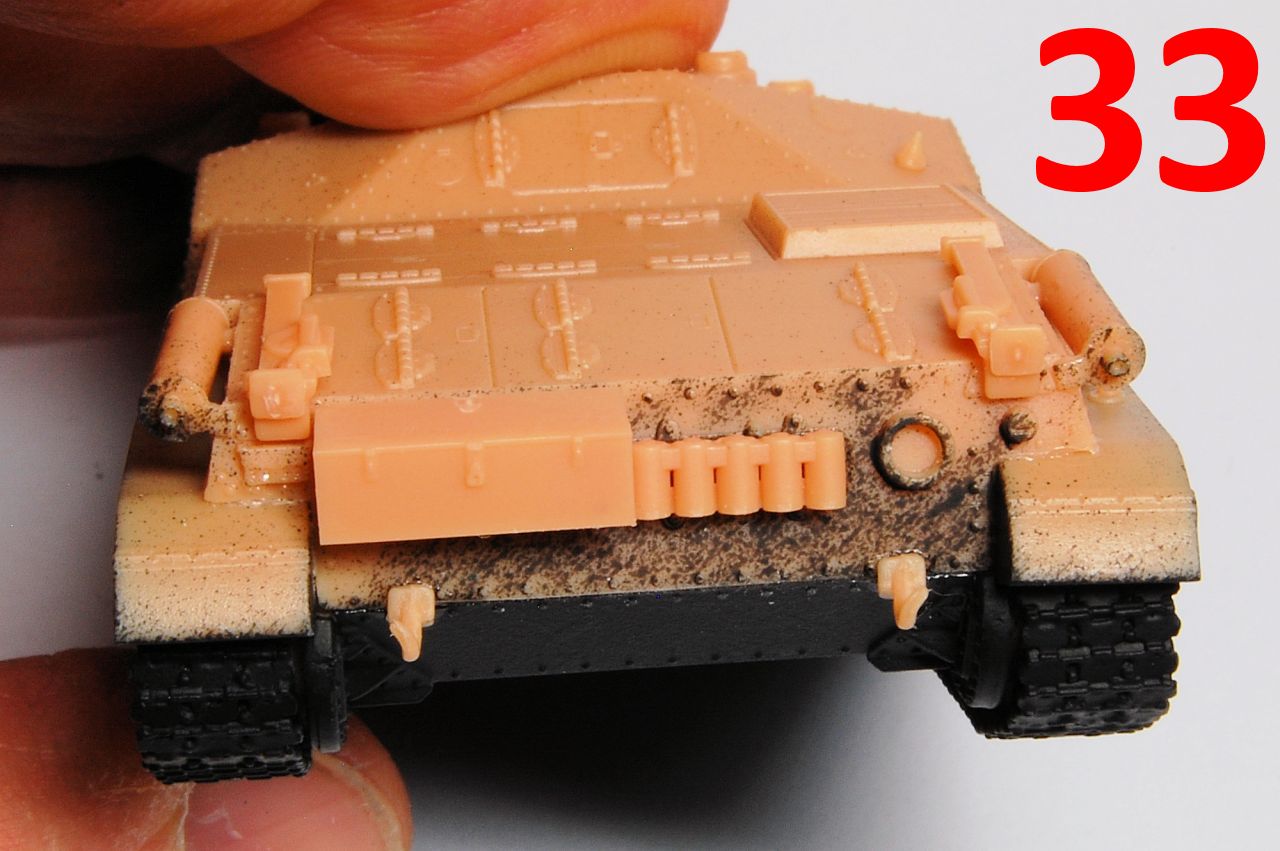
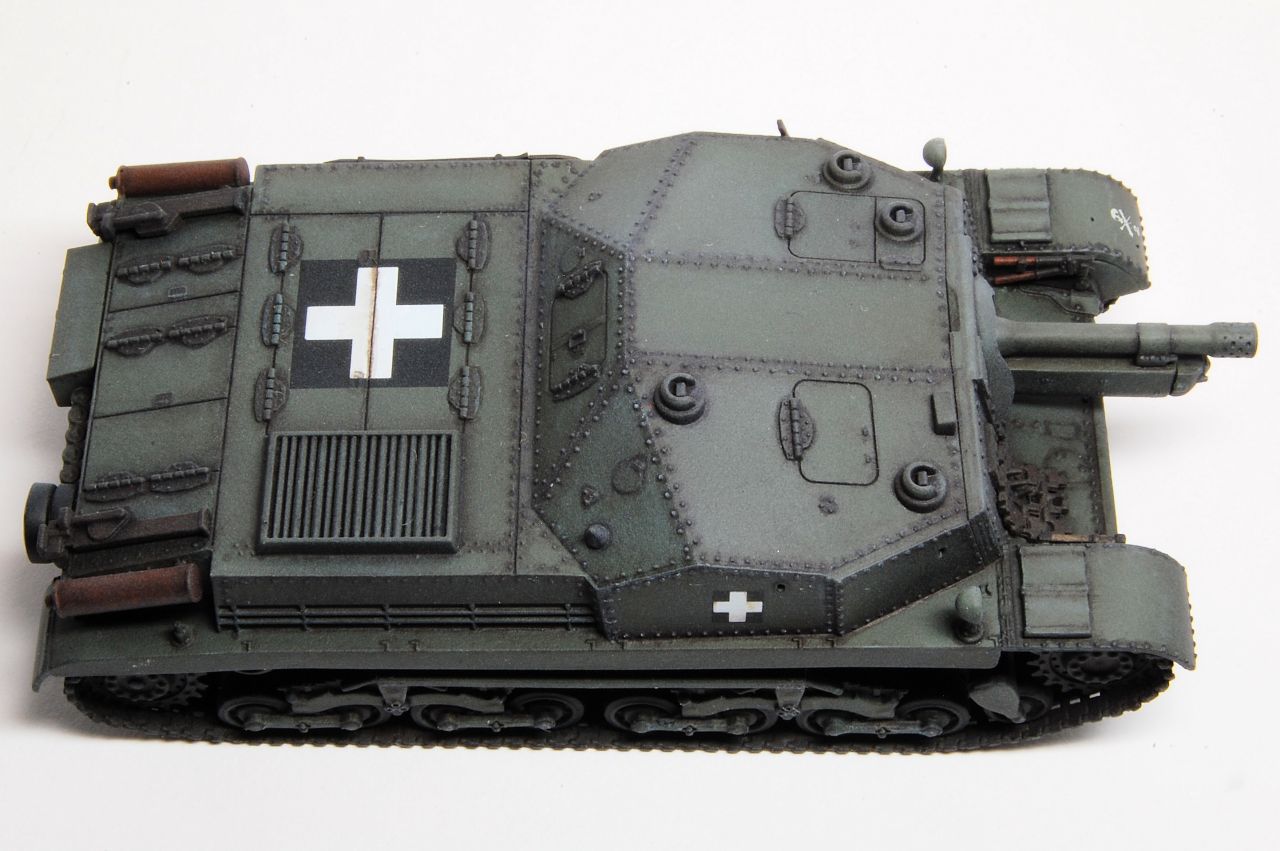
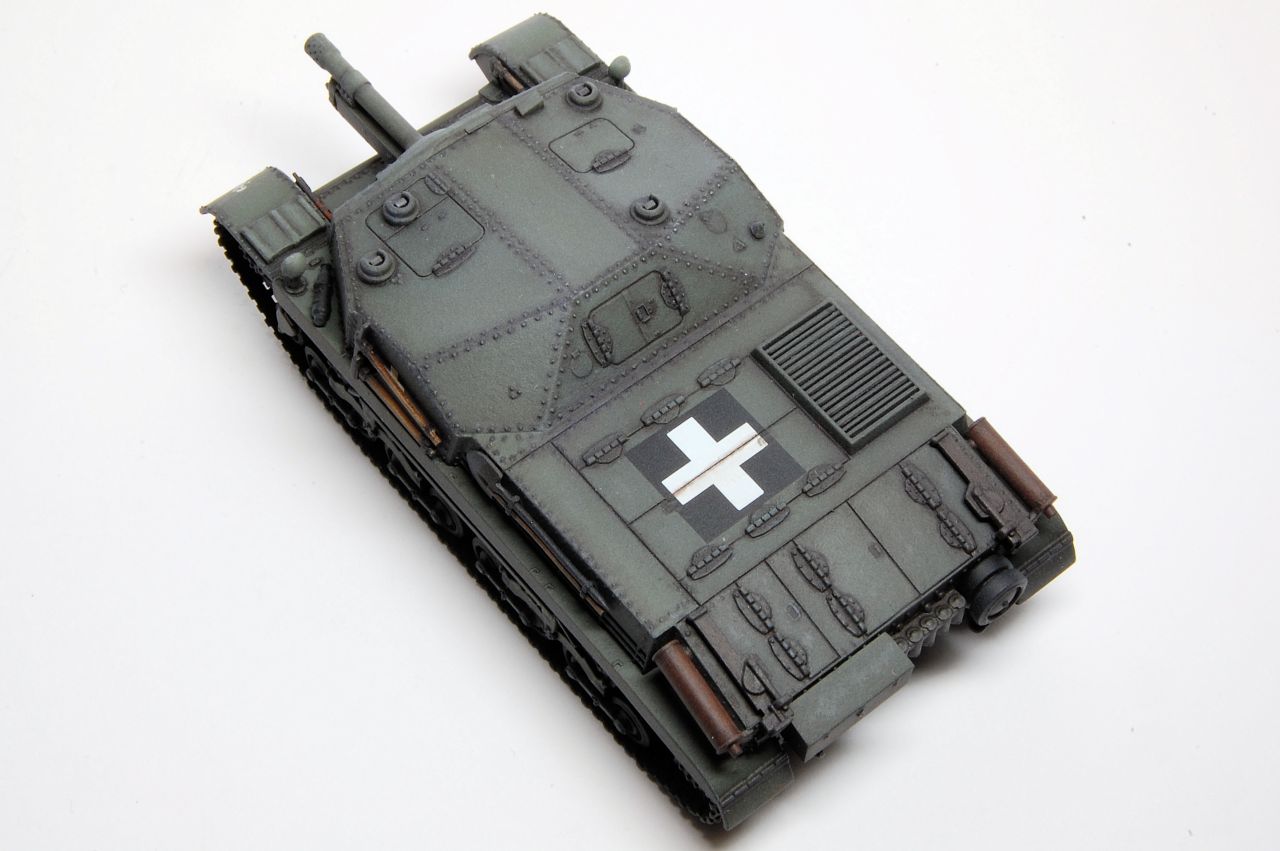
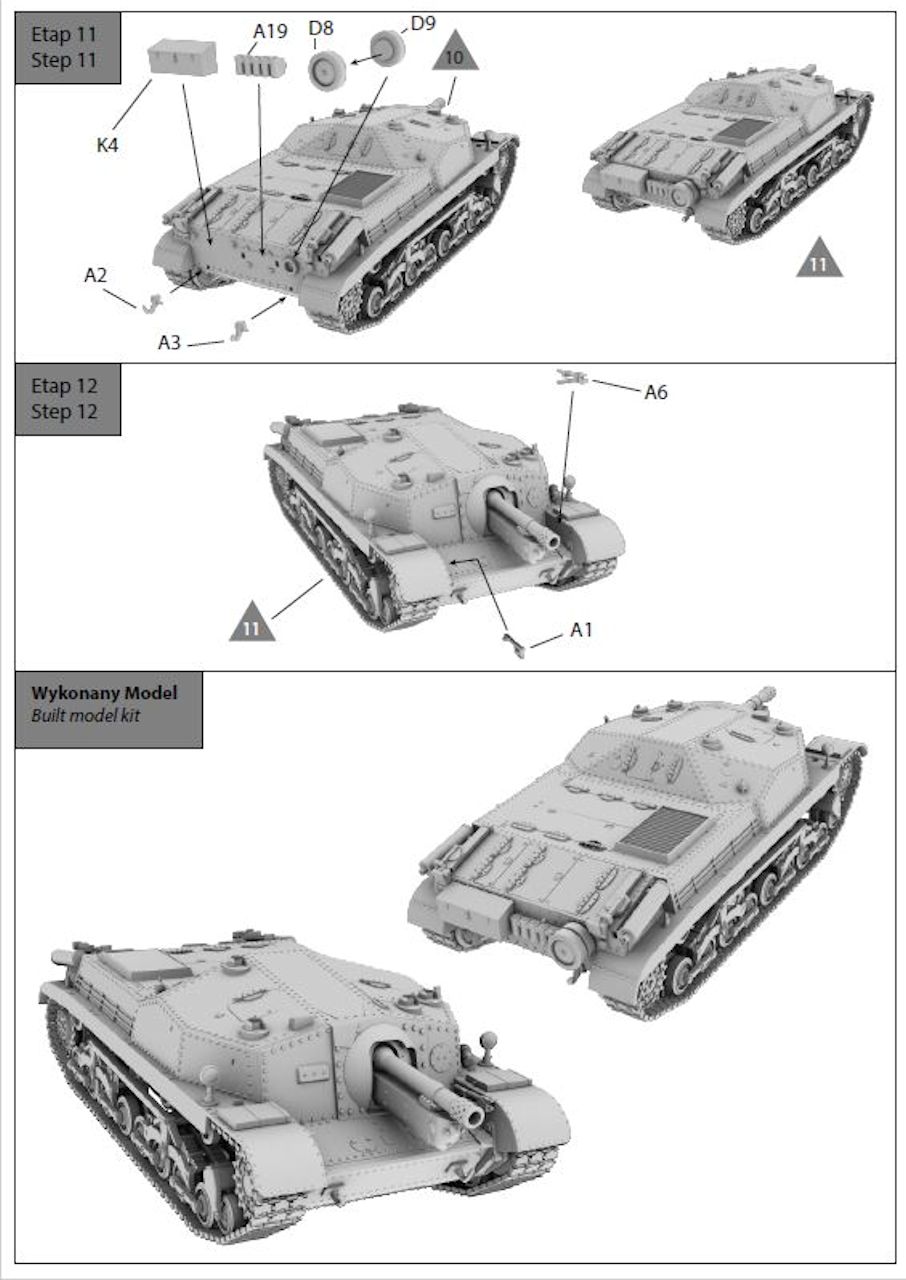
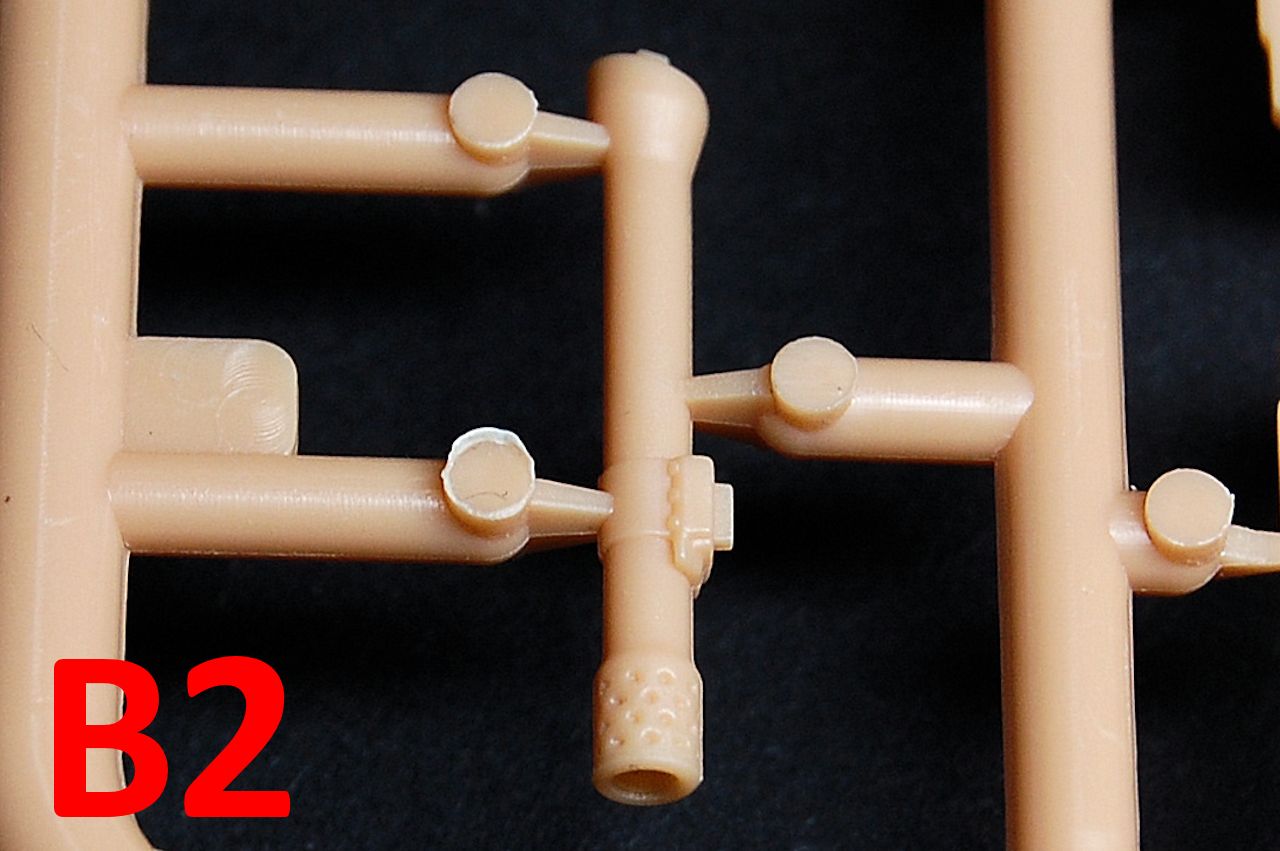
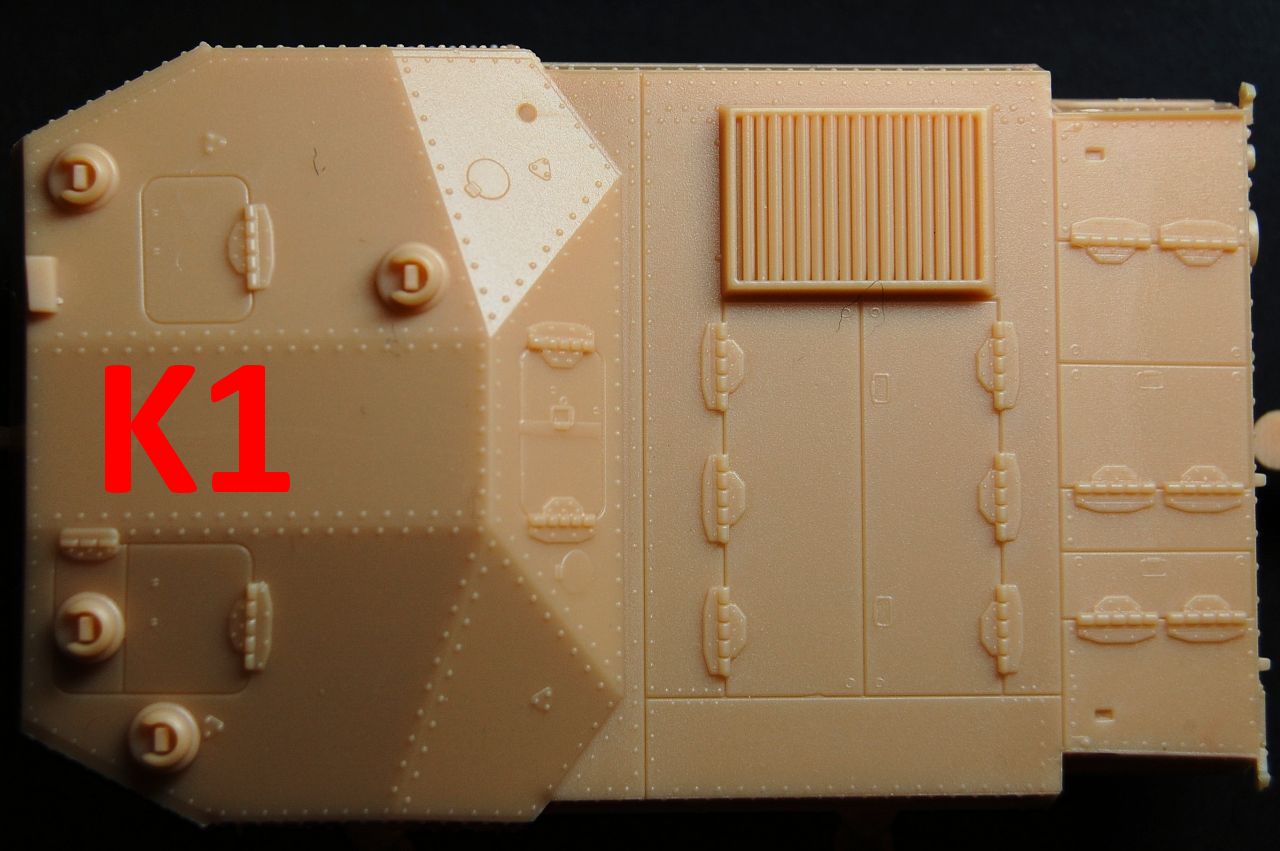
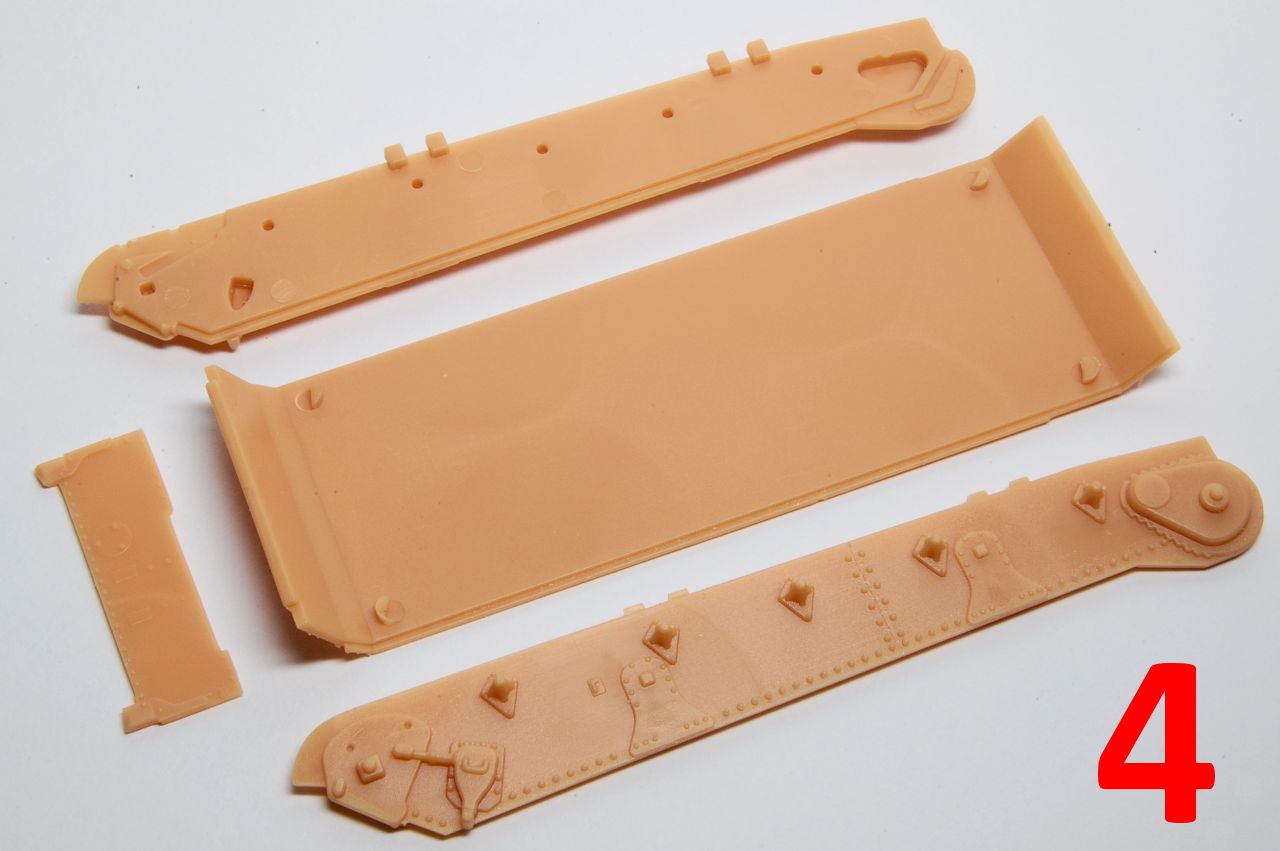
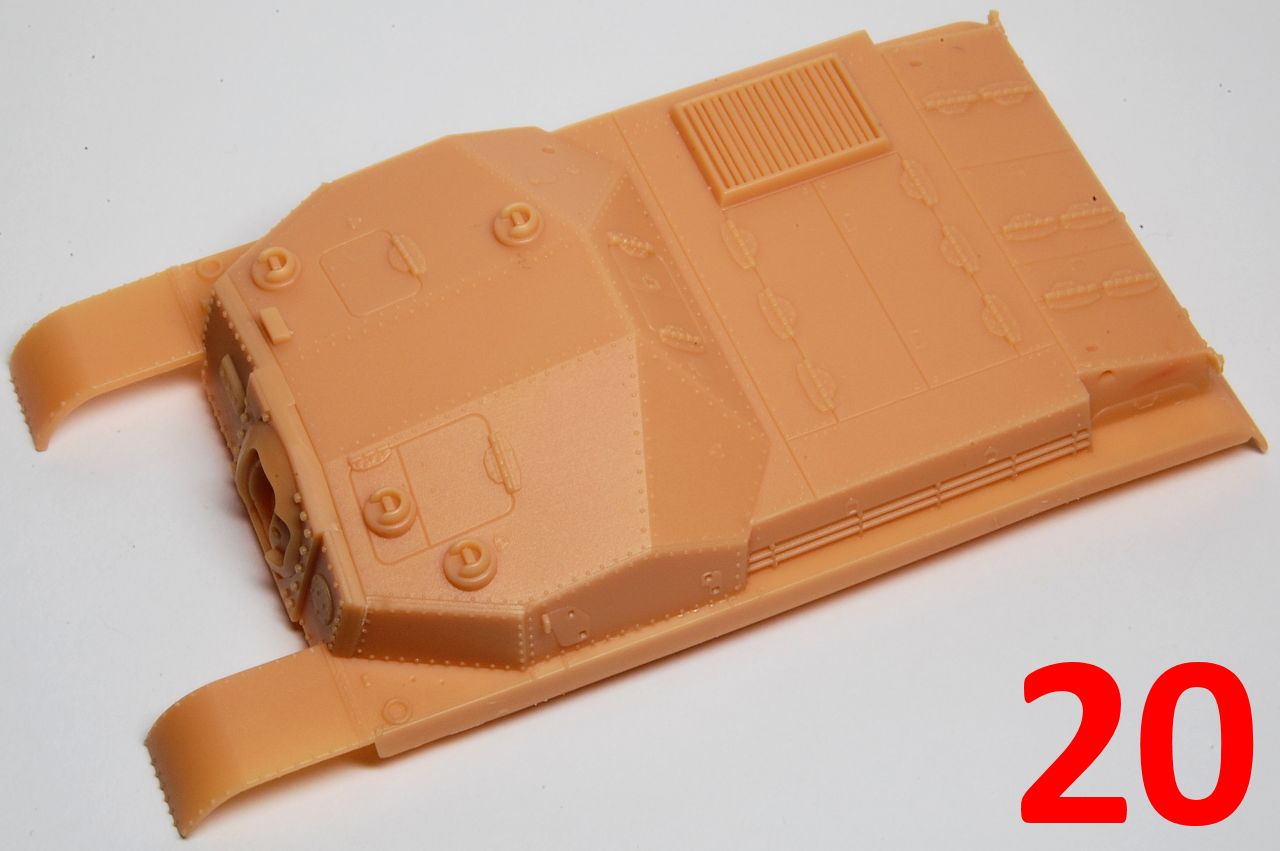
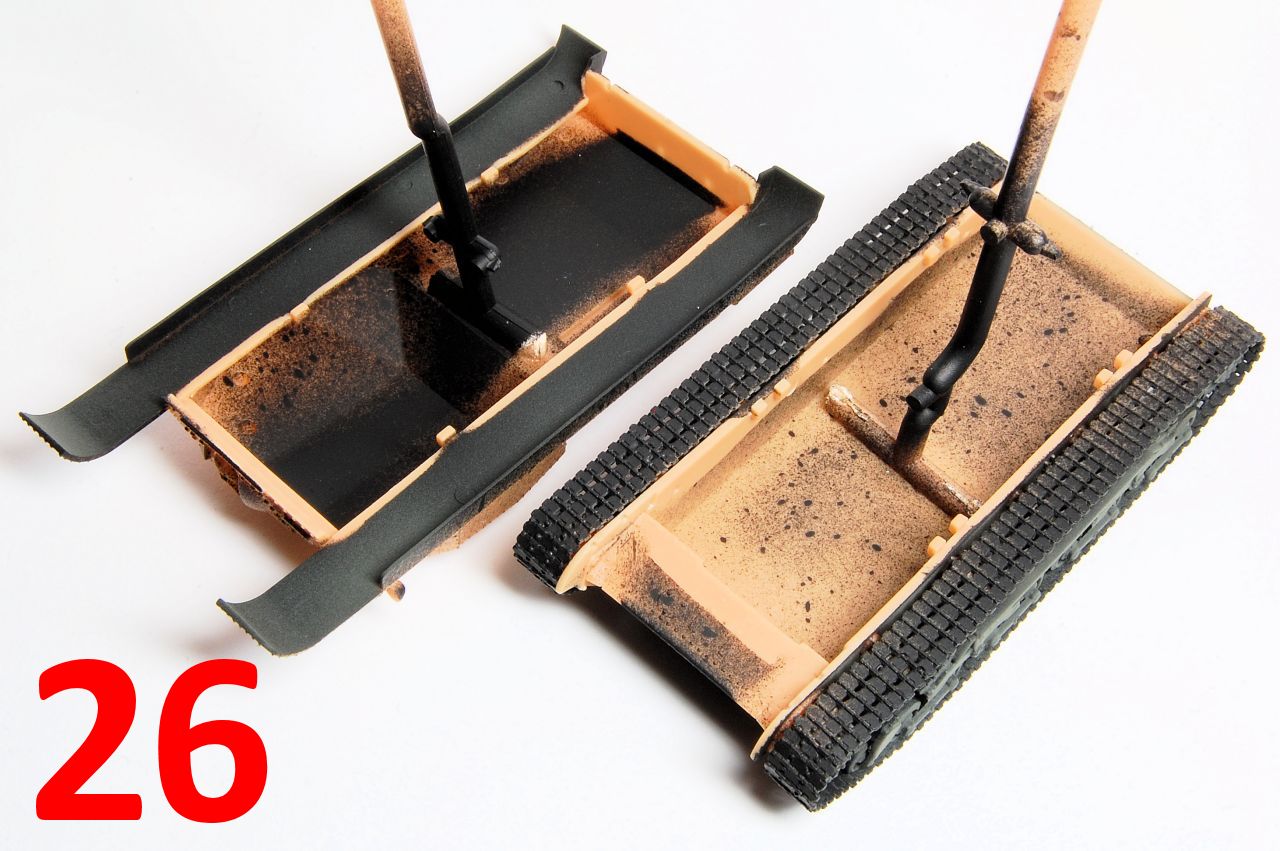
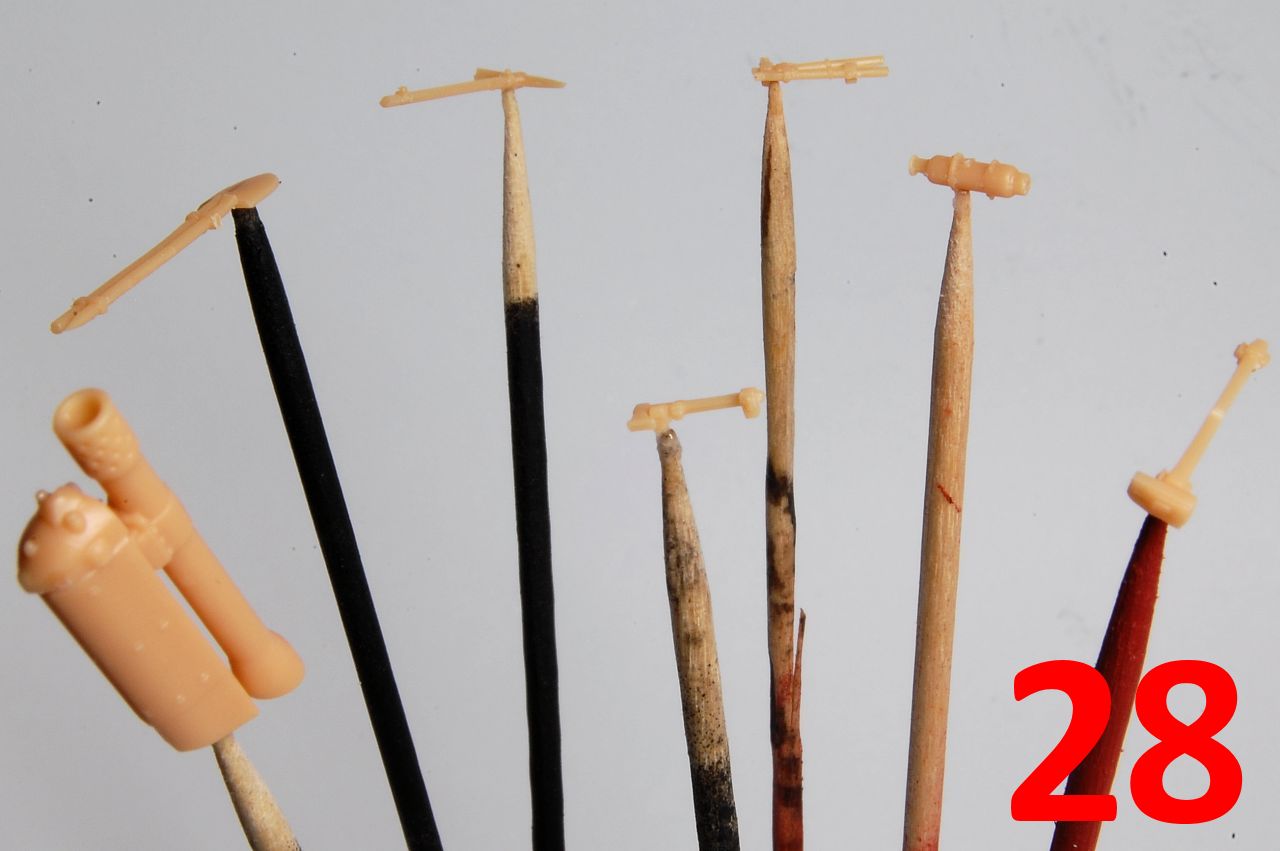
Slide moulding has been used to provide a good level of detail to the sides of the hull superstructure (although the side ventilation louvres are moulded closed, photo K2), as well as to produce an open ended muzzle on the howitzer (photo B2). The tools are again very well done, all being separate components, although the combined pry bar and shovel on my sample was slightly bent and I wasnt able to fully straighten it; this time, in addition to the separate shovel / bar, two jacks, wire cutters and axe, we also get a pick axe and a sledgehammer on sprue K (photo K3). The surface detail on the superstructure (photo K1) is very nicely done, something that only really becomes apparent once painted.
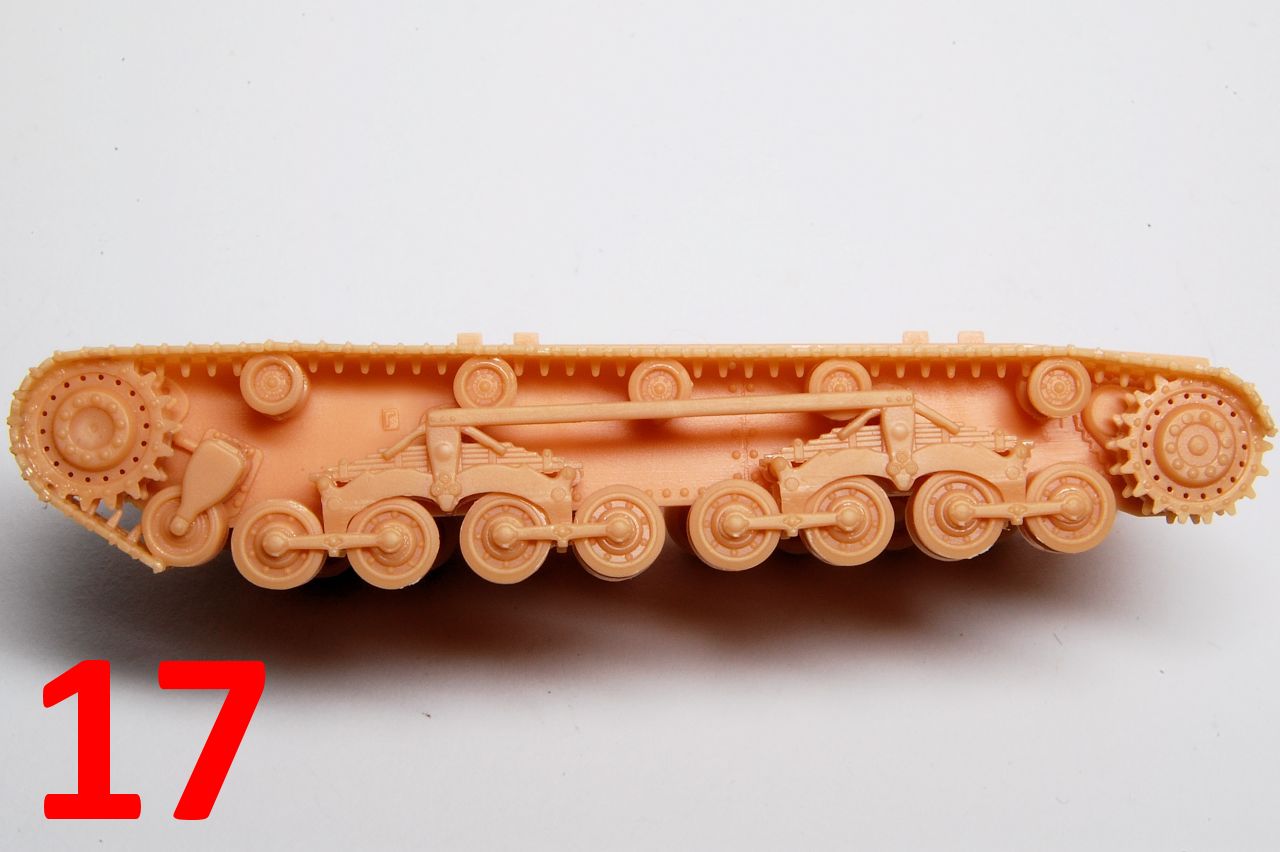
As with so many small scale kits, its again something of a disappointment that none of the hatches nor the driver visor can be set in an open position (especially as I even have Hungarian tank crew figures ) something that I think seriously limits the possibilities for placing the model in a diorama. The tracks and all the suspension components are identical to those of the Turan kit, the tracks being link and length, with the links that wrap around the idlers and sprockets being provided as single units while other sections are in various longer runs. The tracks are perhaps a little bit too thin, in photos of the real thing they have a chunkier appearance.
The Build
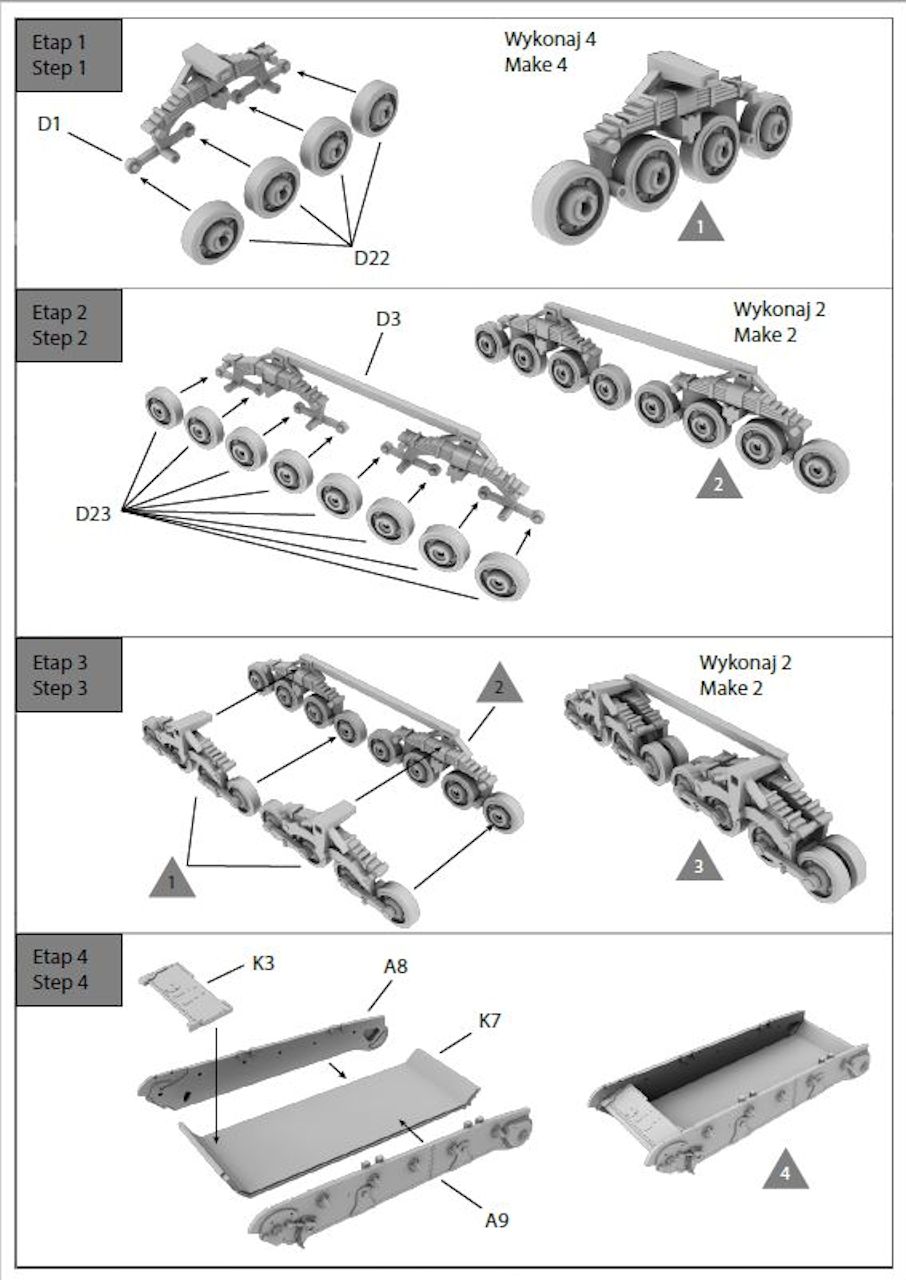
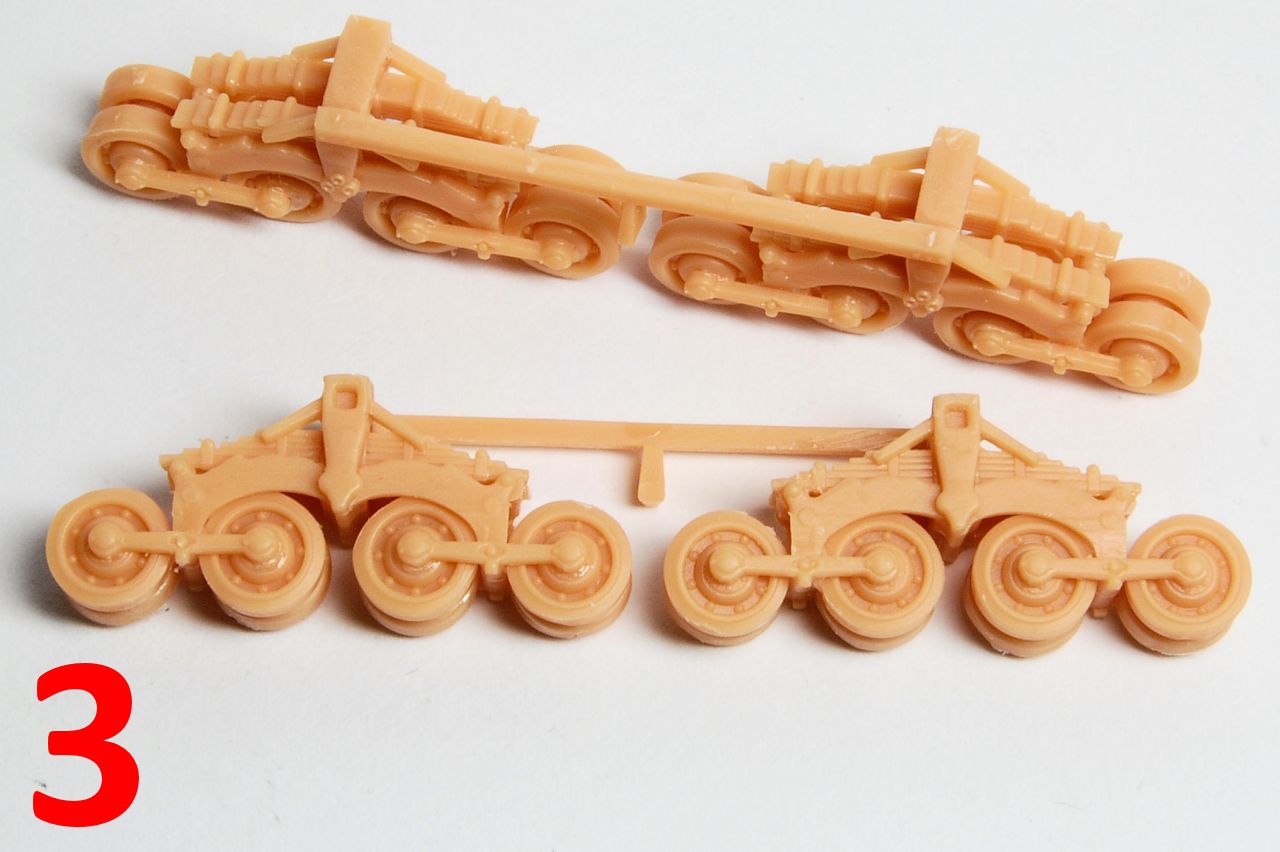
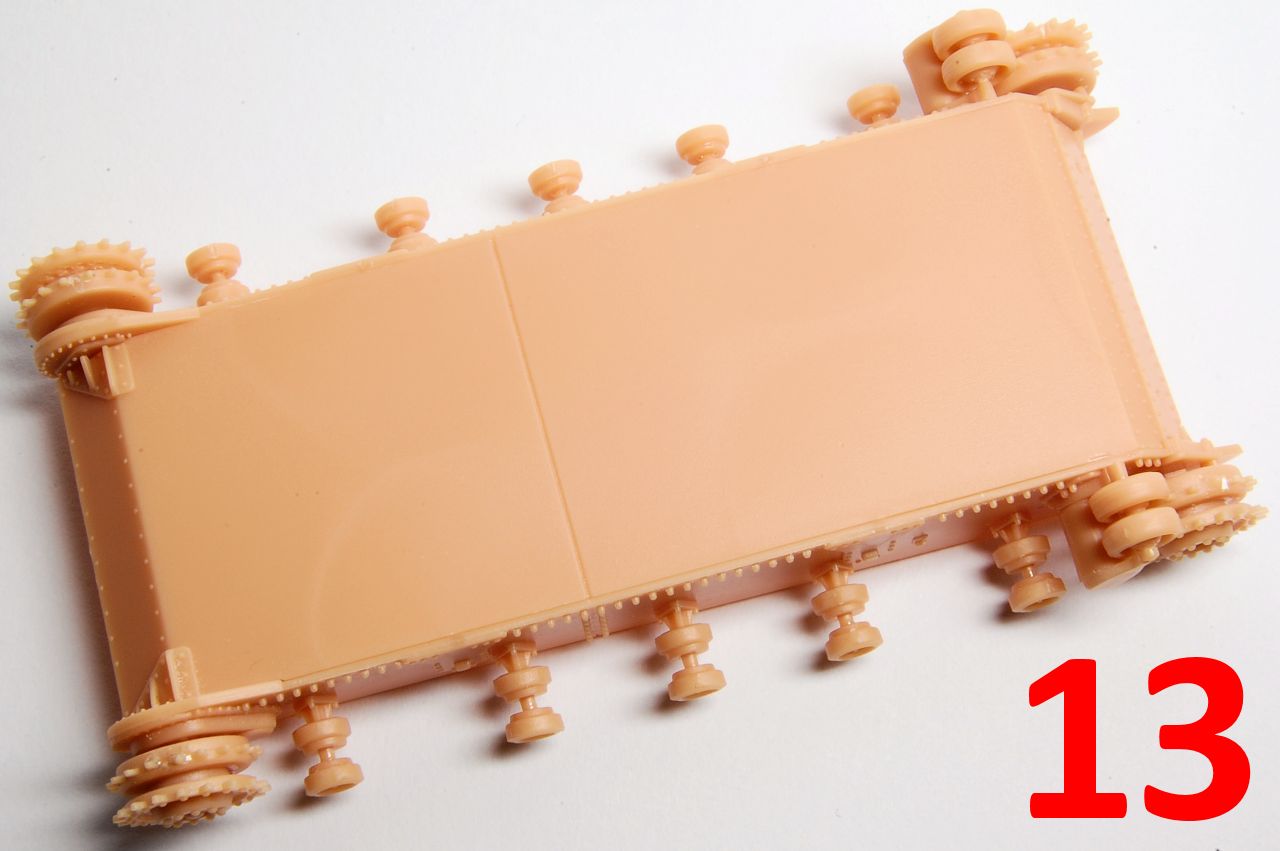
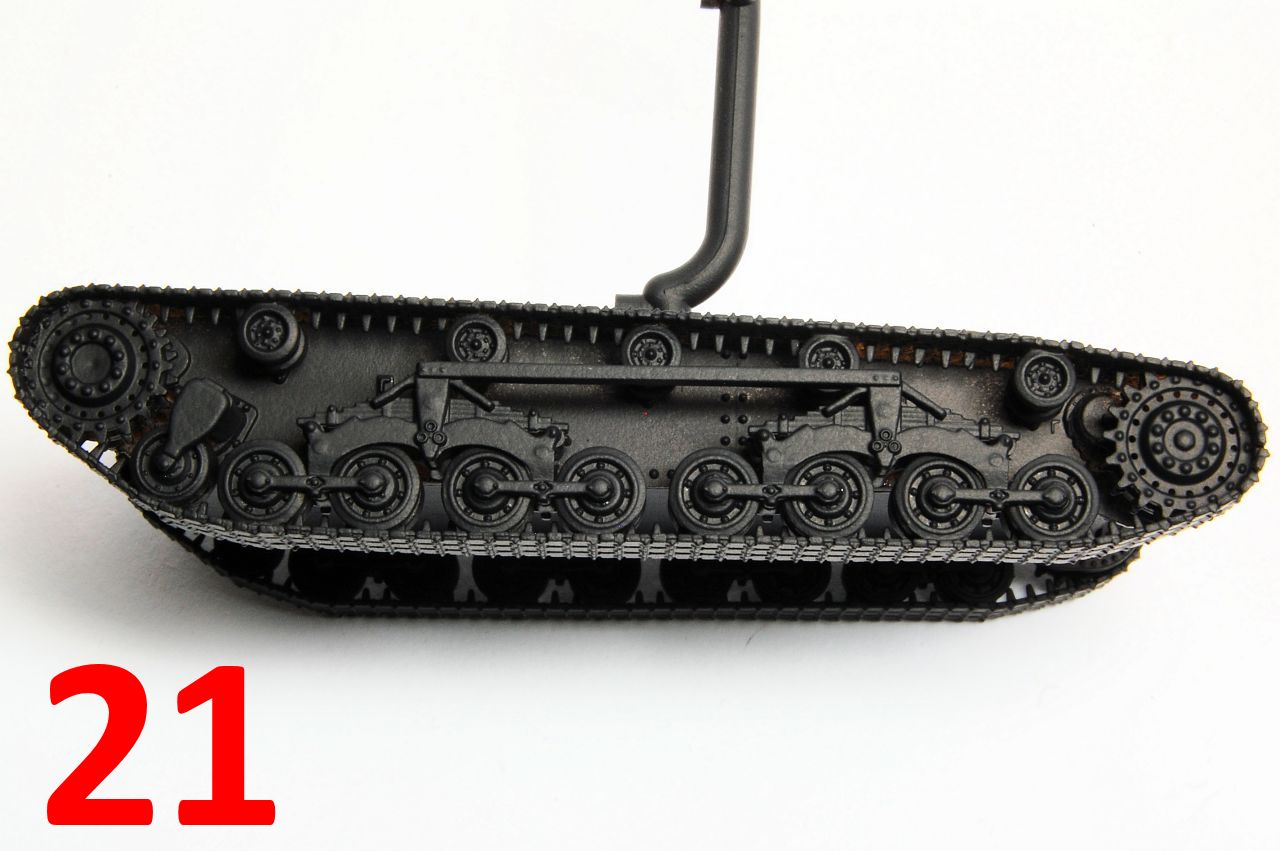
Having practiced on the Turan, things went faster with the relatively complex running gear this time: as before, instead of assembling single wheels to each side of the bogie and then bringing them together as directed by the instructions, I started by making up all of the double wheels (photo 1). While they are setting I remove the bogie parts from the sprue and clean them up, then add four wheels to the long bogie half, then the other side of the bogie; this was then clamped with tweezers (2) so that it sets with a good alignment. Doing that four times results in two long double bogies of eight wheels each (3).
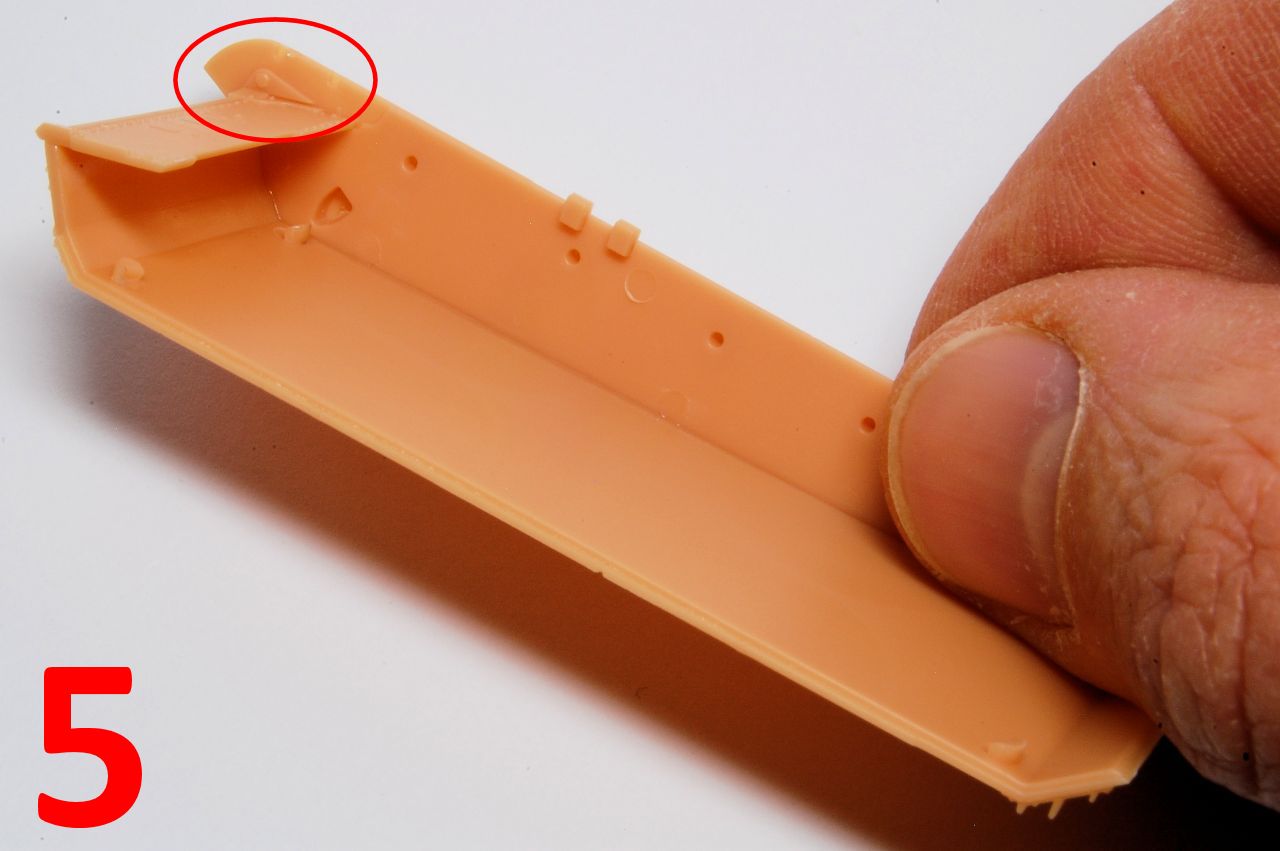
We turn to the hull assembling it from three main plates (4) with the upper nose plate being added at the same time to make sure all is square. Note the internal surface of the side plates includes some exterior detail above the upper nose plate (ringed, 5), so cement is applied there from underneath to avoid damage.
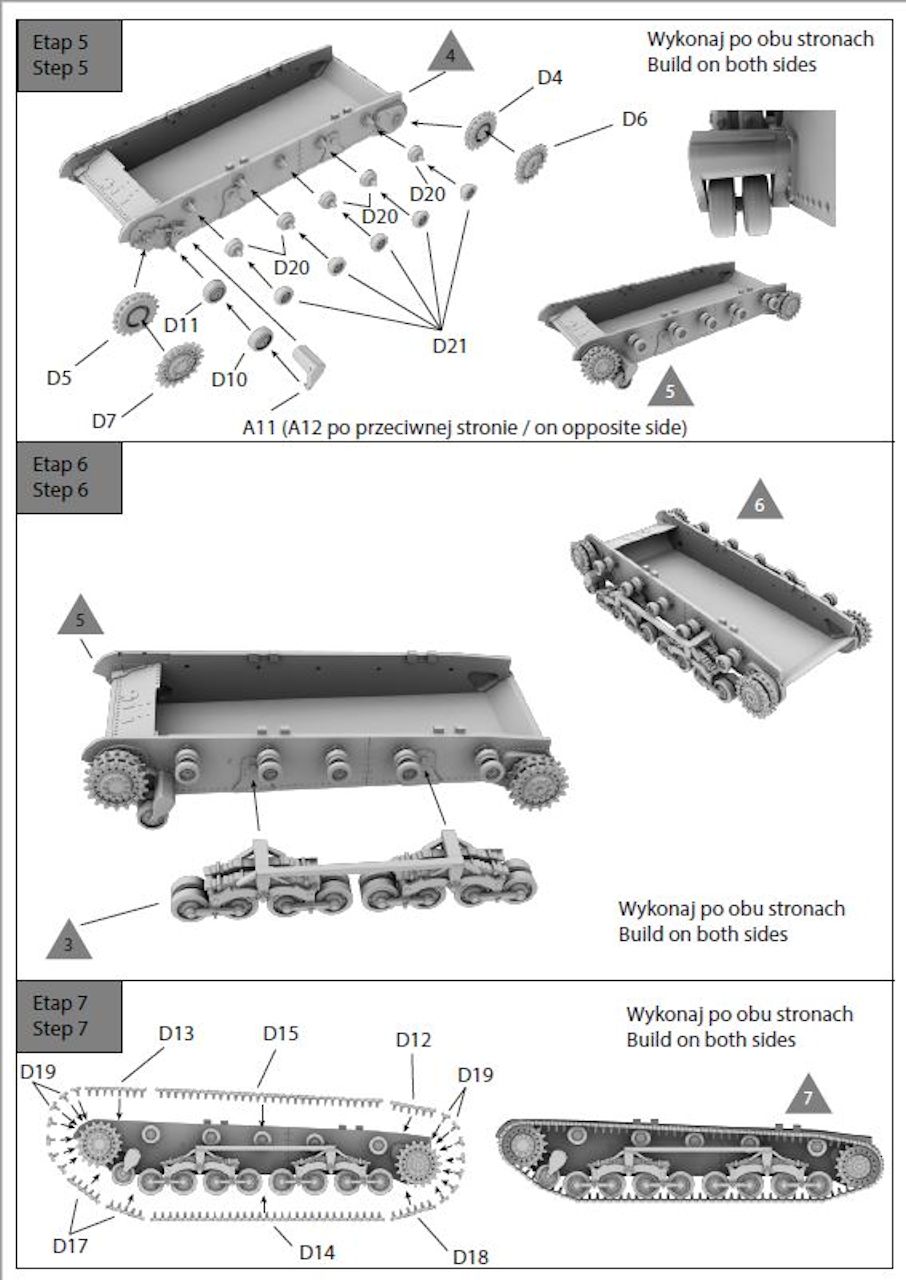
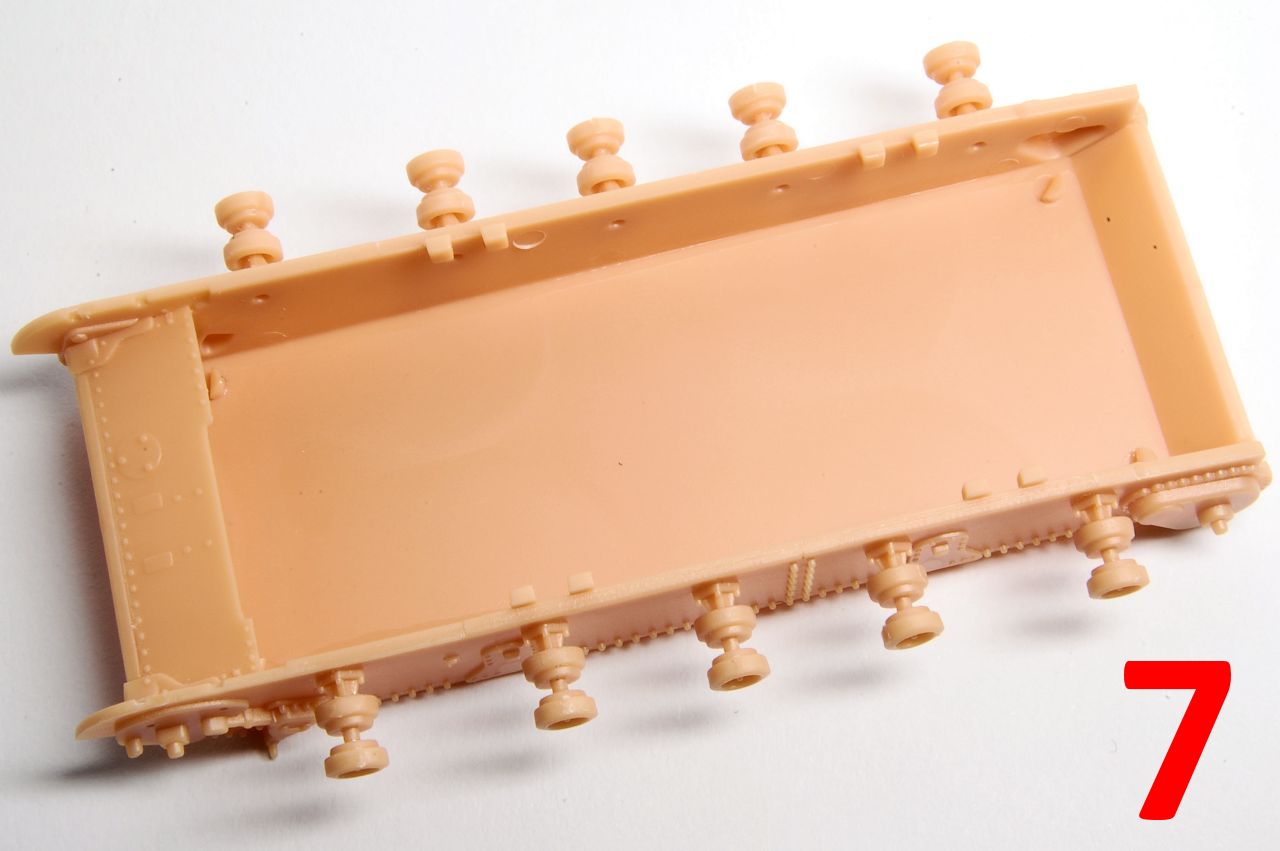
This time I assembled the return rollers on the hull, adding first the inner half (6), letting the cement set with them nice and straight, and then the outer (7). Bear in mind the link and length track will be cemented to the rollers, so setting them straight is important.
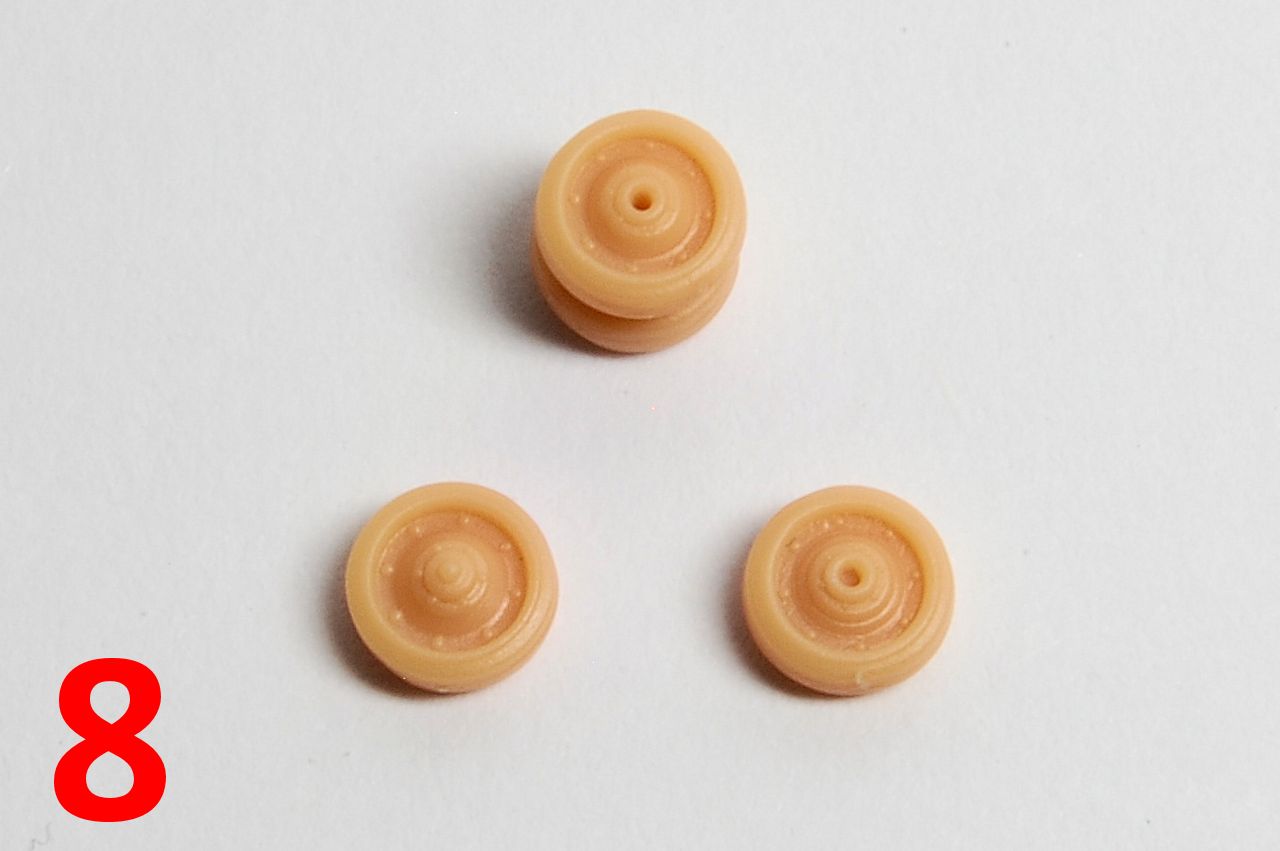
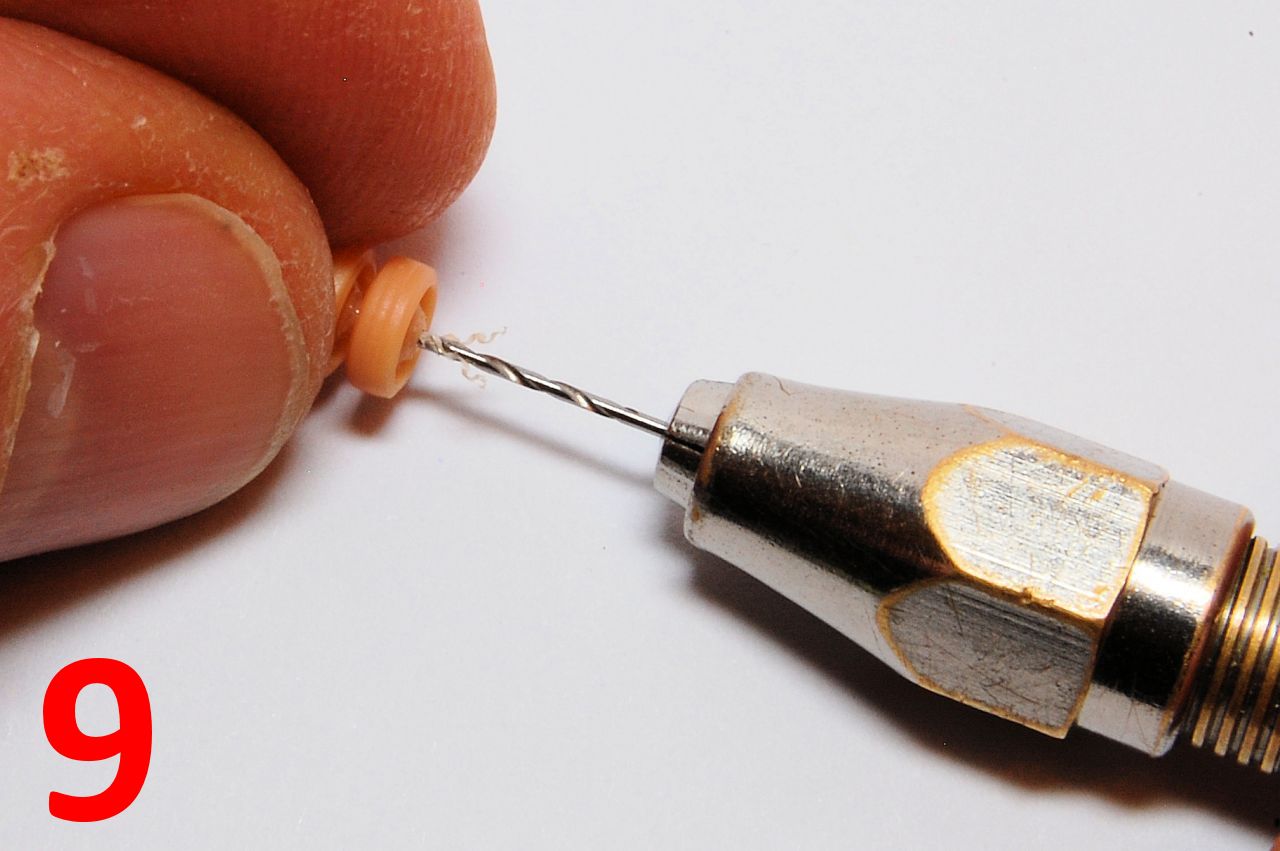
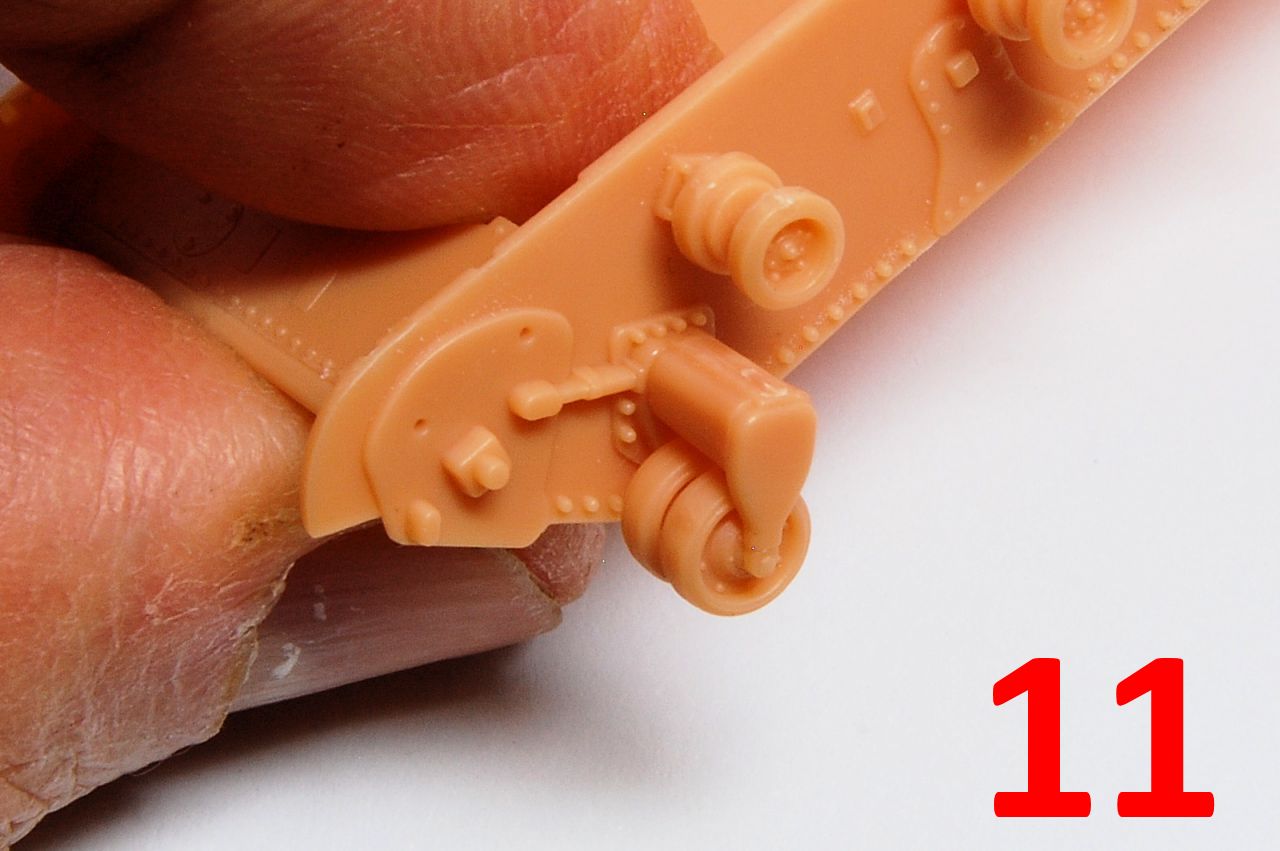
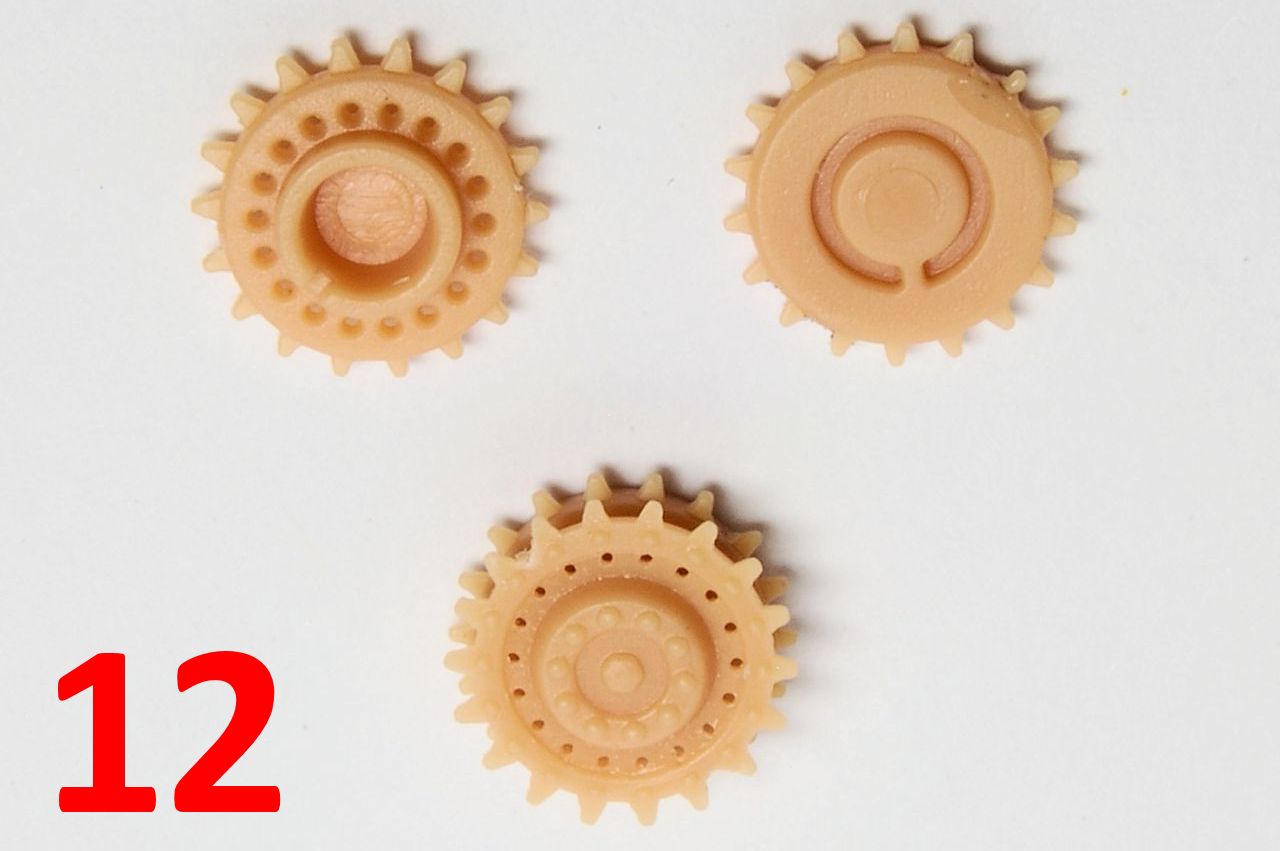
Now we take the halves of the special leading road wheel, the one on its own, assemble them (8) and then slightly enlarge the centre hole (9) so that it sits fully on to the pins (10) and so the odd caster-like mount will be straight (11). We still have four more wheels to assemble (theres 32 in the kit, each made of two halves ) the sprocket and the idler, both of which are toothed, so we take care not to confuse them (12, 13). Cleaning these up is tricky as the sprue attachment is in between teeth, which is an odd design decision if you ask me much easier is cleaning up the point of a tooth, than cleaning up in between two teeth.
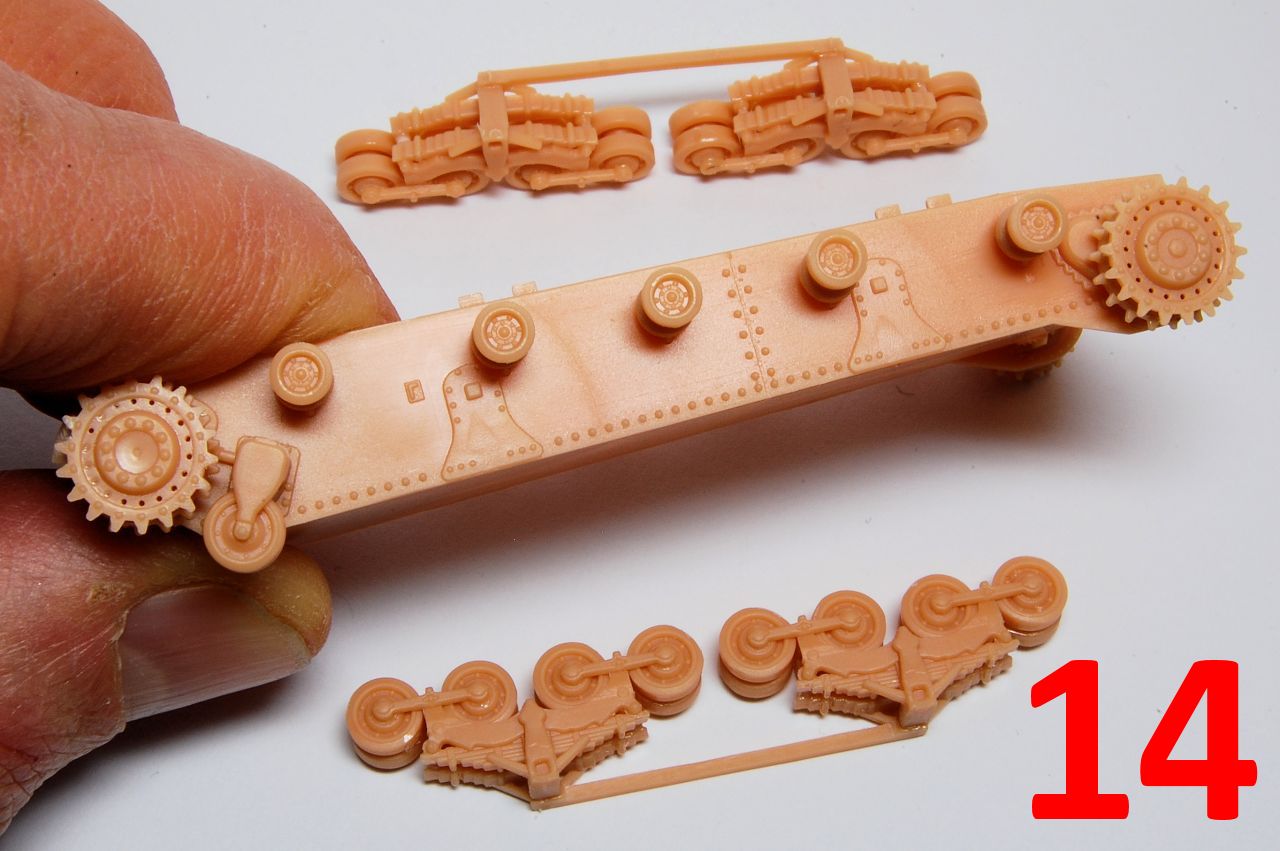
The completed bogies attach to the hull at just two quite shallow points (14) so a decent bond is important to make sure all remains lined up (15) in preparation for the track assembly. Following an overnight setting, we can proceed with the tracks. I started with the top run leading to the drive sprocket, then worked my way down the sprocket with the single links (16). Its crucial to make sure that the track joins up, and with the Turan I thought the best place to make the join was between the last road wheel and the idler, where a little sag can be added in if necessary to make room for the last link. This proved difficult to achieve this time around, requiring the significant reduction in size of two links, and given that I now know that the upper run of the track is virtually hidden in the final build, the top run is probably the best place to make the final join (so, not like photo 17 )
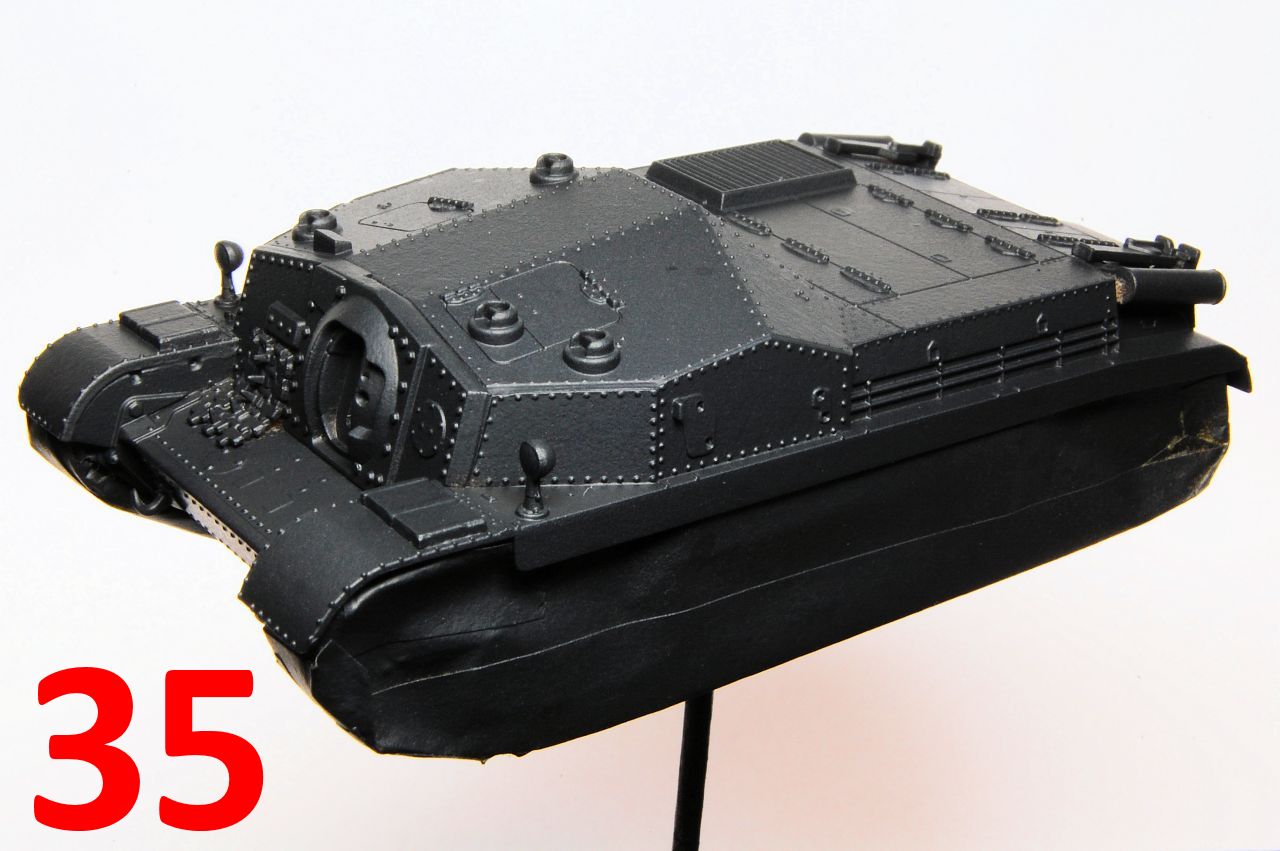
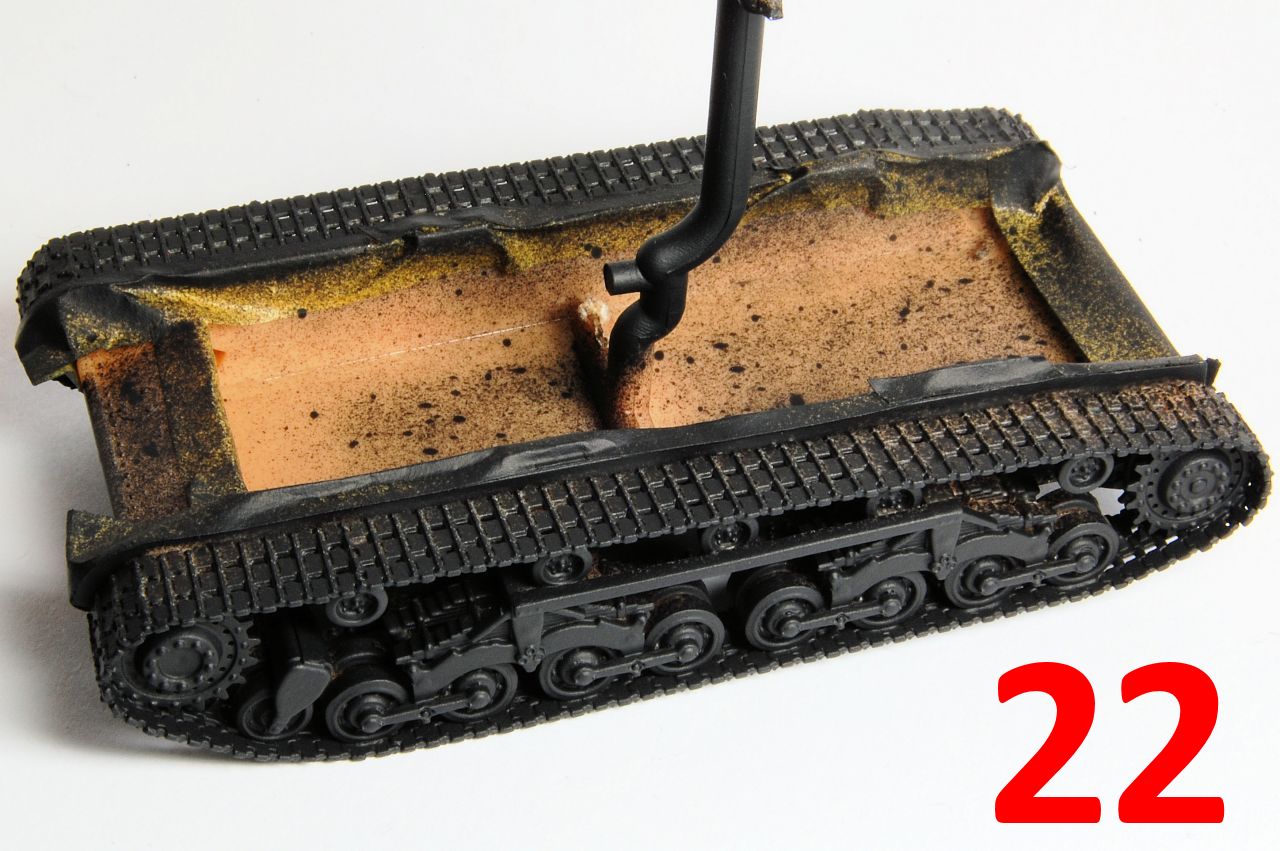
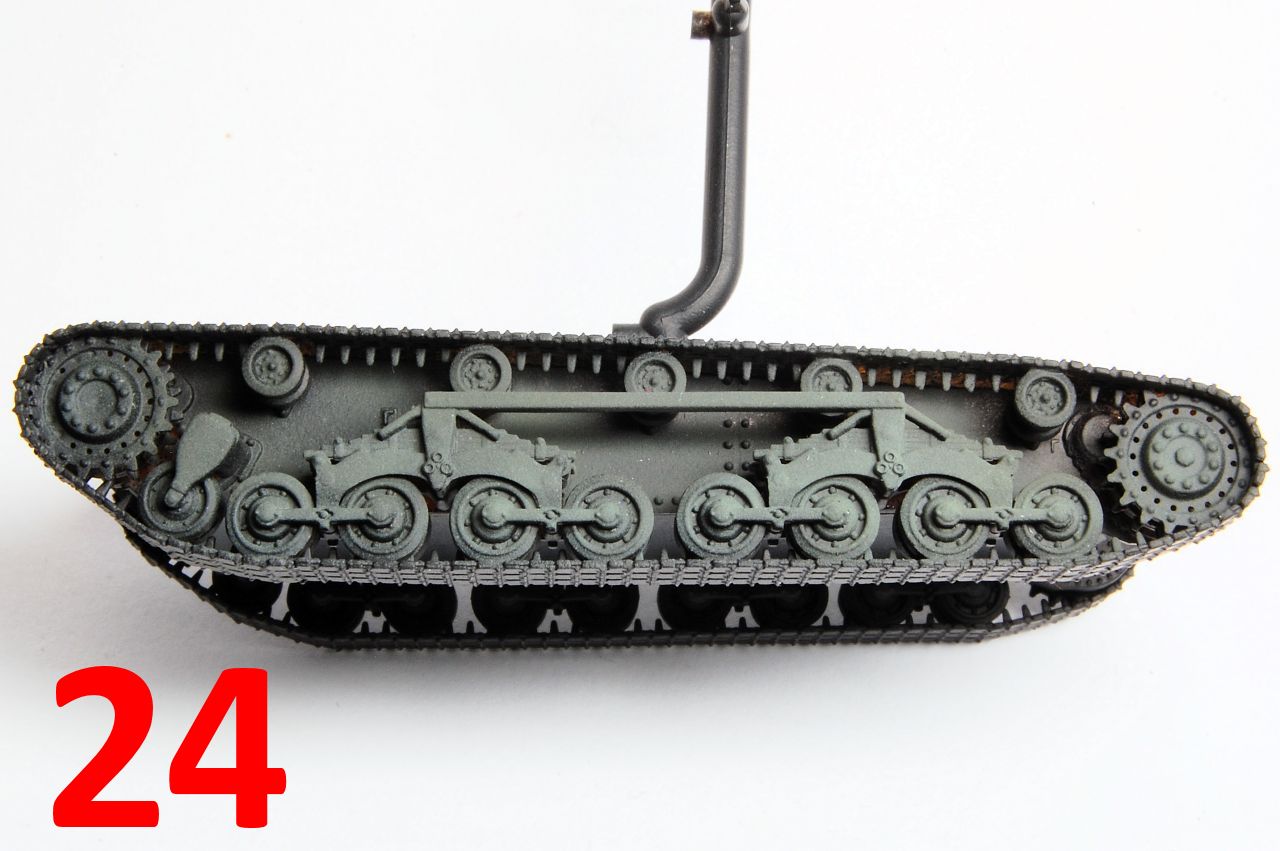
The rest of the build is now quick, the superstructure being simple to construct (18), notice the nice laminated or cut appearance of the edges of the thick frontal armour (19, 20). Following my usual method I masked off the contact surfaces, then primed the hull (21, 22) and the underside of the track guards (23); the wheels and hull sides were then sprayed with Tamiya XF-74, highlighted with XF-73 (24, 25). With the masking removed (26), and while waiting for the paint to set, the howitzer was assembled (27) and prepared for separate painting along with all of the tools and the fire extinguisher (28).
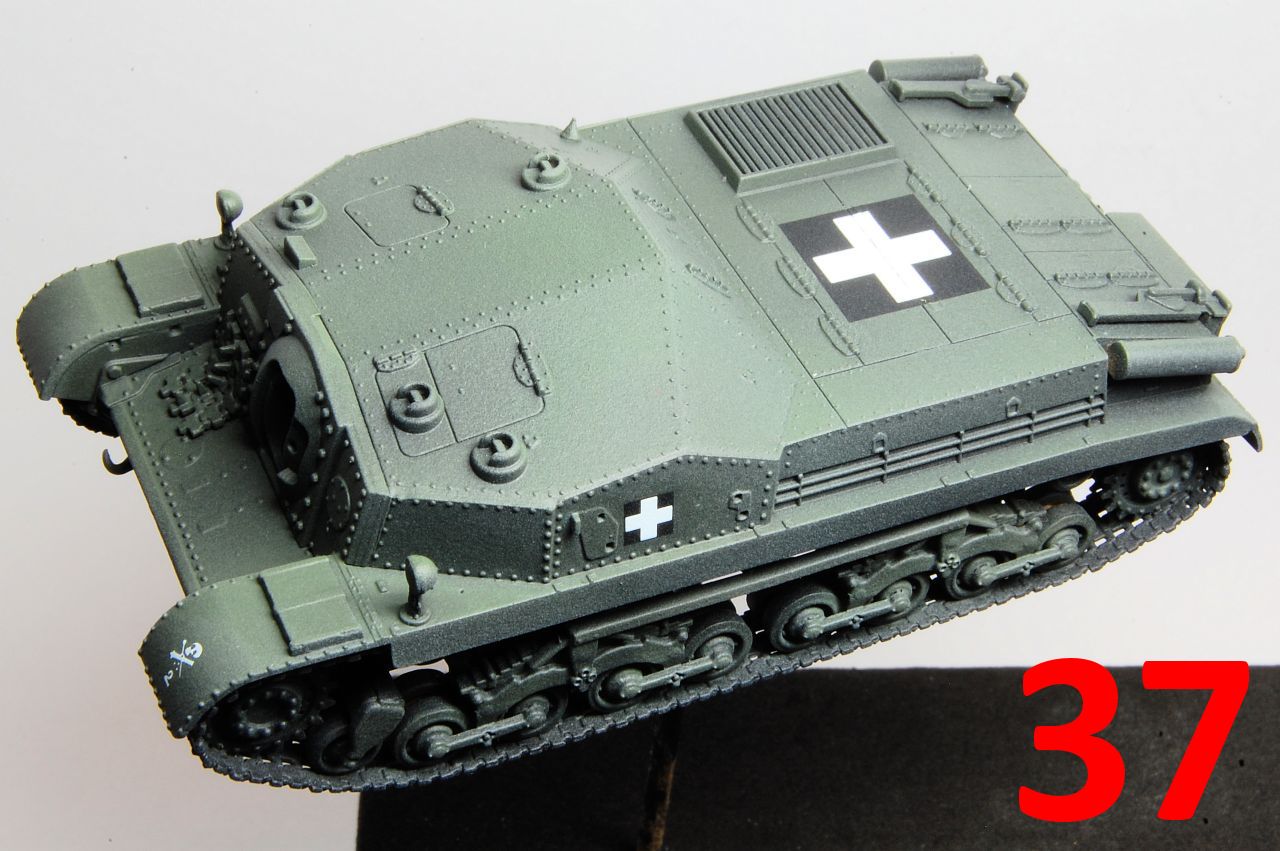
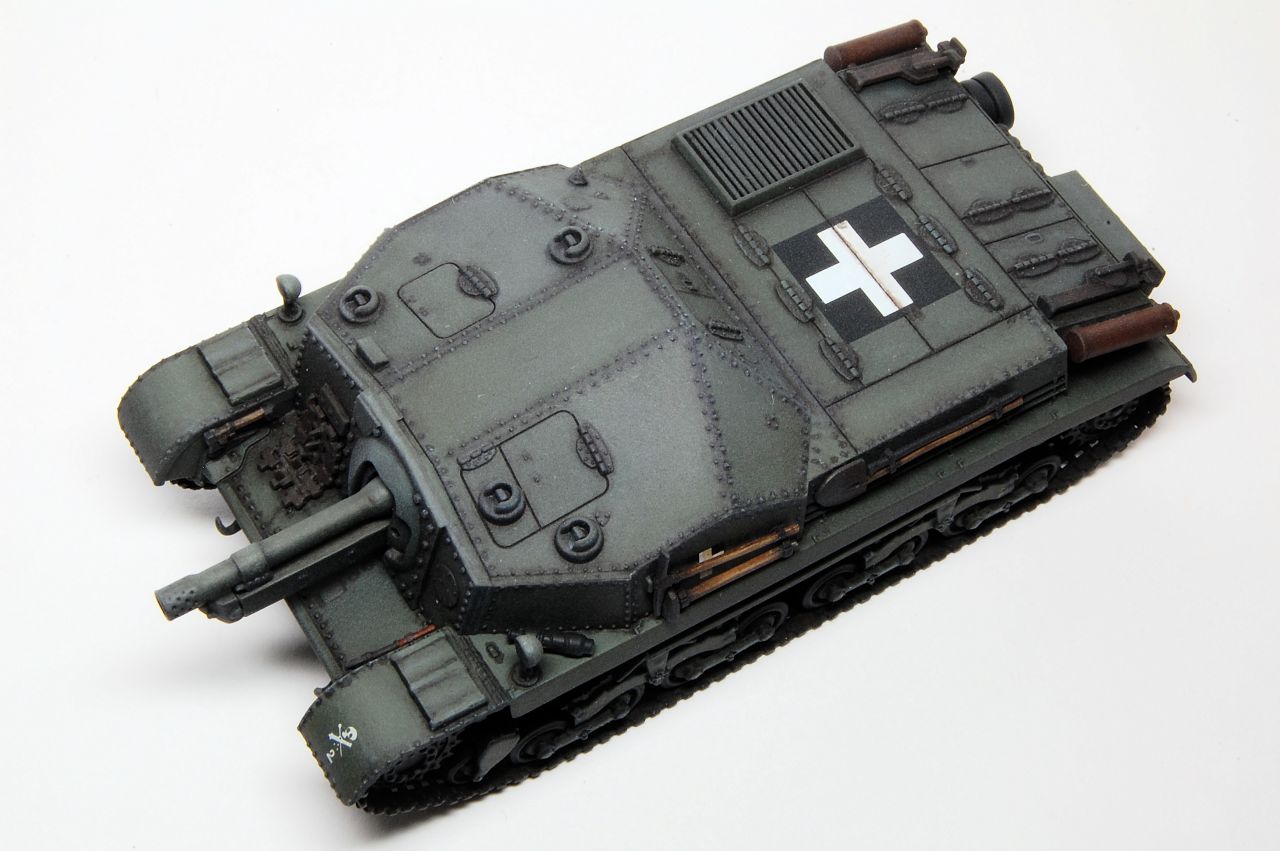
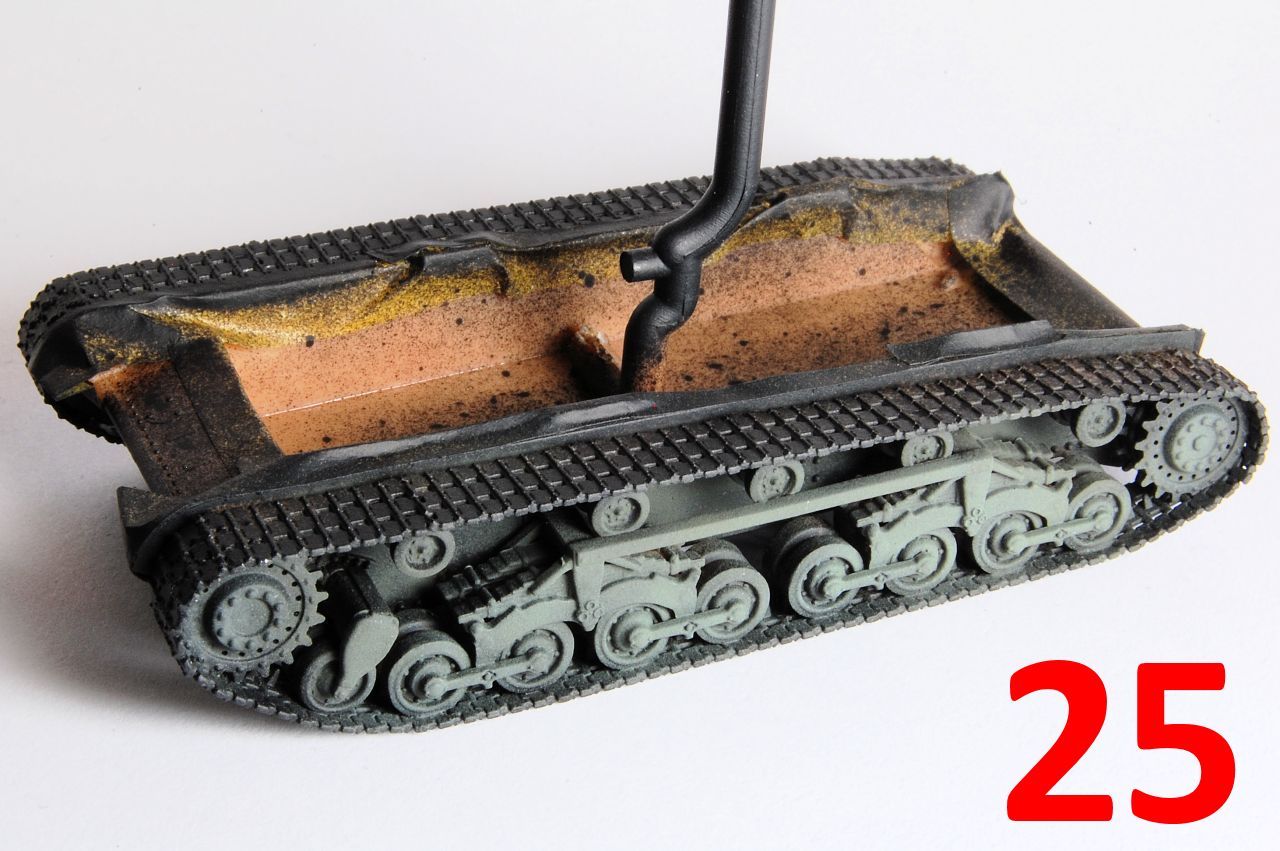
Further details were now added to the superstructure: smoke grenade launcher, exhausts, jacks, lamps, aerial socket and rear stowage box (29), following which the superstructure and hull were assembled (30, 31, 32). I added the few spare single track links left over from the Turan to those from this kit to make a small length of track to go under the drivers visor (34). With the wheels and tracks masked off, everything was primed in black (35), sprayed with the same two greens (36), then followed by the usual varnish, decals, varnish, pin wash, detail painting routine (37). The big aerial recognition decal was easier this time as it fits exactly between the nicely moulded hinges, the layout of the engine deck being different to that of the Turan. The final touches were adding all of the tools, the spare wheel just clipped on the back, and the howitzer was glued in place.
Conclusion
Slightly simpler than the Turan, but still quite complex for a small model, with the elaborate wheel assemblies broken down in to individual components, and the link and length tracks. Not hard however, just time consuming, and everything fits well, with the instructions doing an excellent job of explaining assembly, including very clear as-built images for every single step. Once the running gear is out of the way then the rest is quick and simple.
As with the Turan, some additional detailing could be done to make up for minor simplifications that are to be expected at this scale. Lifting hooks could be added to the roof, the holes of the muzzle brake could be deepened, and something could be done for the drivers periscope which is a featureless block. Looking at my build, as well as removing the rivets from, and thinning down, the front track guards, some attention should also have been given to the point at which the track guards join the hull front, and the main join at the rear plate isnt perfect.
Overall this is yet another very decent offering from IBG, with proper tracks and separate tools adding to a well-executed kit that makes up into a very good looking model with lots of nice surface detail. The addition of one or two optional openings for crew in the superstructure would really have been a bonus to what is already an excellent kit. At only 10.50 Euros it is top value.
SUMMARY
Highs: Design, detail and fit very good; excellent instructions; lots of separate, well detailed tools.Lows: Tracks could be chunkier; a pity there are no opening hatches.Verdict: Good quality, enjoyable kit at a very reasonable price.
Our Thanks to IBG Models! This item was provided by them for the purpose of having it reviewed on this KitMaker Network site. If you would like your kit, book, or product reviewed, please contact us.
About Matthew Lenton (firstcircle) FROM: ENGLAND - SOUTH EAST, UNITED KINGDOM
Earliest model memory is a Super Sabre my grandmother bought for me around 1972. Have always dabbled in painting and making things, and rediscovered doing that with plastic in 2008. Vowed then to complete the 30 year old stash, and have made some progress. Hobby goes hand in hand with BBC Radio 3...
Hello Matthew, nice review.
Some info to clarify the features mentioned:
The patch on the corner of the mantlet is a unique feature of the Kubinka vehicle. It's basically a 25 mm armor plate cut from another Zrínyi or Turan to cover a penetration.
The "smooth" lower plate is a feature of the mild steel protype vehicle, this was later used as a testbed for the 75 mm gun.
The circular plate on the left of the front plate is a moveable door for the direct sight on the prototype. On the first vehicles it was patched over with a similar circular plate and deleted on later vehicles.
The three rivet drivers plate can be found on a few (2-3?) vehicles, no clue why it was made this way.
The "thinned" gun mantlet with countersunk screws was the first layout of the mantlet on the mild steel prototype. Later it was rebult the standard setup.
Adam
Adam, thank you for clearing all of that up. It shows that you can observe photos as much as you like but not understand the true meaning of them without other knowledge to back it up. It makes sense that there are often good photos of the prototype that are well preserved, but also often not representative of the rest of the production run.
Interesting about the Kubinka vehicle, it means that it is the same vehicle in the photo below, and it confirms that, for whatever reason, someone decided to rebuild the track guards which were lost at some point, and they also fixed up the side armour...
Matthew


Comments