Overview
Scalemilitary.com came out with a new line of diorama building accessories at the end of 2005. The line is a number of different component based building segments the line is named the BattleFronts series. The goal of this was to design a number of interchangeable units a builder can assemble based on their needs and creativity. When the line came out a review was written in an In-Box form, it can be found
here.
Selected Items
The line consists of 15 pieces that range from a full clapboard wall to a chimney segment. These pieces are tied together by scale (1/35) and your creativity. All of the pieces are created the same way and use the same manufacturing process. With this in mind only a sub-set of the entire line needs to be reviewed to provide enough information to make a wise buying decision. This review will focus on four pieces in this line. Use the information here and your creativity to decide which pieces suit your needs.
The pieces used in this review are: 35-513 Plaster and Beam Shop Front in conjunction with 35-508 Stucco wall ruin w/ window; and 35-510 Brick wall section ruins (this consists of two pieces) combined with 35-511 Damaged brick wall with debris at base.
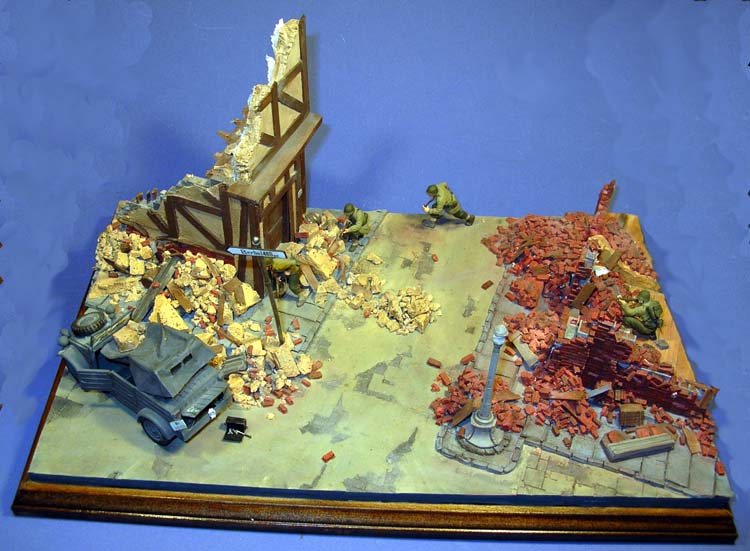
The Project
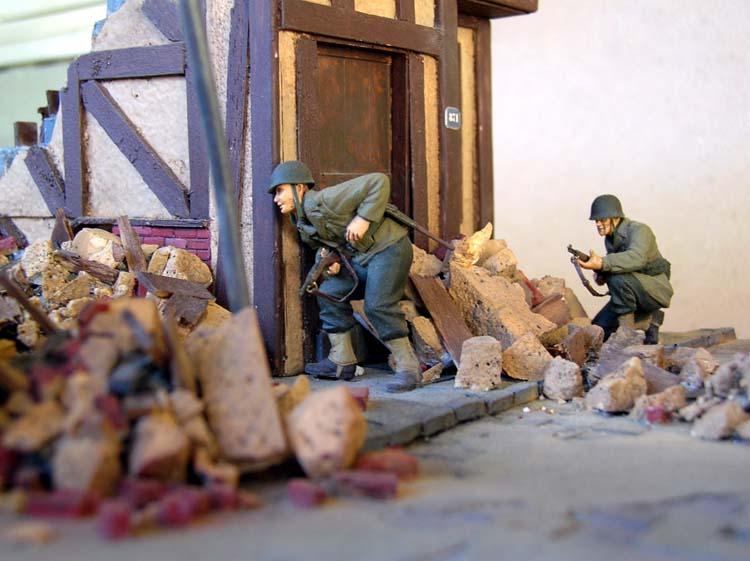
The basic project that will highlight this line is a street fighting scene late in WWII. The scene will be a street corner with a different style building on each side of the street. This will allow for two styles of buildings and a better representation for the buyer.
The parts
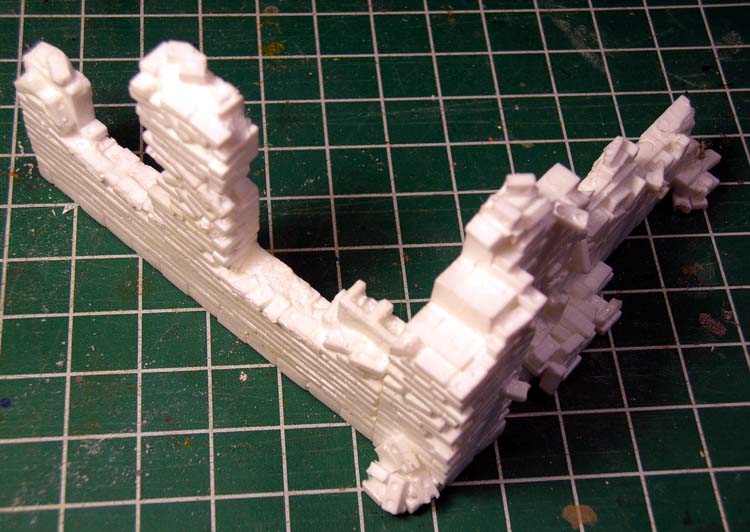
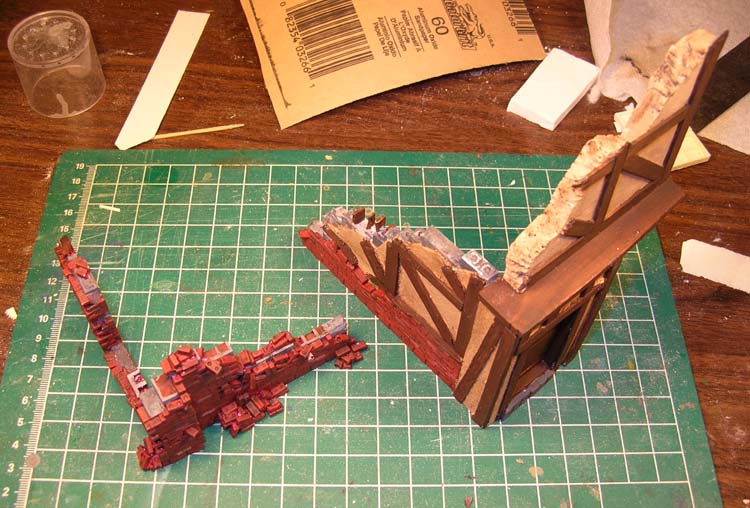
The pieces are all molded in a nice hard resin from a one piece mold. This creates a part with one blank side. This is acceptable with a building segment as long as the blank is an interior wall. ScaleMilitary.com made sure that every blank is an interior wall. The molding on these pieces is nicely done. There is a great deal of detail on every piece. The selected pieces show this very well.
The brickwork is wonderfully detailed; as is the wood work on the Plaster and Beam shop front. The detail indicates that real wood was used in the master. This is nicely duplicated. The construction and layout of the pieces is nicely done with well placed windows and doors. In general these are nicely designed to allow for optimum interchangeability.
There are a few bubbles trapped in some of the pieces. The location of these bubbles is typically in hollow spots where you can pick out the bubble or blend them into your project. In addition there are a few bubbles here and there on the fronts of some of the wooden sections. These can be used as battle damage or they can be filled in with putty.
The pieces fit together well; all joints or potential joint surfaces are nice and square. This will help you mix-and-match pieces as you see fit.
Construction
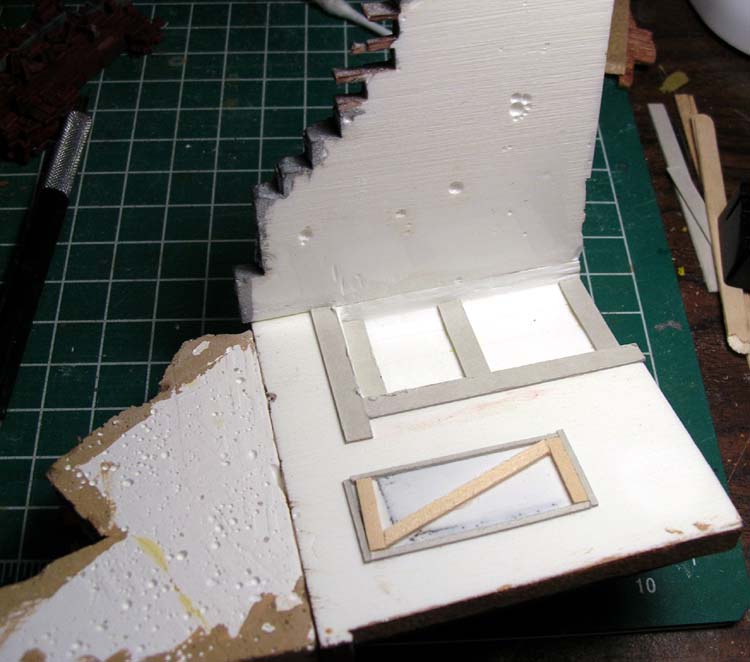
The pieces and project you select will dictate what level of clean up you will have. The pieces used in this review had very little cleanup. The blank side had no excess thickness as a result of an over-pour of resin. This is a great feature. Sanding down an over-pour can be time consuming and tedious, there is none of that here. There is no flash to clean up. You will notice in the In-Box review pictures that there is a bit of flash in some of the windows and doors. The only thing I would recommend every builder do is it to look for molded bubbles and remove them. This is very easily done with a hobby knife and maybe a little bit of putty. Based on what you plan to do on the interior blank wall you have choices. You can; apply wall paper, apply wall spackle, fill and sand smooth or do nothing. To show case options, I did two of the four. I applied wall paper and wall spackle. Both applications were easy and covered all the bubbles on the blank wall.
Creating a building was easy. You mix-and-match until you are happy with the look. There are no instructions on which pieces go together. There are a couple of pieces that do fit best together. That does not mean you must put them together. This is a diorama builders dream. The creativity is up to the builder to make the parts work, not the other way around. I have worked on a number of projects where my creativity was used to make project work around the kit vs. the kit working around my creativity.
When you have a building you ensure a nice even joint and apply some resin glue. As mentioned above the edges and potential joints are nicely done. This will keep any seam work to a minimum. If you get really creative you can cut and disassemble and reassemble pieces. In these cases you will have joint cleanup.
For gluing I used a one part epoxy since the pieces fit so well and there was no need for the superior strength of two-part epoxy. I built two corner buildings out of the main components.
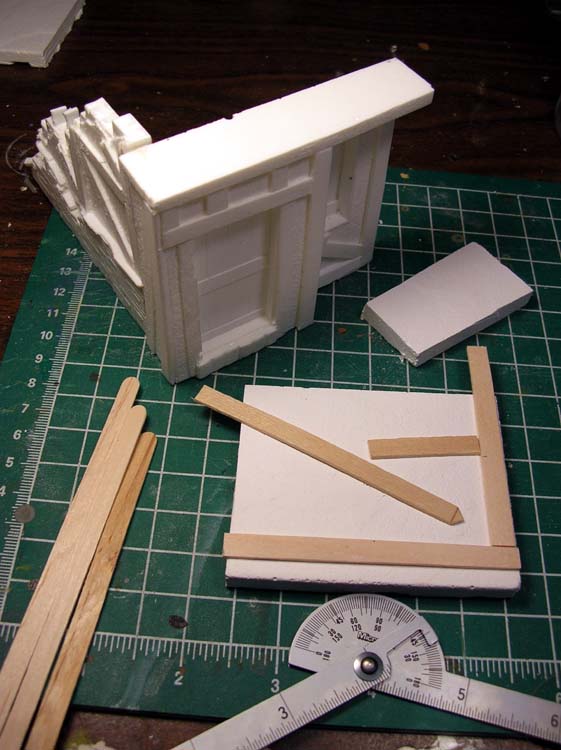
Customizations
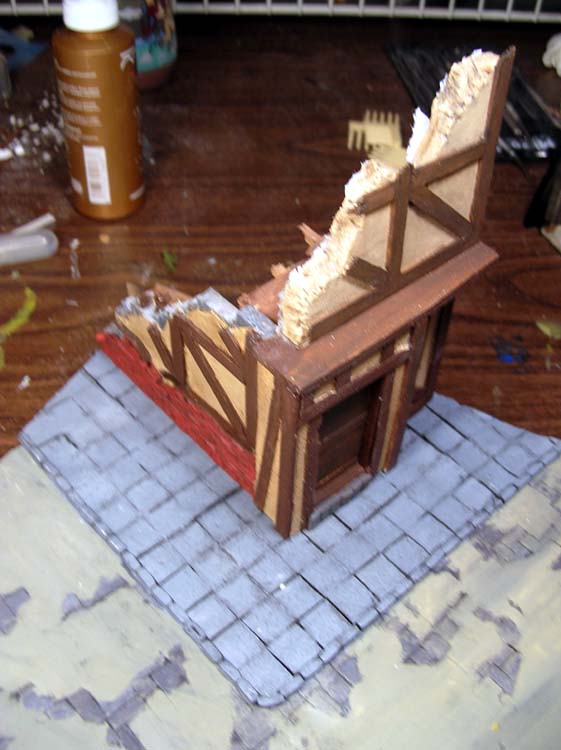
This line of building encourages creativity. The creativity is not limited to the pre-made parts. You can easily add some simple scratch built customizations of your own. As you can see I added a scratch built second story and a scratch built brick wall extension.
These scratch additions were easily added to ScaleMilitary.coms parts with common modeling techniques. You wont have to worry about being limited by this line of pieces.
On the back side of the store front I also carved out a recess to match the front door. The resin is hard and this did take quite a bit of effort with a rotary tool. The results are well worth the effort. It was very easy to add personal details such as window trim, decorative trim or wood or card stock. I used a variety of gluing techniques to test adhesion. I used one part epoxy, full strength wood glue, full strength white glue, dilute white glue, and CA. All worked well and are still holding.
Attaching your buildings to your base was a smooth process. Again I used a one-part epoxy. The weight of these components is quite considerable, especially if you start combining multiple parts. The weight is not a normal consideration, when you add these parts to a flexible latex base you may need to consider a foundation layer under the latex.
finishing
Painting the assembled was easy. I used commonly found hobby acrylics. I used a couple different brands and they all worked very well. I tried to vary the thickness of the paint to test adhesion and coverage. I found that the thicker the paint the better it adhered and covered.
I used standard painting techniques, base coat, various top coats, pin washes (oil and turpentine.) They all covered well and there were no surprises that can sometimes pop out when paint is applied (nooks and crannies, pits and pock marks). The only thing I noticed was that the paint did chip fairly easily.
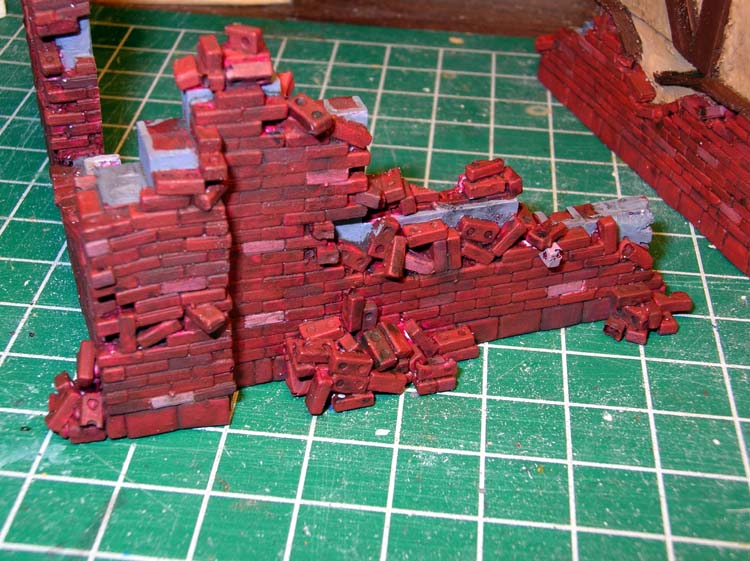
On top of the paint I finished the diorama with two coats of pastel powder. The base coat of powder was a complementary color to match the building (yellow for the store, red for the bricks). On top of that I added an overall light gray/brown to even everything out. The powders went on very well. The detail of the pieces helped this quite a bit. The wood grain and brick details in particular held the powder very well. There are lots of nice tight corners and detail spots that will come to life with pastels.
The overall completion of the diorama with debris and figures and detail work was quite easy. This shouldnt present any difficulties for you at all.
wrap up
Overall these pieces are quite good. I completely enjoyed working with them and look forward to using more.
The possibilities this entire line presents are only bound by your imagination. As I showed you can combine similar pieces within the line, as well as customize and scratch build your own add-on components. The parts are quite universal in style, allowing for a wide array of uses, from the Eastern Front to the Western Front. Time period is also quite open for interpretation. These are suitable for anytime from around WWI to the present.
The pieces themselves are nicely done. They come with tons of detail on them and numerous ways to add your own details. The resin used is quite hard and when you do sand it it does create quiet a bit of fine dust. Use your respirator or mask. The resin is easy to combine with other mediums. In this project I directly combined, wood, plaster, paper, and other resins.
Another benefit to this line is size and cost. Each piece is reasonably priced so most modelers can afford even a few components. The size is a nice general size, not to big, not to small. A few fit nicely into an average size diorama, one can be used in a vignette, and multiples can be combined to grow into a large diorama.
In a word this line is Great. You wont be disappointed. This line is built by a diorama builder For diorama builders. Be creative have and dont hesitate to include these in your next project.