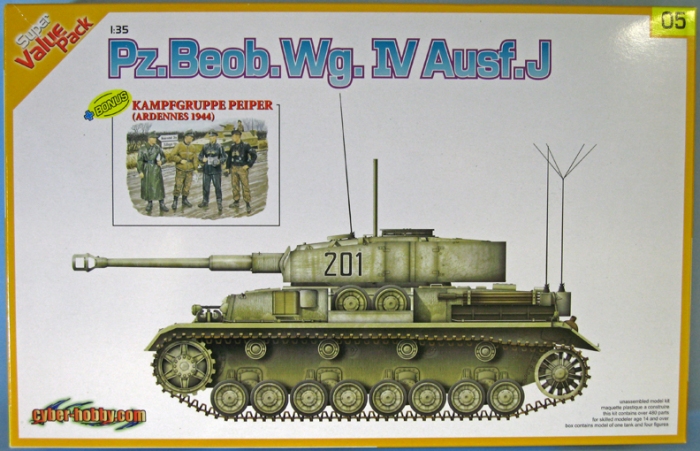
Introduction
Cyber-Hobby offers three different series of kits labeled as White Box, Green Box and Orange Box. The White Box series are high-end, limited release kits featuring new tooling and multiple upgrade parts. The Green Box series are general release kits of popular topics featuring new tooling and bonus parts. The Orange Box series are value-priced, entry-level kits with previous generation tooling and upgraded with combinations of bonus parts such as figures, PE or new tracks.
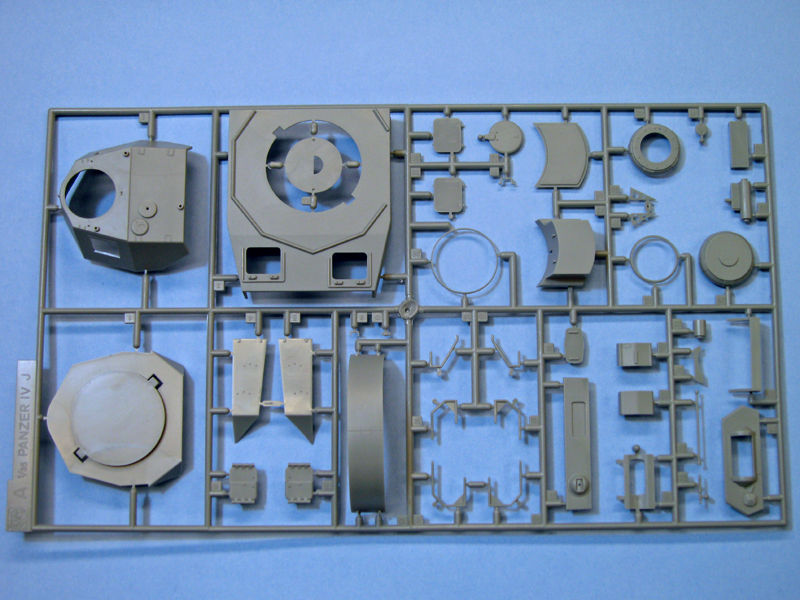
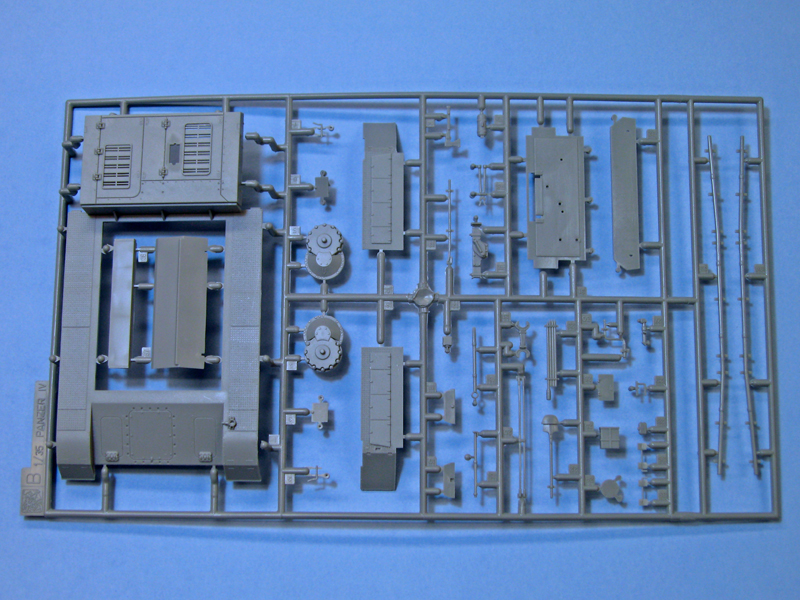
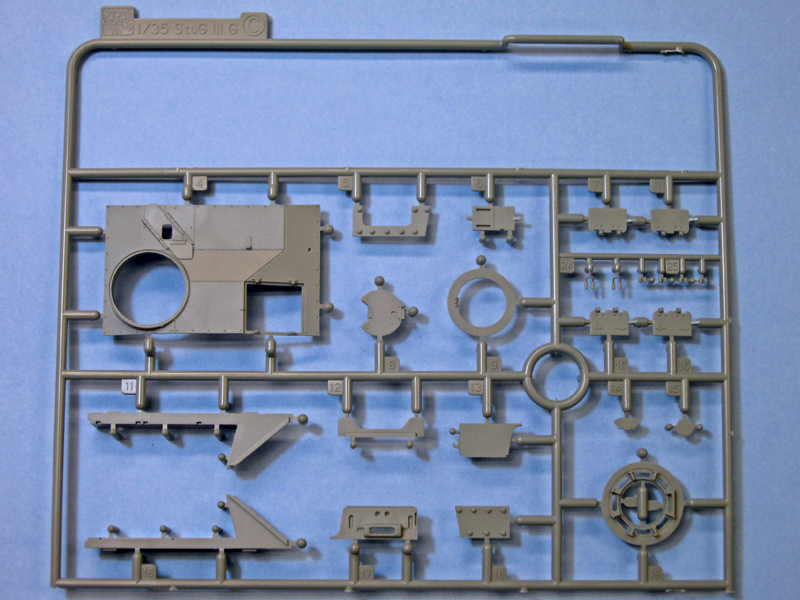
This kit belongs to the Orange Box series, which so far are priced between $29 and $35. The cheaper price is made possible by re-using older molds, along with mixing and matching sprues from other kits where applicable. This Cyber-Hobby Orange Box release of the Pz.Beob.Wg IV Ausf. J uses parts sprues from several different kits, many labeled Panzer IV, one labeled Panzer IV J, several Jagdpanzer IV and one labeled StuG III G.
The Germans developed all sorts of specialized versions of many of the armored vehicles in their inventories. Often older, obsolete chassis were converted into all kinds of configurations either as command vehicles, mobile anti-tank guns, mobile artillery, munitions carriers and artillery/command observation vehicles. The Pz.Beob.Wg. IV Ausf. J was developed to fill a desperate need for artillery command/observation vehicles as the quantity of earlier Pz.Beob.Wg IIIs built for this purpose had become insufficient due to combat losses and attrition. The first experimental Pz.Beob.Wg IV Ausf. J was completed at the end of January 1944. Beginning in April 1944, the plan was to convert every 25th newly built Pz.Kpfw. IV Ausf. J to a Pz.Beob.Wg. IV instead of using rebuilt vehicles. Depending on the reference source used, anywhere from 90 to 133 Pz.Beob.Wg IV Ausf. Js were produced from July 1944 to March 1945. It is believed that 112 of these served in combat units.
Kit Contents
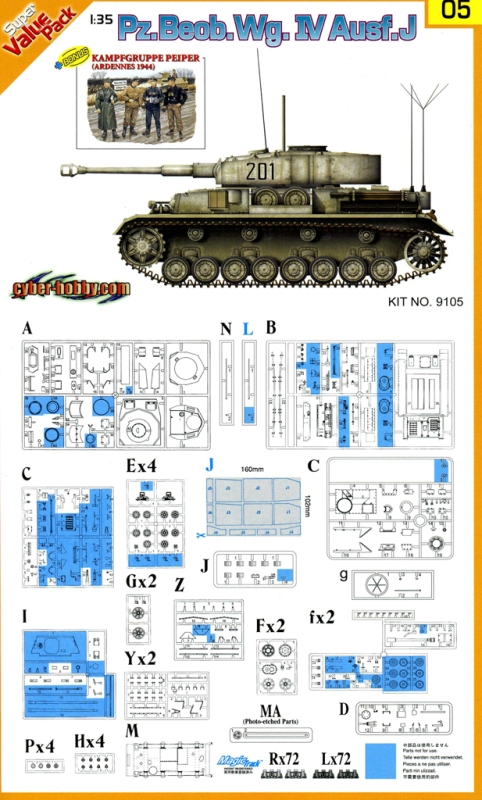
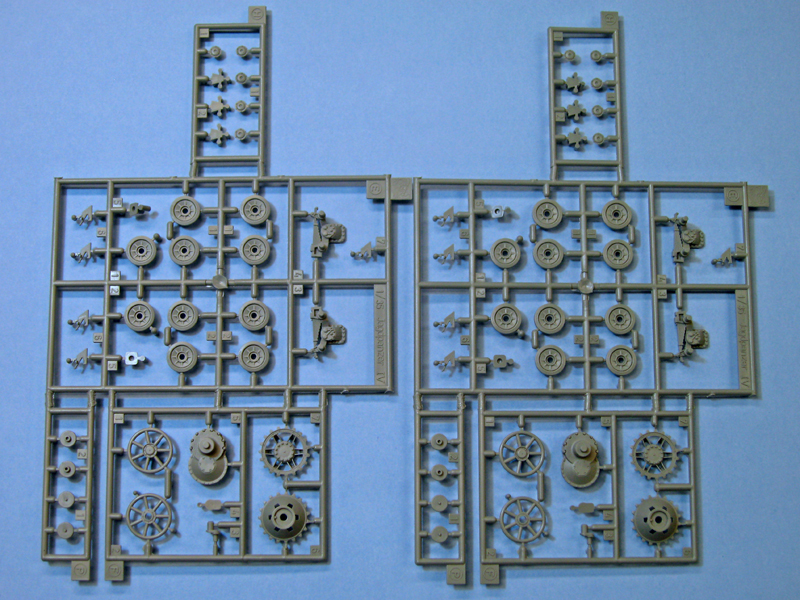
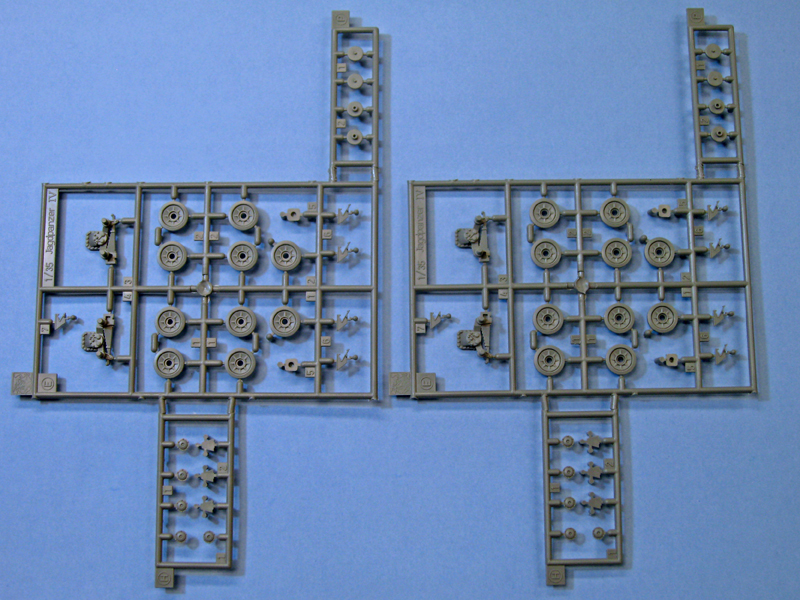
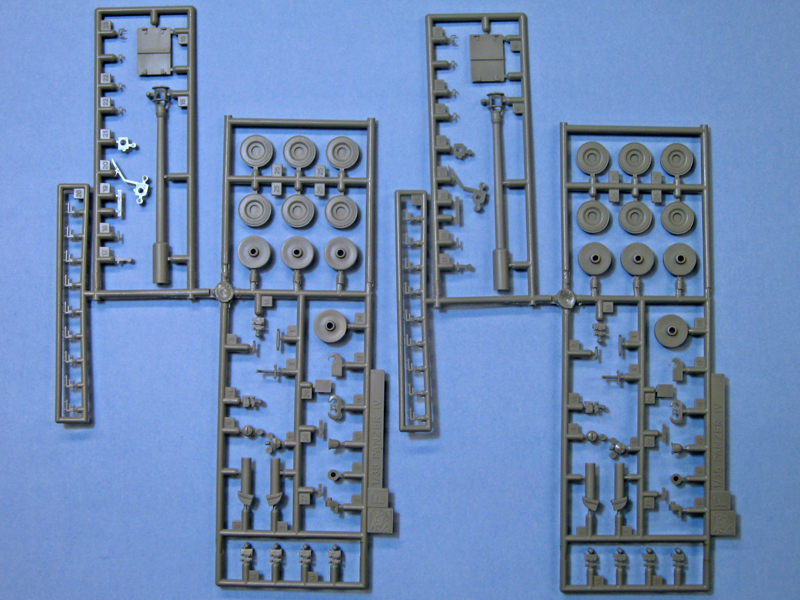
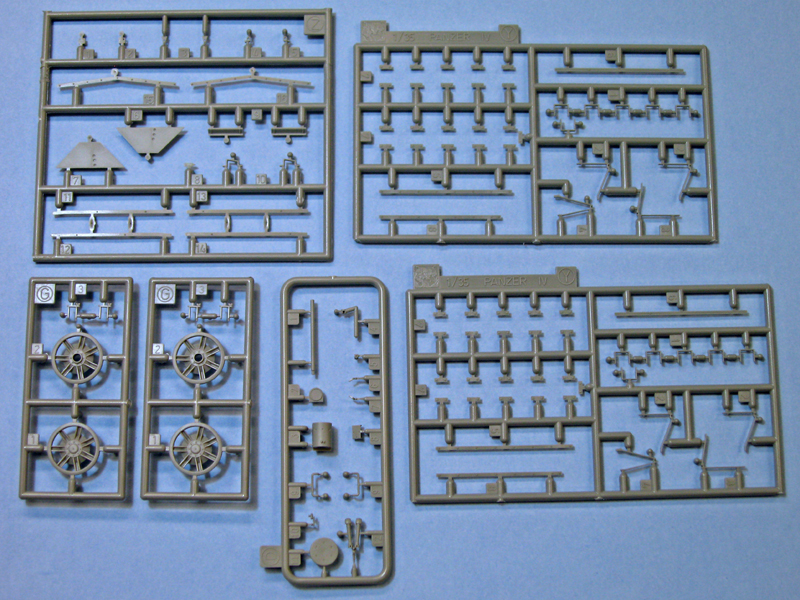
32 sprues gray plastic (as marked, many attached together on one sprue)
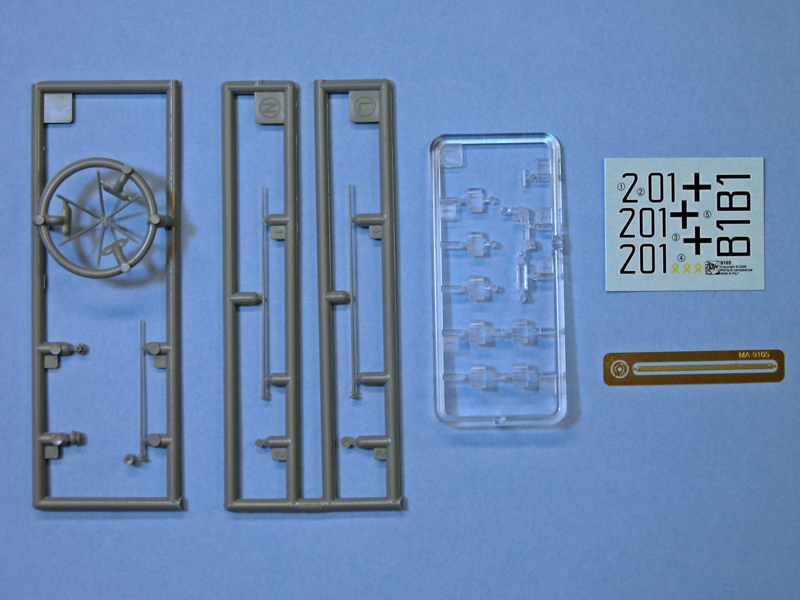
1 sprue clear plastic
1 small strip of brass photo etch
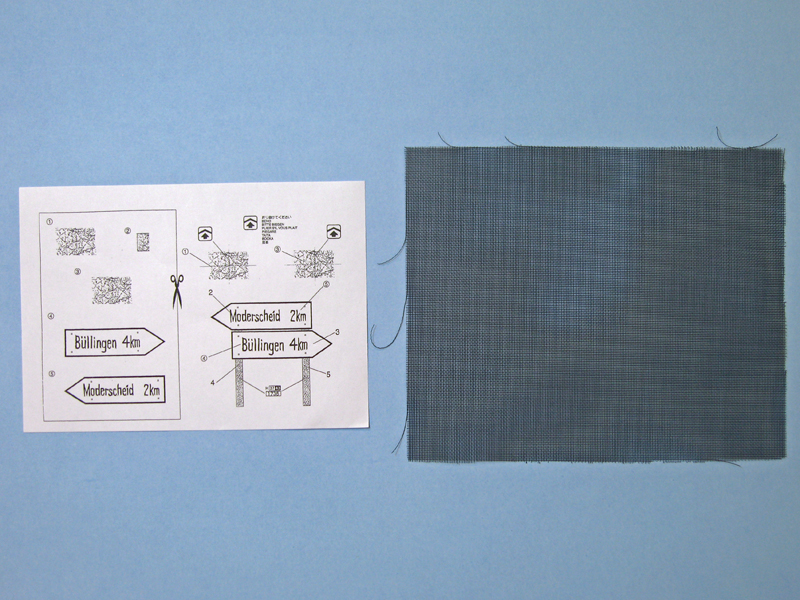
1 square of fine mesh (for the mesh side skirts)
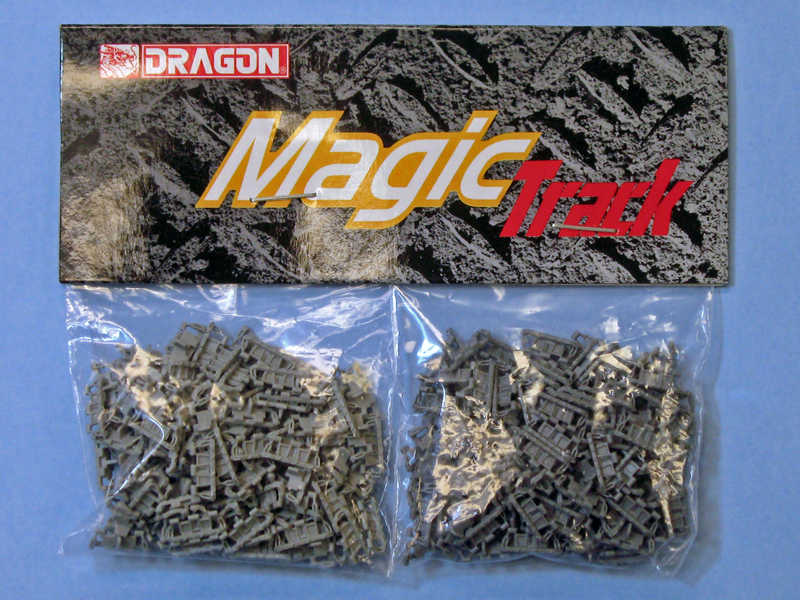
2 bags of sided magic tracks
1 small sheet of decals
1 fold out color sheet for the instructions
The instructions are printed in color on glossy paper in a smaller foldout sheet than what you typically find in their kits. Fortunately, the assembly diagrams are line drawings which are clear and relatively easy to follow.
review
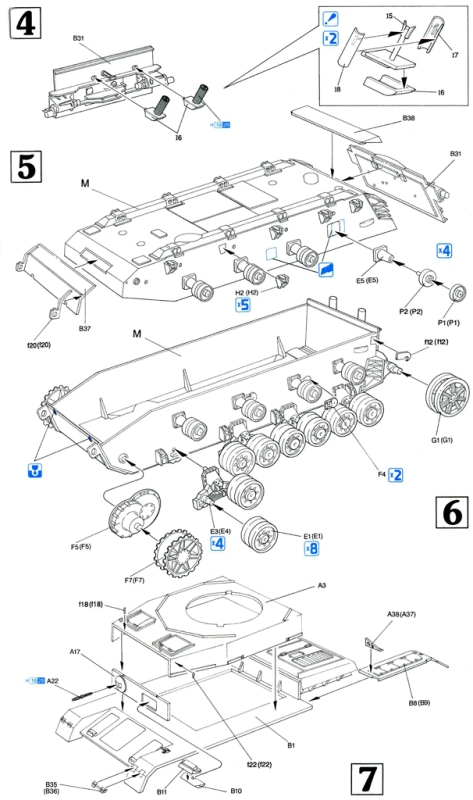
Lower Hull/Running Gear:
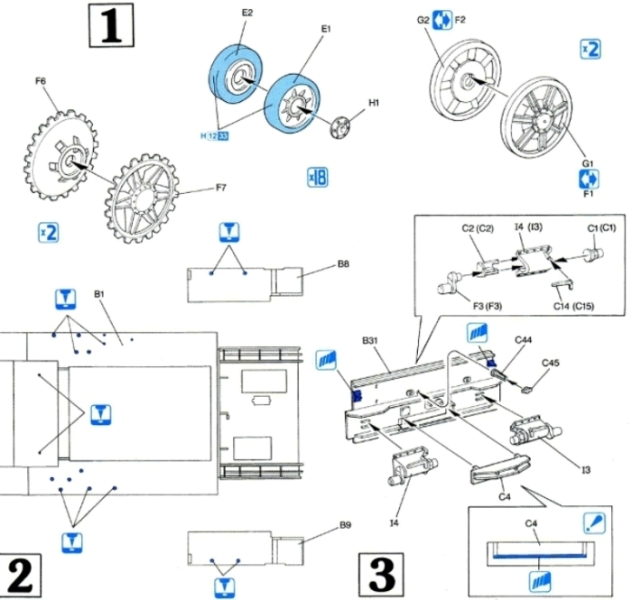
The lower hull consists of a three sided tub with a separate rear hull plate. The front armored nose plates are attached as a cap over the front of the hull box. I would imagine it is engineered this way to allow more economical production of different variants of the Pz.Kpfw. IV. The return rollers consist of three parts; the mount and two separate wheel rollers for each sub assembly.
The suspension consists of eight bogeys, a one piece bogey and two pairs of road wheels each. The idler and drive sprockets are two piece assemblies. The rear idler arms and mounts consist of five parts each allowing for good detail. The exhausts are the flammentöters which were introduced to the Ausf. J series August 1944, and are comprised of 4 parts each. There are grooved shapes on the hull sides to aid in placement of the return roller and bogey assemblies. There are two overlapping placement boxes on the hull for the rear bogies. The instructions would have you remove the one closest to the rear, but in reality you need to fill it since it is cut into the plastic hull.
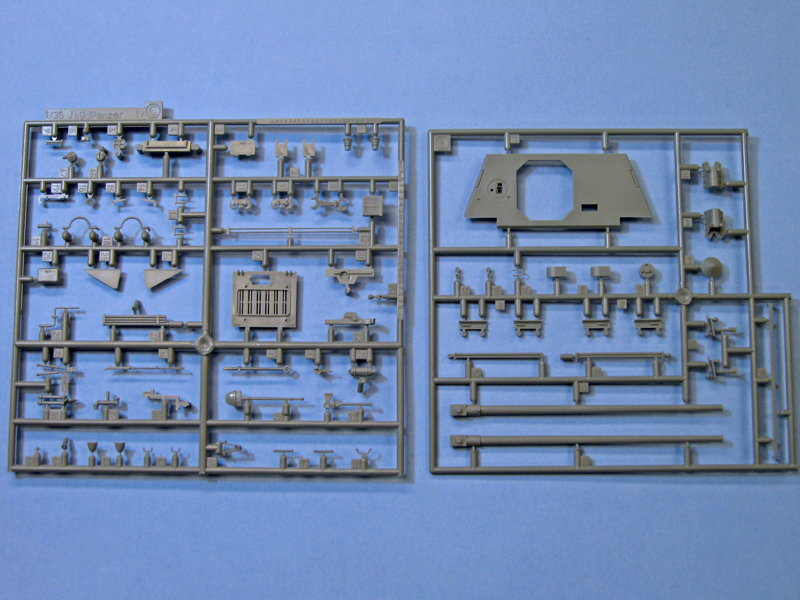
Upper Hull:
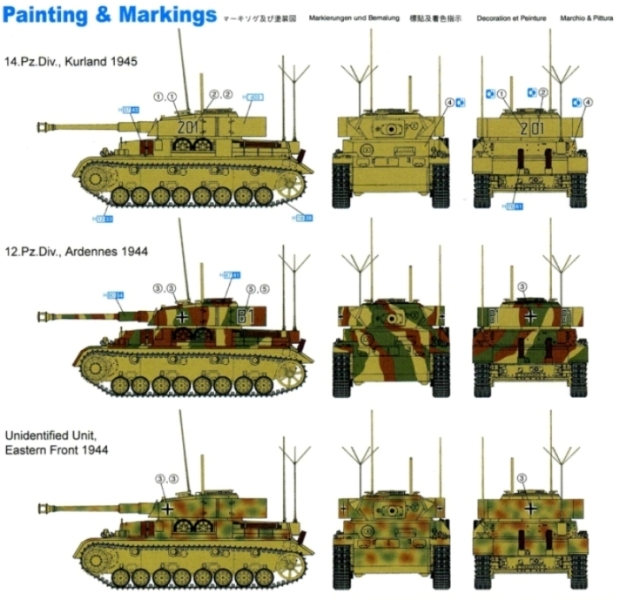
The features modeled on this particular variant of the Pz.Beob.Wg IV Ausf. J are typical of those produced after September 1944. That is good news to those of you who dread dealing with zimmerit as it was discontinued from the production lines September 1944. Pay close attention to your references as some of these did have zimmerit. The marking scheme in the kit for number 201 with the 14th Panzer Div. Kurland 1945 appears in reference photos to have zimmerit.
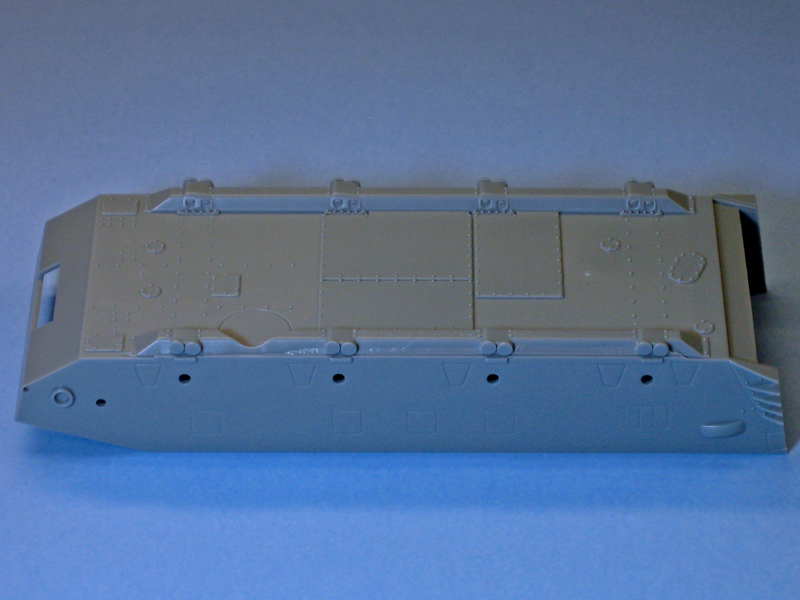
The upper hull consists of a single piece that includes the fenders, front plates and the rear engine deck. The upper hull superstructure is comprised of a single piece with a separate front plate. Three holes need to be drilled through each of the fenders. The hinges for the front fender flaps are molded separately and the detail looks nice. They will be tricky to remove from the sprue since they are molded as two hinges with a very delicate hinge pin between them that can be easily broken from bending or pressure. There is a tricky little sinkhole on the jack that will require some careful filling and sanding. I may have to dig up a replacement in my spare parts stash. The arrangement of the 3 antennas, including the stern antenna, is typical for a Pz.Beob.Wg. IV Ausf. J during the Winter of 1944-45. The stern antenna is quite delicate so extreme caution is advised when removing it from the sprue.
Turret:
The turret is a standard Ausf. J turret with a seven periscope commanders cupola from the StuG III Ausf. G, as it had a lower profile and provided better visibility when the hatch was closed. The kit includes the SF14Z scissors periscope which can be extended through a small hinged hatch without having to open the entire lid. One of only two photo etched parts is used here as the inner ring of the cupola behind the seven periscopes. The other PE part is for the pivot mount in the turret roof through which the T.S.R.1 observation periscope can be extended and rotated 360 degrees. Solid plastic side skirts are provided for the turret with beveled edges which better matches the correct thin scale thickness. The double doors mounted on each side of the turret are molded as one piece, to include the hinge assemblies.
Sideskirts:
The side skirts are the wire mesh
drahtgeflechtschürzen introduced to the Ausf. J series in September 1944. They used less metal and were lighter than the solid metal schürzen. A square of screen mesh is provided in the kit along with 1:1 scale templates printed in the instruction sheet that will help you cut the mesh to the appropriate sizes for each of the panels. I suggest making a photocopy of the instruction sheet so you wont have to cut up the original. It will be interesting to see how easy the screen is to cut to shape.
Tracks:
The tracks are individual magic track links that come in two bags, since the track links are different between the right and left sides. There are two bags of track links, the dark gray links are for the left side and the light gray for the right. The detail on the links is exquisite. The guide horns are the solid guide horns, historically accurate for this build.
Figures:
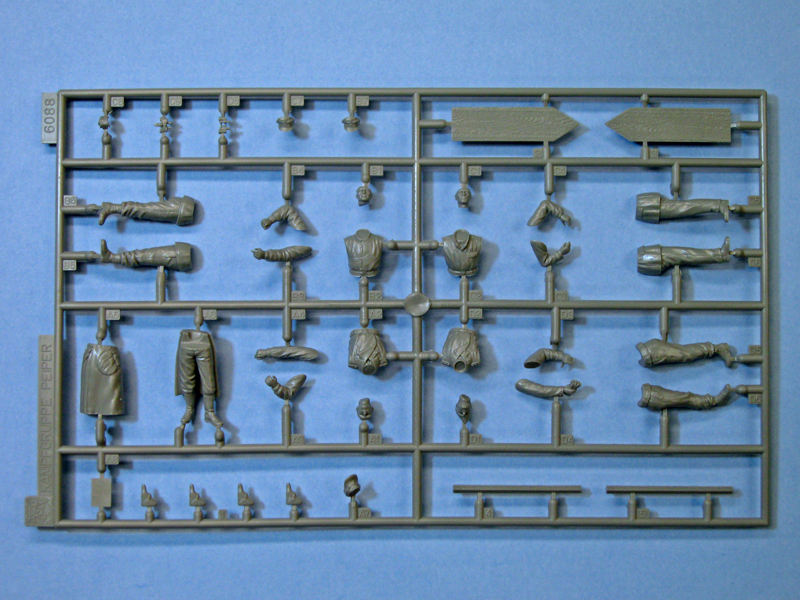
As an added bonus to the value of this orange box kit, Dragons Kampfgruppe Peiper (Ardennes 1944) figure kit #6088 is included (appears to no longer be in production). There are 39 parts on the sprue to include 2 road signs with a wood grain pattern. Paper road signs will need to be cut out from the sheet and somehow glued down onto the plastic. Hopefully some of the wood grain detail will show through. The detail on the figures looks decent with separate arms, legs, torsos, heads, caps, binoculars and pistols in holsters. The figures appear to be a generation behind when compared to some of my newer Dragon figure sets which feature more separate parts, equipment and PE for various details. Considering the affordable price of the kit, however, the figures are a nice bonus.
Conclusion
Overall this is a good bang for the buck kit of an interesting and unique subject. Cyber Hobby got all the major details right for a Pz.Beob.Wg. IV Ausf. J. Because this is an Orange Box offering that uses older molds, the detail is sometimes not as good or as crisp as what you would expect from a Smart Kit. With the magic tracks and screen schürzen however, it should build into a nice representation of the subject. For the price, this looks like a great kit! Follow along in my build log if youre interested in how the kit builds up.
References:Panzerkampfwagen IV Ausf. G, H and J 1942-1945
By Hillary Doyle & Tom Jentz, Illustrated by Tony BryanNew Vanguard #39
Osprey PublishingSd.Kfz. 161
PzKpfw. IV Ausf. G/H/J
vol.2
By Waldemar TrojcaEncyclopedia Of German Tanks Of World War Two: The Complete Illustrated Dictionary of German Battle Tanks, Armoured Cars, Self-Propelled Guns and Semi-Tracked Vehicles 1933-1945
By Peter Chamberlain and Hilary Doyle
Technical editor Thomas L. Jentz
A
Build Log has been started on the Forums to evaluate the kit construction.


Comments