Introduction
The arrival of the new Tamiya Matilda was warmly welcomed by the wider modelling community and a review of their kit was done by Matan Ram here on site:
Tamiya Matilda
This new 'Queen of the Desert', as the Matilda was affectionately known, opens up lots of new modelling possibilities and
Inside the Armour have taken this option a stage further by developing a full interior set for the Tamiya kit.
This is the second full vehicle interior kit that Inside the Armour have produced. The kit is designed for the new Tamiya Matilda Kit No mm35300 and provides an interior for either the Mk III or Mk IV version of the tank.
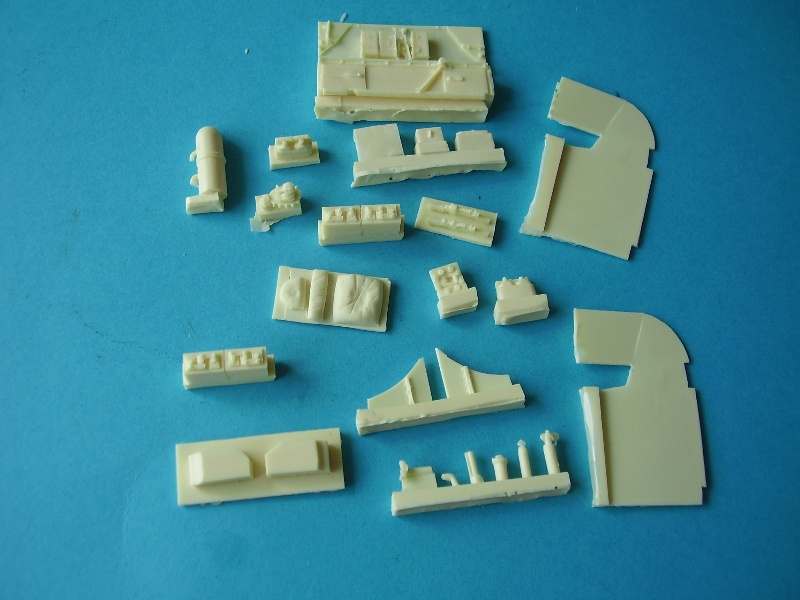
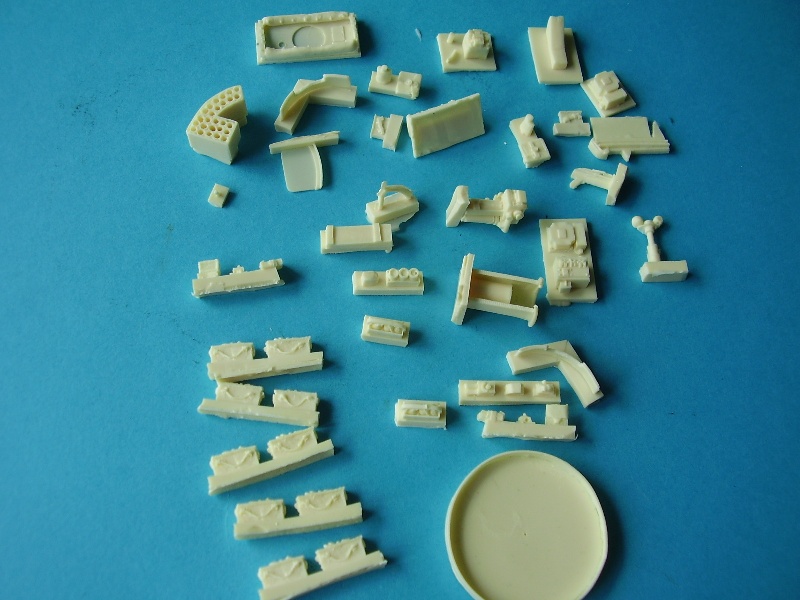
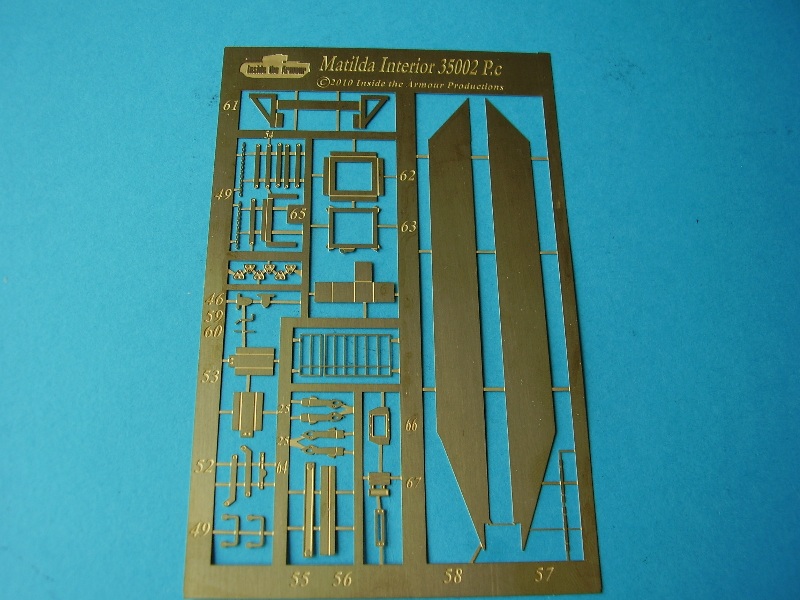
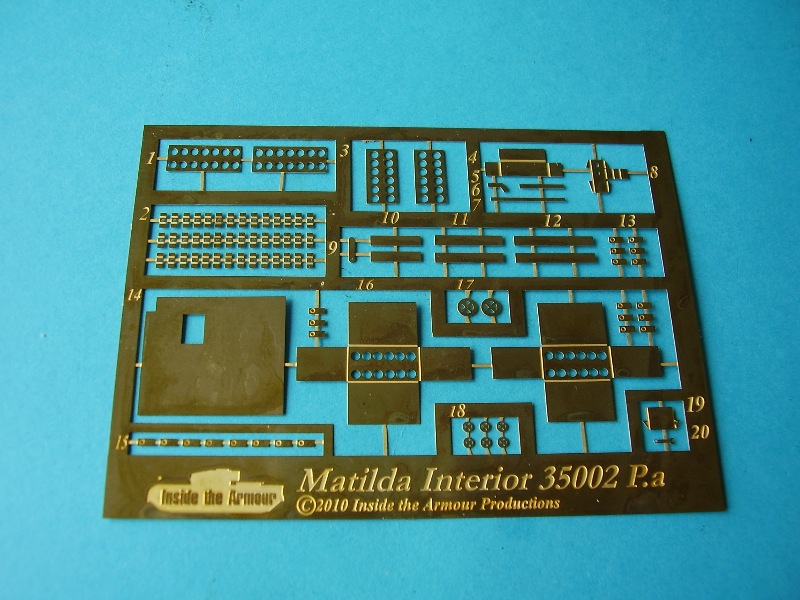
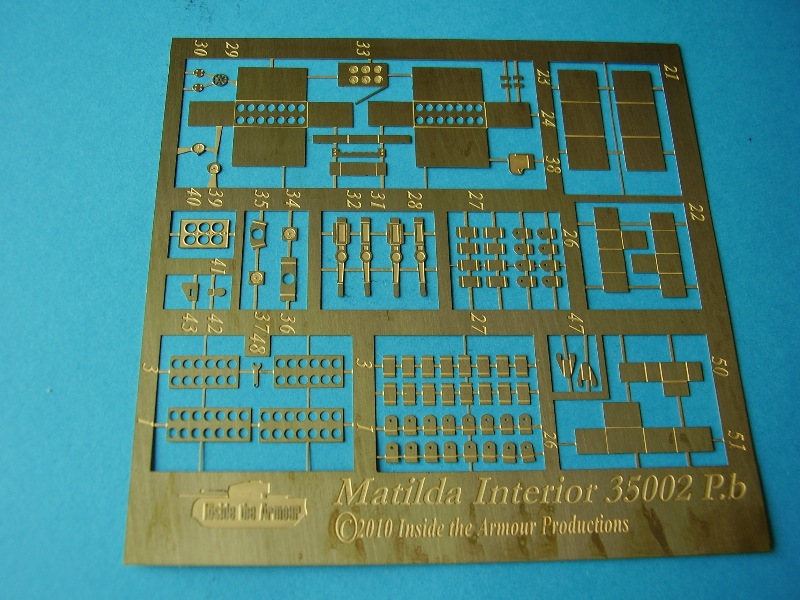
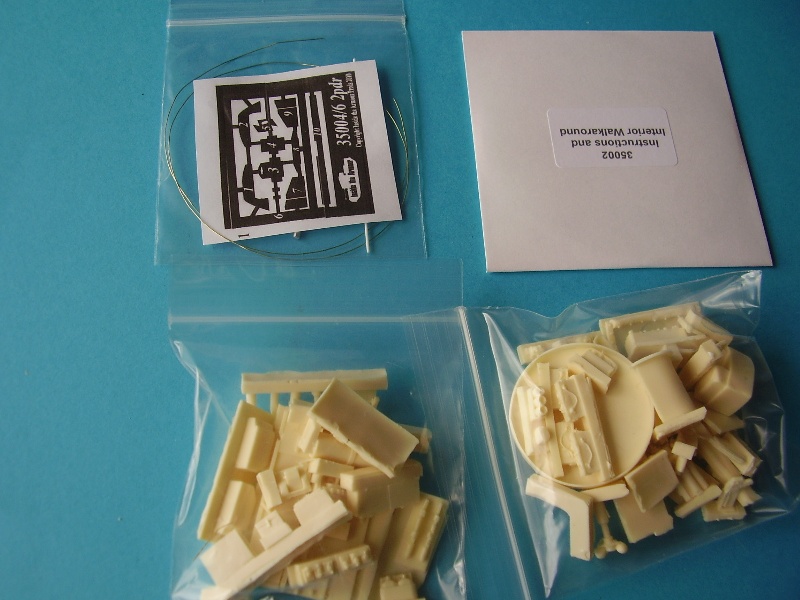
The kit consists of both resin and PE parts, a large proportion of the conversion is PE related and also provided in the set is a metal replacement barrel for the 2pdr gun which is a nice addition.
A new development is the inclusion of the instructions on CD disc format and as a bonus you get an excellent interior walk-around provided on the CD from
Toadmans Tank Pictures.
So lets see what you get:
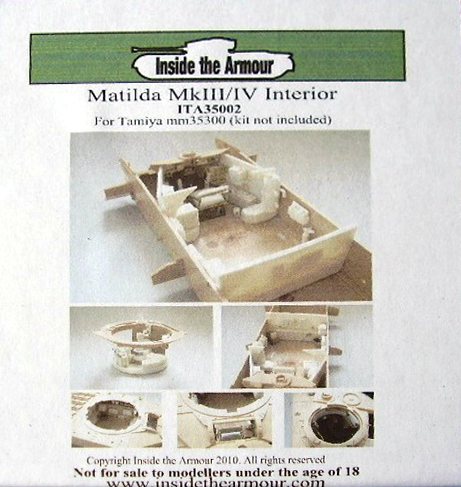
The Set
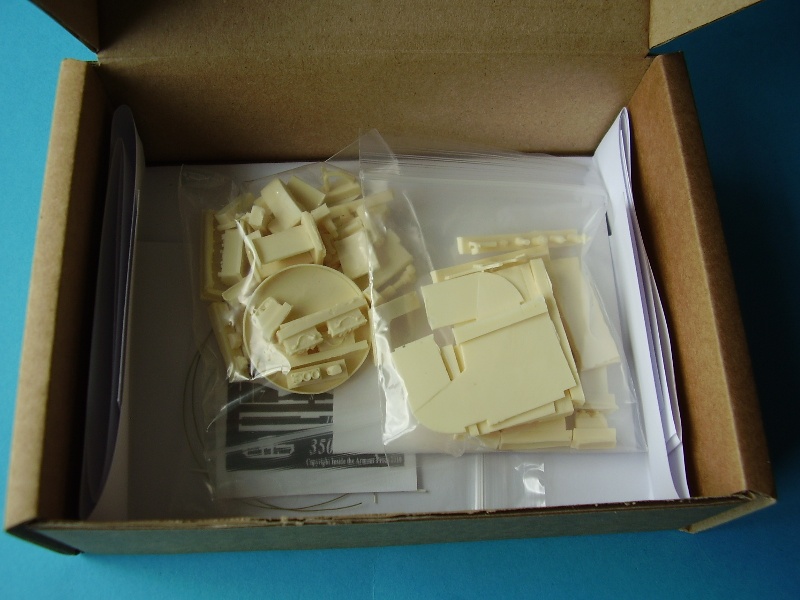
The set comes packed in a small sturdy cardboard box with the manufacturer and product detail outlined on the front. Inside the box are two plastic zip bags of resin parts, a small CD containing the build instructions and Toadmans Matilda Interior walk around, 3 large frets of PE, plus a smaller one, a zip plastic bag containing the metal barrel, some plastic rod and some brass wire.
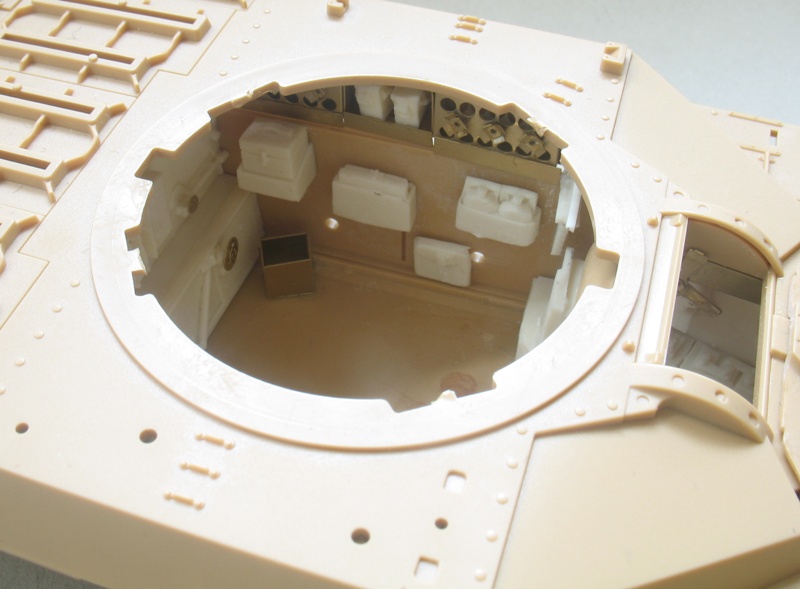
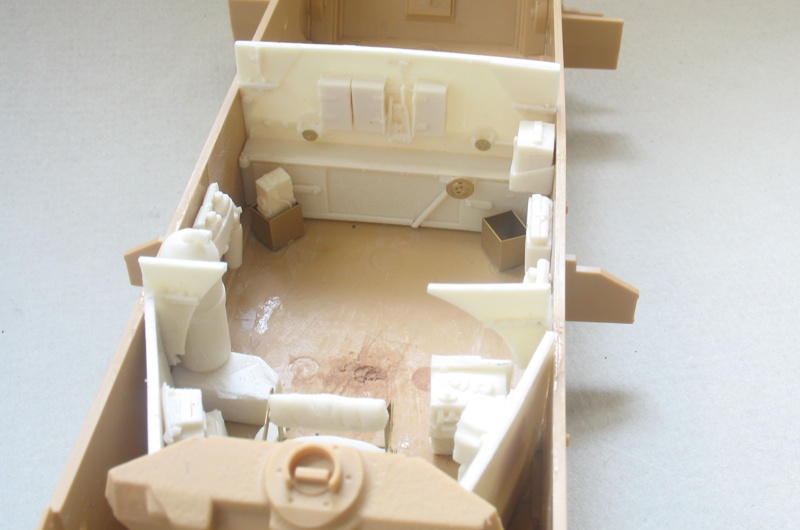
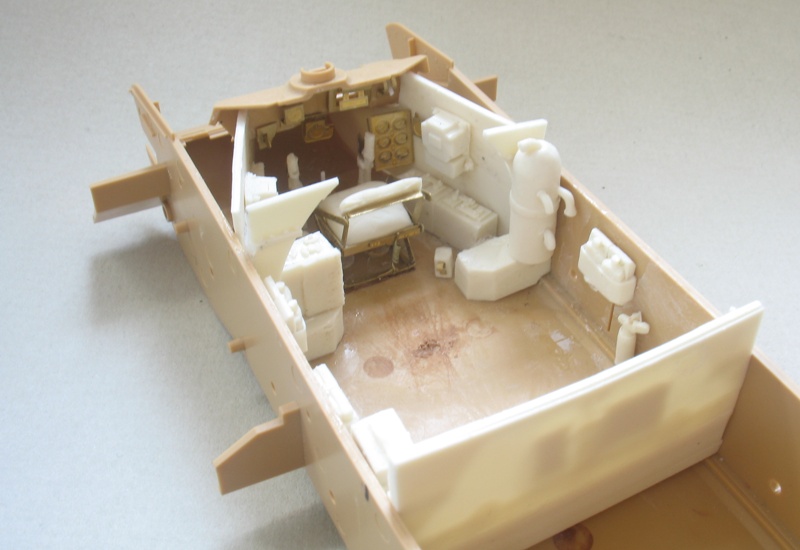
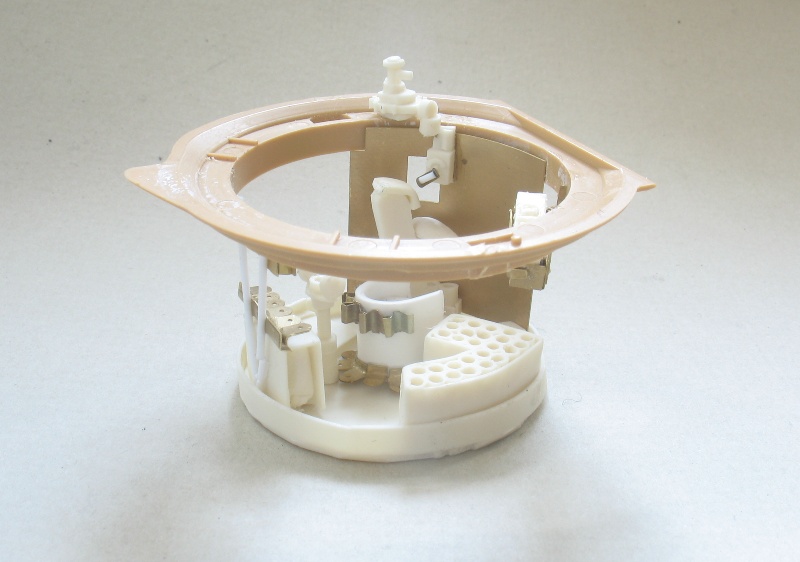
The parts are moulded in a light cream resin, and what is apparent is that the overall quality is much improved with the detail being much sharper and clearer than on the initial Churchill interior production run. There has also been a switch to PE for the ammo bins and this will also allow a much better detailed interior to be built.
There are no part numbers on the parts themselves but provided in the instructions is a 2 page parts list showing the part number and corresponding them to the build instructions. Whilst some of the parts are easily identifiable, over all I would like to have seen an identification list added to the parts list so that you know exactly what part 36 is, not just where it goes. This not only helps increase ones enjoyment and understanding of the build but makes parts more easily matched to diagrams and real pictures that you will need for reference.
I contacted Chris at Inside the Armour and he kindly sent me a parts list which Ive reproduced below for reference:
1. Drivers Compartment Walls
2. Electrical junction box
3. Batteries
4. Electrical junction box
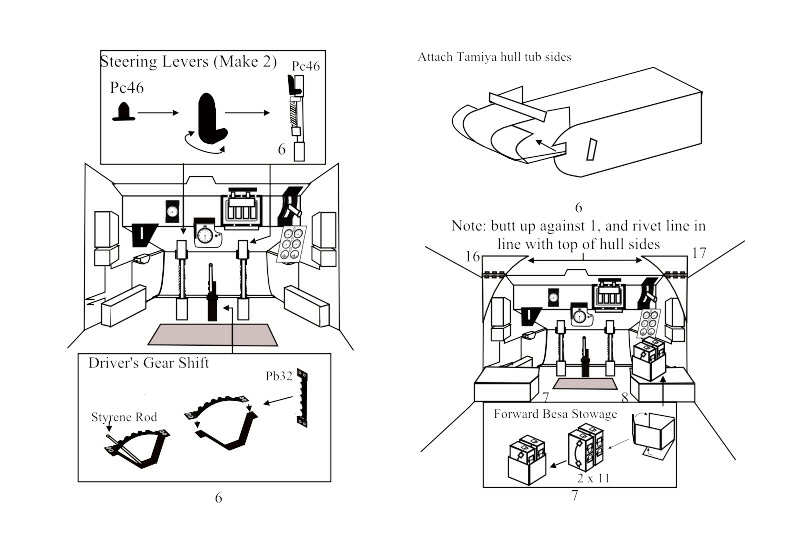
6. Drivers control levers
7. Floor bulkhead between drivers compartment and fighting compartment (right side)
8. Floor bulkhead between drivers compartment and fighting compartment (left side)
9. Fuse Box
10. Drivers seat pad (bottom)
11. BESA ammunition
12. Drivers seat Pad (Back)
13. Water bottle
14. Oil can (requires wire to assemble)
15. Firewall
16. Upper bulkhead between drivers compartment and fighting compartment (right side)
17. Upper bulkhead between drivers compartment and fighting compartment (left side)
18. Compressed air reservoir
19. Valve for Compressed Air Reservoir
20. Combined water bottles and spare periscope blocks
21. BESA tools
22. Unknown stowage. Possibly power traverse spares
23. Inner mantlet
24. BESA
25. 2pdr Breech and free elevation shoulder pad
26. Number 19 set
27. Power Pack for 19 set
28. (not used)
29. Pistol Port
30. Grenades
31. Number 19 set variometer
32. Recuperator for Power Travers
33. Gun sight
34. Spare Telescopic sight
35. Turret cable coupling
36. I/C boxes
37. Stowage box for Number 19 set parts
38. Spare triplex blocks
39. Signal Satchel
40. Headpads for cupola ring
41. Turret turntable
42. 2pdr stowage
43. Power takeoff conduit for the turret
44. Turret power takeoff and 2pdr stowage
45. Commanders pedestal
46. Compass binnacle
47. Smoke bomb cartridges
48. Gunners seat
49. Gunners seat pad
50. I/C box
51. Satchel (in frame)
52. Turret traverse Motor
Other 48; spare periscope prisms and brushes
Photo Etched
Four Frets of photo etched parts are provided to add extra detail to the set. These are nicely done and not quite as daunting as I first thought. They should add considerably to the build and the bins look like you could load shells into them if you wish!
Instructions
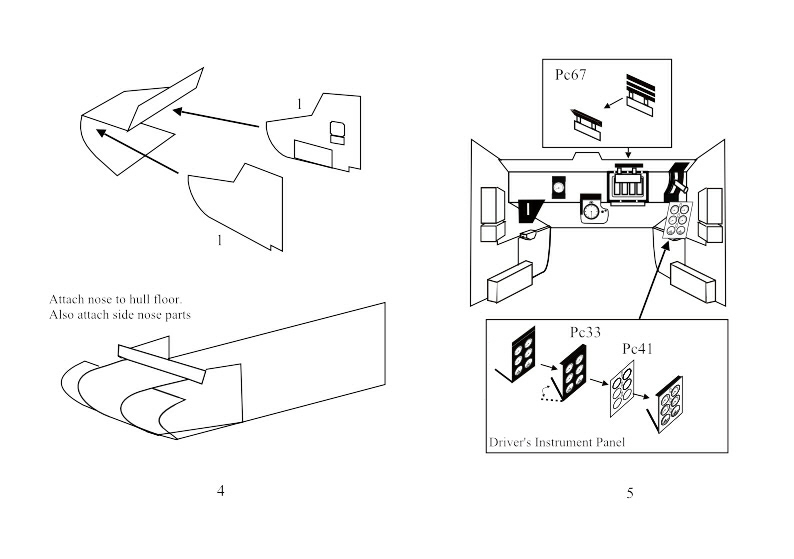
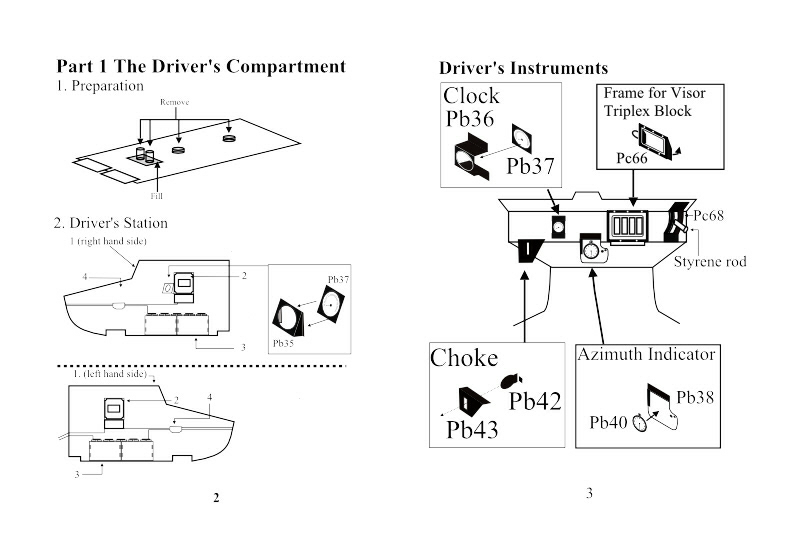
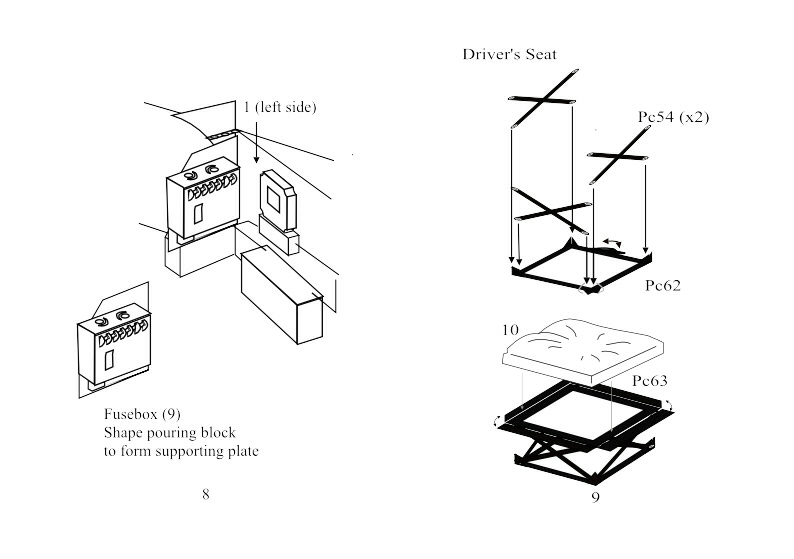
The instructions are laid out in 4 Parts. Part 1 covers the construction of the drivers compartment, Part 2 the building of the fighting compartment, Part 3 completion of the upper inner hull and Part 4 the building of the turret interior, with a final section on Completing the build. My advice here is to upload the information directly onto your computer and either work from screen or print off the pages as you need them.
What would have been good to include with the instructions would have been a copy of the interior stowage sketches, although with the inclusion of the walkaround mentioned below you may not feel these are necessary.
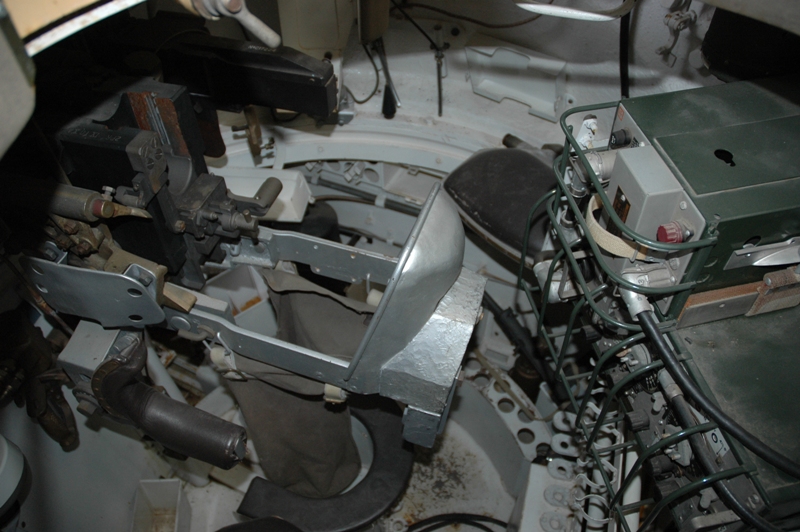
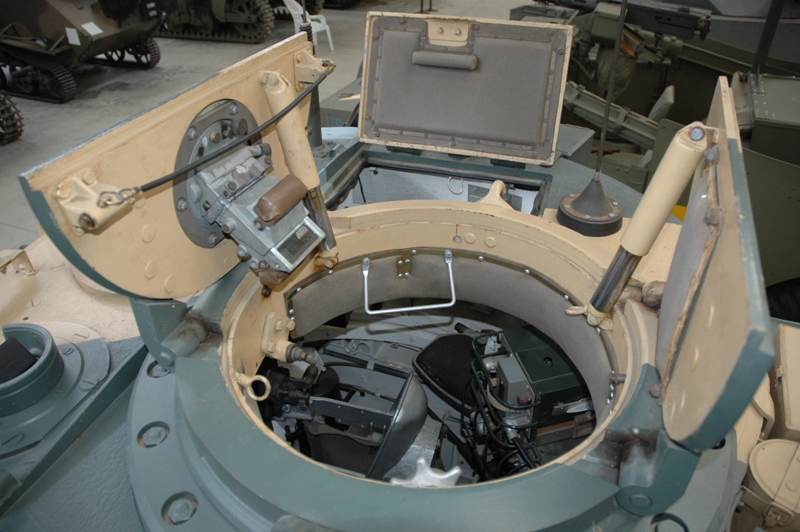
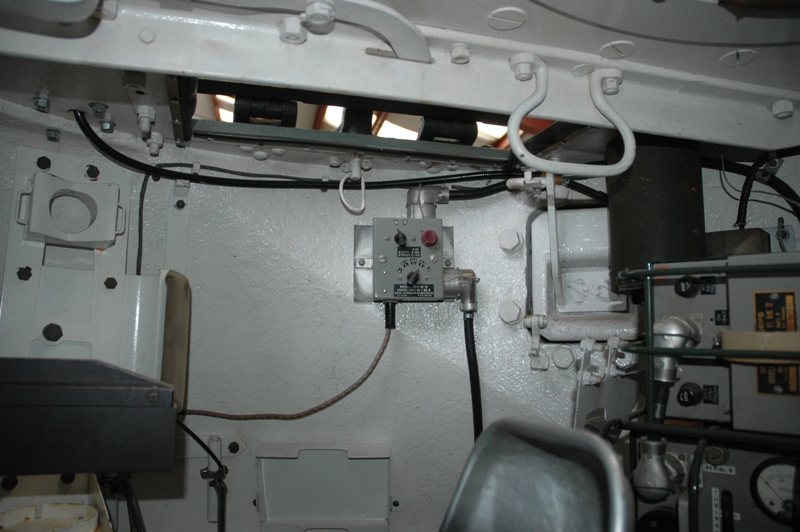
The Walkaround
Provided courtesy of
Chris Hughes of Toadman's Tank Pictures is an excellent 33 picture walkaround of the Matilda Interior. These are quality high resolution photographs that will be of great use when building the set.
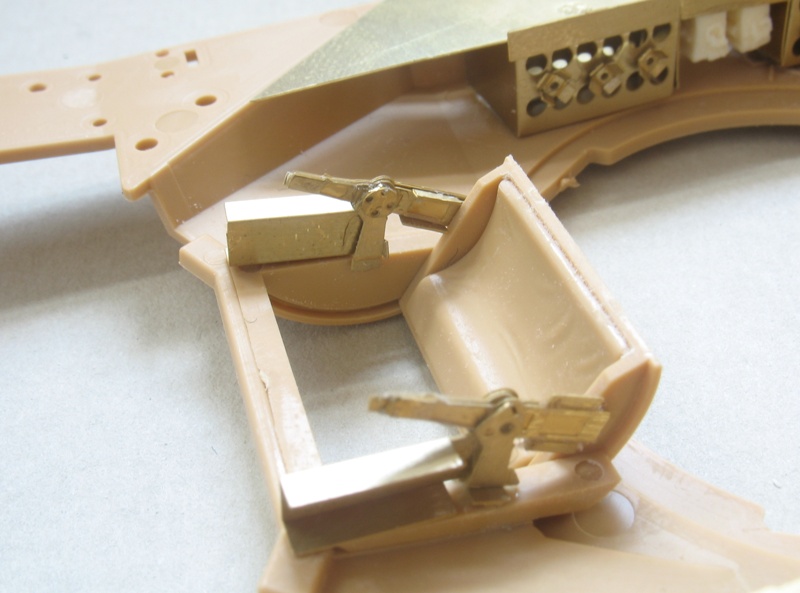
I have included a number of the original build pictures from Inside the Armour at the end of the review, again just for additional reference material.
Conclusion
This is an excellent set to enhance your Matilda Mk III or IV. The overall casting of the parts looks extremely good and you get a comprehensive range of fittings for both the hull and turret interior. The inclusion of a replacement 2pdr gun barrel is also a plus.
The presenting of the instructions on disc and the excellent walk around from Toadman's Tank Pictures should give you just about everything you need to make a successful build.
Interiors are not for everyone, but if you do like them then you should enjoy this set. There is quite a lot of PE to deal with but overall this should enhance the build considerably, it is not a medium I personally favour but I have found that if you take a bit more time it usually works well. A good tool helps, something I may have to invest in.
Overall I see significant improvements in the detail and casting in this set. Many of the parts are quite small as is the Matilda interior, so take care not to lose any to the carpet monster.
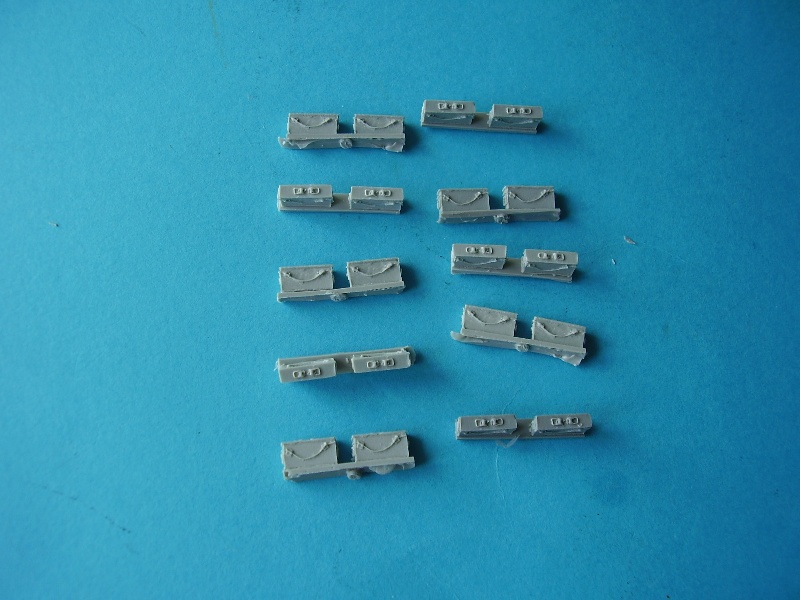
Chris has recently re-mastered the Besa ammunition boxes available in set 35011 and these are now included in the kit as standard. I have added some additional images at the end of the picture listing.
So if you are looking for something special, a little different perhaps or just like a challenge then this set should meet that need and give you a lot of fun and a highly detailed model at the end of the build.
Normal precautions apply when working with resin.
References:
Tank Power Volume XL11 (267) Matilda from Bronco5
Toadmans Tank Pictures Walkaround Toadman's
Post Script
Just announced
here is an update set of ammo stowage to add yet more detail to the Matilda turret interior.


Comments