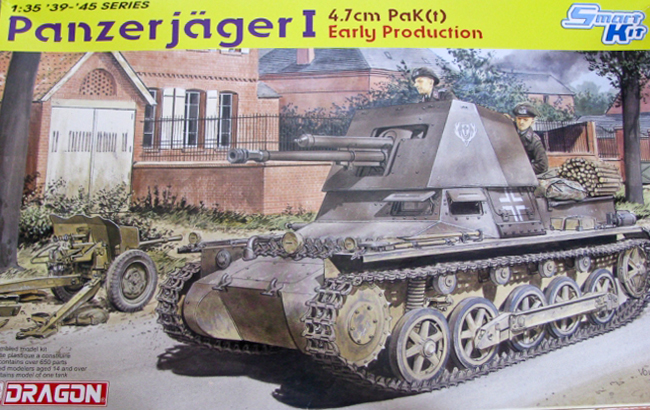
Introduction
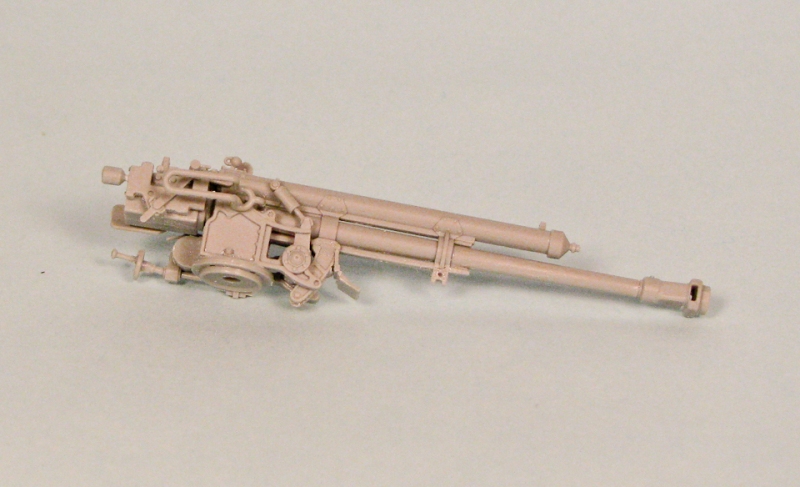
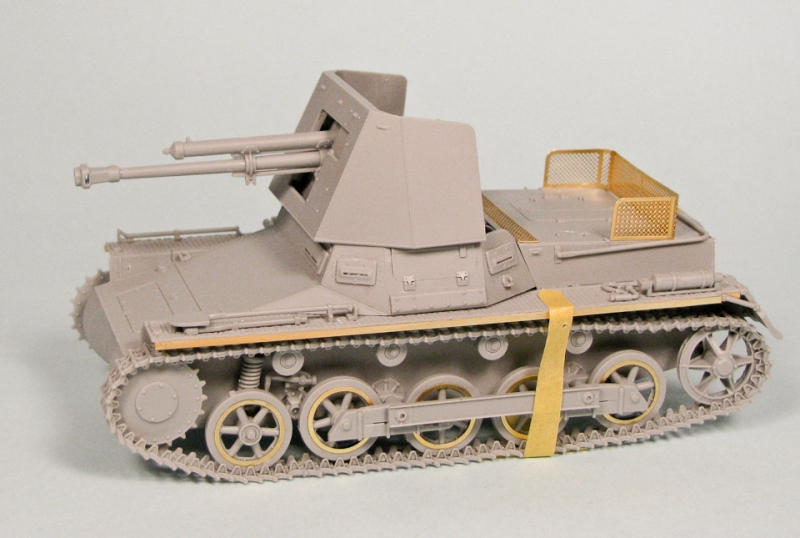
During the Polish campaign in 1939 the German Army met the need of powerful mobile anti-tank weapon. The company Alkett mounted on a chassis of Panzer I Ausf. B captured Czech 47mm gun (later called Pak (t) L/43,4) that was capable of piercing 60mm armor. The original tank turret as well as some of the superstructure was removed, and a new open top five-sided fighting compartment was made. The gun lost its wheels and trails and received a new gun shield. In the spring of 1940, 132 Panzerjägers were produced and they battled in France and later in Barbarossa operation. Later, a 7-sided superstructure was introduced (this model was previously released by Dragon; cat. no. 6230). Even though KVs and T-34 (as well as Matilda in Africa) were invulnerable to Panzerjäger I, some vehicles were still used until 1943.
contents
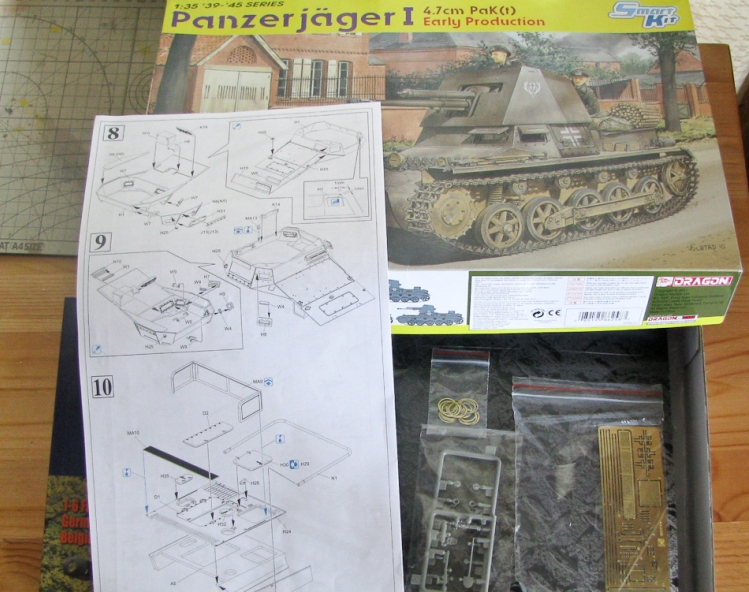
The kit comes packaged in the standard
Dragon slip-top cardboard box with nice artwork from R. Volstad on top and the kits features printed on sides. Inside everything is packed in individual bags and a Dragon card with PE parts, decals and magic tracks on it.
The box states that the kit has more than 650 parts (I havent counted) and those include:
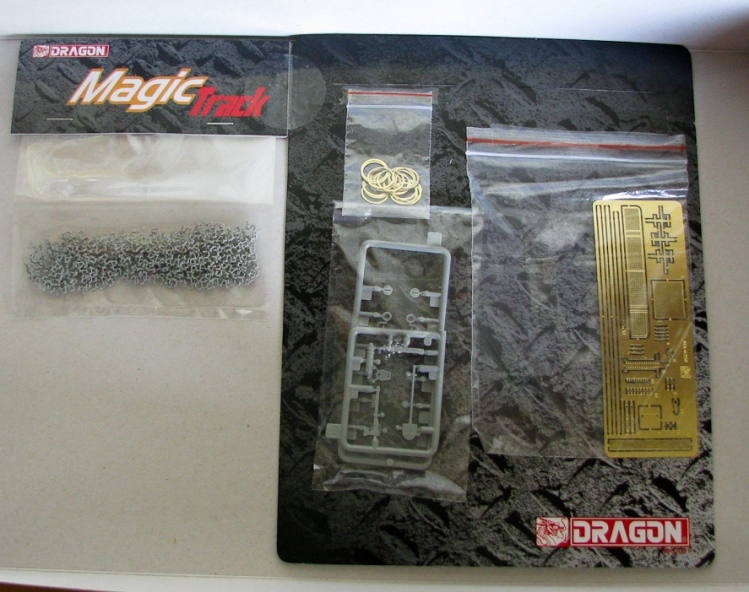
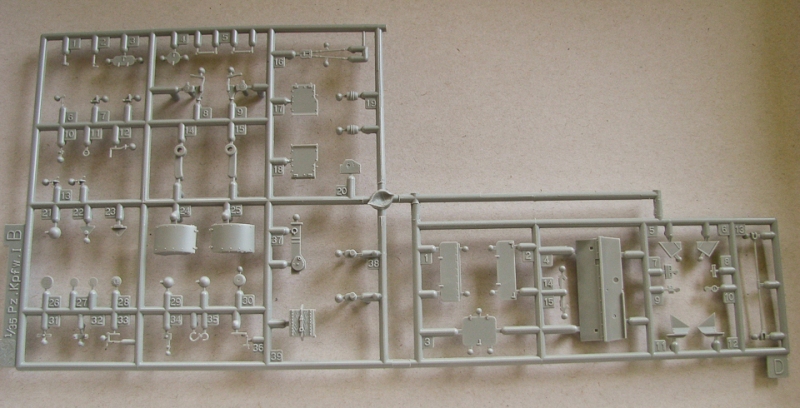
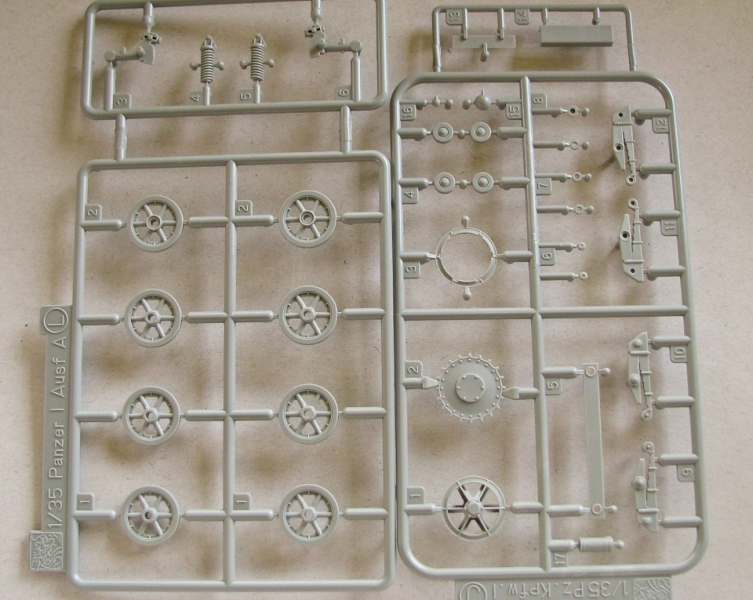
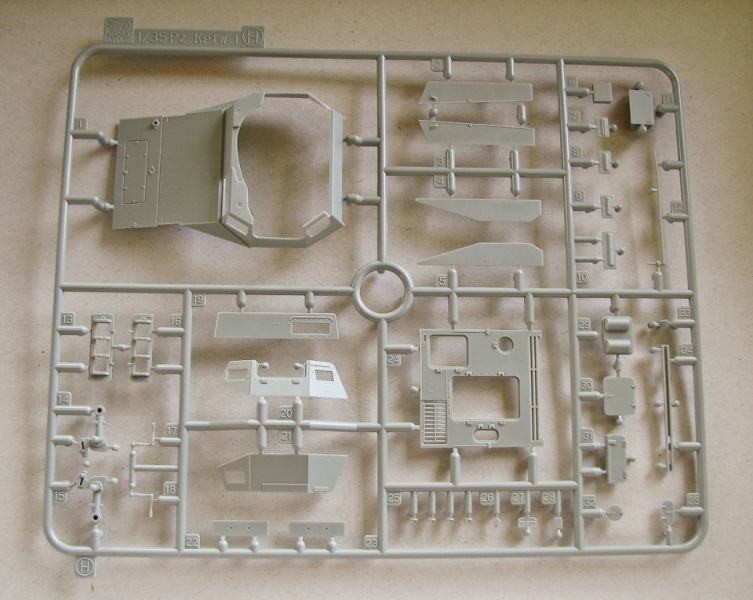
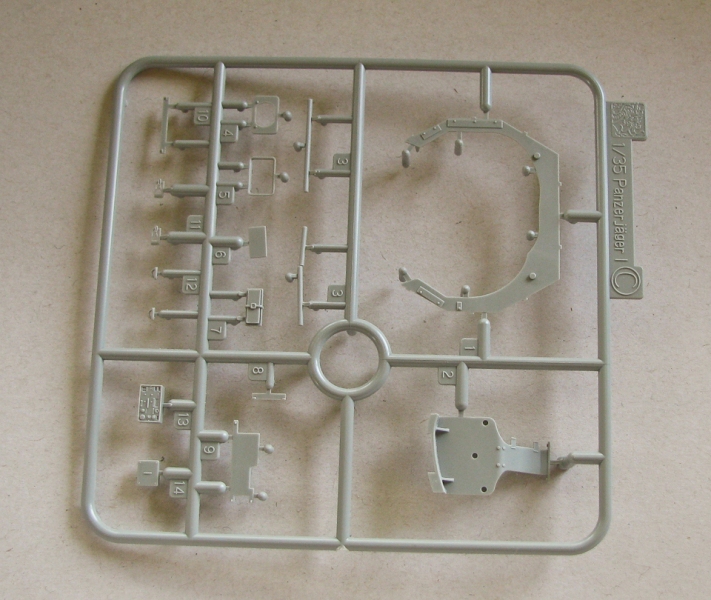
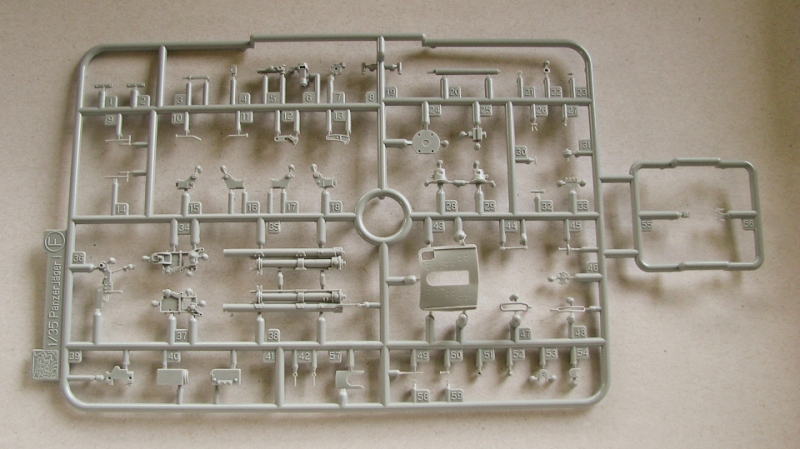
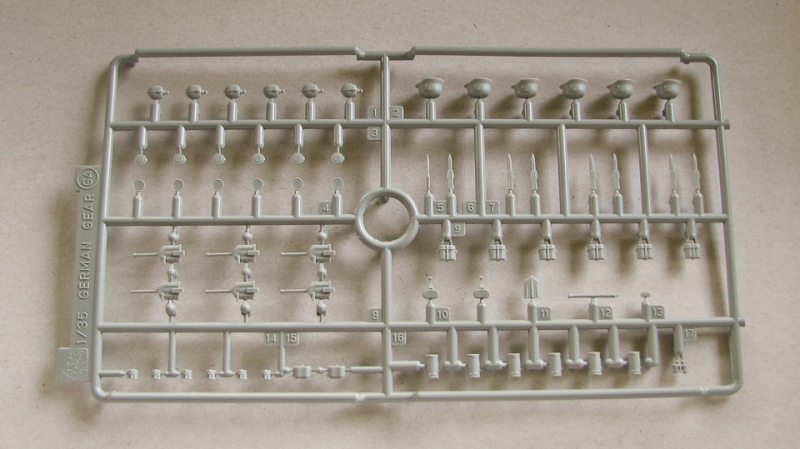
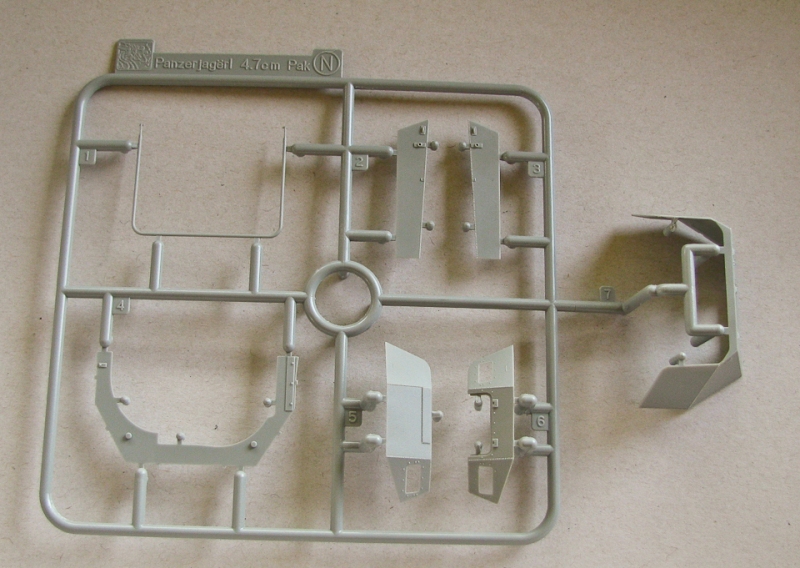
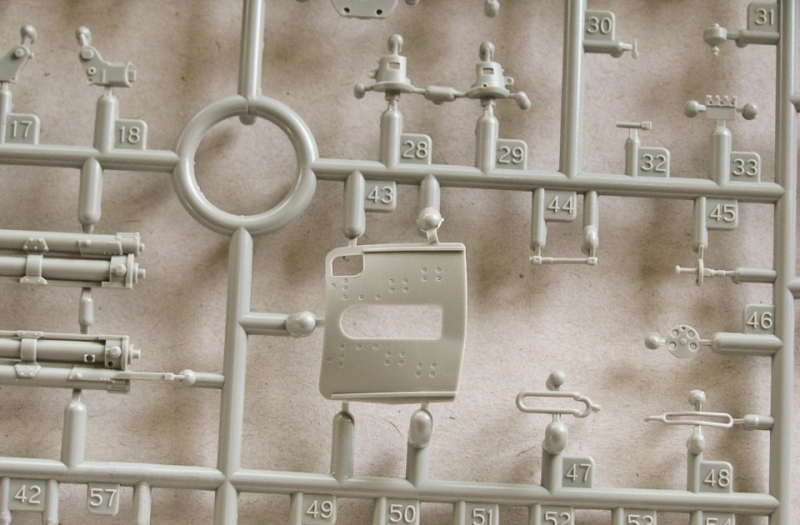
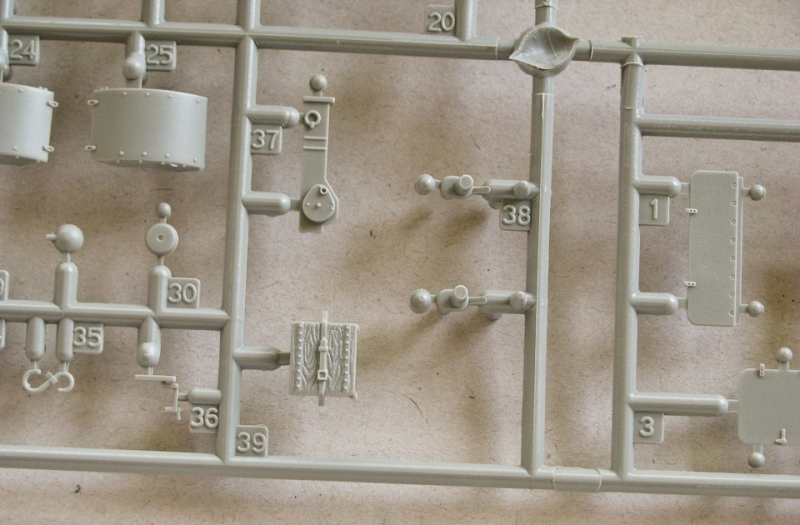
15 grey styrene sprues (including one Gen2 personal equipment sprue - gas masks, helmets, knives, flasks and shovels)
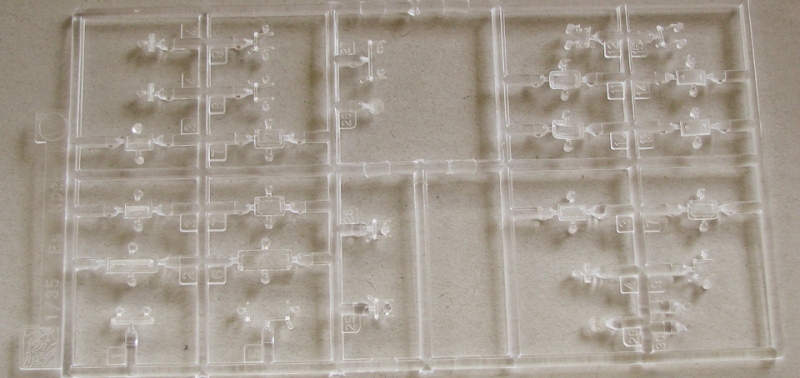
2 clear styrene sprues (each has enough parts for 1 model)
1 grey styrene lower hull with fenders
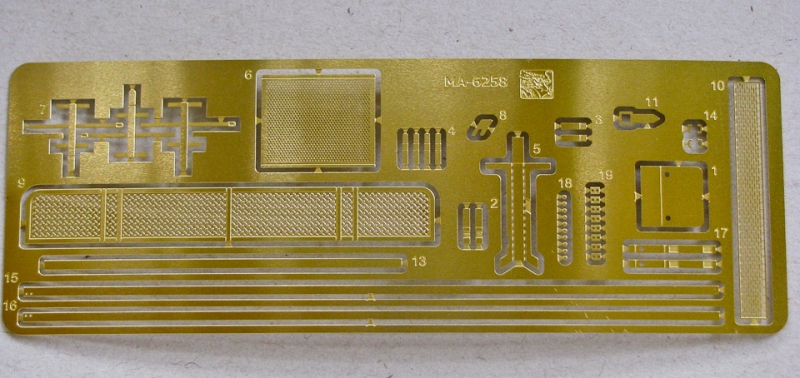
1 PE fret
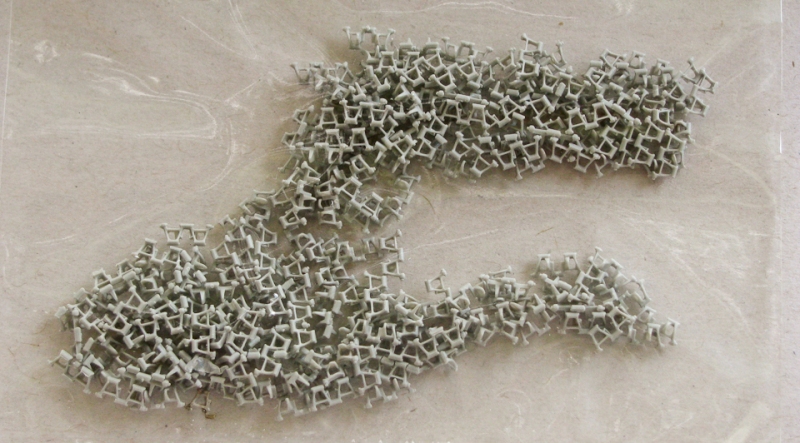
1 bag with 216 individual magic tracks
1 bag with PE road wheel rims
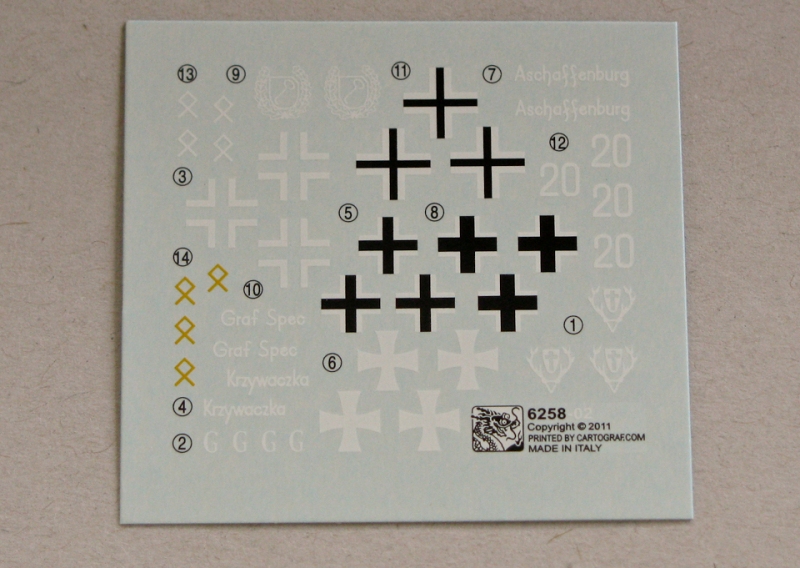
Decal sheet and instructions
in brief
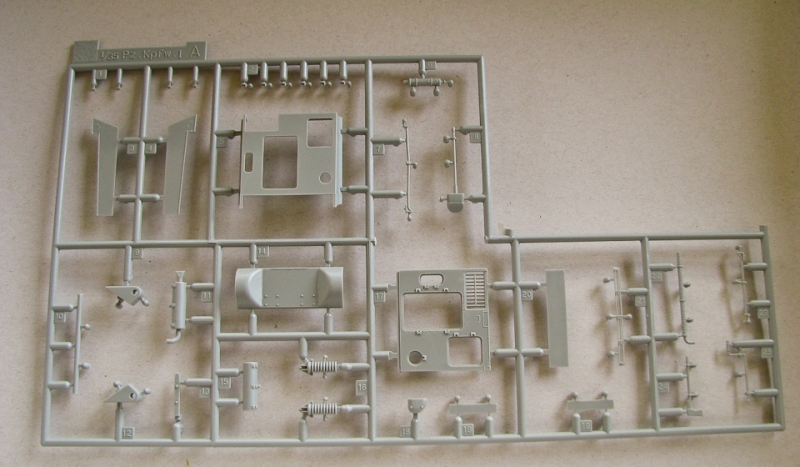
This is basically the same kit as Dragon Panzerjäger late version kit (cat. no. 6230, released in 2008) apart from sprue N that carries the new fighting compartment armor, upper hull and engine deck parts corresponding to early Panzerjäger I. Also, the PE fret differs from 6230 parts for the jerry cans are excluded. At this stage you will notice the first flaw of the kit the instruction still depicts the PE fret from 6230 so many PE part numbers will be wrong in the instructions.
As usual, not all parts will be used and you will have some leftovers for your spare parts box. Please note that it is not possible to build a late version of the Panzerjäger from the kit because the late fighting compartment armor is not included.
Overall, I was very impressed by the quality and sharpness of the parts and started to build the same day I got the kit. I finished the "out of the box" build in a couple of evenings and it gave me a lot of fun (hope you will enjoy it too!).
Step-by-step build
The instructions have exploded view drawings and requires attention. Please be careful and check everything before gluing, especially with PE parts. Overall, the fit was excellent and went without any problems. Below I will try to focus your attention on crucial/interesting points and give some additional detailing hints for those that dont want to go 'OOB'.
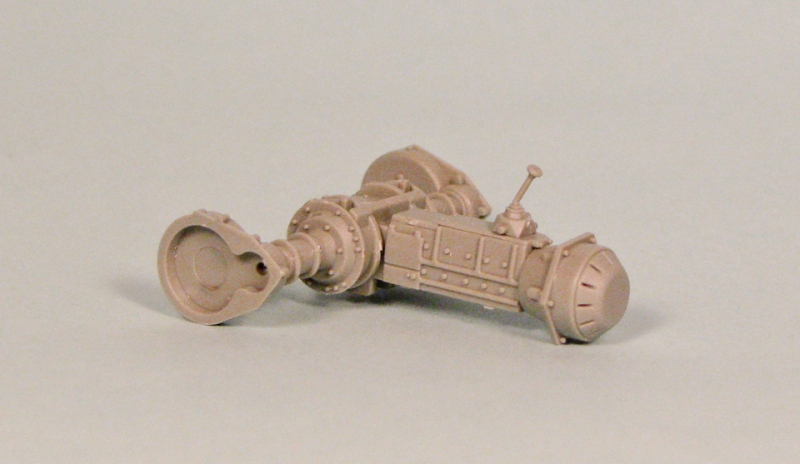
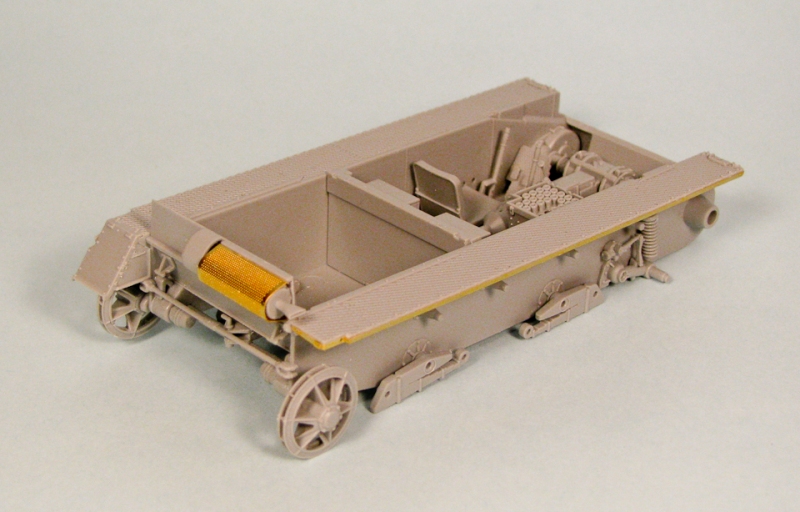
Steps 1-4, running gear and lower hull:
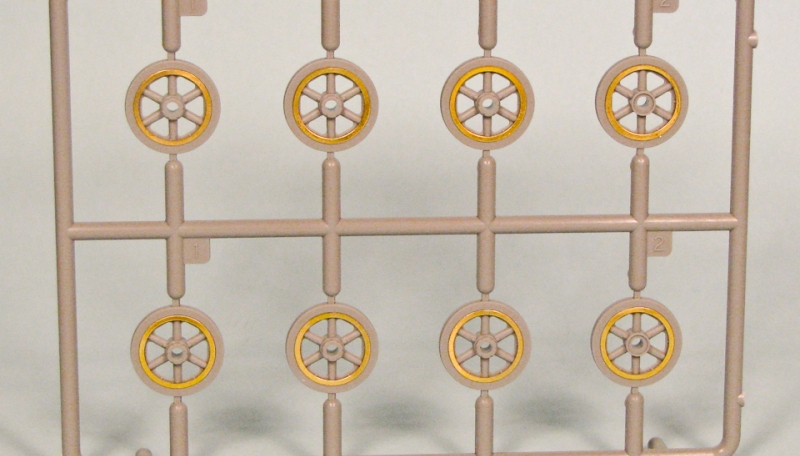
Construction begins with road wheels and those are really nicely detailed and have separate PE rims. That is a big step forward from earlier Dragon models (6186 and 6207), and was featured previously on late Panzerjäger (6230) and Flakpanzer I premium edition (6577) models. I glued those rims before cutting the wheels from the sprues to ease handling. Note that you must have only 2 first road wheels (part L2) and 8 others (part L1).
The idler wheel is made of 2 parts and depicts the correct metal idler wheel with a gap between disks (previous Panzer IB kit #6207 had wrong idler).
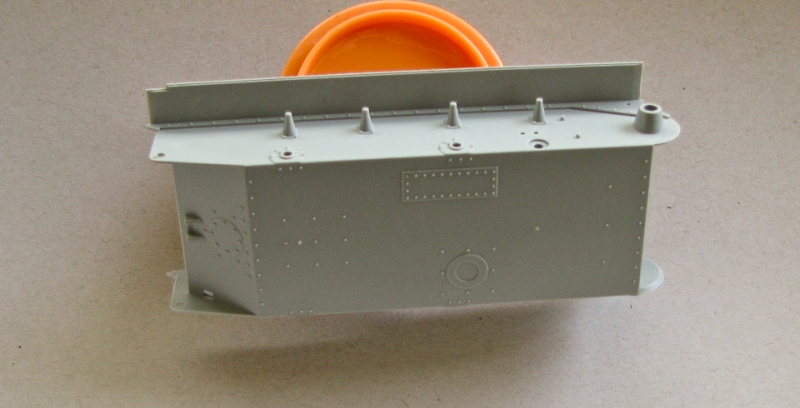
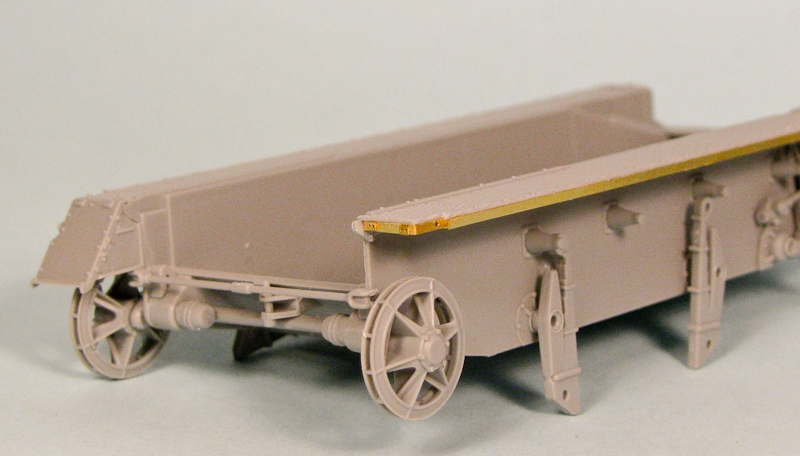
The lower hull comes with fenders and the edges of fenders are made from separate PE parts, thus significantly increasing the detail of the model and saving you some money from purchasing after-market products. Both lower hull and front armor plate have correct weld seams and great rivet detail. As mentioned above the PE part numbers are wrong so MA5 should be read as MA18, MA7 as MA19 and MA3 as MA17.
Suspension units can be done workable if you dont glue parts J11 and J12 to the hull but only to the parts J7. Depending on how you prefer to paint wheels (glued to the hull or separately) you can proceed to further steps without actually gluing everything to the hull. But dont forget to glue the rear wall with nicely done PE muffler guard (that rolled perfectly without any annealing).
For additional detailing you can add the weld seams that are lacking around parts A9 and A12 (idler adjustment mechanism) and small chains on the trailer hitch and idler adjustment mechanism caps B19 (see references).
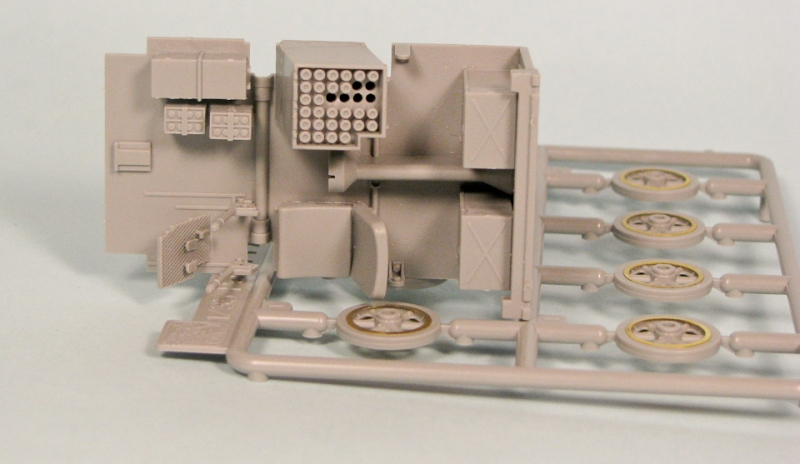
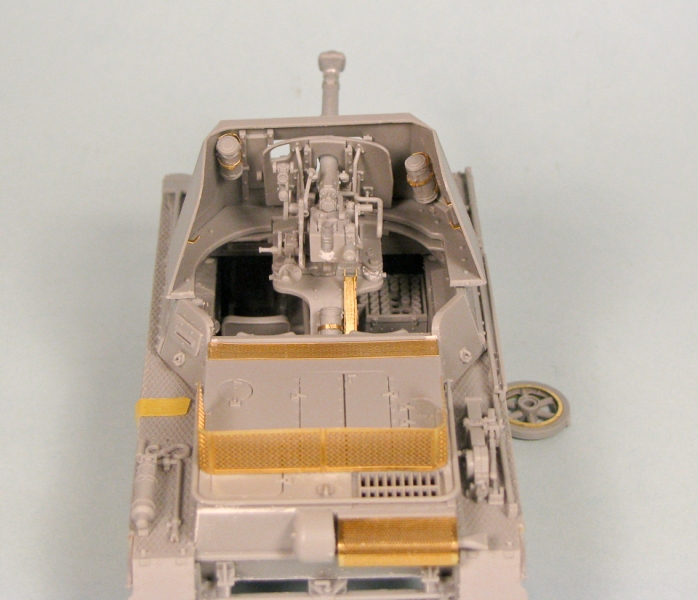
Steps 5-9, interior and hull roof:
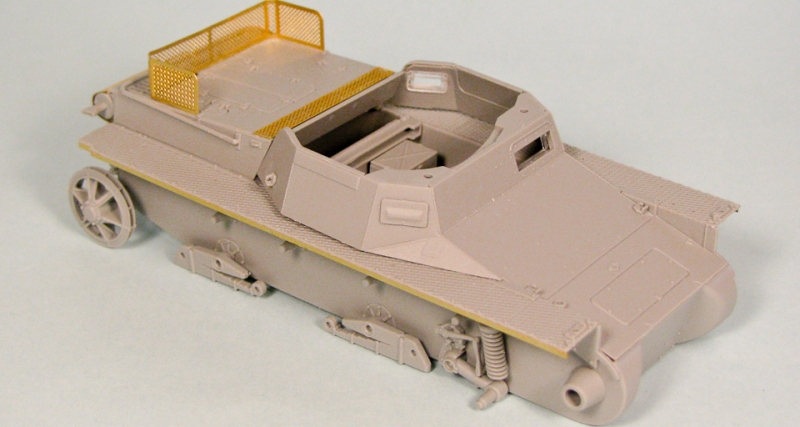
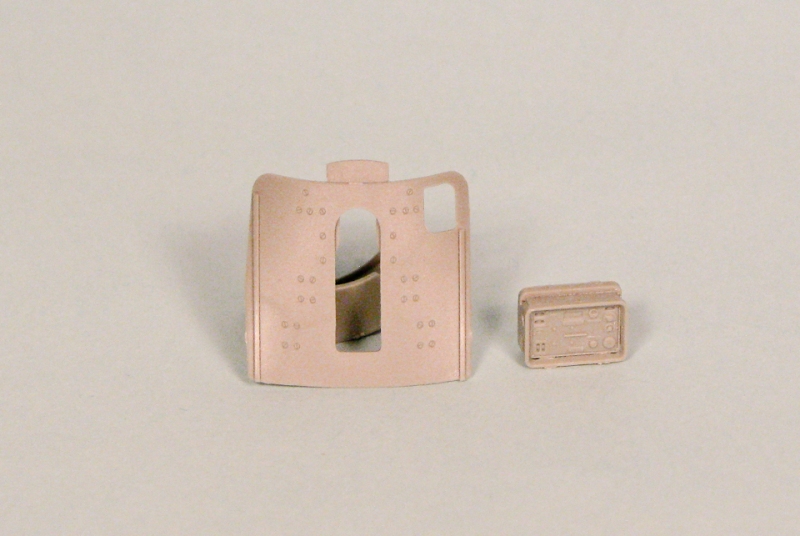
A reasonably complete interior includes detailed transmission parts; batteries, drivers seat and controls as well as 3 ammo boxes that can be positioned opened or closed. Separate ammo is also provided (6 rounds). I really like the level of detail here and superb seams, bolts and rivets on the hull roof. The visor ports come as clear parts and can be assembled open or closed.
Wrong part numbers here are: MA11 should be MA3, MA13 should be MA2 and battery unit K21 should be K22; the handle for left drivers visor port is part W8 and not W9 as per instruction. Be sure to fill and sand ejector pin marks on parts H4 and H5 those will be seen from the outside!
Additional detailing - bolts on inner walls, inside edge of fenders, drivers visor block, drivers handles (see references).
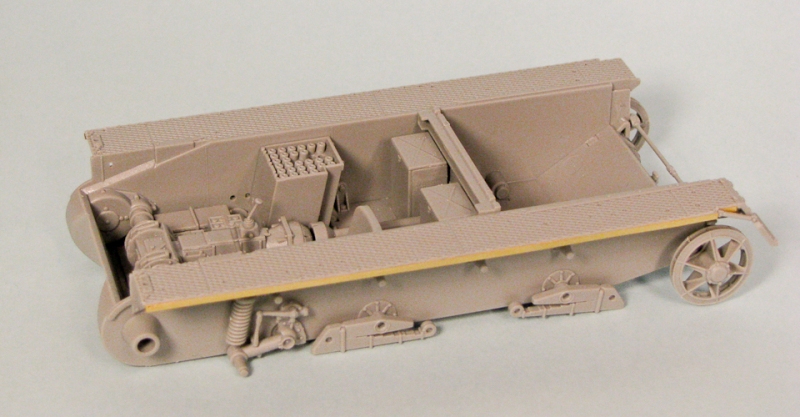
Steps 10-14, engine deck and completing the hull:
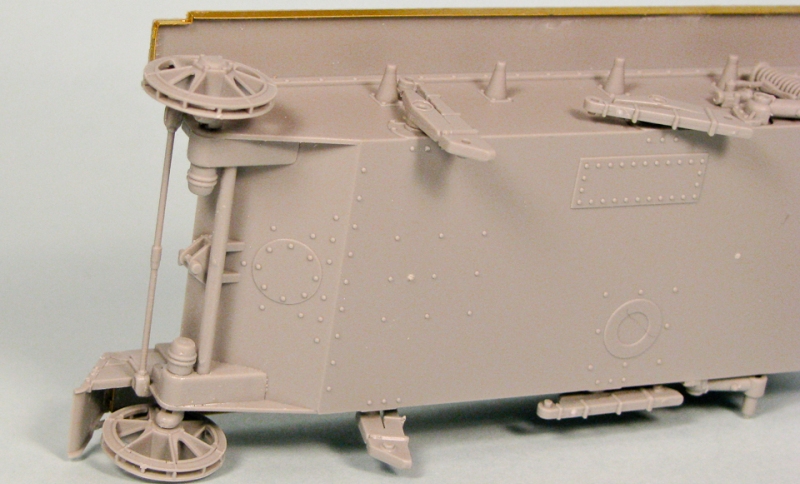
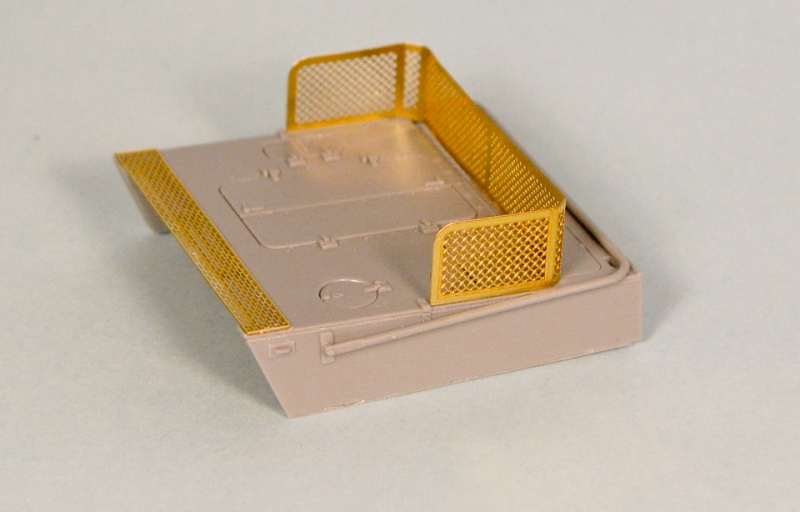
The engine deck has nice detail with a PE mesh and a stowage basket that can be seen on many war time photos filled with personal equipment or other stuff! There is some confusion here coming from previous release the part for stowage basket is different but the drawings are the same.
The vehicle tools are with clamps and, of course, many of us would like to change those with PE for better detail. The rear stop for the spade is not marked in the instructions but is present on drawings part B12. The jack block tightening straps should be changed with PE or foil.
Lights have clear parts and I will advise to check reference pictures because some of the vehicles had the Notek light not on the left fender but next to transmission access door, and some Panzerjägers were without Noteks at all, the same applies to rear lights different combinations can be found and even though nothing is mentioned in the instructions the parts are present (if you decide to have a vehicle without rear light as Dragon offers simply fill the holes with putty). And be sure to paint the interior before gluing the hull roof and proceeding with vehicle tools and lights.
Additional detailing - Wiring for rear lights (if any), PE tool clamps.
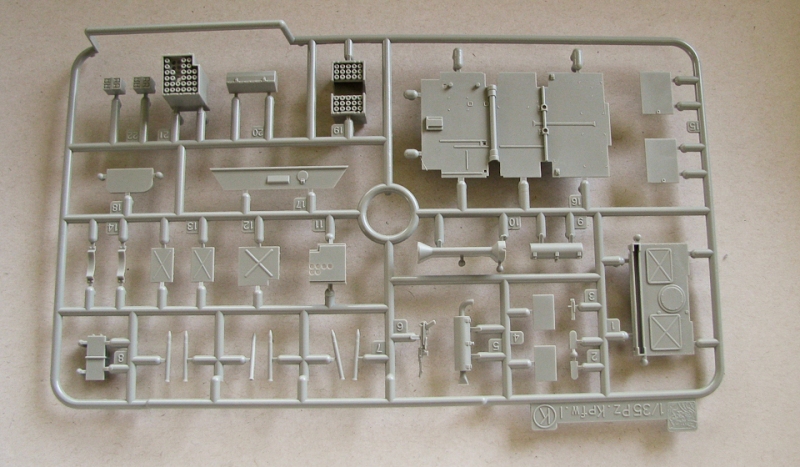
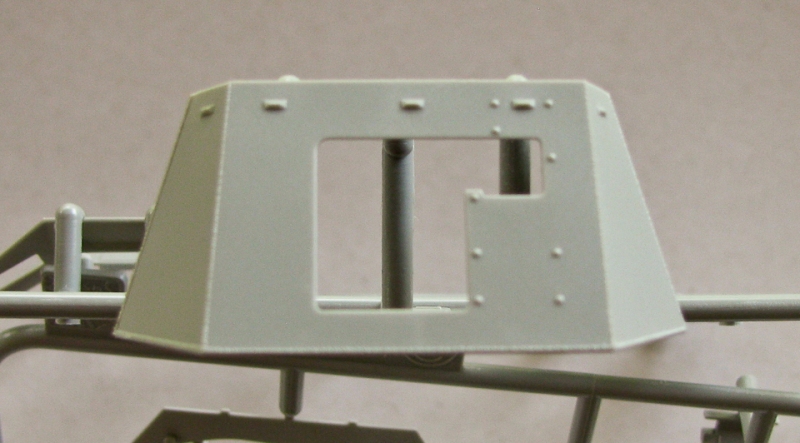
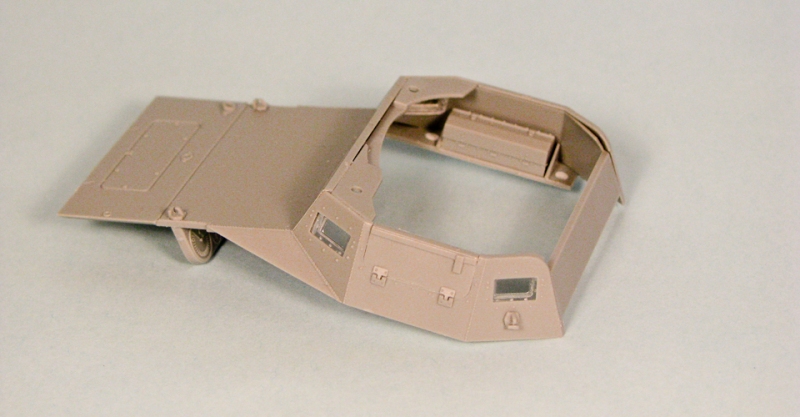
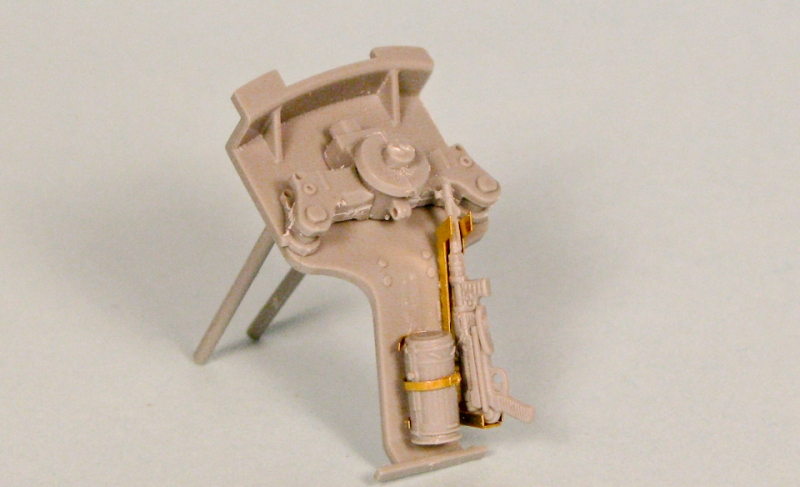
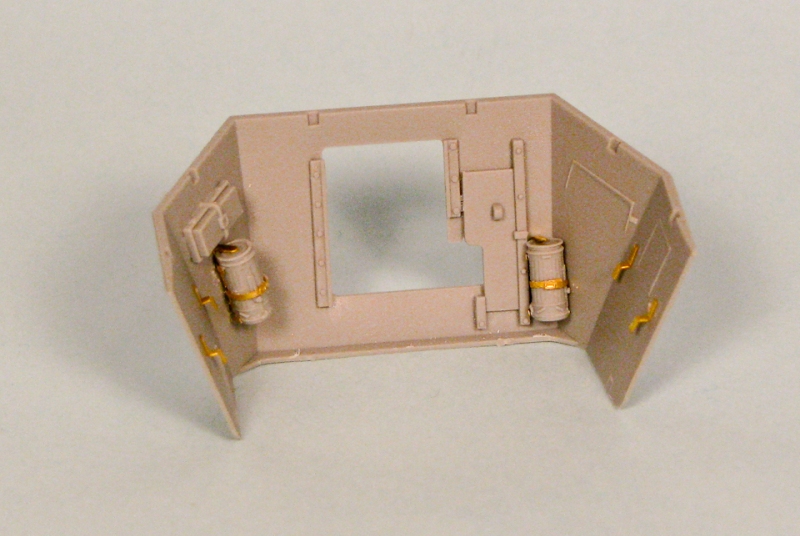
Steps 15-20, the gun and fighting compartment armor:
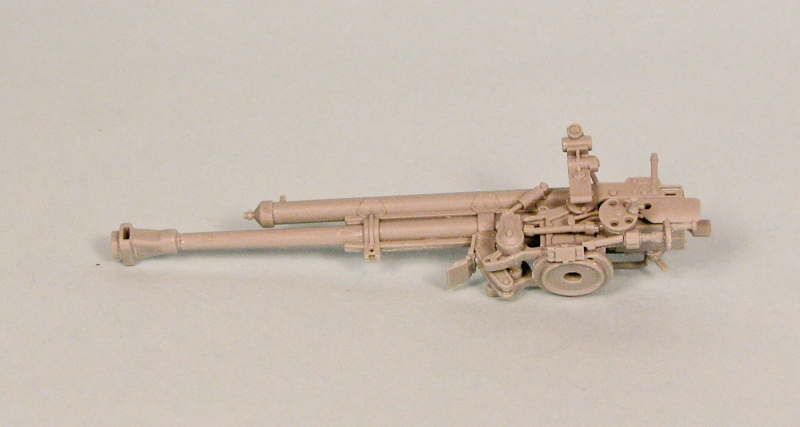
So far, this was the most demanding part of the build a lot of small and tiny details. Pay attention to alignment of the gun barrel and muzzle brake, as well as fitting the gun on the gun base (parts F34, F37 and F24, dry fit those first). If you dont glue parts F42 and parts F19-F8 you will have the possibility of elevation of the gun.
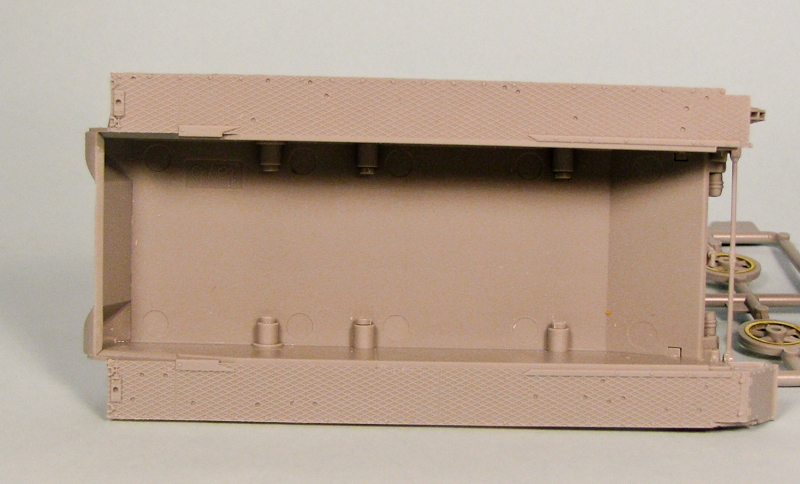
The fighting compartment has nice seams outside (but none inside) and includes internal details such as radio, first aid box, gas mask containers with PE straps, and an MP38 in a PE rack. Helmets and MP38 ammunition can be also positioned here.
As with interior parts it is easier to paint the gun and the fighting compartment before gluing them to the hull.
There is one issue here - it is written in Nuts & Bolts that the radio unit was on the right of the driver and later moved up to fighting compartment. On walkaround pictures you can see leftovers of radio rack mounts exactly on the right of the driver. I havent seen any additional antennas on war images of early Panzerjäger (on later vehicles there is an additional antenna mount under the left rear side wall of 7-side of the superstructure) so maybe it is incorrect to put the radio in the fighting compartment. Or maybe there were 2 radios in it? Who knows, since there are no wartime pictures of the interior
? Anyway, the final decision is yours.
Additional detailing - Wiring, headset and firing lanyard.
Step 21 tracks:
As written above those come as individual magic tracks with superb detail. It is really easy to work with them if you assemble the whole track on masking tape, apply glue (I use Tamiya extra thin), place them around wheels and form the sag, wait some minutes until the track is completely glued and remove the masking tape. 99 links are required per side according to instructions and my build took 100. The remaining links can be utilized the same way the crew did put them on the front armor for extra protection.
Painting and markings:
The decal sheet from Cartograf includes markings for 7 variants:
Panzerjägers used in France, 1940
Graf Spee from Pz.Jg.Abt.670
Krzywoczka from Pz.Jg.Abt.670
Aschaffenburg from Pz.Jg.Abt.643
and a vehicle from Pz.Jg.Abt.521
All should be in plain panzer grey and Krzywoczka had an early war camouflage scheme with panzer grey and red brown. The other 3 variants are for the Eastern front and include two Panzerjägers in panzer grey -Pz.Jg.Abt. LAH (1941) and Pz.Jg.Abt.4, 14. Pz.Div. (Stalingrad 1942) as well as a vehicle belonging to Pz.Jg.Abt.521 (Stalingrad 1943) whitewashed over panzer grey. To my knowledge those markings appear to be correct. Graf Spee decal must be placed on the side of fighting compartment and not under visor ports (see ref.)
If you want to make something different - paint the model in 4BO over panzer grey since several of the Panzerjägers were captured and used by the Soviets (see Wydawnictwo Militaria #144).
Conclusion
I really enjoyed this kit and can recommend it to any modeller interested in early WWII vehicles. Dragon Model keeps the rank very high and I wish the other companies had the same quality of parts and PE. The only noticeable flaw of this kit is wrong part numbers in the instructions, although if you pay attention to details they shouldn't pose a problem. If you prefer to build out of the box (as per this review) you will have an excellent replica of the early Panzerjäger. More sophisticated modellers would go for their own additional detailing or commercially available upgrade sets (try ET model E35-013).
References:
Walkarounds of the Panzerjäger from Koblenz museum that can be found online and I recommend the following books if you are interested in vehicle history and war time photographs:
Nuts & Bolts vol. 07 and updated version vol. 23
reviewed on Armorama
Wydawnictwo Militaria #144 Panzerjäger I (Polish text, images have English captions)
Allied-Axis vol. 09, pages 21-44
The build continues on the forums
Here


Comments