Back several light years ago I built the Tamiya version of the British 25lb gun and tractor, it seemed like a pretty good kit and besides it was the only game in town. Well now along comes Bronco Models with their version of the old warhorse and to say the least it is light years ahead of the old Tamiya kit. It doesnt even seem a fair comparison, kind of like comparing the Kia Rio I drive to a Ferrari!
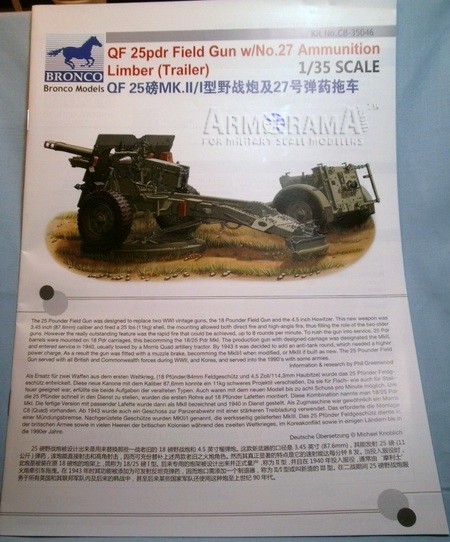
The 25lber came out of the desire to create a gun that incorporated the best features of the 18lber field gun and the more modern howitzers which were being developed at the time. The initial effort simply installed the new gun into the old 18lber carriage but this was only a stop gap until a purpose designed carriage could be finished. The new carriage was finished in 1939 but few guns were actually converted to the new arrangement in time for the Battle of France, although a few were completed. This helps account for the reason that most of the artillery equipment lost during the ill fated battle was of the older variety.
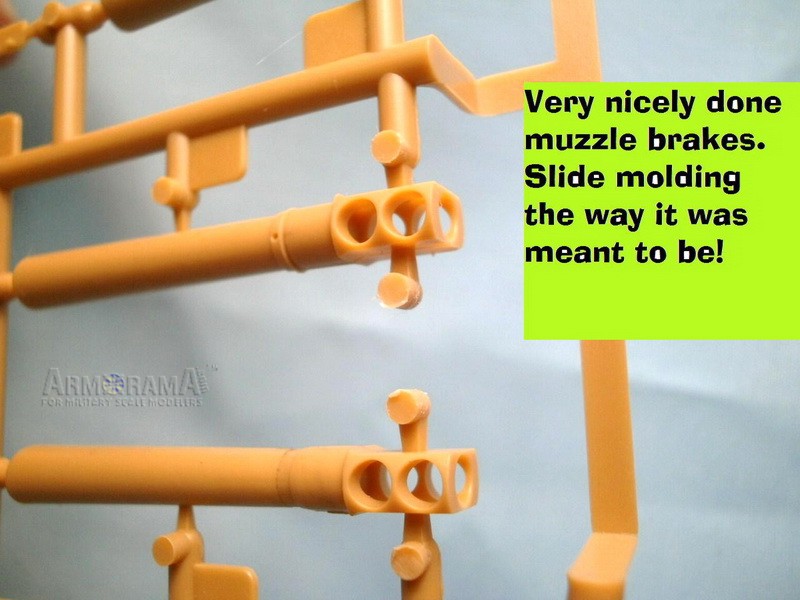
By the time of the decisive engagement in North Africa the older versions of the gun had been updated. By 1942 the gun had been further updated to incorporate a muzzle break enabling the use of more powerful munitions and armored piercing rounds. The excellence of the design is borne out in the fact that the gun was in front line us by the British Army up until the 1960s.
Review
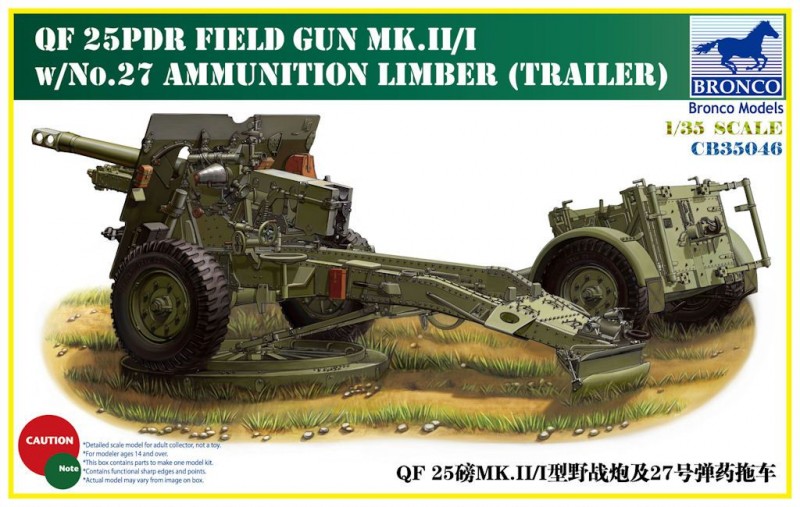
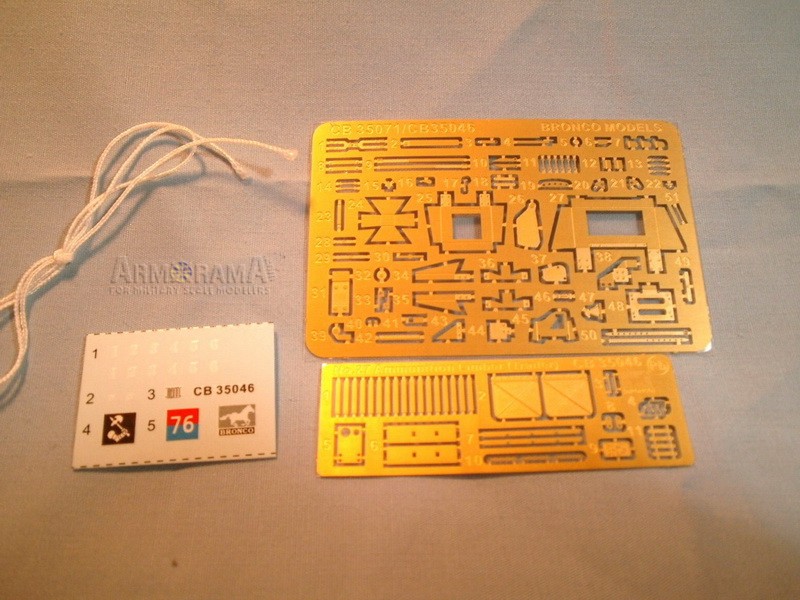
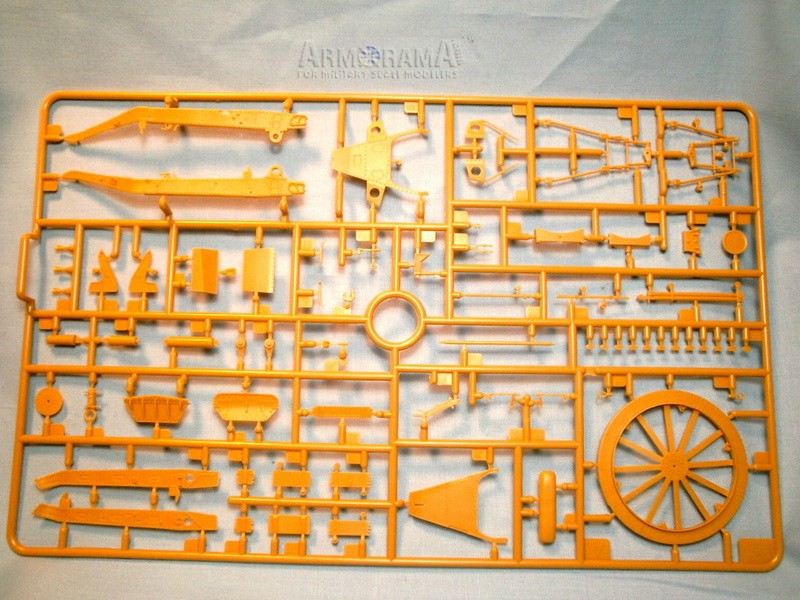
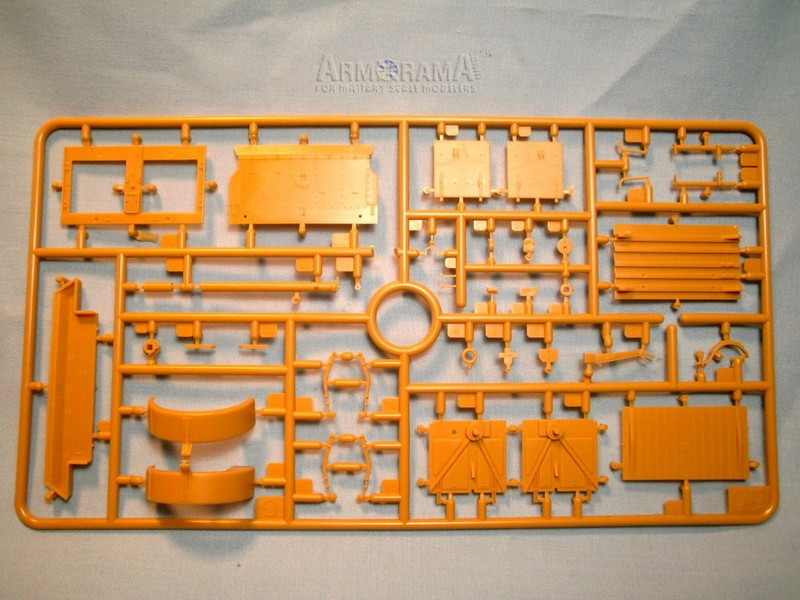
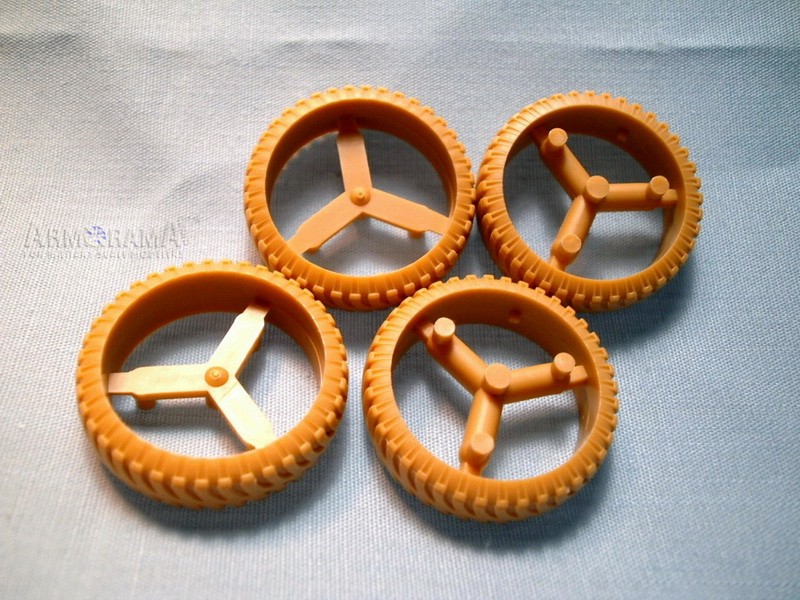
The Bronco kit comes packed in a sturdy box with the base constructed from actual corrugated cardboard. Inside you will find three decal sheets, two photo etch sheets, one length of string, seven sprues of various sizes, four tires molded in styrene, and the 26 page instruction booklet to guide you along the way.
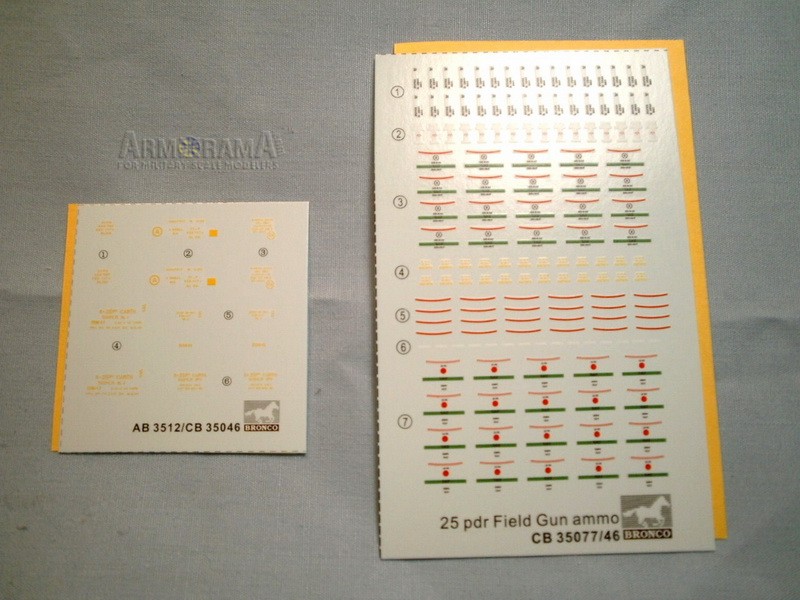
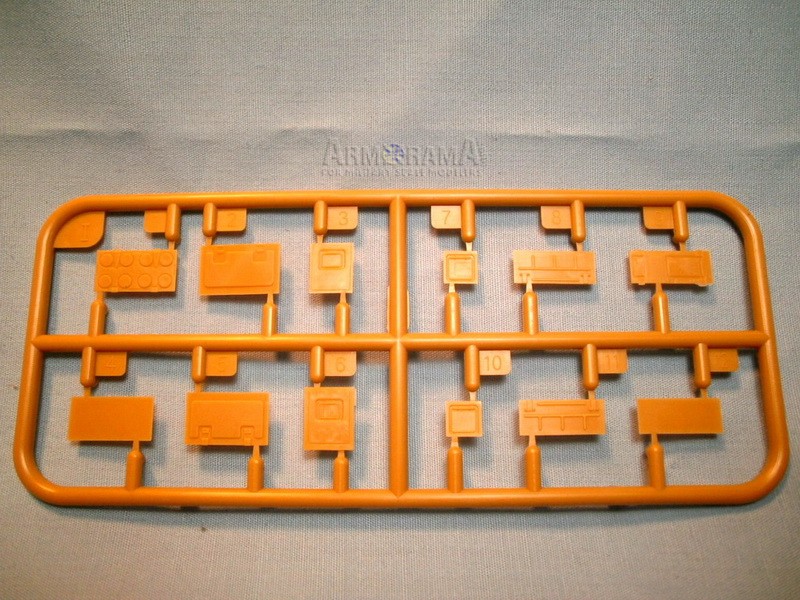
The decal sheets come in three different sizes; one small one with arm of service marking, 76 with red over blue, for the junior artillery regiment. The other marking is an armored arm holding an axe aloft, which I must confess I couldnt identify, it looks a bit like 6th Armored Division but it is clearly not. I think I will just stick with my fallback position that British WWII markings are for the most part an un-decipherable hodgepodge. The remaining two decal sheets are exclusively for the cases of the propellant charges and the ammunition. The photo etch sheets are absolutely chock a block full of very tiny detail pieces, levers, firing mechanism, straps, brackets, stiffeners, handles, stiles, rails, and more!
The breakdown of the sprues is pretty standard;
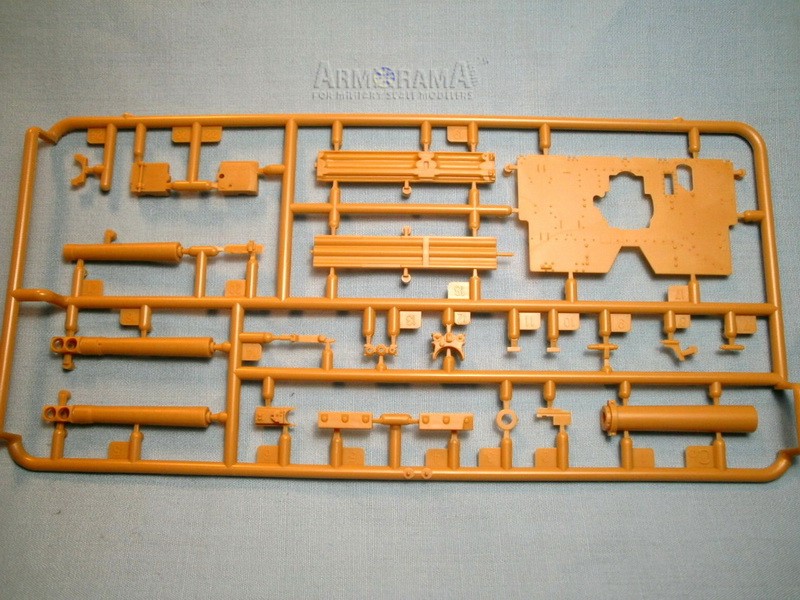
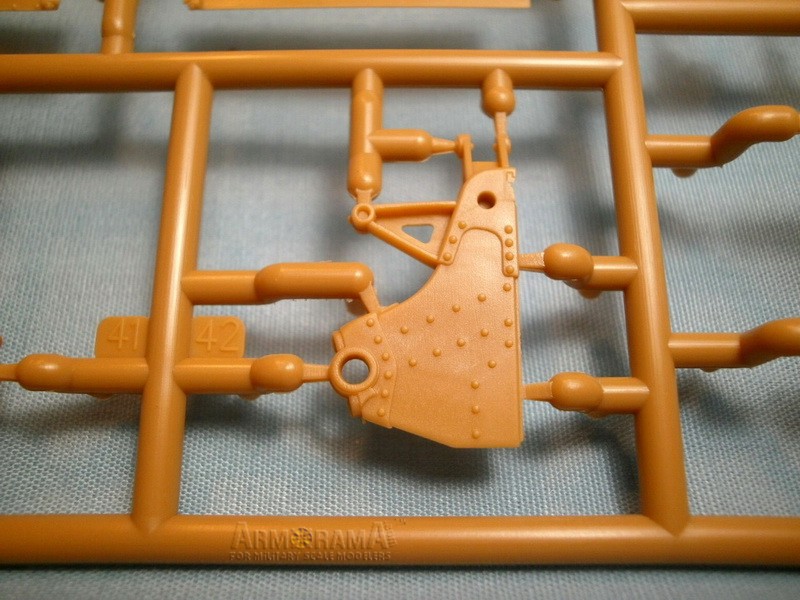
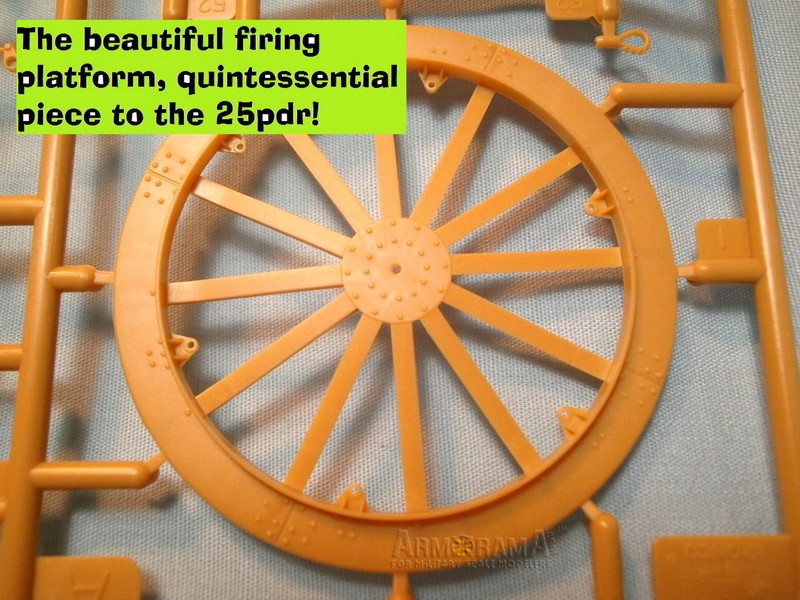
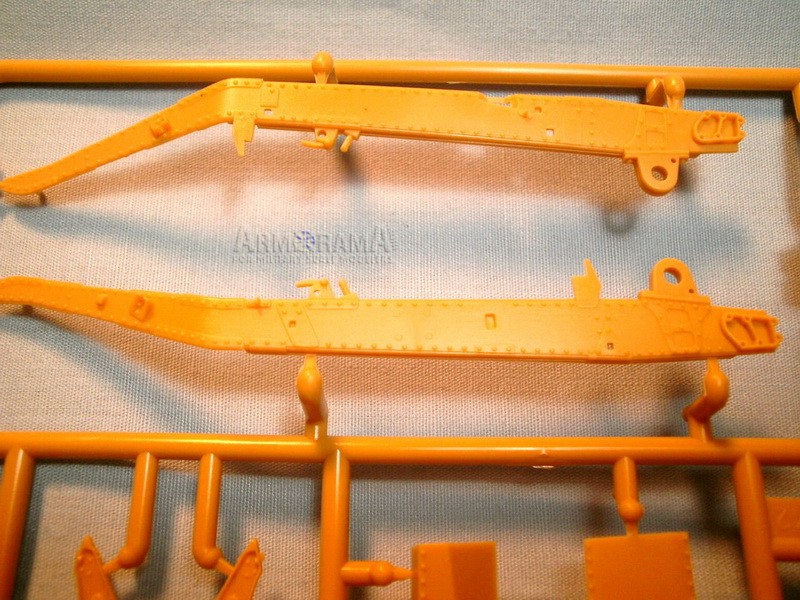
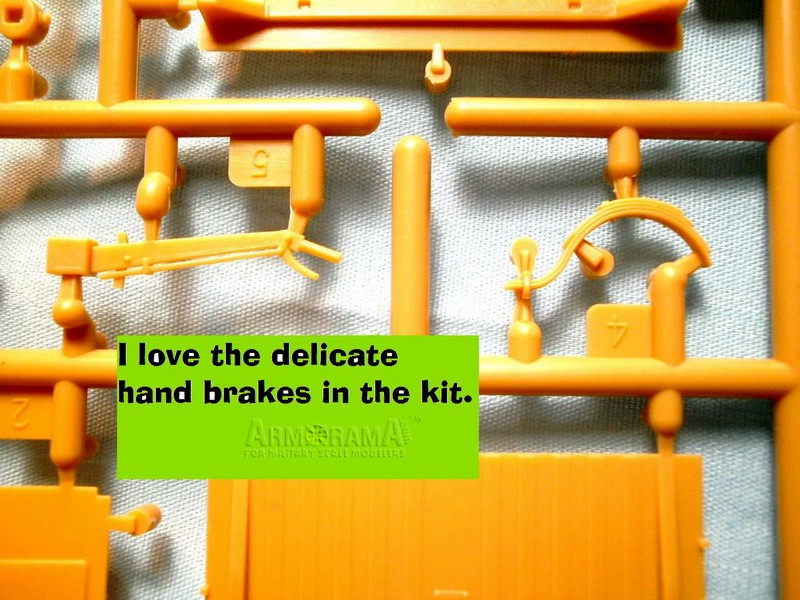
Sprue A carries most of the parts for the box trail, the distinctive firing platform, and the spade arrangement. The level of molding is very high, no flash at all, which is the case for all of the moldings for the kit. The detail overall is excellent, appropriately thin and very fine. The handbrake assembly and the box trail in particular are very well done and should look superb with a bit of dry brushing to highlight the bolt and rivet detail.
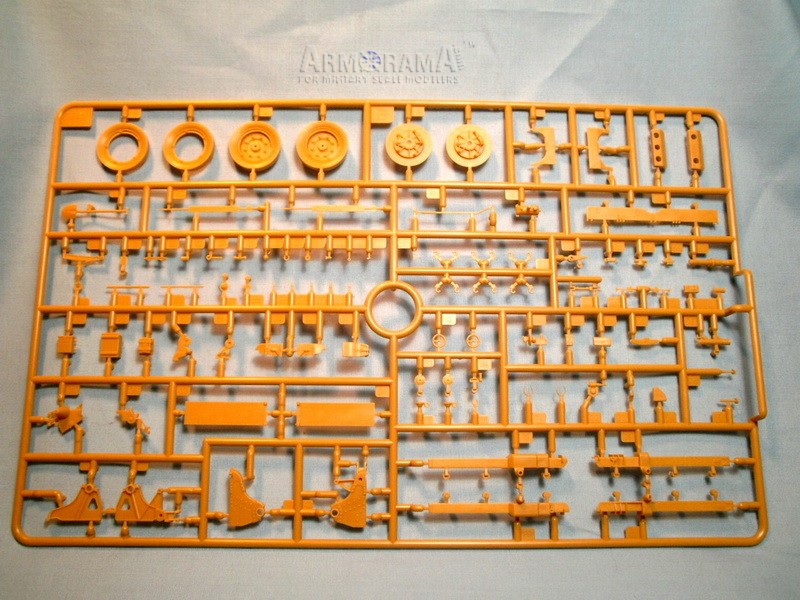
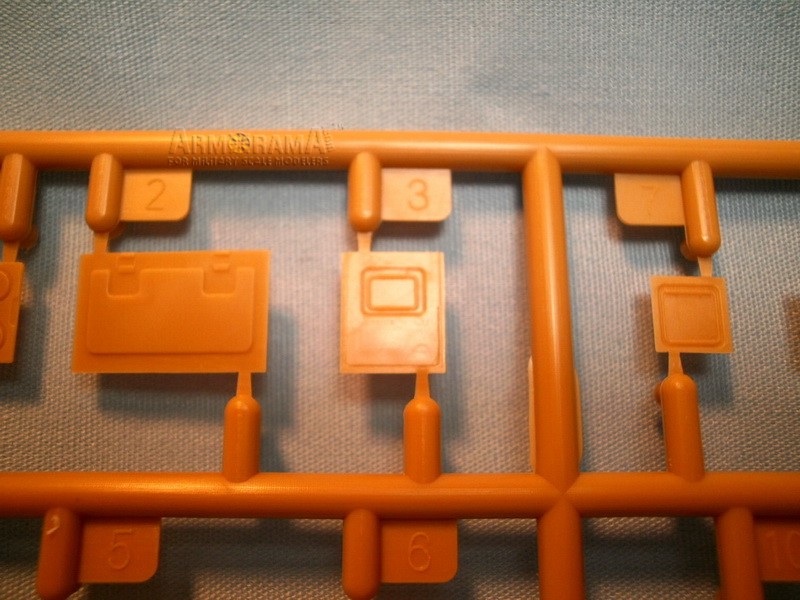
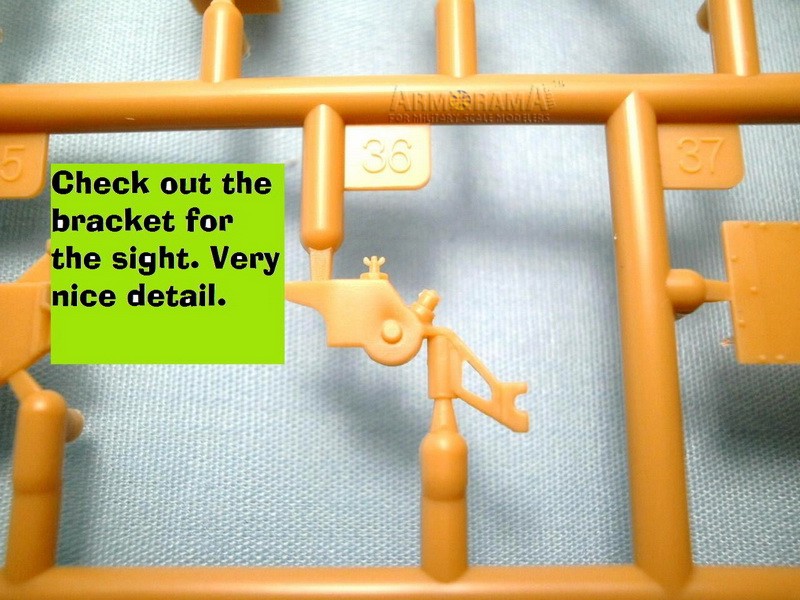
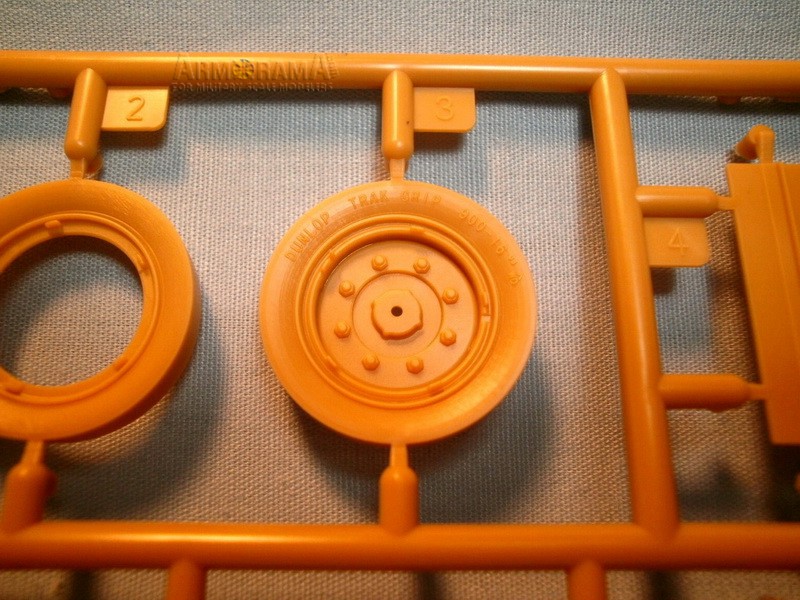
Sprue B has a mishmash of pieces, mostly the gun cradle, elevation and traversing assemblies, the wheels and sidewalls of the Dunlop tires and every tiny detail part you could hope for. Id measure some of these but I would need a micrometer to do a decent job. It also contains all the parts for the gunners range scale better known as the Probert calibrating sight, the anti-tank and the panoramic telescopes. I know I sound like a broken record but again, the level and quality of molding here is simply stunning, the bracket that holds the range setting wheel and the anti-tank (direct fire) telescope is so nice it makes me want to stop writing this review and just build the darn thing.
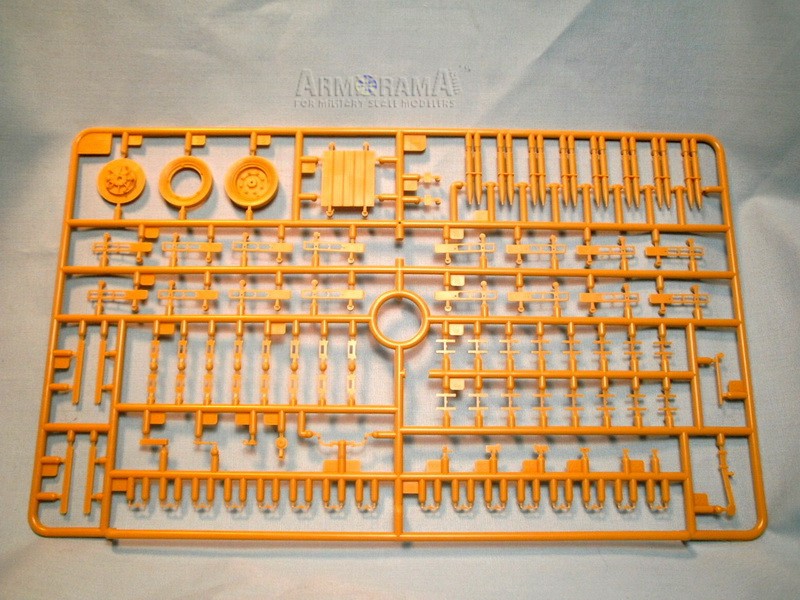
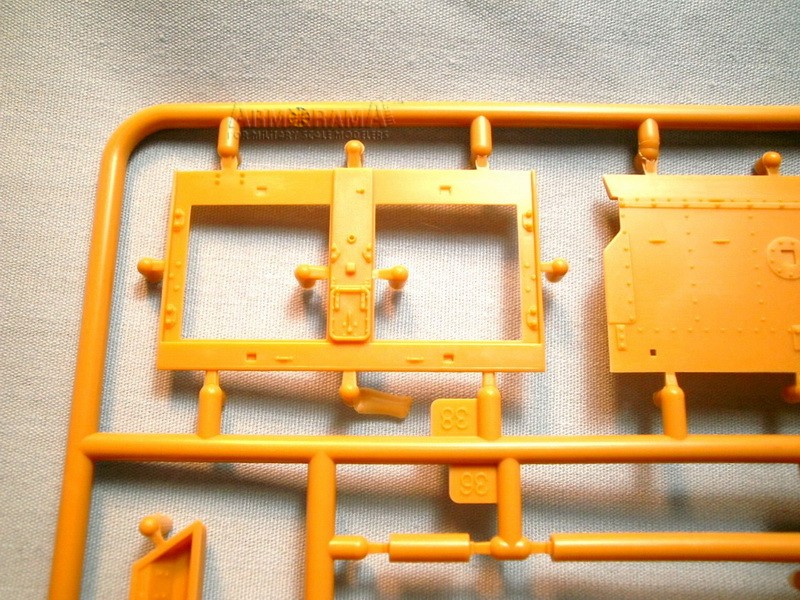
Sprue Cb has three different gun barrels as well as the gun splinter shield, the breech block parts, and the gun cradle. It also has the parts to add the counter weight for the later versions of the gun with the muzzle brake. I am guessing that the reason that this sprue is named Cb, rather than just C is that another later version with the double shield, or perhaps the Mk. II carriage with the narrow shield, will be released at a later date. The Mk II narrow shield was developed in Burma and could be towed by a jeep or loaded aboard a Dakota transport plane. Each of the barrels look very well done, slide molding clearly used throughout. The earlier version of the gun, which does not have the muzzle brake, has very finely molded in rifling on the interior of the barrel.
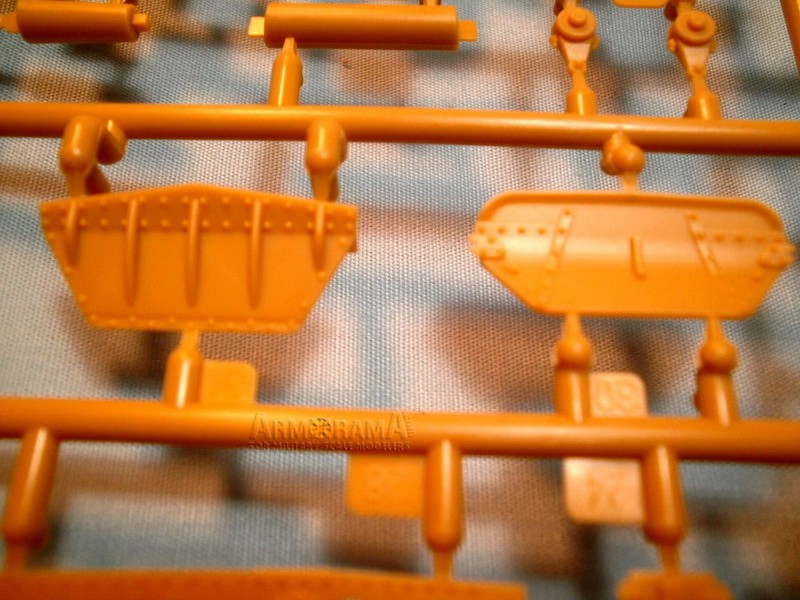
Sprue G (I wonder where sprue D, E, and F went? Certainly gets one to hoping for more to come.) has all of the parts to build the exterior of the No. 27 ammunition limber. Once again, I cant find fault with anything here, everything is very finely detailed and cleanly molded.
Sprue H, you get a pair of these bad boys, contains the interior parts necessary to construct the ammunition limber. Of course you could choose to just close the doors, but then youd lose all of that juicy detail not to mention the complete load of 32 rounds all ready to go in their trays. Bronco has done a really first rate job in getting everything inside the limber just right.
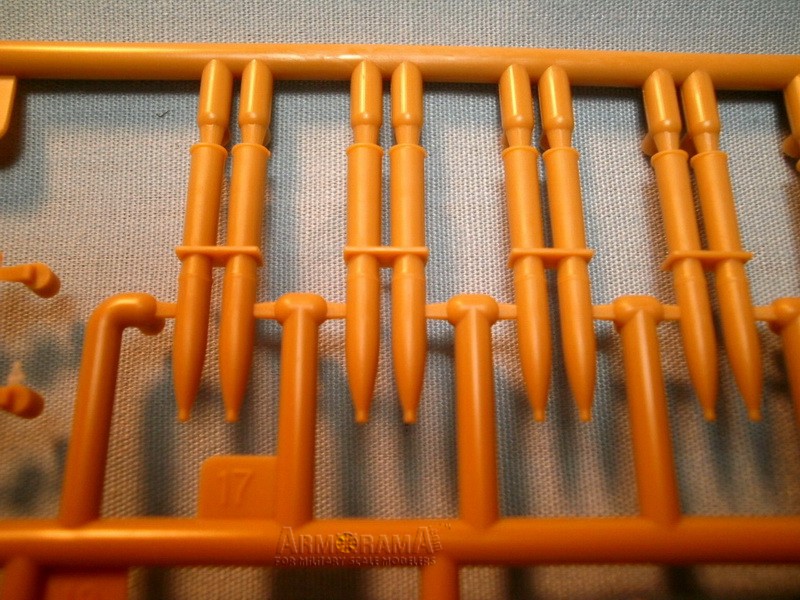
Finally, sprue I which provides the parts for two cases of what is called charge super which allowed higher velocity for anti-tank rounds. One of the decal sheets provides the markings for this nice extra.
And finally, the last item in the box, the 26 page, 37 steps, assembly instructions. They are challenging to say the least. They are done in the common exploded drawing style with plenty of arrows here and there. They also provide numerous detailed color CAD drawings for smaller and trickier assembly sequences. The options are a bit of a challenge to comprehend, the barrel options are pretty straightforward, however the options for the recoil mechanism are a bit more daunting. If you are going to use the earlier barrel without the muzzle break you will want to use option 2, if you are using the muzzle break go with option 1. What makes it easy to get confused is that option 1 appears as assembly sequence 3 whereas option 2 doesnt appear until assembly stage 20, nine pages deeper into the instructions. My best advice runs parallel to the old measure twice and cut once cautionary tale, in short; study the instructions just a bit more than you normally would, take a break for a cup of coffee or whatever, come back and study them again before you get started.
Conclusion
A winner, hands down. If they awarded an Academy Award for artillery this kit would surely receive a nomination. The detail is sublime throughout the kit and the inclusion of the ammunition limber just kicks it up another notch. The only caveat is the instructions, go slow and study them thoroughly before you start gluing bits and bobs together. As for me, this one just moved to the top of my build stack, and that just might be the best recommendation of all.
SUMMARY
Highs: Very well detailed and molded kit of an important subject. Complete ammunition limber with a full load of ammo, ample photo-etch, multiple barrel choices. Top notch kit.Lows: Instructions can be confusing. No clear parts for the sights or scopes.Verdict: A superb kit. I can't recommend this one enough, it should build up to a real gem.
Our Thanks to Dragon USA! This item was provided by them for the purpose of having it reviewed on this KitMaker Network site. If you would like your kit, book, or product reviewed, please contact us.
About Rick Cooper (clovis899) FROM: CALIFORNIA, UNITED STATES
I have been modeling for about 30 years now. Once upon a time in another century I owned my own hobby shop; way more work than it was worth. I tip my opti-visor to those who make a real living at it. Mainly build armor these days but I keep working at figures, planes and the occasional ship.
It may be hard to beat, but I will be waiting for the Dragon version to appear before jumping in. I have had the Tamiya one in the stash for many moons and it looks like it may be heading for Ebay soon...
Thanks for the review Mario. Very comprehensive.
Thanks for the info on the clear parts. I don't find it a big deal but so many manufacturers now seem to like the optics in clear that I thought I would point it out so no one was disappointed.
Rick
A great review Rick, thanks.
I looked up that Div insignia for you in my copy of Cole's Formation Badges of WW2.
It's a bit of a strange choice as it's the 1st Australian Armoured Division which was redesignated 1st Armoured Brigade Group in 1943 and apparently only saw action in the Pacific and the defence of Australia. It might be an idea for builders to replace that decal with one from the spares box...
Wiki Link
Thanks Ken,
Yes, that is indeed a strange choice for the markings. Wish I could figure out what the reasoning was? Wonder what the attached artillery units were equipped with?
Rick
This is not a relaxing weekend build, this is a kit for advanced builders with a strong magnifier, the patience of Job, and neurosurgeon dexterity. Or, you could say it's one of the ultimate rivet counter kits (you actually add rivets and bolt heads).
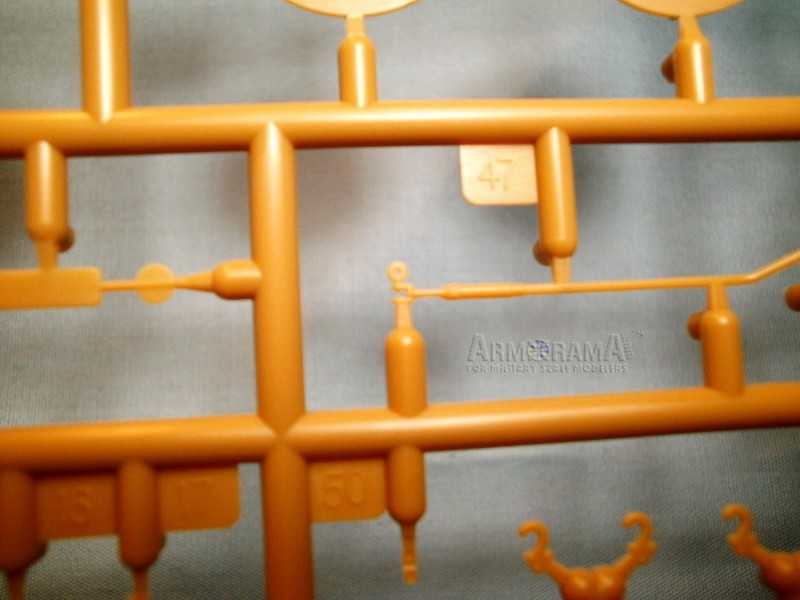
The reviewer says "tiny" pieces. Those "tiny" pieces are less than 1 mm in size, both PE and styrene. On B Sprue, there are many pieces that you must have a strong magnifying glass just to see where the sprue ends and the piece begins. There are PE pieces that measure at 0.3mm.
Part of what makes this frustrating is the styrene pieces are so well molded that many of the tiny tiny PE parts really could have been molded on rather than nearly microscopic PE.


Comments