1/35 Trumpeter BR 86 Dampflokomotive
Canelones, Uruguay
Joined: December 27, 2006
KitMaker: 773 posts
Armorama: 765 posts
Posted: Monday, November 30, 2009 - 01:10 AM UTC
No words


Clare, Ireland
Joined: December 30, 2008
KitMaker: 952 posts
Armorama: 834 posts
Posted: Monday, December 21, 2009 - 12:23 PM UTC
Thank you guys for your kind words

Have another small progress here. Continued from below this time, I have to rework all the wheels.
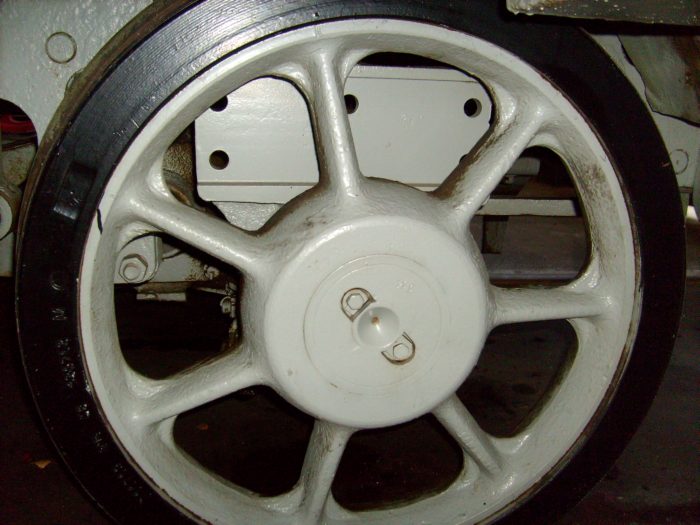
The small whells in the kit were also used on BR 86 locos, but for my build I need wheels with 7 spokes only, and bigger wheel hub, also flange is slightly different. I will make moulds for all of them. I have done a master for 3 spokes already, I will get ready hub and flange soon, then I will complete whole wheel for casting. The big wheels in the kit are simplified and wrong. First and fourth wheels could be used after some work on them, second and third have too small weights balances in the kit. I will rather make new wheels for my build, that seems to be easier. I started with largest weight balance driving wheel, I have removed some sharp edges and fixed the hub, small weights added between spokes where they are suppose to be. They are also various in size and different on the left and right side, what can be seen in the picture. This base will be used together with a flange, what I am gonna scratchbuild next, to get a master for casting.
Cheers
Libor
www.mymodelplace.eu
www.LZmodels.com
Clare, Ireland
Joined: December 30, 2008
KitMaker: 952 posts
Armorama: 834 posts
Posted: Tuesday, January 05, 2010 - 10:43 PM UTC
Waiting for supply needed to finish the wheels, I stated my work on the frame and bearings. I will make a new frame for my BR 86, because that one from the kit is not thick enough, and it is also partly wrong. All the bearings and axles have to be made up as well, as they are kinda sci-fi in the kit. The frame parts from CMK are thick enough, but they are 5mm shorter in length, Trumpeter has corrected this issue, but that means all the proportions in the cabin area are wrong now....
I got ready drawings for my work on BR 86 Knorr brakes, which are missing at all. I will make masters once again to get moulds and resin ones
Cheers
Libor
www.mymodelplace.eu
www.LZmodels.com
Taranto, Italy
Joined: November 07, 2006
KitMaker: 39 posts
Armorama: 38 posts
Posted: Wednesday, January 06, 2010 - 09:30 PM UTC
Hi Libor.
I'm working on the CMK resin kit of the BR 86 (actually I'm gathering info). I decided to avoid buying the Trumpeter kit.
I imagine you have a full closeup of the lokomotive.
My question is if it is possible to get it.
Thanks, Sante
Clare, Ireland
Joined: December 30, 2008
KitMaker: 952 posts
Armorama: 834 posts
Posted: Thursday, January 07, 2010 - 06:32 AM UTC
Hi Sante, PM sent. For anyone else, who can be interested, there will be a book from Wing And Wheels publisher available in two months, for BR 86 locos. Detailed walkaround will cover mostly BR86 001, which is very different from my build here, but there will be also pictures from my collection for BR86 283 and some others, so the book should bring all the most important details and differencies between early and later locos.
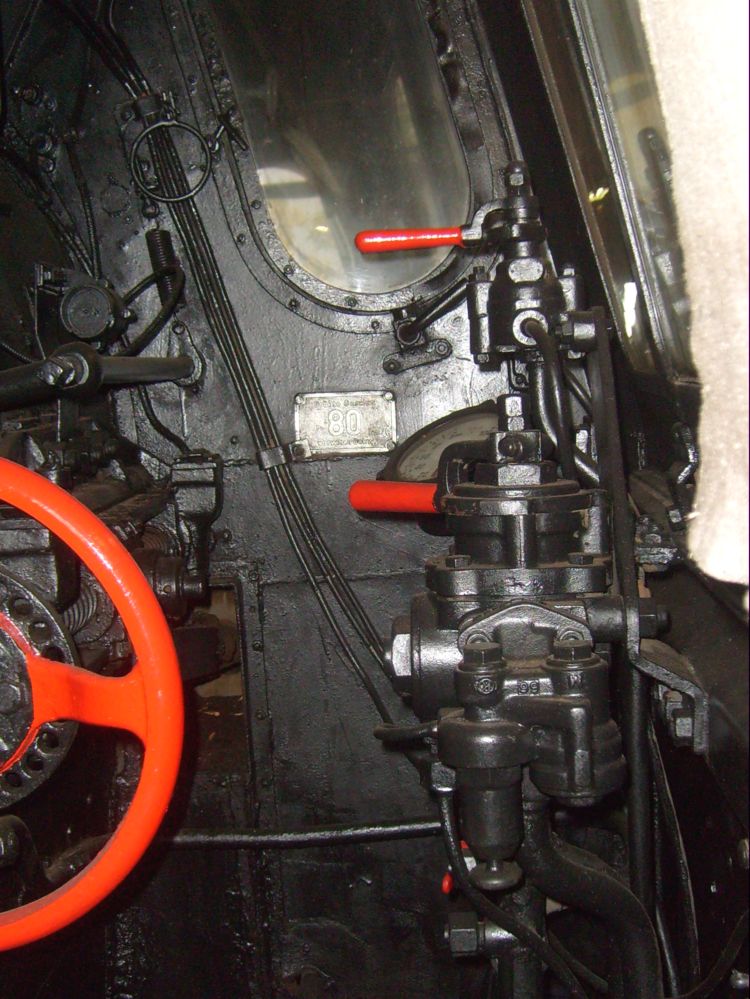
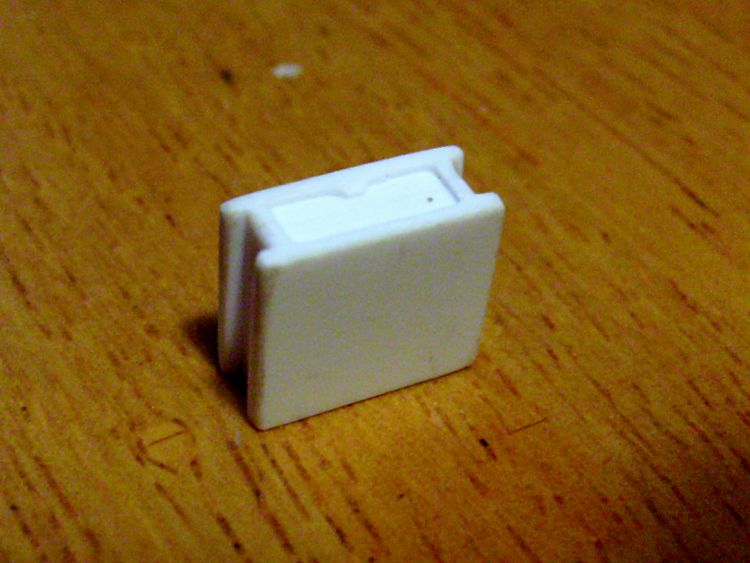
Here after two evenings, train brake regulator finished. I will just stick together the parts of the lever, whole thing will be obtained in three castings, which will make together this nice piece of hardware. Now I am gonna work on smaller one, the loco brake.
Cheers
Libor
www.mymodelplace.eu
www.LZmodels.com
Clare, Ireland
Joined: December 30, 2008
KitMaker: 952 posts
Armorama: 834 posts
Posted: Thursday, January 07, 2010 - 11:59 AM UTC
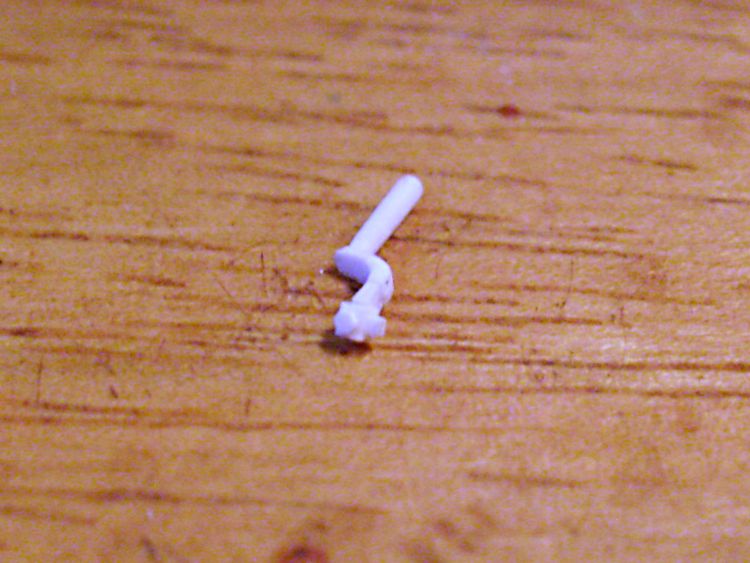
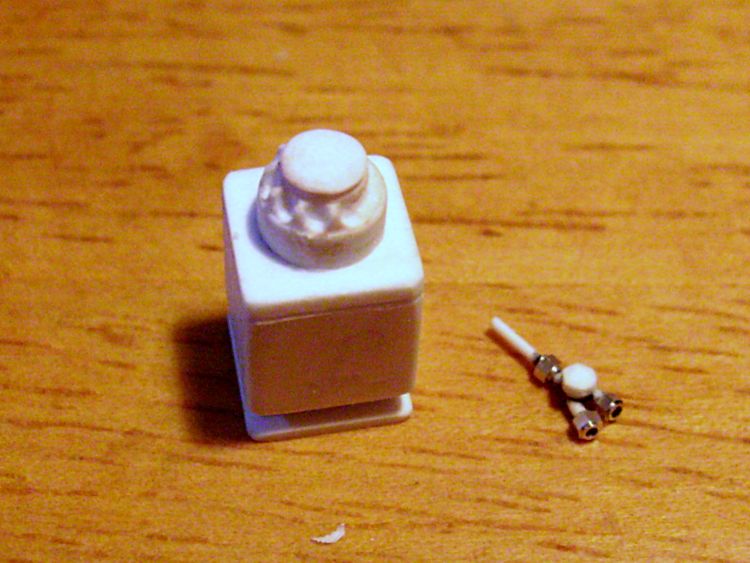
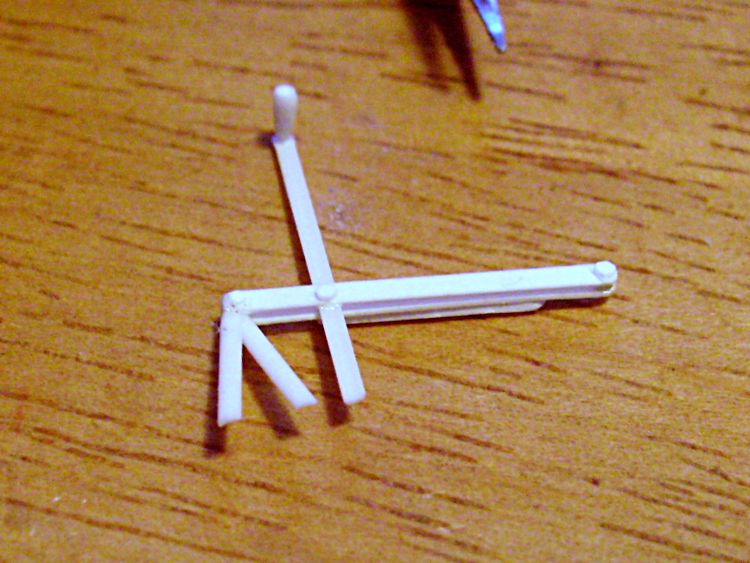
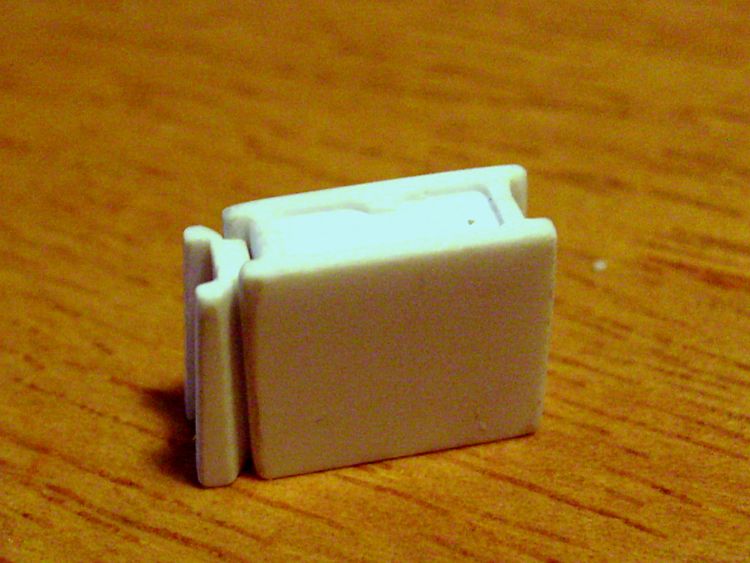
And here finished lever for the train brake and two part master for locomotive brake.
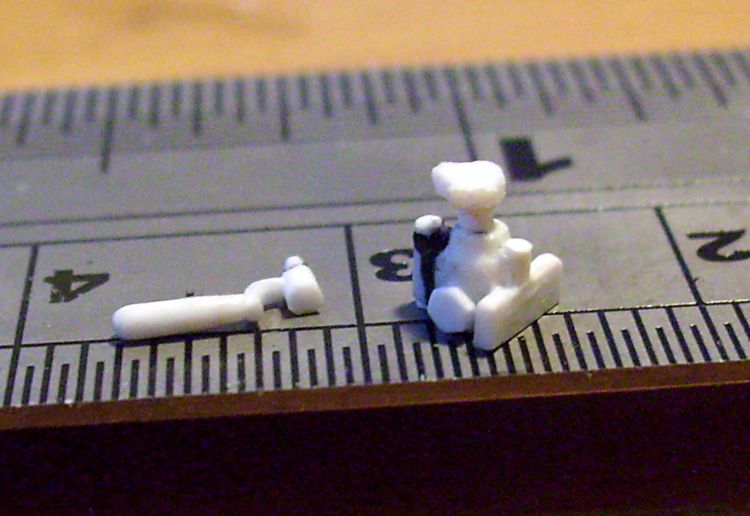
I will continue with other small valves in the cabin and a grease pump.
Cheers
Libor
www.mymodelplace.eu
www.LZmodels.com
Clare, Ireland
Joined: December 30, 2008
KitMaker: 952 posts
Armorama: 834 posts
Posted: Friday, January 08, 2010 - 07:43 AM UTC
Today I got ready drawings for Bosch high pressure oil pump, so I will start shortly another funny task

Cheers
Libor
www.mymodelplace.eu
www.LZmodels.com
Sachsen, Germany
Joined: November 28, 2007
KitMaker: 1,462 posts
Armorama: 1,289 posts
Posted: Friday, January 08, 2010 - 08:19 AM UTC
Ohh, so much small parts to build. Building small parts is fun, but a cruel to me.
Great to see the next "funny task".
But: it would be interesting to have a modelkit, which would be so complex like a kit with scratchbuilt and PE parts. The other interesting part would be the price for this.
BTW, today I had the chance to get small helical antennas for my project.
They were laser-cutted out of 0,2mm thin plastic-board. Cutting one of these using a scalpel was a hard work. So the machine-based solution was a good idea for me.
greetings...
Soeren
progress:
- Venera-14-lander on Venus
- Dragon s.10cm K18 at the Atlantic-wall
completed:
- Venera-10 lander on Venus
Clare, Ireland
Joined: December 30, 2008
KitMaker: 952 posts
Armorama: 834 posts
Posted: Sunday, January 10, 2010 - 11:30 AM UTC
Thank you Seoren. And what about kit with laser cut parts instead of PE? Most things can be done from plastic, which is much easier to work with. Myself I prefer to avoid PE as far as I can (but sometimes I have to go for it). For me the worst thing is to glue PE on plastic, they never hold strong enough

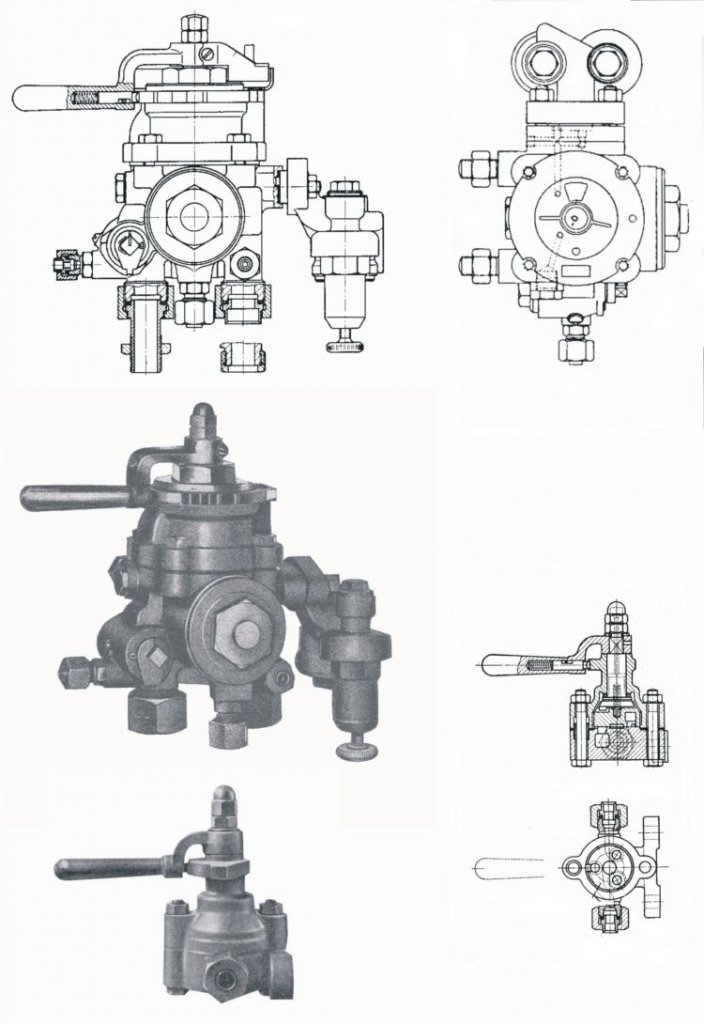
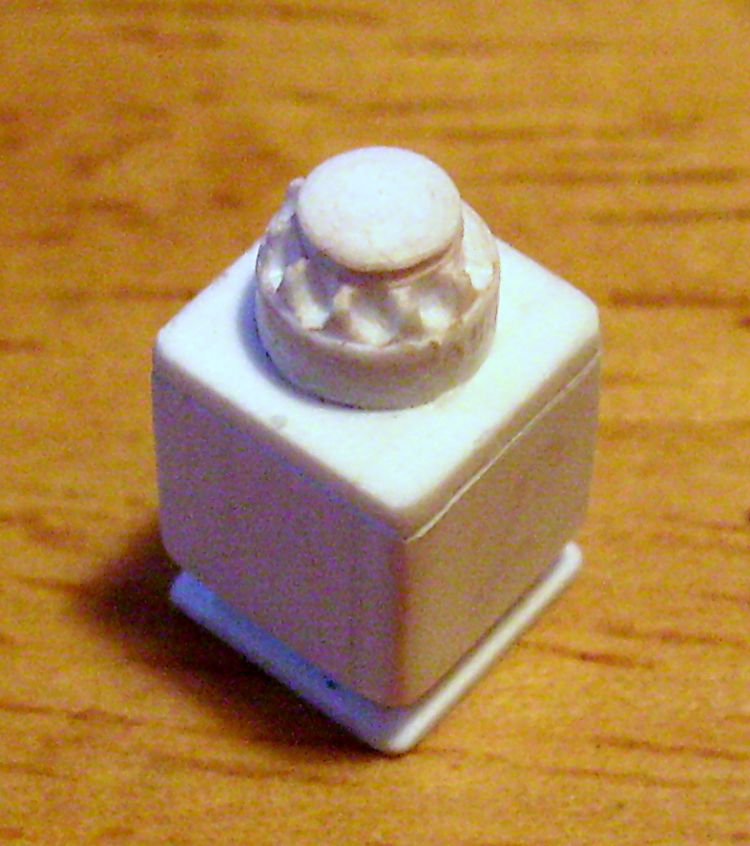
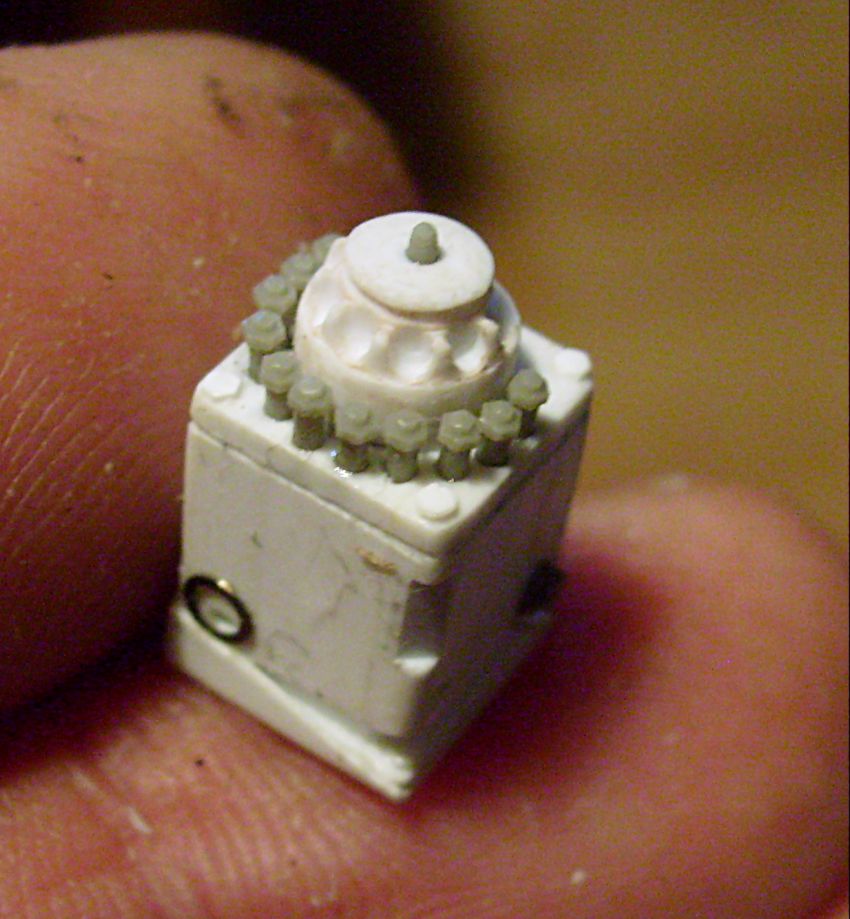
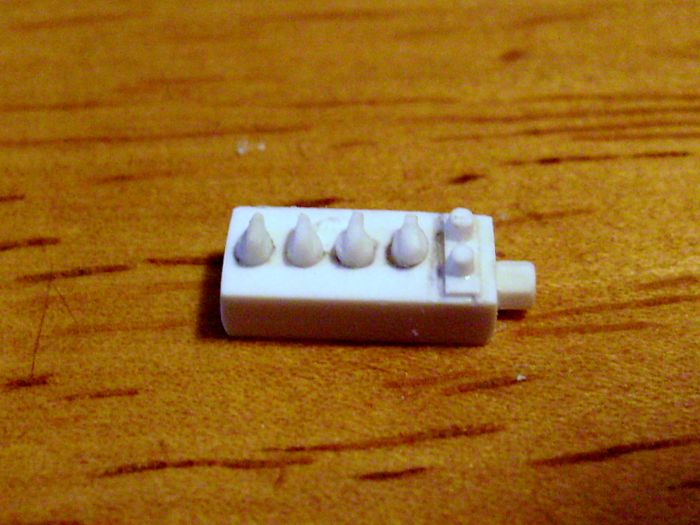
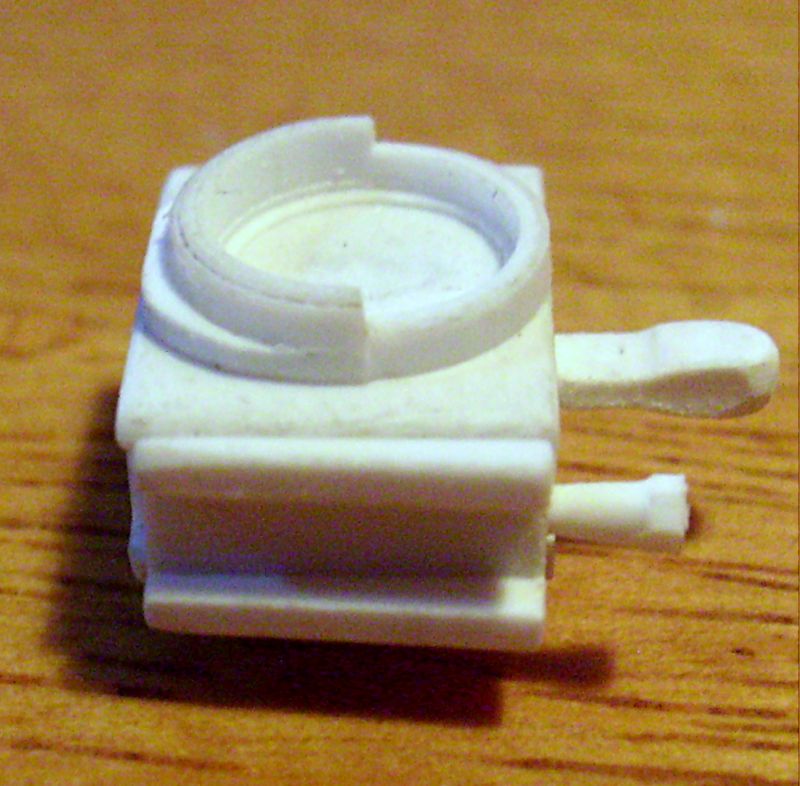
Here I have got base for grease pump. Lid of the oil filter on the top with pressure regulators around it. Each injector (there will be 10 of them) feeding could be set independently for any mechanical part of the locomotive. In my next step I will add 10 injectors on the top and drive mechanism as well. On the side is just simple three way fitting, lever will be mounted later, because of making moulds.
Cheers
Libor
www.mymodelplace.eu
www.LZmodels.com
Clare, Ireland
Joined: December 30, 2008
KitMaker: 952 posts
Armorama: 834 posts
Posted: Tuesday, January 12, 2010 - 12:29 AM UTC
Many modellers contacted me lately, asking for more reference pictures of BR86 283 locomotive. I cannot add all of them at my website in high resolution, because of limited space, and resized photos would not show details needed, but in case of interest I can send a DVD with almost 500 pictures in high resolution, covering every part of the loco, just for the price of my expenses and posting. More about it here:
reference dvd Cheers
Libor
www.mymodelplace.eu
www.LZmodels.com
Clare, Ireland
Joined: December 30, 2008
KitMaker: 952 posts
Armorama: 834 posts
Posted: Wednesday, January 13, 2010 - 08:22 AM UTC
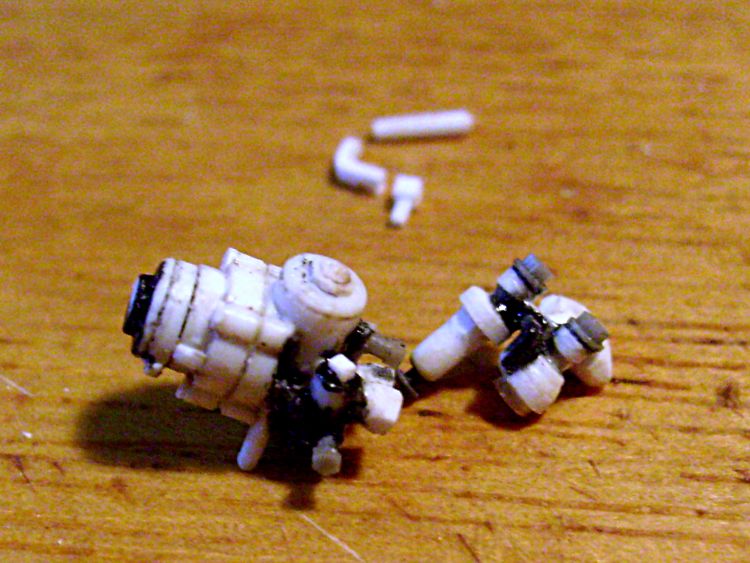
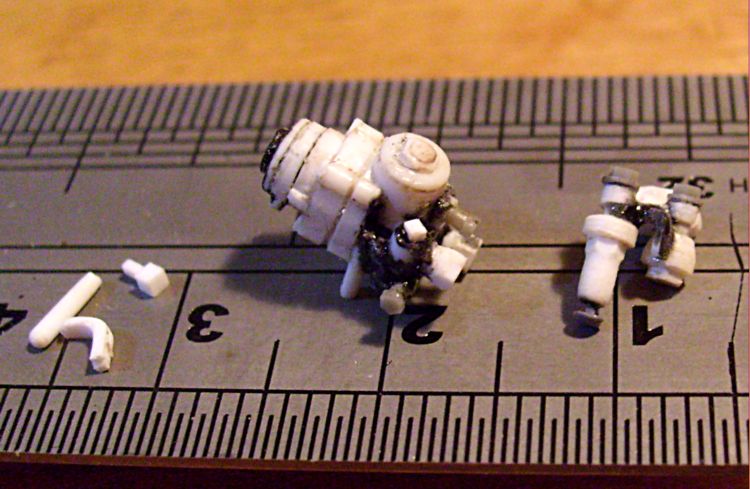
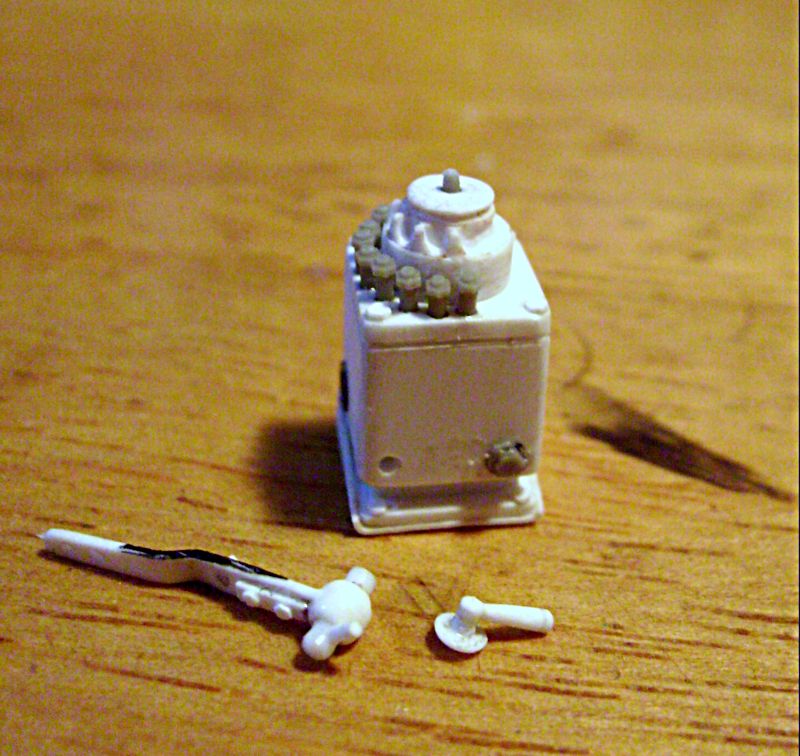
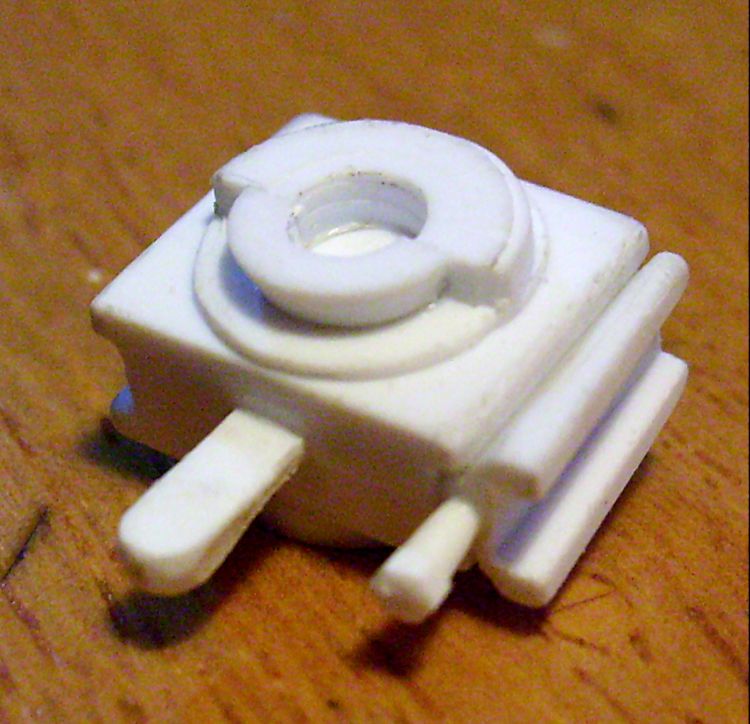
High pressure oil pump Bosch finished, valve and drive rod are kept on the side, because of making the mould. I will just paint surfacer coat over it and light polish then. A few more small valves left to be made, larger and small boxes at the back of the cabin, hand brake and electric equipment - that shloud be almost all for the interior.
Cheers
Libor
www.mymodelplace.eu
www.LZmodels.com
Clare, Ireland
Joined: December 30, 2008
KitMaker: 952 posts
Armorama: 834 posts
Posted: Thursday, January 14, 2010 - 08:46 AM UTC
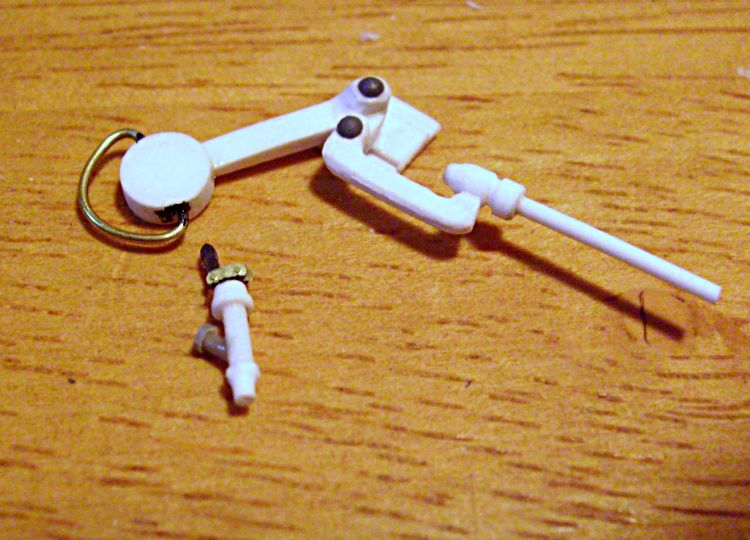
Another small valve finished and the hand brake as well.
Cheers
Libor
www.mymodelplace.eu
www.LZmodels.com
Sachsen, Germany
Joined: November 28, 2007
KitMaker: 1,462 posts
Armorama: 1,289 posts
Posted: Thursday, January 14, 2010 - 09:41 AM UTC
Perfection in detail and good size-comparison with your fingers!
I have no words for that!
greetings...
Soeren
progress:
- Venera-14-lander on Venus
- Dragon s.10cm K18 at the Atlantic-wall
completed:
- Venera-10 lander on Venus
Clare, Ireland
Joined: December 30, 2008
KitMaker: 952 posts
Armorama: 834 posts
Posted: Thursday, January 14, 2010 - 09:53 PM UTC
Thank you Soeren, the oil pump was actually quiet hard task, and I had to leave some details on the injectors, because there was no way to make it. They are just 0,6 mm diameter, and that would not be noticable by eye anyway ...
And more done inside, another lever and both boxes. The last ones are already mounted in position, hand brake just dry fitted.
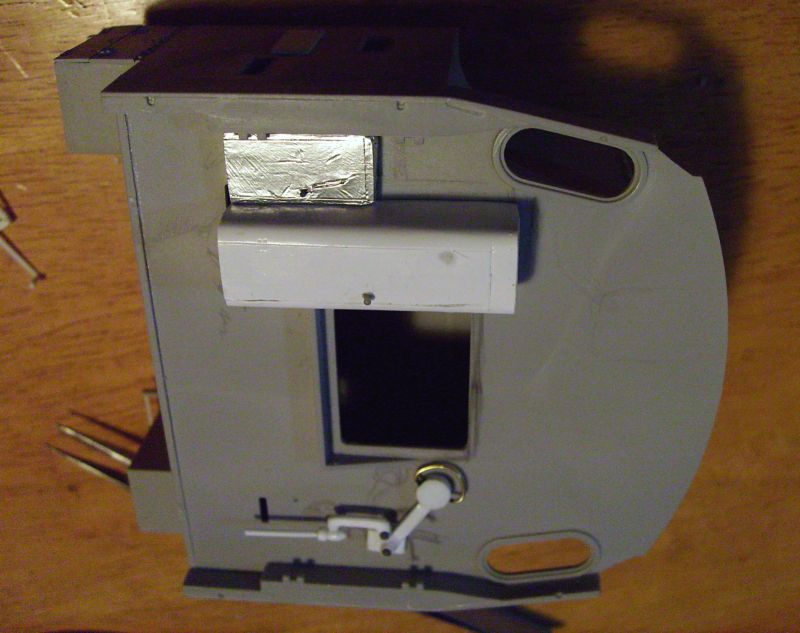
I will have to make the coaling hole wider and its doors have to be reworked.

Cheers
Libor
www.mymodelplace.eu
www.LZmodels.com
Clare, Ireland
Joined: December 30, 2008
KitMaker: 952 posts
Armorama: 834 posts
Posted: Friday, January 15, 2010 - 01:16 PM UTC
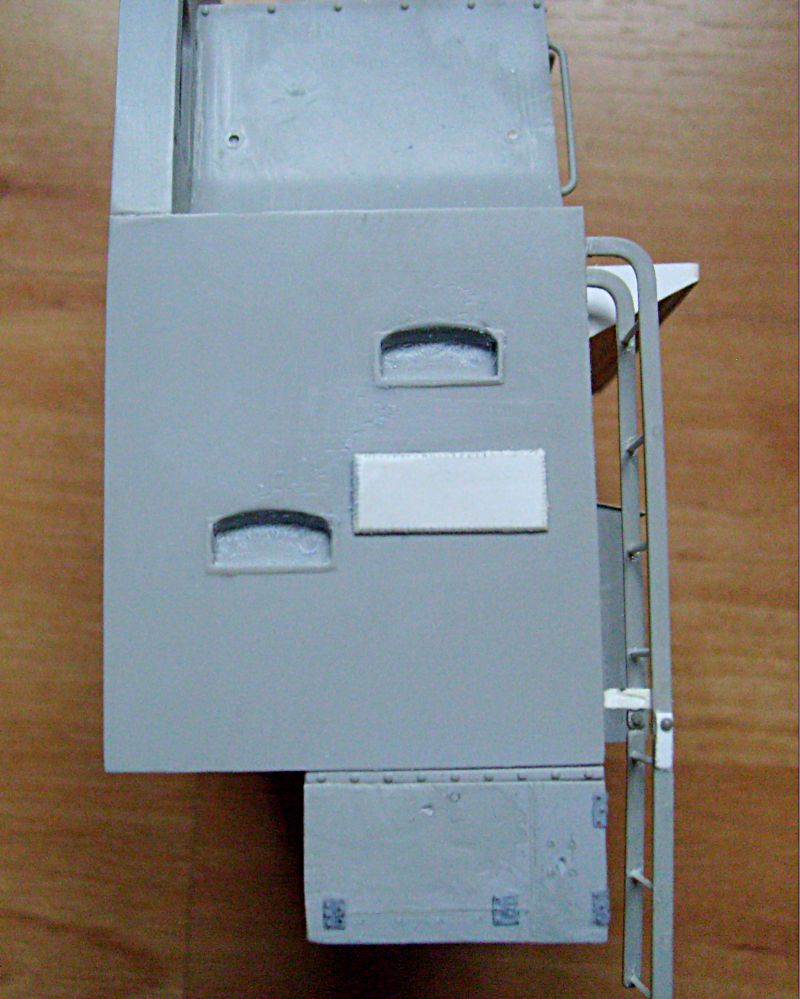
Here finished coaling area with new doors. I have also rounded upper parts of the step bars on the tender, just tiny welts will be added there.

Cheers
Libor
www.mymodelplace.eu
www.LZmodels.com
Clare, Ireland
Joined: December 30, 2008
KitMaker: 952 posts
Armorama: 834 posts
Posted: Saturday, January 16, 2010 - 12:43 PM UTC
Last thing before making moulds is an electric box. To tune up switches, I have to apply surfacer coat first. Whole thing is just 6mm long and small differencies are noticable only in zoomed picture. I will continue on the interior, when castings come out. By then I should also get some PE´s, which I had designed a couple months ago, mostly angles for the corners, window frames etc.
Cheers
Libor
www.mymodelplace.eu
www.LZmodels.com

#003
Donegal, Ireland
Joined: May 14, 2002
KitMaker: 9,763 posts
Armorama: 7,444 posts
Posted: Saturday, January 16, 2010 - 01:26 PM UTC
Excellent as always Libor. Great reference pictures and great scratch building. Top blog.
As they say in Clare ..... keep her cuttin`

IPMS Stockholm
"The problem with common sense, is that it is not that common"
Illinois, United States
Joined: March 29, 2009
KitMaker: 1,135 posts
Armorama: 1,030 posts
Posted: Saturday, January 16, 2010 - 02:05 PM UTC
very nice work. although cliche, "keep chugging along"
Currently taking back the fight to beat modeling ADD
Clare, Ireland
Joined: December 30, 2008
KitMaker: 952 posts
Armorama: 834 posts
Posted: Sunday, January 17, 2010 - 03:46 AM UTC
Thank you Frank and Sean for your kind comments.
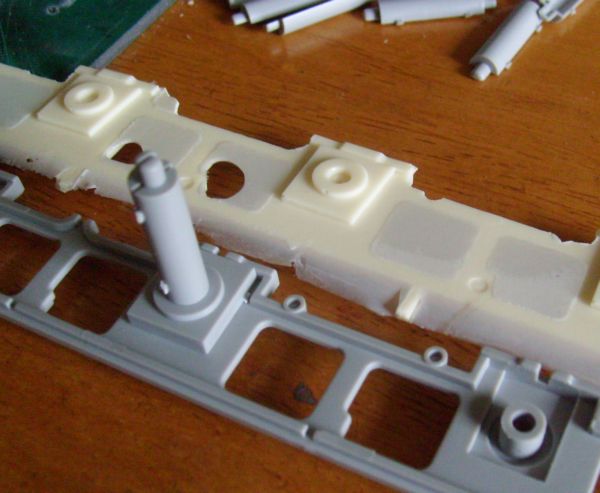
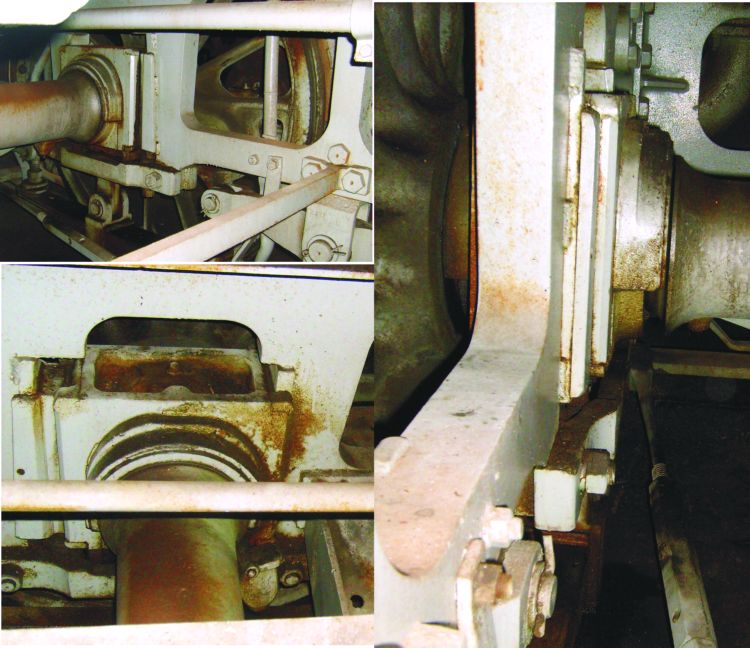
I have started work on the axle bearings. First a base for the main part with slot wedge. Then I will add bearings on both sides, spring holder, tension screw and finaly securing clamps.
Cheers
Libor
www.mymodelplace.eu
www.LZmodels.com
Clare, Ireland
Joined: December 30, 2008
KitMaker: 952 posts
Armorama: 834 posts
Posted: Sunday, January 17, 2010 - 12:11 PM UTC
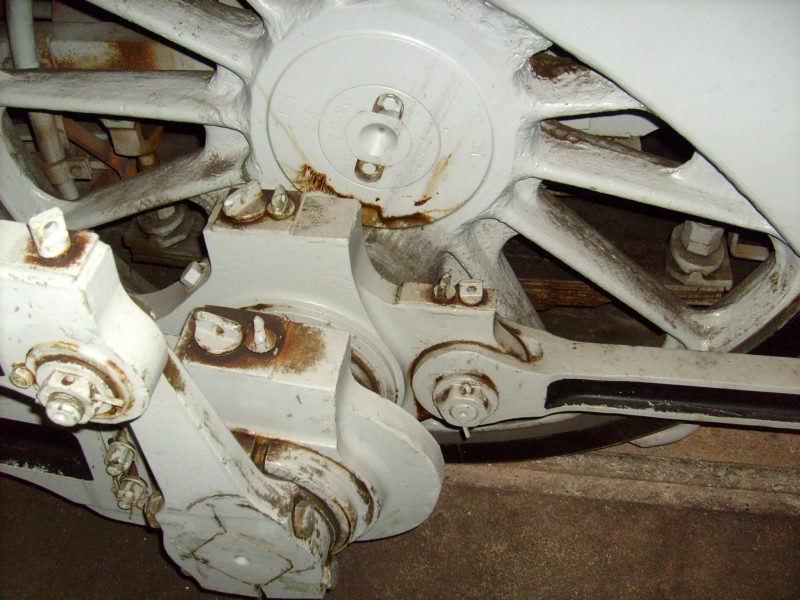
Following pictures show mounted bearings on both sides, lower conical half in last picture is actually a part of the wheel hub, which I have added rather here, because of easier assembly. Also spring holder and tension screw are glued on.
Cheers
Libor
www.mymodelplace.eu
www.LZmodels.com
Clare, Ireland
Joined: December 30, 2008
KitMaker: 952 posts
Armorama: 834 posts
Posted: Monday, January 18, 2010 - 11:34 PM UTC
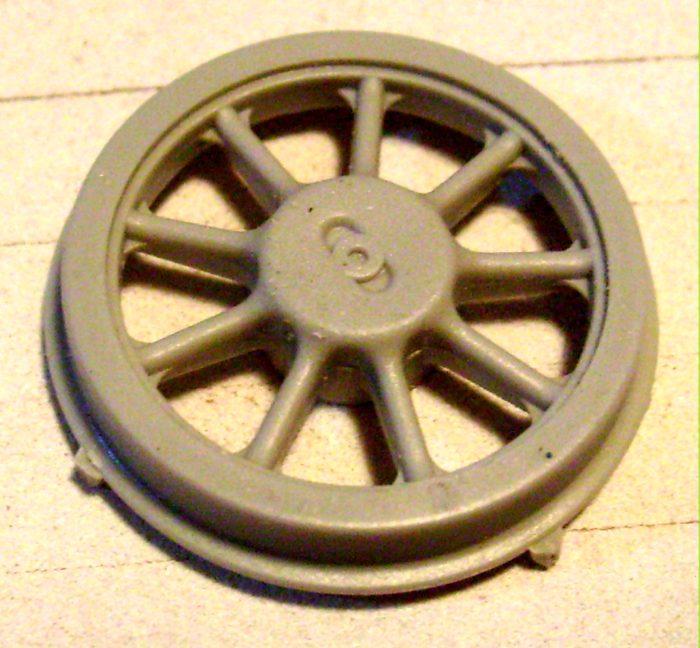
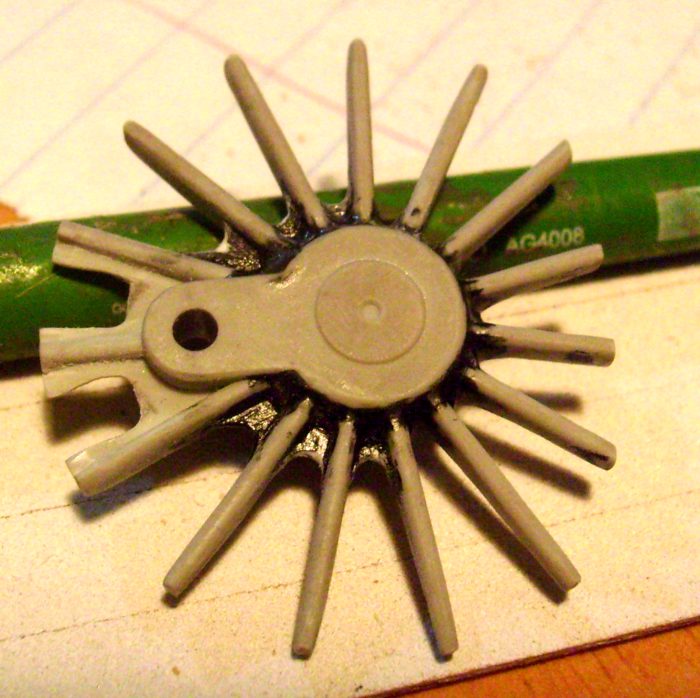
For my loco I need spoked wheel with 7 spokes and also slightly different in proportions from the kit ones. First I turned a hub and made 7 slots around. Then I put it on a board with exact drawing to get very same agles. Then the spokes were glued in slots, used Loctite superglue, which can be sanded easily to get smooth radius later.
Cheers
Libor
www.mymodelplace.eu
www.LZmodels.com
Clare, Ireland
Joined: December 30, 2008
KitMaker: 952 posts
Armorama: 834 posts
Posted: Tuesday, January 19, 2010 - 10:49 AM UTC
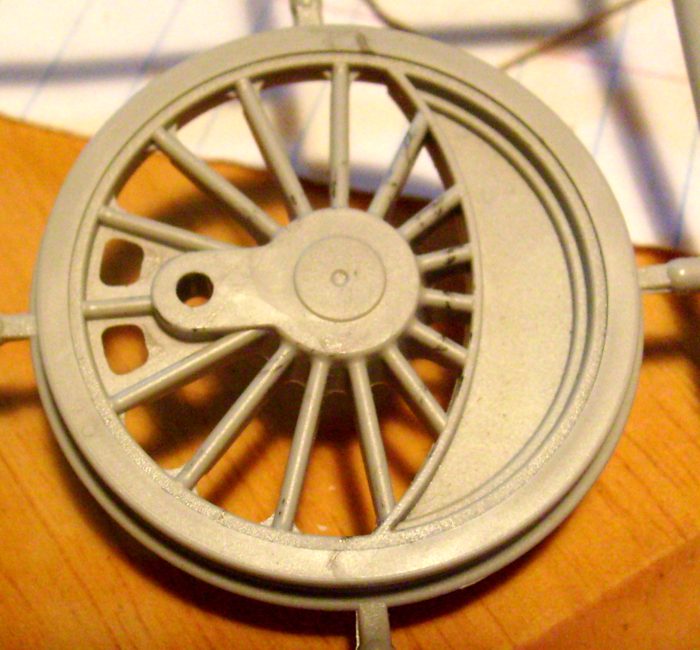
And here I turned the ring and glued all together. Of course, some little corrections and cleaning will be necessary after surfacer coat.

Cheers
Libor
www.mymodelplace.eu
www.LZmodels.com
Clare, Ireland
Joined: December 30, 2008
KitMaker: 952 posts
Armorama: 834 posts
Posted: Wednesday, January 20, 2010 - 10:31 AM UTC
finished wheel in surfacer coat, ready for making the mould. First four castings will be checked again, polished and then used to make multiple mould. Also the other parts are ready to go.
Cheers
Libor
www.mymodelplace.eu
www.LZmodels.com
Clare, Ireland
Joined: December 30, 2008
KitMaker: 952 posts
Armorama: 834 posts
Posted: Friday, January 29, 2010 - 10:20 AM UTC
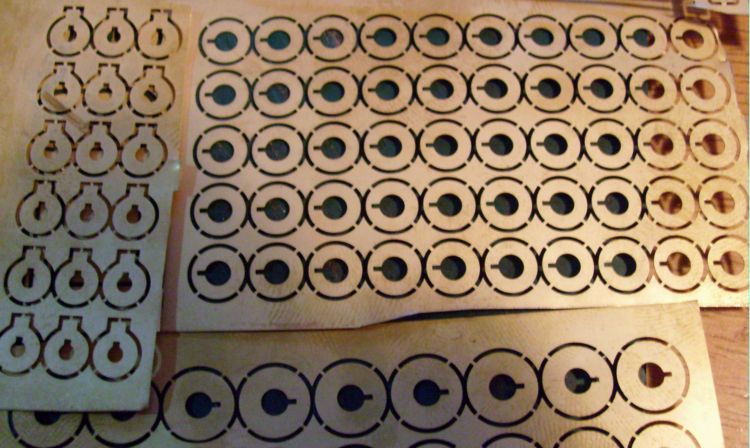
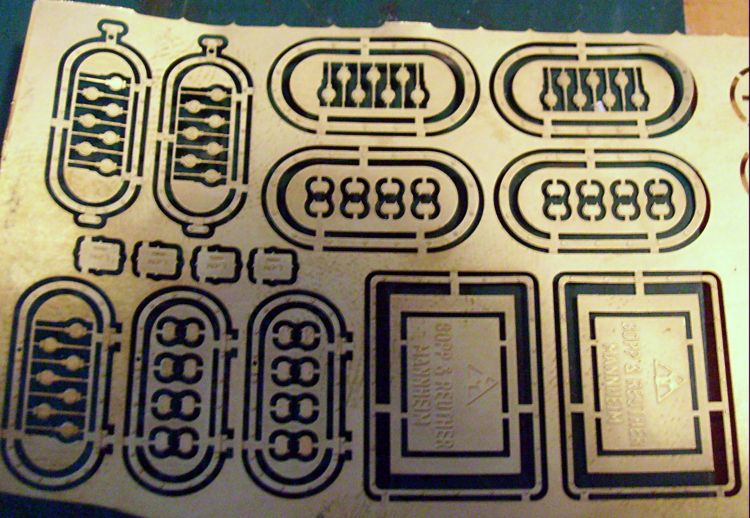
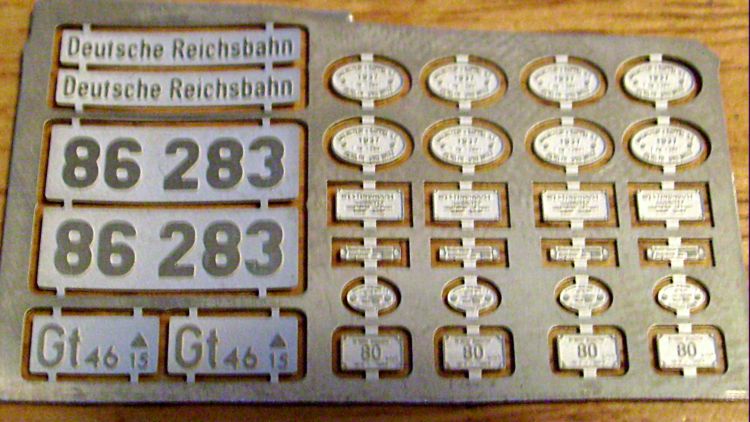
Here some PE I had designed for my build some time ago, and they were finally made up by my friend modeller. Many rounded parts will be used to make a master for Tolkien Knorr compressor, the other are to be used in the cabin or for detailing grease boxes etc. And the rest are various number plates, manufacturer´s names etc.
Cheers
Libor
www.mymodelplace.eu
www.LZmodels.com
North Carolina, United States
Joined: June 26, 2007
KitMaker: 2,116 posts
Armorama: 1,080 posts
Posted: Friday, January 29, 2010 - 12:22 PM UTC
Libor, Its been awhile since I 've checked in on your modeling. You have been very busy with your railroading projects and I see lots more of your Outsanding Work. Thanks for sharing , I just keep on learning. Regards, milvehfan