_GOTOBOTTOM
Armor/AFV: Allied - WWII
Armor and ground forces of the Allied forces during World War II.
Hosted by Darren Baker
M36B1 - kitbash
Dangeroo
#023
Visit this Community
Zurich, Switzerland
Joined: March 13, 2009
KitMaker: 2,058 posts
Armorama: 1,656 posts
Posted: Friday, December 04, 2009 - 08:22 AM UTC
Hello and welcome to my next buildlog!

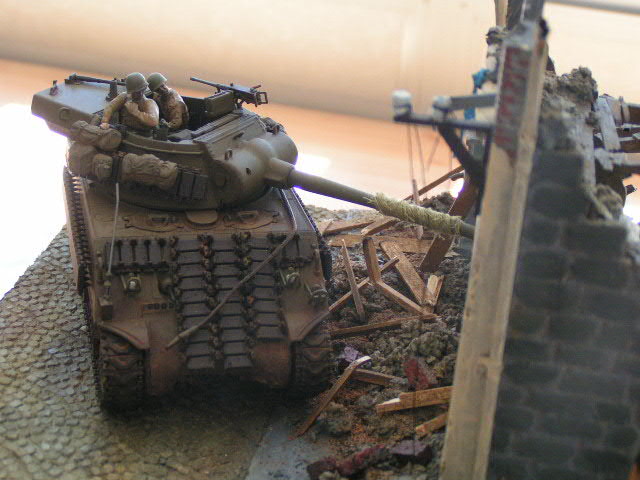
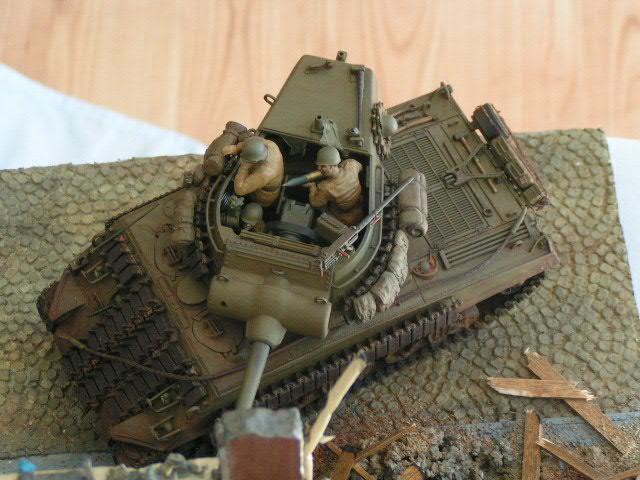
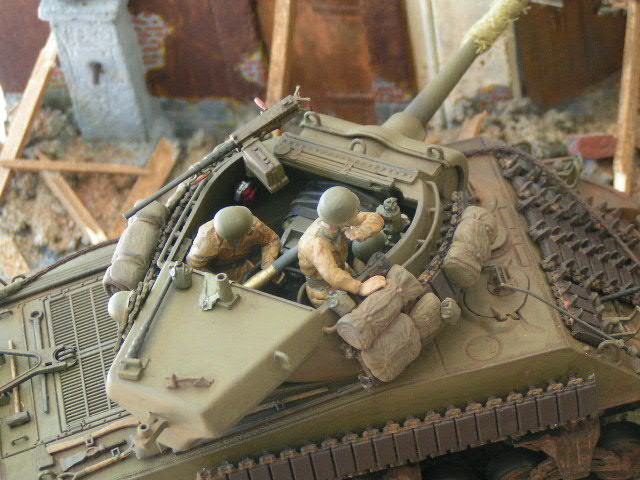
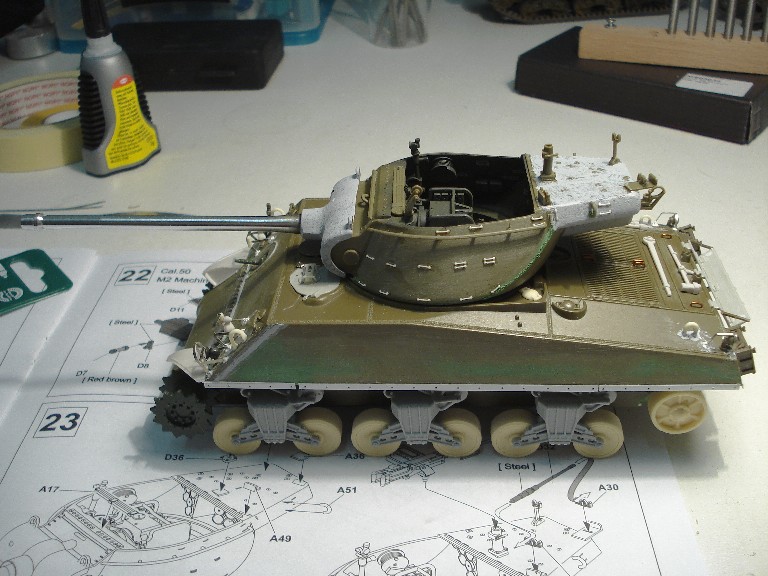
Today (and in the next few months...) I am attempting a kitbash between an Italeri M4A3 upper hull I had laying around and an AFV Club M36, which is ideally suited as its upper hull is not quite correct for an M36. I started this about a week ago so I will enter it into the tank killers campaign.

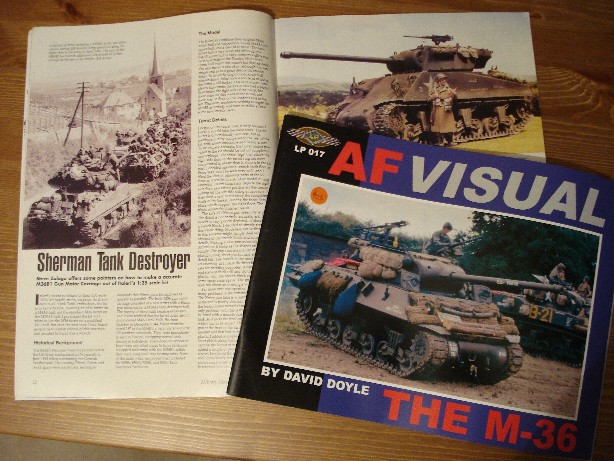
Here are my main references: An AFV Visual on the M36 that has some decent pics of the M36B1 and an issue of Military Modelling from 2001 with an article by Steven Zaloga.


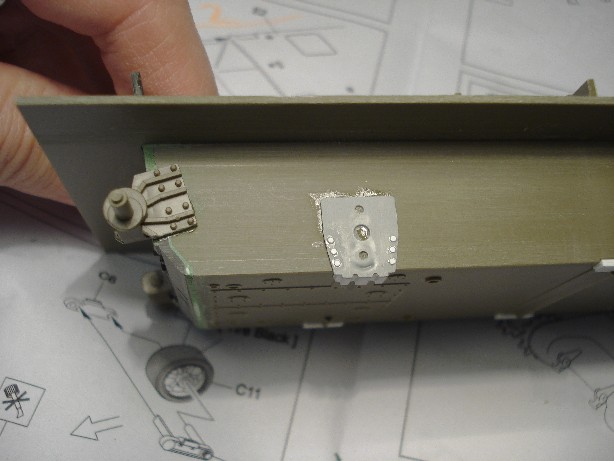
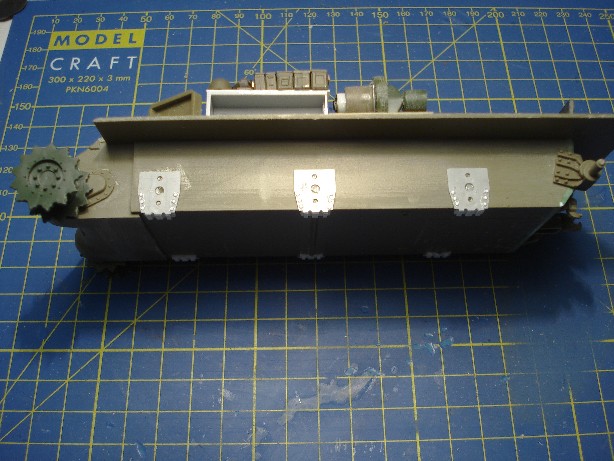
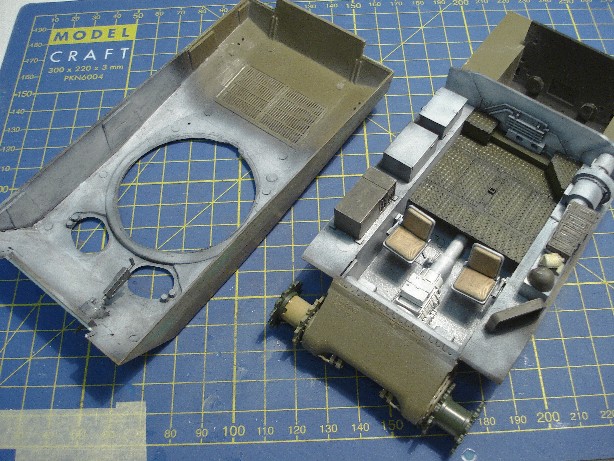
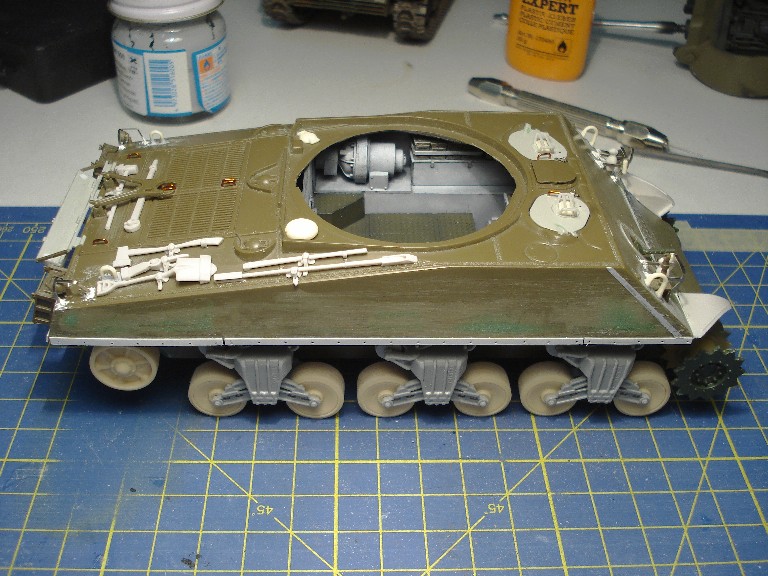
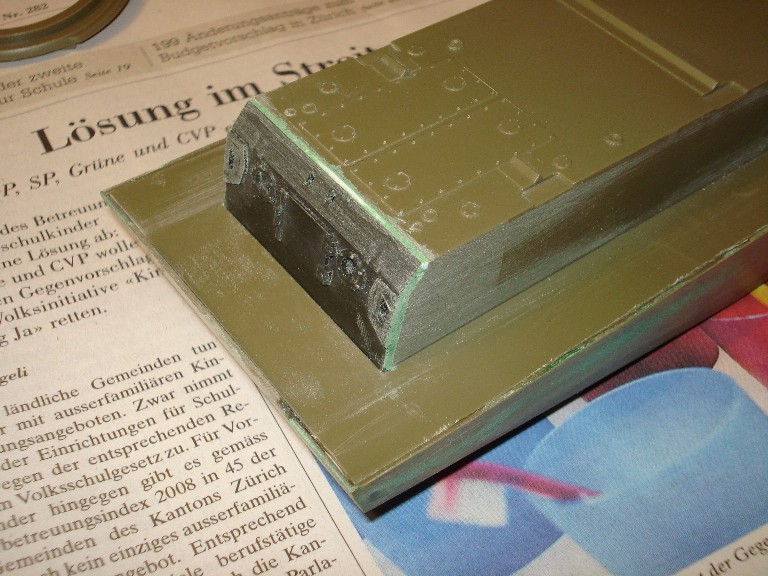
First job was to cut down the sponson fillers of the AFV Club lower hull to get it into the M4 upper hull:


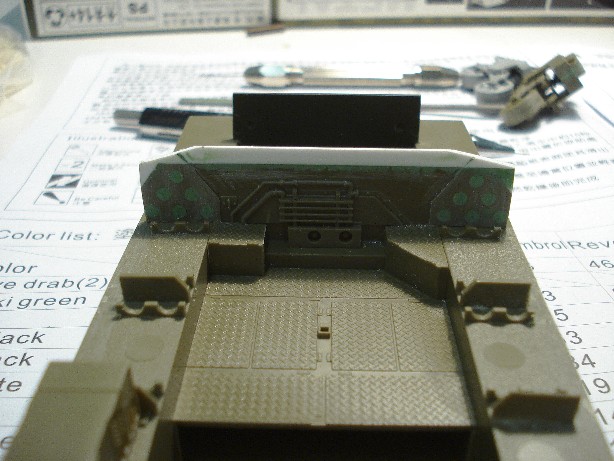
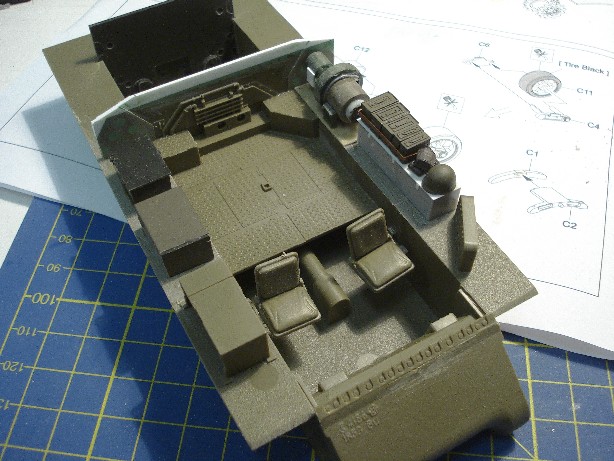
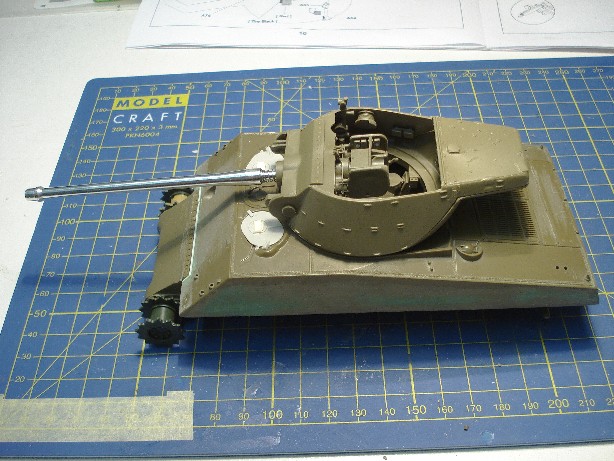
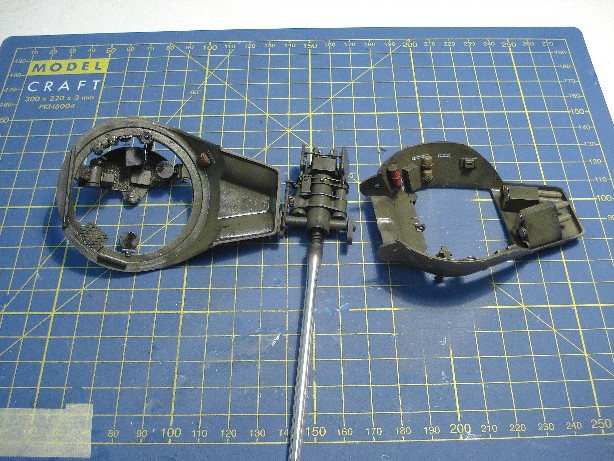
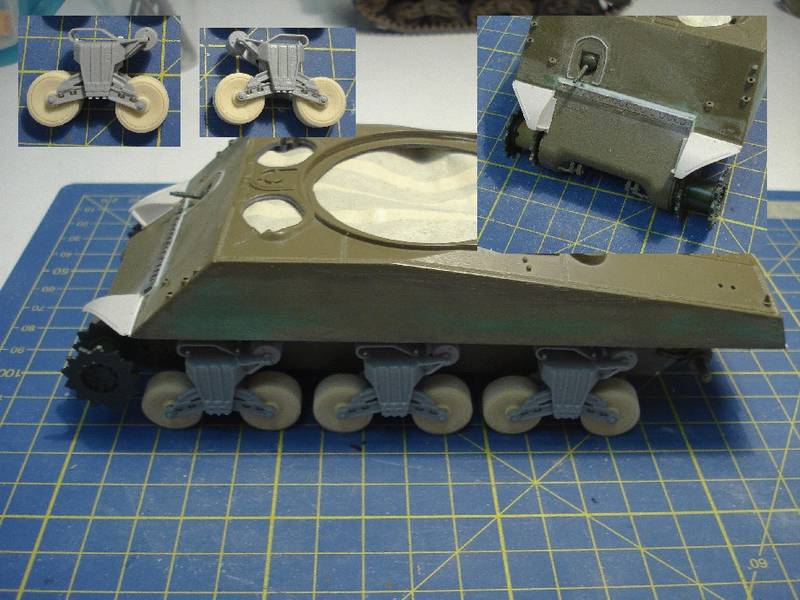
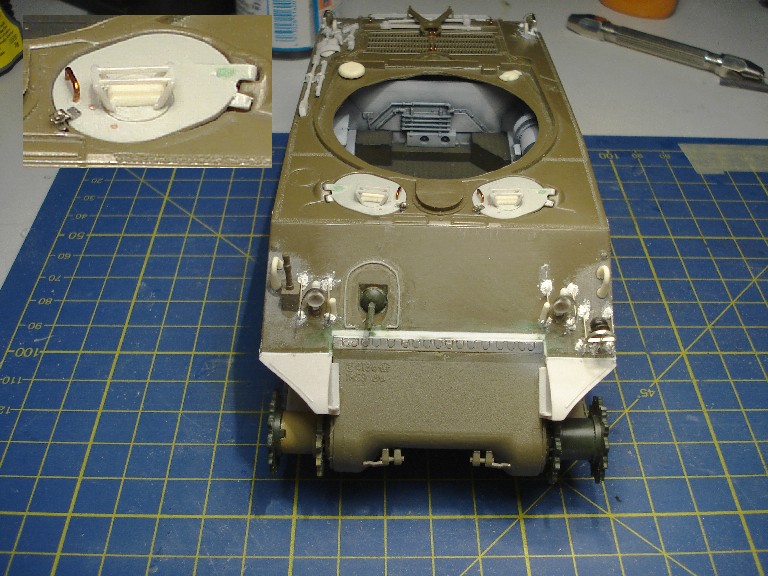
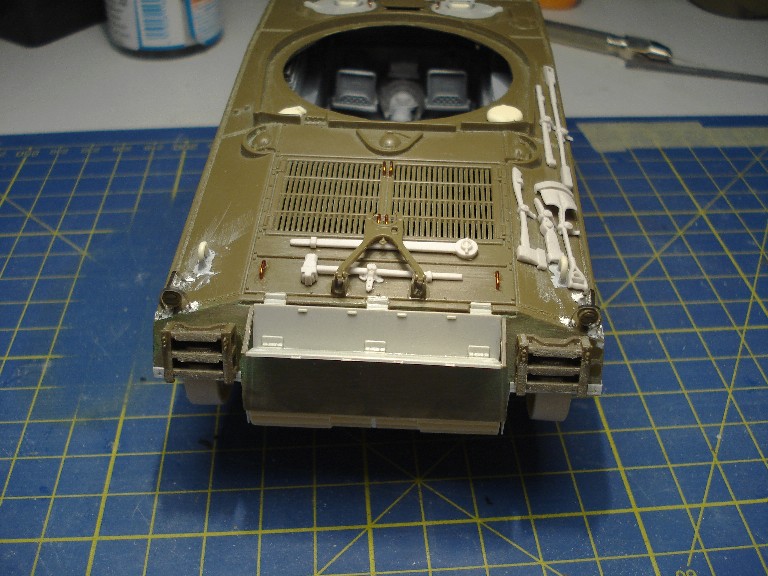
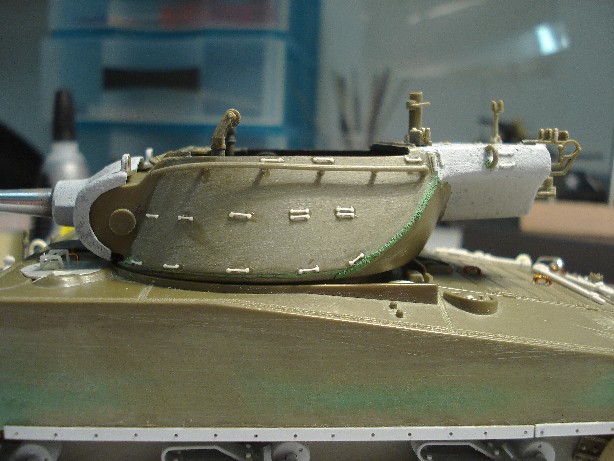
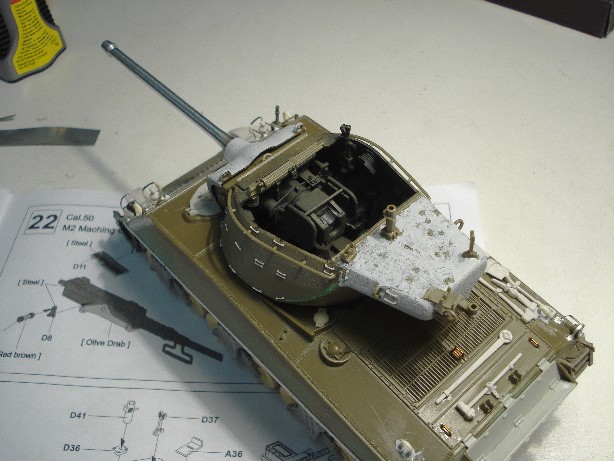
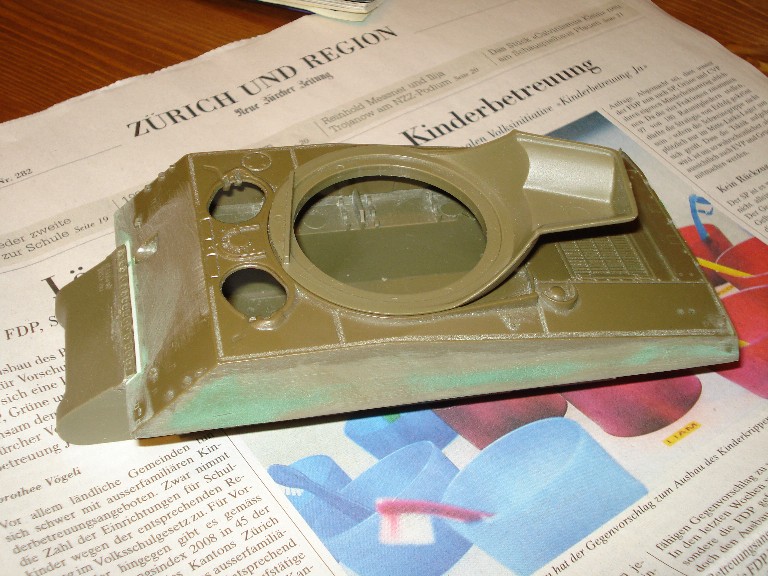
Next were the adaptions needed on the M4A3 upper hull. This included enlarging the turret ring to get the AFV Club turret to fit. Then the front glacis needed some filling to conform to the AFV tranny cover. I also sanded away the Italeri side skirt mounting strips which I will replace with plastic card:


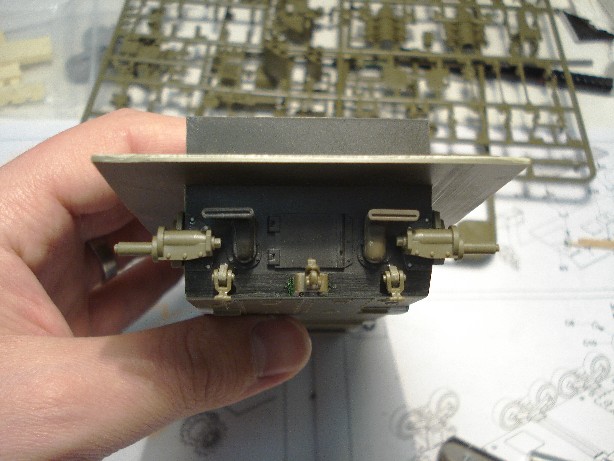
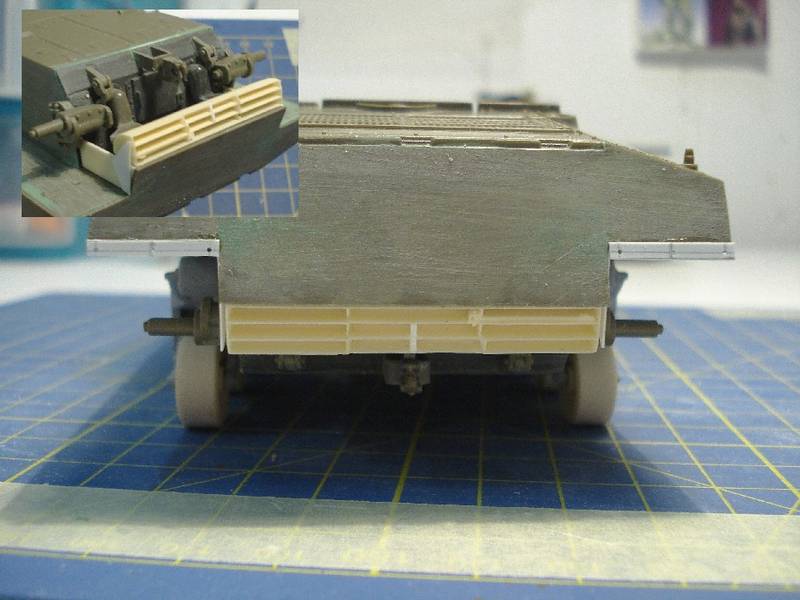
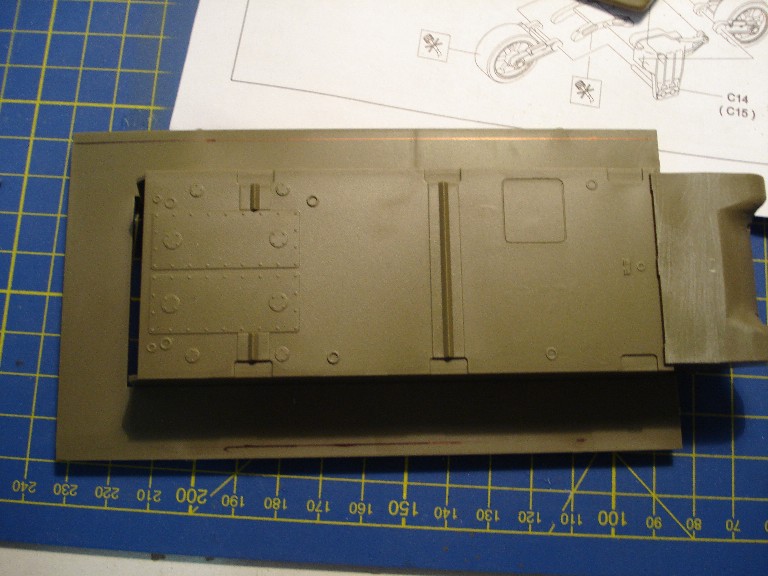
The back plate needed replacing as the AFV one is not suitable for an M4A3 (or an M36 for that matter). I replaced it with a Tamiya part from the spares box and sanded off some of the details to be replaced with AFV items for better definition:


Allright, that's it for now. To be continued!

Cheerio!
shopkin4
Visit this Community
Illinois, United States
Joined: March 29, 2009
KitMaker: 1,135 posts
Armorama: 1,030 posts
Posted: Friday, December 04, 2009 - 08:27 AM UTC
Looking very nice so far. Cant wait to see more
05Sultan
#037
Visit this Community
California, United States
Joined: December 19, 2004
KitMaker: 2,870 posts
Armorama: 1,458 posts
Posted: Friday, December 04, 2009 - 05:04 PM UTC
Didn't Zaloga do his with the Italeri B-36 as a base and scratch from there? I used the Italeri kit with a Verlinden M-10(?) detail kit for turret and engine. Wasn't a bad go,Steve Z's was of course, the better. .
Do you have all this stuff at hand or are you trying to better a certain aspect of the subject?
Cheers!
Rick
sdk10159
Visit this Community
Oregon, United States
Joined: December 08, 2005
KitMaker: 556 posts
Armorama: 433 posts
Posted: Friday, December 04, 2009 - 10:26 PM UTC
Hello Stefan,
Nice work so far.
I'll be watching your build closely, as I'm just about to start my own build of an M36B1. I will be using a Tamiya M4A3 hull and using the AFV Club M36 interior and turret.

Steve
Dangeroo
#023
Visit this Community
Zurich, Switzerland
Joined: March 13, 2009
KitMaker: 2,058 posts
Armorama: 1,656 posts
Posted: Friday, December 04, 2009 - 10:33 PM UTC
Thanks guys. I'm looking forward to my progress as well... Not too much time in the cave lately...


Quoted Text

Didn't Zaloga do his with the Italeri B-36 as a base and scratch from there?


Yeah, that was it. Was my plan at first too, but I wasn't up for the scratched turret interior. Since the AFV-Club offering has a great turret I decided to use most of that kit. The upper hull is actually from the Italeri M36, I gave the rest with an Italeri M4A1 hull to my little cousin.


Quoted Text

I used the Italeri kit with a Verlinden M-10(?) detail kit for turret and engine. Wasn't a bad go,Steve Z's was of course, the better. .


Feel free to post a pic here!


Quoted Text

Do you have all this stuff at hand or are you trying to better a certain aspect of the subject?


Not sure if I understand the question right. I'm planning on using as much as possible from the AFV-kit and adding the rest from the spares box. I will probably get a new exhaust deflector and tools from Formations, just because they're marvellous items.

To be continued!

Cheerio!
05Sultan
#037
Visit this Community
California, United States
Joined: December 19, 2004
KitMaker: 2,870 posts
Armorama: 1,458 posts
Posted: Saturday, December 05, 2009 - 04:30 AM UTC
I was just thinking it was a longer road to get to a nice M36B1, but you're the one building it and that's what counts. You are doing a fine job on it as well. Please keep us current on the progress! Do you have plans for a dio,or is this going on a base?
What I did..........


Beaver2206
Visit this Community
England - West Midlands, United Kingdom
Joined: November 03, 2007
KitMaker: 61 posts
Armorama: 56 posts
Posted: Saturday, December 05, 2009 - 04:58 AM UTC
Nice one - I like the packed turret.

Stu
barkingdigger
Staff MemberAssociate Editor
ARMORAMA
#013
Visit this Community
England - East Anglia, United Kingdom
Joined: June 20, 2008
KitMaker: 3,981 posts
Armorama: 3,403 posts
Posted: Saturday, December 05, 2009 - 08:22 AM UTC
Stefan,

Interesting approach to your build. I'm planning to build the Italeri M36B1 in parallel with an Academy M36 for the Tank Killers campaign, using the Academy turret as a pattern for scratching parts for the Italeri one. (Common sense suggests I ought to buy an Academy or AFV kit for the turret, but that'd be too easy! And it'd cost cash...)

I'm curious about the way you have sanded all the details off the lower hull sides - do you have the necessary new parts for suspension mounting plates etc, or will you scratch-build them?

And Rick, nice diorama! I really like the loading action.

Tom
Dangeroo
#023
Visit this Community
Zurich, Switzerland
Joined: March 13, 2009
KitMaker: 2,058 posts
Armorama: 1,656 posts
Posted: Wednesday, December 09, 2009 - 02:09 AM UTC
Hi all and thanks for the comments!


Quoted Text

I will be using a Tamiya M4A3 hull and using the AFV Club M36 interior and turret.e


Quoted Text

I'm planning to build the Italeri M36B1 in parallel with an Academy M36 for the Tank Killers campaign, using the Academy turret as a pattern for scratching parts for the Italeri one. (Common sense suggests I ought to buy an Academy or AFV kit for the turret, but that'd be too easy! And it'd cost cash...)


The sensible thing would probably be to use a Dragon M4A3/76 and add the AFV or Academy turret. But are we sensible here? I like a challenge once in a while...


Quoted Text

Do you have plans for a dio,or is this going on a base?


Don't know yet, for now it's just the vehicle, no dio planned. Yours looks very nice, by the way. What figures did you use?


Quoted Text

I'm curious about the way you have sanded all the details off the lower hull sides - do you have the necessary new parts for suspension mounting plates etc, or will you scratch-build them?


I didn't sand anything off on the sides, the sanding marks are from sanding the back armor plate flush to the sides. AFV-Club attaches their bogies with the mounting plates and aligns them with depressions on the bottom plate.

Here's my progress from last night, doens't look like much but took a while...

This is what the interior looks like for now. Had adapt the back fire wall to the M4 hull. The interior is not correct for an M36B1 as they had ammo stowage under the floor, not on the sponsons. But I'm no great fan of interiors myself (takes a lot of time and most of it can't be seen in the and) and just want something to bee seen through the open turret. Most of the hull interior details will be obscured by the turret anyway.


Sorry, have to go now, more later today. For some reason my 6 week old daughter always starts crying when I try to post here...

Cheerio!
Dangeroo
#023
Visit this Community
Zurich, Switzerland
Joined: March 13, 2009
KitMaker: 2,058 posts
Armorama: 1,656 posts
Posted: Wednesday, December 09, 2009 - 03:12 AM UTC
OK, back again...

Next up the suspension. The M36B1 requires the late bogies with raised return rollers, so I couldn't use the AFV-Club ones. Luckily I had some spares from a Dragon M4A1 kit. Also most pictures I've seen of the M36B1 had the simple dished wheels. I have a Formations set on the way (with some other goodies...). (Note the Dragon offering is only dry fitted w/o cleanup)


The Dragon bogies require some adaptions to fit them to the hull. Dragon mounts the bogies with a depression on the sides, so the appropriate plug on the Dragon part has to be sawed off. The mounting depressions on the AFV-Club bottom have to be filled (plasticcard):


Also did some work on the back plate:


Thanks for looking! Any comments welcome!

Cheerio!
Dangeroo
#023
Visit this Community
Zurich, Switzerland
Joined: March 13, 2009
KitMaker: 2,058 posts
Armorama: 1,656 posts
Posted: Sunday, December 20, 2009 - 06:44 AM UTC
Hello everyone!

Slow going before Christmas... But nevertheless...

I decided to scratch a makeshift interior that looks more like it should. I took Zaloga's build as a reference and added some boxes and scratched a thing that sortof (I hope) looks like the little machine (I can't remember it's name) on the left sponson. It's mainly made up of several wheels from the spares box (among others an Stuart road wheel, a Sherman return roller and drive sprocket and half an M26 return roller... )


The mounting plates are done now, waiting for the bogies with the appropriate road wheels by Formations. These will hopefully arrive soon together with some other goodies... I also had to replace the kit drive sprockets because they are the fancy type and the M36B1 appearantly used the smooth ones only. The sprockets are Academy.


As I'm waiting for some parts I started on the turret basket and gun.


That's it for now! Thanks for looking! Any comments or tips welcome!

Cheerio!
Dangeroo
#023
Visit this Community
Zurich, Switzerland
Joined: March 13, 2009
KitMaker: 2,058 posts
Armorama: 1,656 posts
Posted: Saturday, December 26, 2009 - 09:21 AM UTC
Some more progress on this one...

Finished the turret interior:


This is what the whole thing looked like before peinting the interior:


Hull interior painted:


Turret painted:


And some formations goodies arrived just in time for Christmas. Exhaust deflector, headlights, tools, roadwhels and new fenders (had to cut them off when I modified the hull).


Thanks for looking!

Cheerio!
shopkin4
Visit this Community
Illinois, United States
Joined: March 29, 2009
KitMaker: 1,135 posts
Armorama: 1,030 posts
Posted: Saturday, December 26, 2009 - 12:31 PM UTC
Very nice progress. Keep working strong!
RotorHead67
Visit this Community
Virginia, United States
Joined: May 07, 2003
KitMaker: 1,174 posts
Armorama: 772 posts
Posted: Saturday, December 26, 2009 - 06:27 PM UTC
Stephan,
Looks great so far. The so called "thingy" you built is the Aux. generator. And if you check your AFV visual you'll see it , also the M36B1 had a rack on the interior fender with open ready rounds (9), I think right side but not possitive. Keep up the great progress.
BTW: I am building an M36B1 as well, using the Tamiya M4 and the Academy turret.
CHEERS
Dangeroo
#023
Visit this Community
Zurich, Switzerland
Joined: March 13, 2009
KitMaker: 2,058 posts
Armorama: 1,656 posts
Posted: Saturday, December 26, 2009 - 09:32 PM UTC
Sean, thanks, will do.

Todd, yeah that's it. I had forgotten its name by the time I got up from the cave... Must be all that glue sniffing... I hadn't noticed there was a pic in the AFV visual, that would have been great help. Of course now it's too late as I've already glued the upper to the lower hull...


Quoted Text

I am building an M36B1 as well, using the Tamiya M4 and the Academy turret.


How about a build log so we can compare notes?

Cheerio!
Dangeroo
#023
Visit this Community
Zurich, Switzerland
Joined: March 13, 2009
KitMaker: 2,058 posts
Armorama: 1,656 posts
Posted: Friday, January 01, 2010 - 01:17 AM UTC
Welcome to 2010!

Here are some updates:

Fixed the suspension. Had to add some screw heads on the bottom and on the track skids. Also added the Formations fenders.


The Formations Exhaust deflector: Although meant for the Tamiya kit it works well on the Italeri hull with some minor adaptations.


That's all for now!

Cheerio!
Dangeroo
#023
Visit this Community
Zurich, Switzerland
Joined: March 13, 2009
KitMaker: 2,058 posts
Armorama: 1,656 posts
Posted: Tuesday, January 05, 2010 - 09:33 AM UTC
I'm still working on this one...

All the little bits and pieces on the hull are done. Some from the spares box, some from Formations and the PE from Finemolds, very recommended. There are even hinges for the drivers hatches.


Comments and hints welcome!

Cheerio!
RotorHead67
Visit this Community
Virginia, United States
Joined: May 07, 2003
KitMaker: 1,174 posts
Armorama: 772 posts
Posted: Tuesday, January 05, 2010 - 02:55 PM UTC

Quoted Text

I am building an M36B1 as well, using the Tamiya M4 and the Academy turret.


How about a build log so we can compare notes?

Cheerio![/quote]

Hey Stefan,
The blog is lookin GREAT. BTW, I bought myself a XMAS present last week, so your prososal for a build log of my own is HIGHLY plausible now. I think I will start on as well. From the looks of your build so far we are not to far differant in the outcome., Just differant starting kits. But I didn't make any special purchases except for deep dish wheels.
I will use parts from both the Academy M36 and the TAmiya M4 and scratch the rest. I'll keep U updated.
Dangeroo
#023
Visit this Community
Zurich, Switzerland
Joined: March 13, 2009
KitMaker: 2,058 posts
Armorama: 1,656 posts
Posted: Tuesday, January 05, 2010 - 11:34 PM UTC

Quoted Text

I will use parts from both the Academy M36 and the TAmiya M4 and scratch the rest.


Hey Todd, thanks for the post! Looking forward to your build. I just hope you got an M4A3, not an M4, that one would not be appropriate...

As for special purchases, well, I didn't plan on those from the beginning, it just got to me...

Cheerio!
Dangeroo
#023
Visit this Community
Zurich, Switzerland
Joined: March 13, 2009
KitMaker: 2,058 posts
Armorama: 1,656 posts
Posted: Monday, January 11, 2010 - 09:02 AM UTC
Not much to say about the turret, mostly out of the box. Some filler was neede to get the turret halves right, the n I had to sand off some of the attachment points so I decided to replace them all (two small discs from a punch & die set plus some streched sprue). Also had to redo the weld seam on the back with putty. While I was at it I added some cast texture to the turret couter weight and the gun mantlet.

So this one's done bilding:


Any comments highly appreciated! Any glaring mistakes before I go to painting?

Cheerio!
RotorHead67
Visit this Community
Virginia, United States
Joined: May 07, 2003
KitMaker: 1,174 posts
Armorama: 772 posts
Posted: Thursday, January 14, 2010 - 12:08 PM UTC
Srefan,
Dude its looking GREAT. one thing is amiss. You have the back bracket for the range stakes too far back on the bustle. It woul be in the way for the 50 cal which goes across the back. You also might want to add the other (2) brakets that go on the right rear of the bustle to hold the other end of the 50 cal receiver and barrel. They are just like the Shermans mounting. You did a banngin job on the tie down cleats. The tools and PE looks good too. I like your mr surfacer cast texture job as well. SHE's a BEAUTY
You got the gears turning for me to get mine goin now.
Do you have PE chains and handles for the gas cap covers? If not I use .015 brass wire for the handles and I twist .010 fuse wire for the chains, I know it may seem picky but it really looks good when its done.
shopkin4
Visit this Community
Illinois, United States
Joined: March 29, 2009
KitMaker: 1,135 posts
Armorama: 1,030 posts
Posted: Thursday, January 14, 2010 - 12:31 PM UTC
Very nice. I've been watching this one from the beginning and I have been throughly impressed all the way through. Looking forward to the painting portion.
Dangeroo
#023
Visit this Community
Zurich, Switzerland
Joined: March 13, 2009
KitMaker: 2,058 posts
Armorama: 1,656 posts
Posted: Thursday, January 14, 2010 - 08:52 PM UTC
Thanks for the kind words guys! Good if I got some other people to try out the subject. Using the Italeri kit has the benefit that some special parts (like the antenna mount and the mirrors on the front glacis) are included and at least you'll remember them even if you don't use the parts.


Quoted Text

one thing is amiss. You have the back bracket for the range stakes too far back on the bustle. It woul be in the way for the 50 cal which goes across the back. You also might want to add the other (2) brakets that go on the right rear of the bustle to hold the other end of the 50 cal receiver and barrel. They are just like the Shermans mounting.


The .50 actually fits, i tested it as it seemed a bit tight. The bracket is actually for the spare .50 cal. barrels and is mounted as per the instructions. I'll look into the other 2 brackets, forgot about them in the rush of wanting to get something done... that's why I like posting here, people always give you feedback that gets you back on the right track.


Quoted Text

Do you have PE chains and handles for the gas cap covers? If not I use .015 brass wire for the handles and I twist .010 fuse wire for the chains,


So you think I should go all the way? I'll look into it...

Cheerio!
RotorHead67
Visit this Community
Virginia, United States
Joined: May 07, 2003
KitMaker: 1,174 posts
Armorama: 772 posts
Posted: Wednesday, January 20, 2010 - 04:58 PM UTC

Quoted Text

Thanks for the kind words guys! Good if I got some other people to try out the subject. Using the Italeri kit has the benefit that some special parts (like the antenna mount and the mirrors on the front glacis) are included and at least you'll remember them even if you don't use the parts.


Quoted Text

one thing is amiss. You have the back bracket for the range stakes too far back on the bustle. It woul be in the way for the 50 cal which goes across the back. You also might want to add the other (2) brakets that go on the right rear of the bustle to hold the other end of the 50 cal receiver and barrel. They are just like the Shermans mounting.


The .50 actually fits, i tested it as it seemed a bit tight. The bracket is actually for the spare .50 cal. barrels and is mounted as per the instructions. I'll look into the other 2 brackets, forgot about them in the rush of wanting to get something done... that's why I like posting here, people always give you feedback that gets you back on the right track.


Quoted Text

Do you have PE chains and handles for the gas cap covers? If not I use .015 brass wire for the handles and I twist .010 fuse wire for the chains,


So you think I should go all the way? I'll look into it...

Cheerio!


Stephan.
I'm not telling you how to build your model.........you take it as far as you wish, but I've been following this one from the begining and you are doing such OUTSTANDING work Why not go for it.( when the bow of the canue crests the top of the falls you cant paddle backwards) You da man. I dont know if I should add my M36B1 build here with yours or start another thread. Keep up the great Job Steph.
Dangeroo
#023
Visit this Community
Zurich, Switzerland
Joined: March 13, 2009
KitMaker: 2,058 posts
Armorama: 1,656 posts
Posted: Thursday, January 21, 2010 - 12:51 AM UTC
Not taken as instructions at all, I like to get hints and ideas for improvment!

I haven't worked on this lately, but I will try the chains. As for the two "missing" brackets, I couldn't find any evidenco of these on M36B1 (or any M36 in fact). This should be due to the fact that these brackets were for the .50 cal. barrel on the Shermie and on the M36 the barrels were stored in the bracket on top of the turret.

Hey, I don't mind you posting your work here, let's make this the semiofficial M36B1 kitbash thread! Yours is a kitbash of an M36B1, so it will fit just fine.

Cheers!
Stef
 _GOTOTOP