_GOTOBOTTOM
Dioramas: Small Scale
Dioramas of subjects smallers than 1/32 scale.
Hosted by Darren Baker
Carentan, June 12th, 1944
ophelia53
Visit this Community
Missouri, United States
Joined: March 10, 2010
KitMaker: 254 posts
Armorama: 226 posts
Posted: Monday, September 05, 2011 - 12:56 PM UTC
Hi guys!
I am back! I hope everyone is well these days!
I started work on my Carentan dio (I know, I know, not that original). I am very excited about this, though, and have planned out the layout. I'll have to get some photos of it, though. For now, I have the start of my Cafe De Normandie to show you!


I'll keep you guys posted on the build and I'll add some photos of the layout when it's unburied
russamotto
Visit this Community
Utah, United States
Joined: December 14, 2007
KitMaker: 3,389 posts
Armorama: 2,054 posts
Posted: Monday, September 05, 2011 - 01:51 PM UTC
Looks like it will be a good one. I'll stay tuned.
GregCopplin
Visit this Community
United States
Joined: September 06, 2011
KitMaker: 212 posts
Armorama: 201 posts
Posted: Tuesday, September 06, 2011 - 04:23 AM UTC
Looking good, is this the building from Band of Brothers, the one that is penning down easy company because theirs two fallschirmjager machine guns in the 1 story window?
Curtisl21
Visit this Community
England - West Midlands, United Kingdom
Joined: July 09, 2011
KitMaker: 51 posts
Armorama: 49 posts
Posted: Tuesday, September 06, 2011 - 07:06 AM UTC
cool i am also doing a carentan project in 20mm i have also make the cafe de normadie too looking good like to see more
tommy1drop
Visit this Community
England - East Midlands, United Kingdom
Joined: February 07, 2011
KitMaker: 131 posts
Armorama: 116 posts
Posted: Tuesday, September 06, 2011 - 07:31 AM UTC
Mind if i tag along, looking forward to seeing more.

Tom
ophelia53
Visit this Community
Missouri, United States
Joined: March 10, 2010
KitMaker: 254 posts
Armorama: 226 posts
Posted: Tuesday, September 06, 2011 - 08:25 AM UTC
@Greg: Yes, this will be exactly that! I have yet to decide in which part of the entering Carentan I'm gonna do...Was thinking how cool it would be to have a little fig throwing the grenade into the window of the Cafe, and looking to buy some figs now. I'm having a hard time finding any paratroopers of US or Germany that are in stock, though. Price isn't a huge concern, but I don't want to wind up paying more in shipping than for the figs themselves.
Also, going to do some research now into exactly which types of armor were used...I may throw in the tank, but we'll see.
@Tom: Not at all! Love to have you!
@Curtis: Excellent! How big is yours going to be, and any luck with figs?

Right now, I'll be building about 4 buildings in total, and the chicken coop as well. The terrain will get laid once I get the figs in the next few weeks (hopefully).
Stay tuned, I'll be updating as I can!
Thanks all for following! This is my first REAL dio and I am quite excited! You guys are really amazing!
Plasticbattle
#003
Visit this Community
Donegal, Ireland
Joined: May 14, 2002
KitMaker: 9,763 posts
Armorama: 7,444 posts
Posted: Tuesday, September 06, 2011 - 08:28 AM UTC
Hi Brandi. Will the windows be all the same size on both upper floors? Some of them look a bit off-square. I recommend making some sort of jig to get the frames the same, and then tidy up the window gaps to keep them as close in size to each other as possible. If you just frame the gaps as they are, it will look rough.
Good start ... I use this poster board as well ... perfect item for such a building. Will be watching
ophelia53
Visit this Community
Missouri, United States
Joined: March 10, 2010
KitMaker: 254 posts
Armorama: 226 posts
Posted: Tuesday, September 06, 2011 - 09:06 AM UTC

Quoted Text

Hi Brandi. Will the windows be all the same size on both upper floors? Some of them look a bit off-square. I recommend making some sort of jig to get the frames the same, and then tidy up the window gaps to keep them as close in size to each other as possible. If you just frame the gaps as they are, it will look rough.
Good start ... I use this poster board as well ... perfect item for such a building. Will be watching


Ah, good idea!! I will do this for the next building. I am working on getting the frames in place and will definitely be tidying up the windows, they do look like beginner's windows, don't they?
Thanks for the tip!
ophelia53
Visit this Community
Missouri, United States
Joined: March 10, 2010
KitMaker: 254 posts
Armorama: 226 posts
Posted: Wednesday, September 07, 2011 - 12:02 PM UTC
Small update from me:
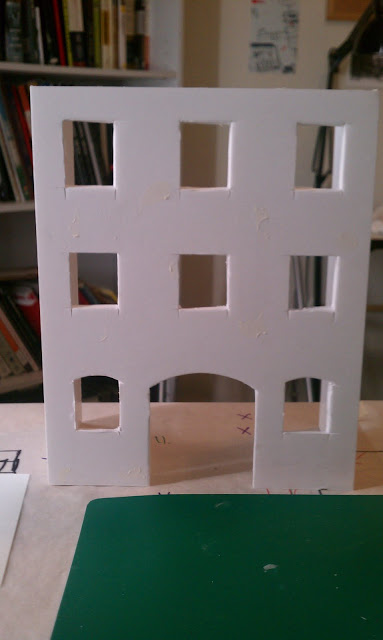
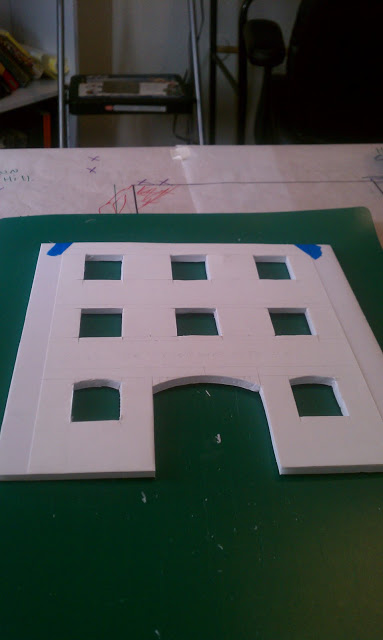
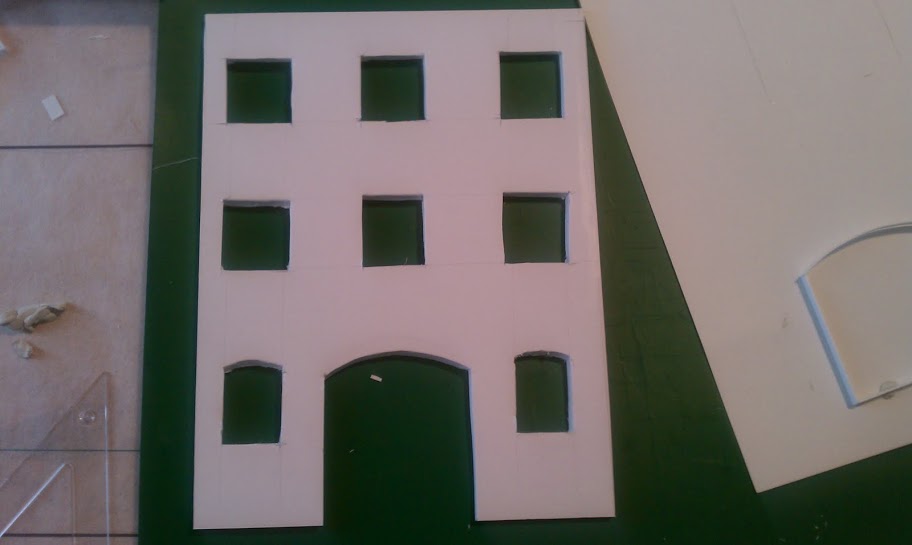
The initial walls I had were a hot mess, so I recut them, then recut them again. Now, I am mostly satisfied, but I think I need to invest in a better hobby knife or something...maybe buy some better knife skills
Anyway, here's the new (hopefully final) front wall, the back will be open and I will be trying my hand at scratch building some furniture! I'm excited! I'm also planning to start modding some figs this weekend, so I'm doing some research on that now.

The new wall (I had a photo with the windows in, but the computer ate it):


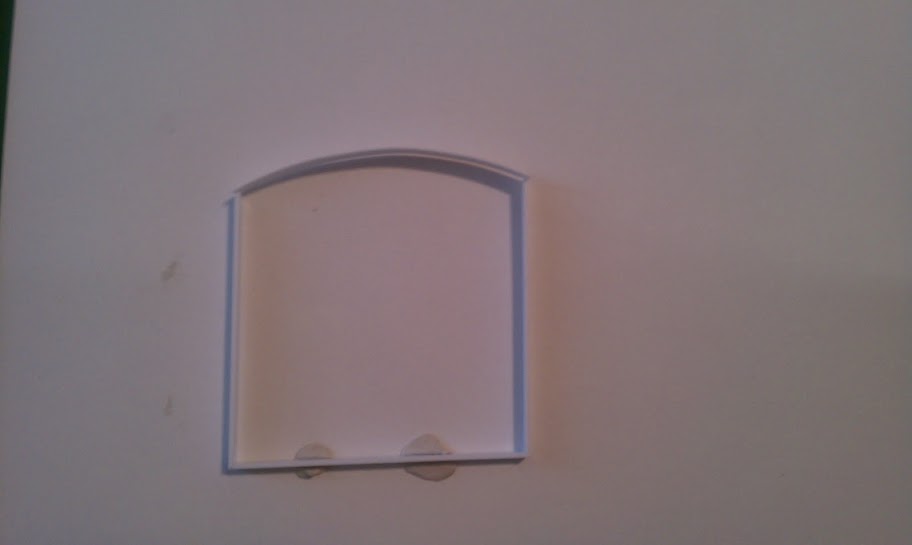
and here's the door frame, built from plasticard:


While looking around today I found some really good photos of the exact scene I am depicting...still deciding on how big i want this thing. I have some figs on order (finally) and will let you guys know when they arrive!
Comments & tips are appreciated!
Happy modeling!
GregCopplin
Visit this Community
United States
Joined: September 06, 2011
KitMaker: 212 posts
Armorama: 201 posts
Posted: Thursday, September 08, 2011 - 04:20 AM UTC
What figs did you get for the Fallschirmjager?
Curtisl21
Visit this Community
England - West Midlands, United Kingdom
Joined: July 09, 2011
KitMaker: 51 posts
Armorama: 49 posts
Posted: Thursday, September 08, 2011 - 04:57 AM UTC
looking good would like to see how it comes out
as for myne i am doing a 1m by 1m board and my figs turned out good
if you want any help with the uniforms i will be happy to hell seen as though
the us para uniforms were abit of a b*tch for me
Removed by original poster on 09/08/11 - 15:58:28 (GMT).
ophelia53
Visit this Community
Missouri, United States
Joined: March 10, 2010
KitMaker: 254 posts
Armorama: 226 posts
Posted: Thursday, September 08, 2011 - 07:25 AM UTC
Greg,
I got my hands on:

http://www.ebay.com/itm/ws/eBayISAPI.dll?ViewItem&item=150491880422&ssPageName=ADME:L:OC:US:1123
, which I am quite happy about. I did a quick lookup to make sure the kit was worth the money, but everything I read on Hobby Fan was pretty good, and I figure it's better than Verlinden, which is sad. Anyway! They are shipping from somewhere far, far away, so I won't get them for a bit. Doing the camo uniform will be a good time, hehe.
Curtis,
That would be awesome! Do you have a link to a blog or a build log you kept while building your dio? How many buildings did you put in yours?
The more I think about it, the more I think I should build this smaller and focus on the story telling. Now, which part of the story do I want to tell?
:)
Thanks for reading! I'll be working on this this weekend, so expect a larger update early next week!
As always, please keep the comments and tips coming!
Happy modeling!
GregCopplin
Visit this Community
United States
Joined: September 06, 2011
KitMaker: 212 posts
Armorama: 201 posts
Posted: Thursday, September 08, 2011 - 09:03 AM UTC
Are you going to have an anti tank gun set up
Curtisl21
Visit this Community
England - West Midlands, United Kingdom
Joined: July 09, 2011
KitMaker: 51 posts
Armorama: 49 posts
Posted: Friday, September 09, 2011 - 10:41 PM UTC
well heres my blog page http://curtispaintworks.blogspot.com/ myne project is still WIP so i have only made two building so far. painted one and not happy with the results and now i am stuck on what paints i can use for the house grrr i am atm airbrushing a stug iii and i also have a marder but i have recived it and it looks 1/76 instead of 1/72 and it looks silly with the stug iii because the stug iii just towers over it. If you need help with Uniforms Drop me an email at [email protected]
thanks
mine_sweeper
Visit this Community
Indiana, United States
Joined: August 27, 2011
KitMaker: 2 posts
Armorama: 1 posts
Posted: Saturday, September 10, 2011 - 01:42 AM UTC
Great start. Going to enjoy watching, especially with the pics from the very beginning.
ophelia53
Visit this Community
Missouri, United States
Joined: March 10, 2010
KitMaker: 254 posts
Armorama: 226 posts
Posted: Sunday, September 11, 2011 - 01:54 PM UTC
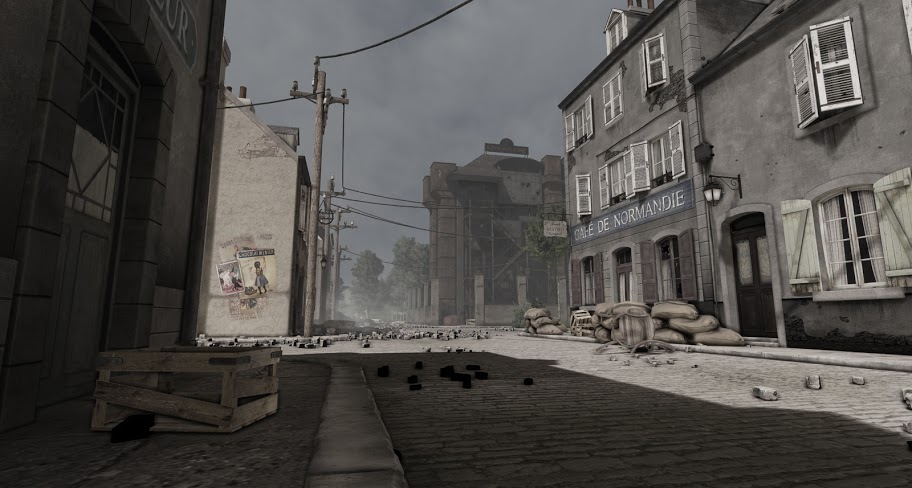
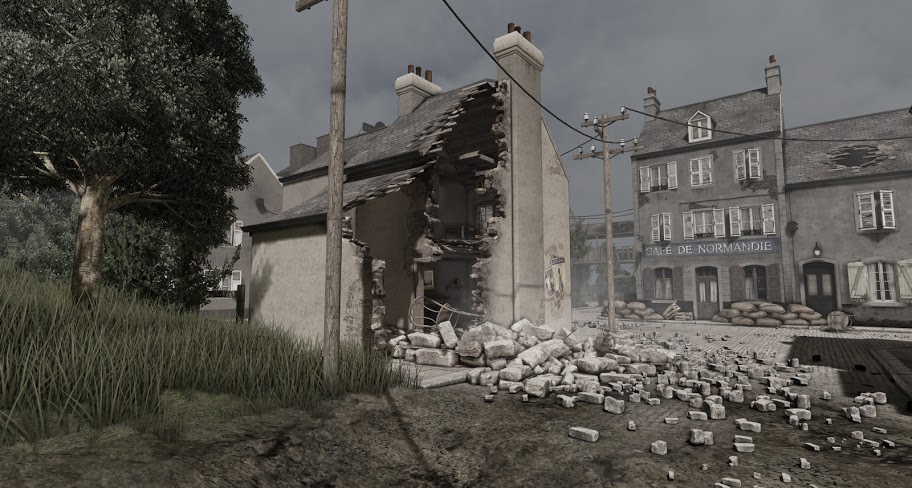
Alright! So I finished the windows, not the dormer, though But I found some awesome renderings of the town Carentan I am depicting from the Band of Brothers series...These aren't actual photos, someone did a fantastic job rendering these in a photo program. Pretty awesome! So I'm using them as a reference.

This first photo is the left side of the Cafe down a ways, the building on the right here is a building I am not building. I am also not building the warehouse, which is the building on the left...follow the photo down the left side and you see the side of the Cafe, which I am currently working on.


This is the other side of the Cafe, and I am going to build the building that's right next to the Cafe, as well as the two across the street. Between those two buildings is the road in which Easy Company comes down in the episode.


A more direct view of the Cafe with the building on the left ruined. The building on the left is a house and is the same building on the left as the photo above, just a different view of it.


Here is some wallpaper I found online and scaled down to use in the first floor of the Cafe


Here's the joists for the first ceiling/second floor. I cut out little squares and filled them with glue, then stuck the joists in. They are just balsa wood.


Here's the front window installed and broken up. I made the panes from a clear sheet of thicker plastic, got it for a good deal at the hobby shop. I have tried resin before, but didn't like how long it took to cure and the mess it made, so I decided on this method instead. I'm actually quite proud of how they turned out!


Here's a little cup filled with cork cut into "bricks" for use on the front of the building


Here's the bricks on the front. The Cafe is brick covered in plaster, with some wear and tear. The bricks show through in some spots, but I wanted to show the bricks on the sides of the building as well.


Here's the inside of the first floor with the wallpaper all covered. I used rubber cement to glue down the wallpaper, as it was simply printed on matte photo paper


Here's the second story ceiling/third floor installed. The ceiling is just Artist's Watercolor paper, the thicker stuff. The texture of it is really nice for a plaster ceiling as it is, and easy to cut.


So far, that's what I've gotten done. This week, I'll be trying to finish up the inside of the house and try getting started on the plaster on the outside, and maybe start building some furniture!
Til next time.
Thanks for reading!
ophelia53
Visit this Community
Missouri, United States
Joined: March 10, 2010
KitMaker: 254 posts
Armorama: 226 posts
Posted: Sunday, September 11, 2011 - 01:59 PM UTC
Greg, I'm not sure yet...I need to get a little further along and see where I am

Curtis, thank you! I'll take a look!

Harold, thanks a lot!
Curtisl21
Visit this Community
England - West Midlands, United Kingdom
Joined: July 09, 2011
KitMaker: 51 posts
Armorama: 49 posts
Posted: Tuesday, September 13, 2011 - 05:41 AM UTC
cool them photos are amazing i might have to use them
stansmith
Visit this Community
England - North West, United Kingdom
Joined: July 18, 2010
KitMaker: 611 posts
Armorama: 584 posts
Posted: Tuesday, September 13, 2011 - 08:28 AM UTC
nice job.
one the most memorable scenes from band of brothers and one of my fave episodes of band of brothers, the guy who played Blithe did a great job!
stan
MDDMack
Visit this Community
Utrecht, Netherlands
Joined: May 03, 2011
KitMaker: 11 posts
Armorama: 10 posts
Posted: Tuesday, September 13, 2011 - 10:35 AM UTC
Aaahh, nothing better than some good old Carentan. Looking good so far! Can't wait for more pictures
ophelia53
Visit this Community
Missouri, United States
Joined: March 10, 2010
KitMaker: 254 posts
Armorama: 226 posts
Posted: Wednesday, September 14, 2011 - 07:44 AM UTC
Here's what's happening right now:
I found this awesome map of the 506/501 attack movements into Carentan. I noticed that Band of Brothers isn't that far off, but it's also not all that accurate. I've tried looking for more info, and have been able to find that the road in which E Co came in (what I am depicting in my dio) was not a T, but a Y axis. This is really good for two reasons:
1. This will make the dio layout much more appealing and aesethic and,
2. It just would make more sense to play off the maps I've seen than go straight off a TV show. They did a great job on the battle itself. And also, the Cafe wasn't actually the Cafe in real life, during the attack. There was no "Cafe De Normandie", actually, but I really love that idea and I think it tells 2 stories on its own, just by being a Cafe in which the Americans are getting beat down by the Germans.

Also found out it was Fallshirmjager 6th regiment, and they had a mortar team. The americans getting into Carnentan took a ton of casualities. The 501st was originally supposed to be the ones securing and taking the town, but during the early part of June, while they were making their way across the causeways into the area, they took a lot of damage and had a lot of causalities, so the 506th/101st AB was tasked with the job of securing Carentan instead.
So, here we are now with a final layout. This is just tracing paper (I'm an Urban Planning student) with the layout...note, the buildings are mostly to scale, might get shifted a bit here and there, but the roads are probably a little off.

Here's the map I'm using:

And here's the Y axis, more clearly, in blue:


Here's my layout, finally!
The first one is preliminary, to the map, before I knew what size base I'd need:


Next, we have a layout with the cafe on it for sizing/scale:


The same thing, only now on an 18x20 poster frame from the hobby shop (got it with a 50% off coupon! woot!)


And again, for scale:


And here's some photos:

I started work on the hard wood floors for the cafe. Balsa wood is best, but I ran out and had to use basswood, which meant I had to sand the floors once they were glued down to make sure they were even. I used the same Artiists' Watercolor paper (the thicker stuff), cut down with a blade to size of the floors and laid it on the joists I installed for the celiein/floors.


The best glue in the world, behind it in the smaller white bottle is the same stuff, but a "quick tack" version of it, which I adore:


The floor laid out before sanding...this is an older building that was heavily used, at least in my dio story, by the germans as they secured the town. So the laying of the boards is a little off to show wear and tear.


Next, I just thinned out some White acrylic paint, the cheaper, nicer stuff, not the fancy stuff I'll use later:


Then, I mixed some acryl and dry brushed it to a tone I liked:


And finally, washed it all with a darker color to get the final coloring"


I placed a good sized order with SpruBrothers (which happens to be really close to where I live, so shipping is ultra fast!) of some MIG pigments, which I'm fantastically excited about getting today!!! I'll let you guys know how I like them once I get to that stage.

I also got my figures from Hobby Fan!!!! I'll be back shortly to post my personal review of the kit. So far, just from taking them out of the box, so good.

Thanks for watching everyone! I hope I do this whole battle justice with my diorama.


Curtisl21
Visit this Community
England - West Midlands, United Kingdom
Joined: July 09, 2011
KitMaker: 51 posts
Armorama: 49 posts
Posted: Wednesday, September 14, 2011 - 09:37 AM UTC
falschijaegar also the lions of carentan you making aweosme progress cant wait to see the figs
bill1
Visit this Community
West-Vlaaderen, Belgium
Joined: August 14, 2005
KitMaker: 3,938 posts
Armorama: 520 posts
Posted: Monday, September 19, 2011 - 08:17 AM UTC
Yo Brandi,

Great update, you sure put mutch time to study your project. I also like that in a diorama.

I think that the wooden floor is out of scale, maybe less thick.

Love to see this one grow.

Greetz Nico
ophelia53
Visit this Community
Missouri, United States
Joined: March 10, 2010
KitMaker: 254 posts
Armorama: 226 posts
Posted: Wednesday, September 21, 2011 - 02:46 AM UTC
Well, I've learned a few things in working on this building.
1. Plaster won't stick to foamboard all by itself
2. Plaster will soak through the foamboardf and make it very wet and hard to work with
3. Plaster is easily removed from foamboard when not glued down...

I also learned that I'm awful at putting the stuff on, ha!
So, I had to undo it all. I was worried I would have to start the building all over again, but luckily, I do not. I have decided to redo the window panes, though, as they all got kind of messed up while adding plaster/varnish.

So, here we are with some photos and the update that's long past due. Sorry about that!

I finally laid out the final plan of all final plans (subject to some last minute changes, of course) and had to change up the Cafe a bit. Let the journey begin:
Here's the plan. Blue=buildings, Green=sidewalk, Red=rubble/ruins, Purple=dirt road, transitioning to cobblestone...the white spaces between buildings=road.


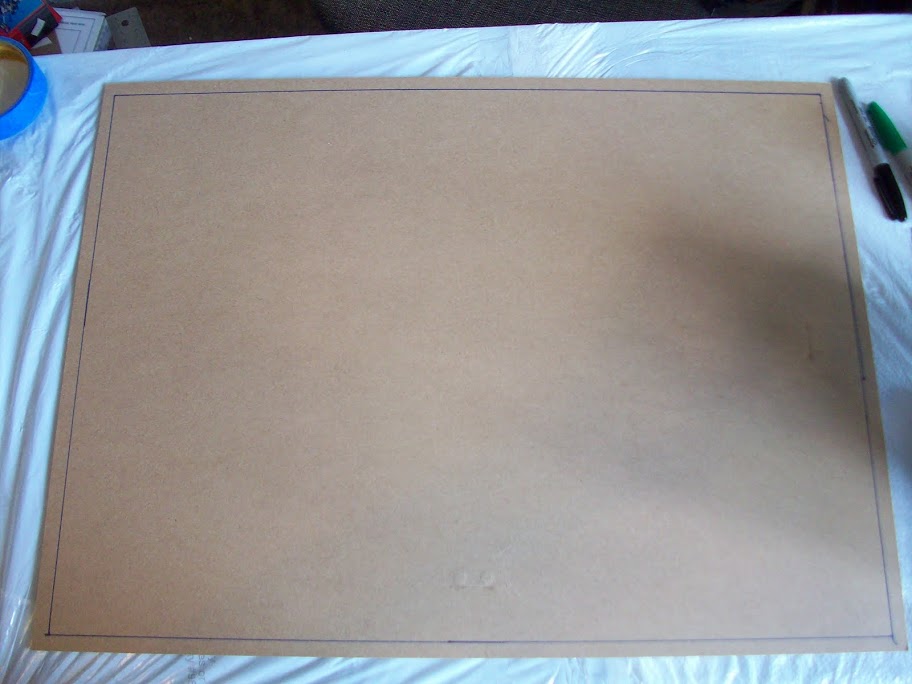
Here's the base of the poster frame I'm building on. I thought I would need to do some modification to it to make it more sturdy, but the board it came on is quite sturdy itself and the only real movement of the dio I see is taking it to my mom's basement when it's down, or while in process for craft days.

So, because of the change from a T axis to a Y axis, I had to change my Cafe a bit. I chopped it, which was sad, and the joists took a bit of damage, as did the ceilings/floors that were already in place, but the actual hardwood floors I had laid out were easy to cut with my new Mat Knife tool (which is like, 100 times better than an Xacto blade!) Here's the chopped up building before floor install:
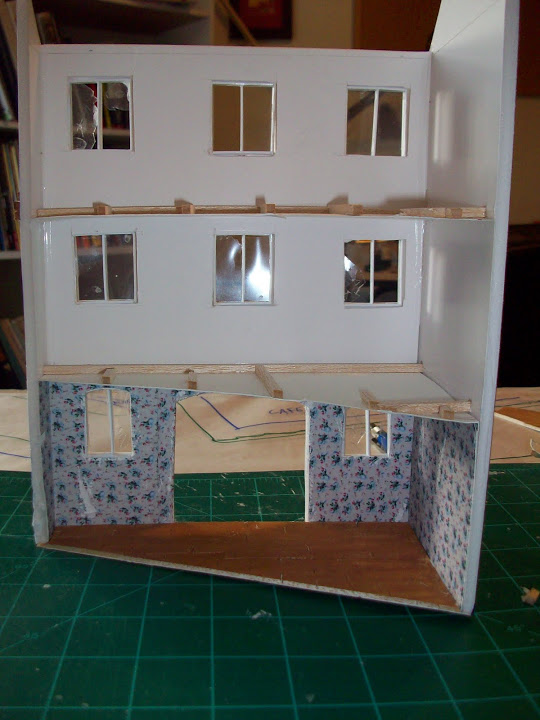

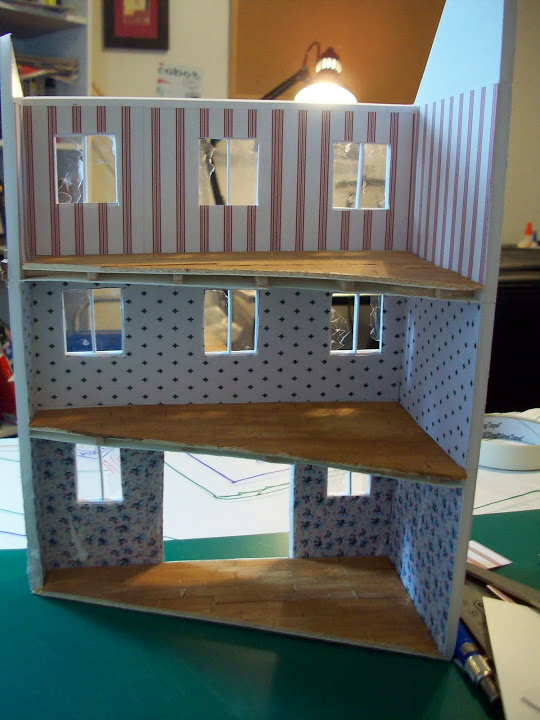
Here's the Cafe with floors installed in the new angle, with wallpaper up and not yet worn with my blades and sandpaper:

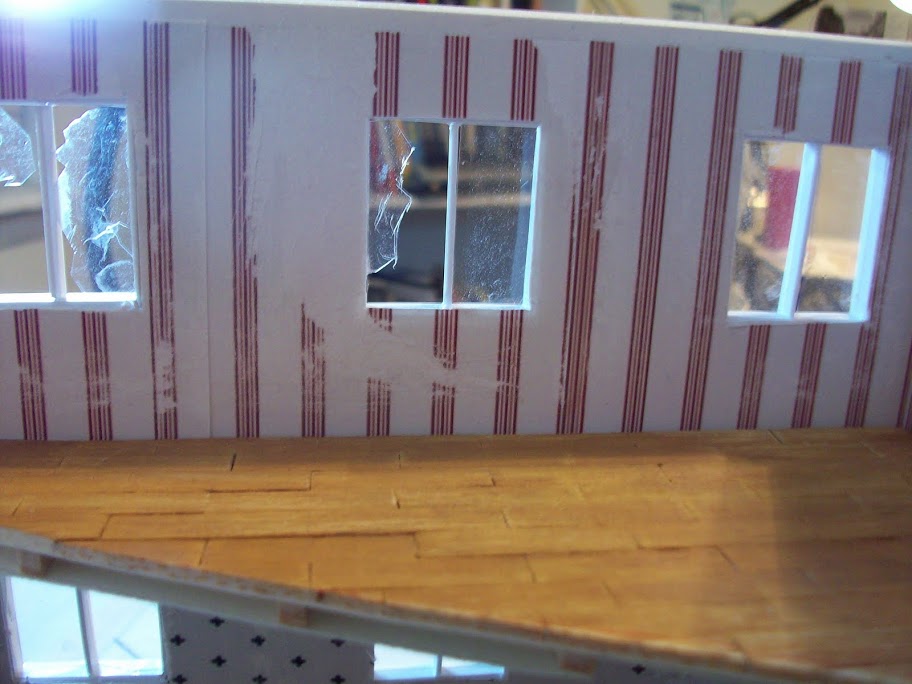
The wallpaper "weathered"

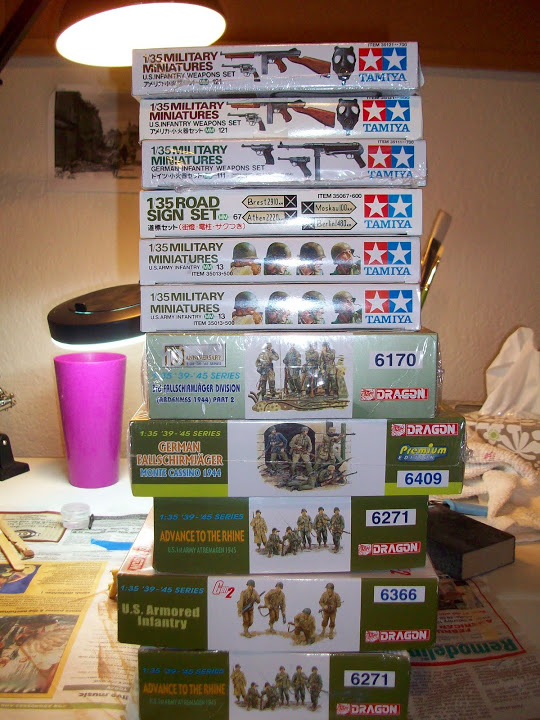
Here's the stack I'm pulling from with 1 more kit on the way. Not shown here, but in a photo below are the HobbyFan resin figs.
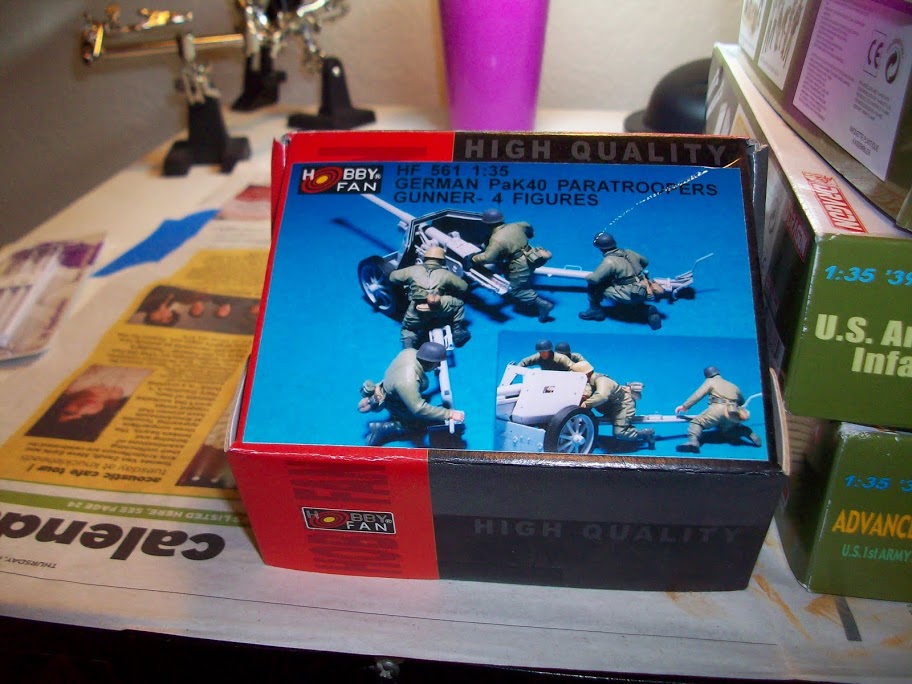


The set of figs I am most excited about, though, is the Dragon Fallschirmjager kit, premium Gen 2 edition. Check out these awesome heads!!!!!
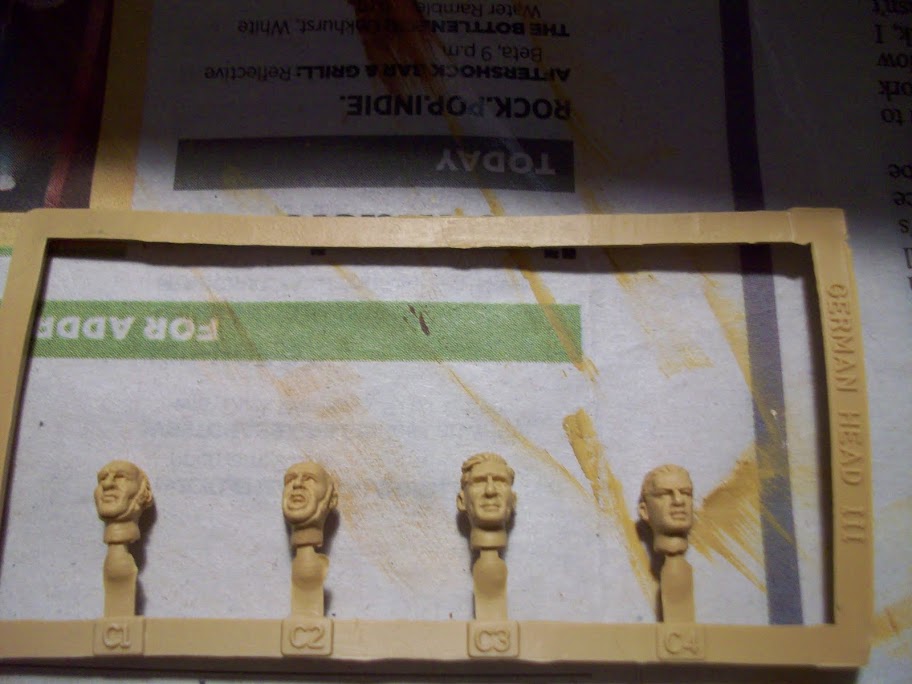


And now, for some surgery:
So, there was this German fig that I really liked, but his leg placement was all sorts of weird. This is one of the figs from the HobbyFan kit that I modded. This is my first ever figure conversion and while it's not cream of the proverbial crop, I'm quite proud of myself!
Here's the process: (sorry for the blurry photos)

See how he's leaning all weird and his leg is in a funky position? WHO could sit like that for any length of time? These guys, in my dio, will be waiting for the Allies to come up that road, so naturally, they'll be in a more comfortable position while waiting...not like this, whatever this is: (sorry for the fuzzy photo)
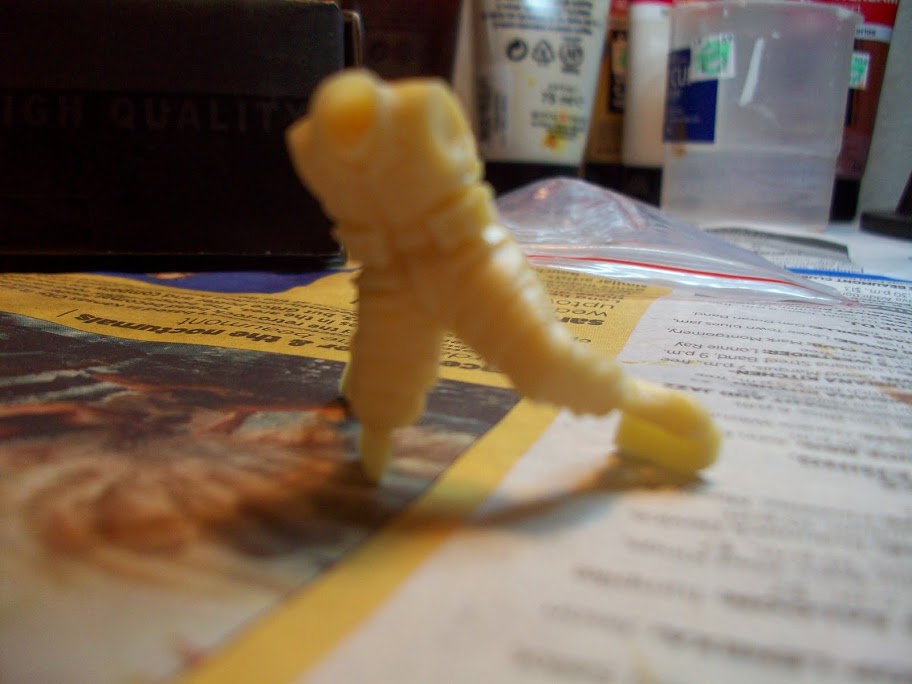

So, while his one leg was perfect, the other leg needed some help. So, I chopped it off with my knife. I know, I know. But don't fret! He's going to be fine!


So now, here we have his new leg made out of Aileen's Epoxy Putty. This stuff was great. Easy to work with, thick and sticky, stuck to the table, I finally had to put the fig on some painter's tape so it wouldn't get stuck and dry to anything.
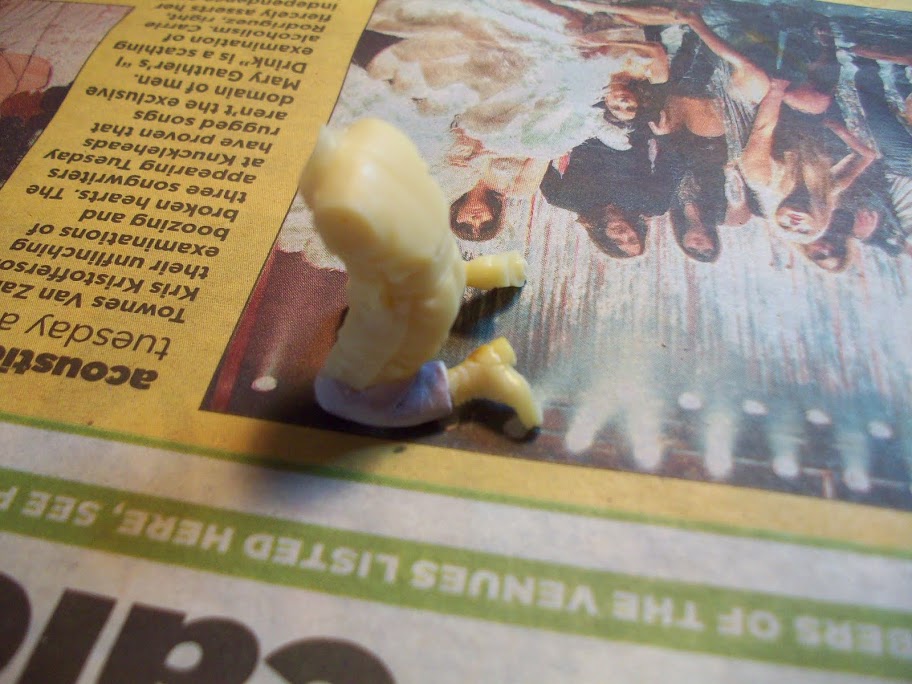
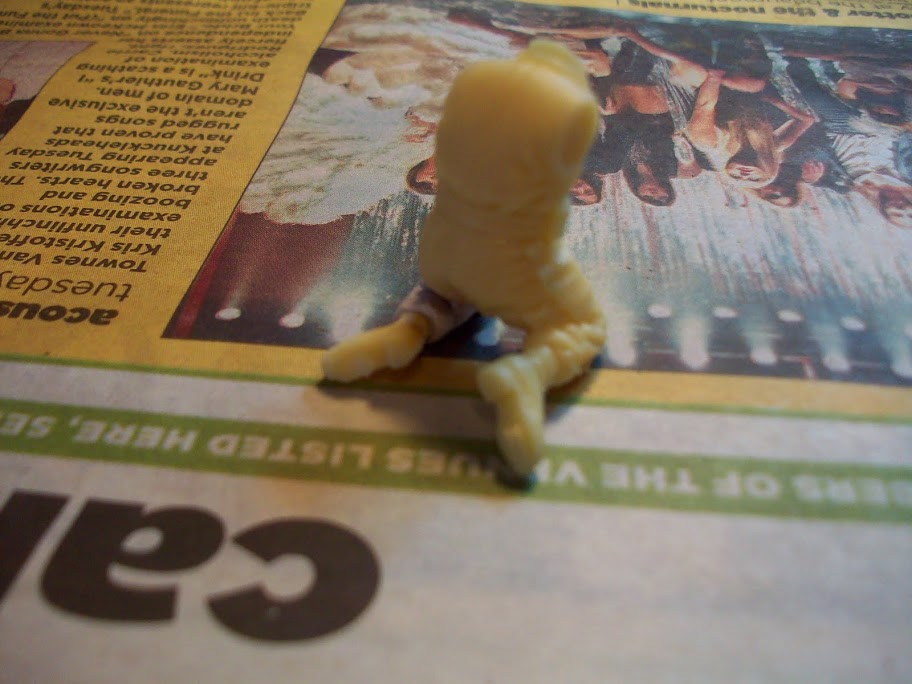


And there we have it! That's what I'm up to. I'll be back shortly with another update.

Anyone have any ideas for some US paratroopers? I could use a dead one, and a couple that are crouching down (or at least in a somewhat easier position to modify). If you have any ideas or suggestions, please let me know. I hope to get better at building as I build.
 _GOTOTOP