

Last October @SMC in Veldhoven, the Netherlands I conceived the plan to build my first real diorama in historic modelling. I've bought myself a Tamiya Tiger I late, some friul tracks, a nice metal barrel and most importantly some reference material for my chosen setting : villers bocage through the lens by Daniel Taylor.
In the meantime I've ordered some additional PE from Aber, Zimmerit stickers from Tamiya and some nice tow cables.
So I'm all set to go!
In my future posts I'll include some pictures of my progress on building the Tiger I but I first want to talk(and maybe gather some feedback/additional ideas) about my chosen setting.
First of all, to the best of my knowledge there is no clear, undoubtable answer to what tank was guided by Wittmann into the town of Villers Bocage on the 13th of June. There are a couple of theories and I've chosen to adhere to te theory based on the coipe of pictures depicting a Tiger beign towed in the direction of hill 213 out of town. My Tiger I will thus be "231".
Then there is the point if picking a "time", a certain moment during his rampage.
I'm still a bit in doubt on this one.
Option 1&2: pretty early in the rampage he takes out the cromwell of Holloway & Cloudsley-Thompson. I'm pondering doing any of those two as a wreck with Wittmann's Tiger passing the wreck. The fact that Holloway backed of the road would make for a more interesting configuration but a much bigger ground surface to get right. I need to research which of these tanks were burning due to Wittmann's shell as I'm not eager to include a realistic burning tank as part of my scope.
As option 3 I was thinking about seconds after the conclusion of Dyas's duel with the Tiger. That way I have a Tiger with "comparable" combat damage with the picture of "231" being towed. But I seem to recall that Dyas's Cromwell went out with quite a bang.
Anyway, I've started the build of the Tiger and still have some time to sketch and play with the different idea's.
I'll try to keep this build updated regularly, but progress will be slow as I'm pushing myself to do this as precise and correct as possible.
as said before......any feedback is appreciated.
Hosted by Darren Baker
Rampage - Viller-Bocage 13th of June1944

vargunge

Joined: October 15, 2014
KitMaker: 13 posts
Armorama: 13 posts
Posted: Thursday, November 20, 2014 - 04:36 PM UTC
vargunge
Joined: October 15, 2014
KitMaker: 13 posts
Armorama: 13 posts
Posted: Monday, November 24, 2014 - 06:39 PM UTC
A little bit of progress over the weekend:
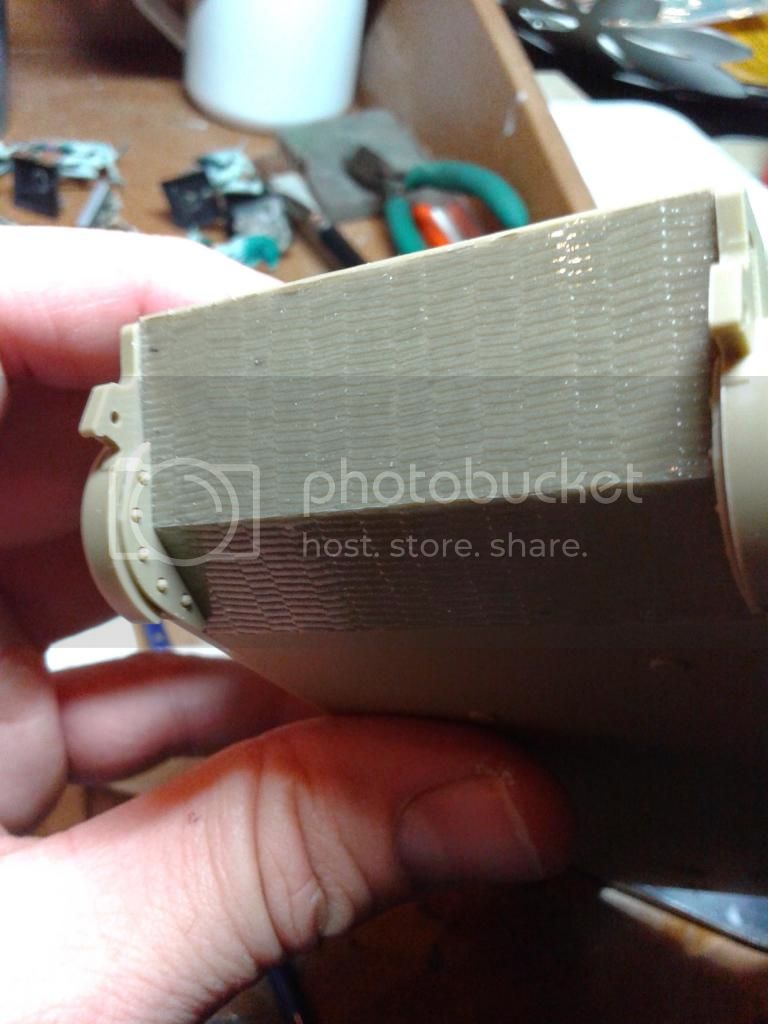
I've started applying the Tamiya zimmerit "stickers". I'm fairly pleased although I'm dreading the larger, more complex surfaces. The effect isn't that visible due to the see-through aspect of the stickers? But after priming, I believe it will look quite nice. I think I'll wait until after priming to make some combat damage for the same reason.
I've also prepared the backplate of the Tiger for some photo-ecthed goodness.
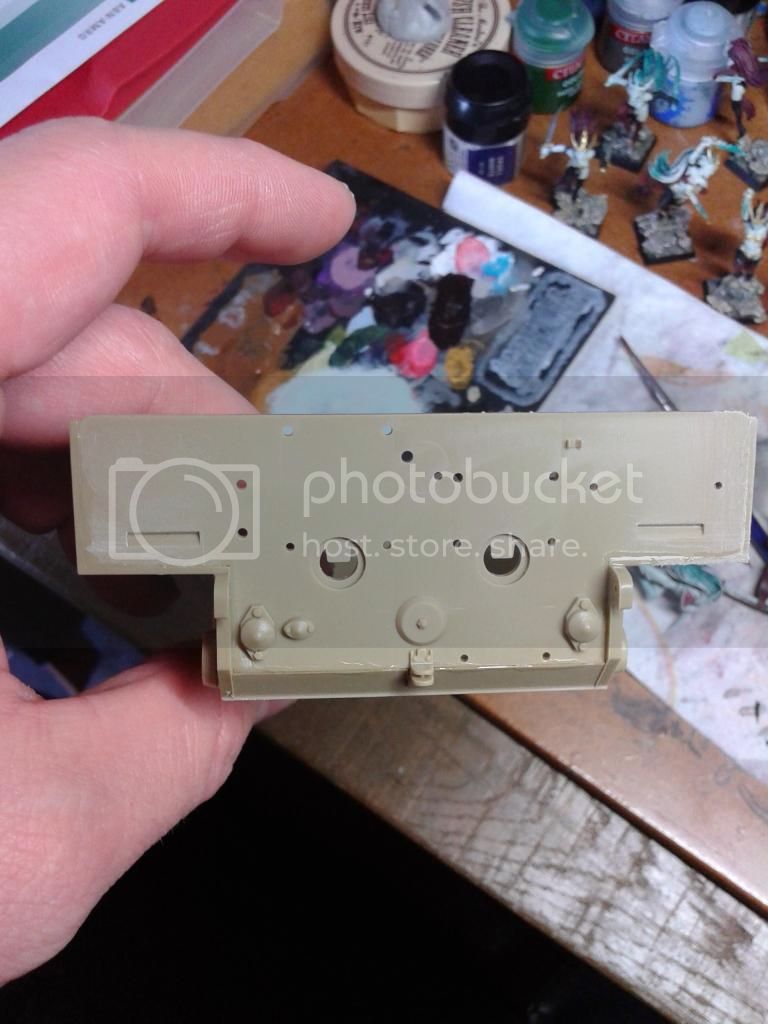
The backplate is ready now to receive it's zimmerit but to be honest...it's one of the panels that I dread the most to get it right. But hey.....gotta stop the procrastination.
And finally I'm still pondering about the scene.
With "Google" as my friend I discovered this image:
Any of those 3 Cromwell's will normally join the scene, I'm just not decided about which.
Does anybody have an idea about the roads in that part of France, around that area? Are these just hard packed dirt roads? I can't see cobblestones or something like that on the various pictures.
I've started applying the Tamiya zimmerit "stickers". I'm fairly pleased although I'm dreading the larger, more complex surfaces. The effect isn't that visible due to the see-through aspect of the stickers? But after priming, I believe it will look quite nice. I think I'll wait until after priming to make some combat damage for the same reason.
I've also prepared the backplate of the Tiger for some photo-ecthed goodness.
The backplate is ready now to receive it's zimmerit but to be honest...it's one of the panels that I dread the most to get it right. But hey.....gotta stop the procrastination.
And finally I'm still pondering about the scene.
With "Google" as my friend I discovered this image:
Any of those 3 Cromwell's will normally join the scene, I'm just not decided about which.
Does anybody have an idea about the roads in that part of France, around that area? Are these just hard packed dirt roads? I can't see cobblestones or something like that on the various pictures.

rolltide31

#377

Joined: June 27, 2010
KitMaker: 1,481 posts
Armorama: 93 posts
Posted: Monday, November 24, 2014 - 07:53 PM UTC
Gert,
Your Tiger is looking good. I have been heistant to try the Tamiya sticker Zimmerit so your feedback and opinion is of interest to me. I love the diorama concept and will follow with keen interest.
Good luck.
Dave
Your Tiger is looking good. I have been heistant to try the Tamiya sticker Zimmerit so your feedback and opinion is of interest to me. I love the diorama concept and will follow with keen interest.
Good luck.
Dave
jrutman
Joined: April 10, 2011
KitMaker: 7,941 posts
Armorama: 7,934 posts
Posted: Monday, November 24, 2014 - 09:04 PM UTC
Country roads at the time were usually packed dirt/stone with only built up areas having metaled or cobbled streets.
Of course,there are always exceptions.
J
Of course,there are always exceptions.
J
kurnuy
Joined: August 22, 2009
KitMaker: 1,491 posts
Armorama: 997 posts

Posted: Monday, November 24, 2014 - 10:16 PM UTC
Quoted Text
Country roads at the time were usually packed dirt/stone with only built up areas having metaled or cobbled streets.
Of course,there are always exceptions.
J
Hi Gert ,
i'm with Jerry , although the place where the tiger of Witmann was taking out was actually in an open field. But it will be not that specific scene on the diorama.
Concerning the scene , first of all you have to makeup your mind which version of the two stories you're going to tell and then you have to stick to it.I suggest to make the tanks first and then you can estimate or calculate how large the groundwork has to be.
Witmann was a tiger ace so he served in a elite unit consisting of Tiger tanks as a commander of a heavy tank company . So your Tiger I with zimmerit is the exact tank to start with.
Well done and keep us posted , i'm going to follow this one !
Kurt

Sean50

Joined: March 20, 2007
KitMaker: 340 posts
Armorama: 328 posts
Posted: Monday, November 24, 2014 - 10:47 PM UTC
Hello there,
Regarding the road, as Jerry said, the majority of rural roads were (and occasionally still are) packed dirt and stone.
The main road through Villers-Bocage was a "Route Nationale" so would have been metalled.
Some pictures in the town seem to show some stone sets/cobbles, which presumably pre-dated the asphalt, along the edges/gutters.
Hope this helps.
Cheers, and good luck,
Sean
vargunge
Joined: October 15, 2014
KitMaker: 13 posts
Armorama: 13 posts
Posted: Thursday, November 27, 2014 - 07:49 PM UTC
Hello All,
update time!!!!!
Earlier this week I've finished the dreaded rear panel zimmerit. It looked like a nightmare. Just look at the sticker:
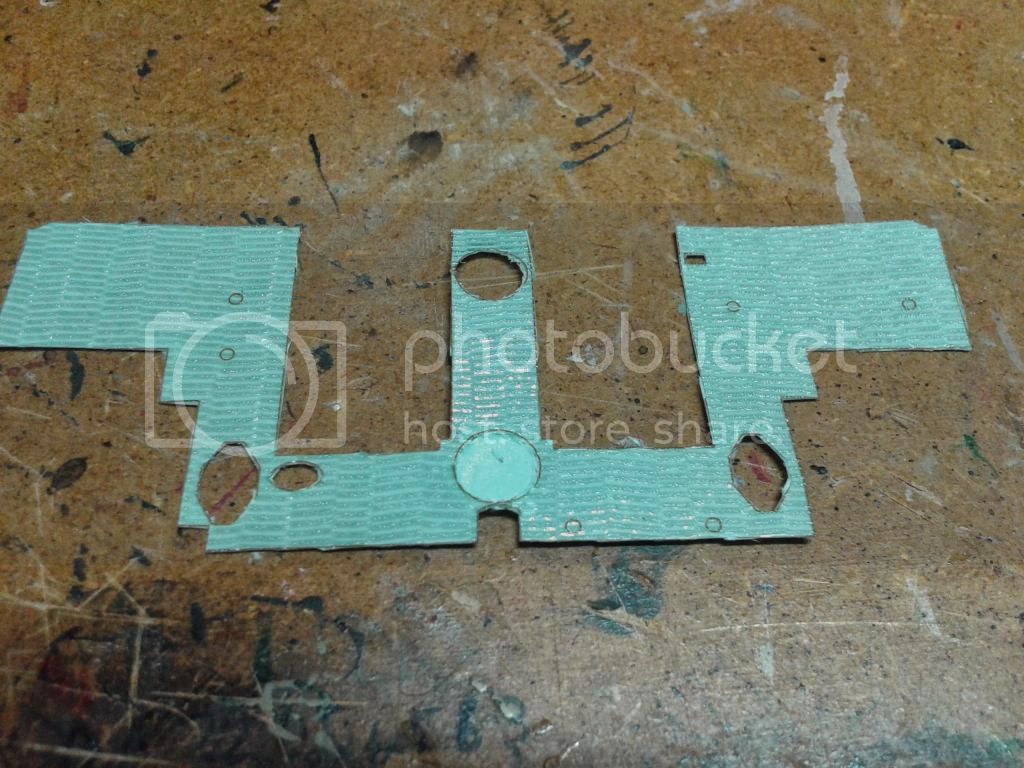
All these openings that need to fit, considering that you are working with a slightly elastic, sticky sticker.
But it turned out quite allright. Not 100% perfect but we'll see how it looks a little further down the line with more details attached.
And now I'm kind of stuck until I make my mind up about the scene. I want to position the torsionbars fitting to the metalled road. So I'll need to at least build a mock up of the scene and assemble a suitable length of track before I can glue the torsion bars in position.
Talking about the scene: I've been playing around with some pictures and I've come to this picture.
Now all I need to do is choose one of the orangey rectangles
Hopefully more on that in a next update.
I wanted to thank you all for contributing to this thread. It helped me to choose for the metalled road. I've even got an idea on how to do it......
Keep the comments/suggestions coming and please correct me if you detect mistakes in my statements. I'd rather make amends during the project then need to cry after it's done.
Cheers,
Gert
update time!!!!!
Earlier this week I've finished the dreaded rear panel zimmerit. It looked like a nightmare. Just look at the sticker:
All these openings that need to fit, considering that you are working with a slightly elastic, sticky sticker.
But it turned out quite allright. Not 100% perfect but we'll see how it looks a little further down the line with more details attached.
And now I'm kind of stuck until I make my mind up about the scene. I want to position the torsionbars fitting to the metalled road. So I'll need to at least build a mock up of the scene and assemble a suitable length of track before I can glue the torsion bars in position.
Talking about the scene: I've been playing around with some pictures and I've come to this picture.
Now all I need to do is choose one of the orangey rectangles
Hopefully more on that in a next update.
I wanted to thank you all for contributing to this thread. It helped me to choose for the metalled road. I've even got an idea on how to do it......
Keep the comments/suggestions coming and please correct me if you detect mistakes in my statements. I'd rather make amends during the project then need to cry after it's done.
Cheers,
Gert

Robbd01
#323
Joined: February 13, 2013
KitMaker: 791 posts
Armorama: 344 posts

Posted: Thursday, November 27, 2014 - 08:32 PM UTC
You might ask the kitmaker crowd to vote on which one you should do. I will start by voting for the middle one.
Cheers


Cheers

jrutman
Joined: April 10, 2011
KitMaker: 7,941 posts
Armorama: 7,934 posts
Posted: Thursday, November 27, 2014 - 08:46 PM UTC
If you do the last one you are kind of stuck making the building behind it as it is really close. The middle one would be easier with just the picket fence imho.
J
J
vargunge
Joined: October 15, 2014
KitMaker: 13 posts
Armorama: 13 posts
Posted: Sunday, November 30, 2014 - 02:34 PM UTC
I've narrowed down the choice of scene to 2 options over the weekend. I also made some real scale sketches to be better able to judg ethe visual impact/size of bothoptions.
The center of the 3 options was eliminated as I believe the straight road/2 tanks "passing by" will look visually less interesting than the other two candidates.
Very scribbly scribbly but one of these two sketches will become the blue print of some serious styrofoam cutting to serve as a base for the diorama.

At the moment I'm rather charmed by the top scene, option B, with Pat Dyas his Cromwell. The bend in the road gives me some interesting angles. The state of "battle damage" in the Tiger is quite well documented (assuming it was Tiger "231" that rampaged through V-B ).
).
Now let me retrace some hi-res picture of 231 being towed out of V-B, and I can "kickstart" this project.
A final question for experienced Tiger/Panther/king tiger/....builders: Have you got experience with getting the suspension in a believable state. I'd like to build the metalled road and have teh suspension swing arms in a realistic pose.
The kit is foreseen to have all the swingarms horizontally. And altough I don't expect big changes as the metalled road will be mostly flat, a little variance would look interesting. If I cut off the little studs for positioning these swingarms, I believe my complete tiger will drop untill the bottom of the hull rests on the road. Anybody who has tackled this before, with some usefull tips & tricks?
The center of the 3 options was eliminated as I believe the straight road/2 tanks "passing by" will look visually less interesting than the other two candidates.
Very scribbly scribbly but one of these two sketches will become the blue print of some serious styrofoam cutting to serve as a base for the diorama.
At the moment I'm rather charmed by the top scene, option B, with Pat Dyas his Cromwell. The bend in the road gives me some interesting angles. The state of "battle damage" in the Tiger is quite well documented (assuming it was Tiger "231" that rampaged through V-B
).Now let me retrace some hi-res picture of 231 being towed out of V-B, and I can "kickstart" this project.
A final question for experienced Tiger/Panther/king tiger/....builders: Have you got experience with getting the suspension in a believable state. I'd like to build the metalled road and have teh suspension swing arms in a realistic pose.
The kit is foreseen to have all the swingarms horizontally. And altough I don't expect big changes as the metalled road will be mostly flat, a little variance would look interesting. If I cut off the little studs for positioning these swingarms, I believe my complete tiger will drop untill the bottom of the hull rests on the road. Anybody who has tackled this before, with some usefull tips & tricks?
SdAufKla
Joined: May 07, 2010
KitMaker: 2,238 posts
Armorama: 2,158 posts

Posted: Sunday, November 30, 2014 - 08:03 PM UTC
An interesting project. Your research is quite well done, IMO.
Because you've taken such troubles to research the setting, in regards to your top sketch, I would offer up the following observation:
Note that the garage shown in the background of the street level view is quite a distance from the right rear corner of the Cromwell (at least the length of the tank itself if not farther). In your aerial photo, you can see the peak of the garage just below the head of the red arrow.
If I interpret your sketch correctly, you're depicting the Cromwell next to and quite close to the garage which doesn't fit the photos.
In answer to your question about articulating the suspension of the Tiger tank, only cut the locator tabs from the suspension arms in the middle of each side. That is, fix the first road wheels at the front and the last road wheels at the rear on each side and leave the wheels in between able to move. The front and rear wheels will hold the hull of the tank at the generally correct height.
An alternative is to fix EITHER both front or both rear road wheels and then fix ONLY ONE of the road wheels on the opposite end of ONE side leaving the opposite wheel on that end to articulate. This method will work for moderately rough terrain, but you must predetermine which end of the tank (front or rear) should appear to have the most articulation. This should be the end that should only have one road wheel fixed leaving the other to conform to the terrain.
For terrain that will be very rough is to fix one front and one rear wheel but on opposite corners of the hull (i.e. left front wheel and right rear wheel or right front wheel and the left rear wheel). This will allow you to adjust and articulate one front and one rear wheel on each side to compensate for the rougher terrain, but still generally keep the ride height correct.
This last method will require that you wait until you have the terrain constructed before you fix the articulation of the suspension. You must then place the model on the terrain and while holding the hull in the desired attitude, you would then glue the wheels and suspension arms to conform to the terrain.
The first method with the fixed front and rear wheels on both sides can be done during construction of the model, and the model and suspension will later conform to the terrain (but only if the terrain is more or less level under the very front and rear wheels).
The middle method works well for moderately rough or uneven terrain.
HTH,
vargunge
Joined: October 15, 2014
KitMaker: 13 posts
Armorama: 13 posts
Posted: Monday, December 01, 2014 - 02:43 PM UTC
Thank you for the incredible good suggestions. I'll try my luck with the middle solution altough the metalled road will have a limited impact on the suspension. Maybe I can build the tiger partially on the curb as this will make it way more interesting. And you are completely right. I need to correct my quick sketch of the situation to a more accurate overview drawing before I start modelling the diorama's base. I might even cut out the garage and choose to portray the facades at the Tiger's side of the road as there are pretty good pictures of that side. I'll make a mock up to get a more accurate feel or a 3D sketch and then it's back to decision time!
vargunge
Joined: October 15, 2014
KitMaker: 13 posts
Armorama: 13 posts
Posted: Sunday, December 07, 2014 - 04:57 PM UTC
As I need a surface to model my suspension to and because the hard choice about time/location of my dio has been made, I've started some work om a bit of polystyrene as a base. First of all I've drawn out the outlines:
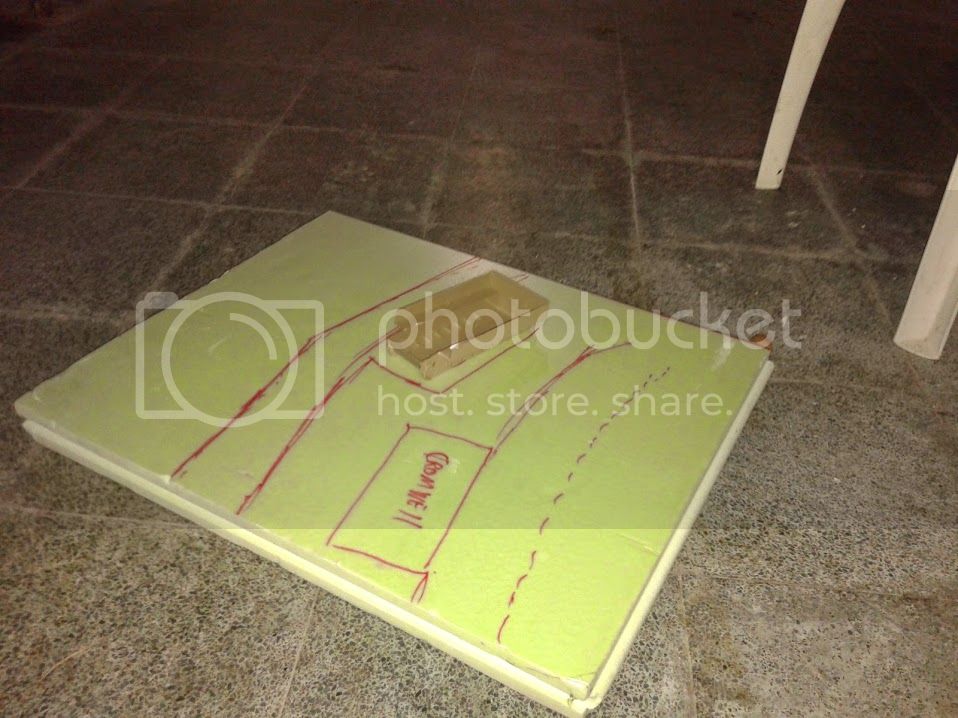
This first version was made before my slight change of angle....see my previous post.
I've chosen now to rather portray the line of house to the rear-right of the Tiger I instead of the garage in front of the cromwell. The plain simple reason is documentation. There are a couple of pictures from kübelwagens and pz IV's driving up and down this part of the street and these pictures show the facades of those buildings pretty good.
So here I've updated my sketch and started carving in the slightly deepened gutters.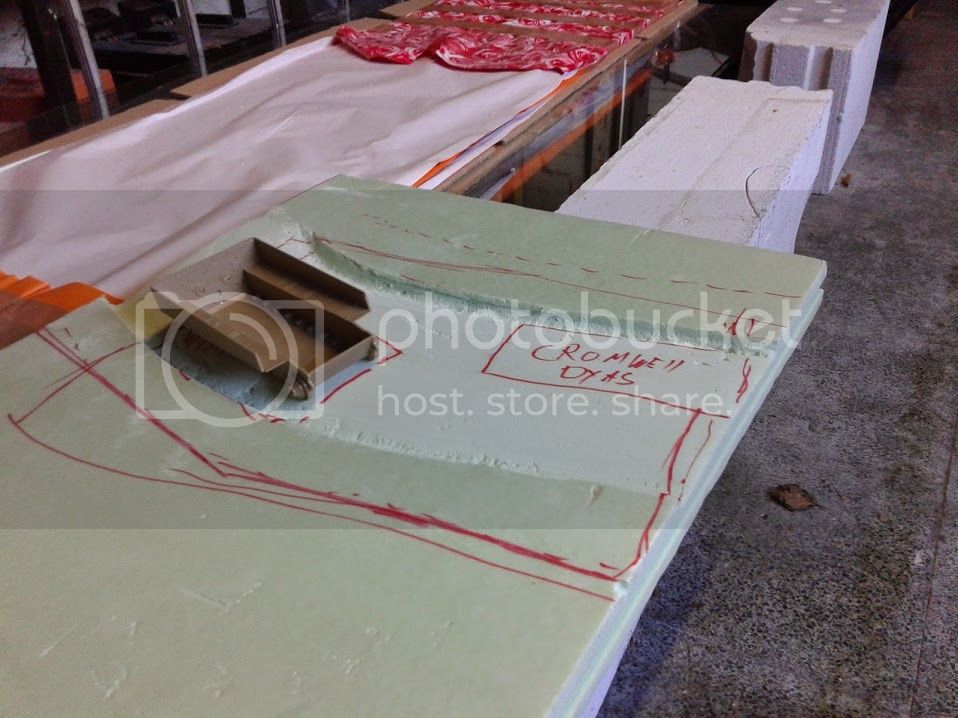
And a different angle to show the shape of the cutting and shaving.
Now I need to apply some plaster to actually make the road surface and then again for the sides of the road. Alas the season of the year is preventing me from doing this in the chilly garage. So now I'll have to convince my sweet wife that I won't make a hell of a mess
In the meantime I'm preparing all the small bits that I need to temporarly build the Tiger's suspension: Torsion arms, road wheels,Idler,....
I've also cracked open my lovely box of Friul tracks.....OMG!!! Not really looking forward to cleaning all those tracks but hey....who said that modelling was all about fun anyway.
jrutman
Joined: April 10, 2011
KitMaker: 7,941 posts
Armorama: 7,934 posts
Posted: Sunday, December 07, 2014 - 07:50 PM UTC
I like the concept that you decided on and you have made a great start. Hopefully the"One that must be Obeyed" will let you move indoors and continue.
Looks to me like you have a lot of dead space on your layout plan though. I believe you can narrow down the sides of the base closer to the sides of your road?
What is behind the building facades is really not needed for your story.
J
Looks to me like you have a lot of dead space on your layout plan though. I believe you can narrow down the sides of the base closer to the sides of your road?
What is behind the building facades is really not needed for your story.
J
kurnuy
Joined: August 22, 2009
KitMaker: 1,491 posts
Armorama: 997 posts
Posted: Tuesday, December 09, 2014 - 12:21 AM UTC
Nice lay out , it looks very ambitious too.
Succes !
Kurt
Succes !
Kurt
vargunge
Joined: October 15, 2014
KitMaker: 13 posts
Armorama: 13 posts
Posted: Wednesday, December 17, 2014 - 03:46 PM UTC
Finally updating time!
I've been pretty busy as I organised/hosted the 2nd Dutch Massive Voodoo workshop in Sprang Capelle.
For any of you who don't know these guys....check out their website/blog/collection of tutorials: http://massivevoodoo.blogspot.de/ Though mostly concerned with fantasy/sci fi miniatures they have some very interesting tutorials that are very relevant to the more historical side of the hobby.
But on to "rampage":
I've begun building the tracks and what a tedious but rewarding job it is.
I've started making series of 10 track links. Then combining them to series of 30 links until I combine them to 90 links. First the right side.....then a break where I will finish some of my warhammer witch elves and then onto the left side. The final 10/9 will happen after I've fixed my suspension. I'm at around 70 links right now but here is an in progress picture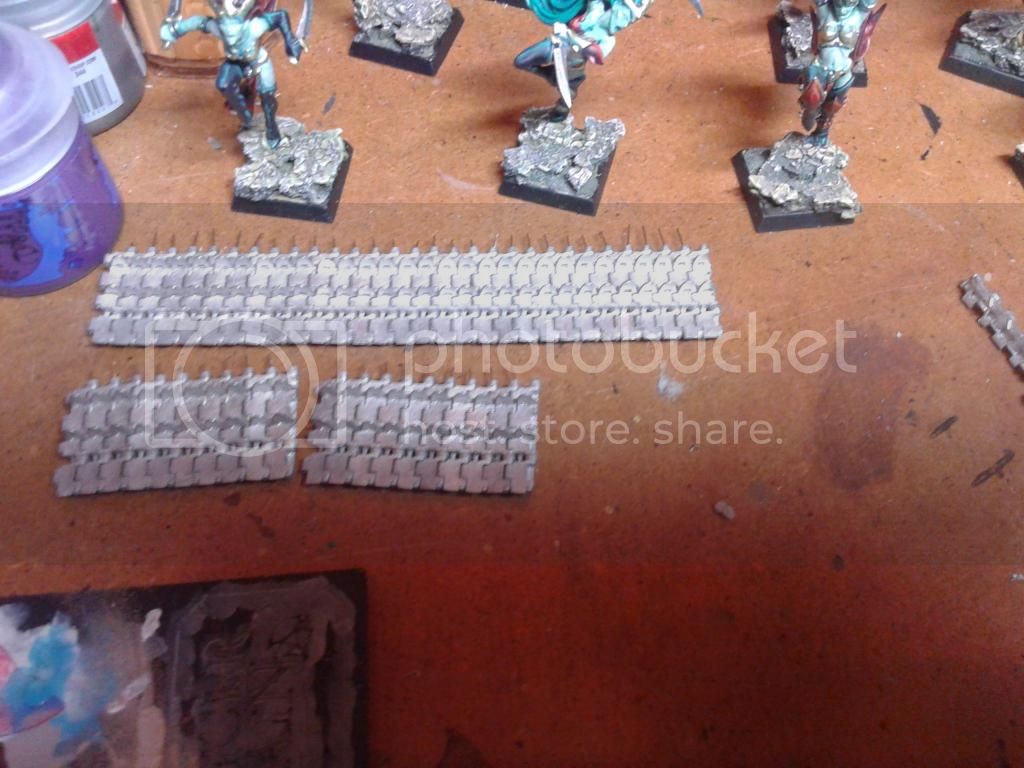
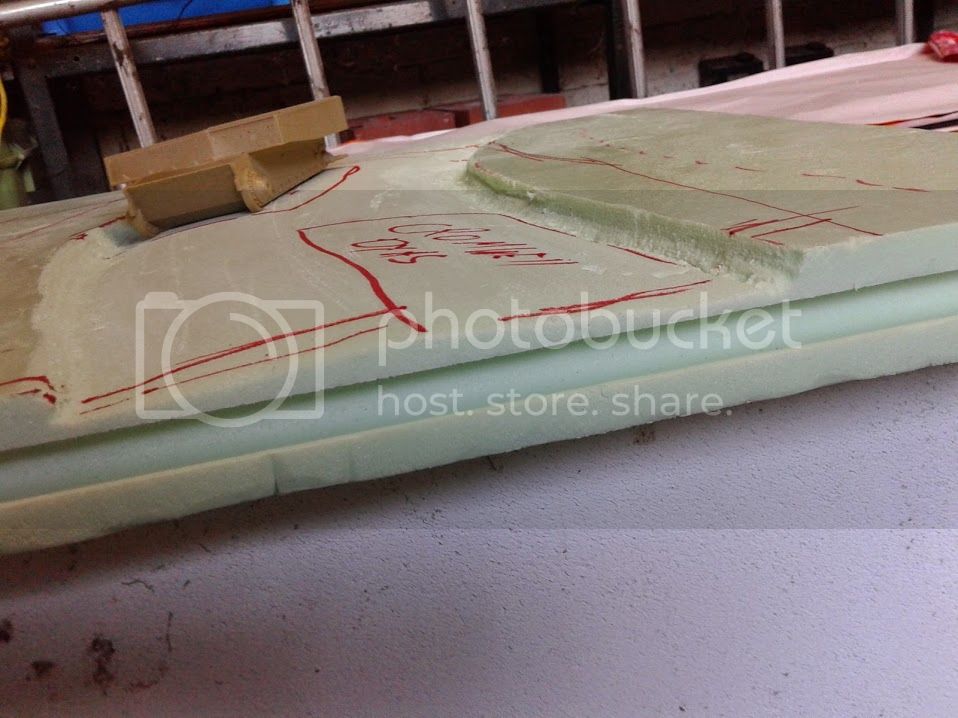
But what I'm personally the most opleased about is that I was able to pour some drywall-finishing-gypsum over my styrofoam sketch. It's still drying at home but I hope to be sanding and scratching in details pretty soon.
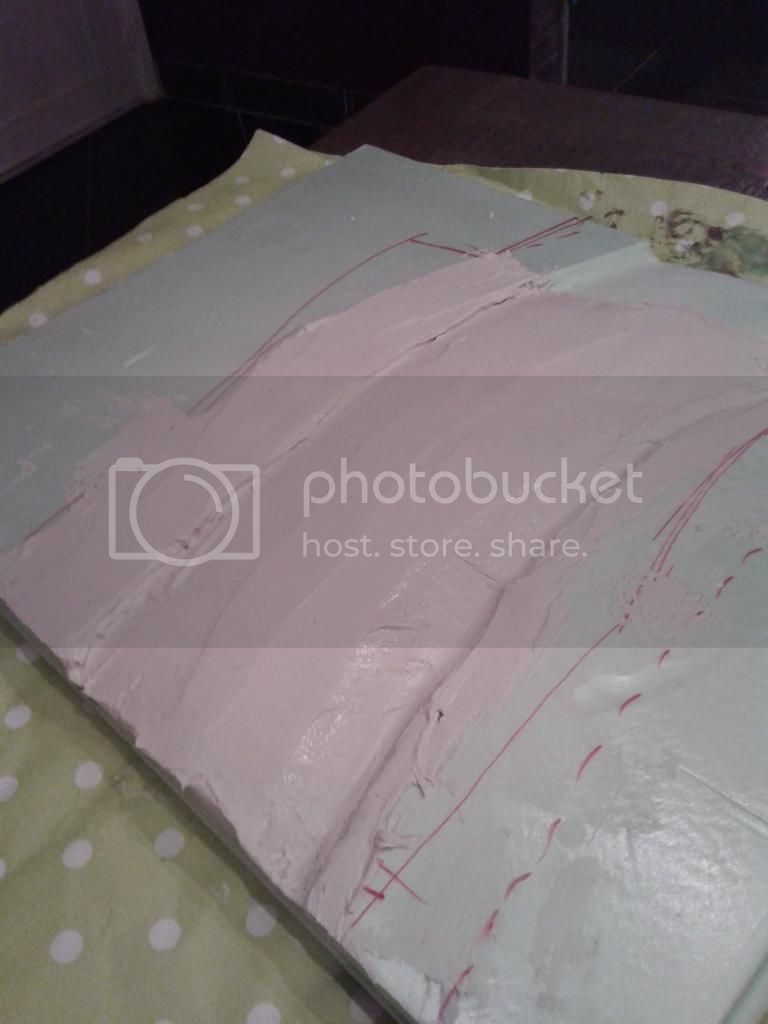
Still pretty rough as you can see....but I need a base to pose my Tiger's suspension.
I've been pretty busy as I organised/hosted the 2nd Dutch Massive Voodoo workshop in Sprang Capelle.
For any of you who don't know these guys....check out their website/blog/collection of tutorials: http://massivevoodoo.blogspot.de/ Though mostly concerned with fantasy/sci fi miniatures they have some very interesting tutorials that are very relevant to the more historical side of the hobby.
But on to "rampage":
I've begun building the tracks and what a tedious but rewarding job it is.
I've started making series of 10 track links. Then combining them to series of 30 links until I combine them to 90 links. First the right side.....then a break where I will finish some of my warhammer witch elves and then onto the left side. The final 10/9 will happen after I've fixed my suspension. I'm at around 70 links right now but here is an in progress picture
But what I'm personally the most opleased about is that I was able to pour some drywall-finishing-gypsum over my styrofoam sketch. It's still drying at home but I hope to be sanding and scratching in details pretty soon.
Still pretty rough as you can see....but I need a base to pose my Tiger's suspension.

Biggles2

Joined: January 01, 2004
KitMaker: 7,600 posts
Armorama: 6,110 posts

Posted: Wednesday, December 17, 2014 - 08:53 PM UTC
At Villers-Bocage Wittmann wasn't using his own tank as it broke down, but commandeered a colleague's. His replacement Tiger was most likely a mid-production with the earlier dished wheels. Villers-Bocage is on Route National 175, a main road going directly to Caen. It was (at the time) almost certainly paved with ashphelt. Wittmann's Tiger was disabled just on the eastern outskirts of the village, at a junction for Tilly-sur-Seuls. Hope this helps. 
Biggles2
Joined: January 01, 2004
KitMaker: 7,600 posts
Armorama: 6,110 posts
Posted: Wednesday, December 17, 2014 - 09:40 PM UTC
There's a lot of discussion and argument over which number Tiger Wittmann actually commanded. Accounts agree that he commandeered Unterscharfuhrer Sowa's tank. Sowa was assigned Tiger 222 (in the Battle of the Bulge, Sowa also commanded King Tiger #222), but as 222 was also disabled (Tigers had a reputation for breaking down when needed!) he also, in turn, commandeered either Tiger 231 or 212. So nos. 231 or 212 seem to be the likely candidates for Wittmann's Tiger at Viller-Bocage.
vargunge
Joined: October 15, 2014
KitMaker: 13 posts
Armorama: 13 posts
Posted: Thursday, December 18, 2014 - 01:18 PM UTC
Biggles2,
thank you for the invested interest.
You make some good points....and your input about the asphalt road is what mught push me over the brink to do it like that. I can't decide from the pictures whether it's muddy surface is covering asphalt(metalled) road or cobblestones.
I was aware of the discussion about which Tiger Wittmann was in, so early in this blog/build report I stated that I'll go for the 231 as I assumed that the Tiger dragged towards point 213 away from the Village is the disabled Tiger Wittmannn used. The Tiger is being dragged by 222 in the photo-series.
The only thing that I can't completely follow is your statement about those Tiger's being mid production. Do you have proof for this?
Biggles2
Joined: January 01, 2004
KitMaker: 7,600 posts
Armorama: 6,110 posts
Posted: Thursday, December 18, 2014 - 09:19 PM UTC
Actually, they were quite a mixed bag of mid and late Tiger l's, and some research would be neccessary for exact detail. For example; Tigers 131, 305, 311, 313, 333, 334, and 342 all positively have earlier dished wheels. Tigers 007, 009, 121, 211, 221, and 222 are confirmed with late wheels. Photo references from "The Panzers and the Battle of Normandy" by Georges Bernace, and "Tigers in Combat ll" by Wolfgang Schneider. There are plenty of pics of other Tigers of the 101 in Normandy, but either the tank number, or wheel type is obscured. If David Byrden is lurking in the background, he can certainly give much more detailed info. Wittmann's 205 was certainly an all steel wheel late type as he was presented with one during a "pep talk" to the Henschel workers in (or around) April '44. As for paved roads in rural areas, they are rarely seen with neat, straight borders, but with rather raggedy edges, with dirt and gravel encroaching on both sides.
 |

WEB HOSTING BY


Copyright ©2021 Armorama and Kitmaker Network, a subsidiary of Silver Star Enterprises
All Rights Reserved. Please read our Conditions of Use and Privacy Policy.
All Rights Reserved. Please read our Conditions of Use and Privacy Policy.