_GOTOBOTTOM
Dioramas
Do you love dioramas & vignettes? We sure do.
The Battle of Debecka Pass
Stickframe
#362
Visit this Community
California, United States
Joined: December 01, 2013
KitMaker: 1,661 posts
Armorama: 1,202 posts
Posted: Monday, August 03, 2015 - 04:24 AM UTC
Hello fellow model builders.

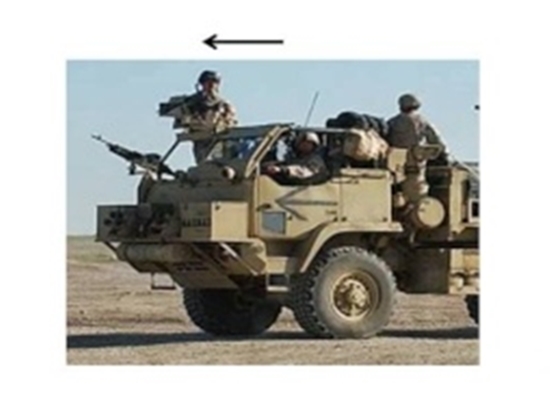
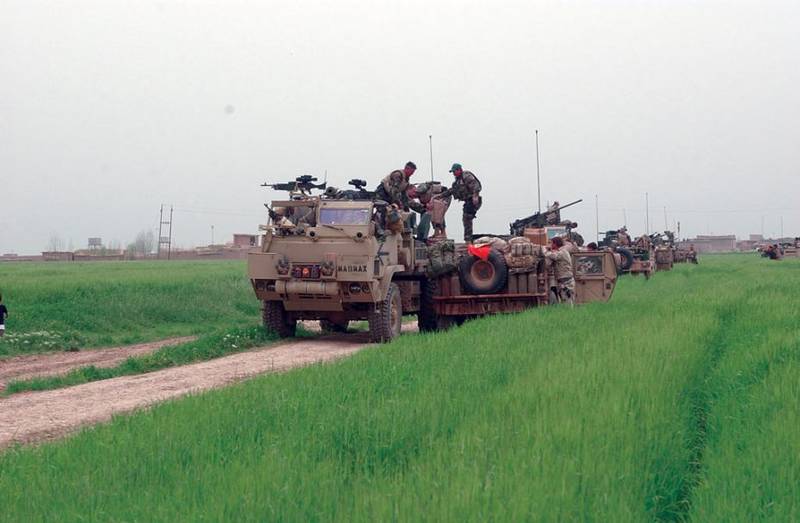
I'm getting going on a new project. As the title notes, it will indeed involve the 2003 Battle of Debecka Pass, in Iraq. I learned of this event as I was on a search to find a written reference citing the use of the M1083 "warpig" (aka a GRV - Ground Resupply Vehicle). I'm sure many of you have seen the following pic:


It's the only version of the M1083 GRV I've seen. On an impulse I purchased a kit of the truck, and the Blackdog conversion - more on that later...

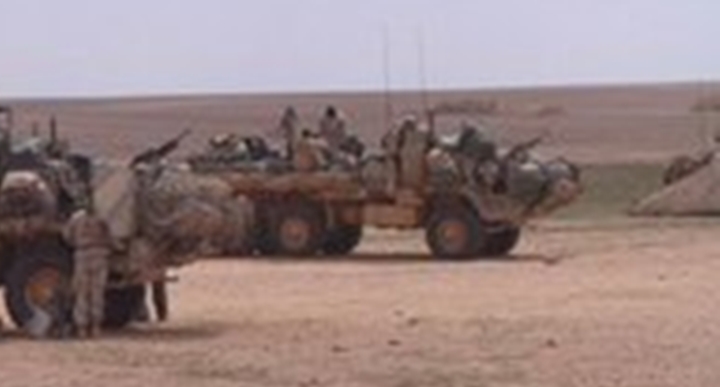
In the meantime, my task was to find out when and where this truck (M1083 GRV) was actually used (I didn't want to do a strictly hypothetical build). I finally found a written account of the battle, and in it several references are made to the use of "5 ton medium trucks", with cabs cut down to provide real time resupply. Perfect, I thought....then, I saw the following:


The said "5 ton truck"....looks like an M1078 to me, which is a 2.5 ton light truck....??

Too bad I decided - I'm building the M1083, but it will incorporate some of the elements found on the apparent M1078!

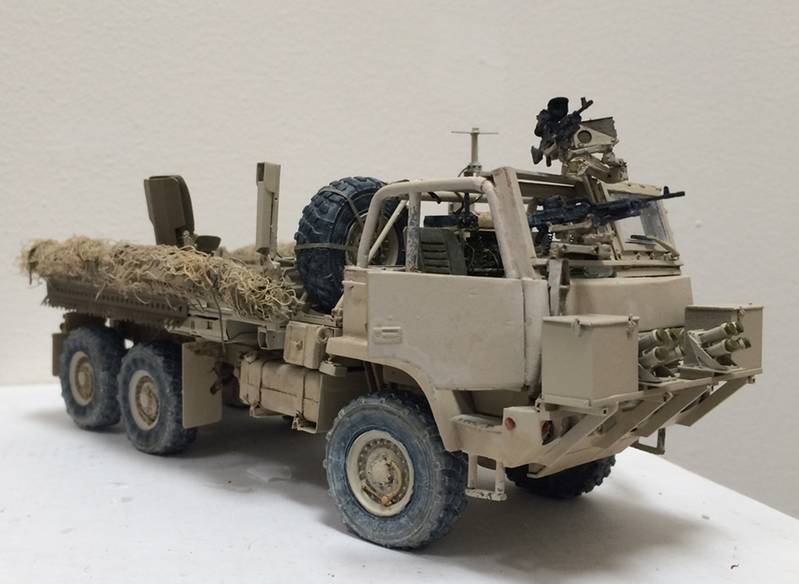
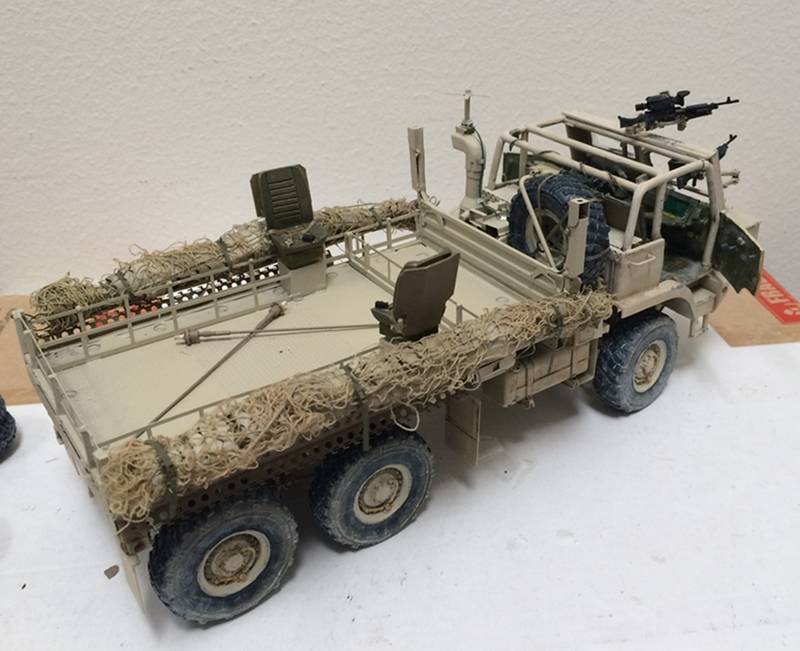
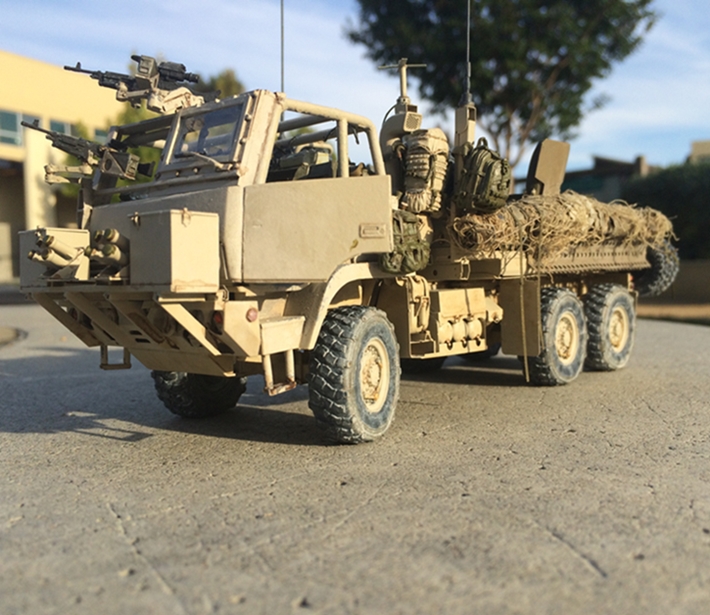
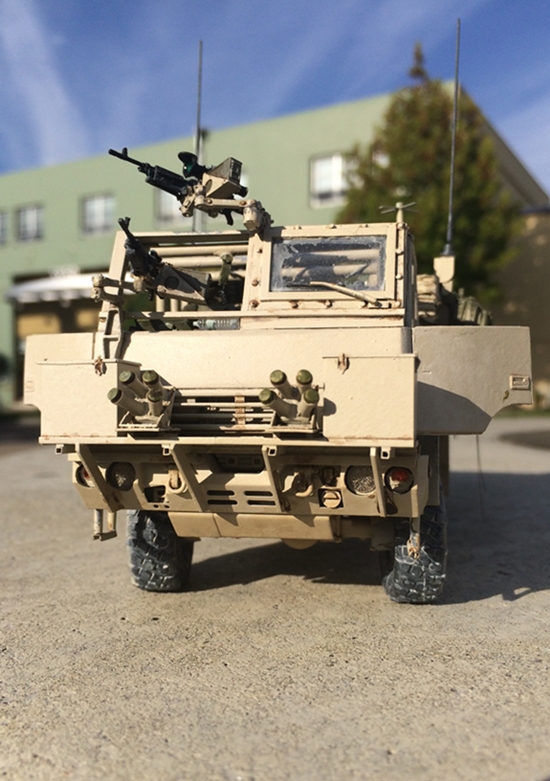
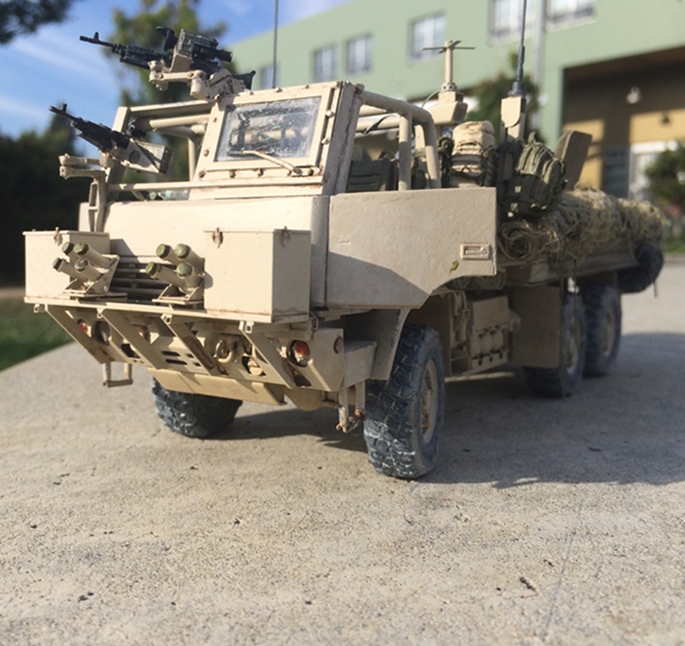
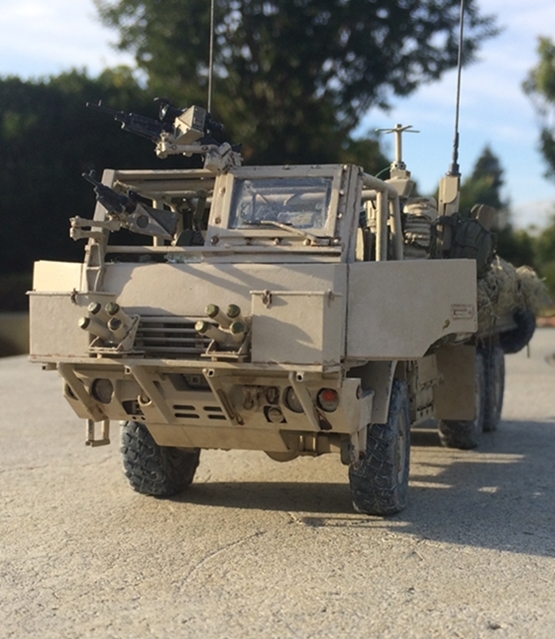
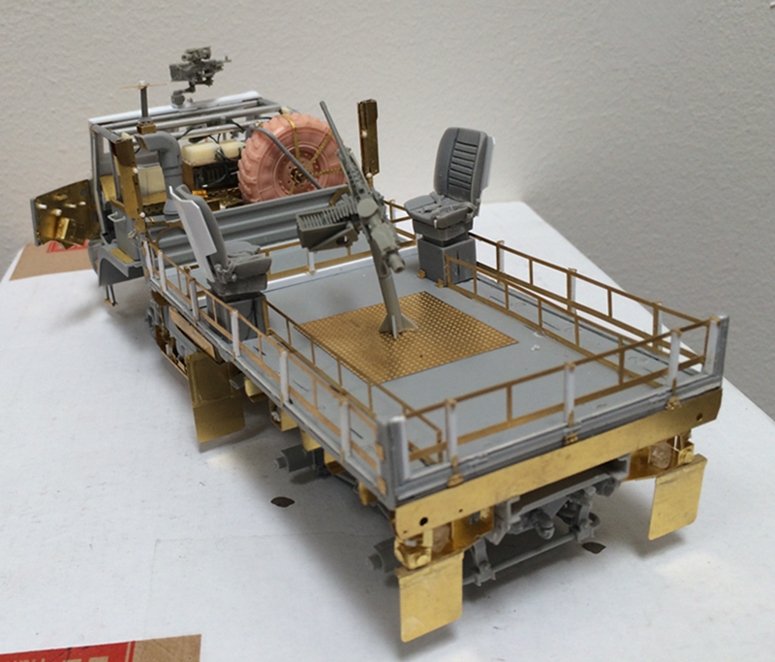
So, I'm off and running, have a look:


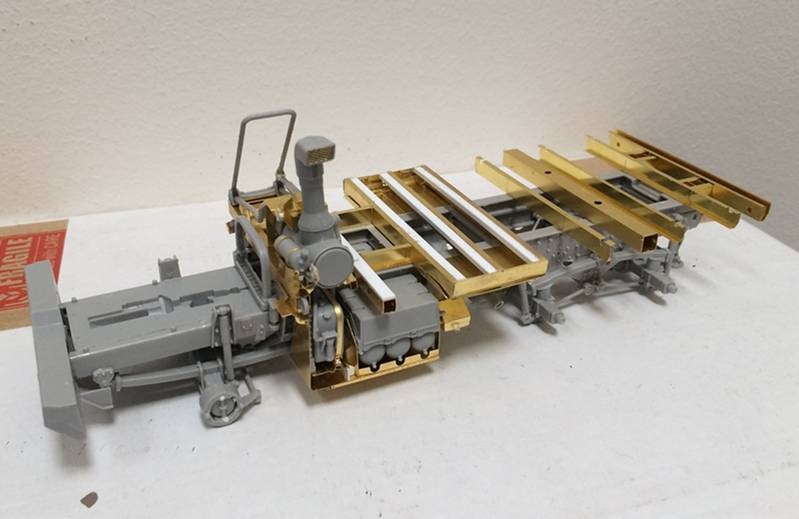
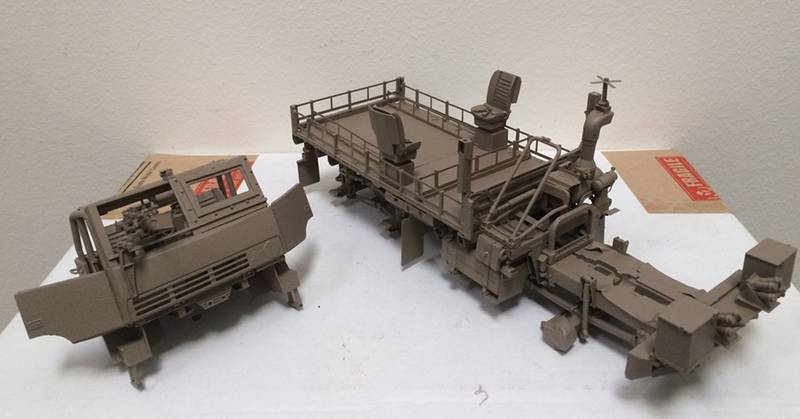
Step one: Above, get going with the kit and early "layer" of Voyager PE. No picnic, but, not a nightmare either....then:


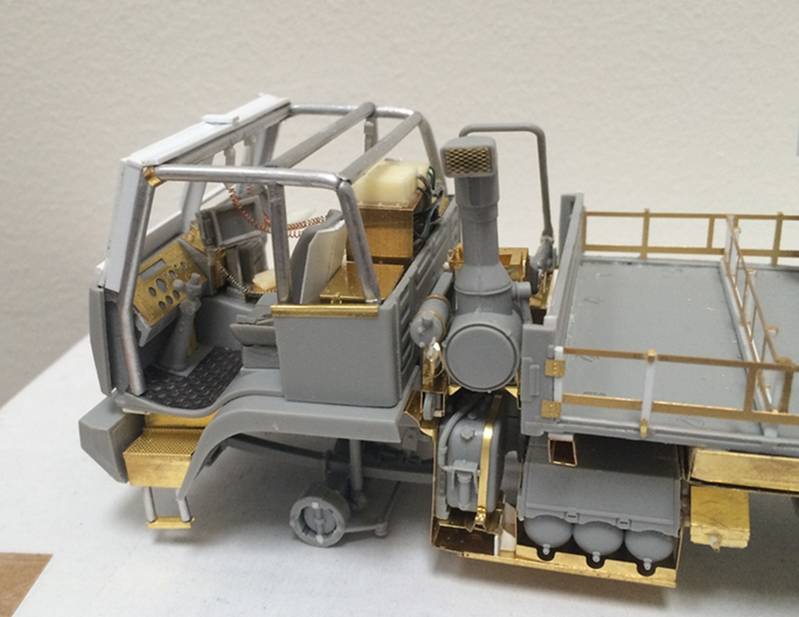
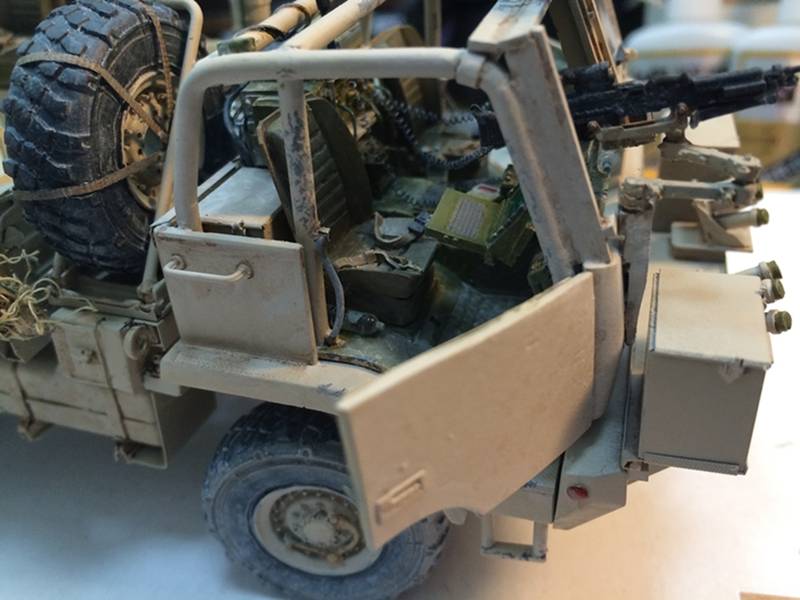
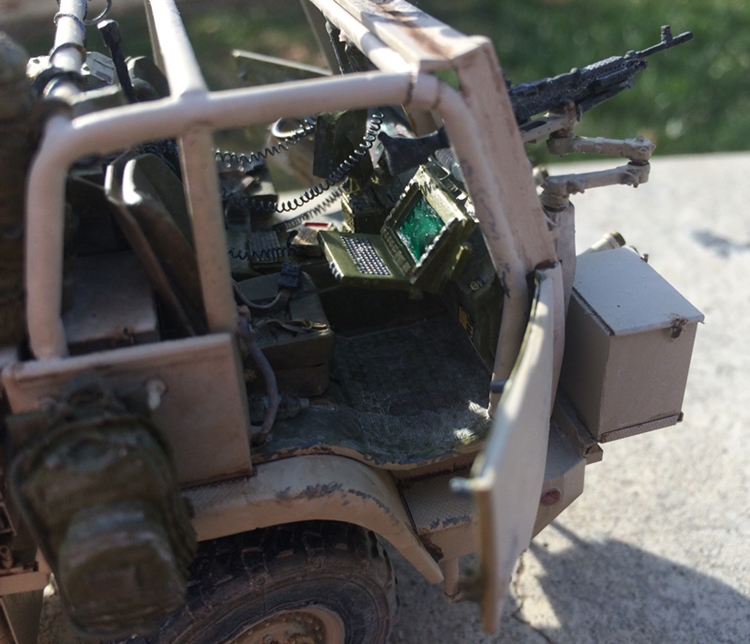
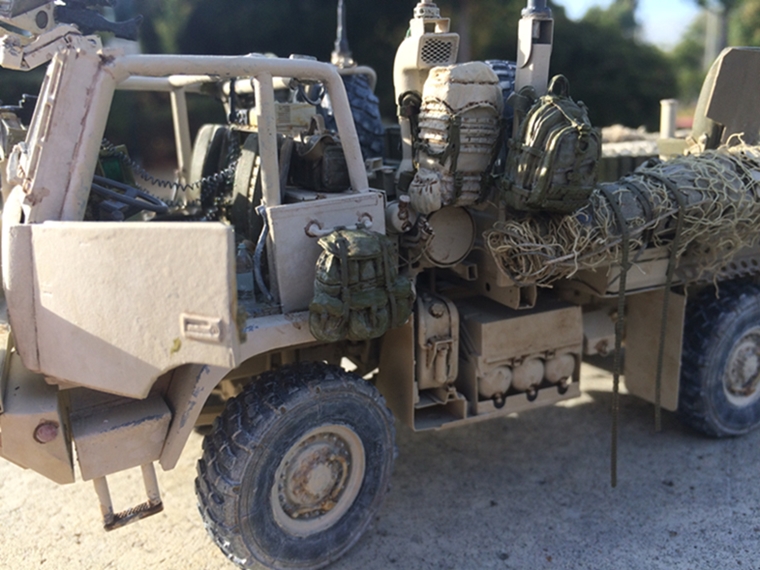
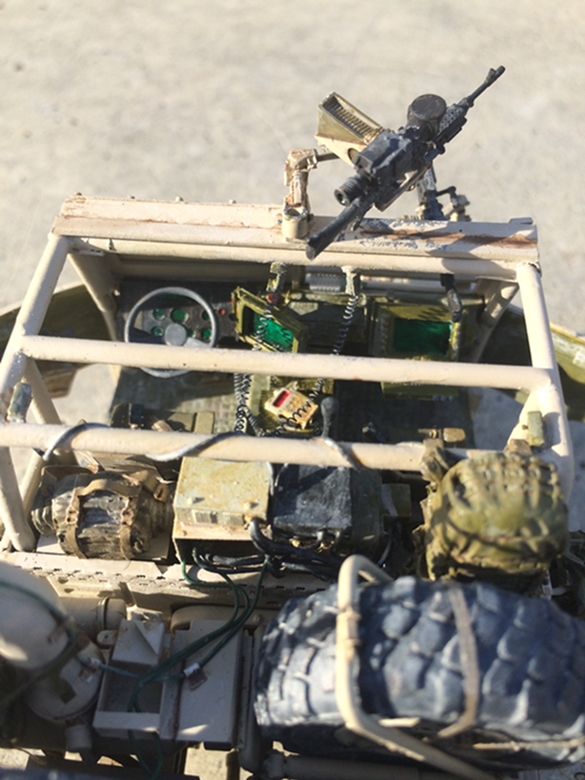
Step two: Above, get going on that cab! while the Blackdog kit includes some cab parts, I preferred to cut up the original, and detail it with some Voyager parts, Pro Art parts, junk box parts/scraps, and of course some scratch work.
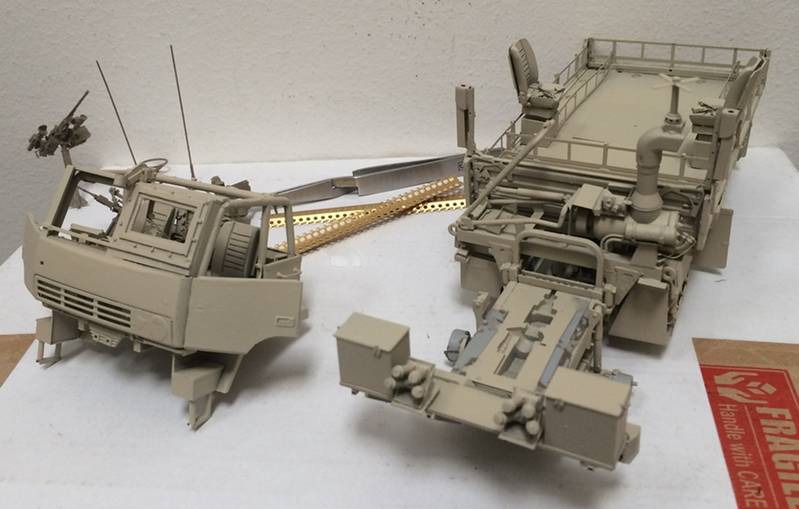
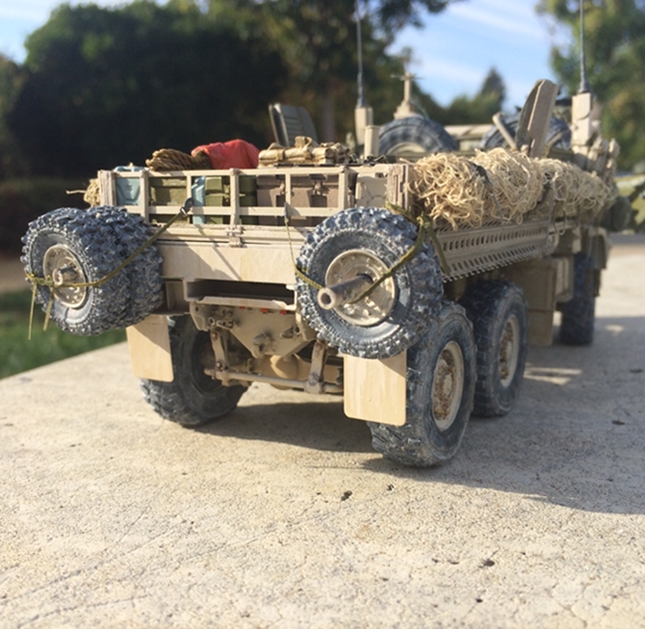
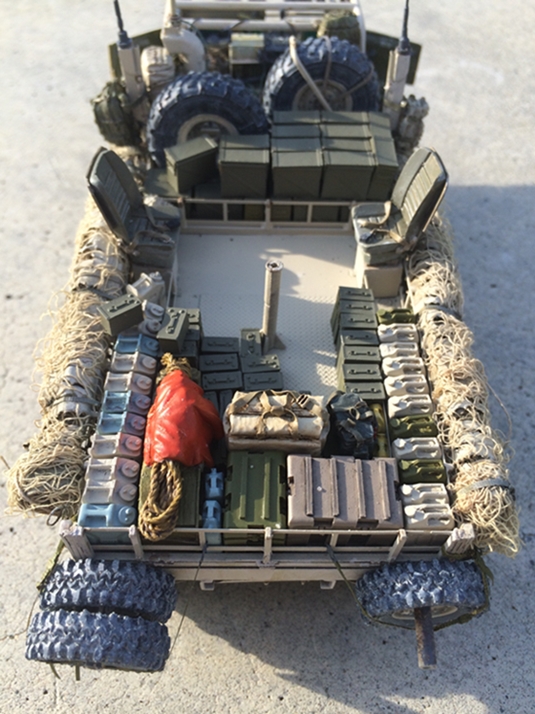
Next:


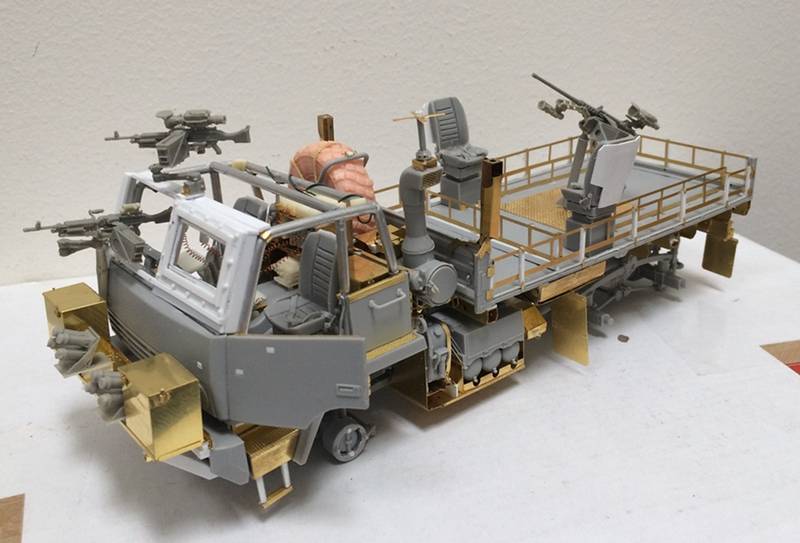
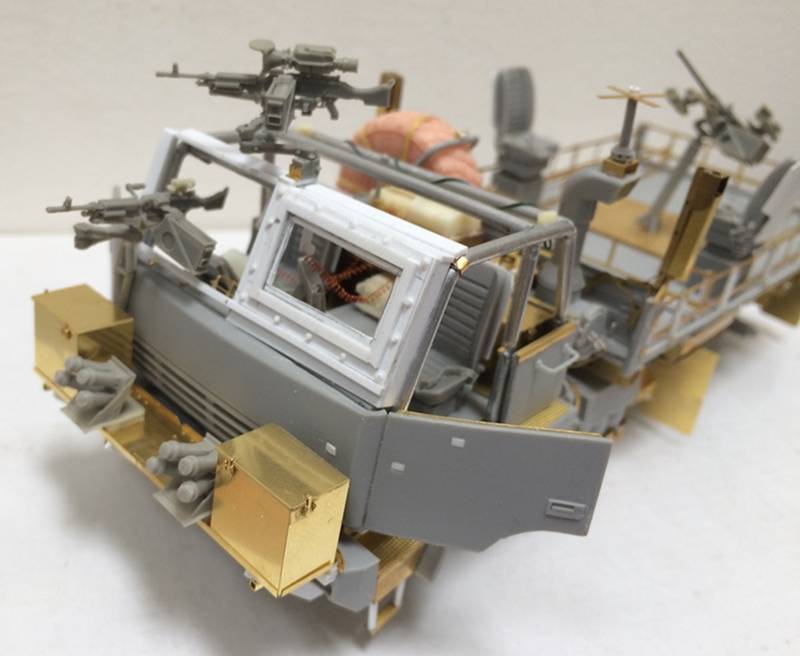
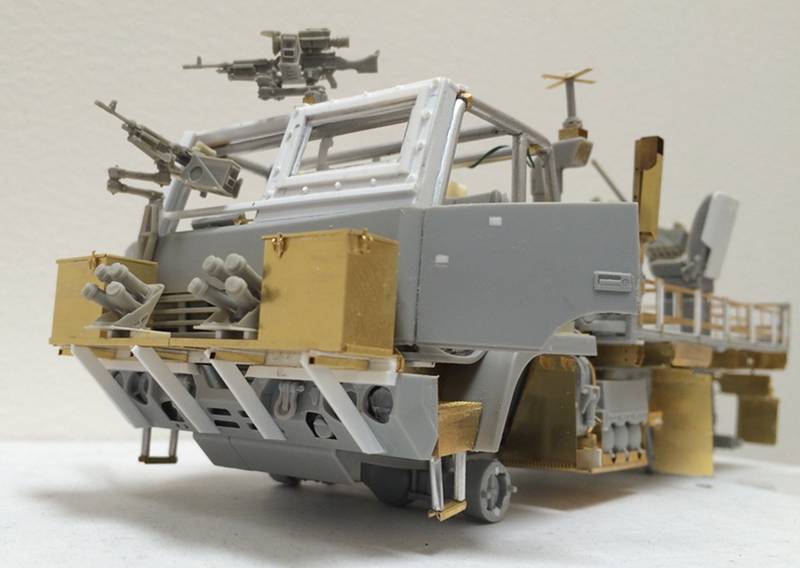
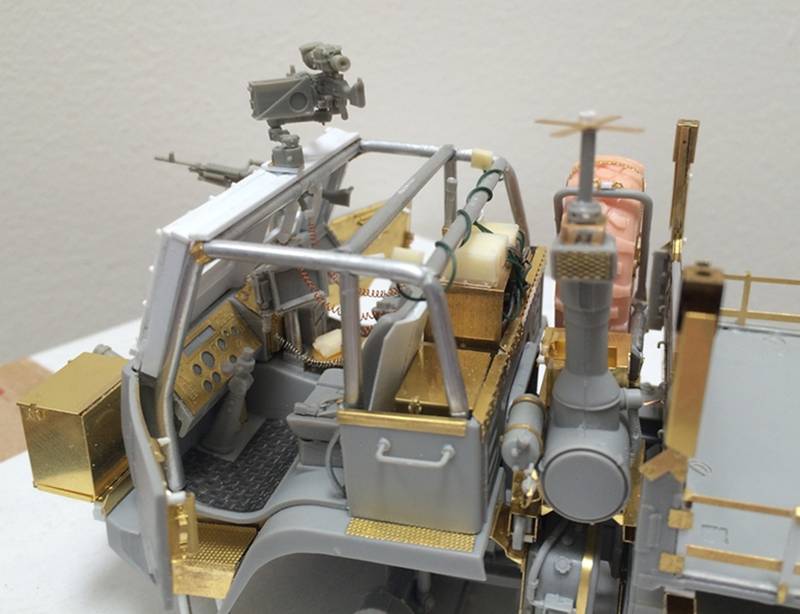
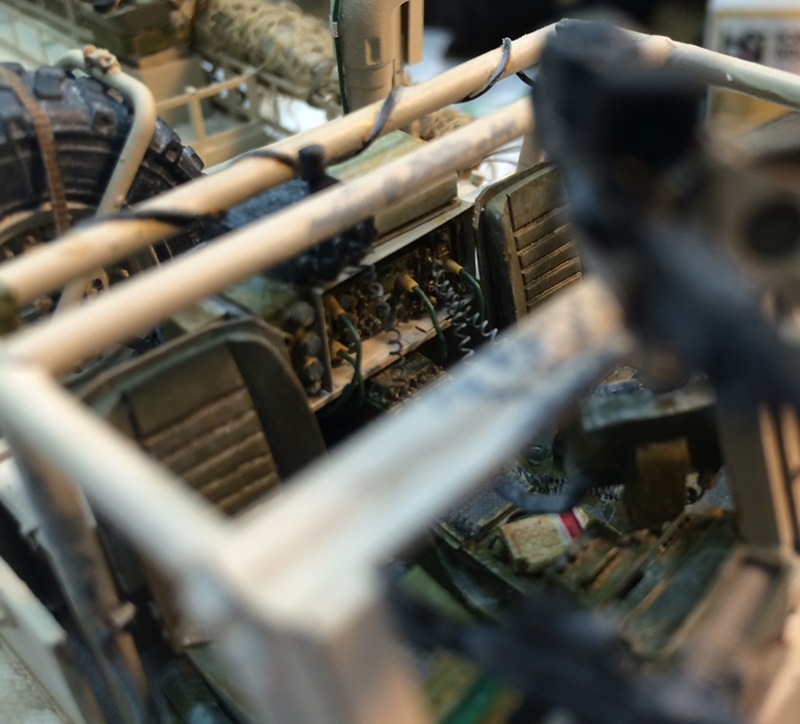
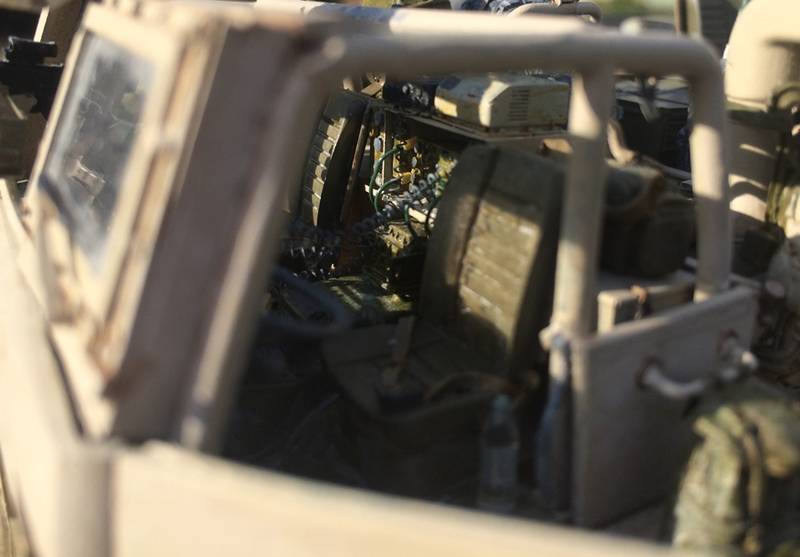
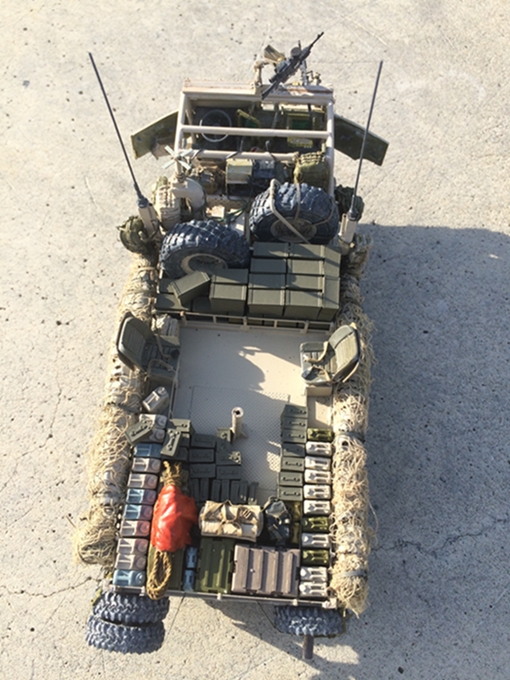
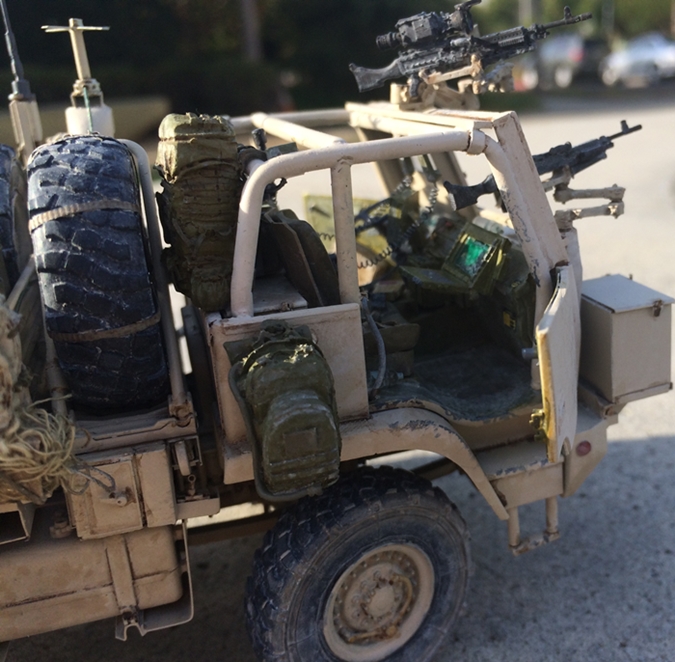
And, there you have it - yes! you'll see more than a few odds and ends from Live Resin too (yes, very nice!).

I've usually had good luck with Blackdog - not this time tho - the weapons were particularly bad - warped or broken out of the box....and, other parts were not cast square??? -again, not my typical experience with them.

Next mistake, I did not buy ALL of the Pro Art parts....hence, my radios/tech/coms etc include parts from many sources - hand sets and other parts just scratch built.

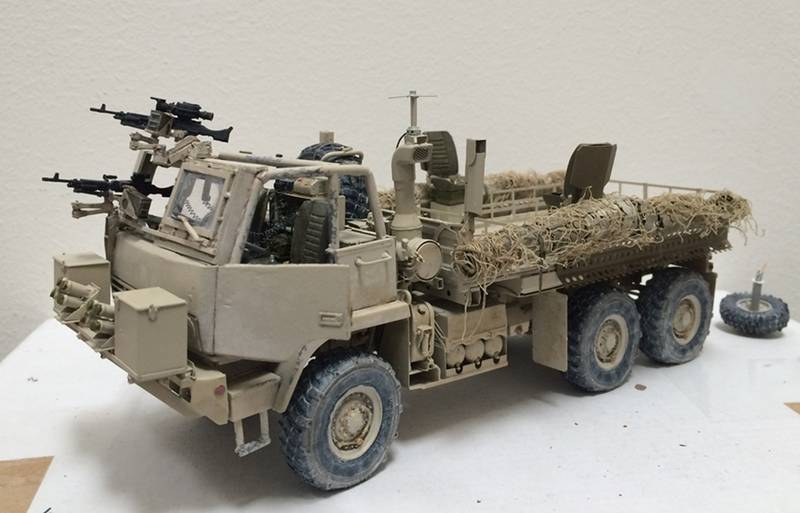
The good news is this isn't my first rodeo, so these "problems" were really just annoying - not deal breakers.

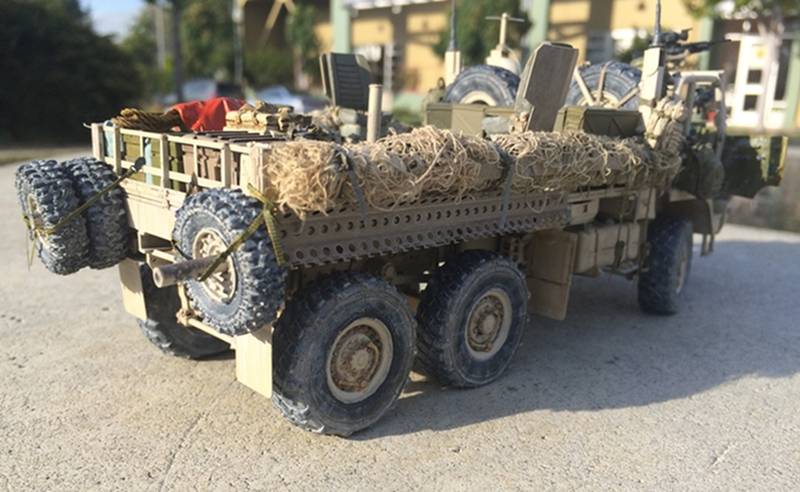
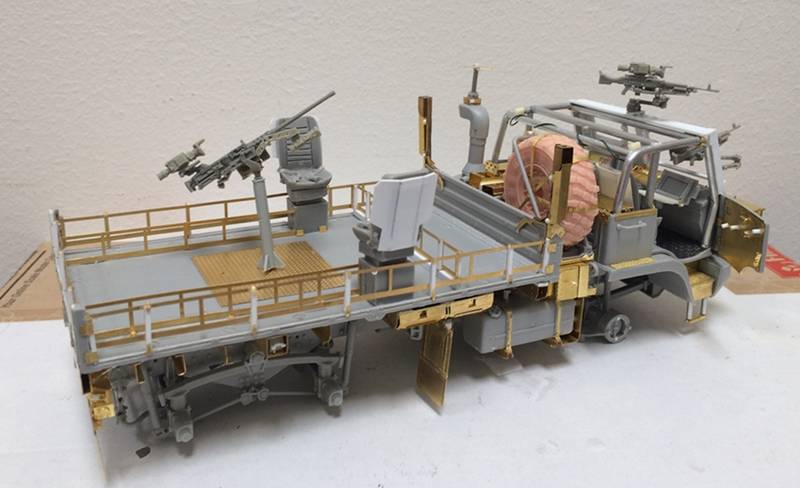
As for the model, I'm waiting on wheels. I ordered a set from Lucky, and in no time they arrived - but, SHORT ONE WHEEL! and not the spare...perfect. I emailed them and a wheel is on its way!

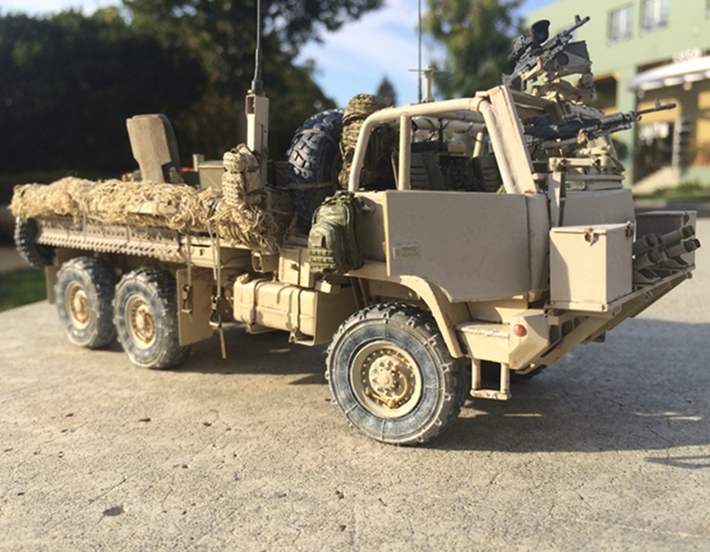
I'll provide a better summary of what I'm actually doing for the dio on another post - more modified vehicles to follow!

Thanks for having a look!

Nick
jrutman
Visit this Community
Pennsylvania, United States
Joined: April 10, 2011
KitMaker: 7,941 posts
Armorama: 7,934 posts
Posted: Monday, August 03, 2015 - 09:37 AM UTC
And he's off!!!!!
I will stay tuned for this race for sure. Awesome work as usual. I was wondering what you'd been up to.
J
justsendit
Visit this Community
Colorado, United States
Joined: February 24, 2014
KitMaker: 3,033 posts
Armorama: 2,492 posts
Posted: Monday, August 03, 2015 - 09:49 AM UTC
Jerry, Nick's been busy alright. I don't think he ever sleeps!

—mike
avenue
Visit this Community
Philippines
Joined: May 25, 2013
KitMaker: 544 posts
Armorama: 542 posts
Posted: Monday, August 03, 2015 - 10:11 AM UTC
wow... nothing but praise for your effort.how do you make the telephone wire?
grimmo
Visit this Community
Queensland, Australia
Joined: January 17, 2006
KitMaker: 752 posts
Armorama: 569 posts
Posted: Monday, August 03, 2015 - 04:36 PM UTC
Mate, read the book called "Roughneck Nine One".

http://www.amazon.com/Roughneck-Nine-One-Extraordinary-Special--team/dp/0312544146/ref=sr_1_1?ie=UTF8&qid=1438688103&sr=8-1&keywords=roughneck+nine+one
HeavyArty
Visit this Community
Florida, United States
Joined: May 16, 2002
KitMaker: 17,694 posts
Armorama: 13,742 posts
Posted: Monday, August 03, 2015 - 04:45 PM UTC
Looking great so far. I found a pic that seems to show another vehicle like the one you are building. It is an M1078 LMTV though.


I also found a whole album of Warpigs. Don't know if you have seen these yet, but good ref pics.

Warpigs Album

Stickframe
#362
Visit this Community
California, United States
Joined: December 01, 2013
KitMaker: 1,661 posts
Armorama: 1,202 posts
Posted: Tuesday, August 04, 2015 - 05:30 AM UTC
HI guys - thanks for having a look.

Jerry and Mike - as the two of you are busy building so many unbelievable figures, heck - I better be doing something!! yes, like with all dios, this one will eventually need figures....the good news is I have plenty of other stuff to build first!

Hi Richard - glad you like it so far. As for the phone line, I use thin wire, which I wrap around a segment of brass rod. You can wrap it pretty tight, then, as you slide the wrapped wire off of the rod you can stretch it out to look like handset wire. It's easy to do. The bigger problem for me has been finding thread thin wire! Once you find it, you'll be good to go!

Hi Matt - very good lead on the book! I'll check it out!

Hi Gino - yes, the pic you posted is the version I've been studying. As for the collection of images, thanks - I hadn't seen it before.

Yes, the M1083; while its clear that the GRV was built and used, there don't seem to be all that many photos of it around. While the text in the report of this battle is said to be a 5 ton truck, the pic looks like the 2.5 to me -

It is just a concession I'm willing to make. The roll cage, weapon mount and other elements are more interesting to build than just cutting the top half of the cab off -

Less interesting is painting all of this. With the roll cage in place, everything needs to be installed, so no easy painting lays ahead....I did tho, keep the cab removable so, while still a pain to paint, at least it will be small enough to handle relatively easily.

thanks for having a look

NIck
kurnuy
Visit this Community
West-Vlaaderen, Belgium
Joined: August 22, 2009
KitMaker: 1,491 posts
Armorama: 997 posts
Posted: Tuesday, August 04, 2015 - 02:25 PM UTC
Hi Nick ,

that's an impressive upgrade on the vehicle , a lot of PE involved , very nicely done my friend . It looks already fantastic.

I'm waiting for the next update .

Kurt
Stickframe
#362
Visit this Community
California, United States
Joined: December 01, 2013
KitMaker: 1,661 posts
Armorama: 1,202 posts
Posted: Tuesday, August 04, 2015 - 11:06 PM UTC
HI Kurt- nice to hear from you and thanks for the positive words! Yes, this turned out to have quite a bit of PE. We'll see how it works out -

First, I found another picture of an M1078 with the roll cage. I believe its the same truck shown in the second image above. The image resolution is low, and it appears to have been distorted (btw - if anyone has one or a few images of the M1083 GRV please feel free to add them!)....but, you can still see what's going on:


Next, the truck has been primed and received a base coat:


And now, on to painting the details. Yes - the optivisor will be attached to my head for the next few days as I try and get at least a respectable job done of painting the inside of the cab. my sense is this will not be particularly smooth sailing.....

OK, happy trails -

Nick
jrutman
Visit this Community
Pennsylvania, United States
Joined: April 10, 2011
KitMaker: 7,941 posts
Armorama: 7,934 posts
Posted: Wednesday, August 05, 2015 - 12:28 AM UTC
That was fast! I am wondering though why you built the whole inside and then closed it in. This seems like a very difficult way to pint the interior. Kind of like painting a face when the helmet is molded on already.
J
Stickframe
#362
Visit this Community
California, United States
Joined: December 01, 2013
KitMaker: 1,661 posts
Armorama: 1,202 posts
Posted: Wednesday, August 05, 2015 - 06:31 AM UTC
Hi Jerry...yes...about "that" - - I debated adding/not adding parts, painting assembly order etc - eventually I concluded it was going to be a headache whether I built and painted in modules or all at once.....I'm sure it will be.

Notes to self for painting the inside of the cab:

1) Velcro optivisor to head
2) Turn on bright lights
3) Limit coffee intake
4) Prohibit beer intake
5) Keep limiting coffee intake
6) Keep painting
7) Repeat until done.

The good times are ahead!

Nick
justsendit
Visit this Community
Colorado, United States
Joined: February 24, 2014
KitMaker: 3,033 posts
Armorama: 2,492 posts
Posted: Wednesday, August 05, 2015 - 09:37 AM UTC
That looks great Nick!

Quoted Text

... I debated adding/not adding parts, painting assembly order etc - eventually I concluded it was going to be a headache whether I built and painted in modules or all at once.....I'm sure it will be. ...


Age old question and one of the reasons why it takes me forever to build anything … and it seems to vary from one build to the next. I tend to overthink things, all the while imagining the most horrible results. So, I can never seem to figure out which order is best …

Coffee, beer, paint. ☕️ 🍺 🎨
Beer, coffee, paint. 🍺 ☕️ 🎨
Coffee, paint, beer. ☕️ 🎨 🍺

Regardless, I get sleepy and just go take a nap. 💤

Cheers! 🍺
—mike
jrutman
Visit this Community
Pennsylvania, United States
Joined: April 10, 2011
KitMaker: 7,941 posts
Armorama: 7,934 posts
Posted: Wednesday, August 05, 2015 - 06:37 PM UTC
Mike,I like your style!
J
SGTJKJ
#041
Visit this Community
Kobenhavn, Denmark
Joined: July 20, 2006
KitMaker: 10,069 posts
Armorama: 4,677 posts
Posted: Wednesday, August 05, 2015 - 06:42 PM UTC
Beautiful build. The detail is awesome.

Looking forward to see more.
mvaiano
Visit this Community
Sao Paulo, Brazil
Joined: January 24, 2012
KitMaker: 1,054 posts
Armorama: 1,050 posts
Posted: Wednesday, August 05, 2015 - 07:03 PM UTC
Hi Nick!

Again, not to say, just to see and (try to) learn.

Great!

Cheers!

Marco
Stickframe
#362
Visit this Community
California, United States
Joined: December 01, 2013
KitMaker: 1,661 posts
Armorama: 1,202 posts
Posted: Wednesday, August 12, 2015 - 12:50 AM UTC
Mike and Jerry - NO BEERS for me!!! I'll never finish this! haha! so far, so good - and yes, I've enjoyed a cold one or two along the way.

Hi Jesper - thanks! we'll see how long the commitment to detailing lasts - this truck certainly has plenty going on -it's pretty slow going, but, I do want it to look the part

Hi Marco - thanks for the positive words! yes, the forum is a great place to pick up ideas and techniques - I do the same!

On to a quick, lunch time update using out the door before work pics! (sorry about the quality)

This truck build is necessarily being completed in steps. The basic truck is now painted and assembled. The interior of the cab has been painted,and first "heavy handed" pass at interior weathering done. The first pass of weathering of the lower part of the truck is done too (chassis etc) with darker colors than what I will use on the upper parts.

There's still a long way to go. Please take a look:


And there you have it. This truck by the way is getting heavy - with the various add ons - it's also getting increasingly hard to handle and easy to break! At this point, I'll be spending time painting and adding supplies, then, back to weathering -

thanks for checking it out

Nick

justsendit
Visit this Community
Colorado, United States
Joined: February 24, 2014
KitMaker: 3,033 posts
Armorama: 2,492 posts
Posted: Wednesday, August 12, 2015 - 01:26 AM UTC
Nice update Nick … looks great!

And for those of us with bad eyesight and shaky hands (obviously not you Nick) … I found this nifty training apparatus for post-assembly painting of interiors and other tight spaces!

Cheers!
—mike
jrutman
Visit this Community
Pennsylvania, United States
Joined: April 10, 2011
KitMaker: 7,941 posts
Armorama: 7,934 posts
Posted: Wednesday, August 12, 2015 - 05:52 AM UTC
Well OK!! I don't know how you managed that excellent level of detail painting with the whole cab already put together but there you are! Nice! Great update man.
J
Stickframe
#362
Visit this Community
California, United States
Joined: December 01, 2013
KitMaker: 1,661 posts
Armorama: 1,202 posts
Posted: Wednesday, August 12, 2015 - 08:36 AM UTC
Hi Mike - haha!! That is the exactly the same thing!! The only difference is no buzz - instead, a nice streak of dark black paint exactly where you see it but don't want it!! Or, should I say "them" - lots of unwanted "accent" colors all along! So, lots of touch up cover up....yeah....and on to Jerry's point...

Jerry - yeah, you spotted the headache a mile away! I used several layers of each color to try and not have streaks on surfaces like seats etc, which is easier to do when you can use brushes bigger than #0 and #1....a lot like surface painting with a toothpick.....yeah, good times. The non-stop use of the optivisor made it all feel a lot less ridiculous...no, it didn't!, but, glad it received your vote! I've been retouching it tonight. Hopefully next pics will be in better light. I went overboard with my favorite Lifecolor dust wash...so, I've now had the "opportunity" to repaint the seats, computer monitors and dashboard. Mercifully, the interior of the cab is almost done.

Thanks for your comments guys! Happy model building
Nick
Stickframe
#362
Visit this Community
California, United States
Joined: December 01, 2013
KitMaker: 1,661 posts
Armorama: 1,202 posts
Posted: Sunday, August 16, 2015 - 11:26 PM UTC
Hi guys -- well, I'm still working on this M1083...Although it appears to be a relatively simple build, it has quite a bit going on - and, now that I'm into the process of loading it up, the build has slowed quite a bit! that said, it's still moving. Just like the cab, the other details are being installed (and repaired!! - you'll see a few random paint - like on the driver's side door) in layers.

The pictures below are better than the previous set, but you can clearly see that:

1) only a portion of the truck has received weathering yet

2) more "load" to add to the bed

3) several odds and ends to be either redone, or cleaned up.

OK, enough BS - take a look at the pics:


And there you have it - sorry about the lack of "order" - it's still clearly a WIP - when I eventually finish this, it will be presented in a more linear manner!

thanks for having a look!

Nick
jrutman
Visit this Community
Pennsylvania, United States
Joined: April 10, 2011
KitMaker: 7,941 posts
Armorama: 7,934 posts
Posted: Monday, August 17, 2015 - 12:21 AM UTC
I always love how your combination of good building,cool weathering and outdoor photography all come together.
J
justsendit
Visit this Community
Colorado, United States
Joined: February 24, 2014
KitMaker: 3,033 posts
Armorama: 2,492 posts
Posted: Monday, August 17, 2015 - 07:09 AM UTC
Exactly! And you have a real knack for stowage — especially hanging the items.

Well done sir!

—mike
Stickframe
#362
Visit this Community
California, United States
Joined: December 01, 2013
KitMaker: 1,661 posts
Armorama: 1,202 posts
Posted: Monday, August 17, 2015 - 08:15 PM UTC
Hi Jerry and Mike - thanks for your comments!

Jerry, I have fun with the outdoor pics. At this point, they're pretty helpful at showing where paint/weathering needs to be added or changed, and every now then to get a cool pic of the build!

Mike - I feel like a small scale baggage handler! That is, a baggage handler with some lead foil for straps to hold the stuff on (a tip shared by none other than Jerry!)

So I'm still working on this truck; more gear, more weather....eventually I'll add a couple of GMV's and a dio! - and yes....figures...😓😬

Cheers
Nick
matt
Staff MemberCampaigns Administrator
Visit this Community
New York, United States
Joined: February 28, 2002
KitMaker: 5,957 posts
Armorama: 2,956 posts
Posted: Monday, August 17, 2015 - 10:02 PM UTC
OYE.. another wicked cool build!!! you really don't sleep!!!!
bill_c
Staff MemberCampaigns Administrator
MODEL SHIPWRIGHTS
Visit this Community
New Jersey, United States
Joined: January 09, 2008
KitMaker: 10,553 posts
Armorama: 8,109 posts
Posted: Wednesday, August 19, 2015 - 02:34 AM UTC
Really nifty work! Love the PE.
 _GOTOTOP