Tamiya M1A1with mine plow
Distrito Federal, Mexico
Joined: May 31, 2013
KitMaker: 1,457 posts
Armorama: 1,440 posts
Posted: Tuesday, December 08, 2015 - 01:12 AM UTC
My new project:

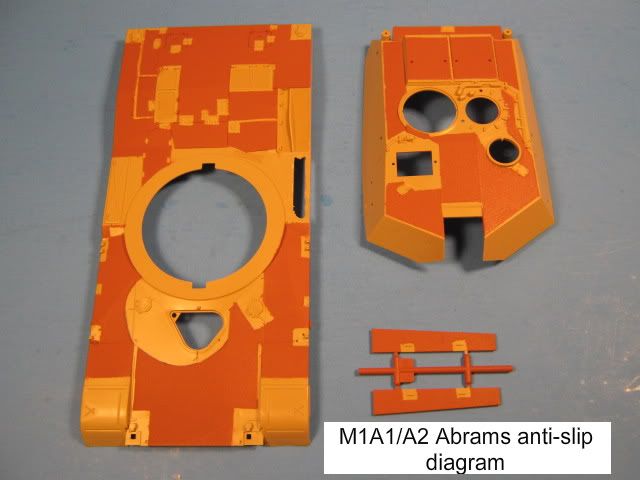
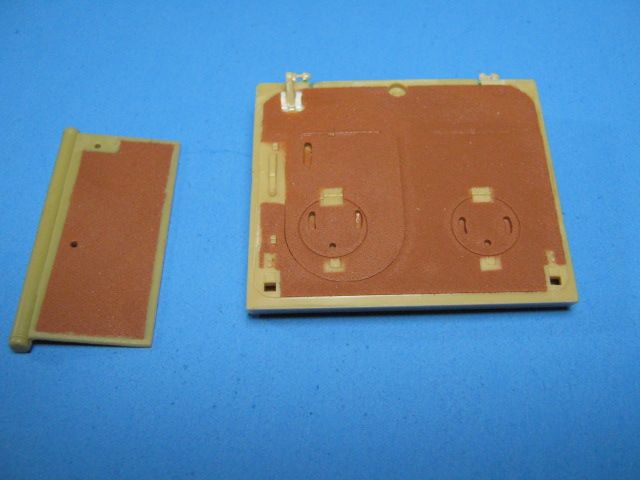
Preparing the surfaces for the anti slip strips:

I will use this product, as I have seen several modelers use it:

Distrito Federal, Mexico
Joined: May 31, 2013
KitMaker: 1,457 posts
Armorama: 1,440 posts
Posted: Tuesday, December 08, 2015 - 01:14 AM UTC
It looks a bit rough. lets see when it dries and it is primed:


Distrito Federal, Mexico
Joined: May 31, 2013
KitMaker: 1,457 posts
Armorama: 1,440 posts
Posted: Tuesday, December 08, 2015 - 01:18 AM UTC
I think it looks a bit too rough. I think I will sand it down a bit to reduce the roughness.

Florida, United States
Joined: May 16, 2002
KitMaker: 17,694 posts
Armorama: 13,742 posts
Posted: Tuesday, December 08, 2015 - 02:15 AM UTC
You are on the right track. I agree though, the Stone texture is way too heavy. I use Terra Cotta Rustoluem to get a much more muted effect.

It gives a fine textured surface every time.
Field Artillery --- The KING of BATTLE!!!
"People sleep peaceably in their beds at night only because rough men stand ready to do violence on their behalf." -- George Orwell
Showcase
Distrito Federal, Mexico
Joined: May 31, 2013
KitMaker: 1,457 posts
Armorama: 1,440 posts
Posted: Tuesday, December 08, 2015 - 02:49 AM UTC
Thanks Gino. I have sanded it down a bit and I think I can get away with it. Next time around I will get the terracota
New York, United States
Joined: September 23, 2006
KitMaker: 389 posts
Armorama: 358 posts
Posted: Friday, December 11, 2015 - 10:15 PM UTC
I'll thank Gino again too, just ordered the Terra Cotta Rustoluem off Amazon
Distrito Federal, Mexico
Joined: May 31, 2013
KitMaker: 1,457 posts
Armorama: 1,440 posts
Posted: Thursday, January 14, 2016 - 10:41 PM UTC
All primed and ready:


Plow painted with a wash on:
Distrito Federal, Mexico
Joined: May 31, 2013
KitMaker: 1,457 posts
Armorama: 1,440 posts
Posted: Thursday, January 14, 2016 - 10:47 PM UTC
Pin washing with MIG enamel:
Turret:


Gun:

Chasis:


Distrito Federal, Mexico
Joined: May 31, 2013
KitMaker: 1,457 posts
Armorama: 1,440 posts
Posted: Thursday, January 14, 2016 - 10:53 PM UTC
Plow:

Did a filter with white and yellow oils to tone down the redish tint of the AK acrylic base paint and give it a sun faded tone:


Distrito Federal, Mexico
Joined: May 31, 2013
KitMaker: 1,457 posts
Armorama: 1,440 posts
Posted: Thursday, January 14, 2016 - 10:57 PM UTC
Another wash of Mig enamel mostly on anti slip surfaces:


Decals have been applied. Used Micro Sol on those.
Distrito Federal, Mexico
Joined: May 31, 2013
KitMaker: 1,457 posts
Armorama: 1,440 posts
Posted: Thursday, January 14, 2016 - 11:01 PM UTC
Pictures with good natural light:
Also have done some chipping on plow:


Distrito Federal, Mexico
Joined: May 31, 2013
KitMaker: 1,457 posts
Armorama: 1,440 posts
Posted: Thursday, January 14, 2016 - 11:02 PM UTC
Next I will start some chipping and rain and rust marks.
England - South West, United Kingdom
Joined: March 13, 2015
KitMaker: 418 posts
Armorama: 235 posts
Posted: Thursday, January 14, 2016 - 11:29 PM UTC
Nice build on that M1A1. It's been a while since I've seen some one build an Abrams kit with a mine plow. Just shows that People still love the older M1A1 kits And not all obsessed with the new and recent M1A2 kits, especially with TUSK.
New Jersey, United States
Joined: September 26, 2006
KitMaker: 857 posts
Armorama: 811 posts
Posted: Thursday, January 14, 2016 - 11:57 PM UTC
Looks really good Marcos!!
I wouldn't go too crazy with chipping a lot more weathering, I think you're almost there

Distrito Federal, Mexico
Joined: May 31, 2013
KitMaker: 1,457 posts
Armorama: 1,440 posts
Posted: Saturday, January 16, 2016 - 02:43 AM UTC
Pretty much done with chipping. Working on rain marks. Next comes rust.


Distrito Federal, Mexico
Joined: May 31, 2013
KitMaker: 1,457 posts
Armorama: 1,440 posts
Posted: Saturday, January 16, 2016 - 02:53 AM UTC
Also, trying to figure out what to put on top of the turret. This is what I have so far:

Can anybody tell me what brands of botteled water were used during operation Desert Shield/Storm?
Distrito Federal, Mexico
Joined: May 31, 2013
KitMaker: 1,457 posts
Armorama: 1,440 posts
Posted: Sunday, January 17, 2016 - 12:33 AM UTC
Distrito Federal, Mexico
Joined: May 31, 2013
KitMaker: 1,457 posts
Armorama: 1,440 posts
Posted: Sunday, January 17, 2016 - 12:34 AM UTC
Myanmar
Joined: March 05, 2004
KitMaker: 4,011 posts
Armorama: 1,498 posts
Posted: Sunday, January 17, 2016 - 12:39 AM UTC
This is a kit that looks good as a straight out of box build.
For stowage I'd suggest a thorough web search.

i watched a scale plastic figure crawl along the edge . . . of an exacto blade . . . that's my dream , it's my nightmare . . . . . . . crawling , slithering . . . . . along the edge . . . . . . of an exacto . . . . . blade . . . . and surviving
Oklahoma, United States
Joined: September 30, 2015
KitMaker: 2,493 posts
Armorama: 2,344 posts
Posted: Sunday, January 17, 2016 - 12:49 AM UTC
This looks killer. Really looks good with the weathering.
Cheers,
Dustin
"Only the dead have seen the end of war." - Plato
South Carolina, United States
Joined: December 14, 2006
KitMaker: 1,355 posts
Armorama: 979 posts
Posted: Sunday, January 17, 2016 - 01:41 AM UTC
Marcos,
Your M1A1 Abrams is looking good, especially after you added your weathering effects.
I did notice a few things you might want to correct.
There appears to be a missing part that connects the upright periscope on the Commander's cupola to the "hole" on the side of the M2 0.50 cal MG. The missing parts is the tapered and rounded flat plate with the inset oval shape with the rivet in the middle in the second picture (pictures from PrimePortal):

The second item is your tow cables are supposed to be mounted more along the bottom edge of the turret side. Lastly, the Smoke Discharger Round Storage Boxes seem a little too low, too close to the Tow Cable End:


I hope this helps. Keep up your good work.
ESSAYONS!
"Man does not live until he looks to the future, and that is his salvation in the worst of times.".... (Author Unknown)
AMPS #2102
Distrito Federal, Mexico
Joined: May 31, 2013
KitMaker: 1,457 posts
Armorama: 1,440 posts
Posted: Sunday, January 17, 2016 - 06:12 AM UTC
Thank you guys. And Majjanelson, I was just presenting the MG. I DO have the part. And as for the tow cables, I tried bending them and one broke in the process, so I set them the only way they did fit the designated original holes from tamiya. I could have scratch built them, but honestly I got a bit lazy. But thanks though.
Distrito Federal, Mexico
Joined: May 31, 2013
KitMaker: 1,457 posts
Armorama: 1,440 posts
Posted: Sunday, January 17, 2016 - 09:28 AM UTC
I changed my mind. I will try to reposition the tow cables. We'll see how that goes.
Distrito Federal, Mexico
Joined: May 31, 2013
KitMaker: 1,457 posts
Armorama: 1,440 posts
Posted: Sunday, January 17, 2016 - 01:24 PM UTC
I was checking some sources and noticed that in earlier versions the Smoke Discharger Round Storage Boxes were set lower. I guess that is why Tamiya placed them there:

Georgia, United States
Joined: August 16, 2015
KitMaker: 63 posts
Armorama: 60 posts
Posted: Sunday, January 17, 2016 - 02:06 PM UTC
Quoted Text
I was checking some sources and noticed that in earlier versions the Smoke Discharger Round Storage Boxes were set lower. I guess that is why Tamiya placed them there:
You would be correct for a Desert Storm Abrams...

27th FEB. 1991... THE VALKYRIES CARRIED MY BROTHERS TO VALHALLA
For the Everlasting Glory of the Infantry.


