Hi Matthew, thank you very much for all of your feedback. In regards to the mould line on the barrel, I have now gone back and sanded that out - I think that is all sorted.
As for the images, I am having a few issues following your suggested method due to my browser. I will need to investigate this, unfortunately I don't have time today but I will sort this out going forward asap.
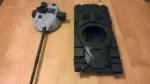
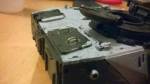
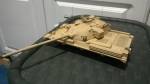
https://gallery.kitmaker.net/showphoto.php/photo/449888/ppuser/73645For colour modulation I have attempted to introduce highlighting and shadows: on the lower hull I have sprayed a darkened mixture of the base colour. I then used a slightly lighter version of the base colour to highlight the tops of hatches and any raised areas (such as the top of the turret and sides of the engine compartment). Following this I sprayed the model with a light dusting of light grey to simulate general dust accumulation. I then highlighted rivets and handles in the light version of the base colour.
My thoughts after all of this is that perhaps a sand colour was not the best colour to practice colour modulation! I have also invested in a better airbrush as mine is just a cheap bottom of the range one and I was struggling to regulate coverage (it does not have a flow regulator for example).
Regardless of these issues hopefully I have made the model a little more interesting and have introduced some realistic shadows and highlights. Thoughts?
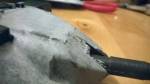
After this step and also after spraying the model in a light coat of matt varnish I have begun adding rust patches.
https://gallery.kitmaker.net/showphoto.php/photo/449885/ppuser/73645 I am using the following photo as inspiration:
http://www.militarymodelling.com/sites/1/images/member_albums/140470/620076.jpgLooking at this photo I think that a lot of the colour has been washed out hence why I am going for a more bold look with the rust.
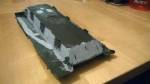
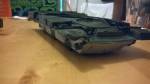
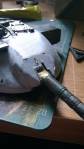
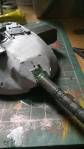
https://gallery.kitmaker.net/showphoto.php/photo/449890/ppuser/73645https://gallery.kitmaker.net/showphoto.php/photo/449889/ppuser/73645I also quite like the image I have in mind of a very tired Chieftain late in the conflict. The technique I am using for the rust patches is to paint on large areas of brown, before adding dark grey patches over these and outlining the rusted areas with a light version of the base colour. I will then blend a different rusty brown over the top. Looking at farming equipment (I don't have a tank museum nearby!) and in the relative absence of top-down photos of tanks, I am concentrating the rust and peeling paint on the engine compartment on the basis that the heat produced in this area accelerates paint degradation. - What do people think of this may I ask?
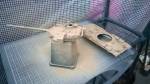
I have also begun painting the tank commander figure. The flesh needs a second coat.
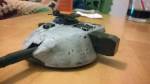
https://gallery.kitmaker.net/showphoto.php/photo/449887/ppuser/73645I have also added some crew-added graffiti:
https://gallery.kitmaker.net/showphoto.php/photo/449886/ppuser/73645Any thoughts on where I can improve, etc, would be welcomed!