

Яusso-Soviэt Forum: Cold War Soviet Armor
For discussions related to cold war era Russo-Soviet armor.
For discussions related to cold war era Russo-Soviet armor.
Hosted by Jacques Duquette
Meng T-90 w/TBS-86 Tank Dozer
JSSVIII

Joined: March 28, 2007
KitMaker: 1,169 posts
Armorama: 1,067 posts
Posted: Monday, November 27, 2017 - 05:37 AM UTC
Thanks for posting those things to watch out for Colin, they are extremely helpful for anyone who intends to build this kit!

ColinEdm


Joined: October 15, 2013
KitMaker: 1,355 posts
Armorama: 1,229 posts
Posted: Sunday, December 03, 2017 - 09:51 AM UTC
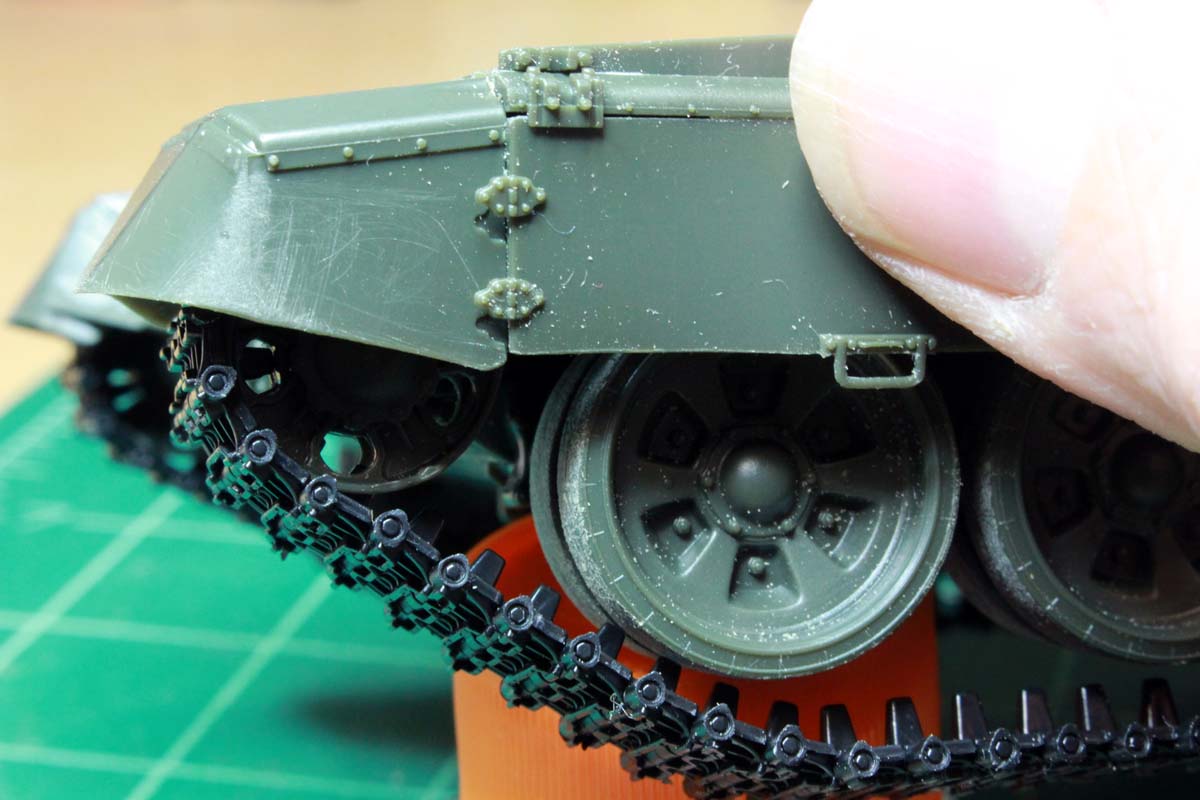
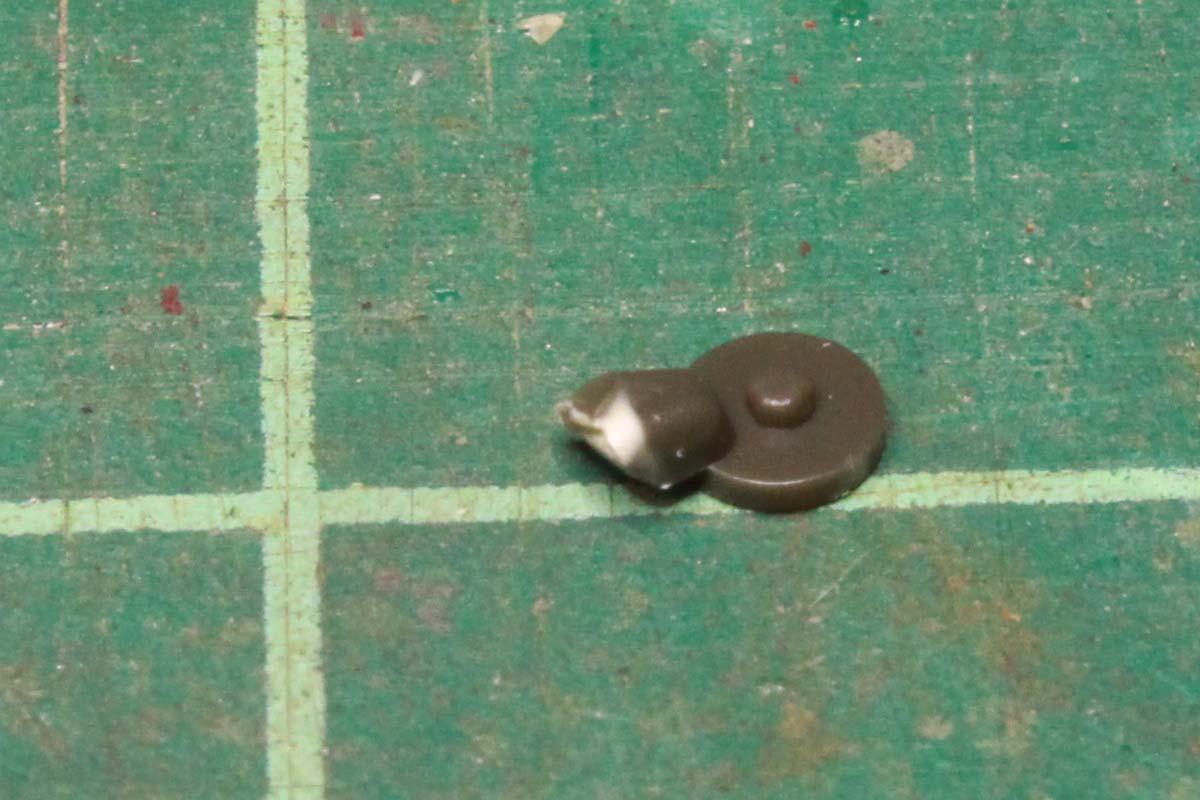
Cheers John. Work continues on the lower hull. Assembled the headlamps and installed them. The guards come in two pieces and I found them to be a bit finicky to get to line up properly, but once done they look pretty good.
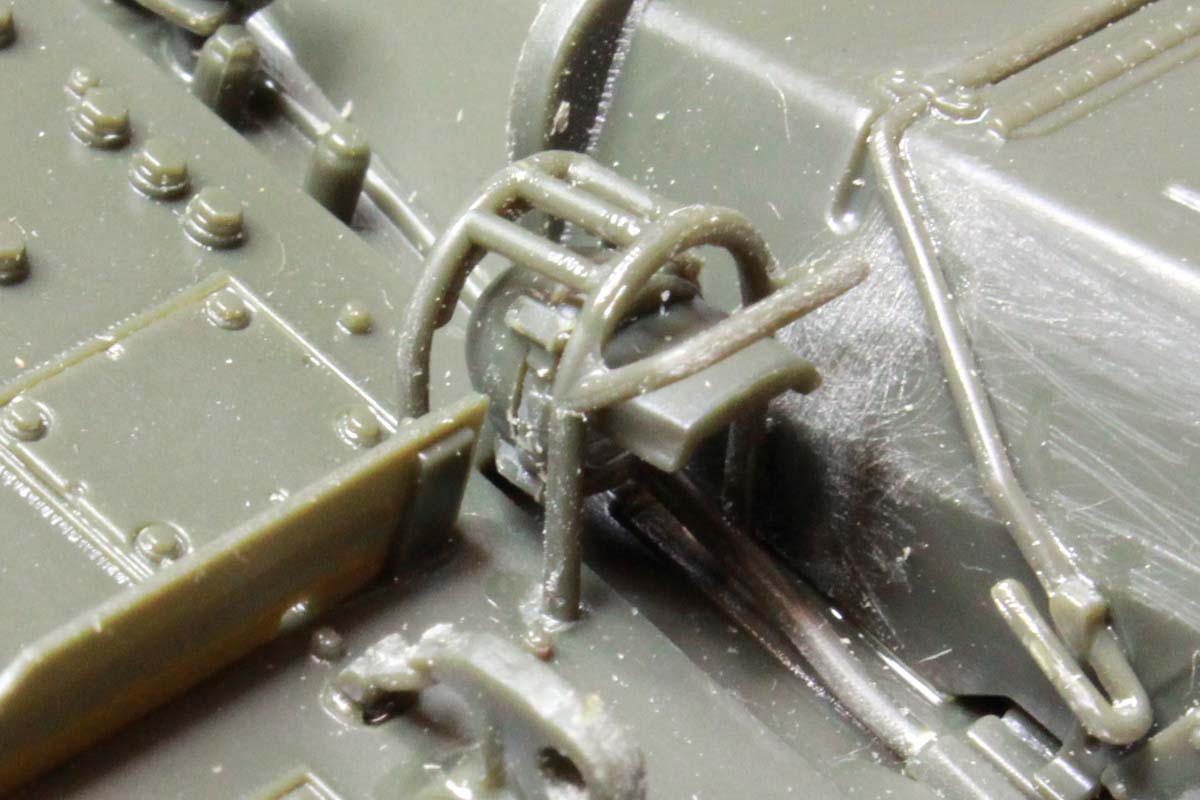
Obviously lots of scraping shrapnel to clean up there...On to the side skirts. A couple of minor issues with these. Some of the parts are very delicate and require some care to remove from the sprues:
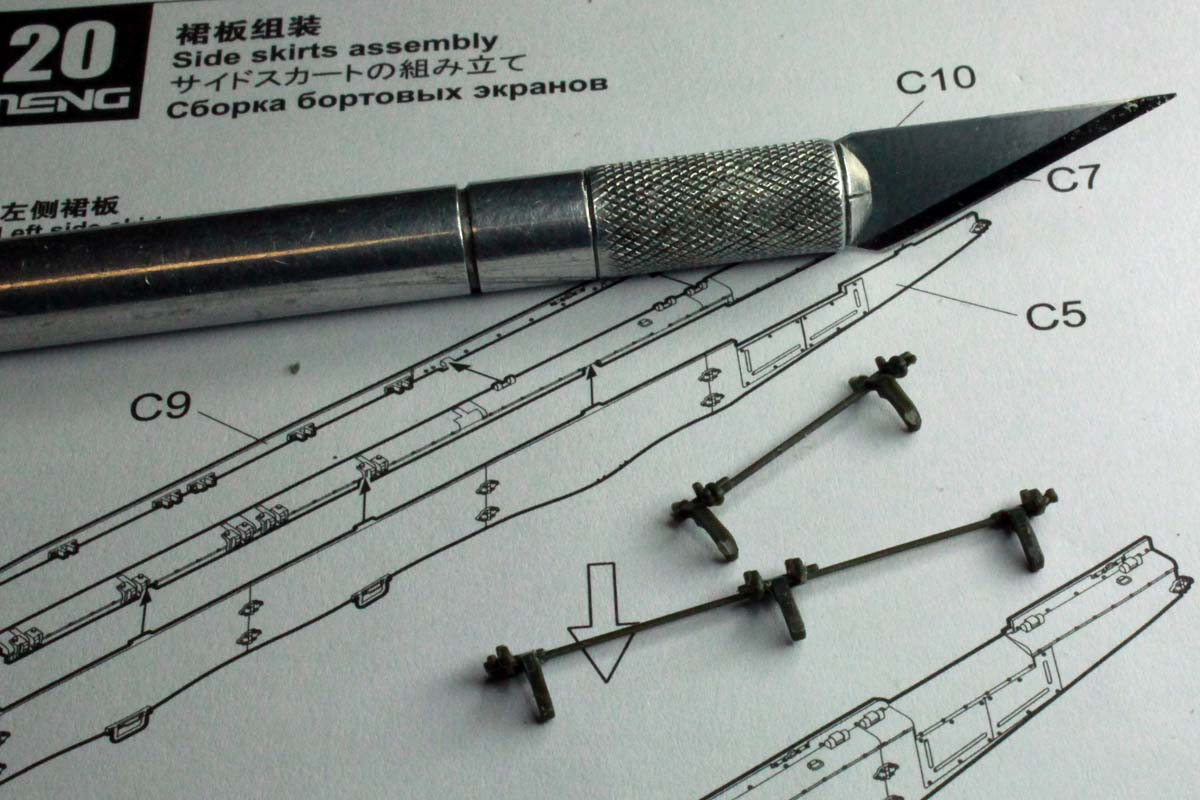
Cleanup is a bit dodgy due to the fragile nature of the parts and it didn't help that there was a fair bit of flash present along with some prominent seam lines.
But they are quite nice when cleaned up. Earlier I had mentioned some issues with lining up the front mud flaps. In retrospect I should have mounted the side skirts at the same time as the mud flaps while everything was still flexible to ensure proper fit and alignment. Adding the side skirts as a totally separate step after the mud flap glue had set resulted in some slight interference:

while it was nice and snug at the other end:
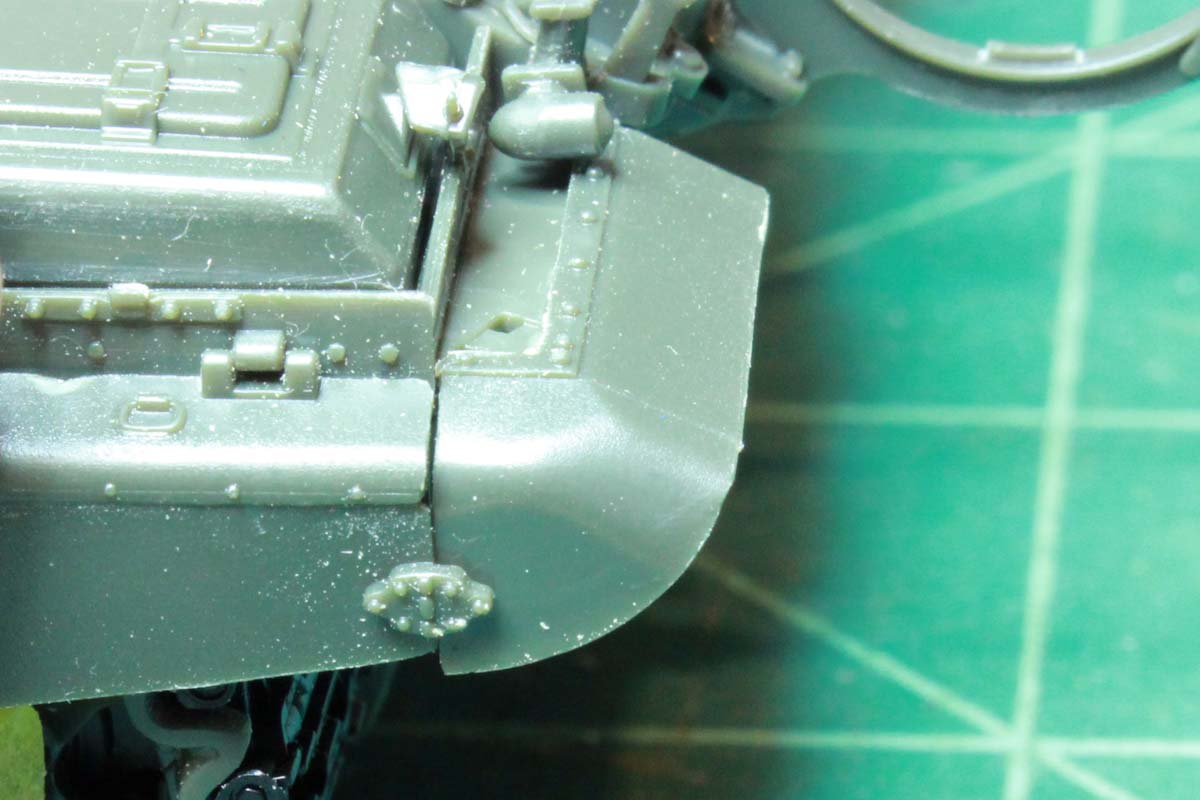
So a bit of trimming was required, after which everything fit together quite nicely.
In summary, attach the upper hull to the lower hull without the mud flaps, then after the hull has set, add the mud flaps and pre-assembled side skirt assemblies (7-8 pieces each) to make sure everything aligns as it should, this will make things go a lot easier. I have kept the side skirts loose so I can remove the tracks and running gear for painting.
Obviously lots of scraping shrapnel to clean up there...On to the side skirts. A couple of minor issues with these. Some of the parts are very delicate and require some care to remove from the sprues:
Cleanup is a bit dodgy due to the fragile nature of the parts and it didn't help that there was a fair bit of flash present along with some prominent seam lines.
But they are quite nice when cleaned up. Earlier I had mentioned some issues with lining up the front mud flaps. In retrospect I should have mounted the side skirts at the same time as the mud flaps while everything was still flexible to ensure proper fit and alignment. Adding the side skirts as a totally separate step after the mud flap glue had set resulted in some slight interference:
while it was nice and snug at the other end:
So a bit of trimming was required, after which everything fit together quite nicely.
In summary, attach the upper hull to the lower hull without the mud flaps, then after the hull has set, add the mud flaps and pre-assembled side skirt assemblies (7-8 pieces each) to make sure everything aligns as it should, this will make things go a lot easier. I have kept the side skirts loose so I can remove the tracks and running gear for painting.
ColinEdm
Joined: October 15, 2013
KitMaker: 1,355 posts
Armorama: 1,229 posts
Posted: Saturday, December 16, 2017 - 09:43 PM UTC
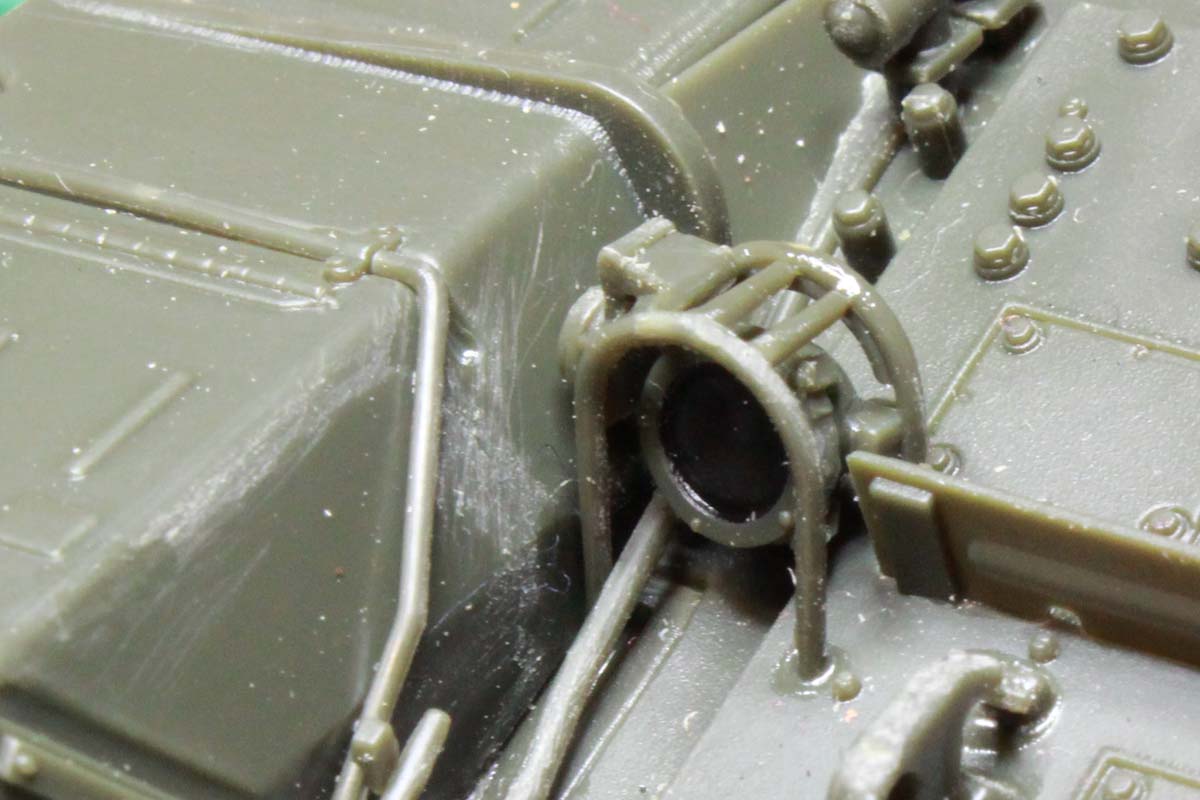
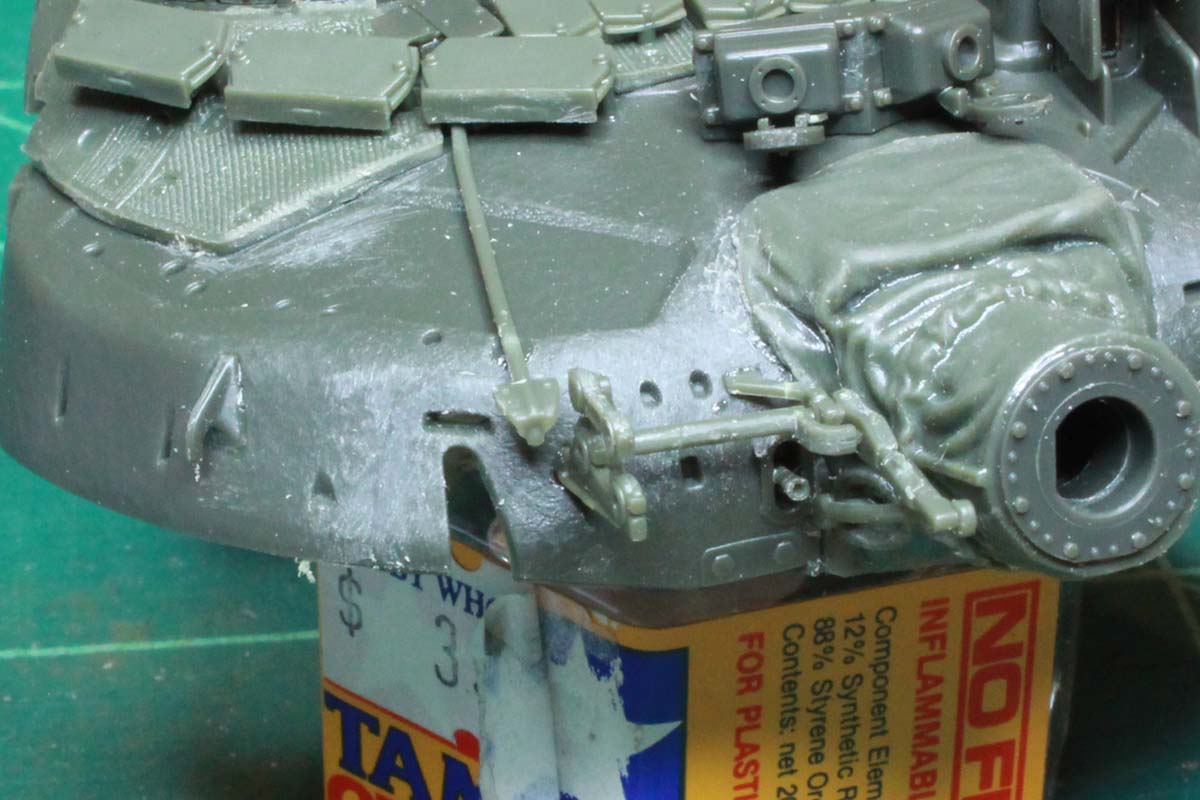
Finishing off the lower hull I have added miscellaneous small hoses and other bits, plus the anti-HEAT 'gills' on the front of the skirts:
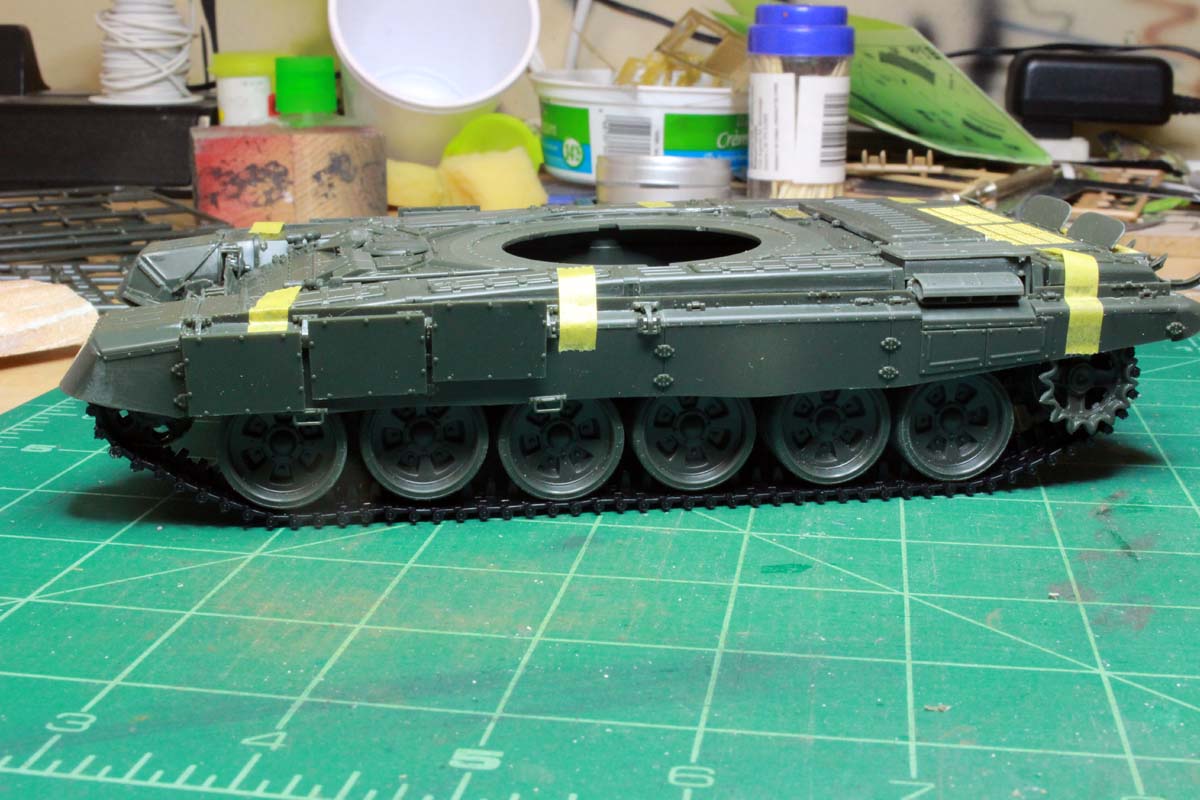
I am leaving the fuel drums and associated hoses off for now, will fit them later but keep them removable for painting.
Meng provides a length of string for the tow cables but I didn't like the look of it so I used some picture hanging cable instead, annealing it over a candle to make it easier to bend (it was still a PITA).
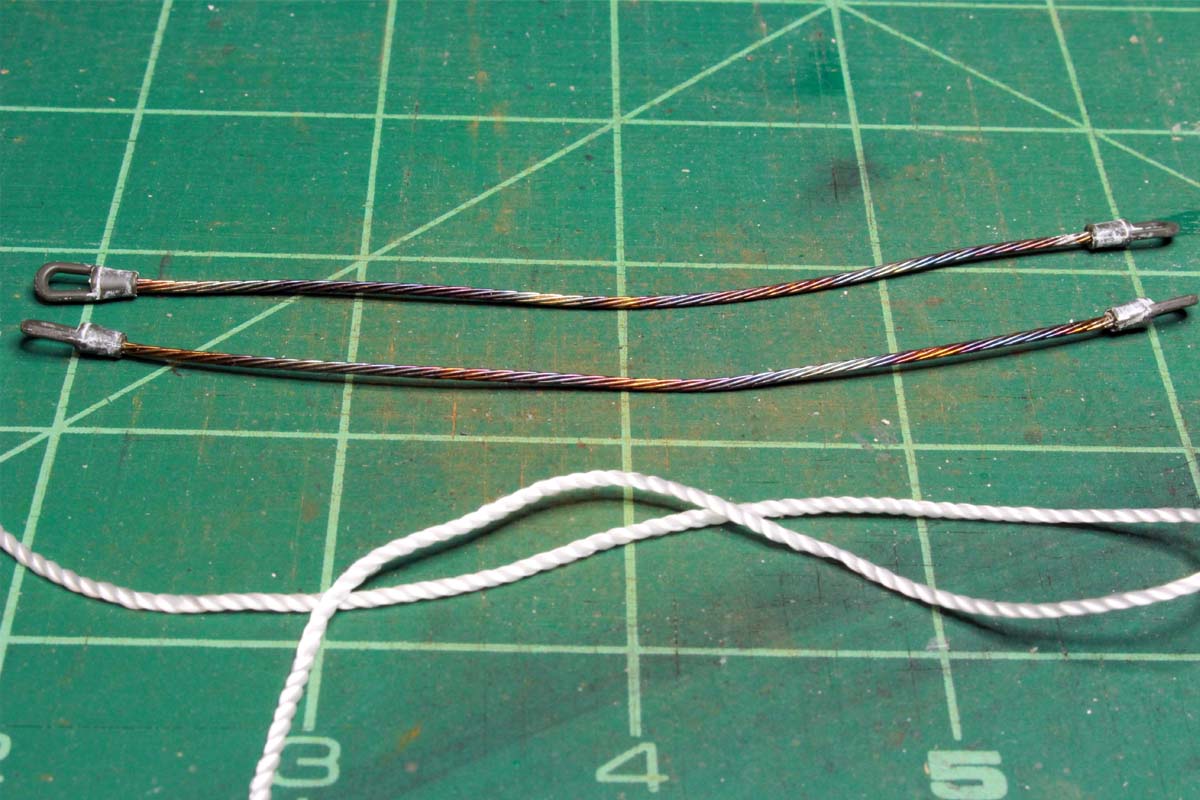
and formed it to fit the back plate and clamps.
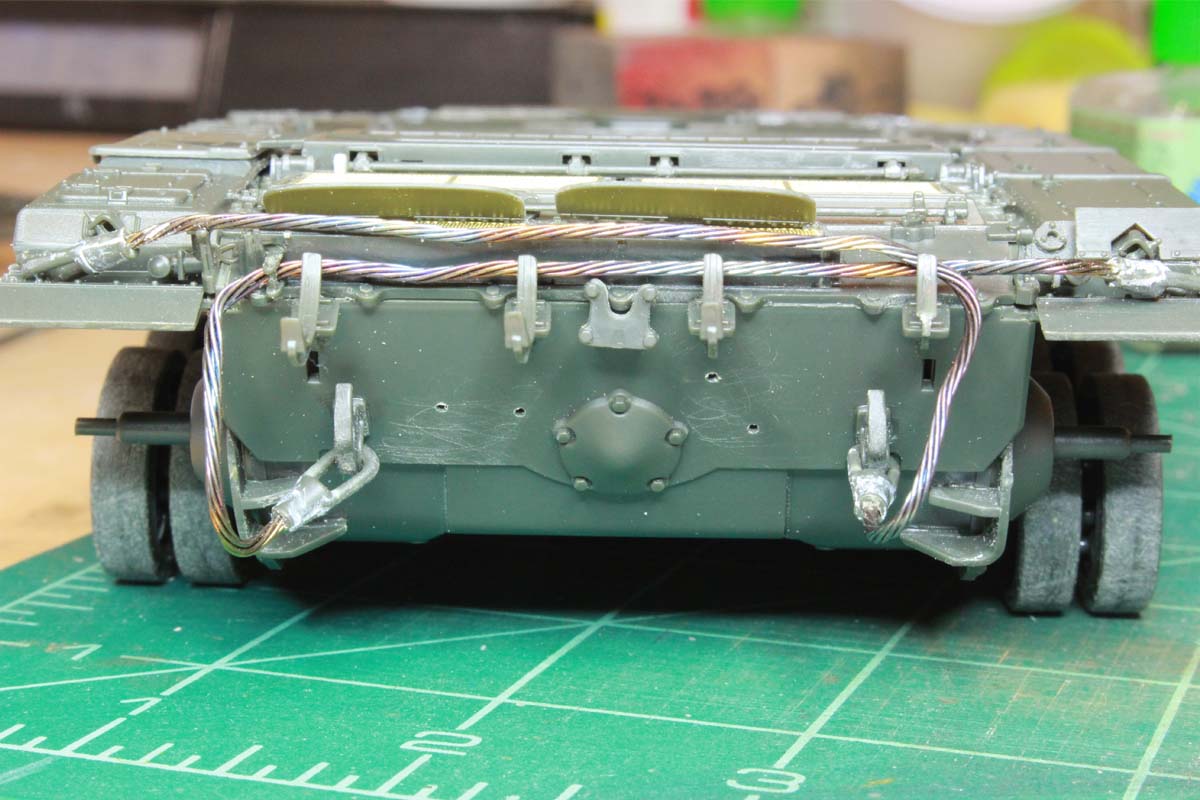
I have left the unditching log off ro make painting easier, and it also needs some work to make it look more like a log...
The 120mm gun tube is next, this is an eight piece affair and comes together pretty good, with Meng hiding most of the longitudinal seams along the top bracket, but some filling and sanding is required where there are no brackets and along the bottom of the tube.
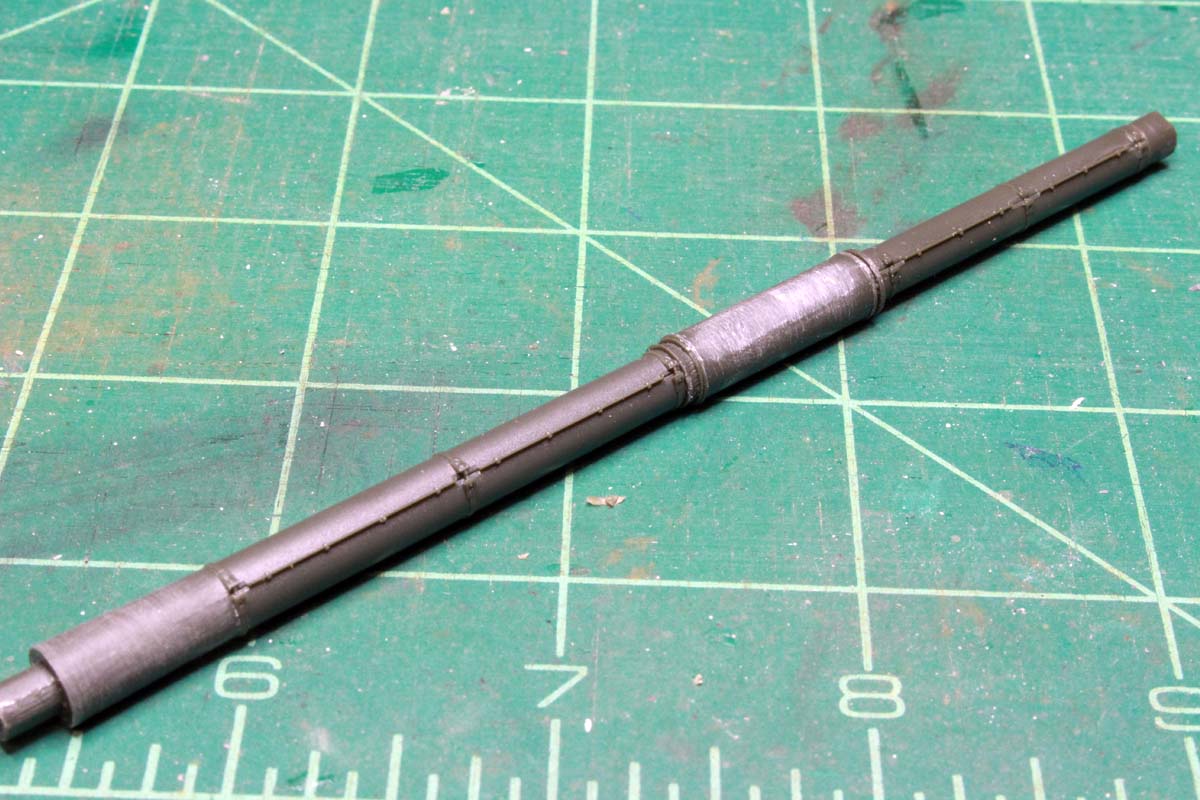
I'm sure once I prime it there will be some more work to be done, I will do that before attaching to the turret.
Next is the turret, which is a kit in itself with now fewer than 20 steps spread out over 6 pages of instructions and over 220 individual parts in multiple subassemblies! First steps are attaching the anti-radiation applique panels to the turret. These are molded in a flexible vinyl-like plastic which takes regular plastic model glue very well, I used Tamiya medium again here (orange top) with extra thin to help snug things down along the edges where needed. I prefer not to use side cutters to remove these parts from the sprue as they will crush and deform at the cut point due to the soft nature of the material. using a new #11 blade and slicing carefully gave the best results for me, and I was able to go back and clean up the attachment points quite well. You can, after a fashion, sand the material as well along the edges to clean up, but being soft you will get some galling of the material, leaving a thin feather of material yet to be removed, you can see some bits on the back of the turret that I still have to clean up. All the pieces fit very nice and snug and conform very well to the turret shape.
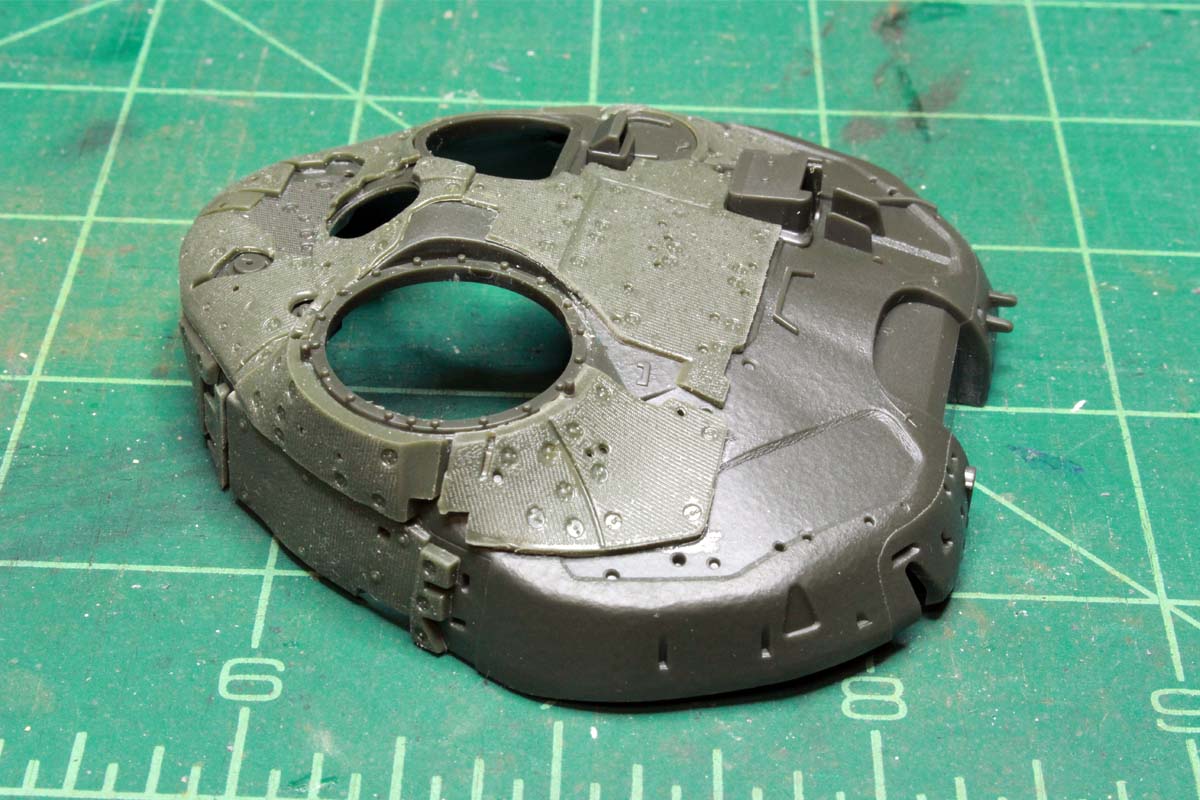
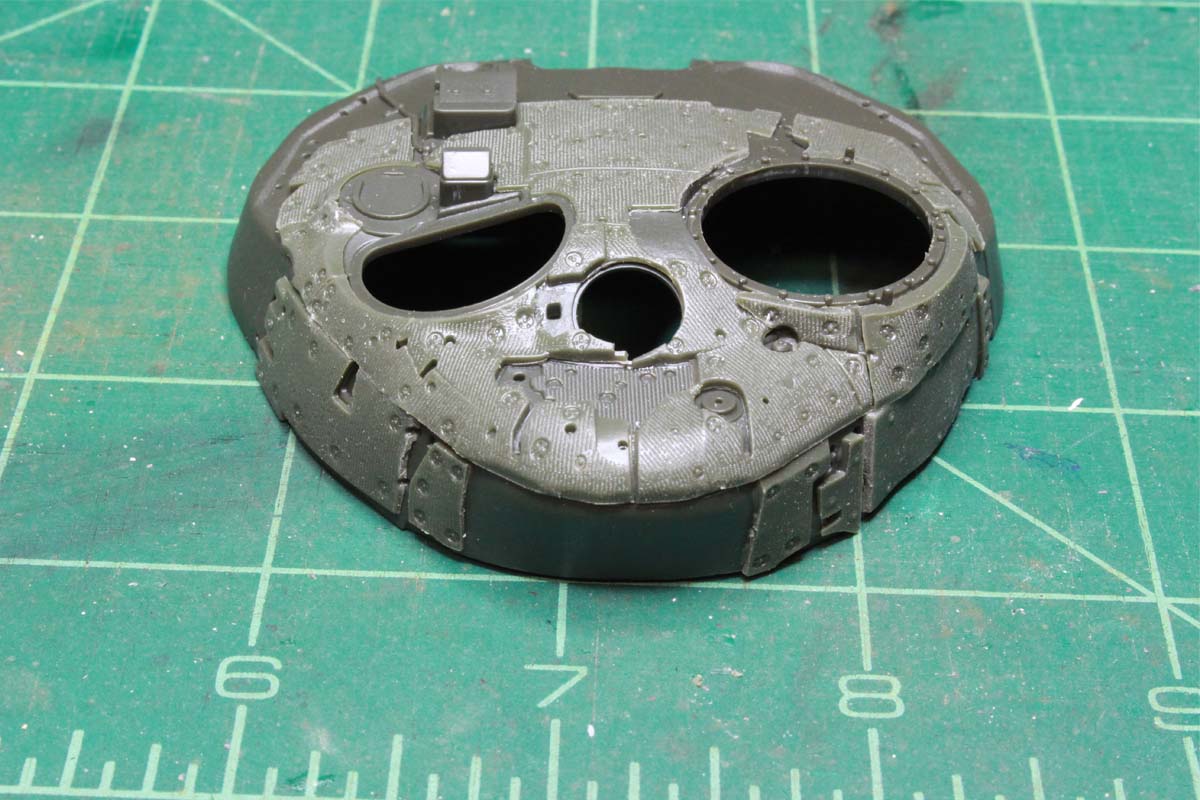
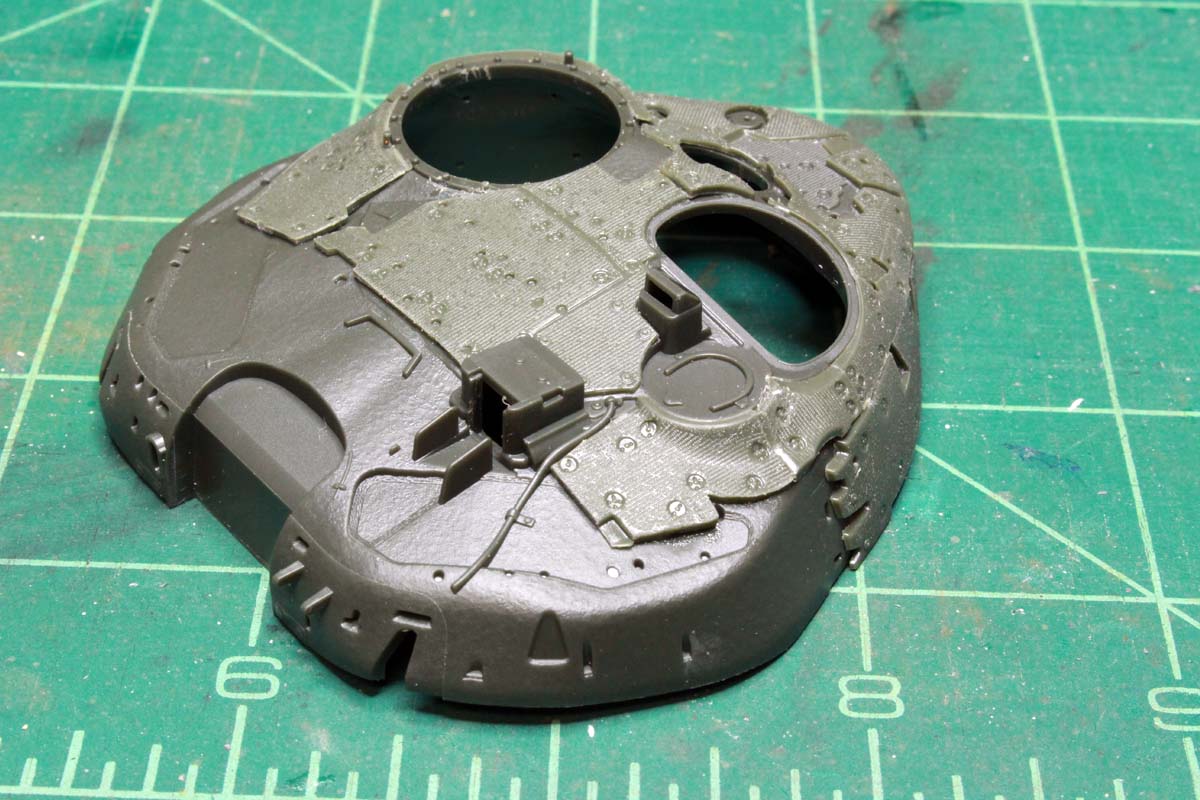
Then it is onto the the first few steps of adding the various details to the turret including ERA bricks on the top of the turret, gun mantlet, laser probe and night sighting system.
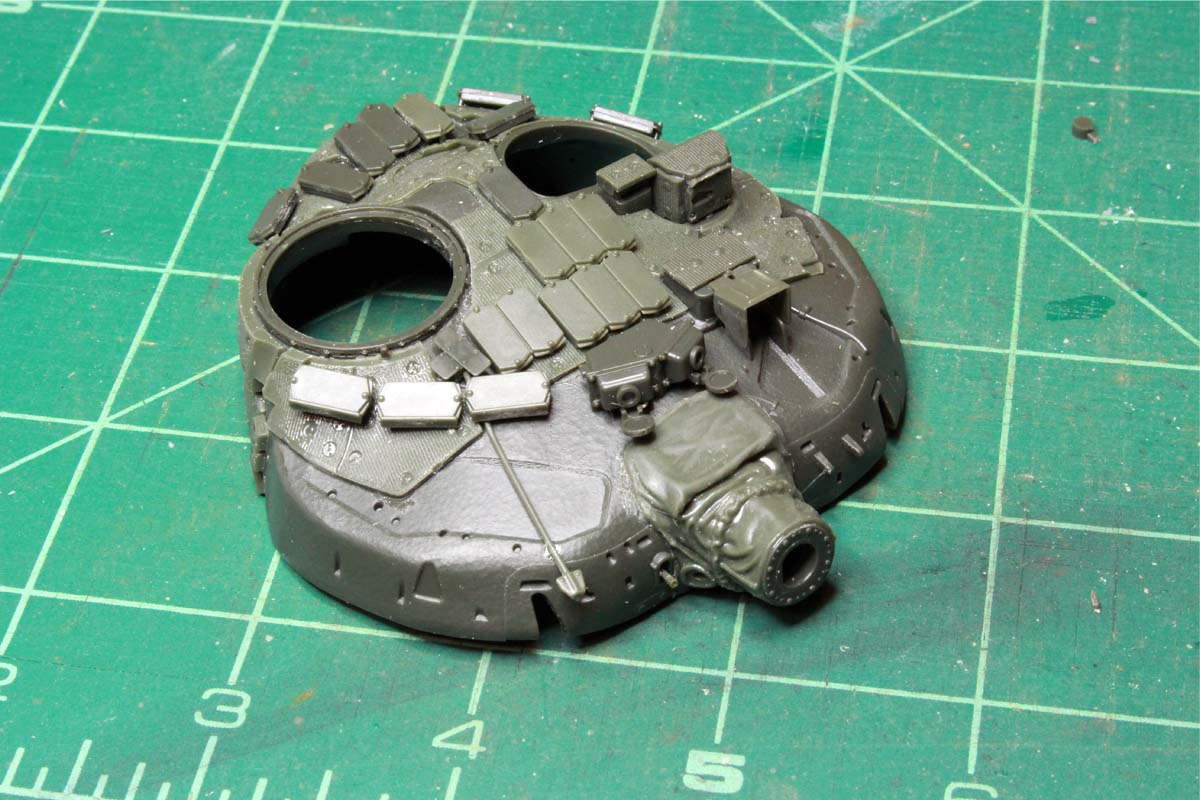
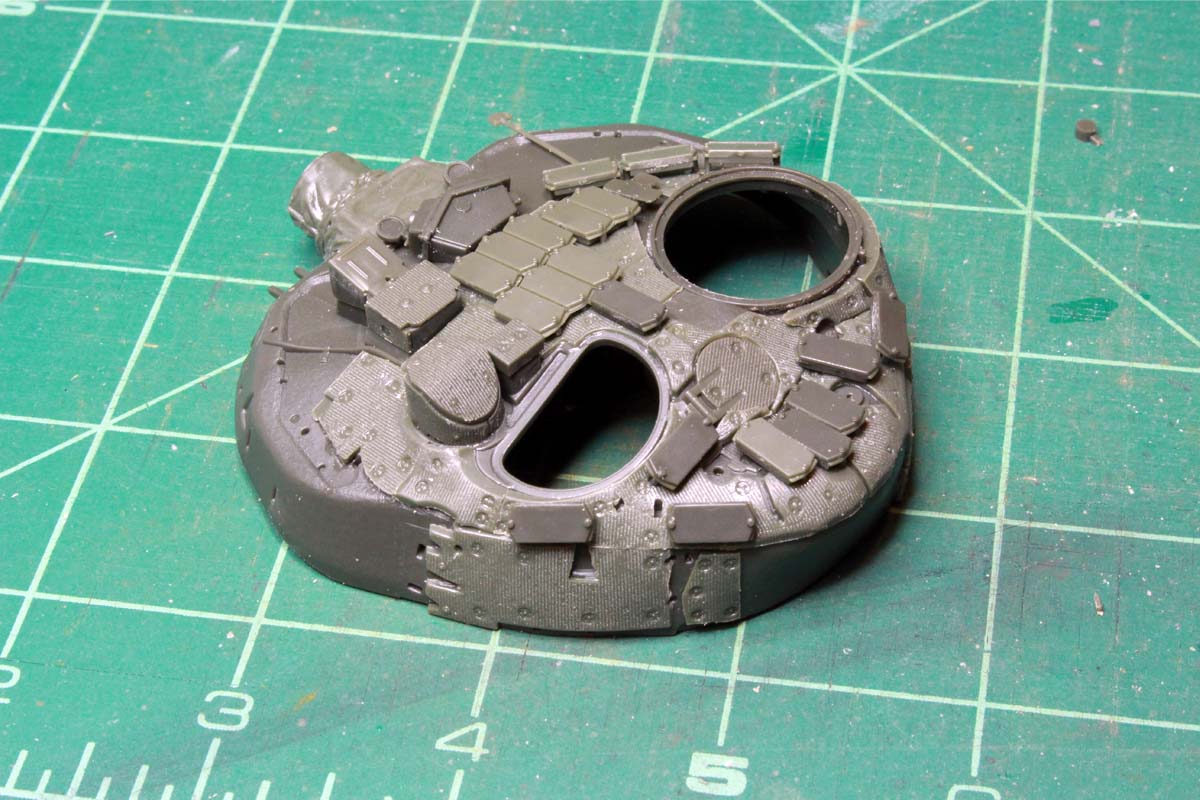
Again everything fits together very nicely. Turret assembly to be continued...
I am leaving the fuel drums and associated hoses off for now, will fit them later but keep them removable for painting.
Meng provides a length of string for the tow cables but I didn't like the look of it so I used some picture hanging cable instead, annealing it over a candle to make it easier to bend (it was still a PITA).
and formed it to fit the back plate and clamps.
I have left the unditching log off ro make painting easier, and it also needs some work to make it look more like a log...
The 120mm gun tube is next, this is an eight piece affair and comes together pretty good, with Meng hiding most of the longitudinal seams along the top bracket, but some filling and sanding is required where there are no brackets and along the bottom of the tube.
I'm sure once I prime it there will be some more work to be done, I will do that before attaching to the turret.
Next is the turret, which is a kit in itself with now fewer than 20 steps spread out over 6 pages of instructions and over 220 individual parts in multiple subassemblies! First steps are attaching the anti-radiation applique panels to the turret. These are molded in a flexible vinyl-like plastic which takes regular plastic model glue very well, I used Tamiya medium again here (orange top) with extra thin to help snug things down along the edges where needed. I prefer not to use side cutters to remove these parts from the sprue as they will crush and deform at the cut point due to the soft nature of the material. using a new #11 blade and slicing carefully gave the best results for me, and I was able to go back and clean up the attachment points quite well. You can, after a fashion, sand the material as well along the edges to clean up, but being soft you will get some galling of the material, leaving a thin feather of material yet to be removed, you can see some bits on the back of the turret that I still have to clean up. All the pieces fit very nice and snug and conform very well to the turret shape.
Then it is onto the the first few steps of adding the various details to the turret including ERA bricks on the top of the turret, gun mantlet, laser probe and night sighting system.
Again everything fits together very nicely. Turret assembly to be continued...

KoSprueOne

Joined: March 05, 2004
KitMaker: 4,011 posts
Armorama: 1,498 posts
Posted: Saturday, December 16, 2017 - 10:05 PM UTC
Thanks for continuing to detail all your steps, tips, and suggestions along this build.

ColinEdm
Joined: October 15, 2013
KitMaker: 1,355 posts
Armorama: 1,229 posts
Posted: Saturday, December 16, 2017 - 11:49 PM UTC
Cheers Bob, I'm glad you and others are finding it useful.

Derevyankin

Joined: February 07, 2009
KitMaker: 40 posts
Armorama: 37 posts

Posted: Monday, December 18, 2017 - 01:45 PM UTC
Quoted Text
I also noticed on some on-line walkarounds that there are different styles
The photo is from T-90A walkaround, not T-90. T-90 has different engine, check this https://www.dishmodels.ru/wshow.htm?p=3469&lng=E walkaround for T-90 photos.
ColinEdm
Joined: October 15, 2013
KitMaker: 1,355 posts
Armorama: 1,229 posts
Posted: Tuesday, December 19, 2017 - 12:23 AM UTC
Spaseba Dmitry!
ColinEdm
Joined: October 15, 2013
KitMaker: 1,355 posts
Armorama: 1,229 posts
Posted: Sunday, December 24, 2017 - 12:42 AM UTC
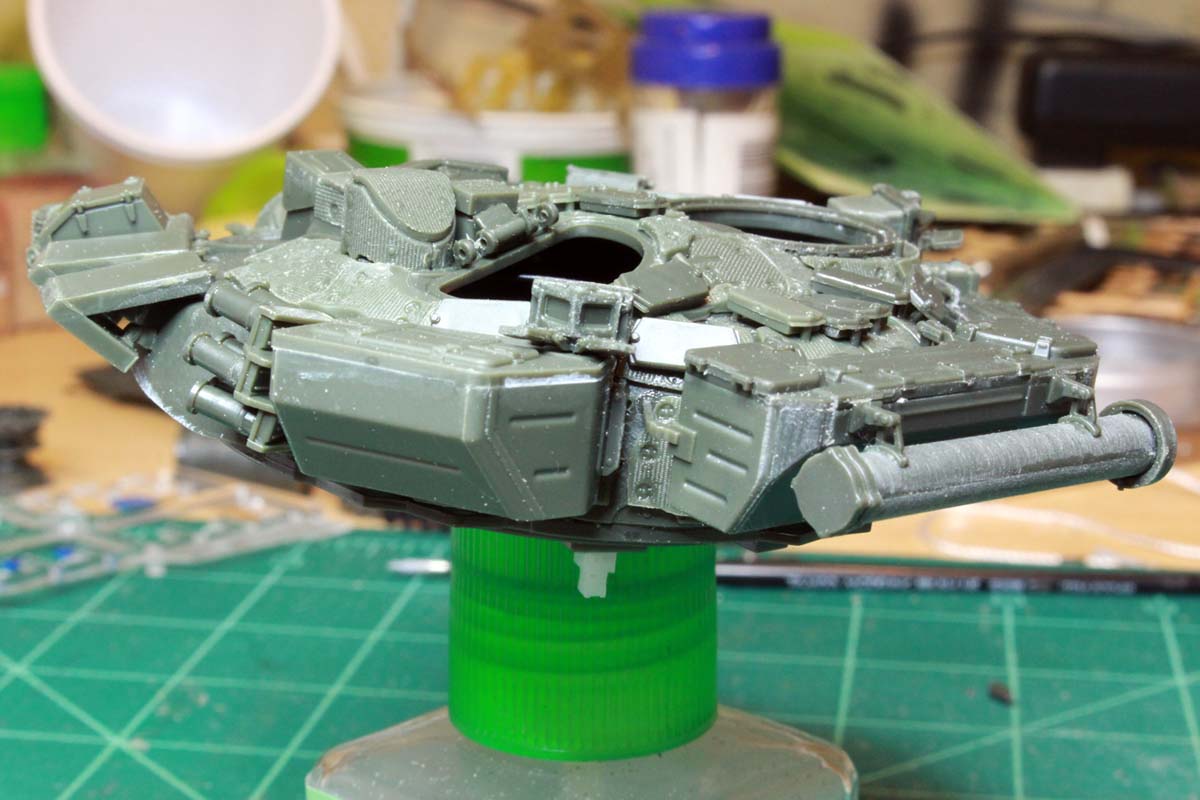
A little Christmas Eve update as the turkey smokes...work continues on the turret. Meng has numerous sub-assemblies that you assemble before attaching to the turret. The smoke grenade launchers are 13 pieces each, with the lid of each launcher molded separately which is nice for detail, but the huge sprue attachment point on the mating surface makes it hard to clean up.
Once assembled they do look good. I tried to put all of the sprue attachment points on the bottom where they can't be see so easily as I did have a hard time cleaning them up.

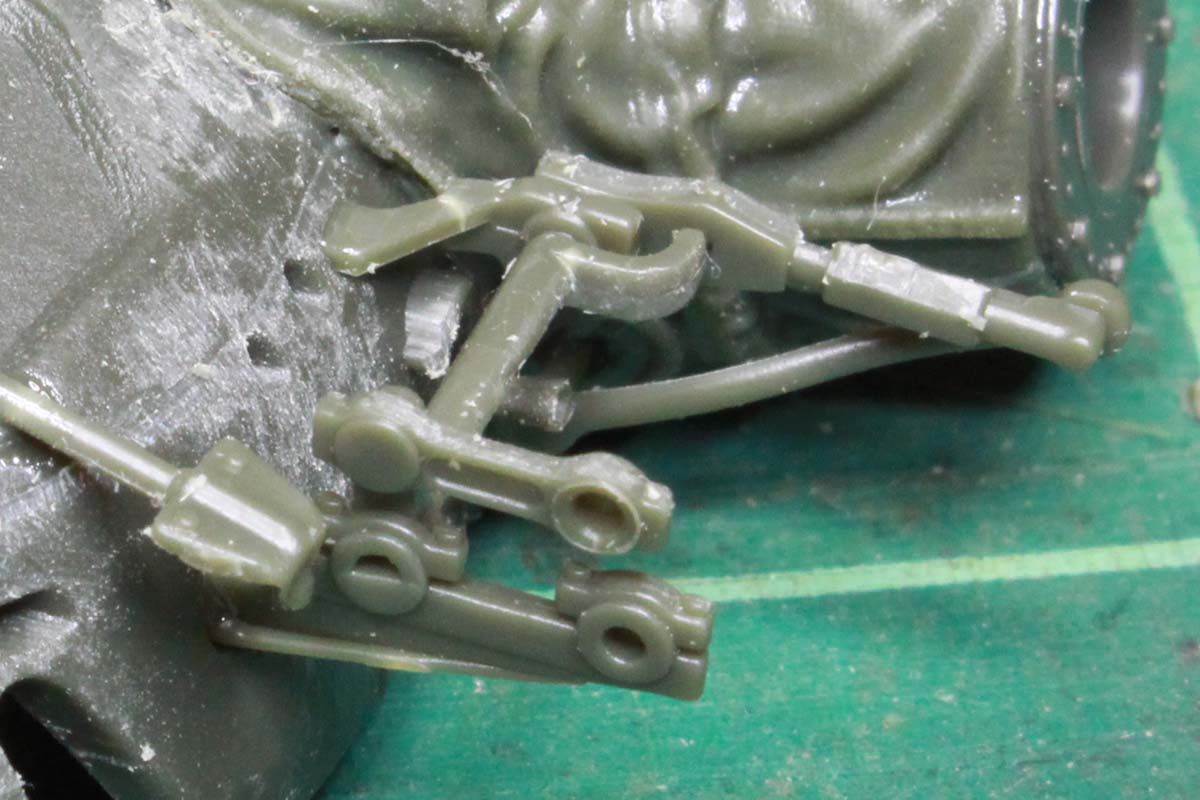
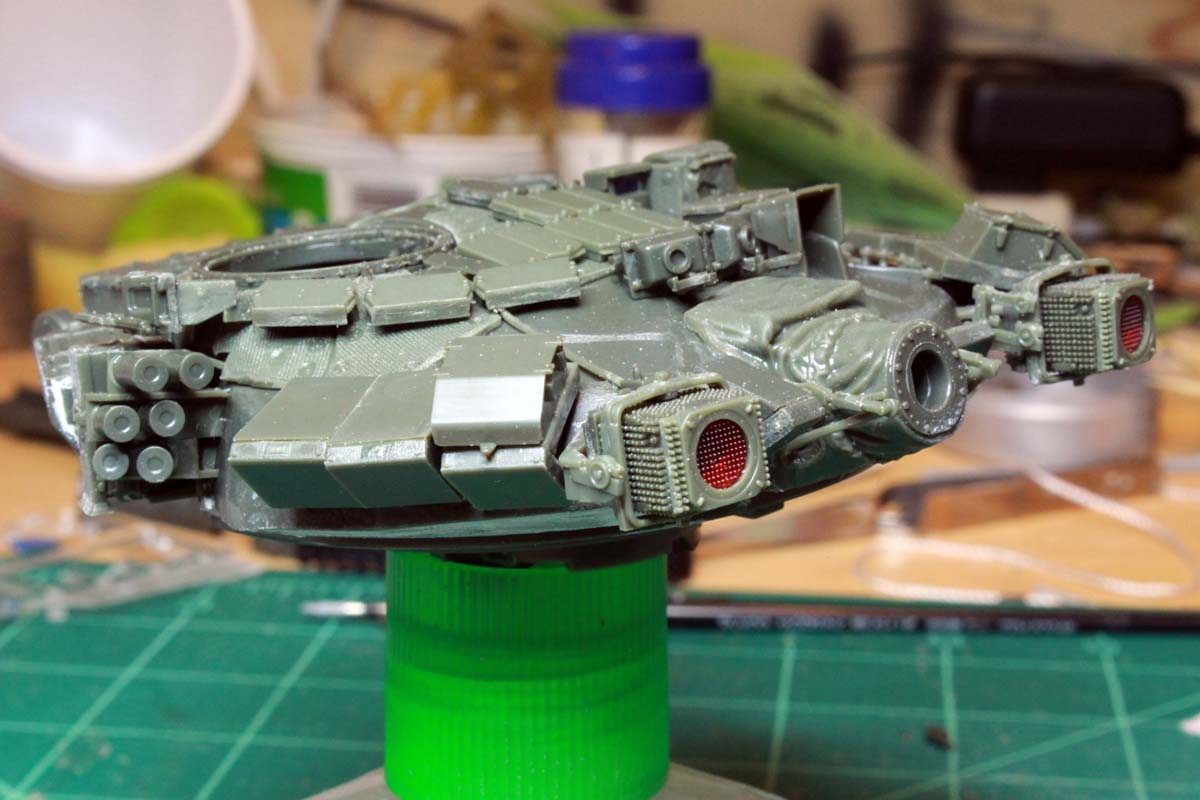
The "Shtora" IR jammers are next, first the mounting/elevation brackets which are 3 delicate pieces each:
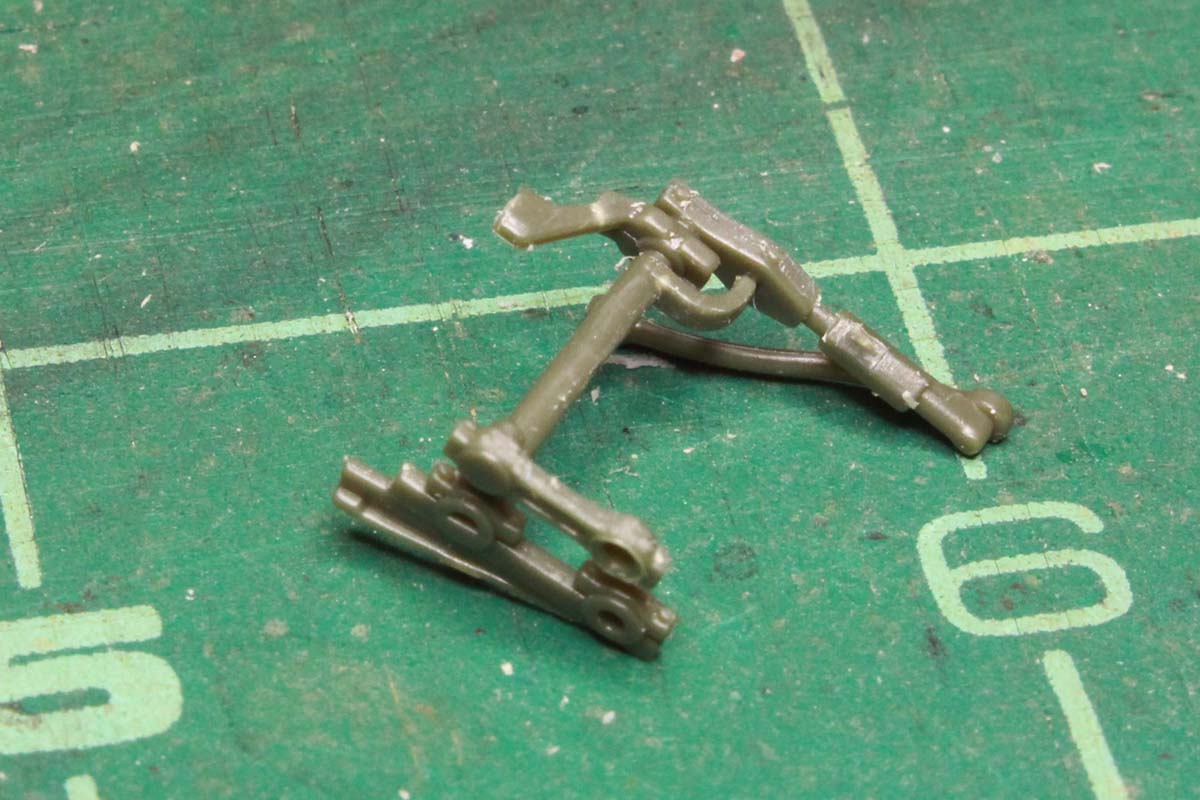
and mounted on the front of the turret.
Then assembly of the IR emitters themselves. Meng provides red LED's for this, a quick test to make sure they work (battery not included!):
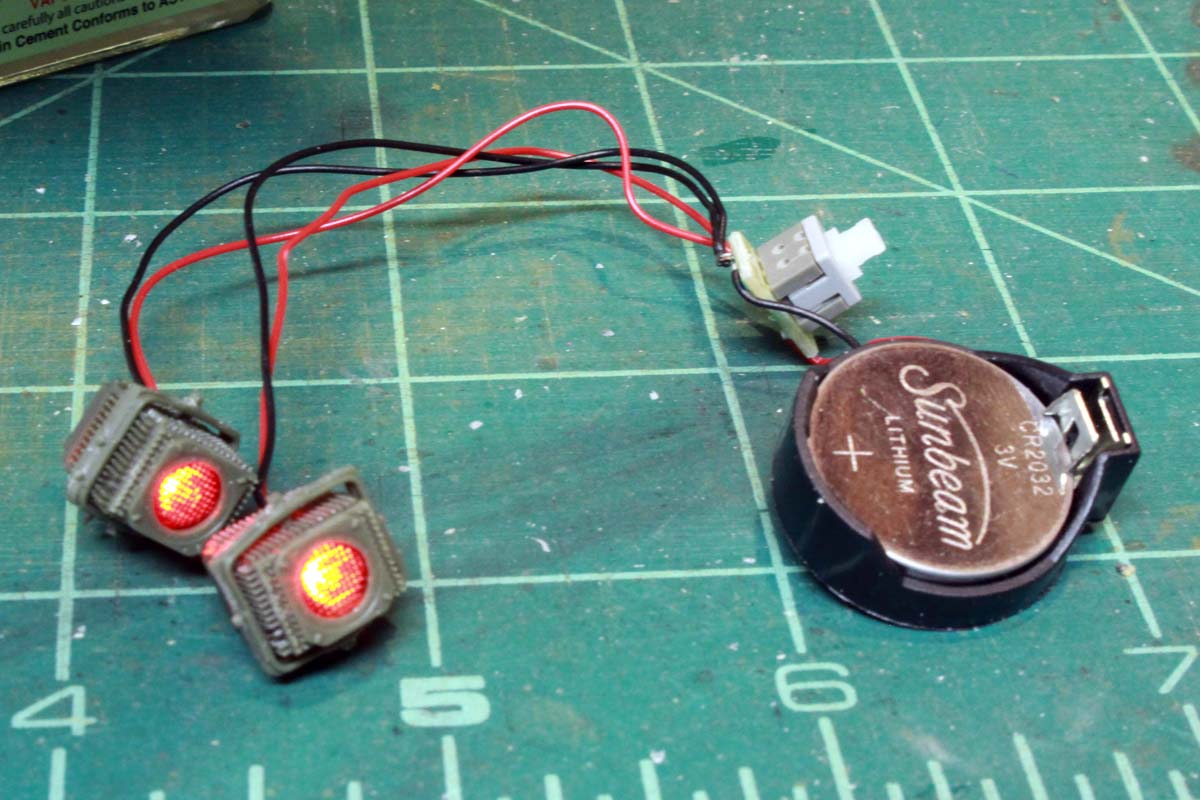
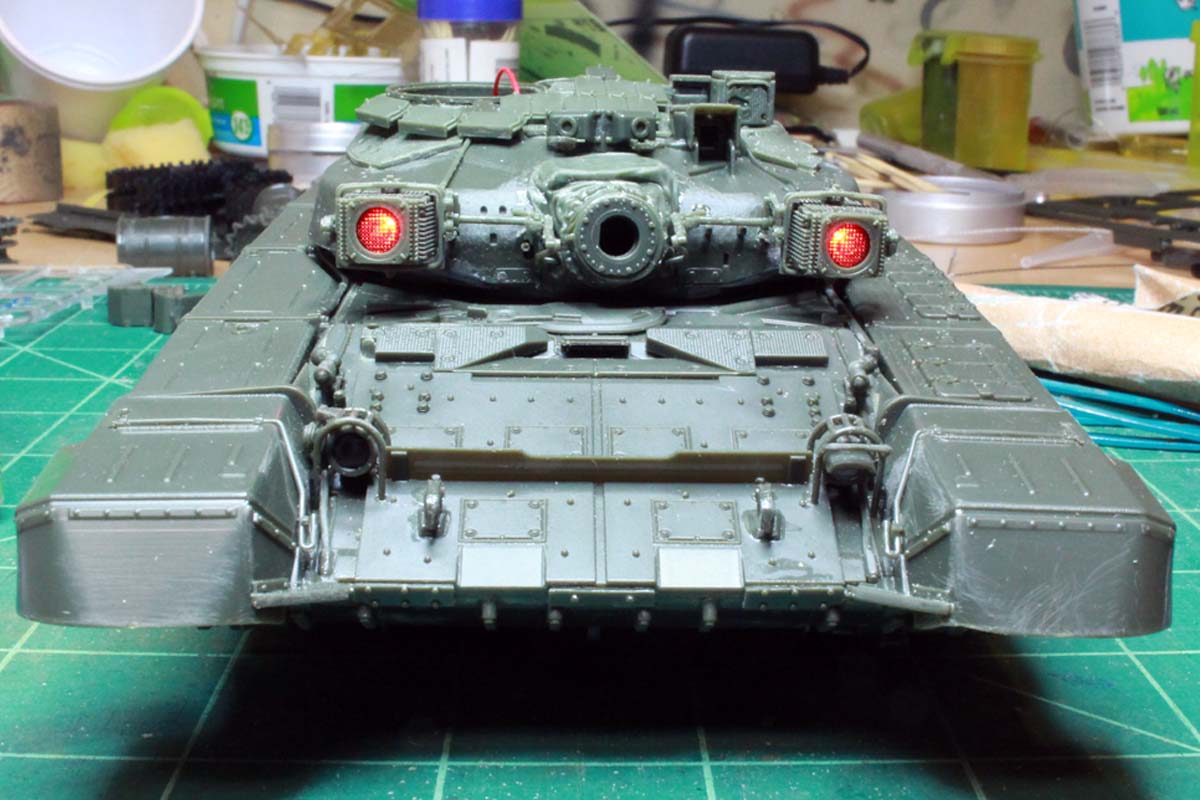
I also painted the clear plastic lenses with Tamiya clear red. The cooling fin detail on the emitter housings is great, but delicate and easily damaged. The battery/emitter assembly fits into the bottom of the turret:
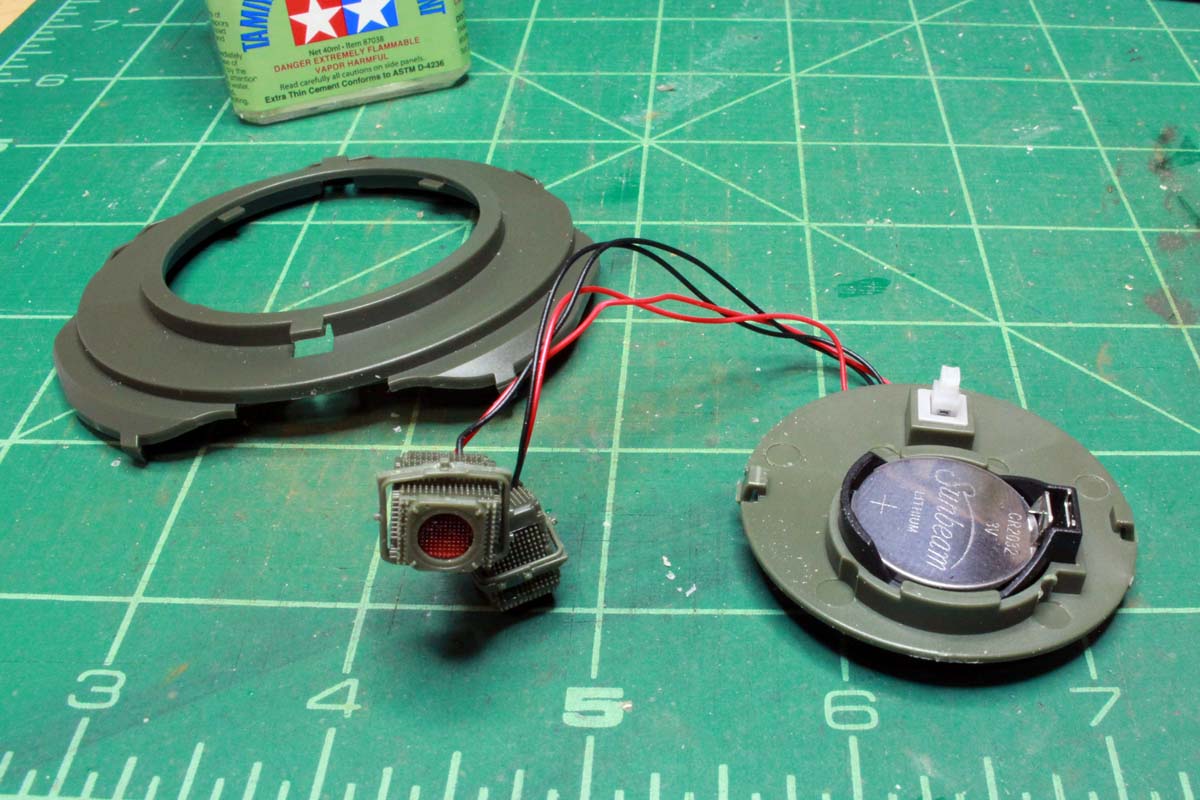
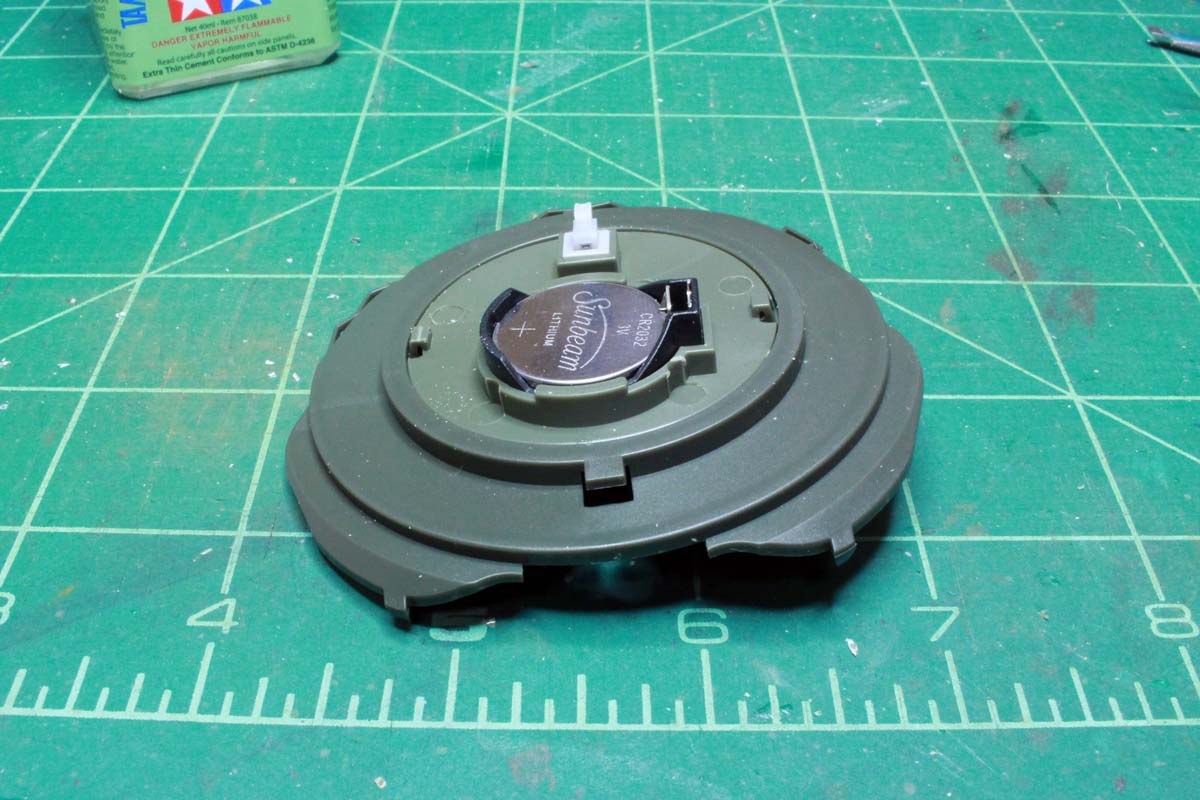
and then you have the thread the wires through two notches in the turret top and slide the bottom on and glue
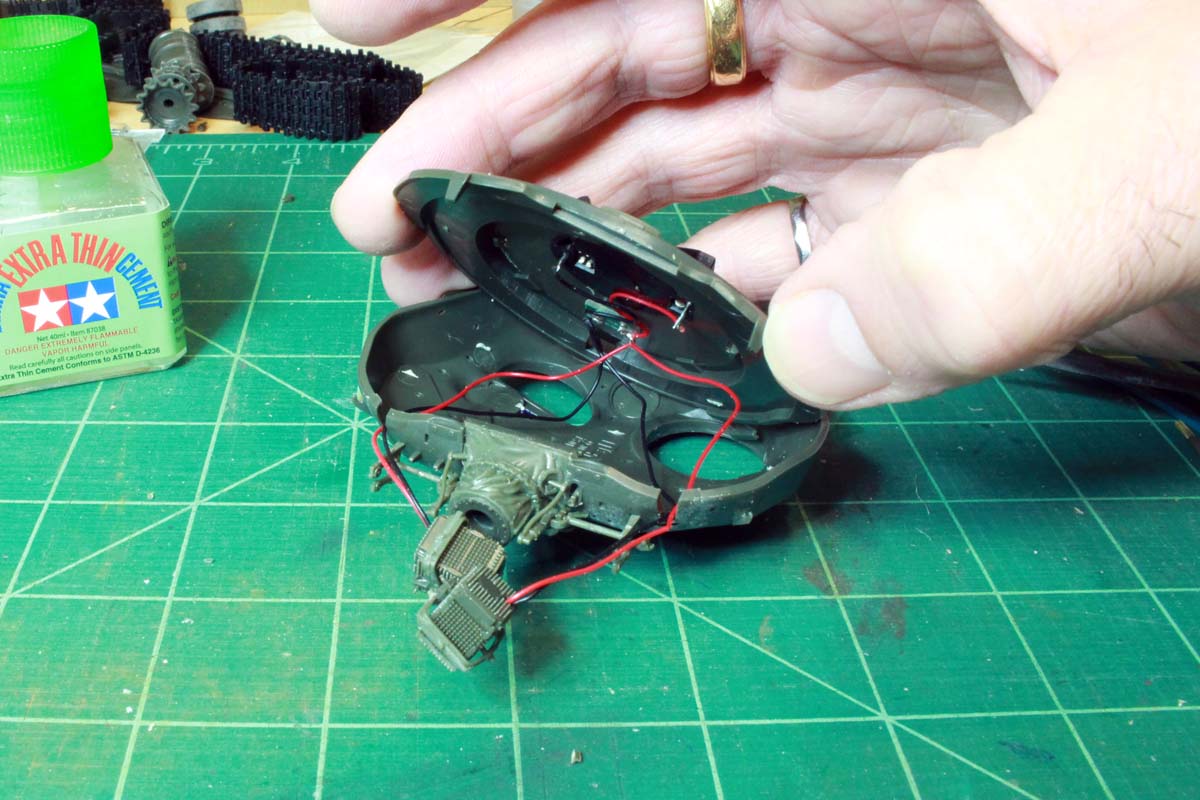
Make sure you don't glue the wires because you want them to be able to be adjusted to position the emitters correctly and not have a bunch of excess wire hanging out. A third hand would have come in handy for this part but it is doable. Looks a bit Star Wars / Battlestar Galactica-ish when done:
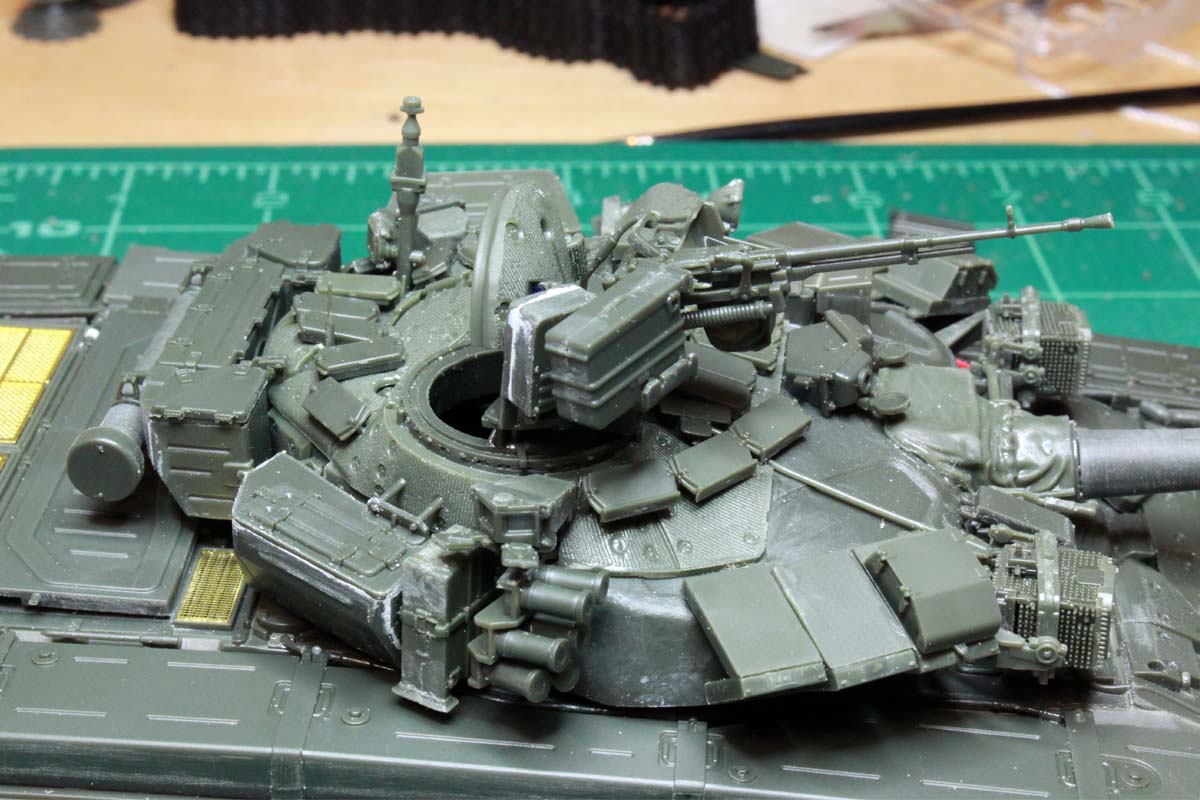
While the glue was setting on that,I assembled the various and sundry remaining ERA blocks, sensors and storage bins that litter
the turret. Once attached, it is very busy indeed!
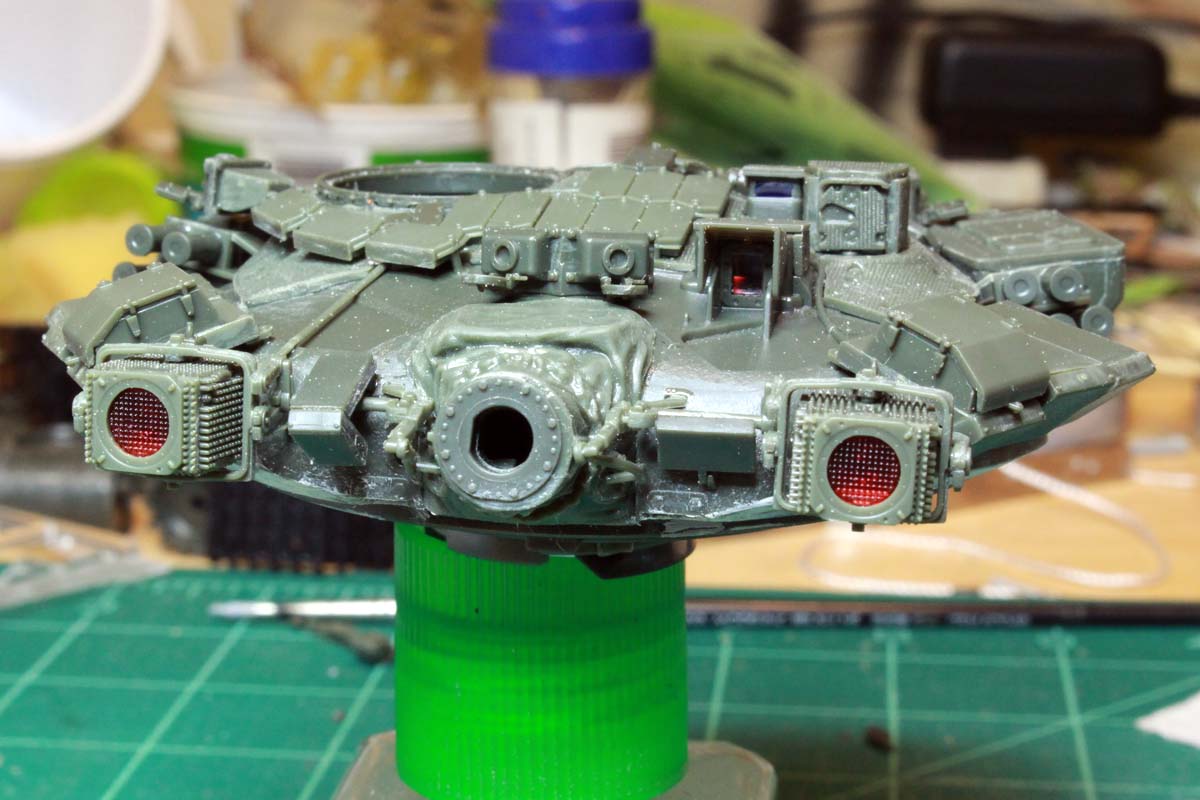
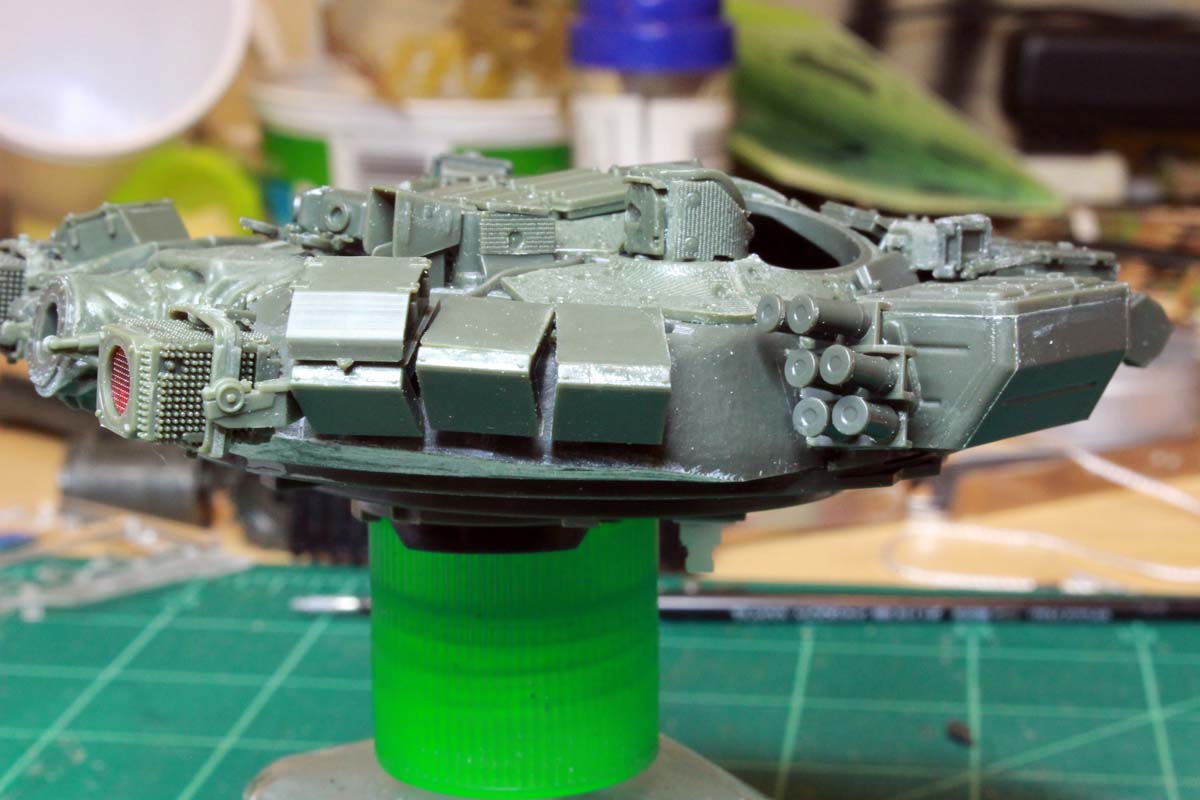
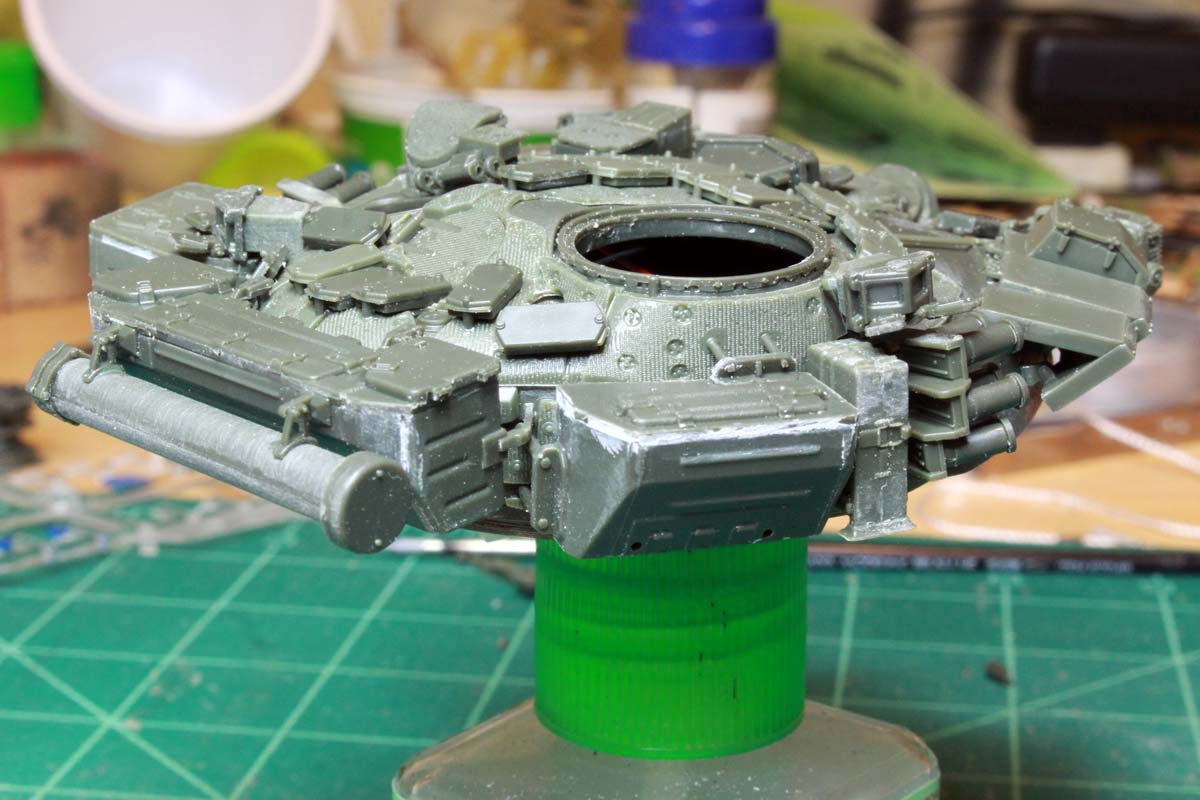
Looking at it, this will be a bear to paint! Commanders and gunners hatches next! In the meantime Merry Christmas everyone!
Once assembled they do look good. I tried to put all of the sprue attachment points on the bottom where they can't be see so easily as I did have a hard time cleaning them up.
The "Shtora" IR jammers are next, first the mounting/elevation brackets which are 3 delicate pieces each:
and mounted on the front of the turret.
Then assembly of the IR emitters themselves. Meng provides red LED's for this, a quick test to make sure they work (battery not included!):
I also painted the clear plastic lenses with Tamiya clear red. The cooling fin detail on the emitter housings is great, but delicate and easily damaged. The battery/emitter assembly fits into the bottom of the turret:
and then you have the thread the wires through two notches in the turret top and slide the bottom on and glue
Make sure you don't glue the wires because you want them to be able to be adjusted to position the emitters correctly and not have a bunch of excess wire hanging out. A third hand would have come in handy for this part but it is doable. Looks a bit Star Wars / Battlestar Galactica-ish when done:
While the glue was setting on that,I assembled the various and sundry remaining ERA blocks, sensors and storage bins that litter
the turret. Once attached, it is very busy indeed!
Looking at it, this will be a bear to paint!
Commanders and gunners hatches next! In the meantime Merry Christmas everyone!griffontech
Joined: November 21, 2007
KitMaker: 237 posts
Armorama: 231 posts
Posted: Sunday, December 24, 2017 - 01:10 AM UTC
Excellent work! I've got this in the stash to build once I get 2 or 3 other models completed. Your detailed descriptions of issues and problems will definately help. Thanks for doing all e hard work first 
Cheers, Dave
Cheers, Dave

acebatau
Joined: February 10, 2008
KitMaker: 730 posts
Armorama: 616 posts

Posted: Sunday, December 24, 2017 - 03:57 AM UTC
Following with great interest, good luck mate
ColinEdm
Joined: October 15, 2013
KitMaker: 1,355 posts
Armorama: 1,229 posts
Posted: Monday, January 01, 2018 - 01:08 AM UTC
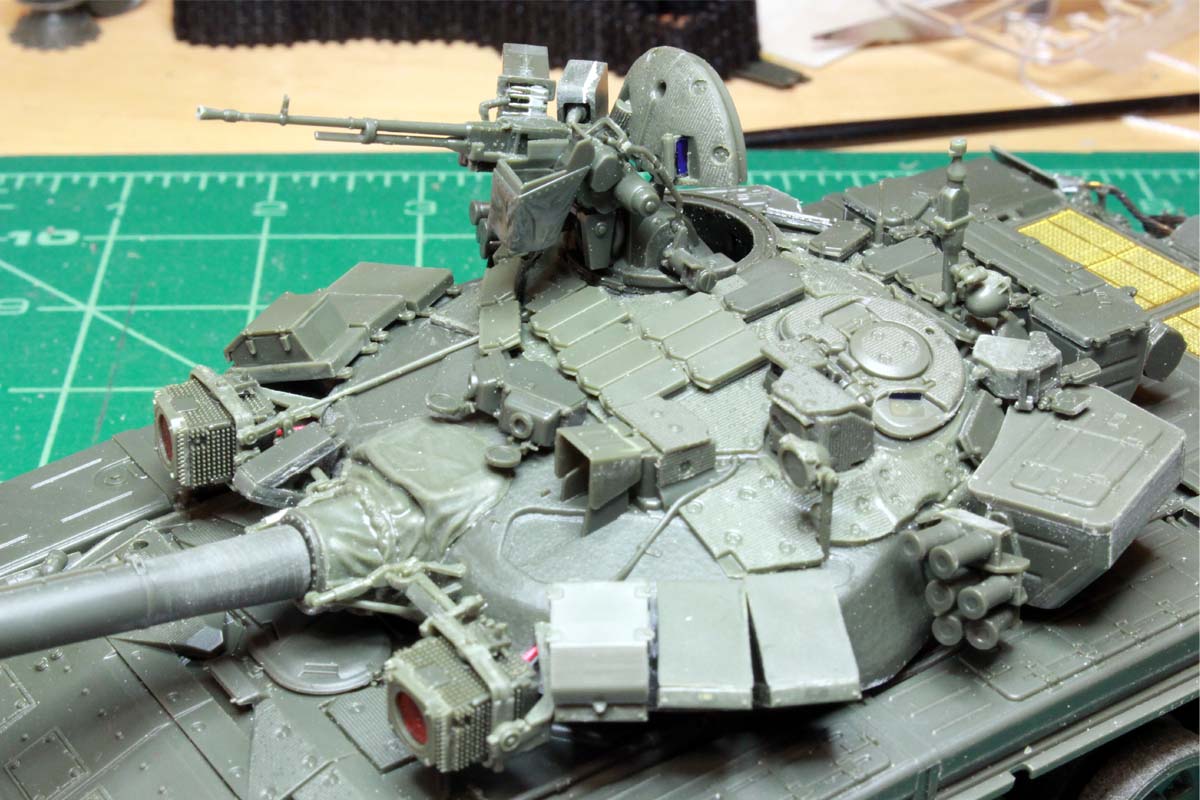
Cheers guys. Happy New Year to all!  Finished off the Commanders and gunners hatches. The Commanders hatch is a small kit in itself with 38 pieces including the DshK.
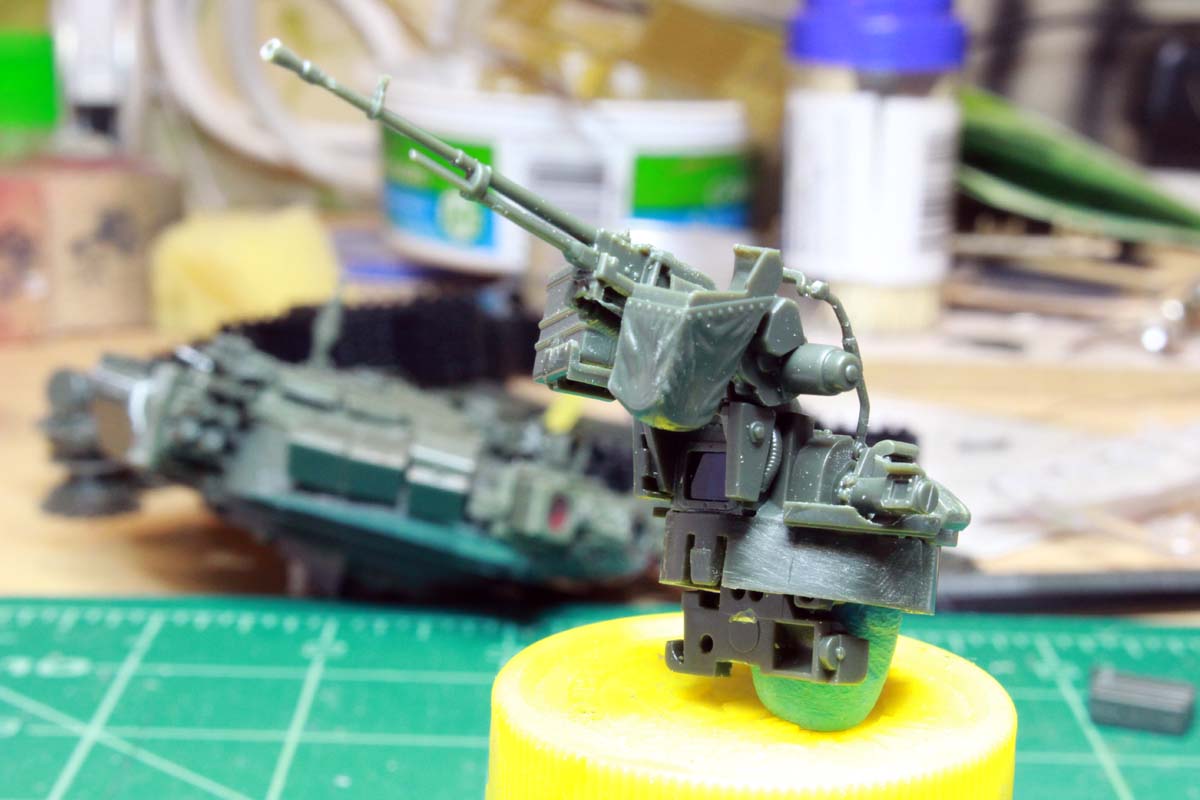
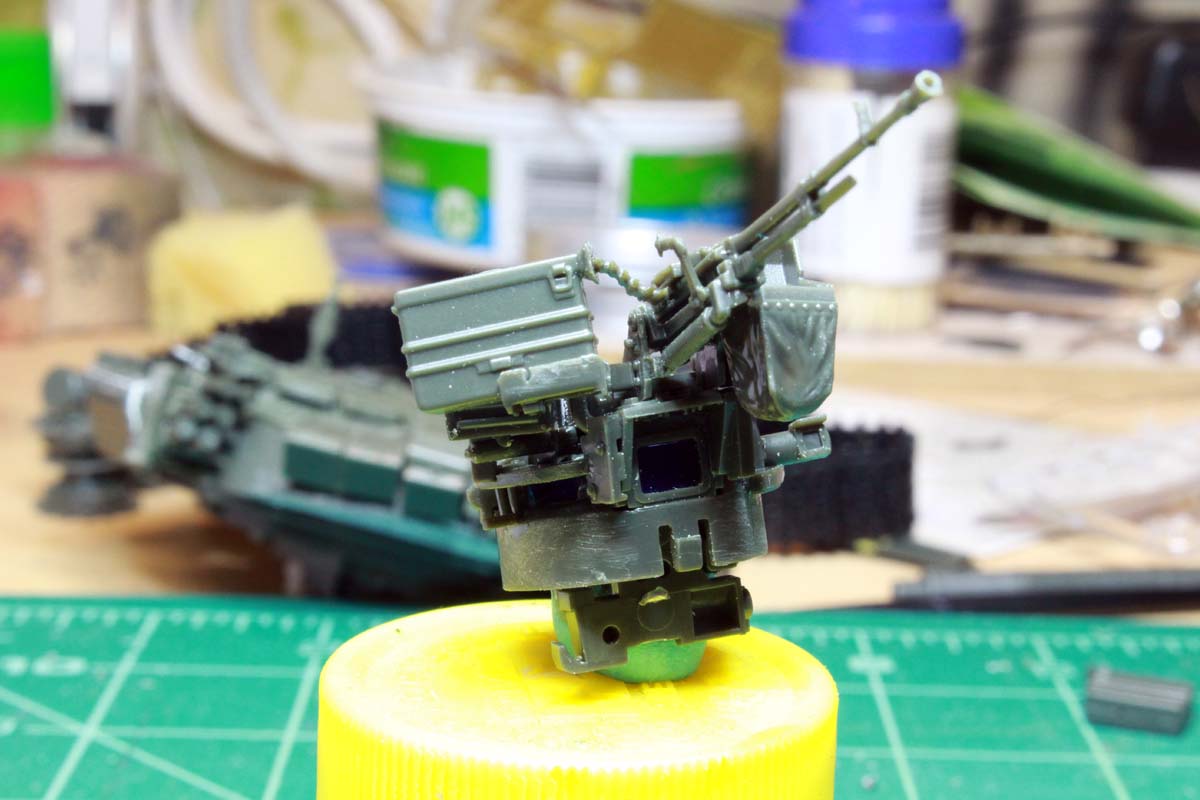
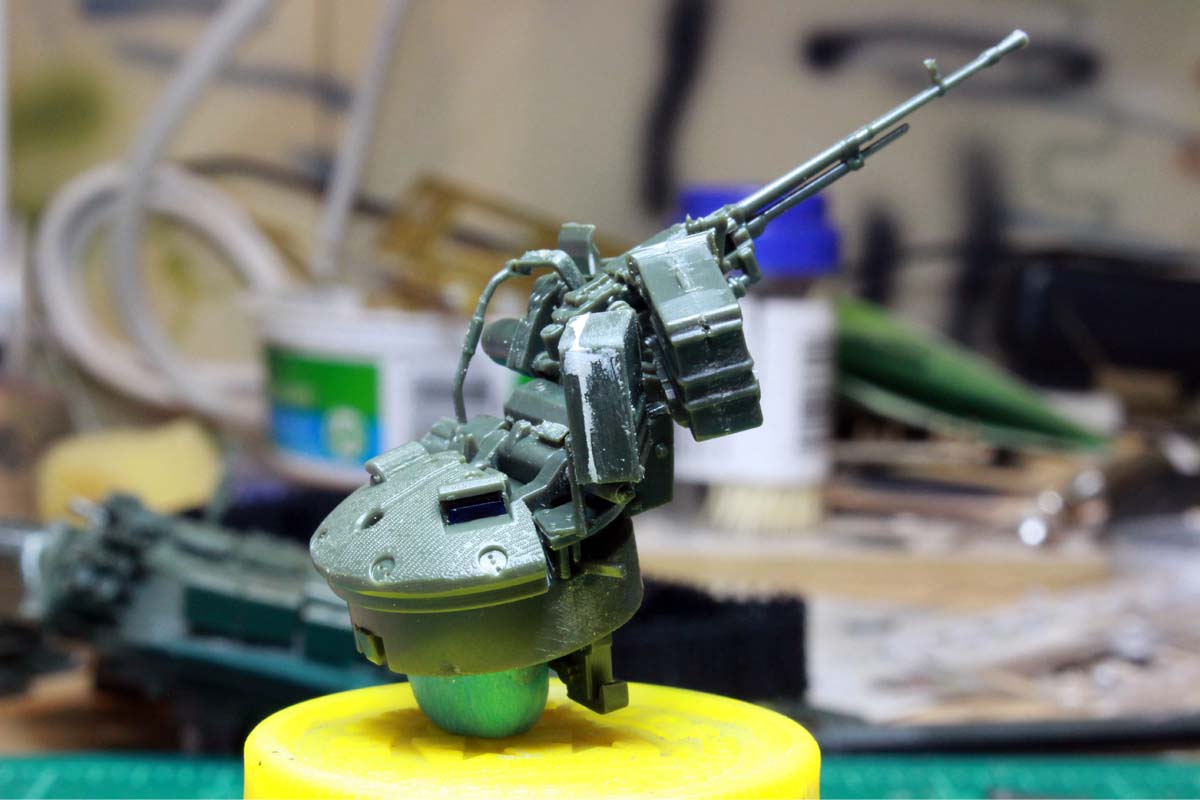
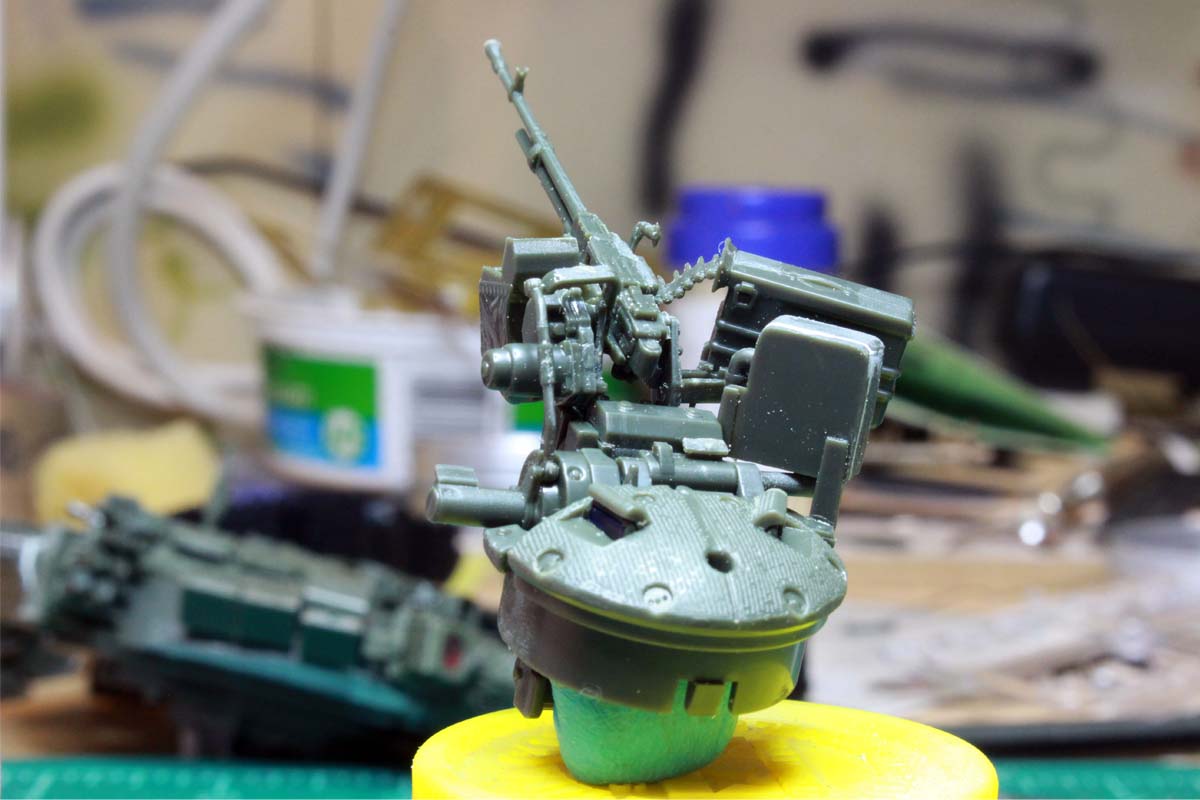
There is nice interior detail on the hatches as well.
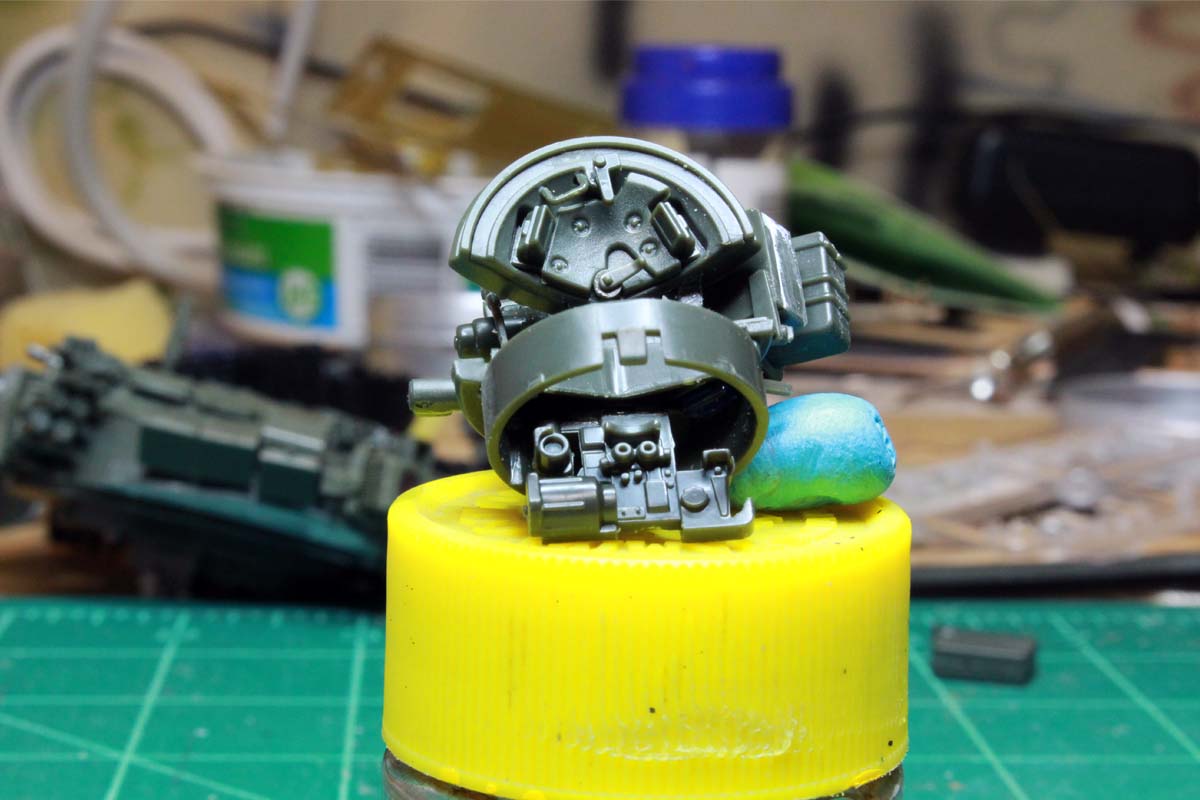
It is rather fiddly getting everything to fit together. I would suggest leaving part D62 off until you mount the gun then it will be easier to line up part D44.
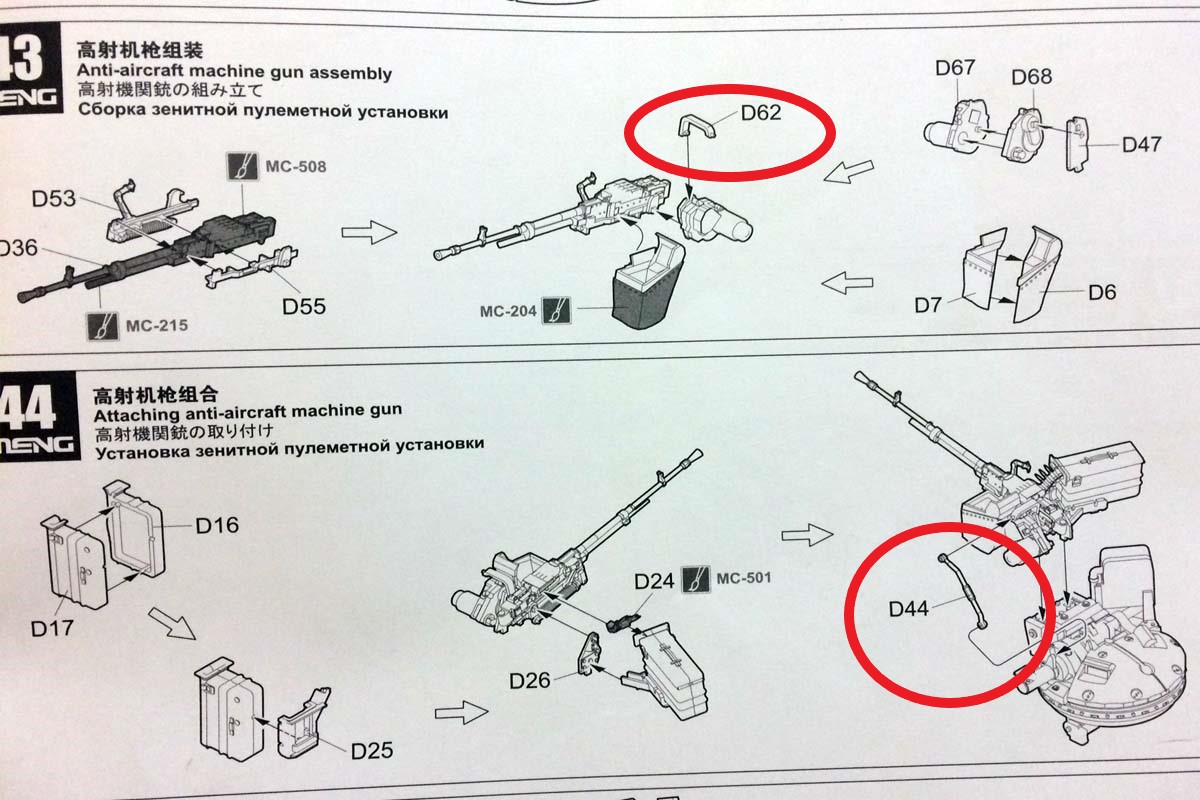
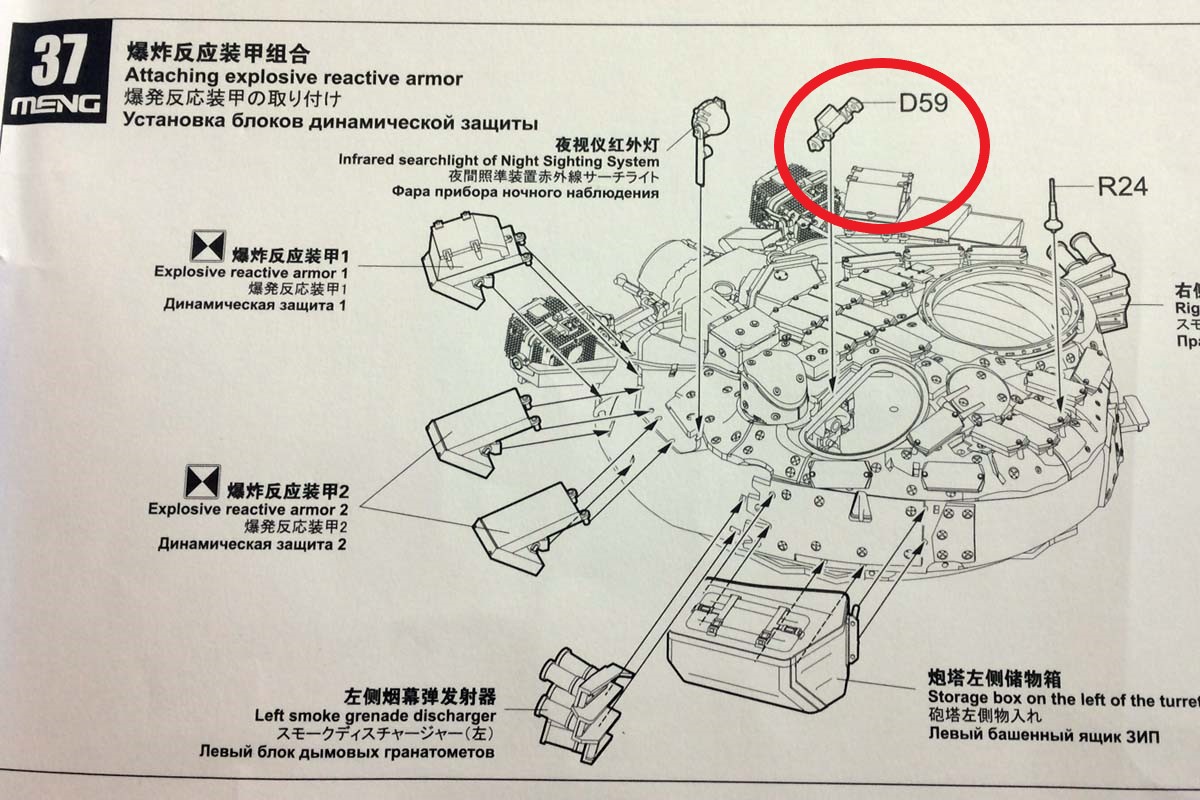
For the gunners hatch Meng has you install part of the hinge(D59) back in step 37, but I would suggest leaving it off until step 45 when the actual hatch is added to ensure good alignment.
The turret is now complete, on to the dozer blade!

Finished off the Commanders and gunners hatches. The Commanders hatch is a small kit in itself with 38 pieces including the DshK.There is nice interior detail on the hatches as well.
It is rather fiddly getting everything to fit together. I would suggest leaving part D62 off until you mount the gun then it will be easier to line up part D44.
For the gunners hatch Meng has you install part of the hinge(D59) back in step 37, but I would suggest leaving it off until step 45 when the actual hatch is added to ensure good alignment.
The turret is now complete, on to the dozer blade!
ColinEdm
Joined: October 15, 2013
KitMaker: 1,355 posts
Armorama: 1,229 posts
Posted: Sunday, January 07, 2018 - 09:10 AM UTC
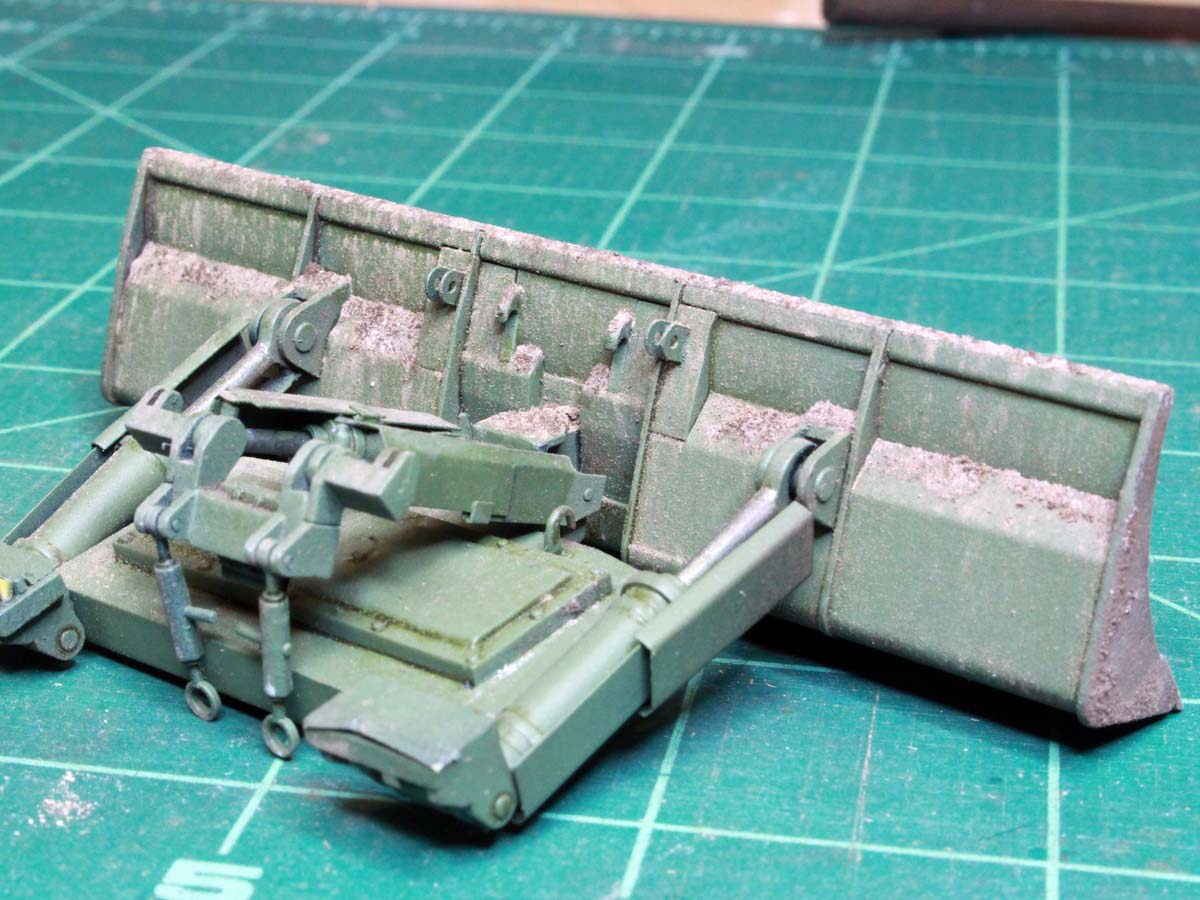
Work on the dozer blade begins with the hydraulic cylinders for elevating the blade. Please excuse my brain fart on the mounting brackets for the two cylinders at the front, I reversed two of the parts and even though it is obvious in hindsight, I didn't figure it out until I had it all assembled and tried to attach to the hull...
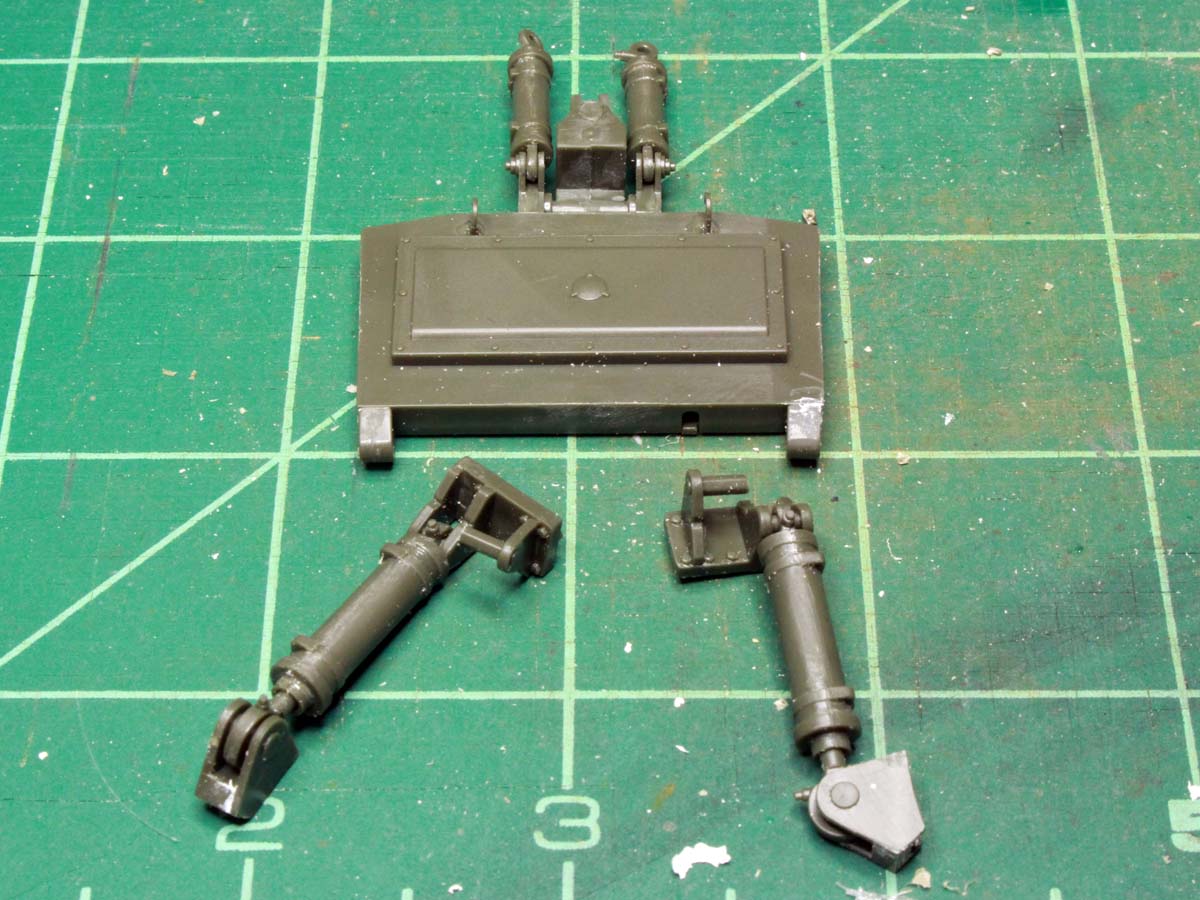
Looking at it now it is pretty obvious...
The guard plates for the hydraulic cylinders are made of photoetch:
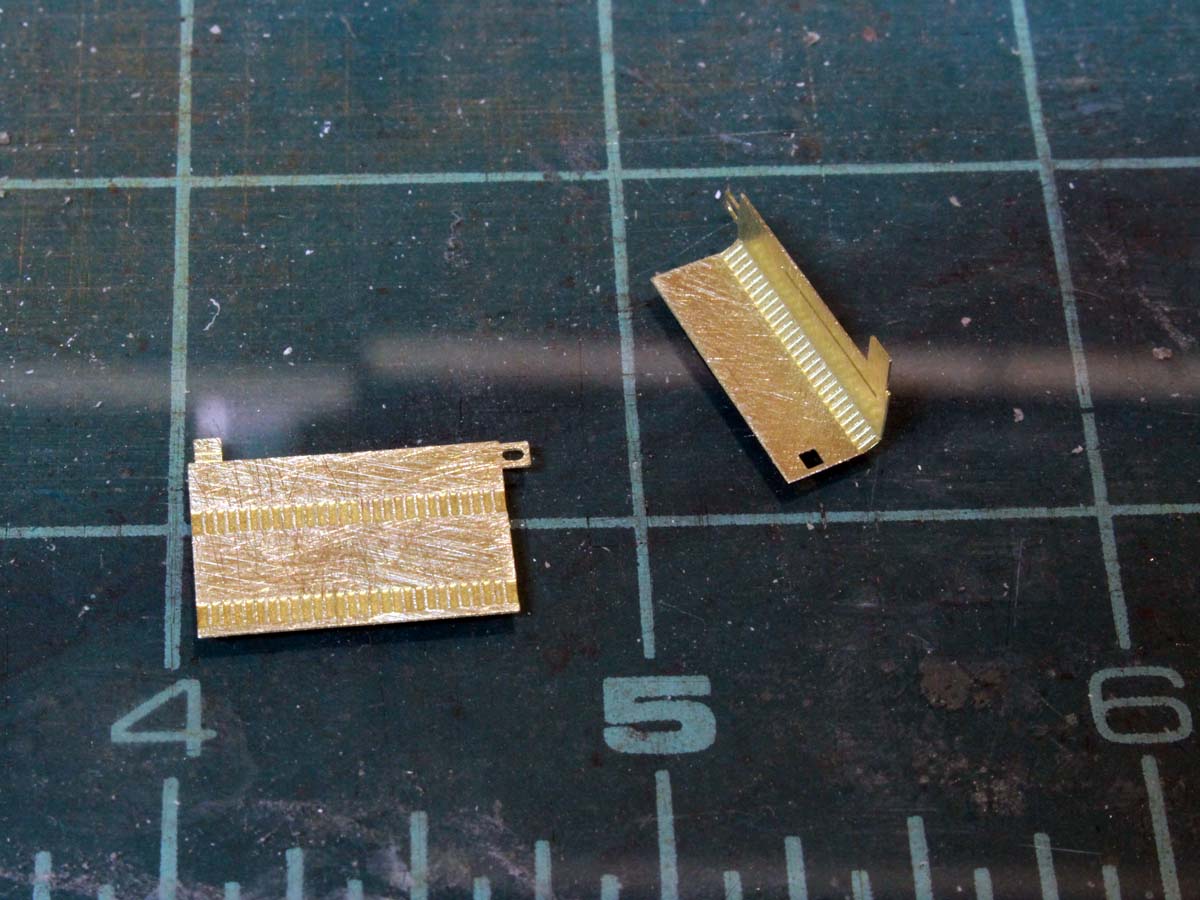

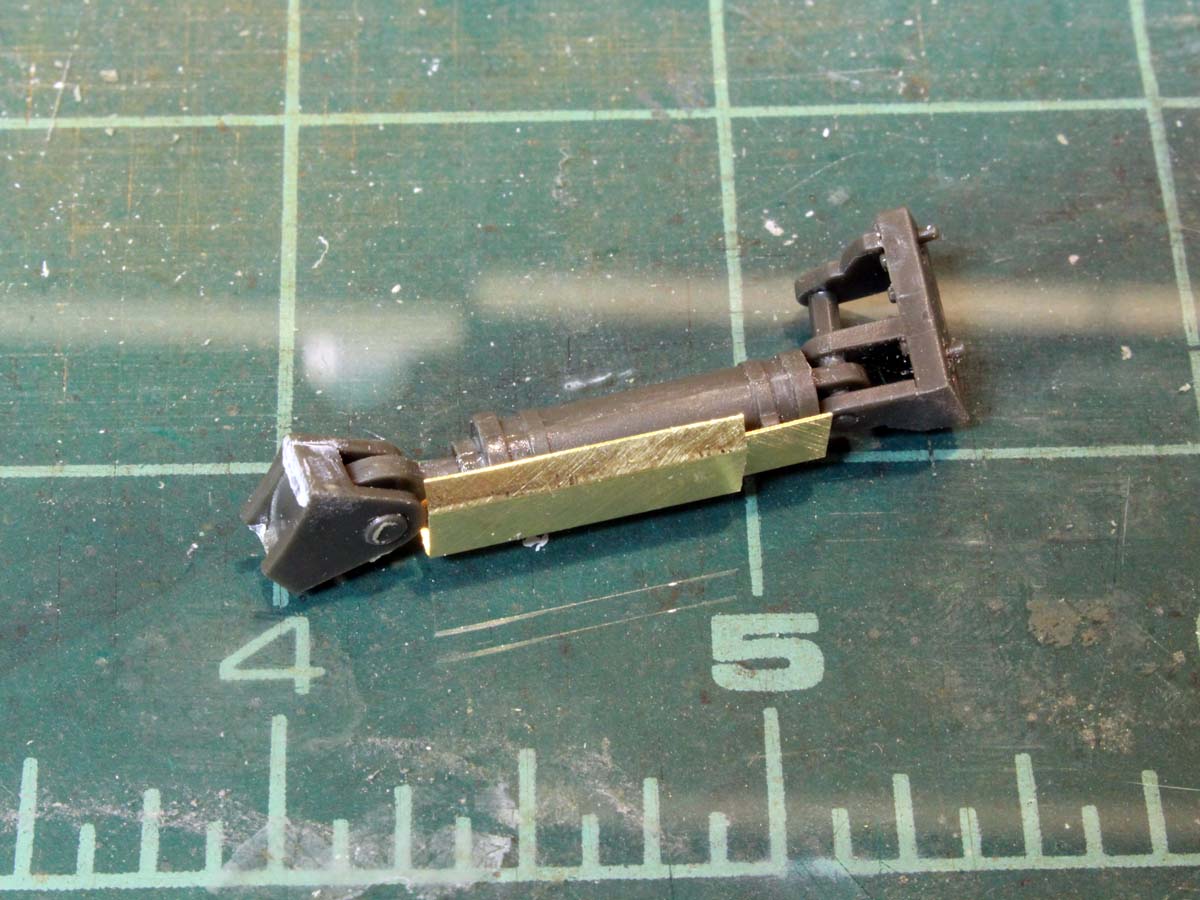
I found them to be quite fiddly and in my opinion could be better designed to make them work better. They are supposed to fit within one another and slide to allow the blade to elevate and depress (the inner pistons have ridges and the cylinders have detents to allow the cylinder extension to be adjusted and the blade to be positioned) but there are no proper bending lines scribed so it is hit and miss to make it fit properly.
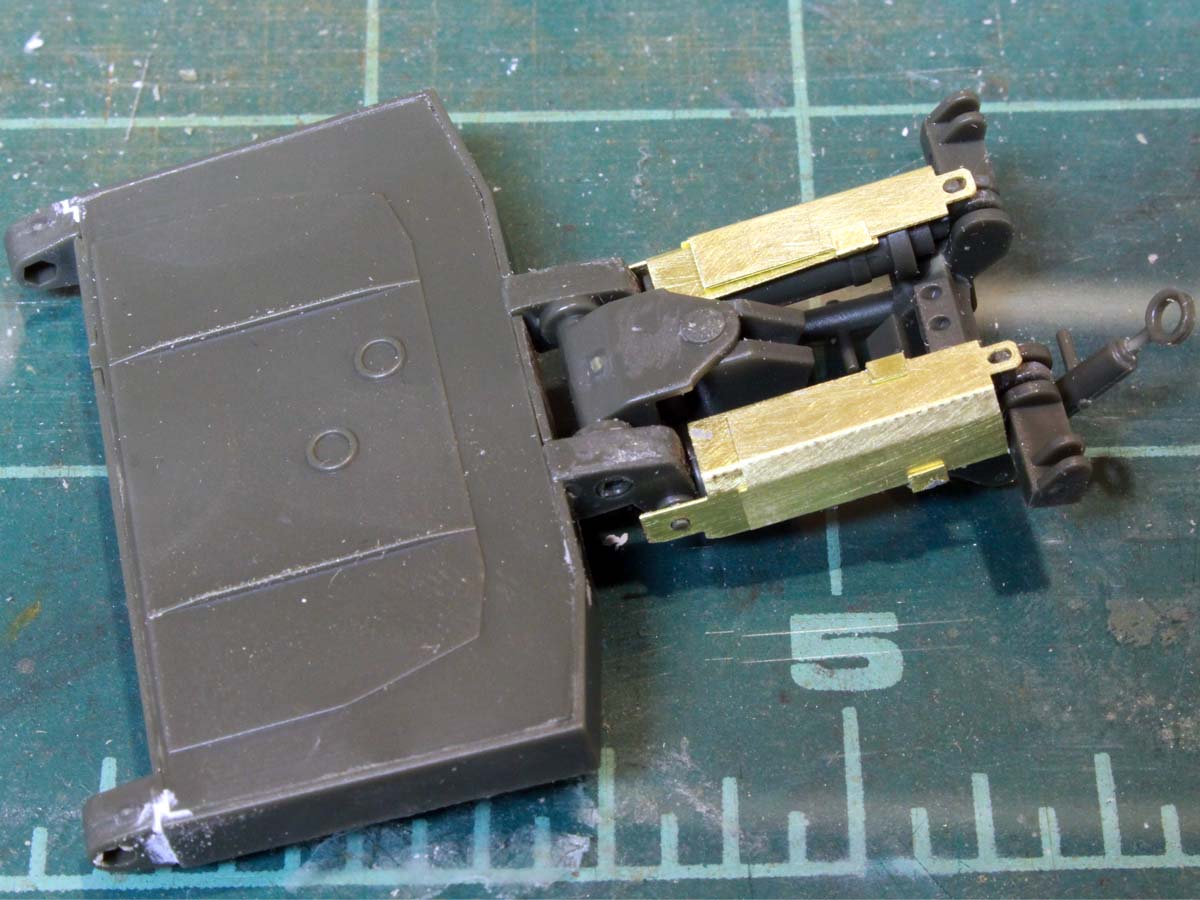
the mounting points for the PE to the plastic are hard to line up and there is not much contact surface so it is easy to break the PE off when manipulating the various parts. once it is together it is quite a nice assembly though (and I fixed the brackets!).
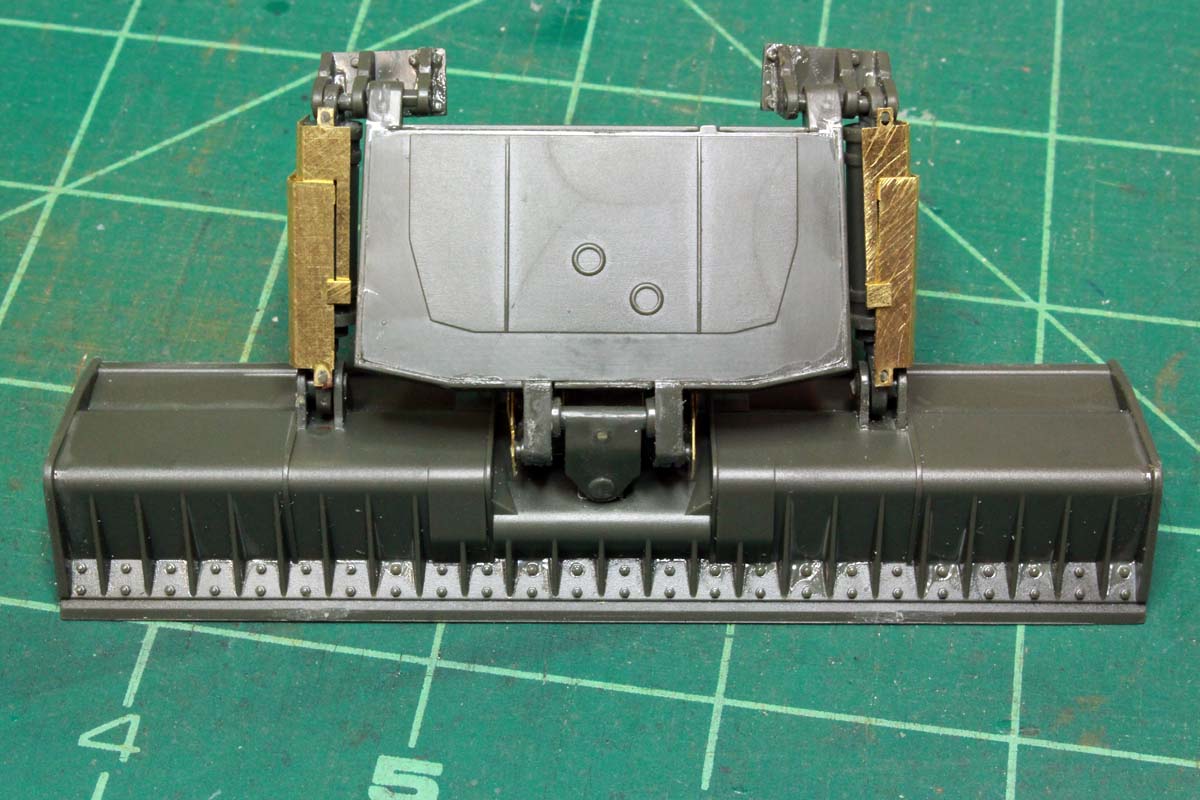
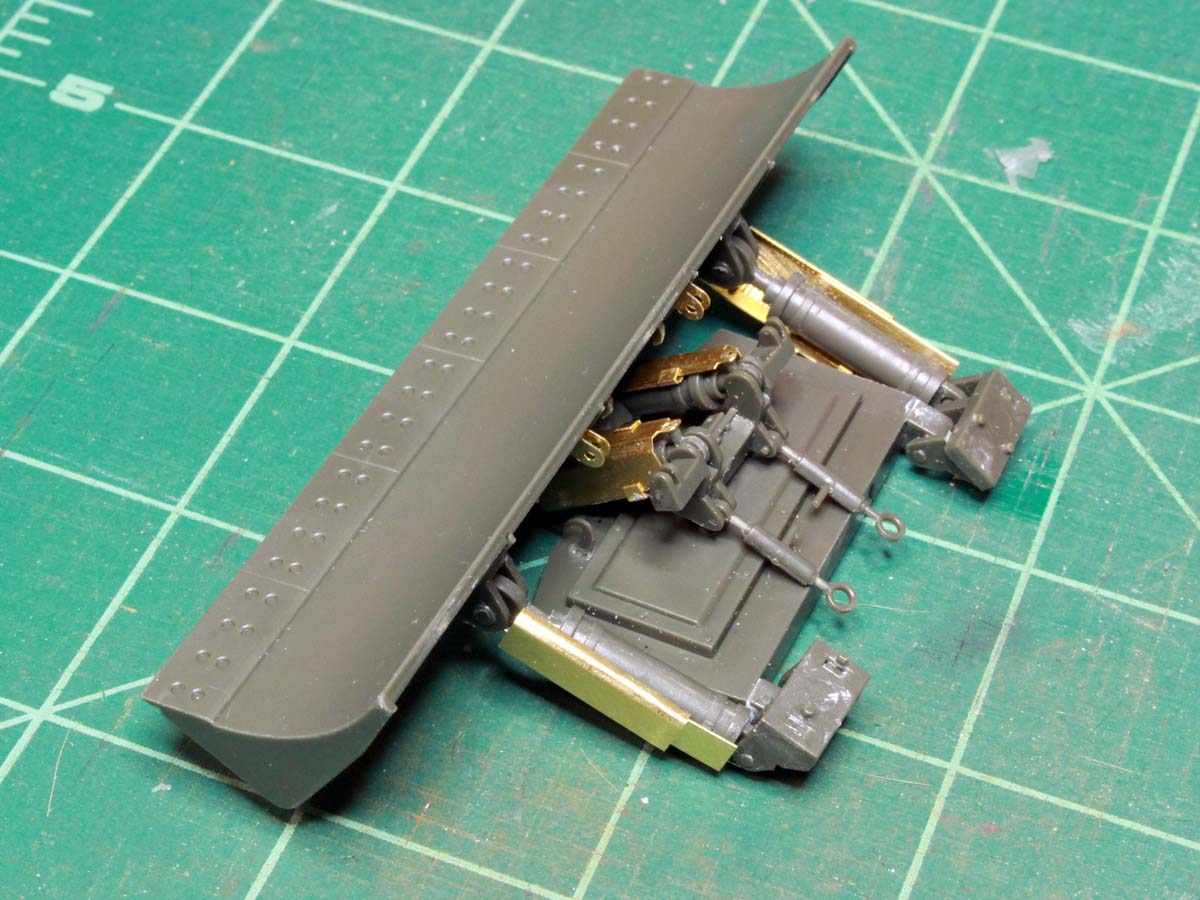
A few final bits and bobs and it is on to the paint booth!
Looking at it now it is pretty obvious...
The guard plates for the hydraulic cylinders are made of photoetch:
I found them to be quite fiddly and in my opinion could be better designed to make them work better. They are supposed to fit within one another and slide to allow the blade to elevate and depress (the inner pistons have ridges and the cylinders have detents to allow the cylinder extension to be adjusted and the blade to be positioned) but there are no proper bending lines scribed so it is hit and miss to make it fit properly.
the mounting points for the PE to the plastic are hard to line up and there is not much contact surface so it is easy to break the PE off when manipulating the various parts. once it is together it is quite a nice assembly though (and I fixed the brackets!).
A few final bits and bobs and it is on to the paint booth!
phantom8747
Joined: March 09, 2015
KitMaker: 281 posts
Armorama: 273 posts
Posted: Monday, January 08, 2018 - 06:59 PM UTC
Thanks for photos of track links Colin I see the little pins now.
ColinEdm
Joined: October 15, 2013
KitMaker: 1,355 posts
Armorama: 1,229 posts
Posted: Saturday, January 13, 2018 - 10:08 AM UTC
Cheers Bob.
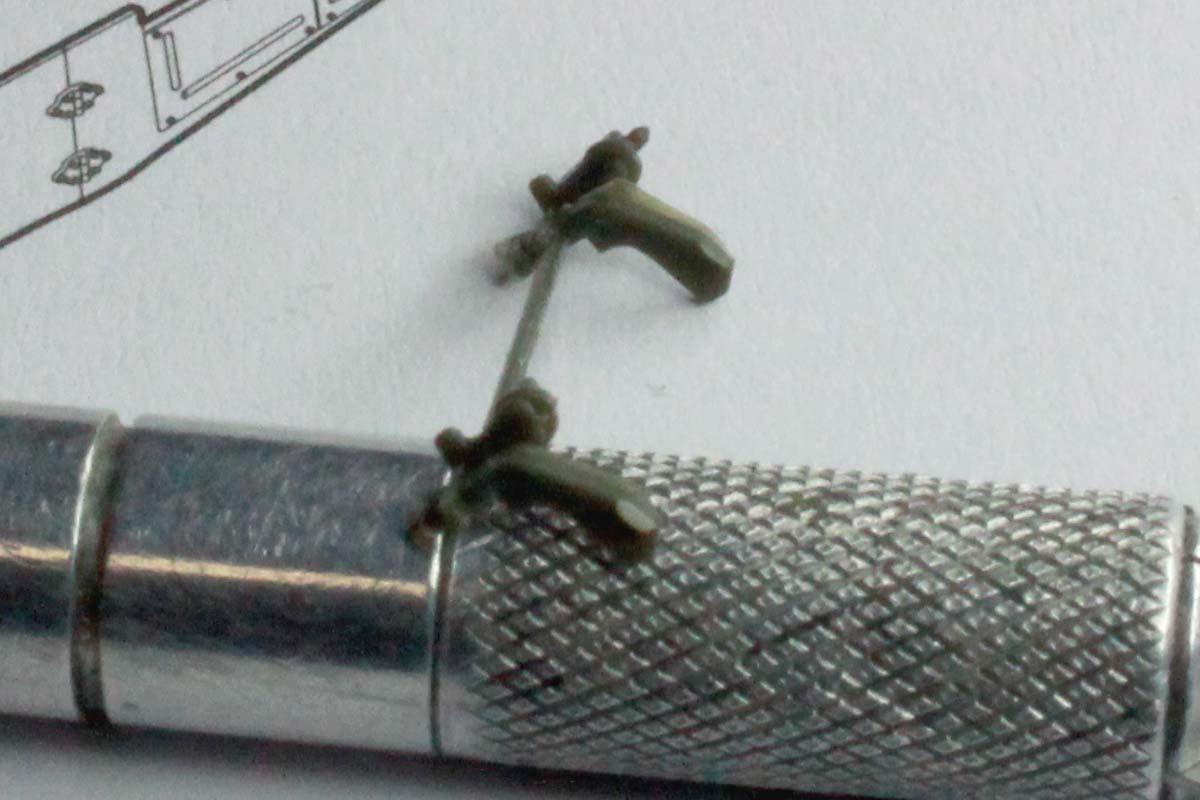
Final bits added - hydraulic line for dozer blade and fuel drums/fuel lines. I wasn't too keen on the kit supplied lines, the soft rubber line for the dozer blade hydraulic had seam lines that were very difficult to remove well, as well as the sprue attachment points.
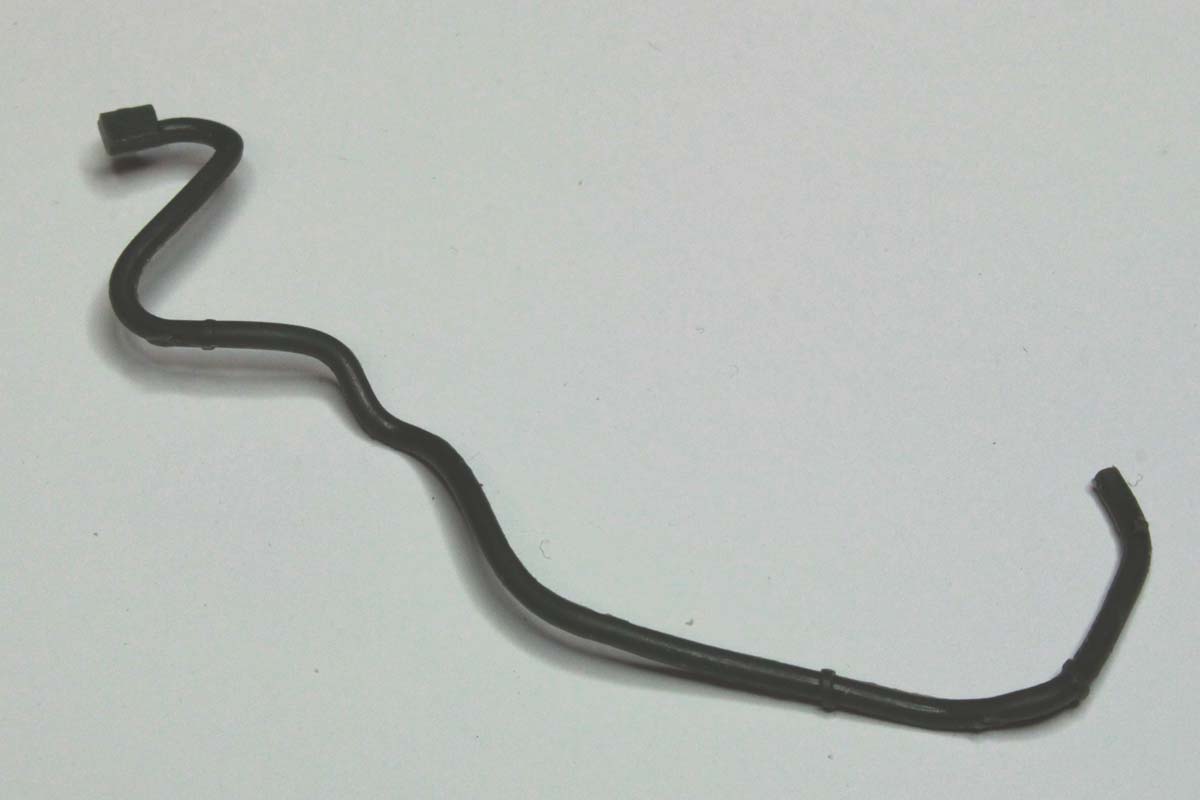
so I made a new one out of solder with some retaining straps made from foil:
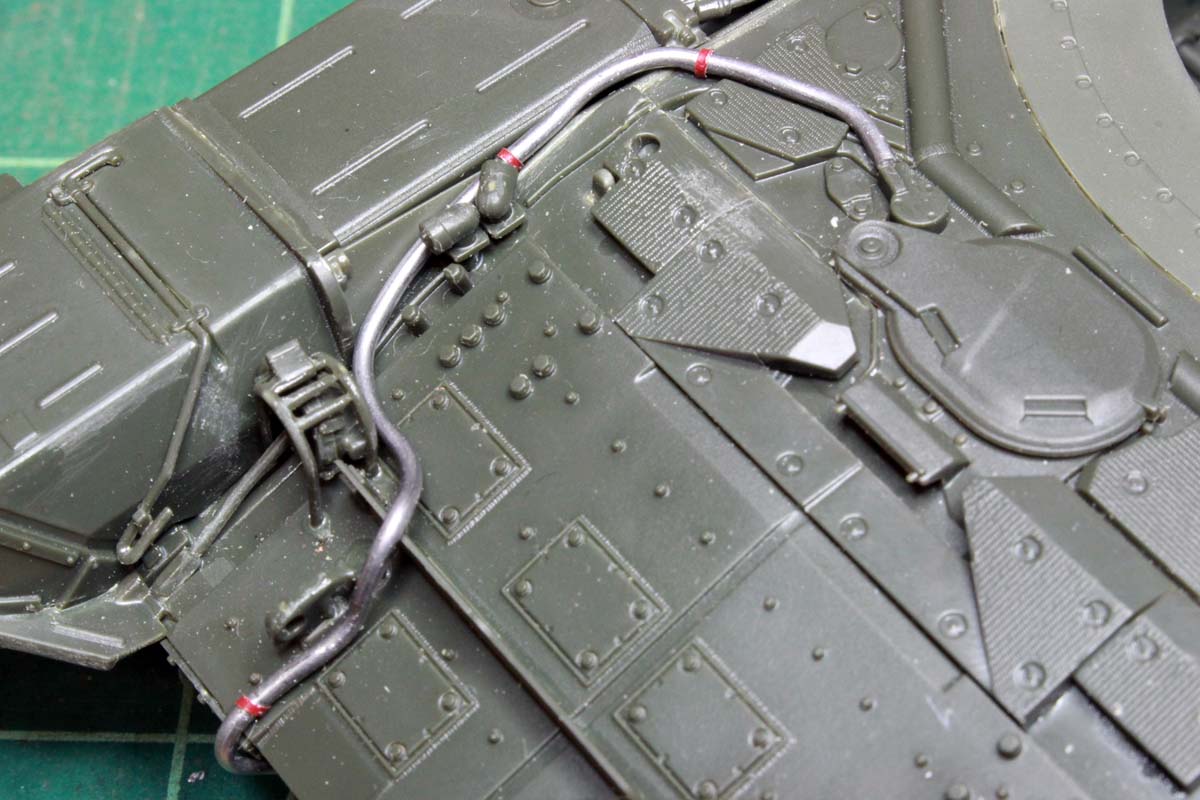
The fuel lines were molded out of regular styrene but I wasn't happy with the detail:

so again with solder and brass wire:
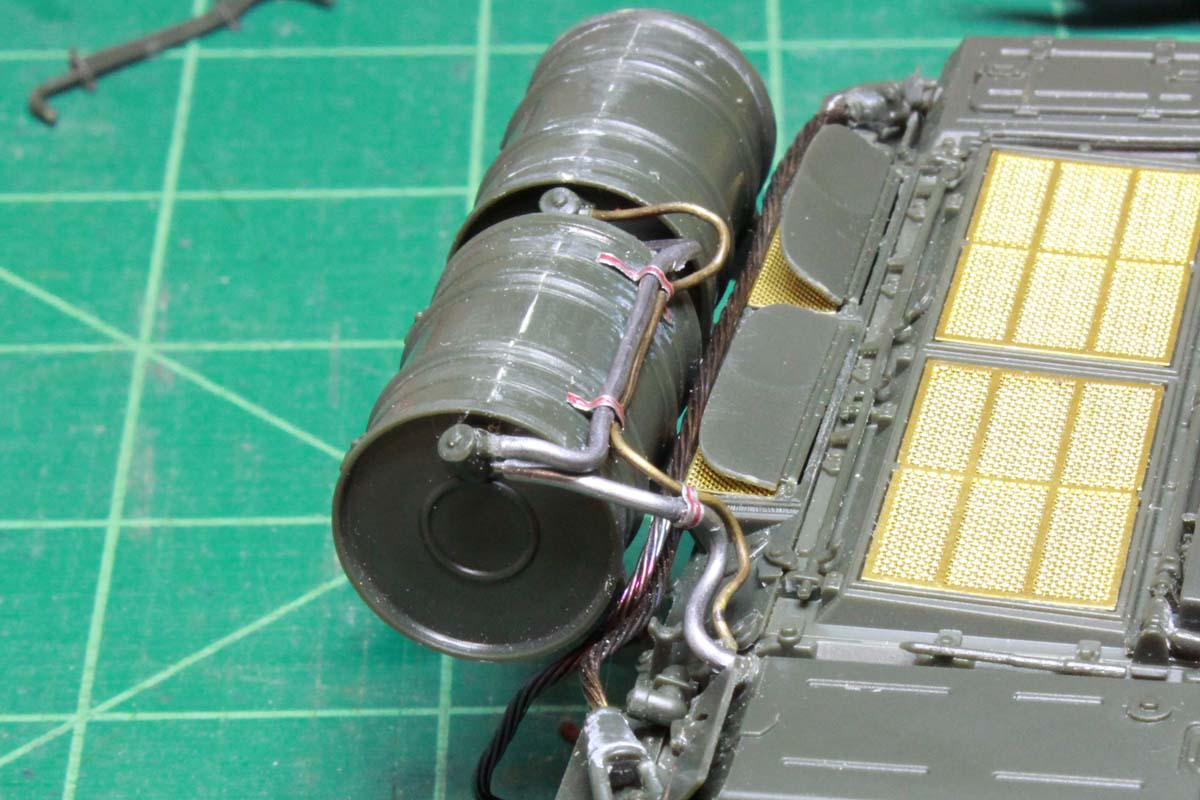
I will trim the straps to be more even when everything has set well.
Final bits added - hydraulic line for dozer blade and fuel drums/fuel lines. I wasn't too keen on the kit supplied lines, the soft rubber line for the dozer blade hydraulic had seam lines that were very difficult to remove well, as well as the sprue attachment points.
so I made a new one out of solder with some retaining straps made from foil:
The fuel lines were molded out of regular styrene but I wasn't happy with the detail:
so again with solder and brass wire:
I will trim the straps to be more even when everything has set well.

pgb3476
Joined: March 11, 2007
KitMaker: 977 posts
Armorama: 976 posts
Posted: Saturday, January 13, 2018 - 09:29 PM UTC
Nicely done. Love those new lines.

newnikonian

Joined: July 28, 2005
KitMaker: 279 posts
Armorama: 233 posts

Posted: Monday, January 15, 2018 - 09:37 AM UTC
Awesome detailing..... Looking Great 
ColinEdm
Joined: October 15, 2013
KitMaker: 1,355 posts
Armorama: 1,229 posts
Posted: Saturday, January 20, 2018 - 08:10 AM UTC
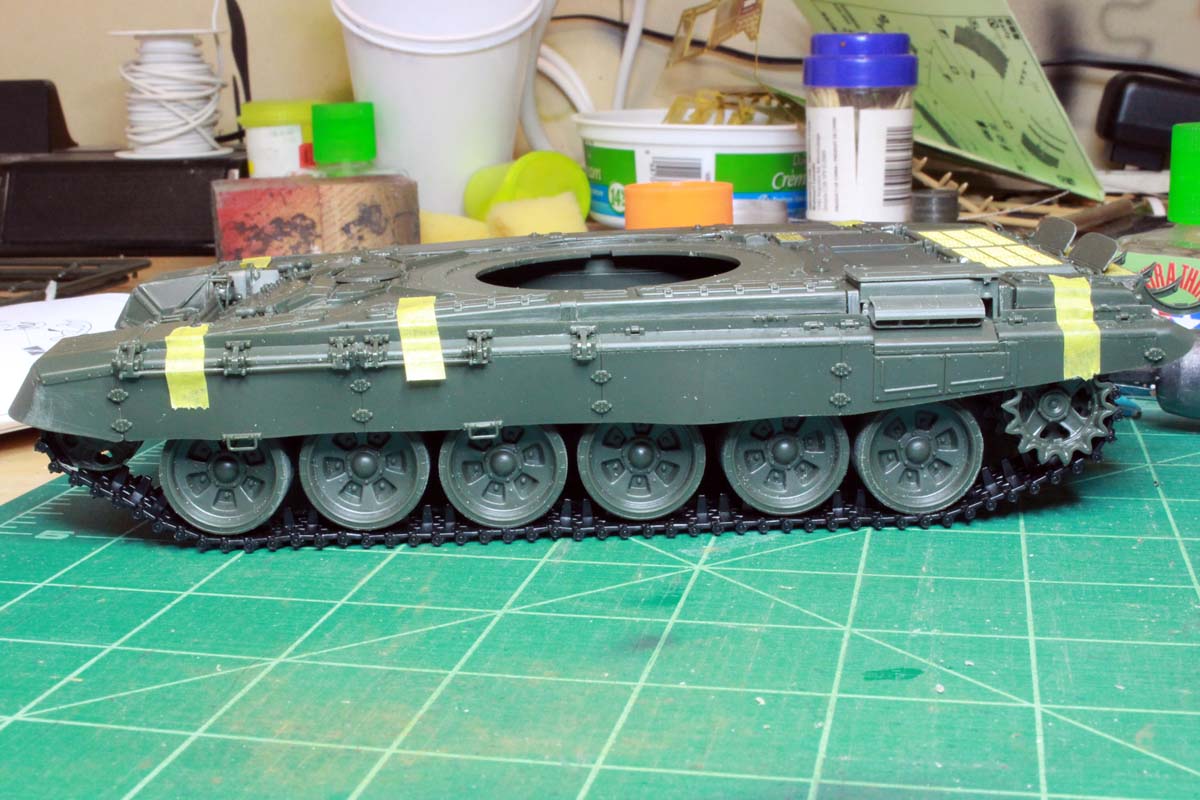
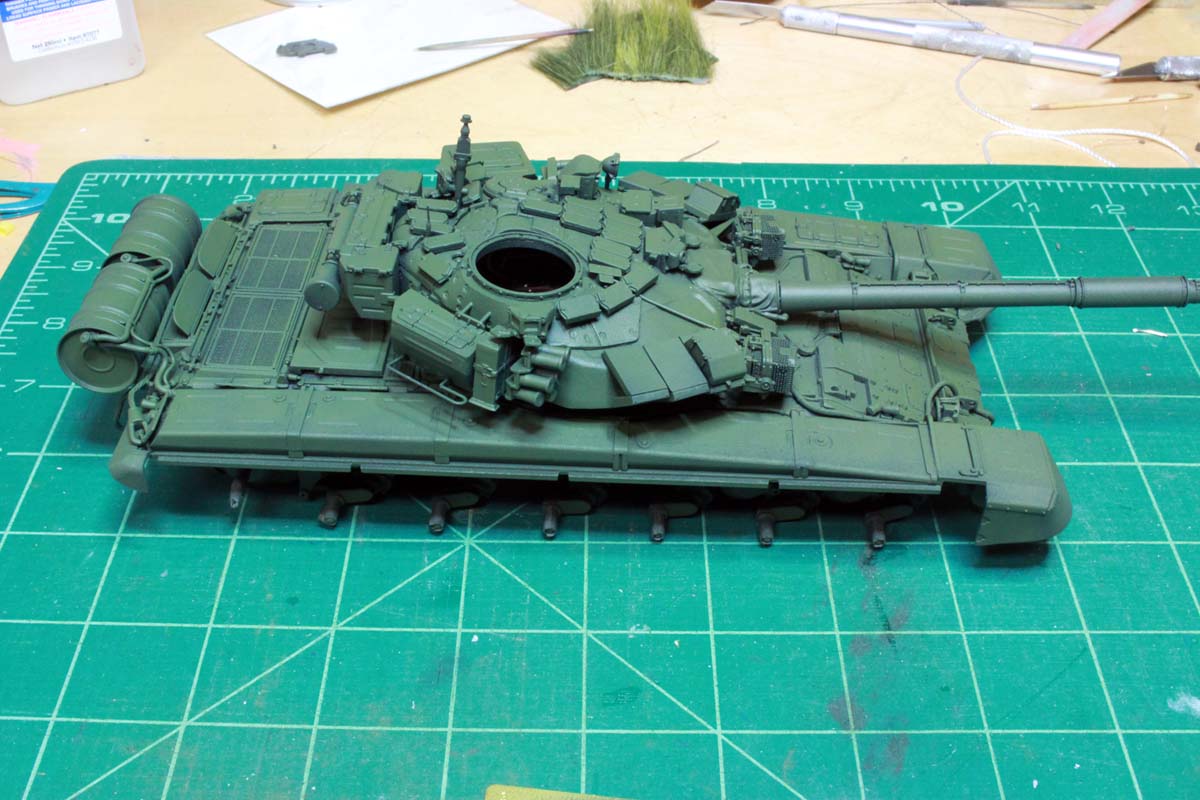
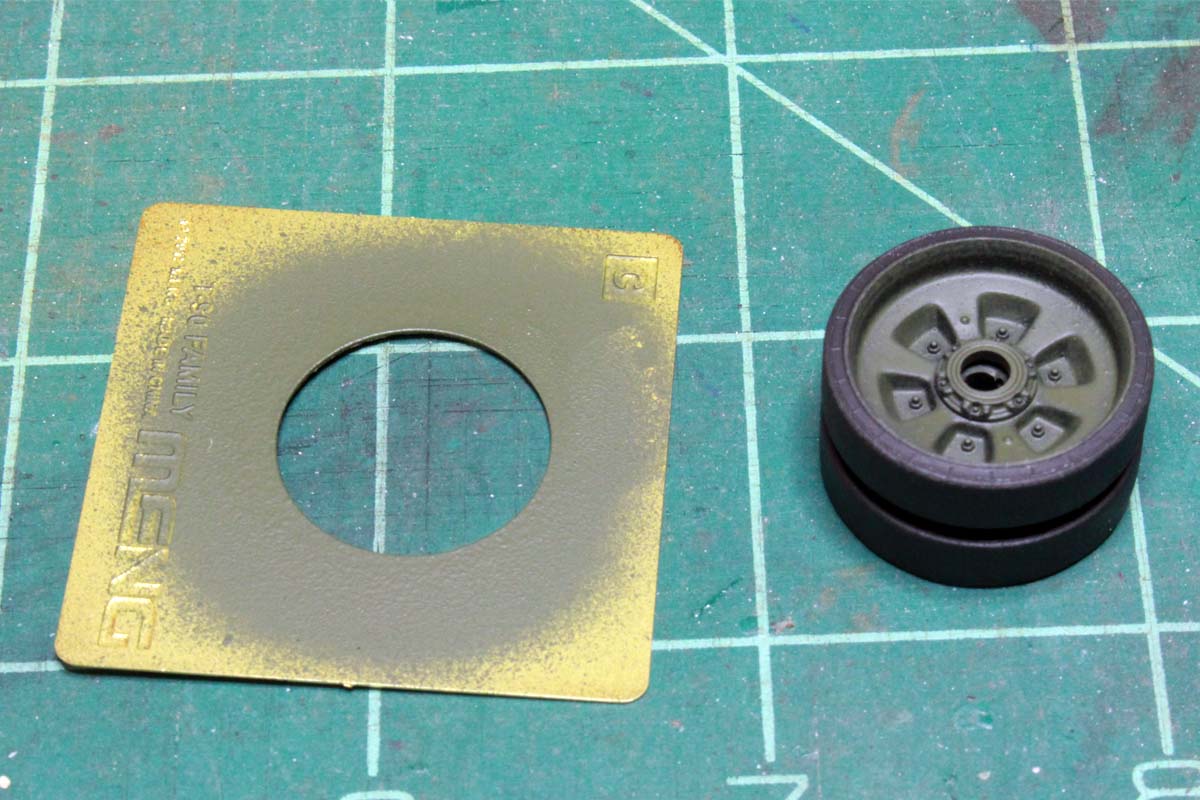
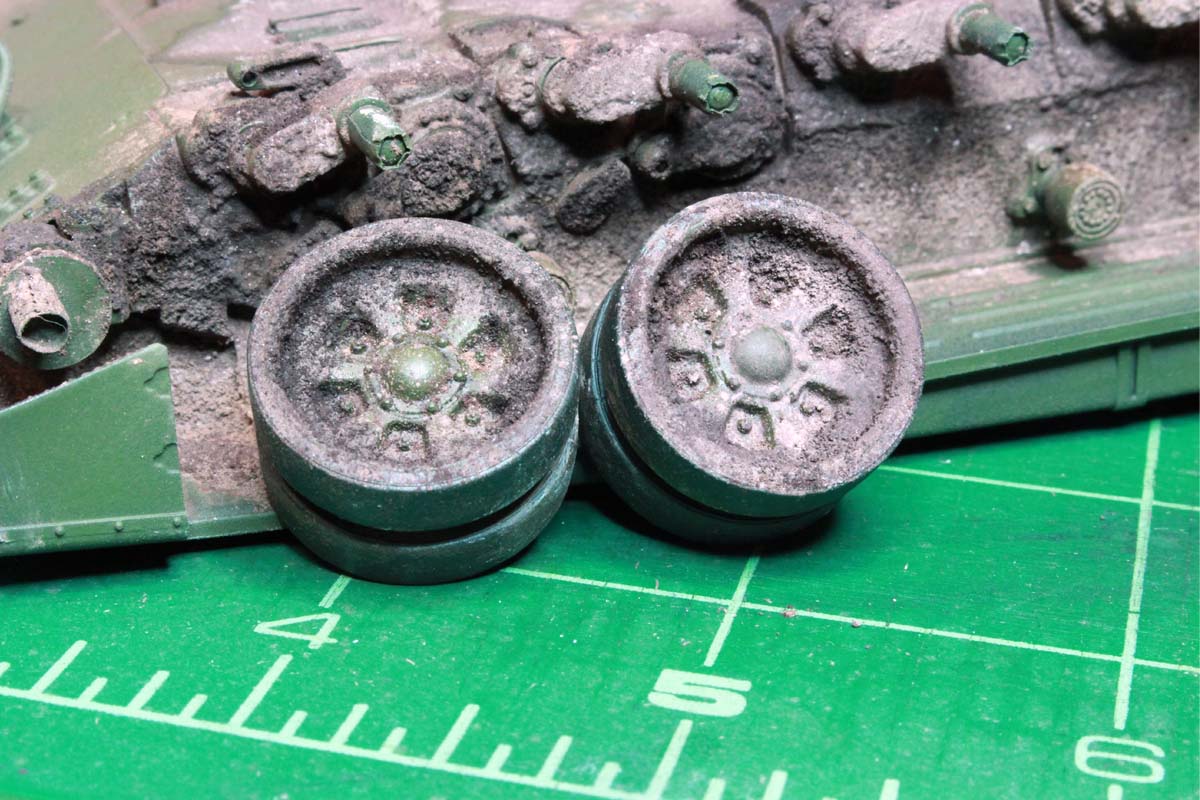
Thanks guys! Masked off the lights, vision blocks etc and on to the paint booth, started with Tamiya rattle can grey as the first primer coat to highlight surface defects and give the acrylic a good base then followed up with black for shadowing and then Russian Green base, I will be doing a three colour camo.
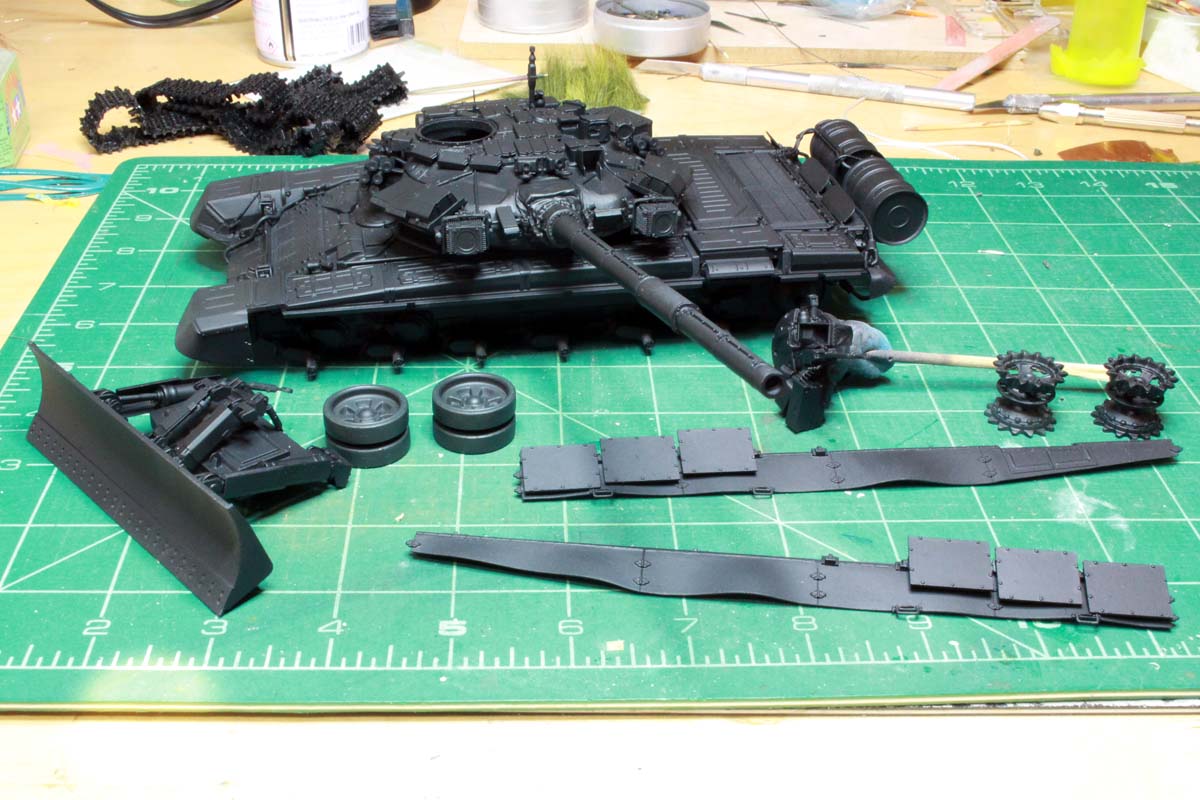
The kit supplied wheel mask worked a treat:
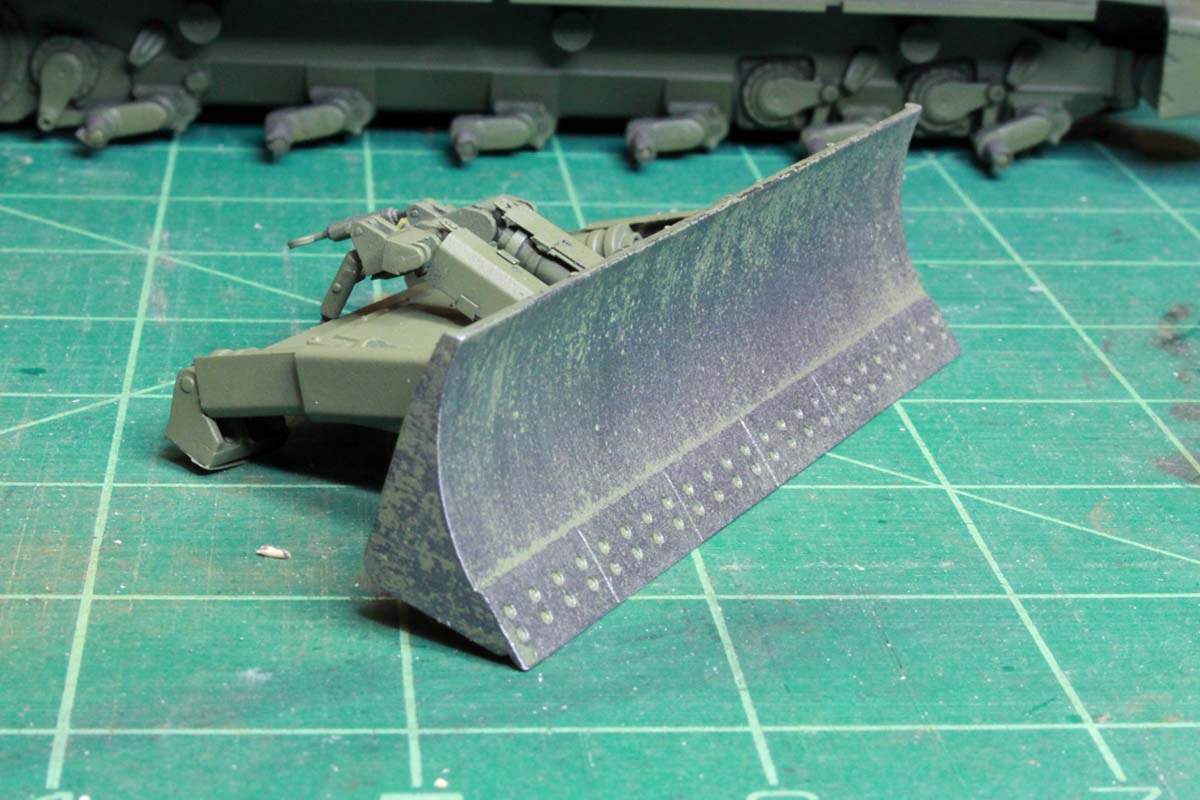
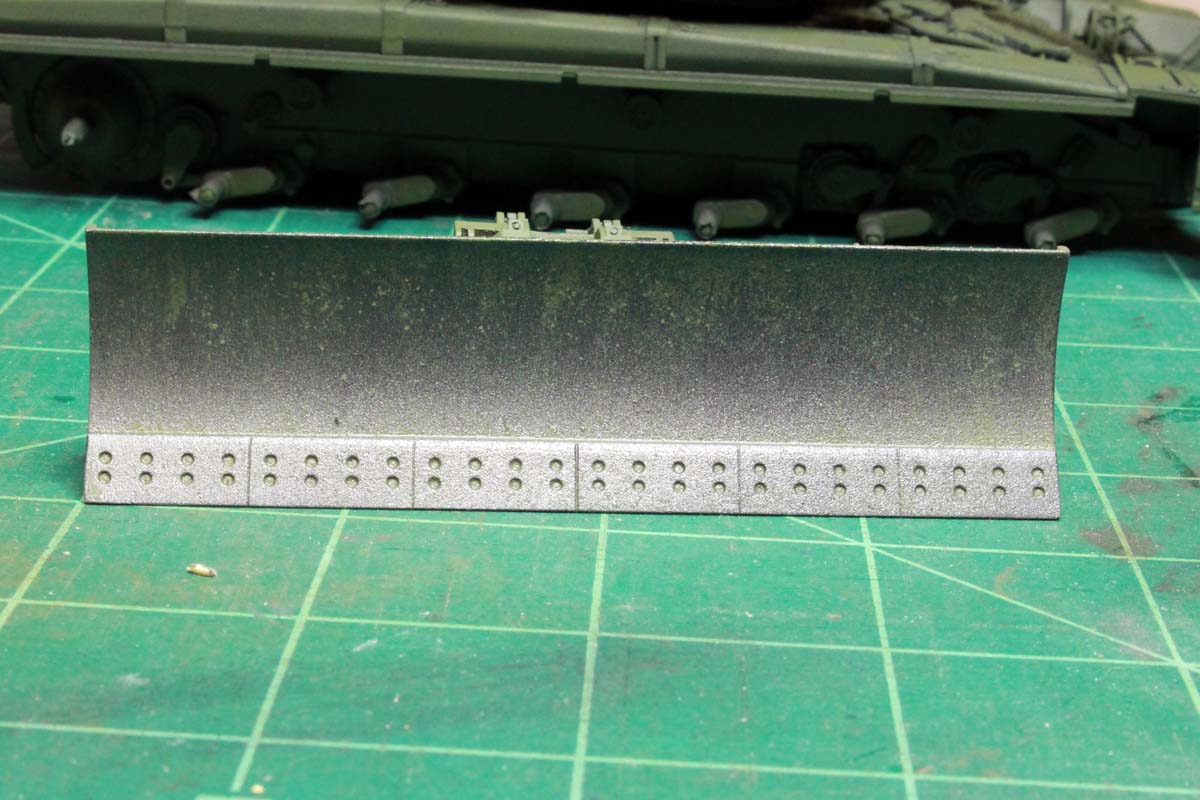
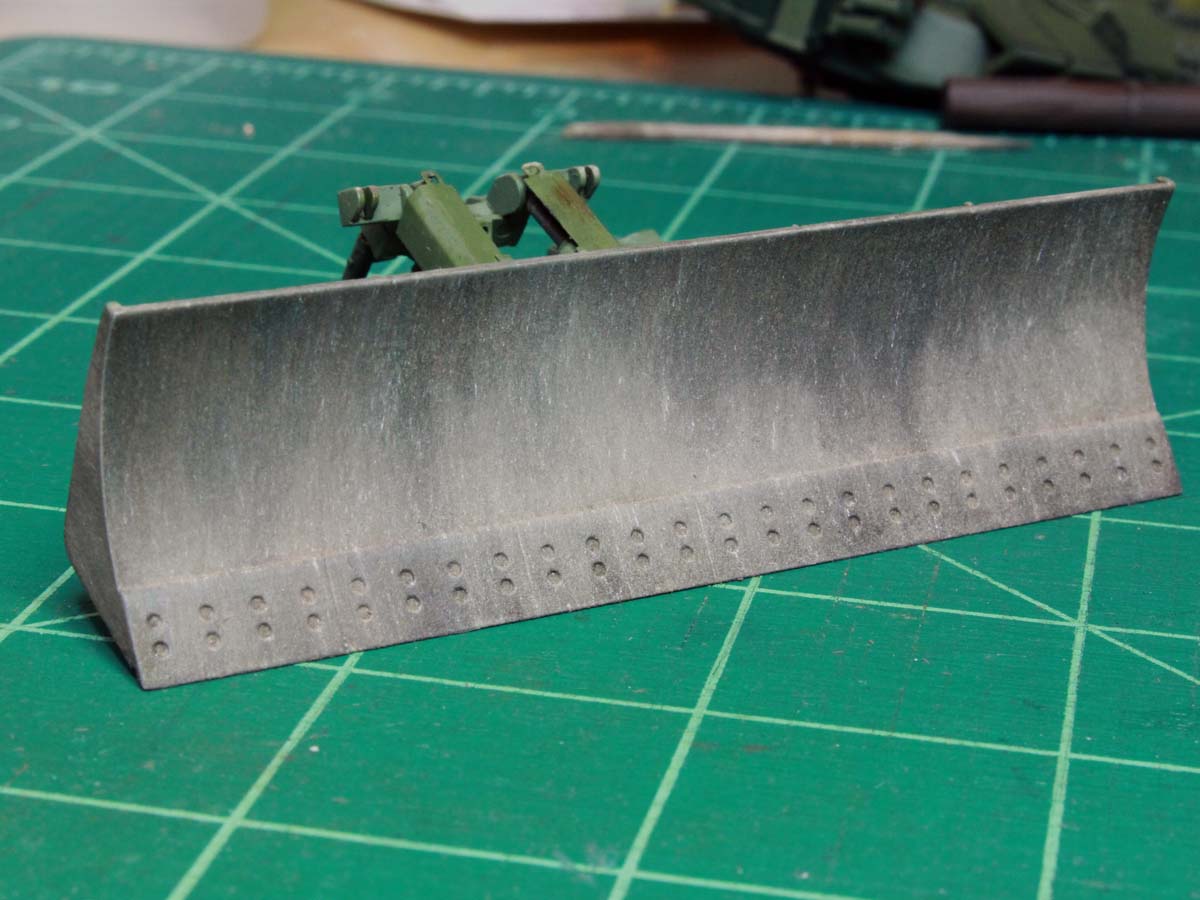
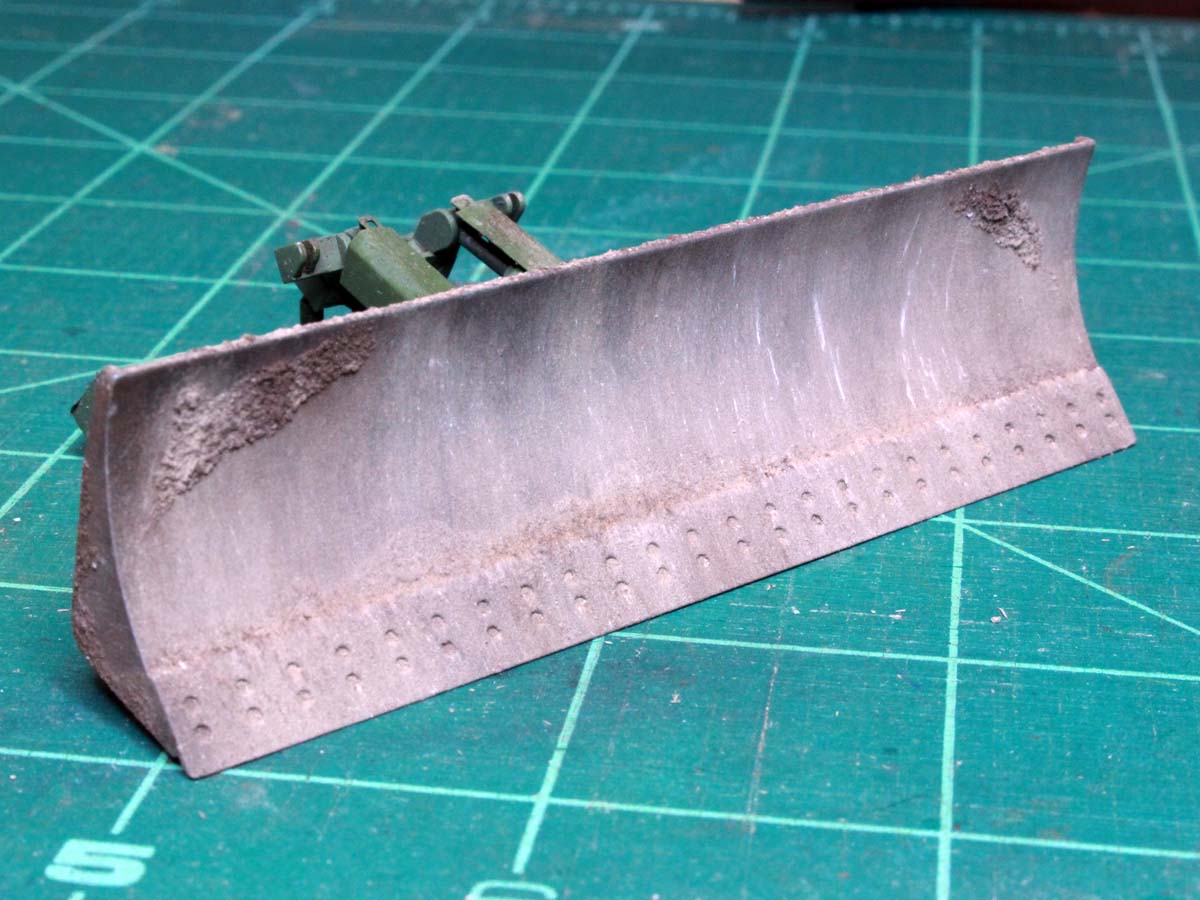
laid a slightly lighter grey-green coat on the dozer assembly after hair-spraying a base metal colour and then wet it and wore most of the green off the surface of the blade:
Time to start weathering the running gear and lower hull so I can get that all put together with skirts on before adding the other camo colours.
The kit supplied wheel mask worked a treat:
laid a slightly lighter grey-green coat on the dozer assembly after hair-spraying a base metal colour and then wet it and wore most of the green off the surface of the blade:
Time to start weathering the running gear and lower hull so I can get that all put together with skirts on before adding the other camo colours.

Sekytwo
Joined: March 08, 2013
KitMaker: 69 posts
Armorama: 65 posts
Posted: Thursday, January 25, 2018 - 08:46 PM UTC
Impressive AF so far!!
ColinEdm
Joined: October 15, 2013
KitMaker: 1,355 posts
Armorama: 1,229 posts
Posted: Sunday, January 28, 2018 - 09:16 AM UTC
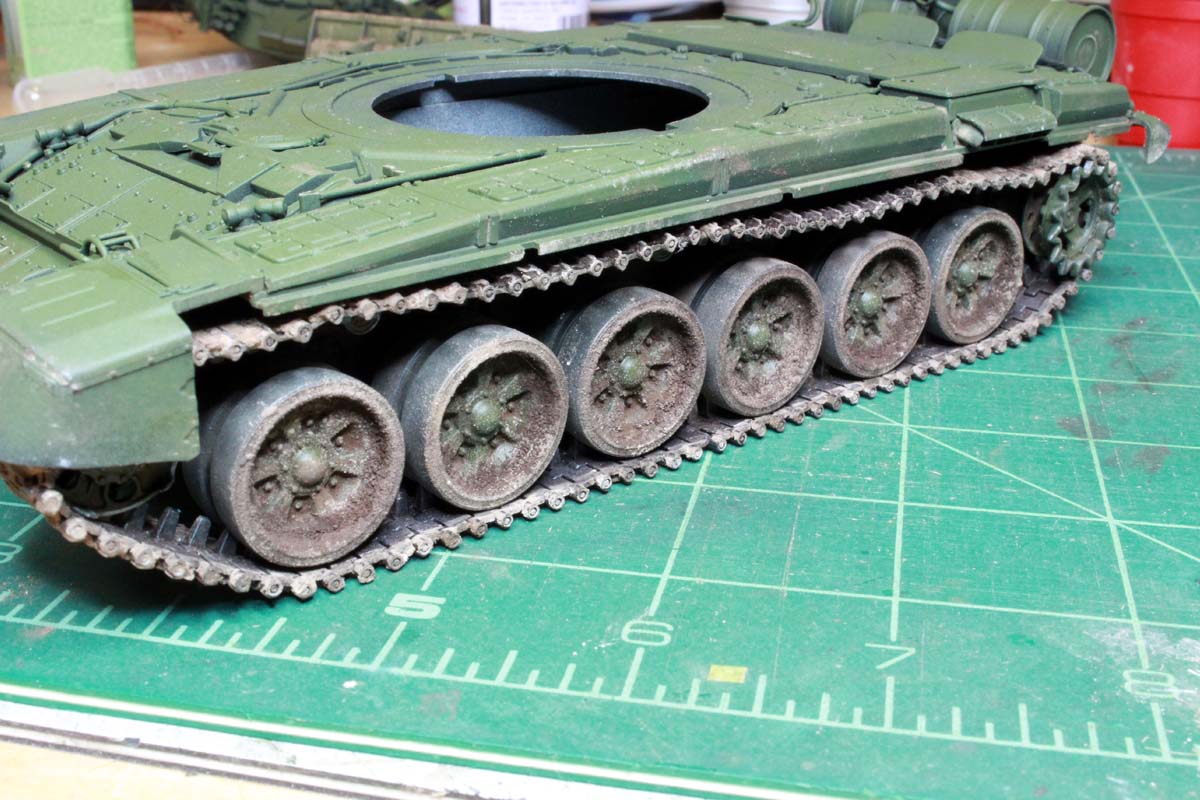
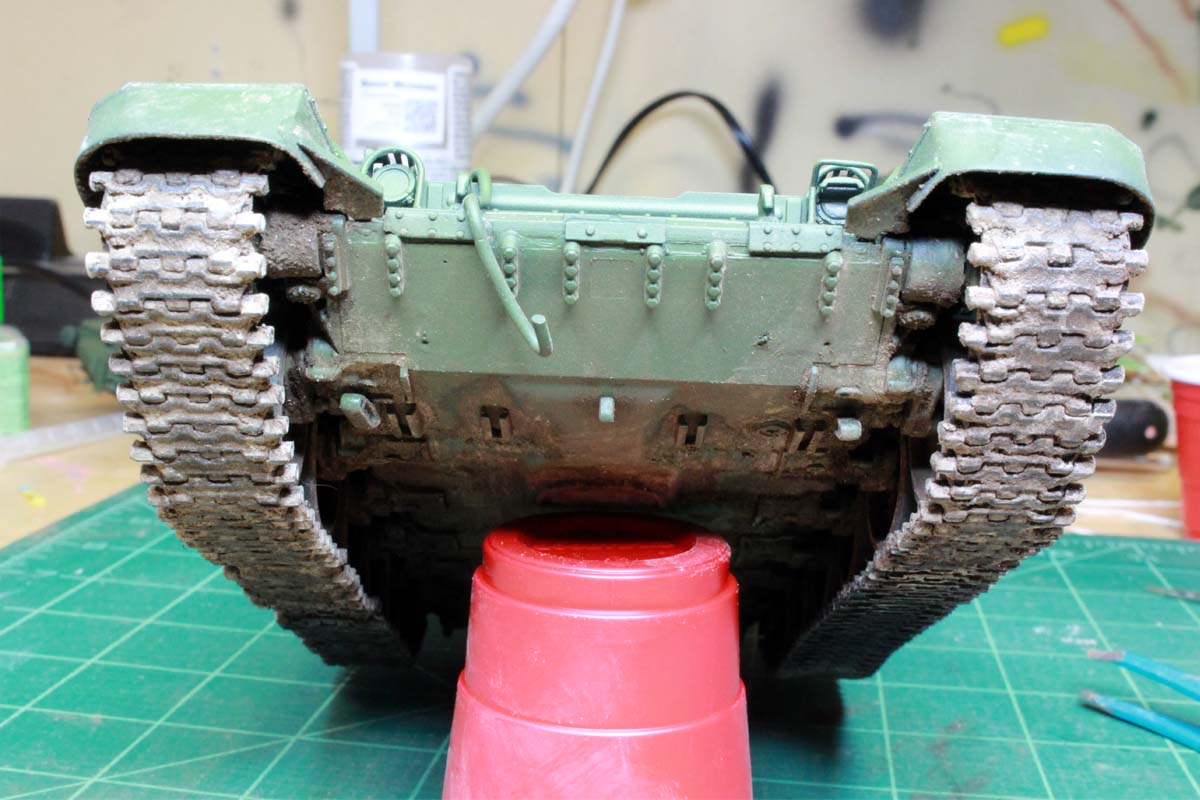
Thanks Luis. With the dozer blade, I figured I would weather this one like it had been playing in the dirt for a while, started on the blade, the dirt doesn't show up too well, and I still want to add a bit of built up dirt accumulations:
the lower hull and running gear is getting dirtied up so I can add the skirts and continue with the camo scheme.
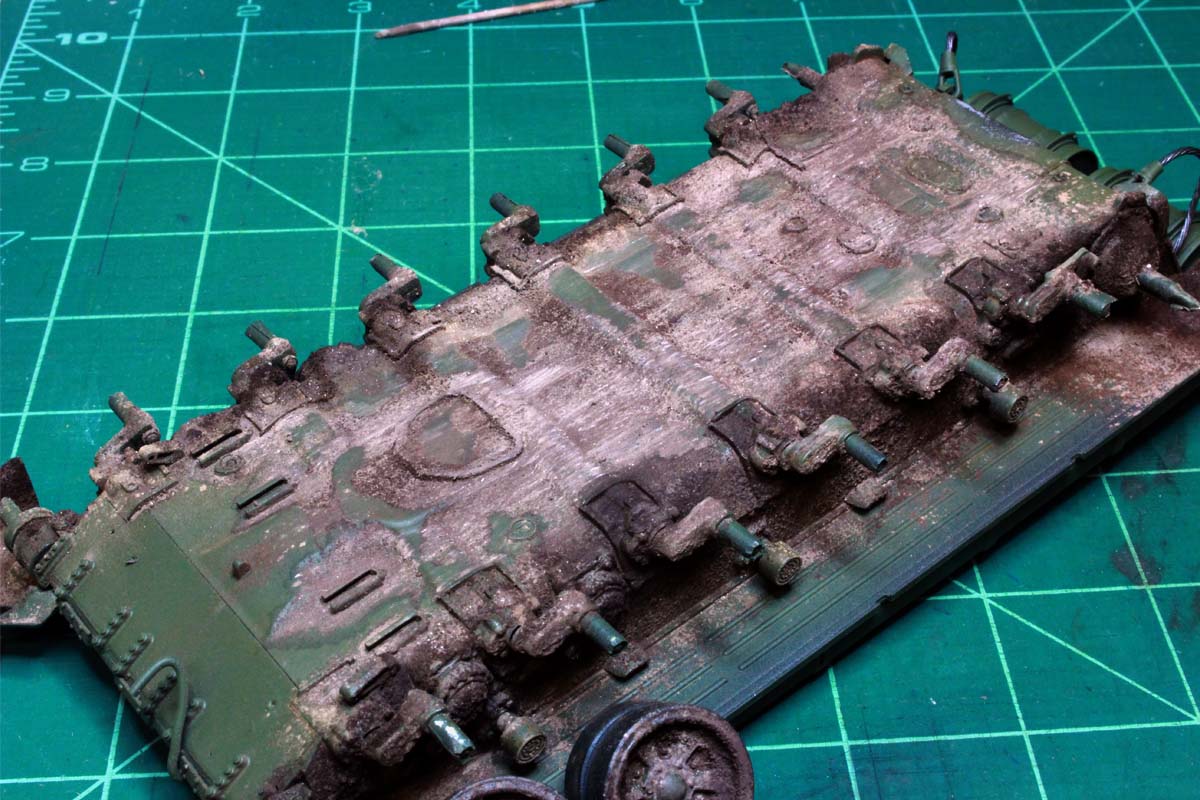
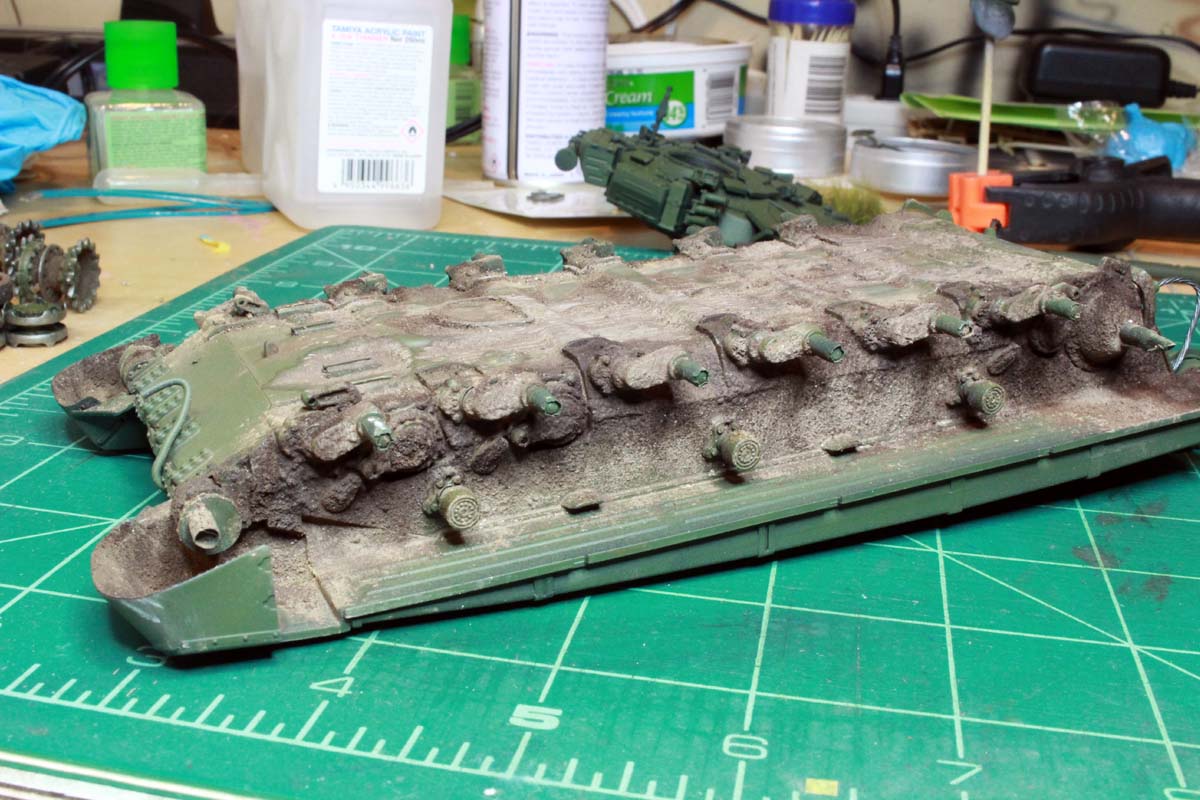
the lower hull and running gear is getting dirtied up so I can add the skirts and continue with the camo scheme.

flugwuzzi

Joined: November 02, 2007
KitMaker: 633 posts
Armorama: 599 posts
Posted: Sunday, January 28, 2018 - 07:52 PM UTC
Excellent work Colin!
Your model is rellay coming to life with all the mud.
cheers
Walter
Your model is rellay coming to life with all the mud.
cheers
Walter
KoSprueOne
Joined: March 05, 2004
KitMaker: 4,011 posts
Armorama: 1,498 posts
Posted: Monday, January 29, 2018 - 07:34 AM UTC
Yeah this is really looking good.
ColinEdm
Joined: October 15, 2013
KitMaker: 1,355 posts
Armorama: 1,229 posts
Posted: Saturday, February 03, 2018 - 09:40 AM UTC
Thanks guys. Continuing with some more dirt on the dozer blade:
and got the running gear and tracks on:
side skirts are on now, so I can start camo!
and got the running gear and tracks on:
side skirts are on now, so I can start camo!
ColinEdm
Joined: October 15, 2013
KitMaker: 1,355 posts
Armorama: 1,229 posts
Posted: Saturday, February 10, 2018 - 02:31 AM UTC
Camo is done, detail painting, touch ups and decals to come.
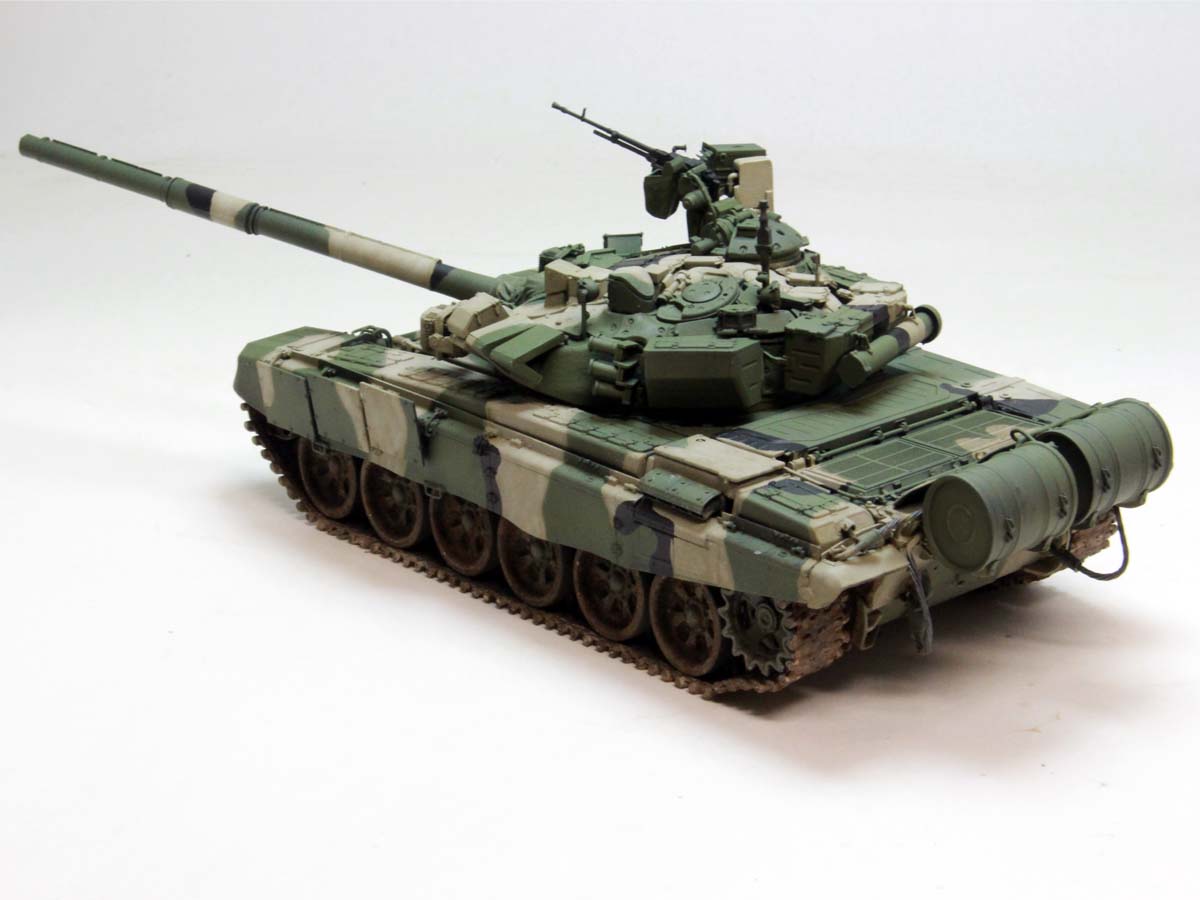
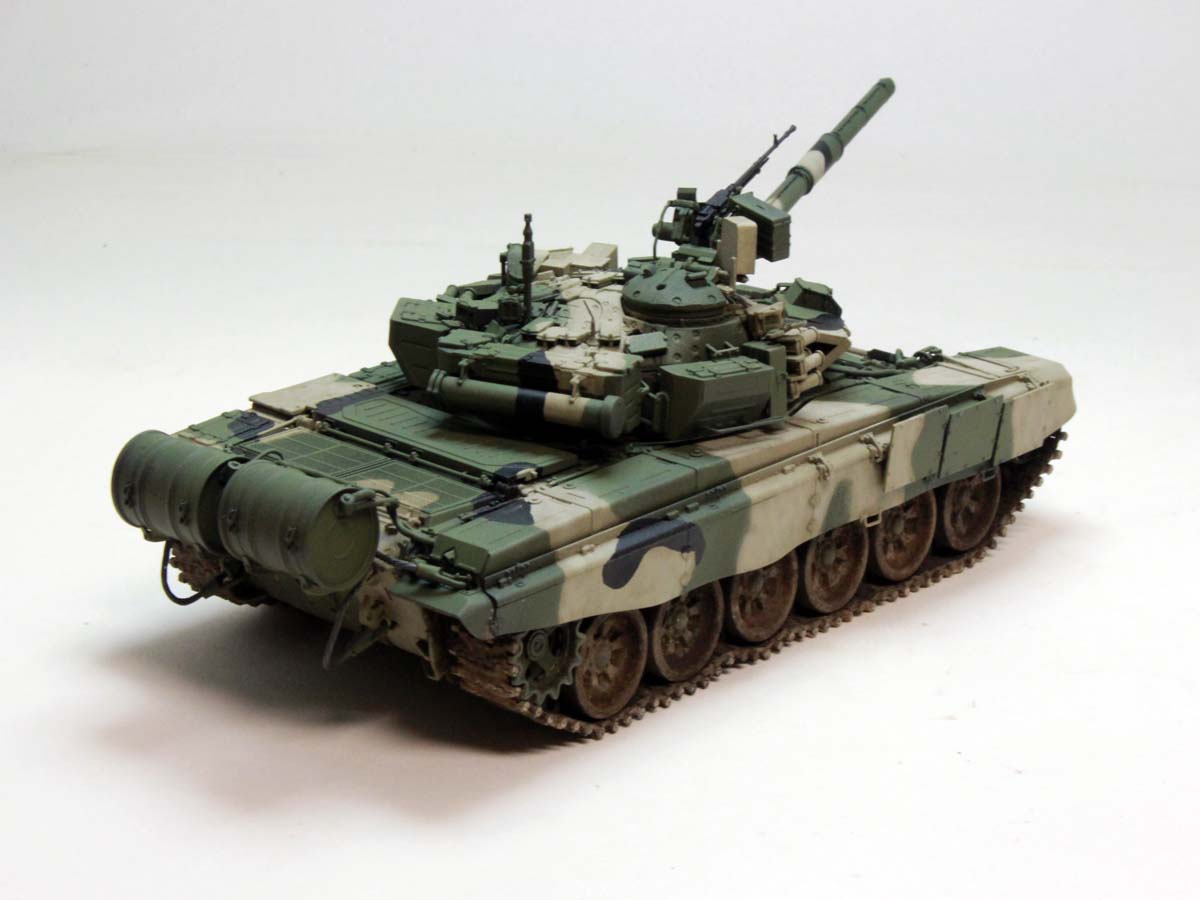
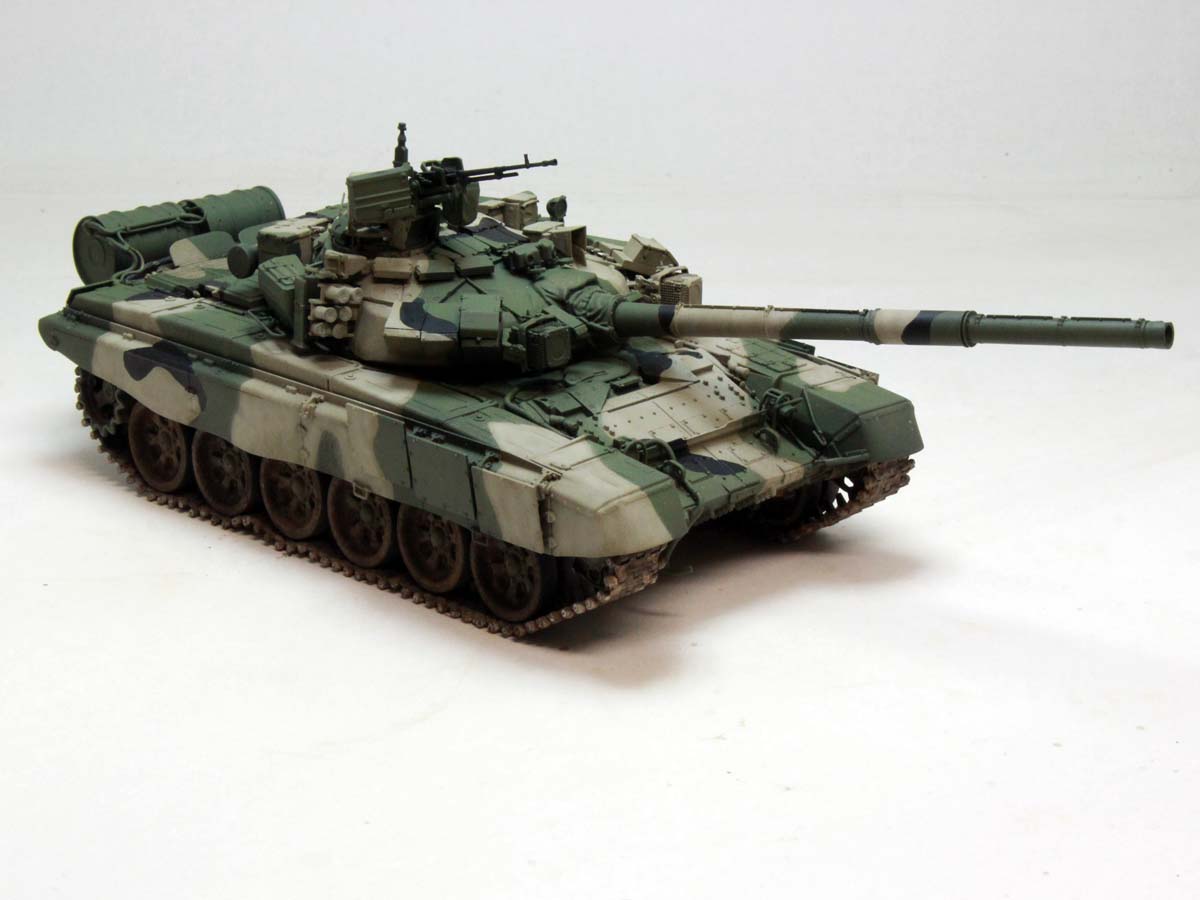
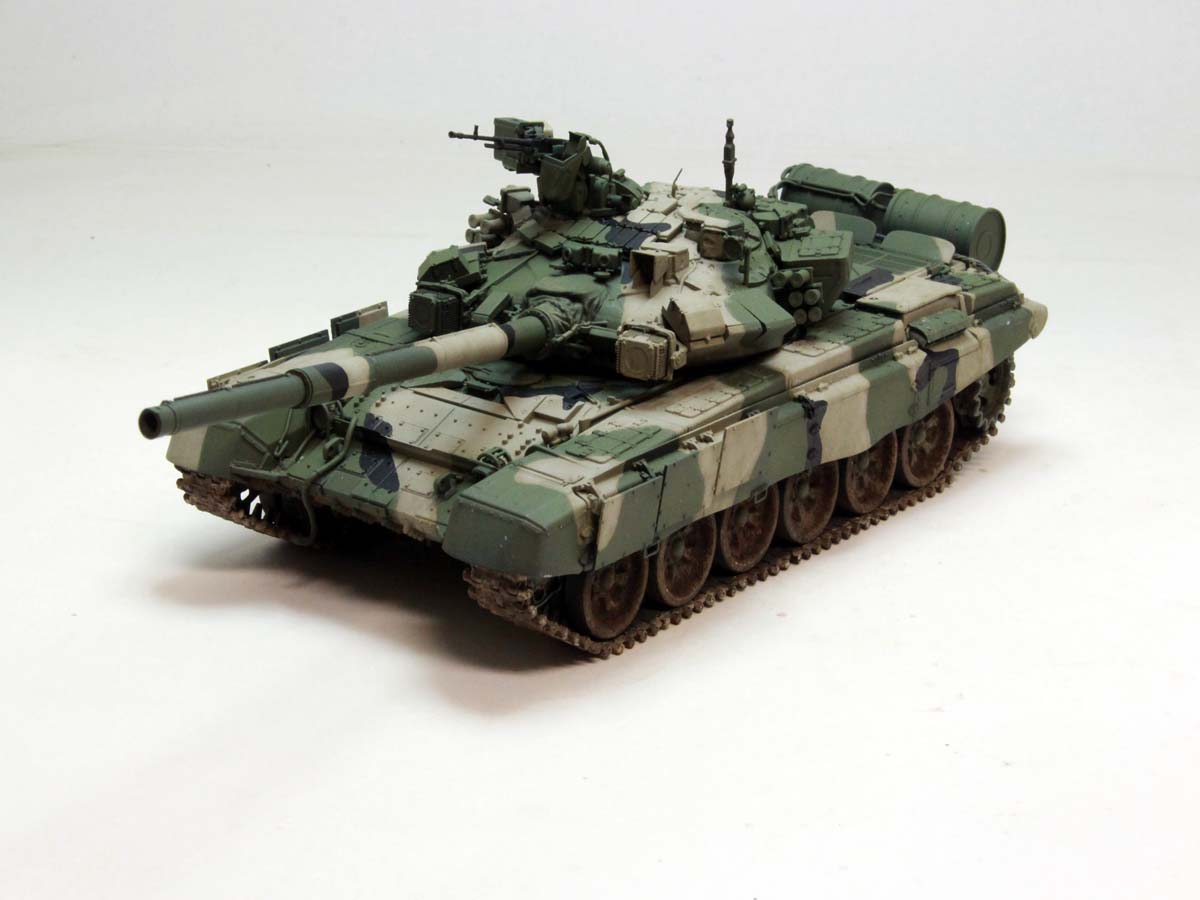
Cheers
Cheers
Jacques
Joined: March 04, 2003
KitMaker: 4,630 posts
Armorama: 4,498 posts

Posted: Monday, February 12, 2018 - 03:02 AM UTC
Looking good!

ColinEdm
Joined: October 15, 2013
KitMaker: 1,355 posts
Armorama: 1,229 posts
Posted: Tuesday, February 13, 2018 - 03:01 AM UTC
Thanks Jacques!
 |

WEB HOSTING BY


Copyright ©2021 Armorama and Kitmaker Network, a subsidiary of Silver Star Enterprises
All Rights Reserved. Please read our Conditions of Use and Privacy Policy.
All Rights Reserved. Please read our Conditions of Use and Privacy Policy.