_GOTOBOTTOM
Dioramas
Do you love dioramas & vignettes? We sure do.
A simple 1/35 vignette scene
Bruc84
Visit this Community
Slovenia
Joined: January 13, 2017
KitMaker: 69 posts
Armorama: 66 posts
Posted: Monday, January 15, 2018 - 01:09 AM UTC
Hallo to evrybody...

I needed a small coobblestone scene for a 3 figure vignette, and i made this scene. Because i think that is simple to do, chip and good looking i Will share it with you...


I added a 20mm polystyrene sheet to a 15mm thick wooden base...

When we are doing rectangular scenes we must take care that nothing is perpendicular to anythink...


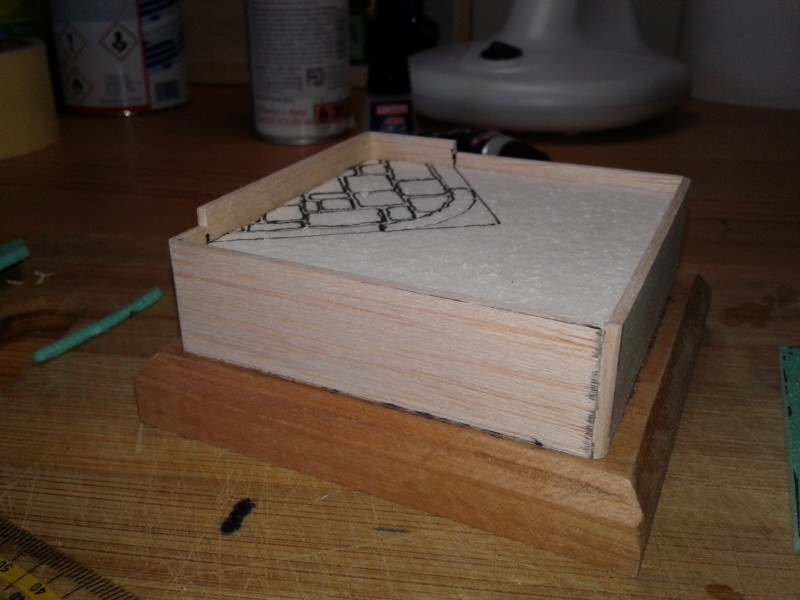
I dressed the styrofoam with 2mm balsa and left a stair when the scene Will be taller... I drawed the corner of the sidewalk so i know where to leave the balsa taller...


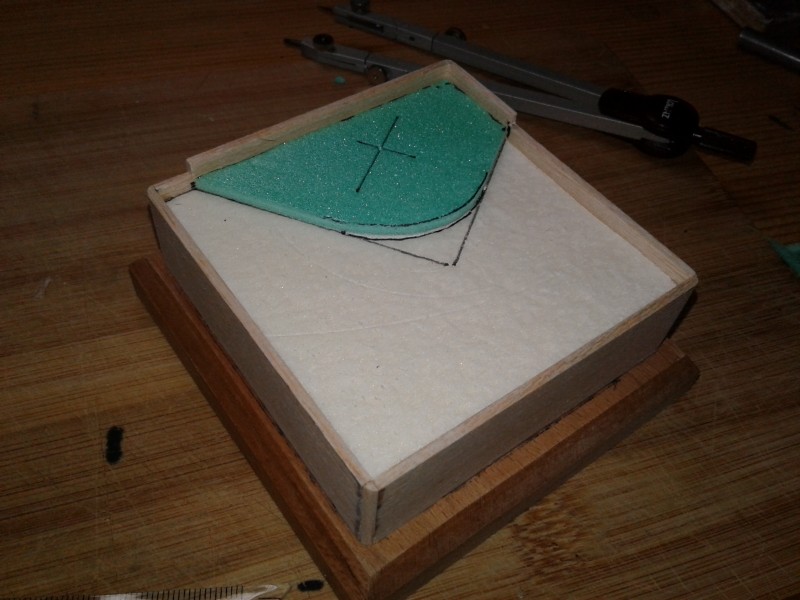
I cutted a piece of 3mm styrofoam with the shape of the sidewalk and i drawed the cobblestone... as you see the lower part of the cobble stone is done, and because the work is the same i Will show how the upper deck is done...


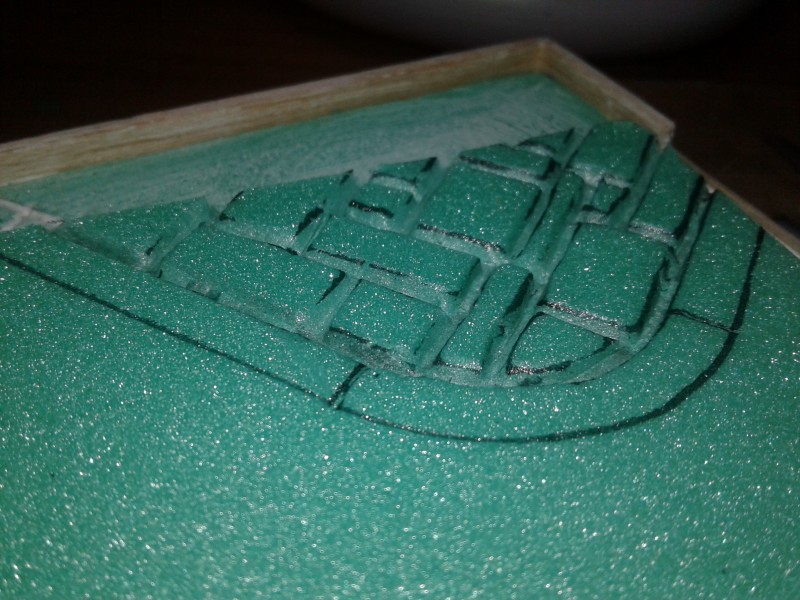
We cut the lines between the stones with a scalpel in a V shape... then we do the lines again with a non sharp pencile... for the lower cobblestone i only cuted 1 line and then done it with the back of the scalpel...


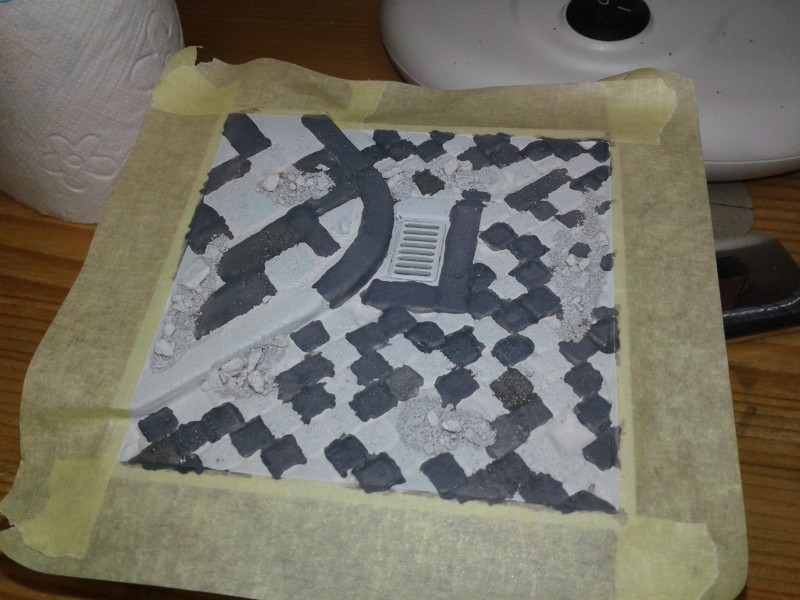
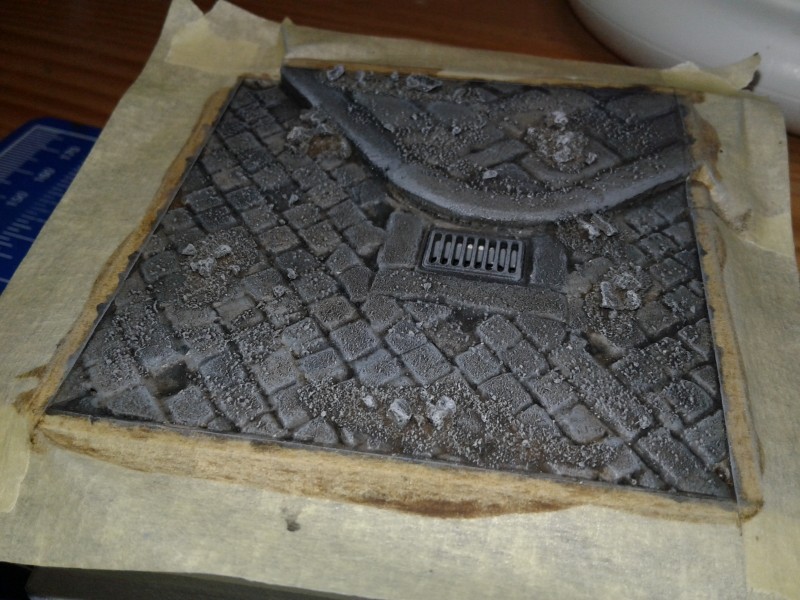
We cut the engraved styrofoam to shape an leave a 1mm space to the balsa. We put some masking tape on the balsa and we are ready to put the acrylic stucco on...


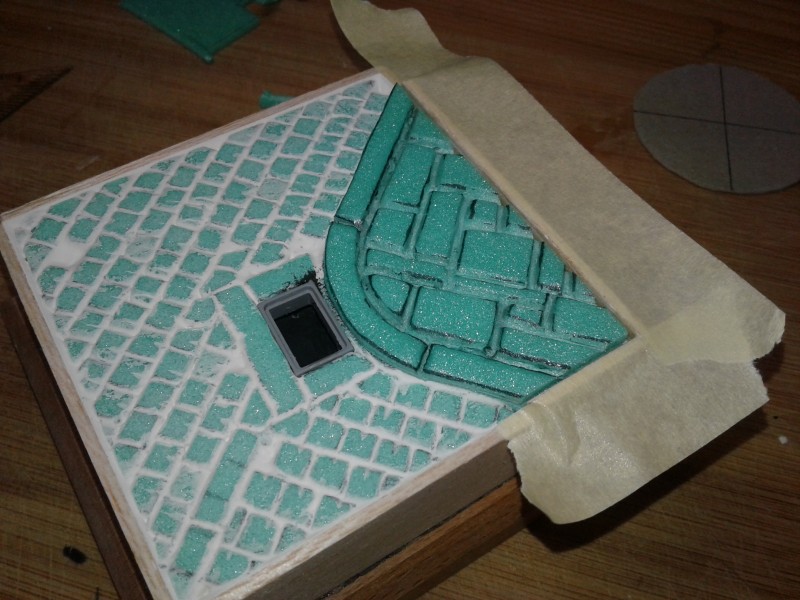
For the stucco i used a ready to use acrylic leveling filler for walls...


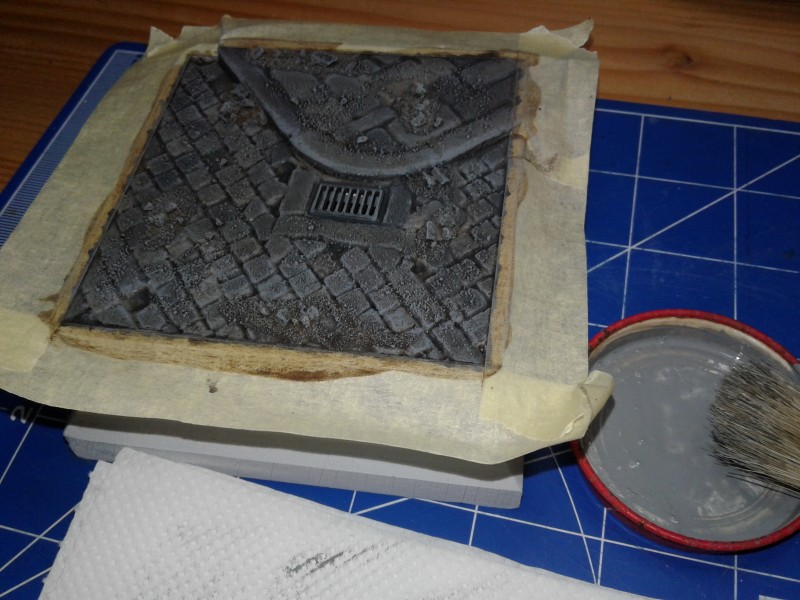
I putted on the stucco with a wooden stick, i waited for about 20min so it started to cure... than i started to take away excess wit a wide chip brush... in the end i weaped evrything with a semy wet sponge...


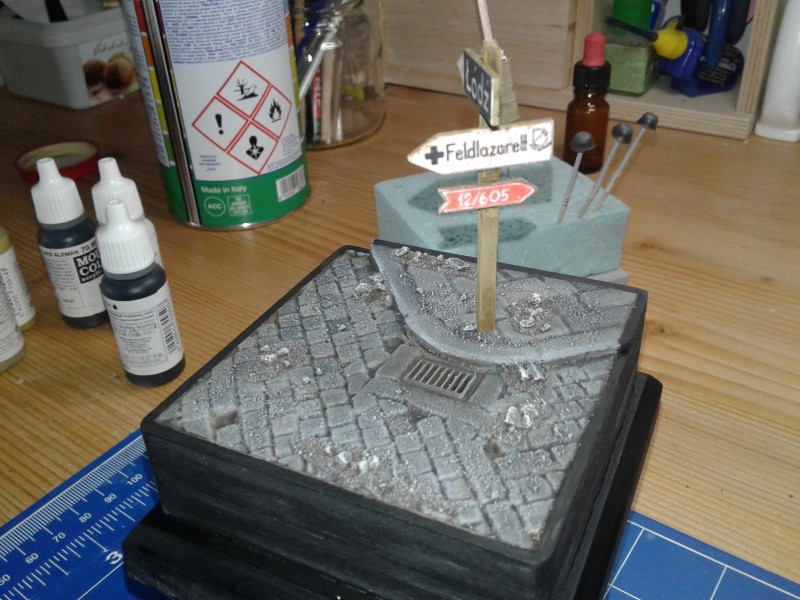
I added a rain gutter from miniart 35530

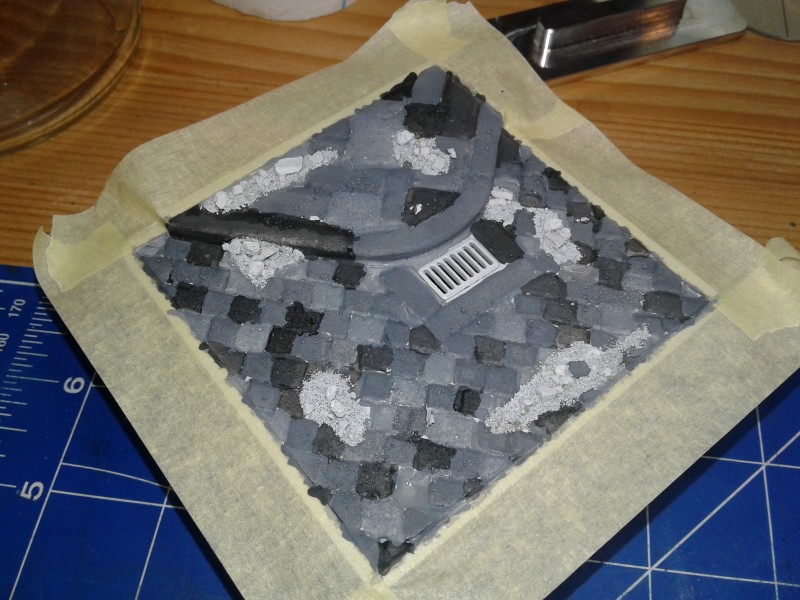
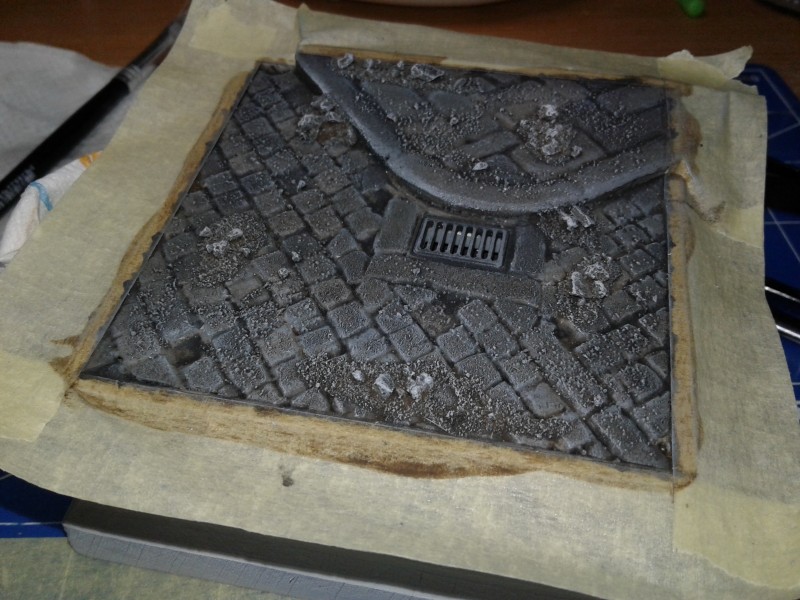
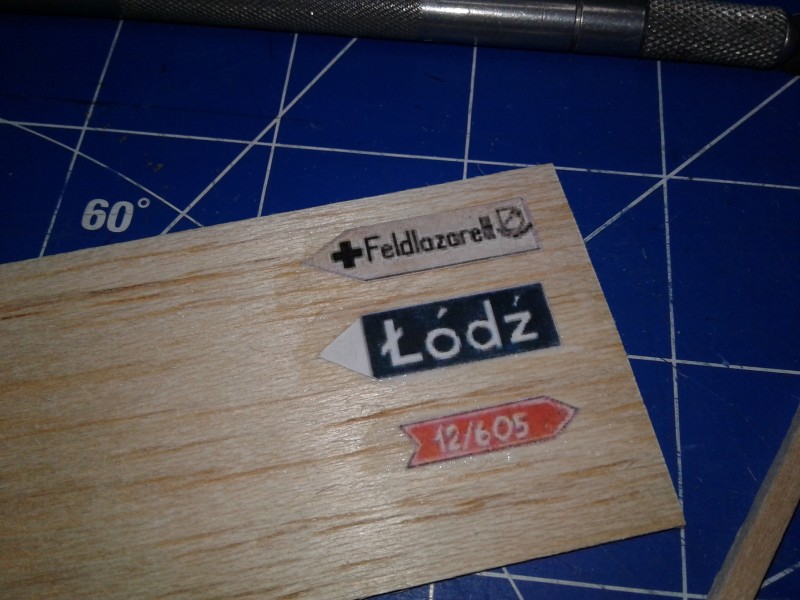
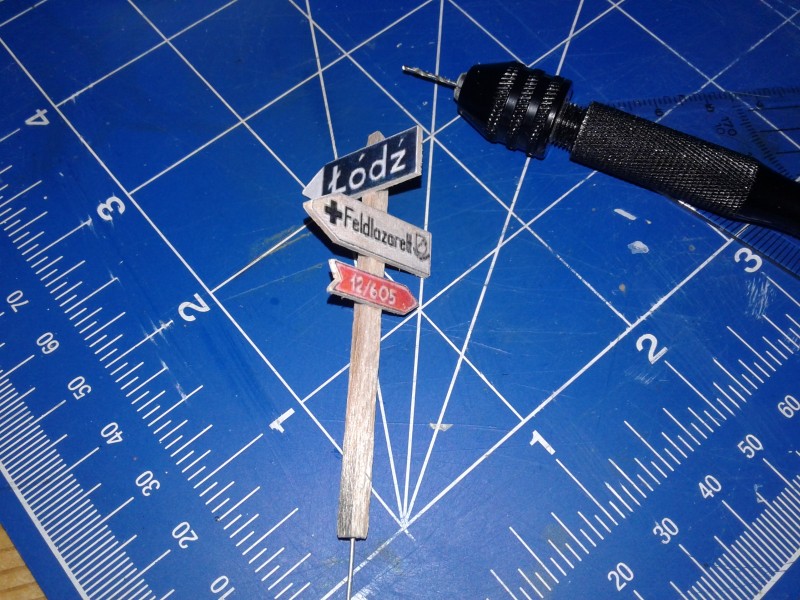
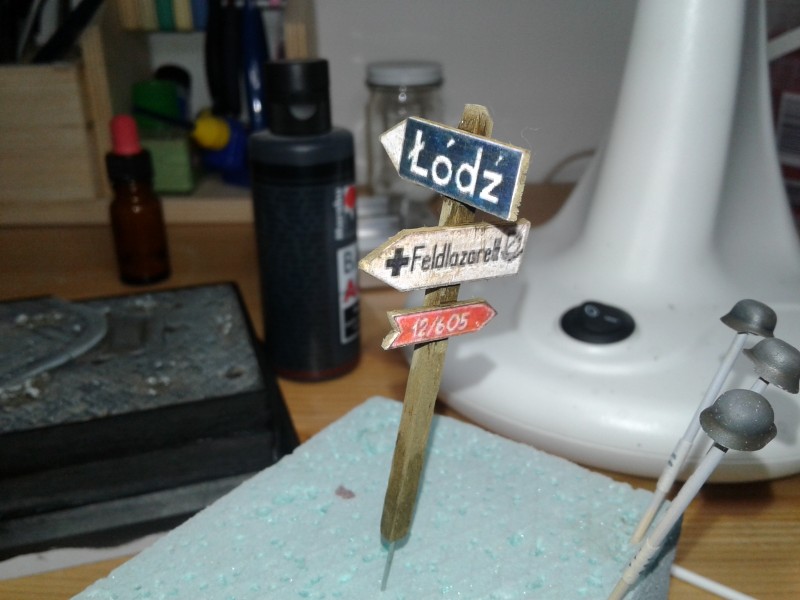
The cobblestone is ready... for the vignette i Will add a barrel with a indication tabble...


I putted some withe glue on the top of the barrel an slowely added some small rocks (cat toilet rocs)


I have putted some white glue + water (3:1) where i want the debries... i puted some debries on (sand+cat toilet rocks+brick debries)


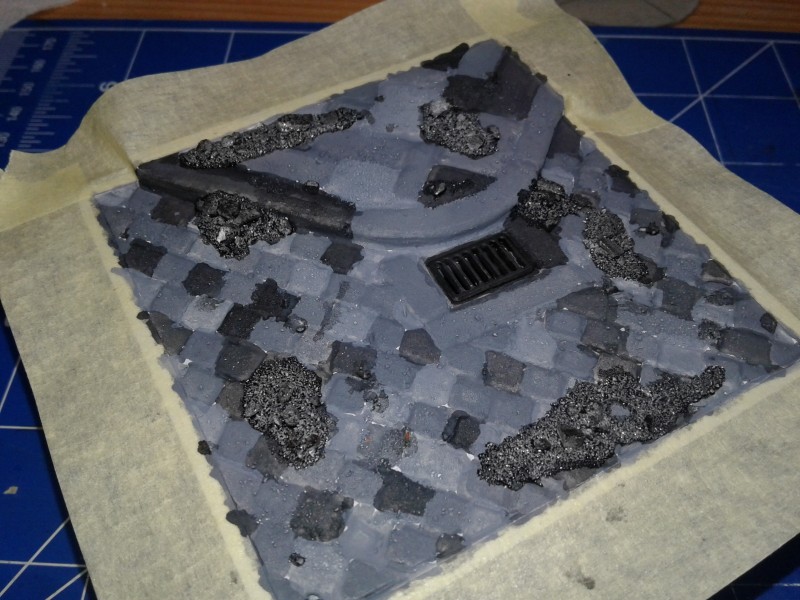
We turn the scene araund so the overleft of debries goes away... than we remove some rocks that are to big and dont fit... we slowely add proper size rocks...


than we add sam glue and wather (1:1) between the debries so that it not tuch the debries and we spray the whole scene wit minimal amount of sand and some micro rocks...
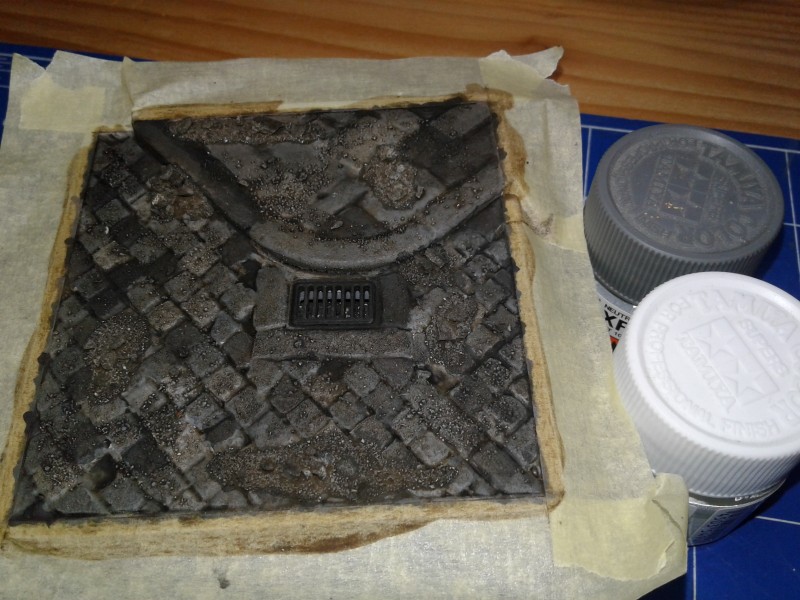


Et voila... hope you like it...

Al comments and questions wellcome

See you... Bruc
Stickframe
#362
Visit this Community
California, United States
Joined: December 01, 2013
KitMaker: 1,661 posts
Armorama: 1,202 posts
Posted: Monday, January 15, 2018 - 06:34 AM UTC
Hi Bruc -

I like it! nice, simple and effective. I too experiment with a variety of materials, and am often surprised with the results - this looks really good, and am curious to see what it looks like with some color -

Please keep posting, and thanks for sharing this with us!

Cheers,
Nick

Dioramartin
Visit this Community
New South Wales, Australia
Joined: May 04, 2016
KitMaker: 1,476 posts
Armorama: 1,463 posts
Posted: Monday, January 15, 2018 - 07:46 AM UTC
Yes! I like it too, very convincing. Please could you clarify your tip about when doing rectangular scenes, nothing should be perpendicular to anything (else?) – apologies but I don’t understand.

Bravo, looking forward to seeing more
Bruc84
Visit this Community
Slovenia
Joined: January 13, 2017
KitMaker: 69 posts
Armorama: 66 posts
Posted: Monday, January 15, 2018 - 11:56 AM UTC
Sorry...

My eanglish explanations are rusty...

This is a rule that i found in many books of dioramas... Hope that the foto explains...


Thanks for the compliments... i Will keep posting...
Dioramartin
Visit this Community
New South Wales, Australia
Joined: May 04, 2016
KitMaker: 1,476 posts
Armorama: 1,463 posts
Posted: Monday, January 15, 2018 - 02:16 PM UTC
Doh! I knew I was being slow, so sorry Bruc - yes absolutely correct, in PLAN the elements shouldn’t align with the edges. I was imagining elements veering off the vertical in ELEVATION mode and wondering if I was the only one who’d never learned that trick. Keep Calm and Carry On
Bruc84
Visit this Community
Slovenia
Joined: January 13, 2017
KitMaker: 69 posts
Armorama: 66 posts
Posted: Monday, January 29, 2018 - 01:03 AM UTC
Ok... lets put some color on... as you can see I am using old "low tech" tecnics... no syence fiction...

I started with the cobblestone... 3 different shades for some diversity...

All colors are Vallejo Model color

The shades are:

-100% German Gray
-70% Ger Gray 30% Flath withe
-70% Flat withe 30% German Gray


I avoided the ruins while painting... next time i Will put theme on when the cobblestone Will be done

I painted the gutter black, and then thinned a lot the same black and painted the ruins... (just tuch theme with a full brush and the color Will flow in place...


Then a random wash (Row umber oil and white spirit was aplied, to unify the colors... be shure to leave a lot of wash in the deppest recesses...


Nex day I aplied a more selective wash (row umber+ivoryb lack and white spirit in the recesses avoiding the upper surfaces of the cobblestone...


The "dark side" of the scene is completed... time to add some highligts with drybrushing... I chose tamiya natural gray and flath white... it was a 3 stage process...

-1.faza : Natural gray
-2.faza: nat. gray + a little white
-3.faza: a little more white

The colors were mixed in a glas jar cover... we need yust a small amount of color... so when we end one stage we just add some white with the brush, some drops of water and mix the paint again in a lighter shade... evry succesiv stage is applied in a lighter way (less preshure)... with the last stage be shure to tuch just the pics of the ruins, to make them pop out...


All coments welcome...

Bruc
Bruc84
Visit this Community
Slovenia
Joined: January 13, 2017
KitMaker: 69 posts
Armorama: 66 posts
Posted: Monday, January 29, 2018 - 01:07 AM UTC
Lets go on with the direction tabble (i dont know how to call it ) It Will add some color and interest to the scene and also some geografical inplacment...

I downloaded the roadsigns from pinterest, printed theme, and glued theme on 1mm blasa


I cuted theme and glued them on a 4x4 balsa stic...


I painted the wood with Khaki (VMC), and added some raw umber oil wash...


I glued the tabble in place and voila....


Its all for now...

Bruc
callmehobbes
Visit this Community
England - North West, United Kingdom
Joined: April 17, 2005
KitMaker: 751 posts
Armorama: 740 posts
Posted: Wednesday, January 31, 2018 - 05:47 PM UTC
Thanks for the SBS. Wasn't sure about your pre-shading technique at first but the end result looks great. Are you going to do any more of these for different environments as well?
Bruc84
Visit this Community
Slovenia
Joined: January 13, 2017
KitMaker: 69 posts
Armorama: 66 posts
Posted: Wednesday, January 31, 2018 - 10:38 PM UTC
I wasnt thinking of that, but now...

Those 3 figures were made for training painting...

It is a good idea to make a same size-different envairoment display for the next training session... And I can train to do different scenarios...

I will post the whole vignette soon...

Regards
RobinNilsson
Staff MemberTOS Moderator
KITMAKER NETWORK
Visit this Community
Stockholm, Sweden
Joined: November 29, 2006
KitMaker: 6,693 posts
Armorama: 5,562 posts
Posted: Monday, February 05, 2018 - 04:27 PM UTC

Quoted Text

Doh! I knew I was being slow, so sorry Bruc - yes absolutely correct, in PLAN the elements shouldn’t align with the edges. I was imagining elements veering off the vertical in ELEVATION mode and wondering if I was the only one who’d never learned that trick. Keep Calm and Carry On


Veering off from the horizontal:
Well, it does happen, at least in some parts of the world, that roads and sidewalks/pavements are not horizontal
If one looks closely most roads/streets are actually a few inches higher in the middle. This allows rain to drain off to the sides of the road. Pavements/Sidewalks also usually have a very slight slope away from the building. It's not much but it is there if one takes a careful look.

Most buildings, road signs and similar tend to be kept vertical.
Unless they are damaged somehow ...
/ Robin

j76lr
Visit this Community
New Jersey, United States
Joined: September 22, 2006
KitMaker: 1,081 posts
Armorama: 1,066 posts
Posted: Tuesday, May 15, 2018 - 09:39 PM UTC
Nice ! very simple and interesting !
 _GOTOTOP