The Great War, A Last Hurrah
United Kingdom
Joined: September 17, 2012
KitMaker: 462 posts
Armorama: 417 posts
Posted: Wednesday, February 06, 2019 - 06:21 AM UTC
start up picture...
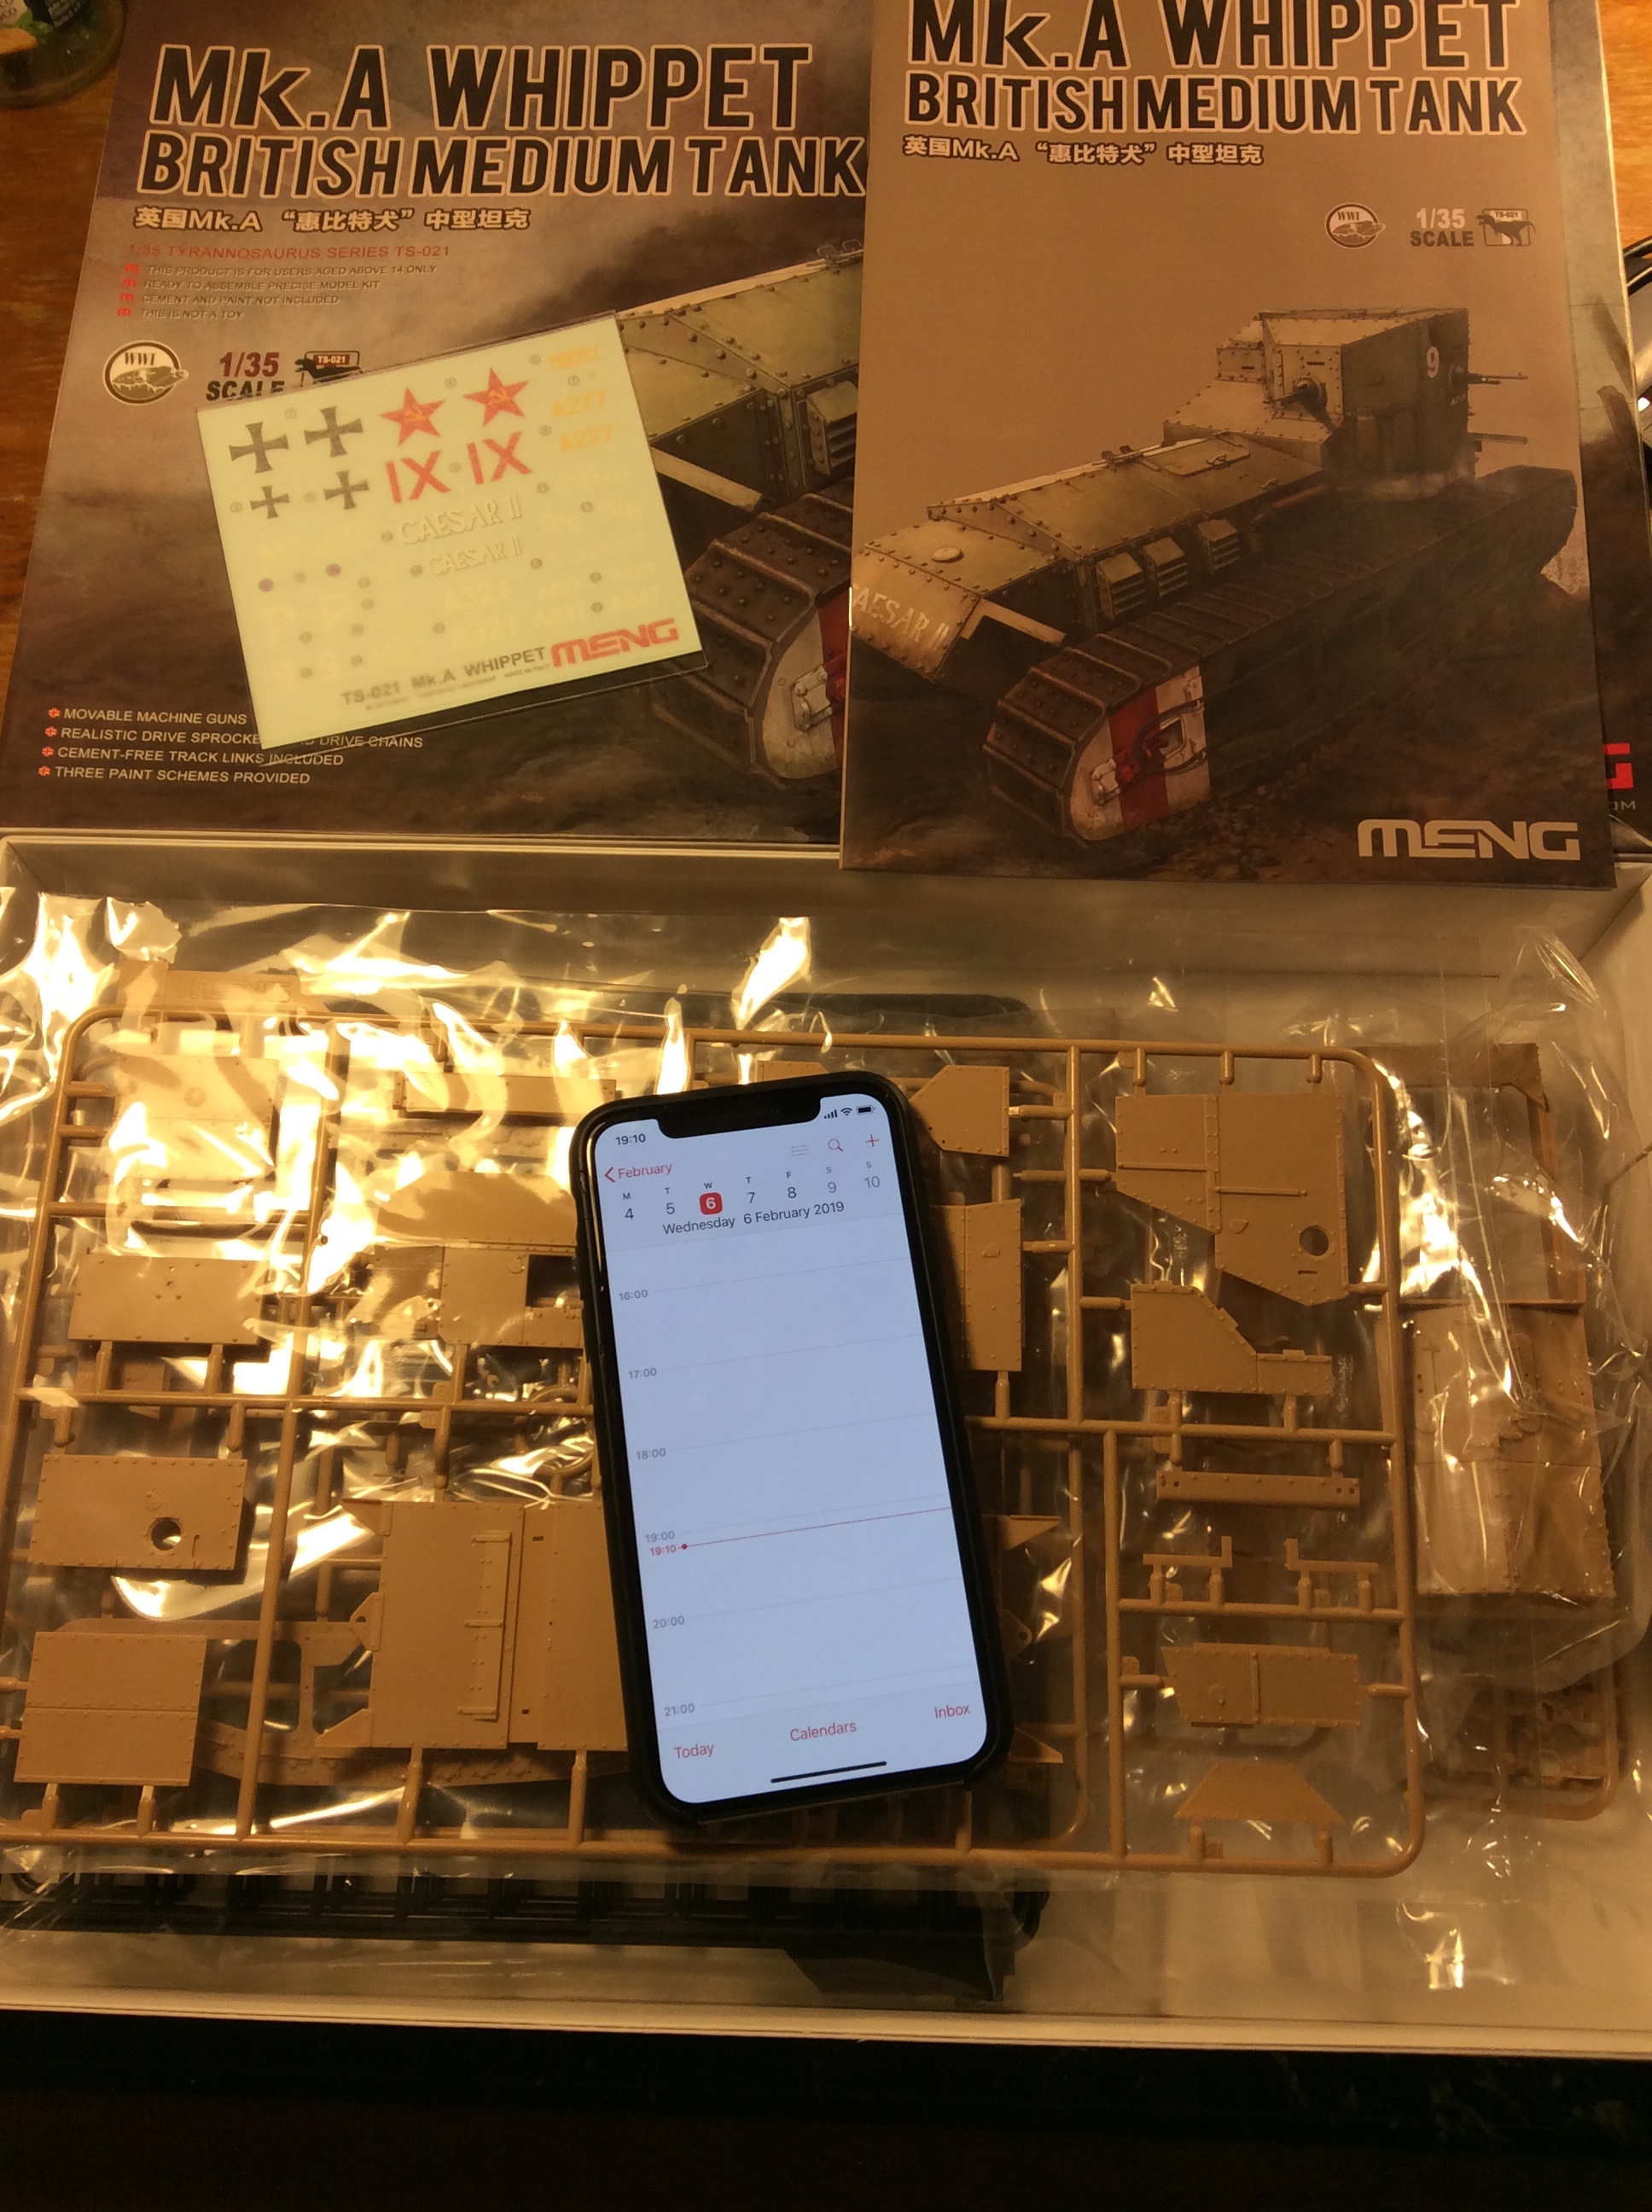
cheers
Matthew
United States
Joined: June 02, 2013
KitMaker: 202 posts
Armorama: 199 posts
Posted: Wednesday, February 06, 2019 - 08:53 AM UTC

#460
California, United States
Joined: September 16, 2014
KitMaker: 1,156 posts
Armorama: 1,024 posts
Posted: Thursday, February 07, 2019 - 12:09 PM UTC
Matthew - Glad to see a Whippet under construction. They are so odd looking they are cool.
Vintage Paul
I'd happily live in the past but for air conditioning, the internet, mobile phones, modern medicine & dentistry and, and, and . . .
#460
California, United States
Joined: September 16, 2014
KitMaker: 1,156 posts
Armorama: 1,024 posts
Posted: Thursday, February 07, 2019 - 12:14 PM UTC
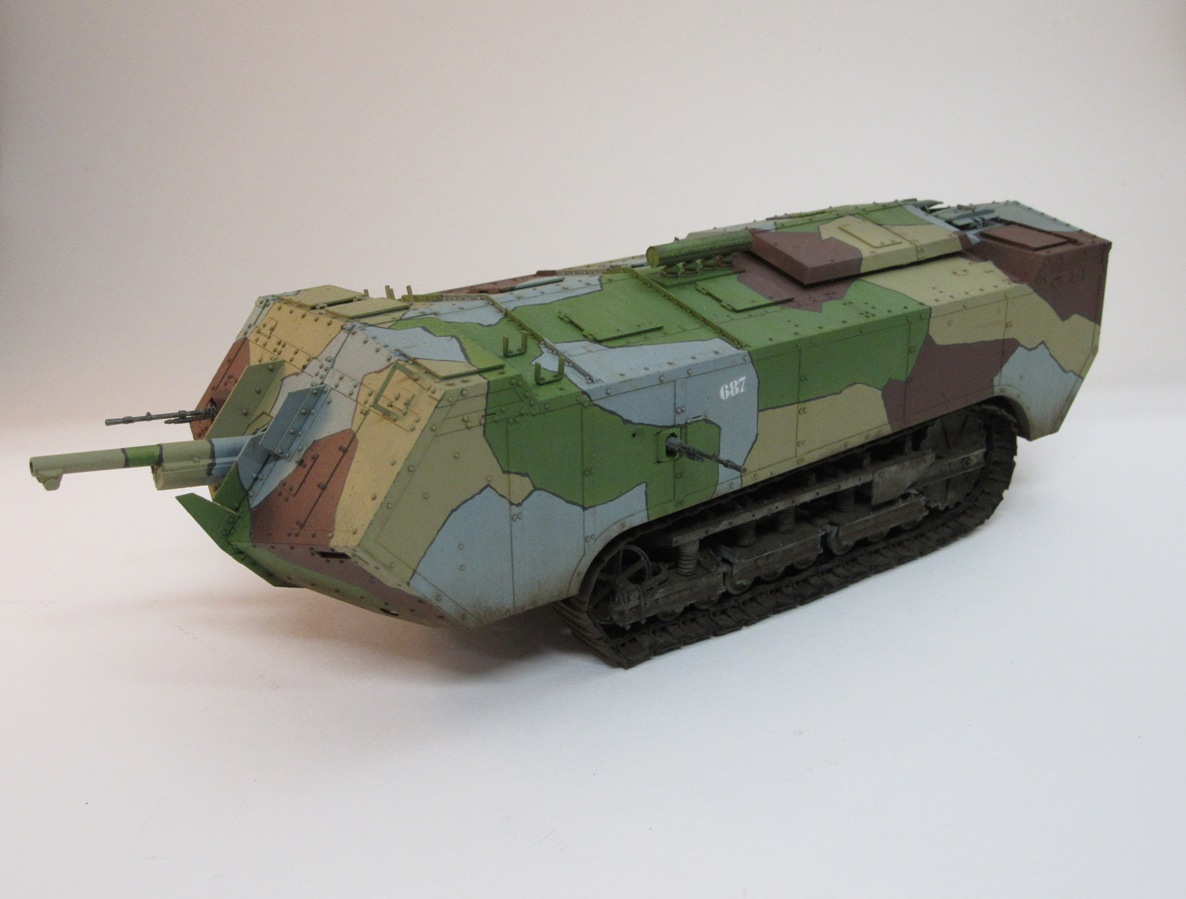
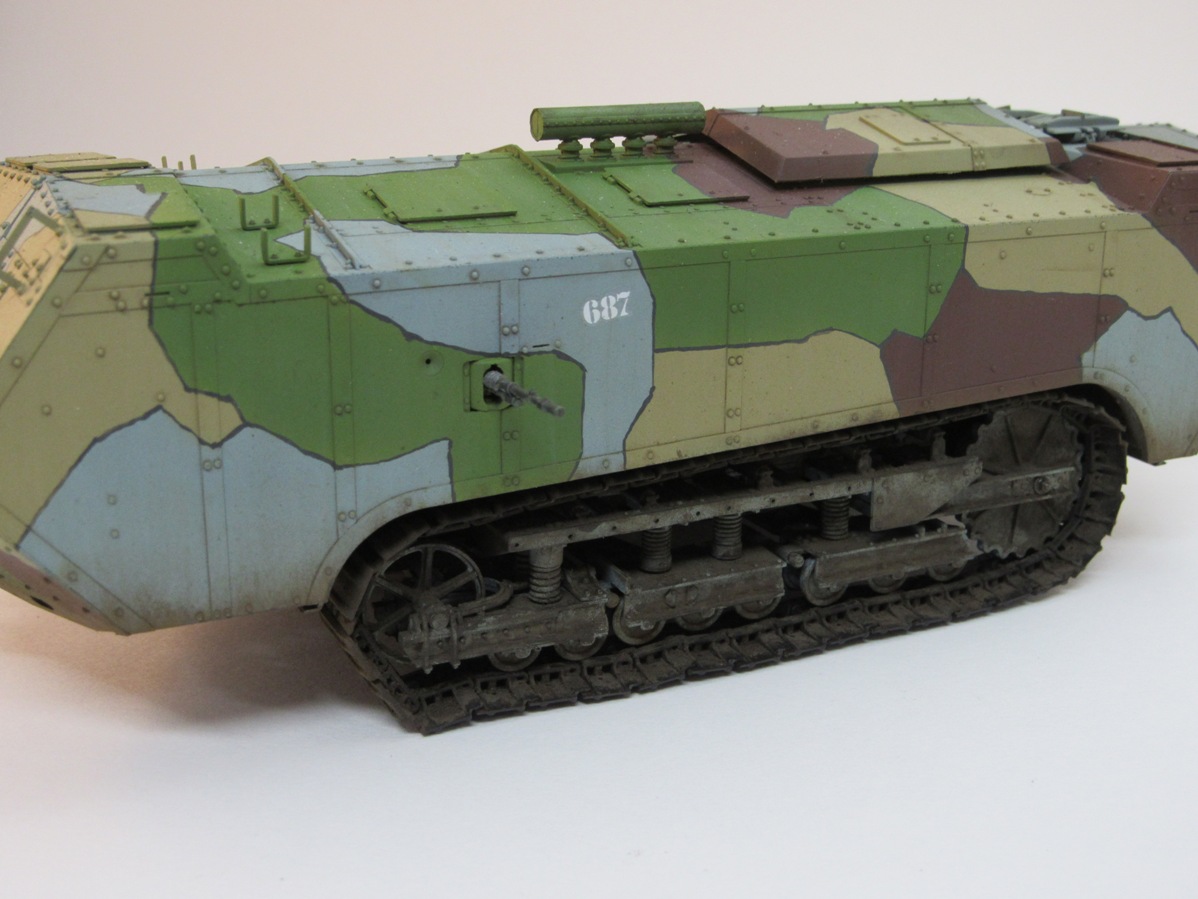
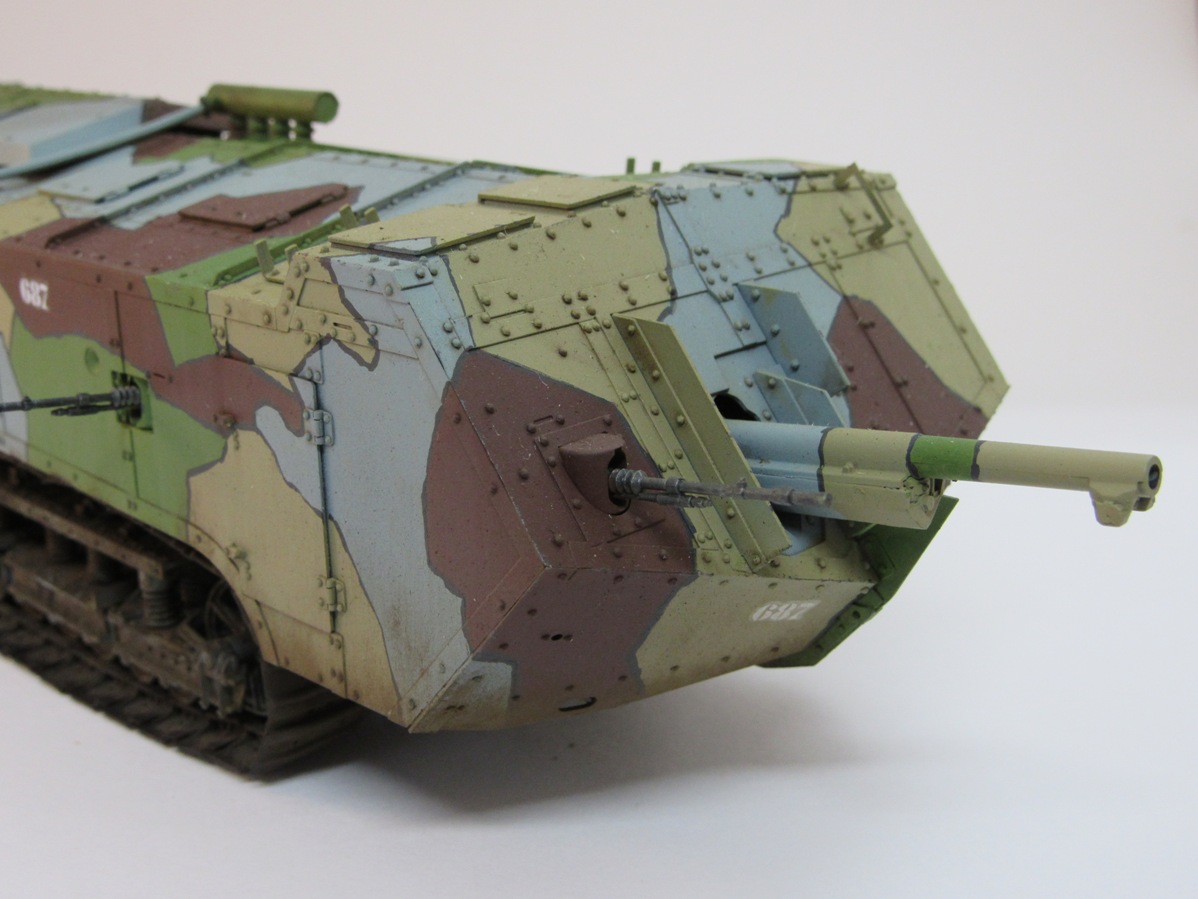
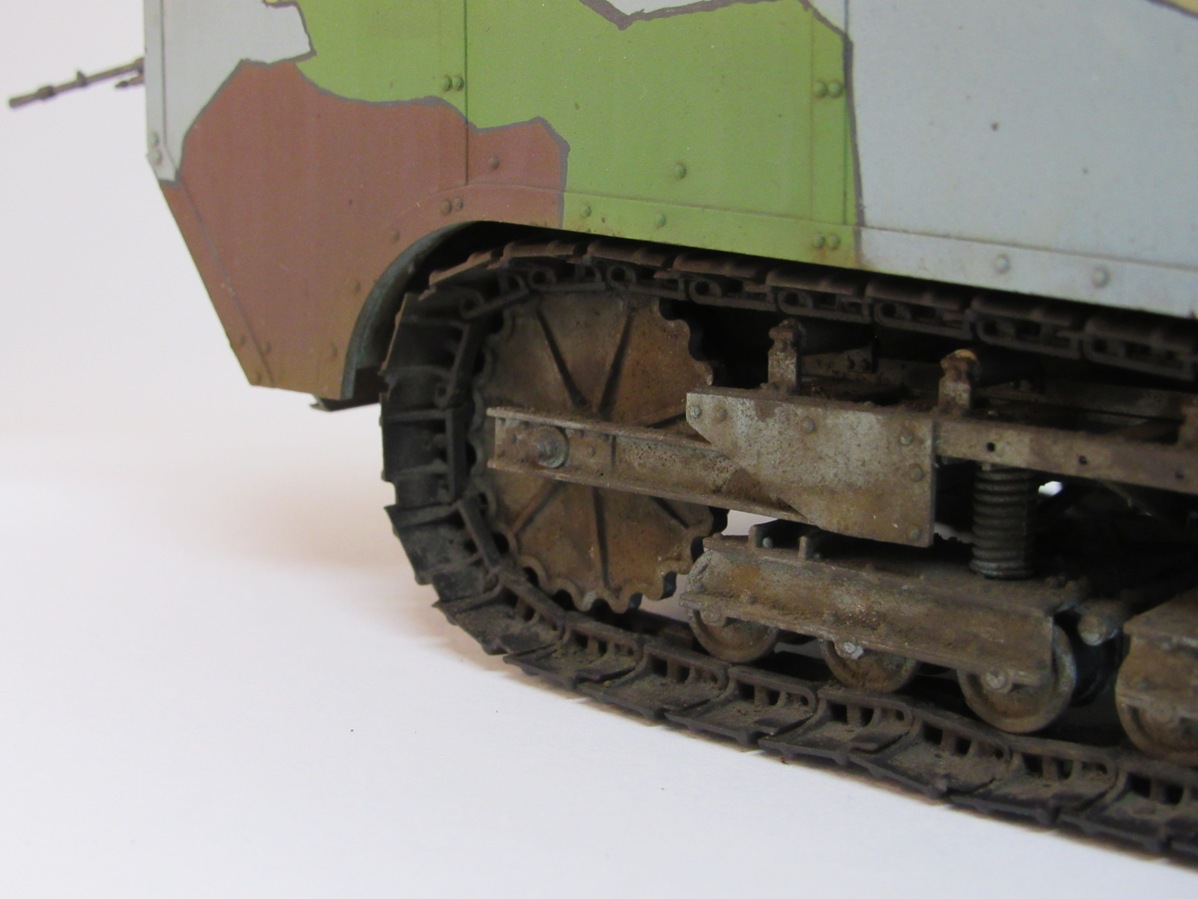
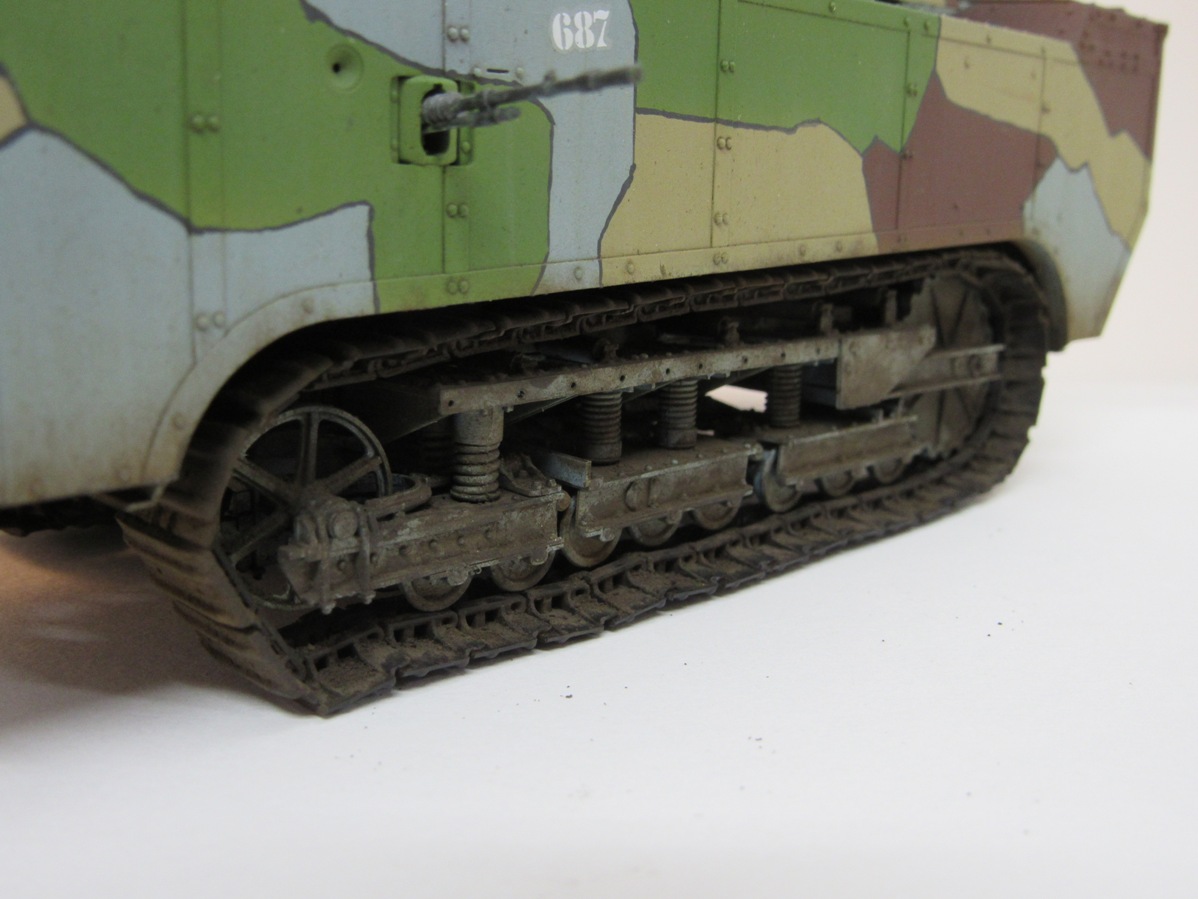
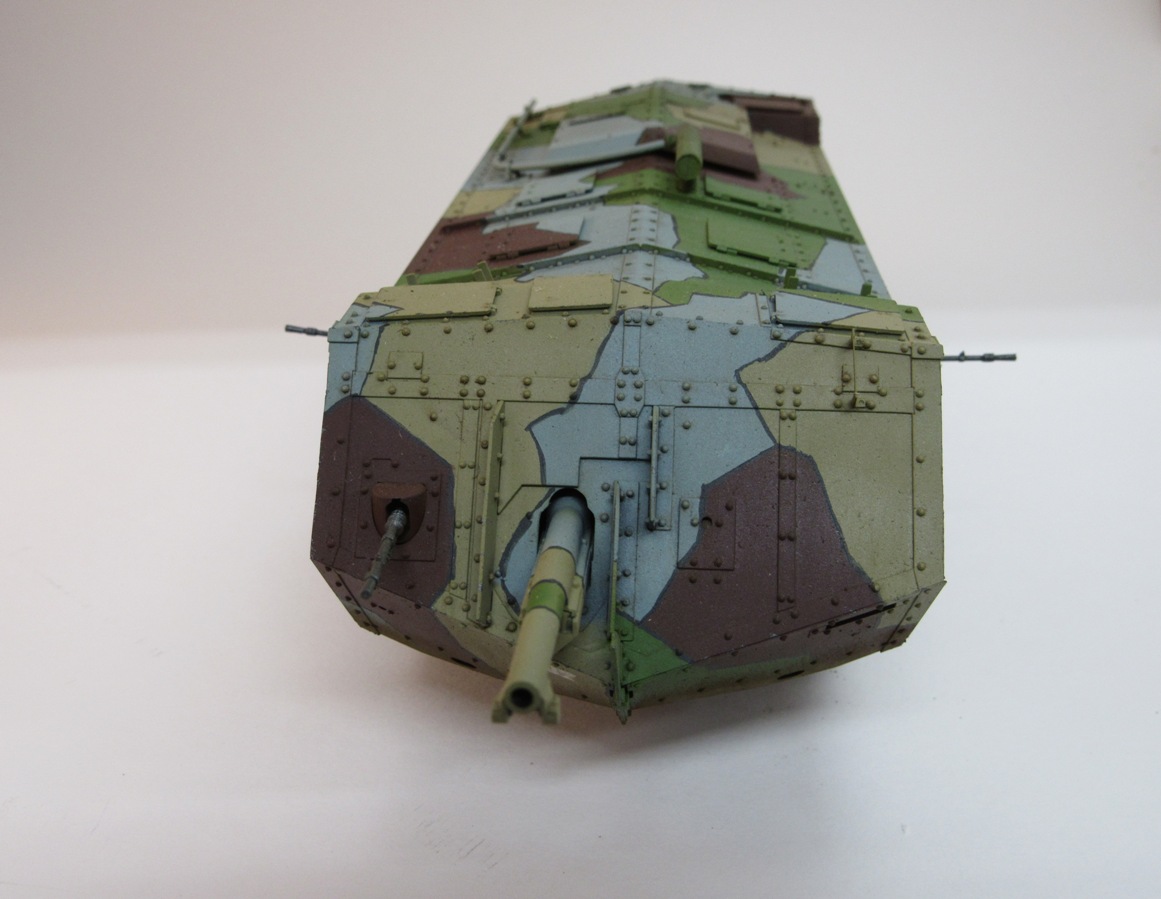
James - What a great job on one of the lesser know tanks of the Great War. Your build is convincing, the undercarriage looks properly used and the bright colors with the separation line will draw many an eye.
Great job on your first campaign! Don't forget to post a few pics of your project on the gallery.
Vintage Paul
I'd happily live in the past but for air conditioning, the internet, mobile phones, modern medicine & dentistry and, and, and . . .
Alvsborgs, Sweden
Joined: September 03, 2018
KitMaker: 31 posts
Armorama: 29 posts
Posted: Thursday, February 07, 2019 - 12:28 PM UTC
Is it too late to join in??

United States
Joined: June 02, 2013
KitMaker: 202 posts
Armorama: 199 posts
Posted: Friday, February 08, 2019 - 04:09 PM UTC
Quoted Text
James - What a great job on one of the lesser know tanks of the Great War. Your build is convincing, the undercarriage looks properly used and the bright colors with the separation line will draw many an eye.
Great job on your first campaign! Don't forget to post a few pics of your project on the gallery.
Thank you. Those bright colors will also look good on the shelf (it's a sea of green right now). Uploaded a few pictures to the gallery, gotta start collecting ribbons now.
United Kingdom
Joined: September 17, 2012
KitMaker: 462 posts
Armorama: 417 posts
Posted: Monday, February 11, 2019 - 12:56 AM UTC
@James. Love your Chamond - looks very nice indeed.
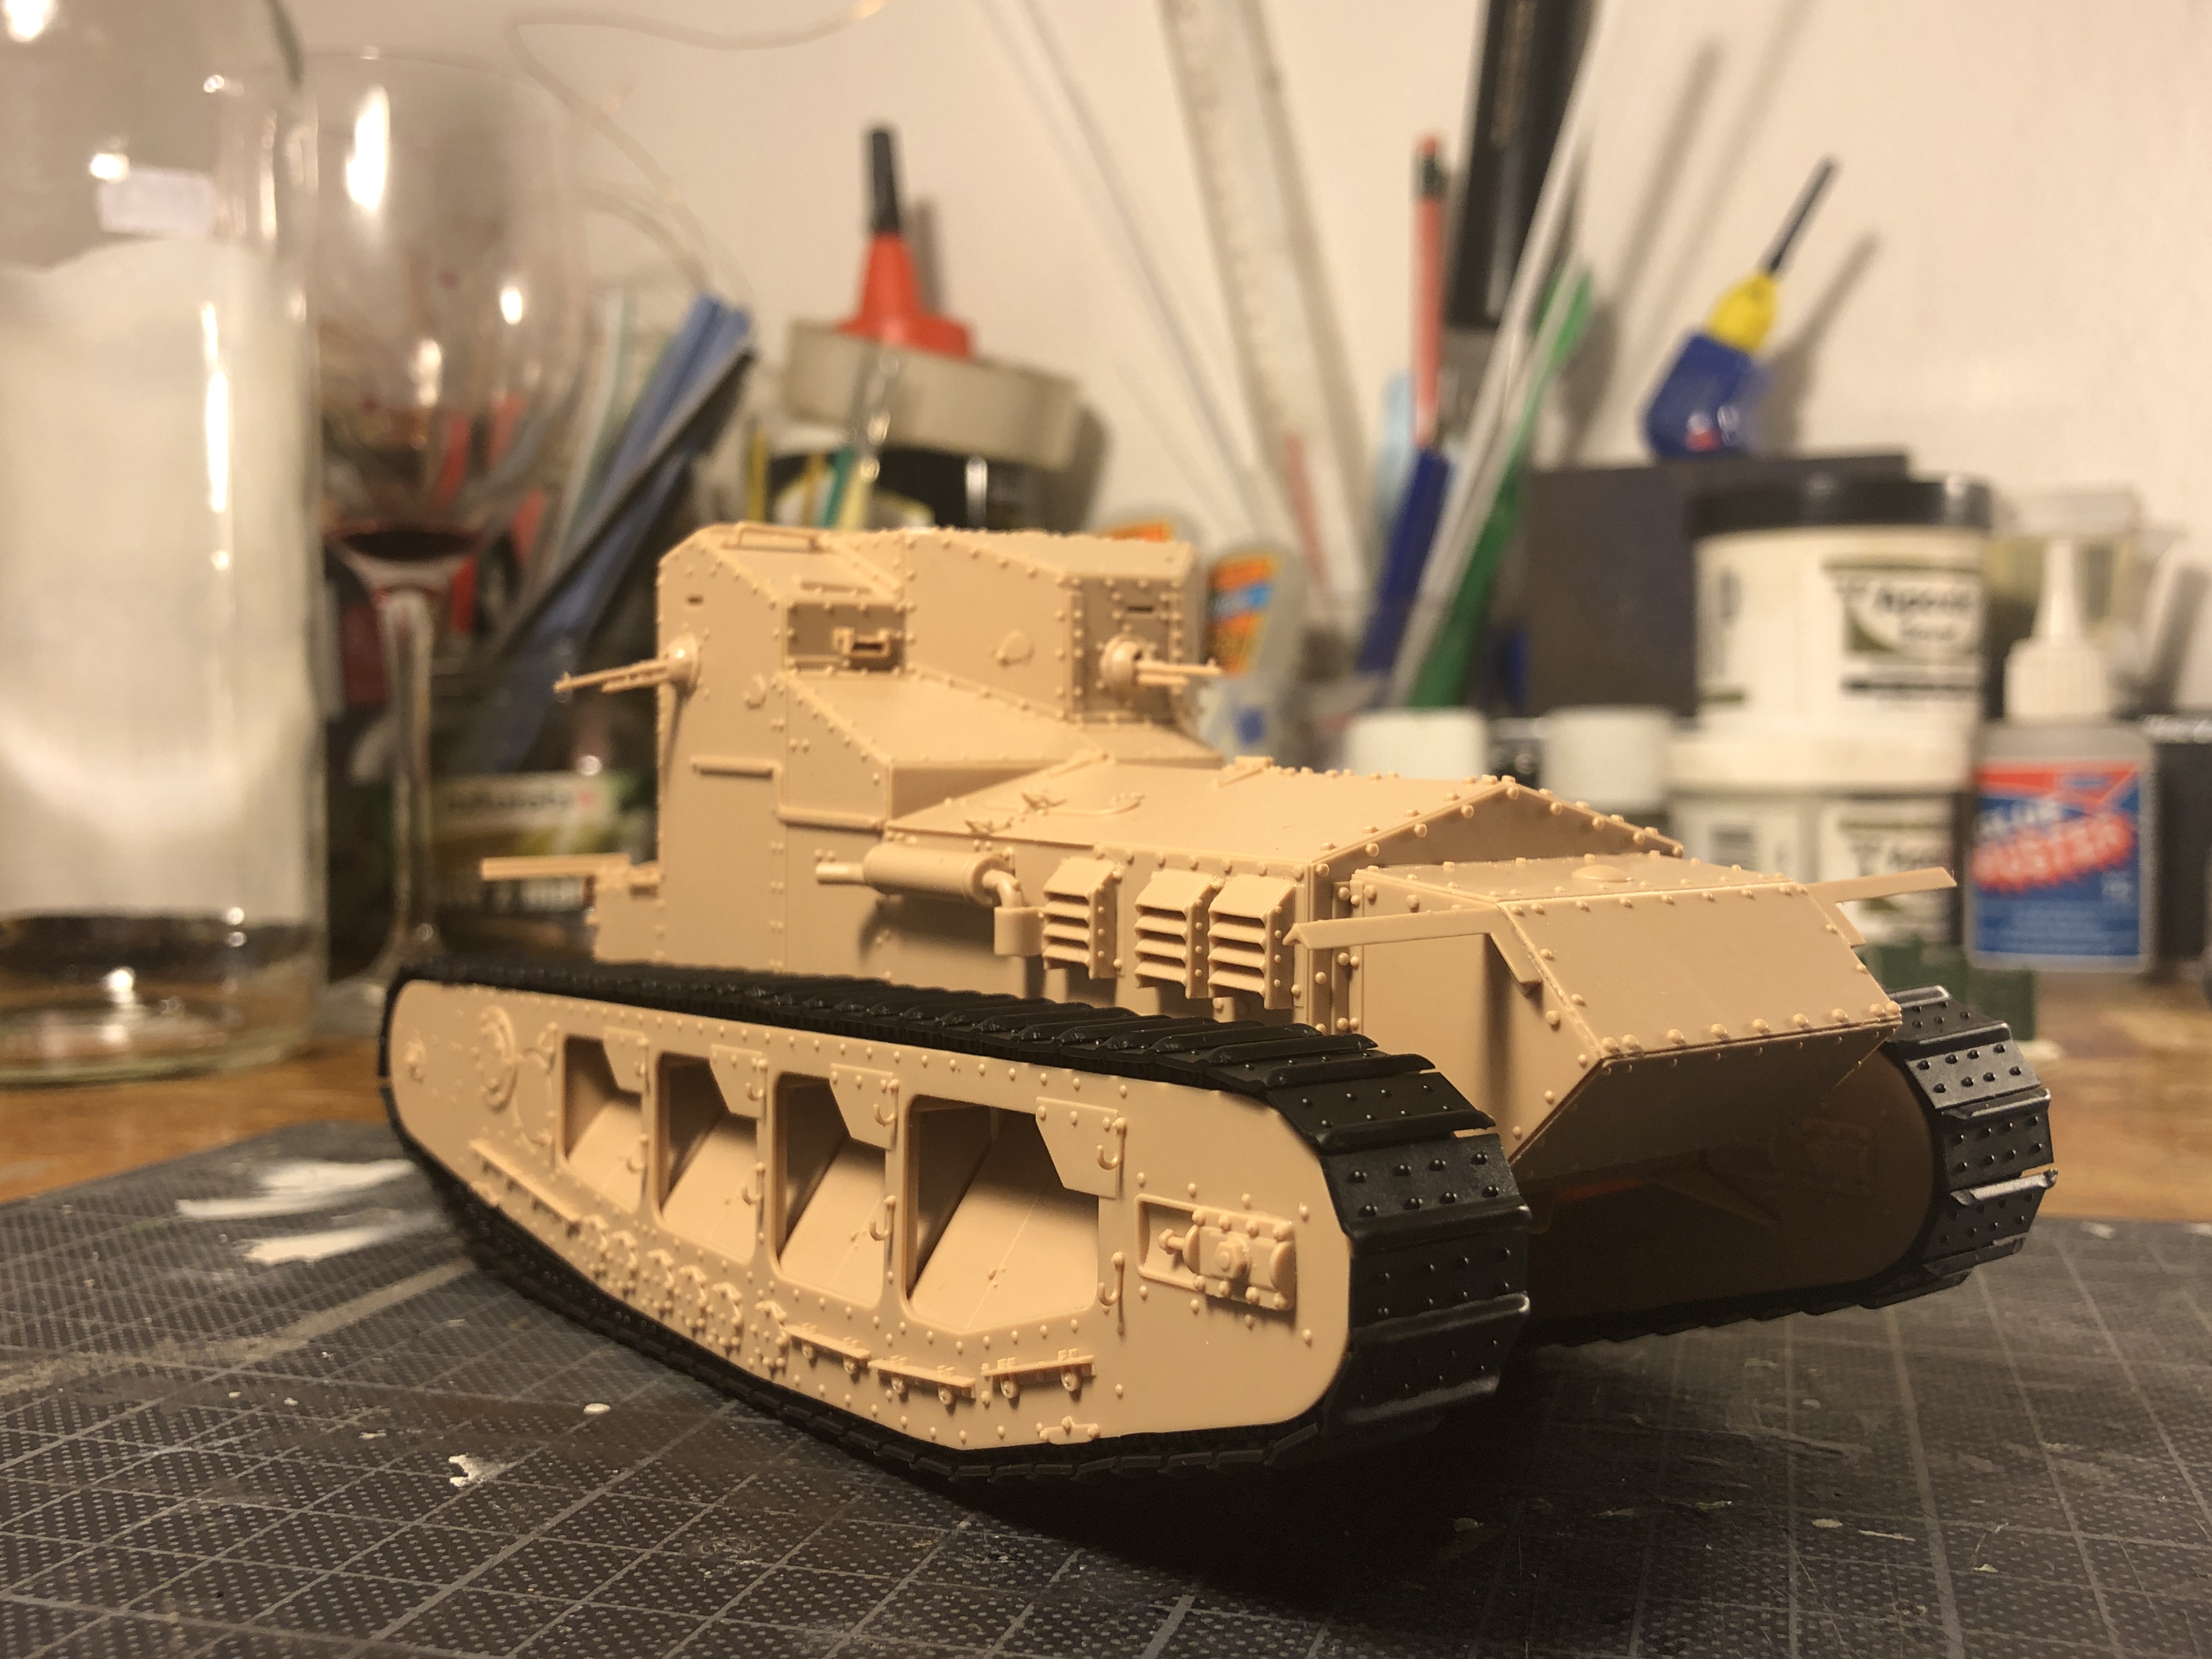
I have quite a bit of progress to report on the Meng Whippet.
I didnt follow the construction steps, but cracked on with the running gear first. Steps 7 -13 are finished. Then I started on the hull. Steps 1-5 also finished, but for a few small detail parts. The kit is superbly engineered, and the fit is excellent, but I advise removing all the parts for the turret structure and assembling them in quick succession to ensure the right angles, etc.
Here are a few pictures:
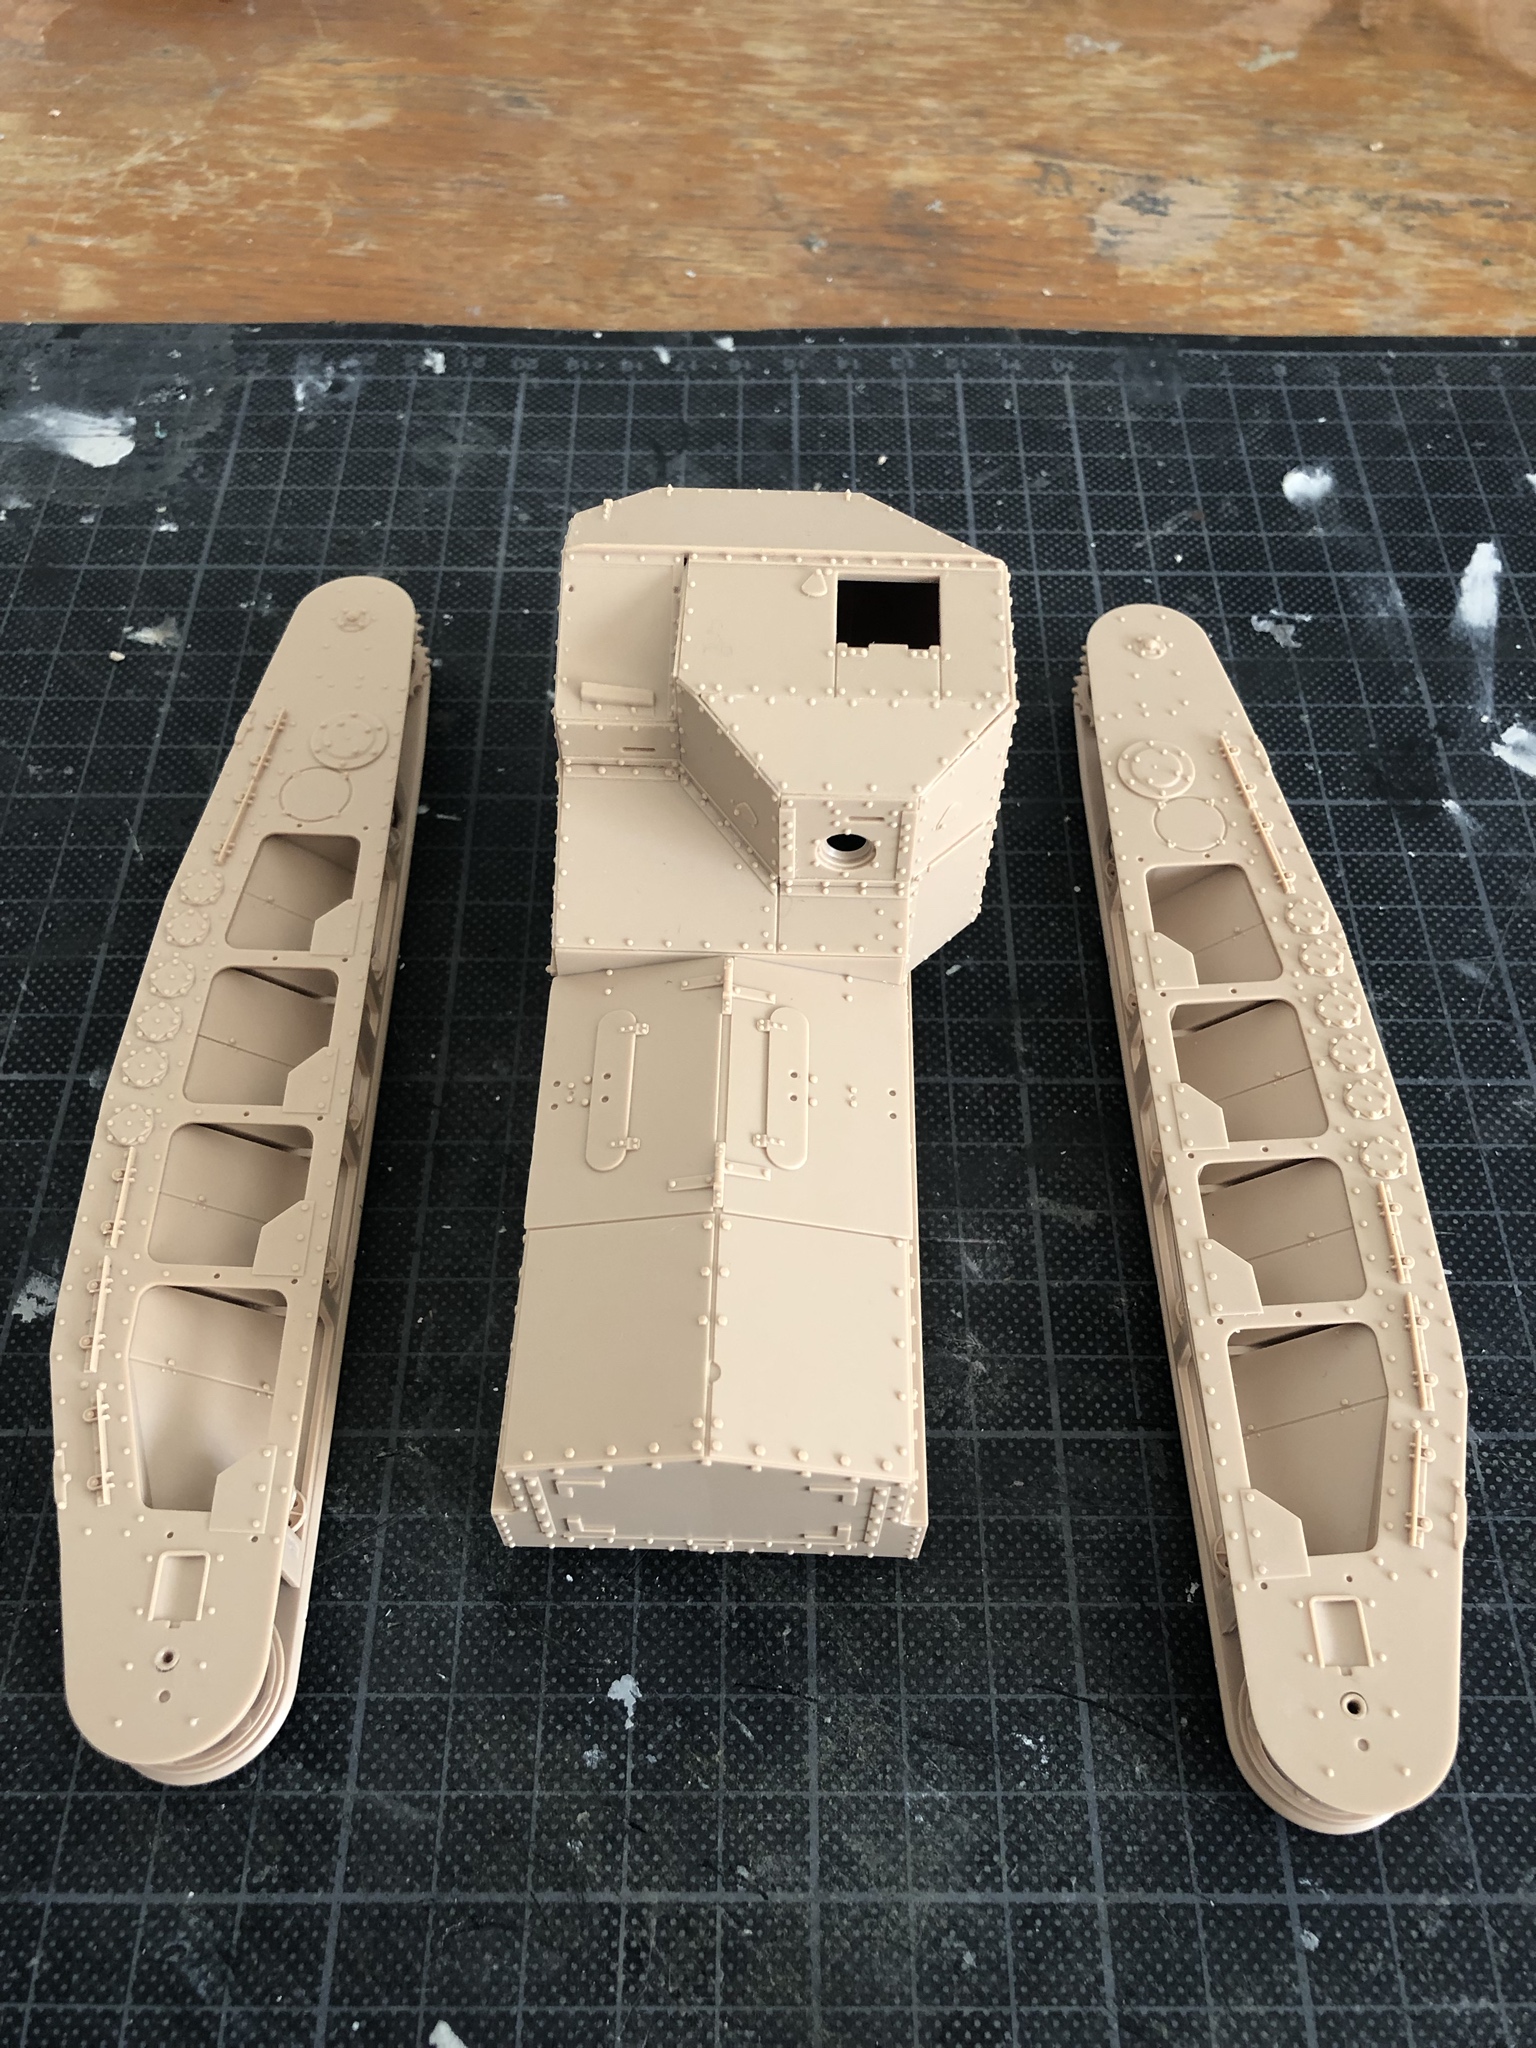
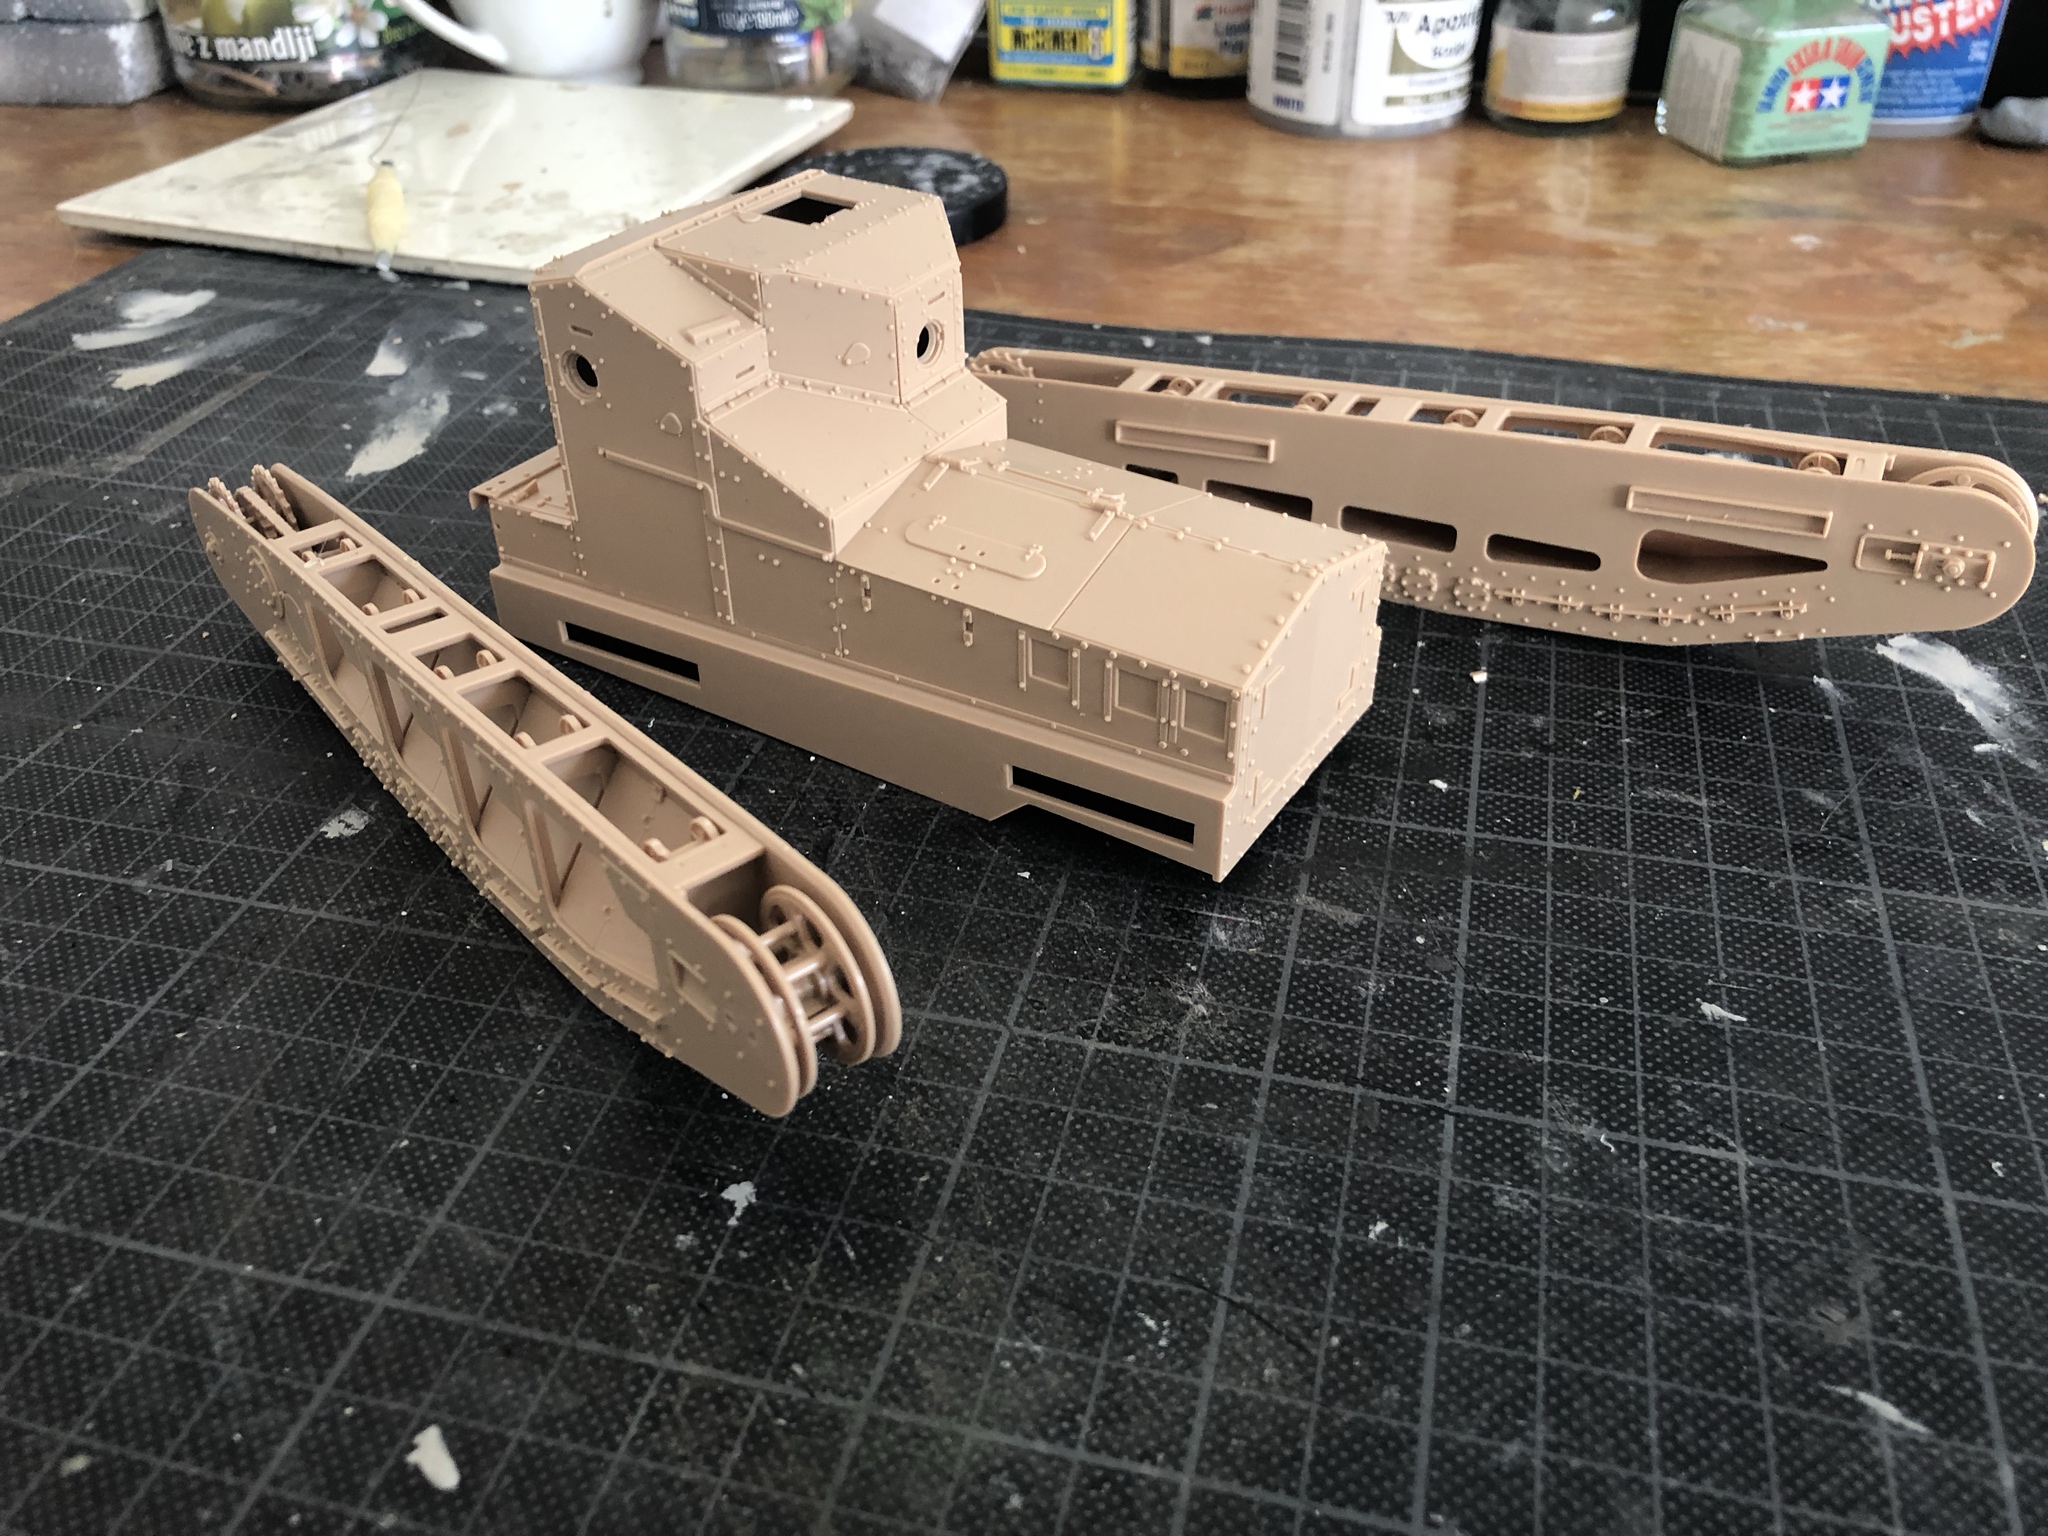
I will press on with the details, tracks, etc. this evening.
Cheers
Matthew
#460
California, United States
Joined: September 16, 2014
KitMaker: 1,156 posts
Armorama: 1,024 posts
Posted: Monday, February 11, 2019 - 11:32 AM UTC
Quoted Text
Is it too late to join in??
No, please feel free to join in. I have yet to start my own project, a Mk. IV tank.
Vintage Paul
I'd happily live in the past but for air conditioning, the internet, mobile phones, modern medicine & dentistry and, and, and . . .
#460
California, United States
Joined: September 16, 2014
KitMaker: 1,156 posts
Armorama: 1,024 posts
Posted: Monday, February 11, 2019 - 12:07 PM UTC
Matthew - Your Whippet is coming along quickly. Have you decided on paint & markings yet?
Vintage Paul
I'd happily live in the past but for air conditioning, the internet, mobile phones, modern medicine & dentistry and, and, and . . .
Alvsborgs, Sweden
Joined: September 03, 2018
KitMaker: 31 posts
Armorama: 29 posts
Posted: Monday, February 11, 2019 - 12:39 PM UTC
Quoted Text
Quoted Text
Is it too late to join in??
No, please feel free to join in. I have yet to start my own project, a Mk. IV tank.
Awesome! Just started on the Takom Mark 1 female today, will post picutres soon.
United Kingdom
Joined: September 17, 2012
KitMaker: 462 posts
Armorama: 417 posts
Posted: Tuesday, February 12, 2019 - 07:22 AM UTC
Thanks Paul. There aren't too many parts in the box and they fall together very easily, hence the quick build. Still not sure what markings it will have. Maybe "Firefly" or "Caesar II". Will post more progress pics soon.
Cheers
Matthew
Alvsborgs, Sweden
Joined: September 03, 2018
KitMaker: 31 posts
Armorama: 29 posts
Posted: Tuesday, February 12, 2019 - 09:23 AM UTC
Just started on the Takom Mark 1 yesterday. Its coming together quite well, the only tedious part is assembling all the road wheels.

I decided to drill out the head lights and I think I might add a drop of
Super glue to make it look like a lence.

Gonna continue the boring work of assembling the rest of the small wheels while waiting for the MR Modellbau resin correction set to arrive.
#460
California, United States
Joined: September 16, 2014
KitMaker: 1,156 posts
Armorama: 1,024 posts
Posted: Tuesday, February 12, 2019 - 09:36 AM UTC
We have a product called Elmer's School Glue that is basically a white glue that is perfectly clear. I use it as an adhesive and to make glass lenses and instrument faces. It does shrink a lot and repeated applications are needed to fill any gap.
Vintage Paul
I'd happily live in the past but for air conditioning, the internet, mobile phones, modern medicine & dentistry and, and, and . . .
Alvsborgs, Sweden
Joined: September 03, 2018
KitMaker: 31 posts
Armorama: 29 posts
Posted: Tuesday, February 12, 2019 - 09:45 AM UTC
Quoted Text
We have a product called Elmer's School Glue that is basically a white glue that is perfectly clear. I use it as an adhesive and to make glass lenses and instrument faces. It does shrink a lot and repeated applications are needed to fill any gap.
Ah. Gonna see if we have something similar in Sweden.
United Kingdom
Joined: September 17, 2012
KitMaker: 462 posts
Armorama: 417 posts
Posted: Tuesday, February 19, 2019 - 01:56 AM UTC
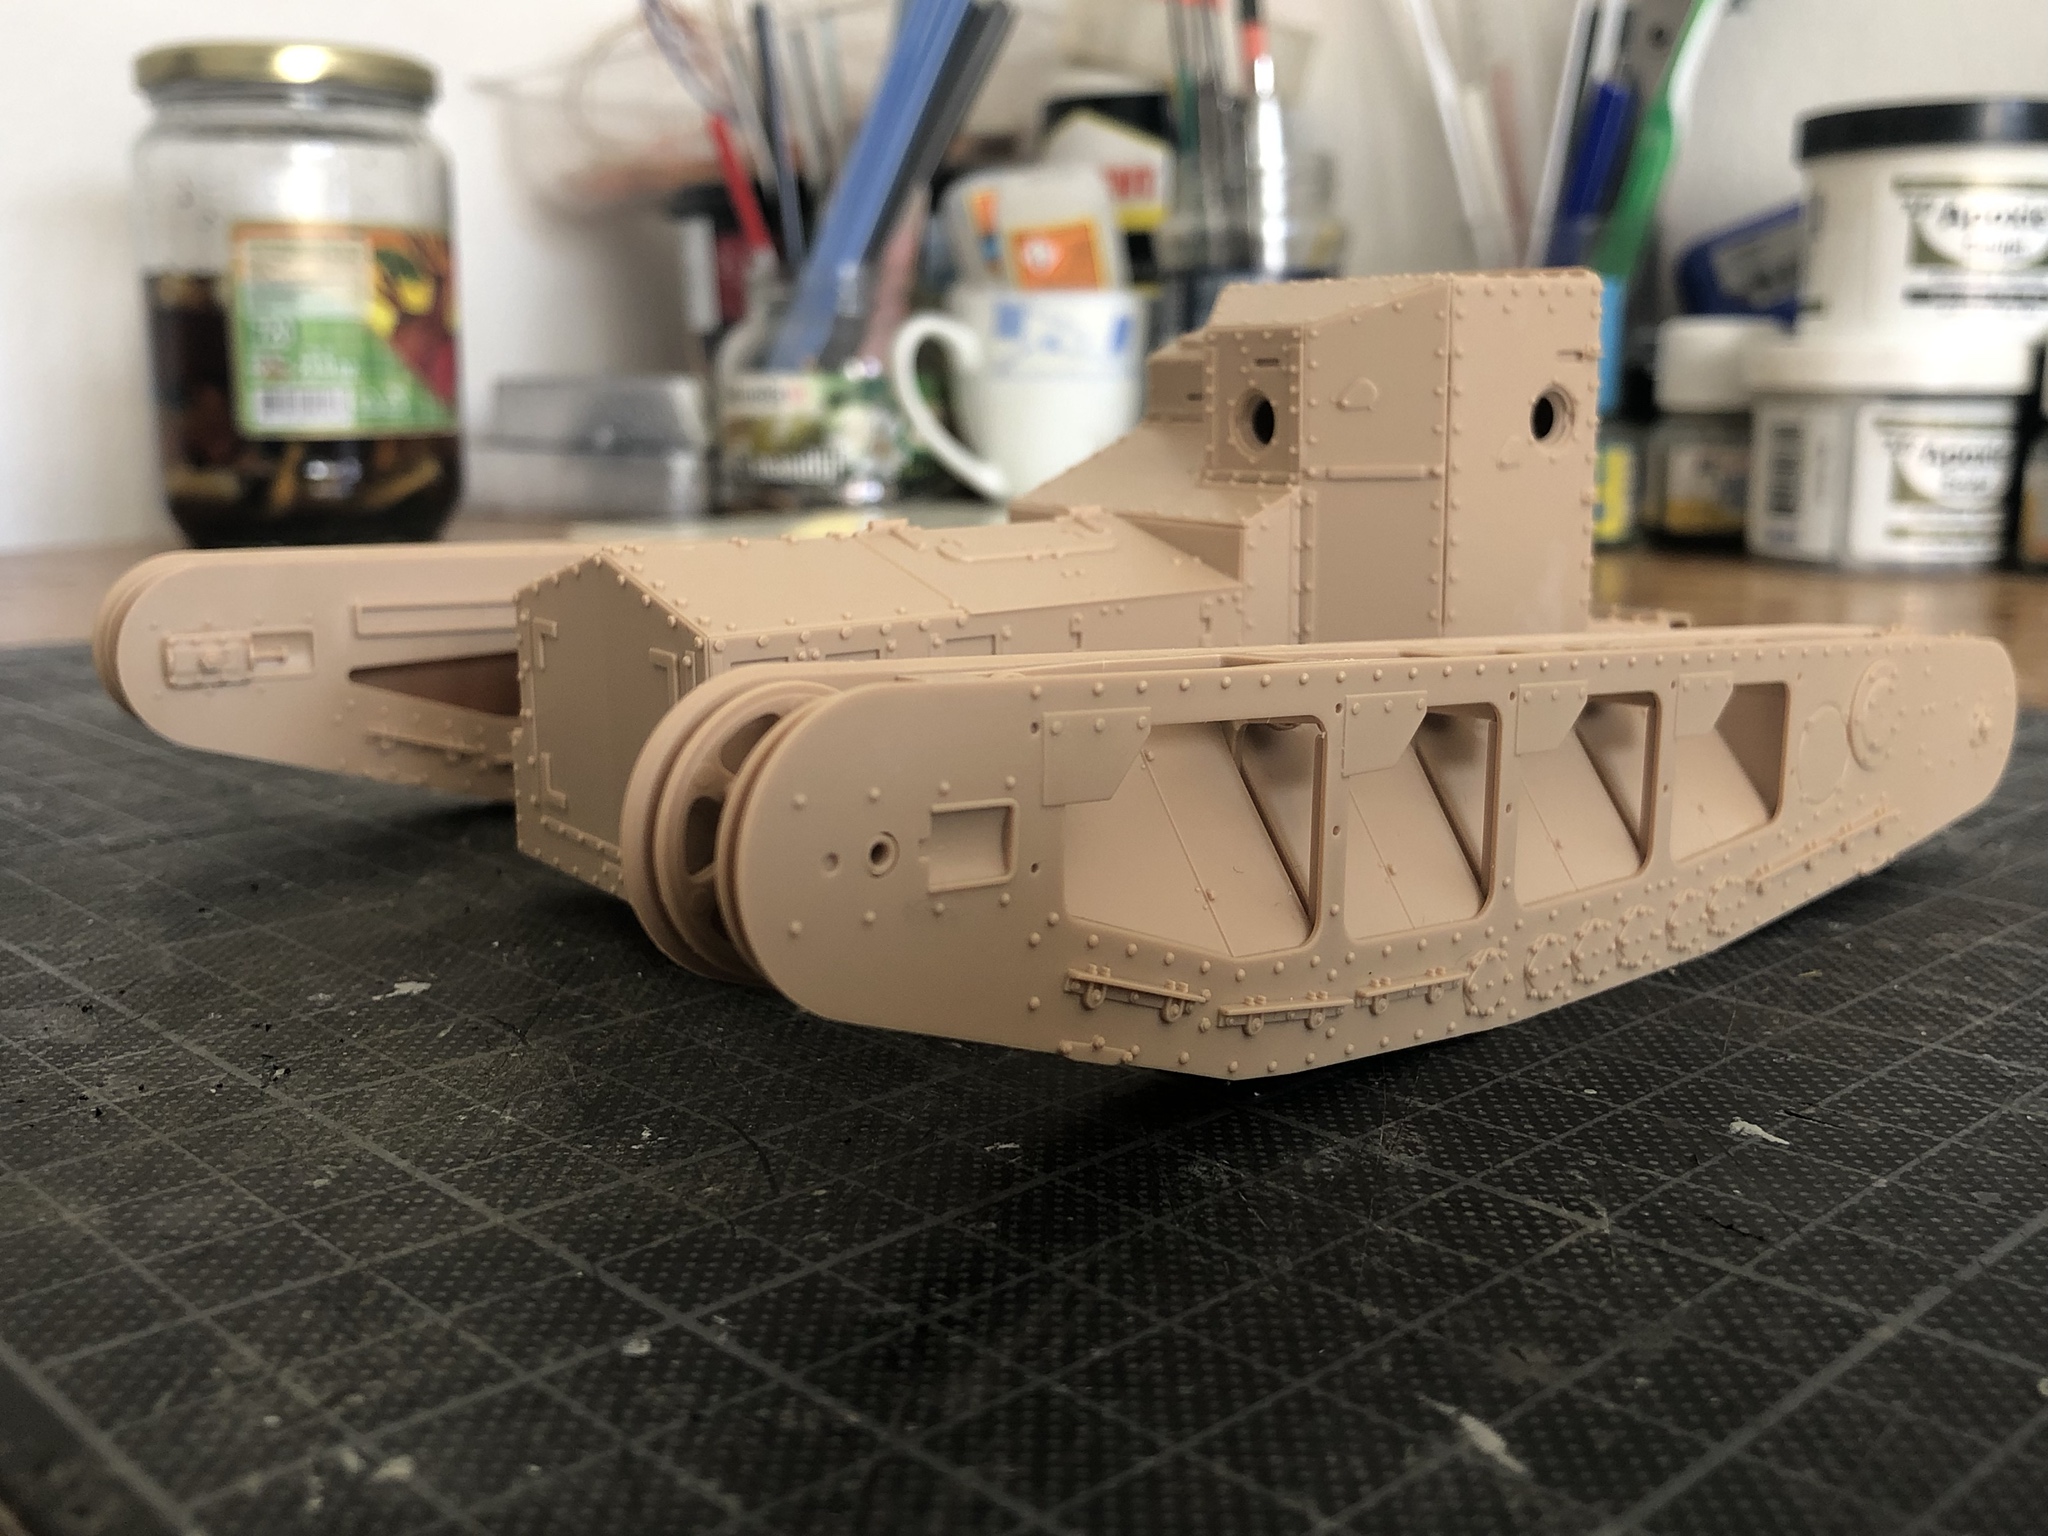
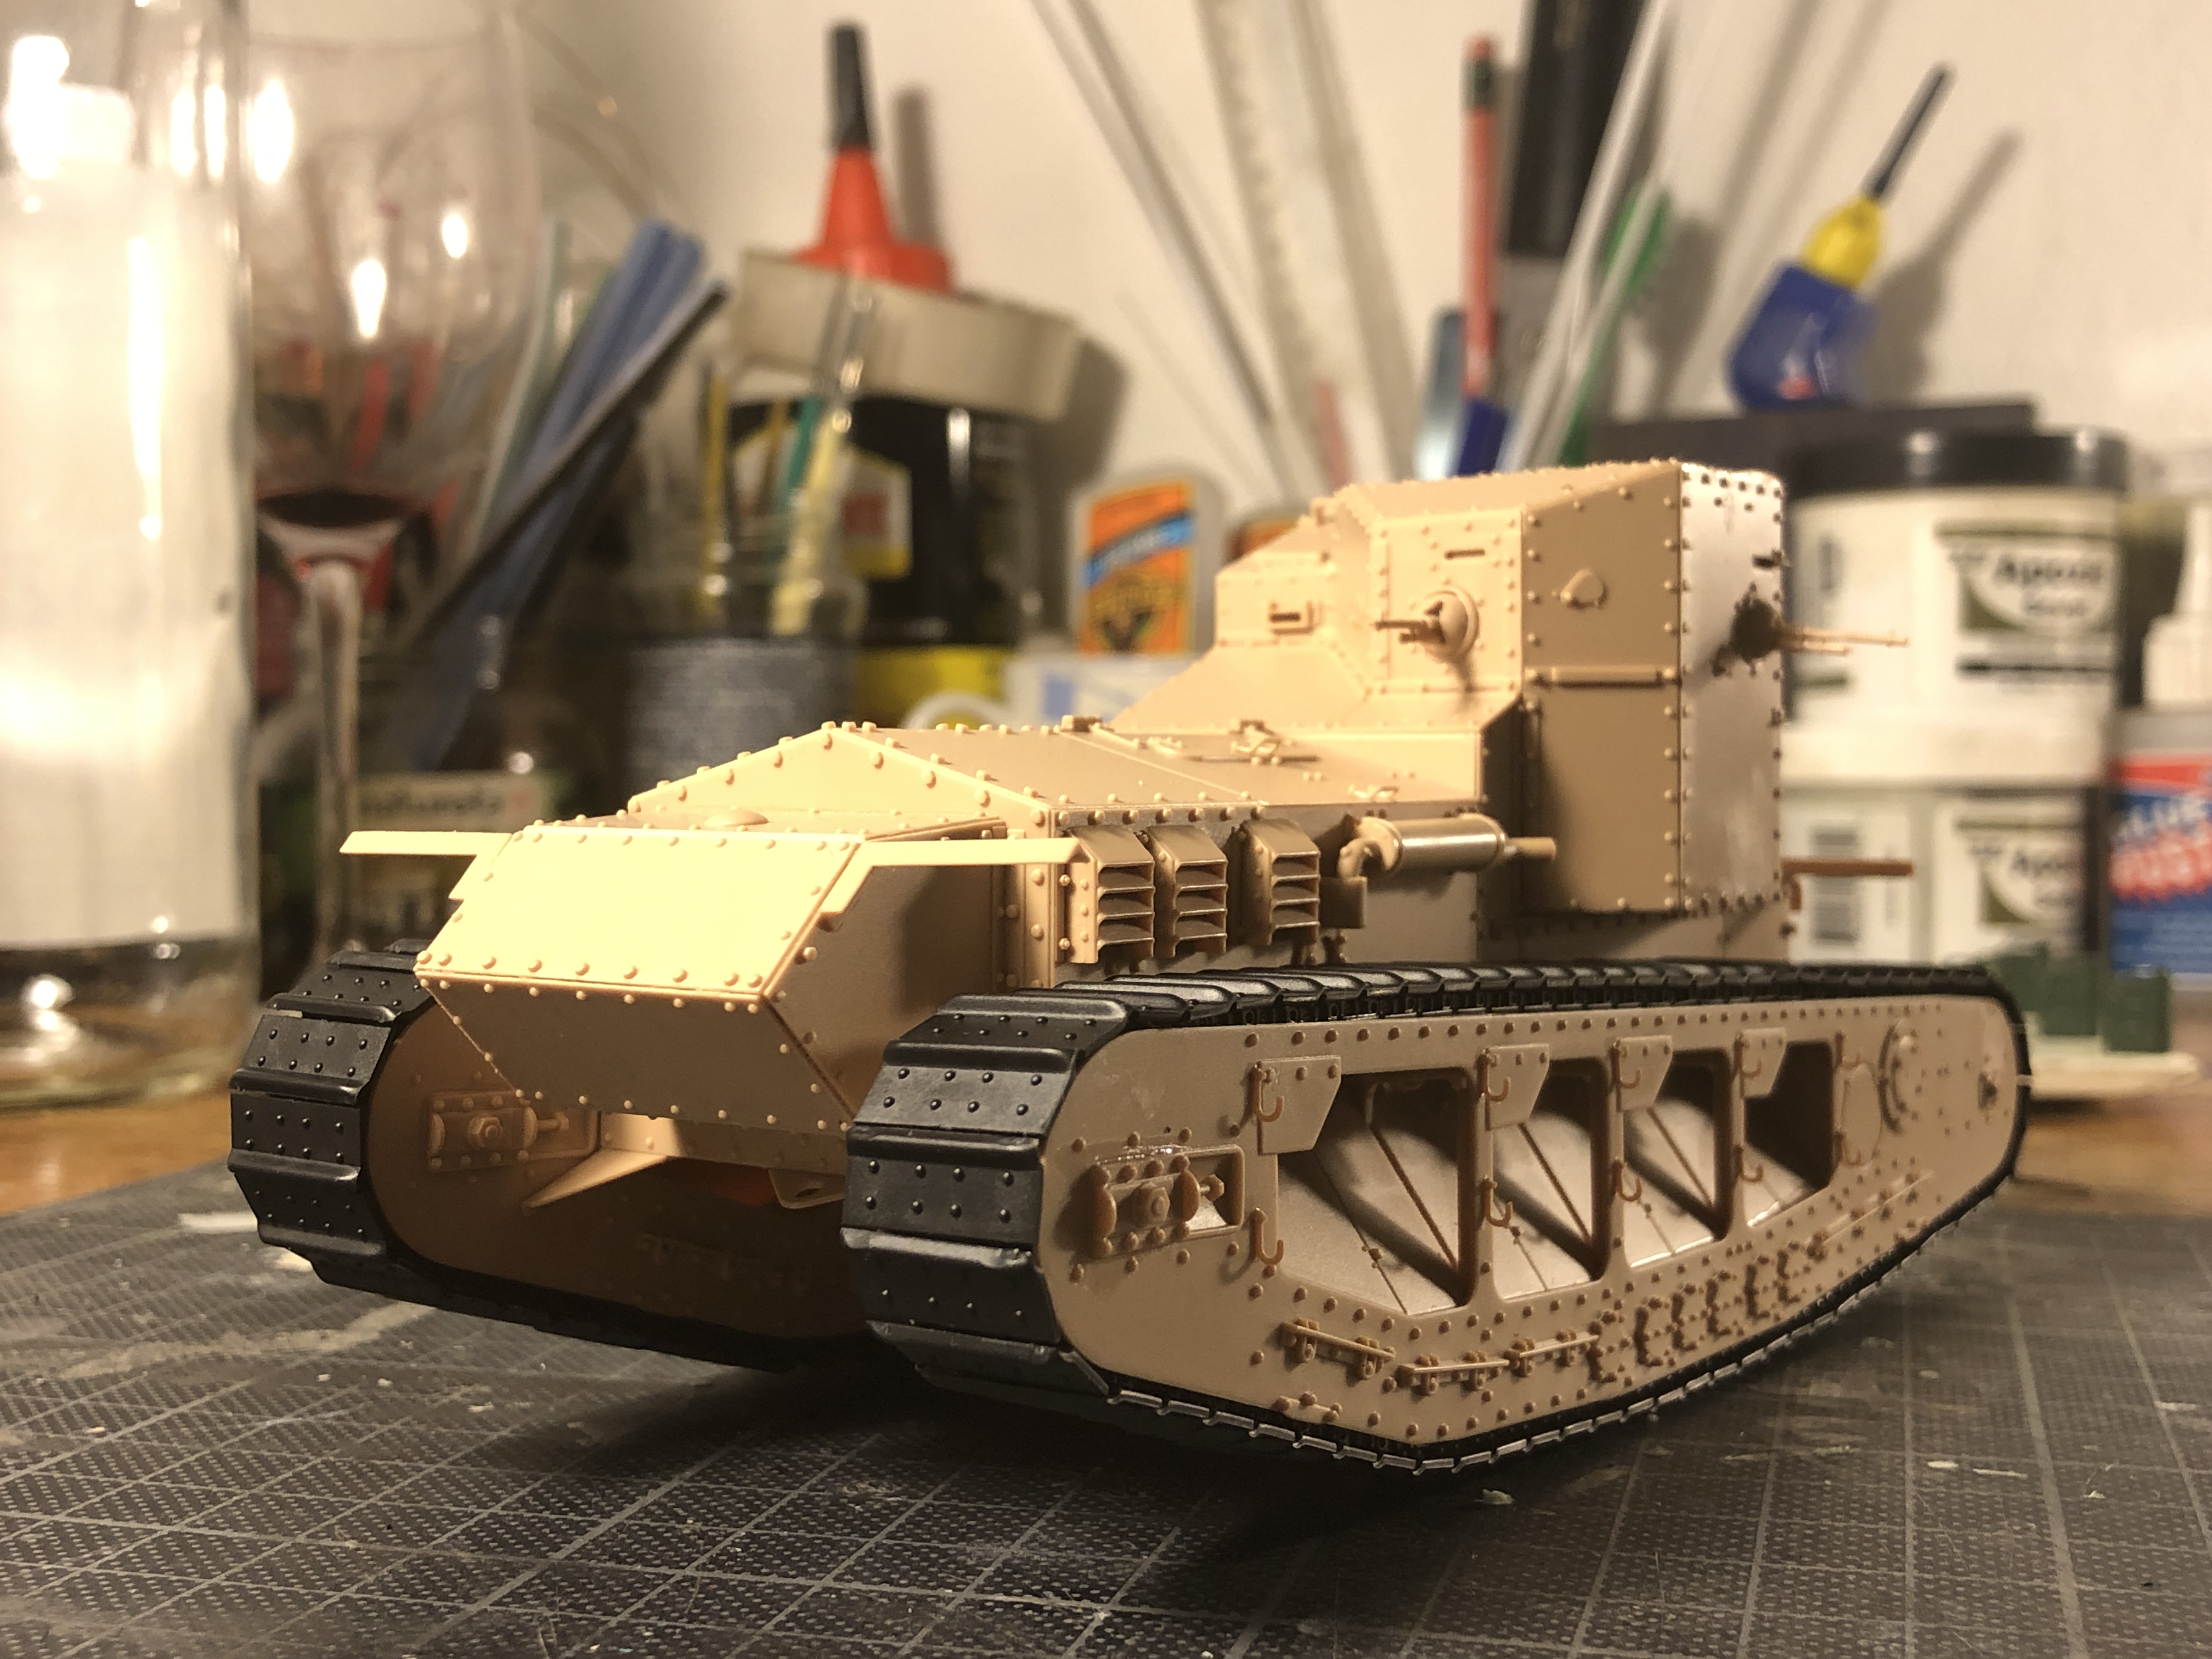
The Whippet build is almost done. Im procrastinating about putting the grousers on the track or hanging them from the hull. I havent found any pictures online of them fitted to the track so will probably do the latter. Also need to add the tools, of which there are two
And now the long procrastination about applying paint
Here are some progress pics

Cheers
Matthew
#460
California, United States
Joined: September 16, 2014
KitMaker: 1,156 posts
Armorama: 1,024 posts
Posted: Tuesday, February 19, 2019 - 06:16 AM UTC
That Whippet is looking great even in its naked plastic.
Vintage Paul
I'd happily live in the past but for air conditioning, the internet, mobile phones, modern medicine & dentistry and, and, and . . .
#460
California, United States
Joined: September 16, 2014
KitMaker: 1,156 posts
Armorama: 1,024 posts
Posted: Tuesday, February 19, 2019 - 06:18 AM UTC
It looks like Takom did a nice job on the Mk 1. Your build is good motivation to get working on my Mk IV.
Vintage Paul
I'd happily live in the past but for air conditioning, the internet, mobile phones, modern medicine & dentistry and, and, and . . .
Alvsborgs, Sweden
Joined: September 03, 2018
KitMaker: 31 posts
Armorama: 29 posts
Posted: Saturday, February 23, 2019 - 10:49 AM UTC
Looks great so far Matthew. Nice clean build. Which paint scheme are you going for? Im thinking about picking up either the Meng or Takom kit.
Alvsborgs, Sweden
Joined: September 03, 2018
KitMaker: 31 posts
Armorama: 29 posts
Posted: Sunday, February 24, 2019 - 05:33 AM UTC
Since I was off from work today I managed to finish assembling the Mark I. The correction set from MR Modellbau arrived some days ago and it felt kind of "old school" working with resin again.
Here follows some in progress photos:

The drivers cab/dog house from MR needed some work to fit and unfortunately it had some air bubbles on it too. I filled in the air bubbles, sanded off all the rivets and replaced them with the spare ones that came on the Takom sprues.

Next up I assembled the the machine gun housings and decided to use the machine guns that came in the MR kit. They're quite nice and I think they're a slight improvement over the ones in the kit.


It was quite a fiddling task to put together the two housings for the machine guns and some filler and patience was needed.


This is where I am now. All in all this was a really enjoyable and fast kit to build (besides all the small wheels that won't be shown once the tracks are on).
Now on to the fun part, painting it!
Hope you'll like it!
// Henrik
#460
California, United States
Joined: September 16, 2014
KitMaker: 1,156 posts
Armorama: 1,024 posts
Posted: Tuesday, March 05, 2019 - 11:03 AM UTC
Henrik - with the P/E the resin enhances the build. I like that one of the pistol ports was open and the rest closed. A neat & convincing detail.
Vintage Paul
I'd happily live in the past but for air conditioning, the internet, mobile phones, modern medicine & dentistry and, and, and . . .
#460
California, United States
Joined: September 16, 2014
KitMaker: 1,156 posts
Armorama: 1,024 posts
Posted: Tuesday, March 26, 2019 - 05:17 AM UTC
I have an Su-9 Fishpot build nearing completion for a campaign over on AeroScale and then I can dig in to the Mk. IV. Its sitting right on my work bench winking at me . . .
Vintage Paul
I'd happily live in the past but for air conditioning, the internet, mobile phones, modern medicine & dentistry and, and, and . . .
#460
California, United States
Joined: September 16, 2014
KitMaker: 1,156 posts
Armorama: 1,024 posts
Posted: Monday, April 01, 2019 - 06:55 AM UTC
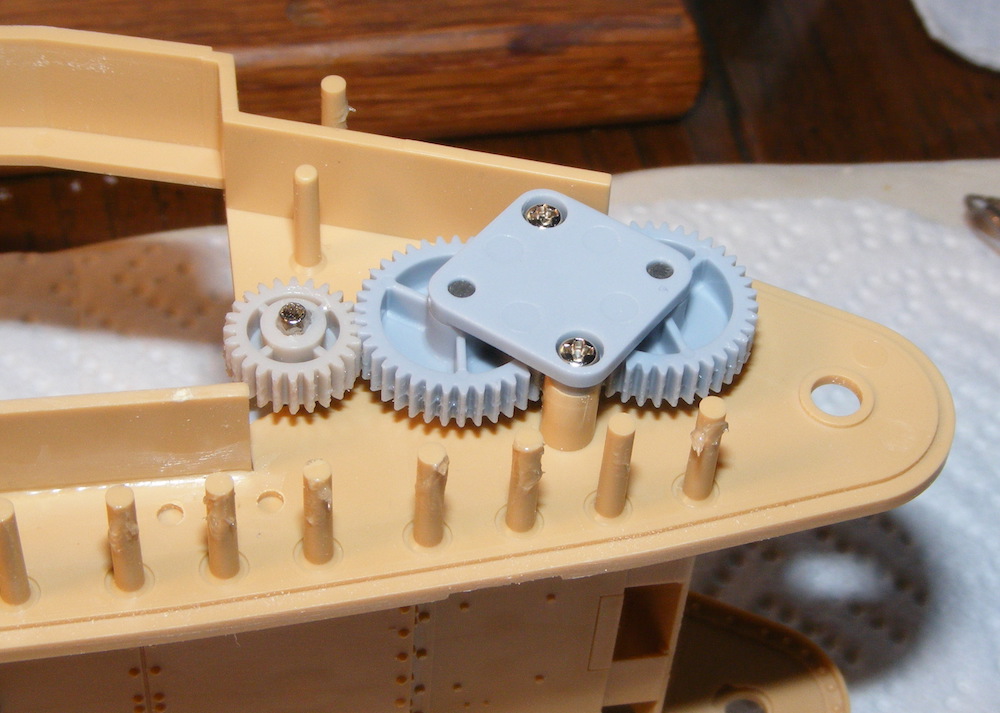
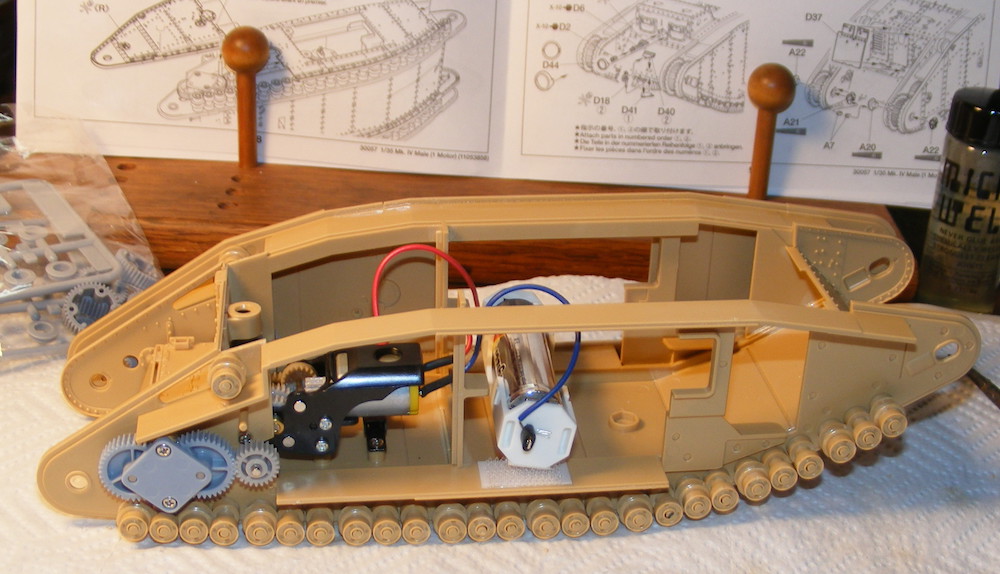
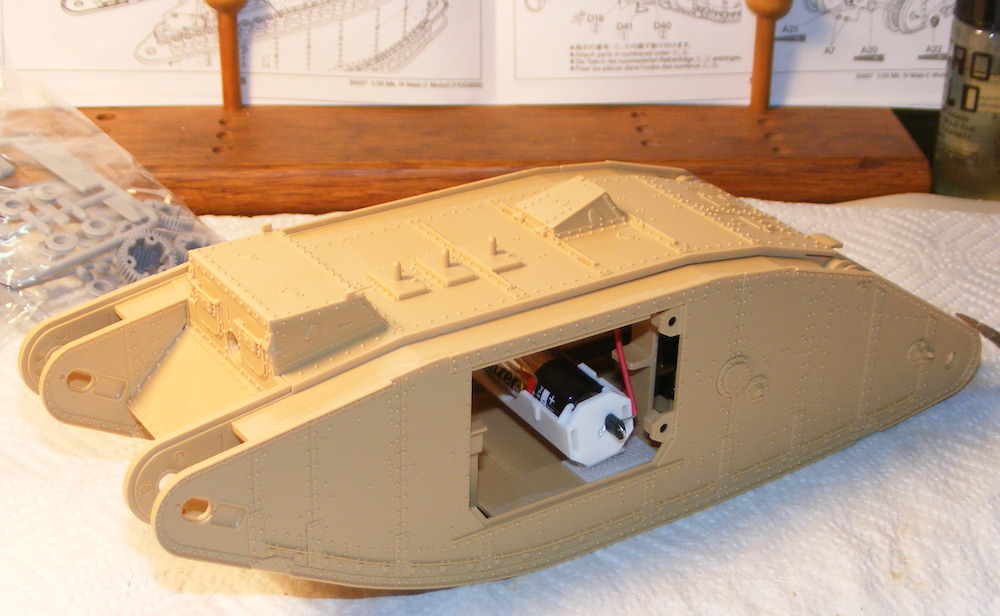
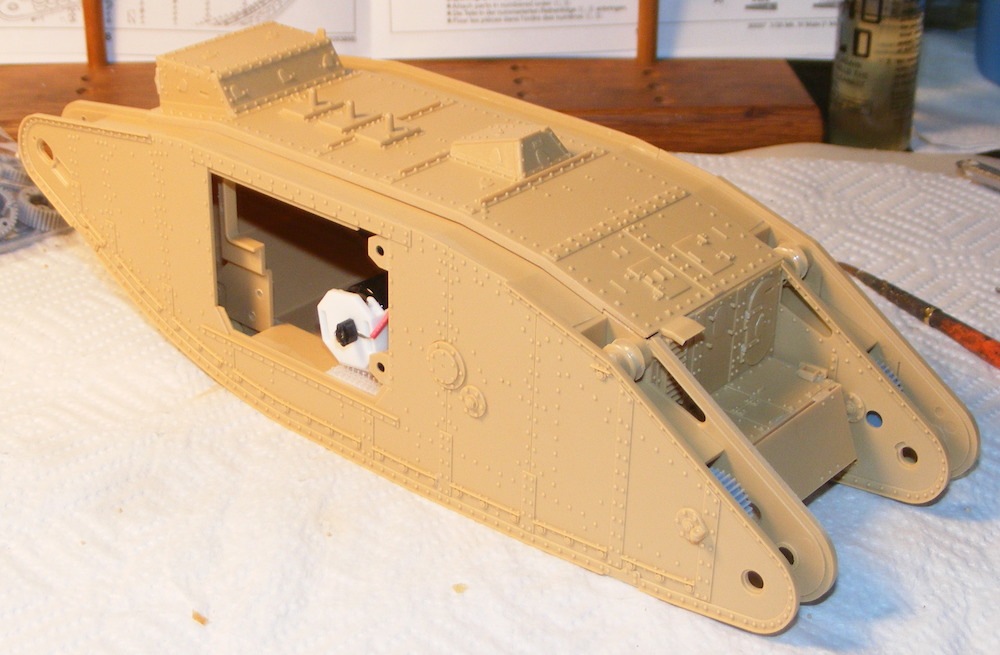
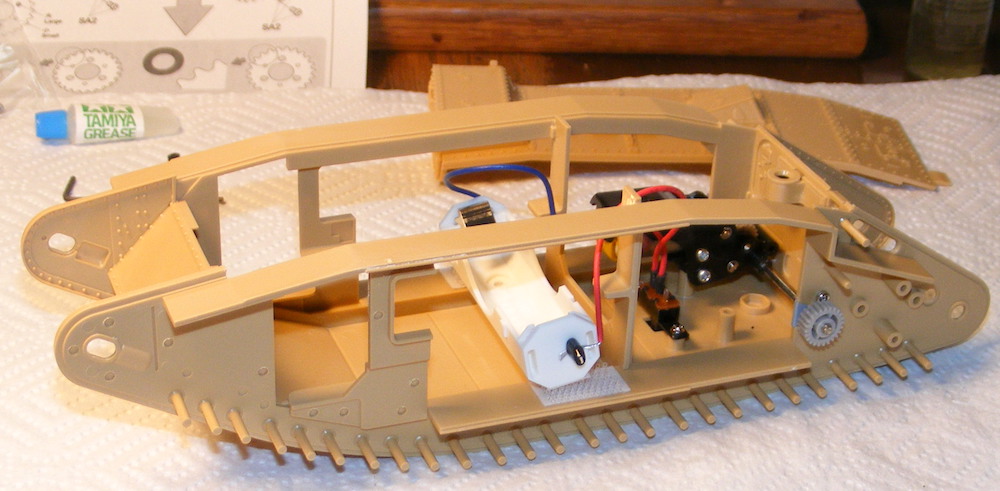
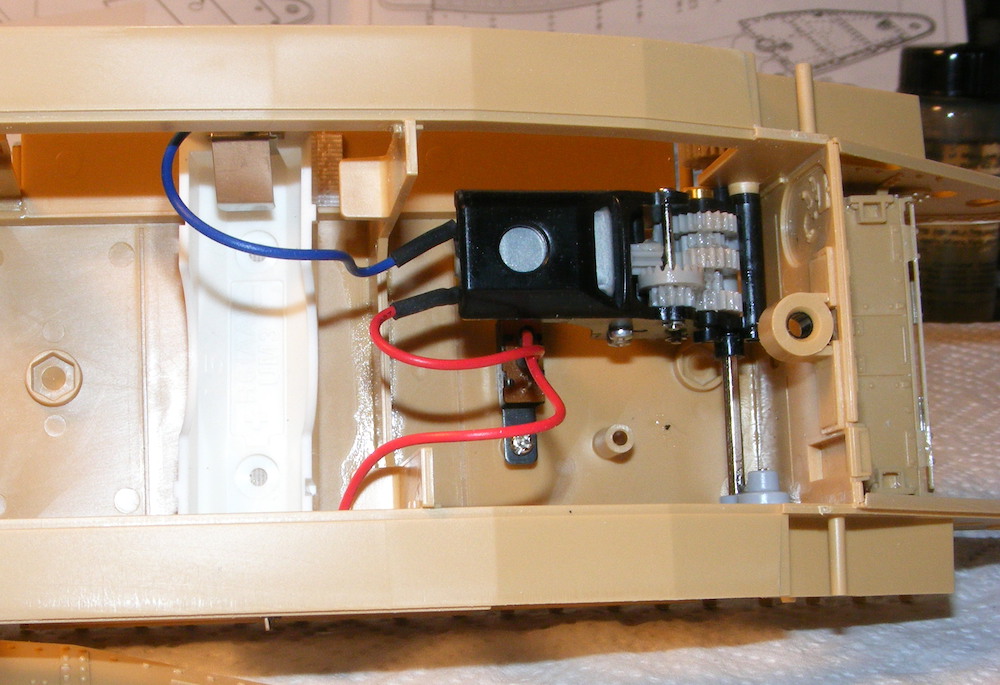
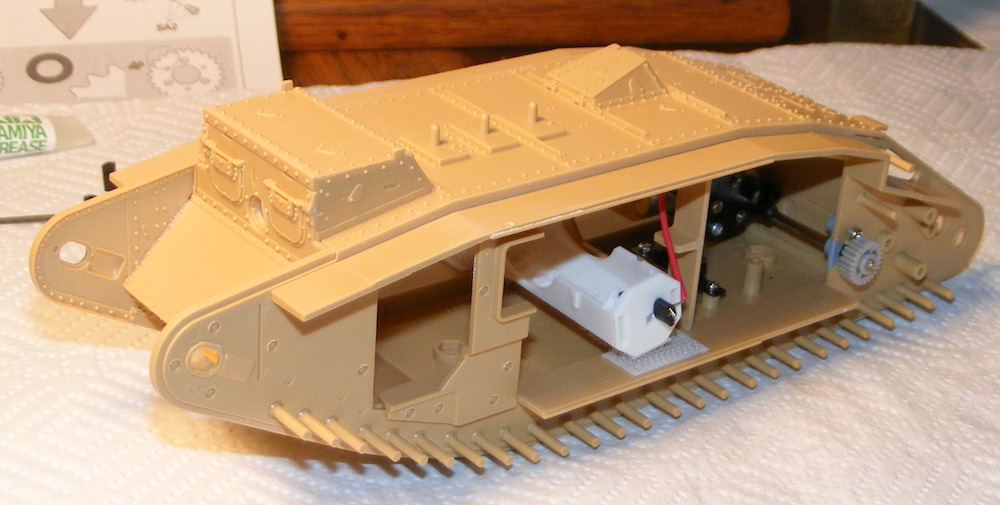
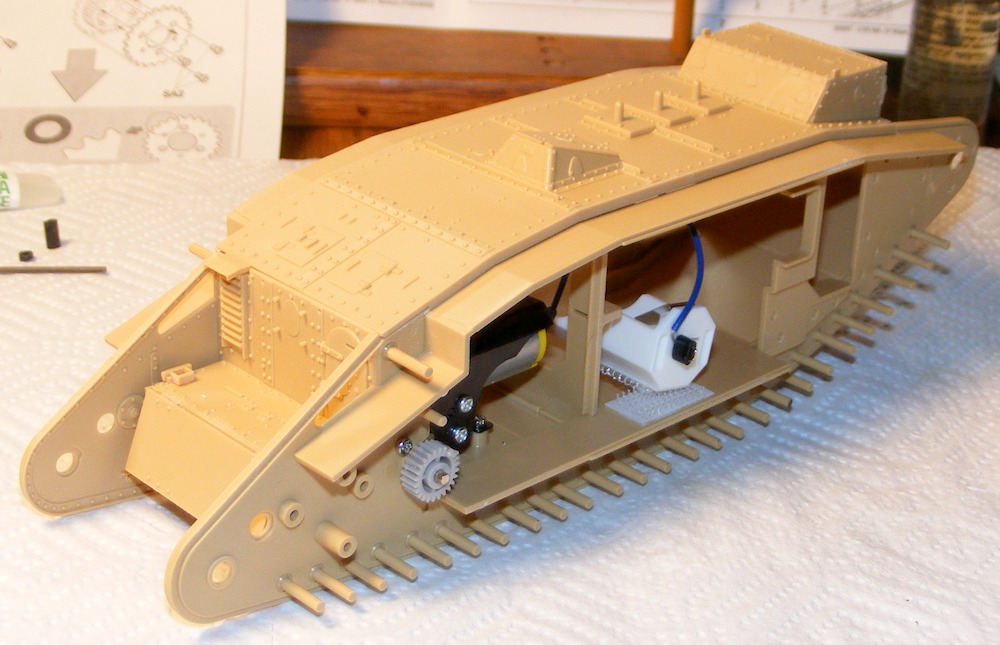
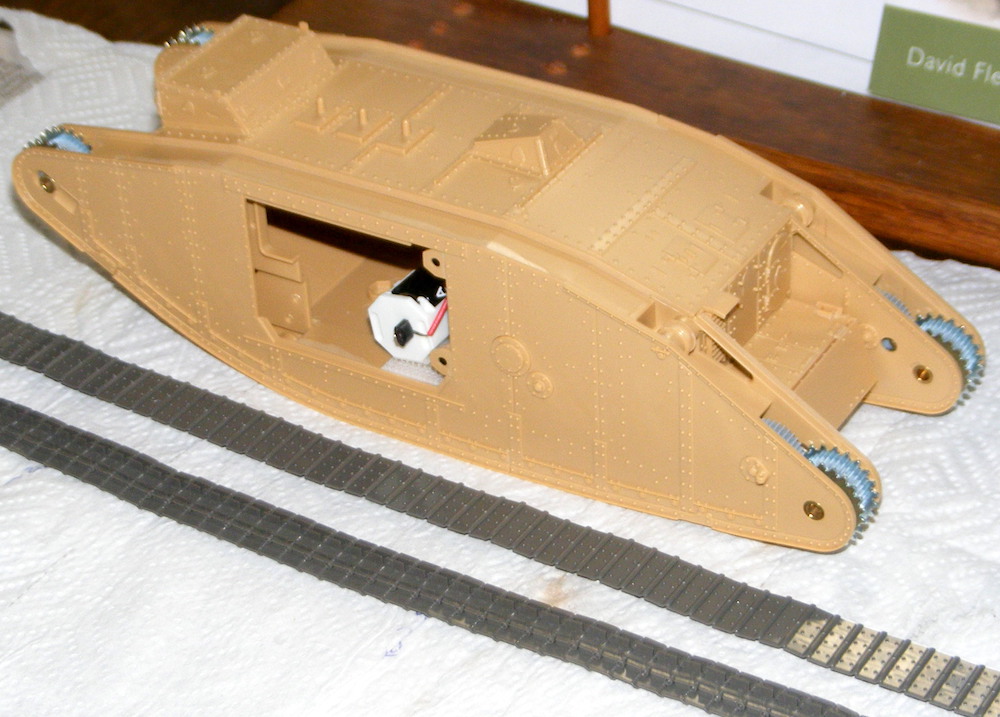
With the Fishpot paint drying it was time to start the Tamiya Mk IV. I love starting a new kit and this one in particular as I have long wanted to build one of these early tanks. This kit was a joy from the first step. The plastic is easy to work, strong & the moldings are clean and needed very little work to prepare them for assembly. I have built Tamiya kits in the past and some were nice some were not. This one has, so far, just about snicked together. The fit has been perfect! The instructions are good with some muddled issues. Tamiya has the plastic down but could learn something from WingNutWings in completeness & clarity.
This kit is motorized and I have some concerns that liberties have been taken with scale to add this toy-like feature. So far, the motorization has been easy & fun to build. If there are distortions, I haven't seen them yet.
Here are some pics of where the project sits after just a few hours work:
Vintage Paul
I'd happily live in the past but for air conditioning, the internet, mobile phones, modern medicine & dentistry and, and, and . . .
#460
California, United States
Joined: September 16, 2014
KitMaker: 1,156 posts
Armorama: 1,024 posts
Posted: Thursday, April 04, 2019 - 04:52 AM UTC
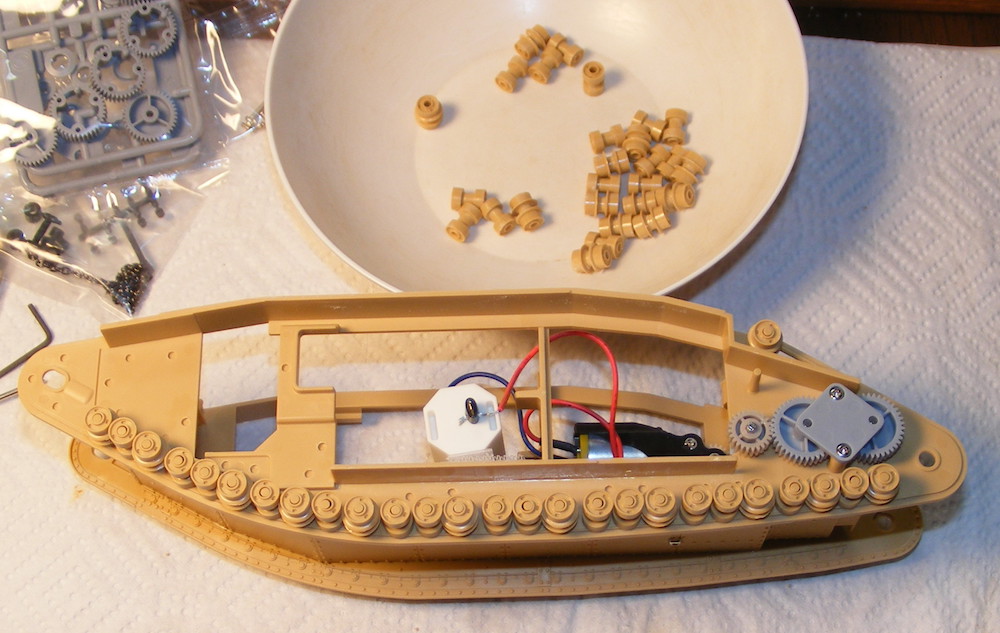
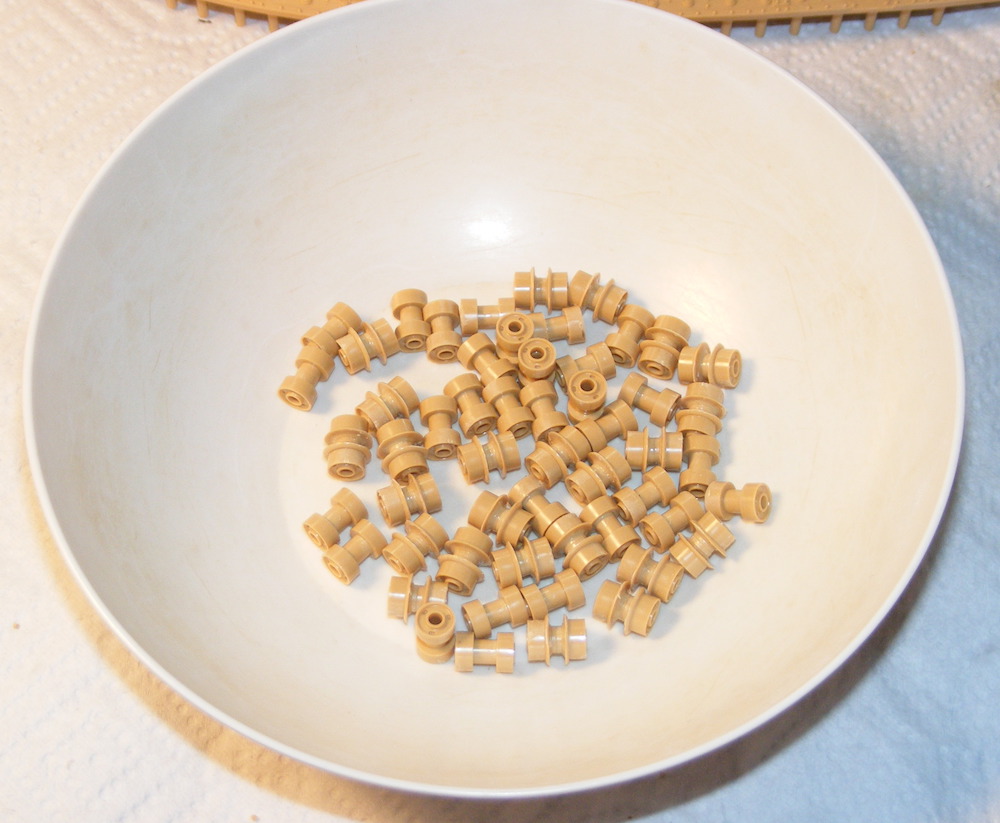
A bowl full of wheels, there is an evening's work here. Some are two part, others four part. The bits fit well and needed only minor cleanup. There are a lot of them!
Vintage Paul
I'd happily live in the past but for air conditioning, the internet, mobile phones, modern medicine & dentistry and, and, and . . .
#460
California, United States
Joined: September 16, 2014
KitMaker: 1,156 posts
Armorama: 1,024 posts
Posted: Thursday, April 04, 2019 - 05:38 AM UTC
Vintage Paul
I'd happily live in the past but for air conditioning, the internet, mobile phones, modern medicine & dentistry and, and, and . . .
#460
California, United States
Joined: September 16, 2014
KitMaker: 1,156 posts
Armorama: 1,024 posts
Posted: Thursday, April 11, 2019 - 06:37 AM UTC
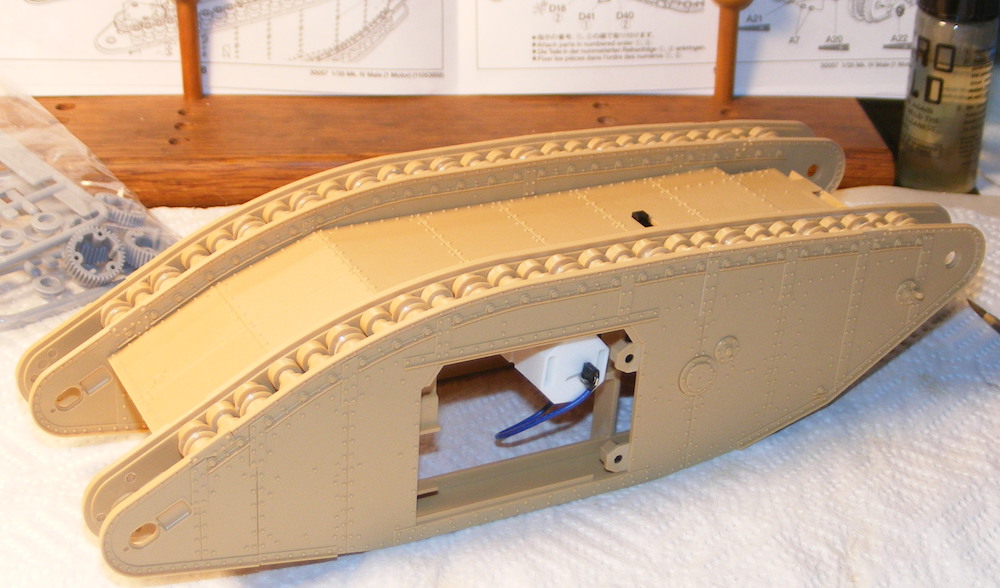
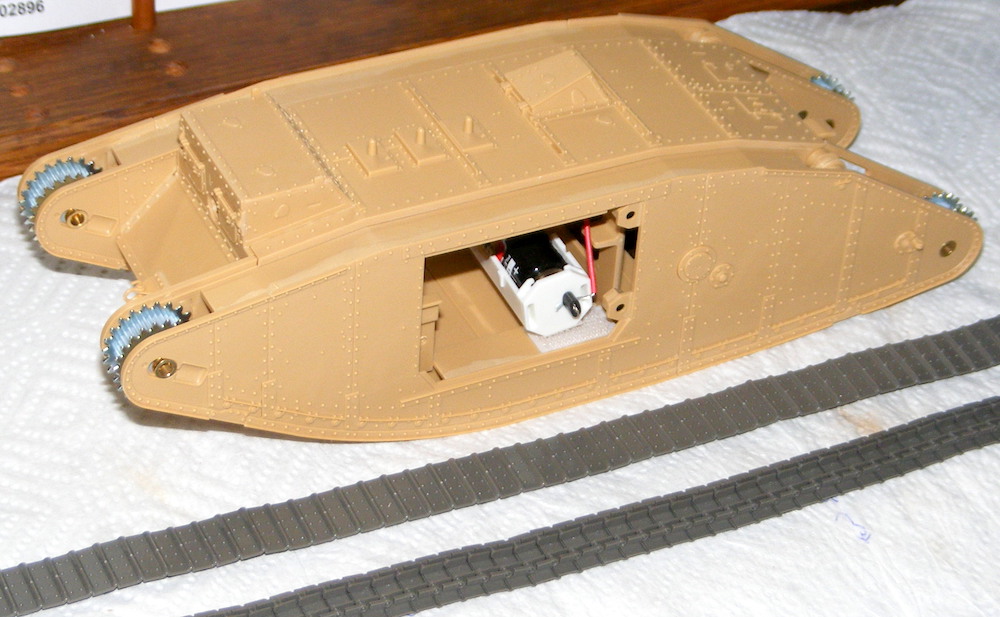
I trial fitted the idler wheels & drive sprockets to see how much would be visable once the tracks were installed. They will come back off for painting later. I then started to assemble a few links of the tracks to try on the wheels and found that they snapped together so well and so quickly that after an hour or so both links were done and ready for paint. Someone finally did tracks right!
The tracks were trial fitted and the wheels are completely hidden, no reason to bother painting wheels & sprockets.
Vintage Paul
I'd happily live in the past but for air conditioning, the internet, mobile phones, modern medicine & dentistry and, and, and . . .