RFM Jagdpanther Ausf. G2 Build Log

#456
Oklahoma, United States
Joined: September 22, 2016
KitMaker: 654 posts
Armorama: 638 posts
Posted: Saturday, May 18, 2019 - 03:01 AM UTC
I have decided to try doing a build log of the subject kit. I've not done one before, so we'll see how it goes. I plan to build in the order laid out in the instructions, which I normally don't do. I'll highlight anytime I deviate from the steps, and why.
Here is a link to the "in-box" review I wrote.
https://armorama.kitmaker.net/review/14417Here is the kit.


There are two frets of PE, so, I'll take care of them first, before beginning with step 1. I always prime my PE, not everyone does. I apply Mr. Metal Primer to both sides of the frets.
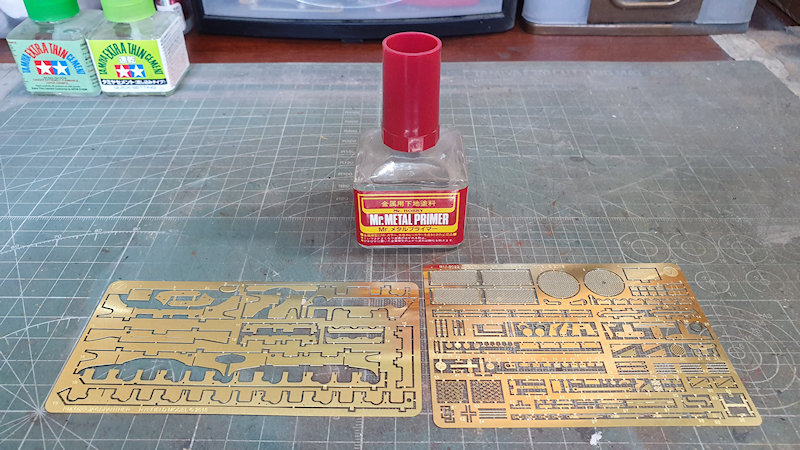
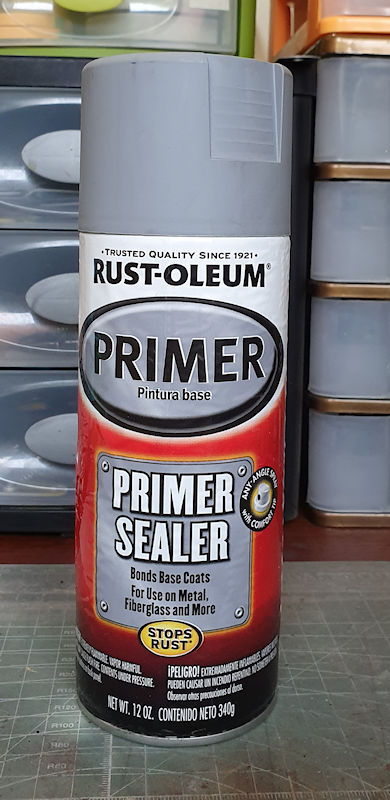
Then, I prime them with Rust-Oleum Primer Sealer. This is a primer specifically for multiple materials, especially metal.
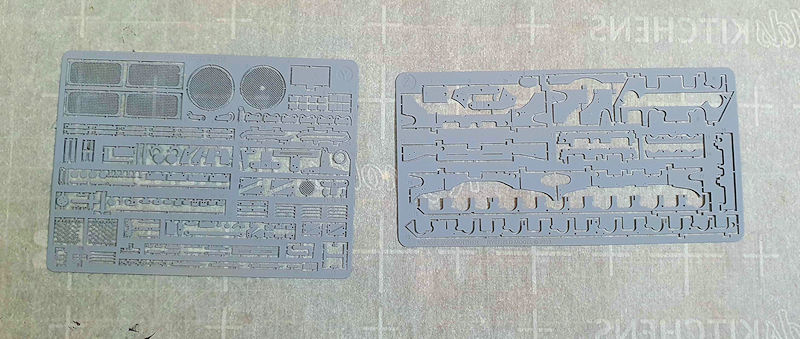
Primed and ready.
Time to go to Step 1
England - North West, United Kingdom
Joined: April 20, 2004
KitMaker: 2,439 posts
Armorama: 1,980 posts
Posted: Saturday, May 18, 2019 - 03:31 AM UTC
Watching,hurry up with the next segment

Never in the field of scale modelling was so much owed by so many to so few.
Washington, United States
Joined: August 09, 2002
KitMaker: 1,742 posts
Armorama: 1,658 posts
Posted: Saturday, May 18, 2019 - 03:54 AM UTC
Great! I have been waiting for someone to start a build log with this kit. The review was well done so I am looking forward to the build.
Msgt Retired USMC
M48/ M60A1/ M1A1
Semper Fi!
Washington, United States
Joined: March 11, 2016
KitMaker: 1,792 posts
Armorama: 1,186 posts
Posted: Saturday, May 18, 2019 - 04:44 AM UTC
Quoted Text
Great! I have been waiting for someone to start a build log with this kit. The review was well done so I am looking forward to the build.
Ditto here, been wanting this kit for several months now.
Arizona, United States
Joined: January 11, 2002
KitMaker: 247 posts
Armorama: 229 posts
Posted: Saturday, May 18, 2019 - 05:45 AM UTC
Very interesting... I never even thought about priming the PE before assembly. Actually, I despise PE, as I ALWAYS have trouble working with those tiny parts and CA glue. Frustration abounds when the part sticks to the tweezers, rather than to the plastic!
Does the priming help or hurt the gluing process?
Thanks
Airborne Infantry - All the way!
#456
Oklahoma, United States
Joined: September 22, 2016
KitMaker: 654 posts
Armorama: 638 posts
Posted: Saturday, May 18, 2019 - 02:14 PM UTC
Quoted Text
Very interesting... I never even thought about priming the PE before assembly. Actually, I despise PE, as I ALWAYS have trouble working with those tiny parts and CA glue. Frustration abounds when the part sticks to the tweezers, rather than to the plastic!
Does the priming help or hurt the gluing process?
Thanks
I'm not a big fan of PE either. I always have the same issues, especially with the small pieces. When gluing, I'll use the tip of my knife to remove the primer. For those times I forget to do that, I haven't had any issue with attaching the parts with CA or epoxy.
I only use CA glue for small parts. I use 2-part Epoxy (5 and 30 minute) for larger parts, or if they will be carrying more of a load, like fenders. Epoxy provides a stronger bond and is less brittle than CA glue.
#456
Oklahoma, United States
Joined: September 22, 2016
KitMaker: 654 posts
Armorama: 638 posts
Posted: Saturday, May 18, 2019 - 08:38 PM UTC
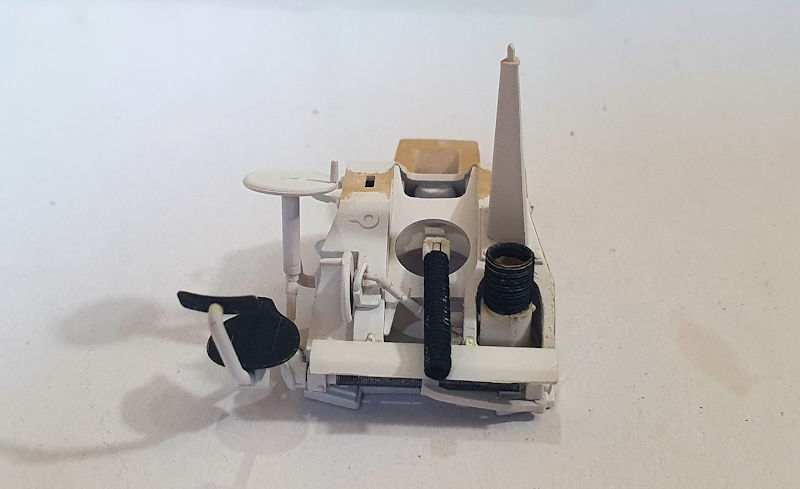
Time to get started gluing parts.
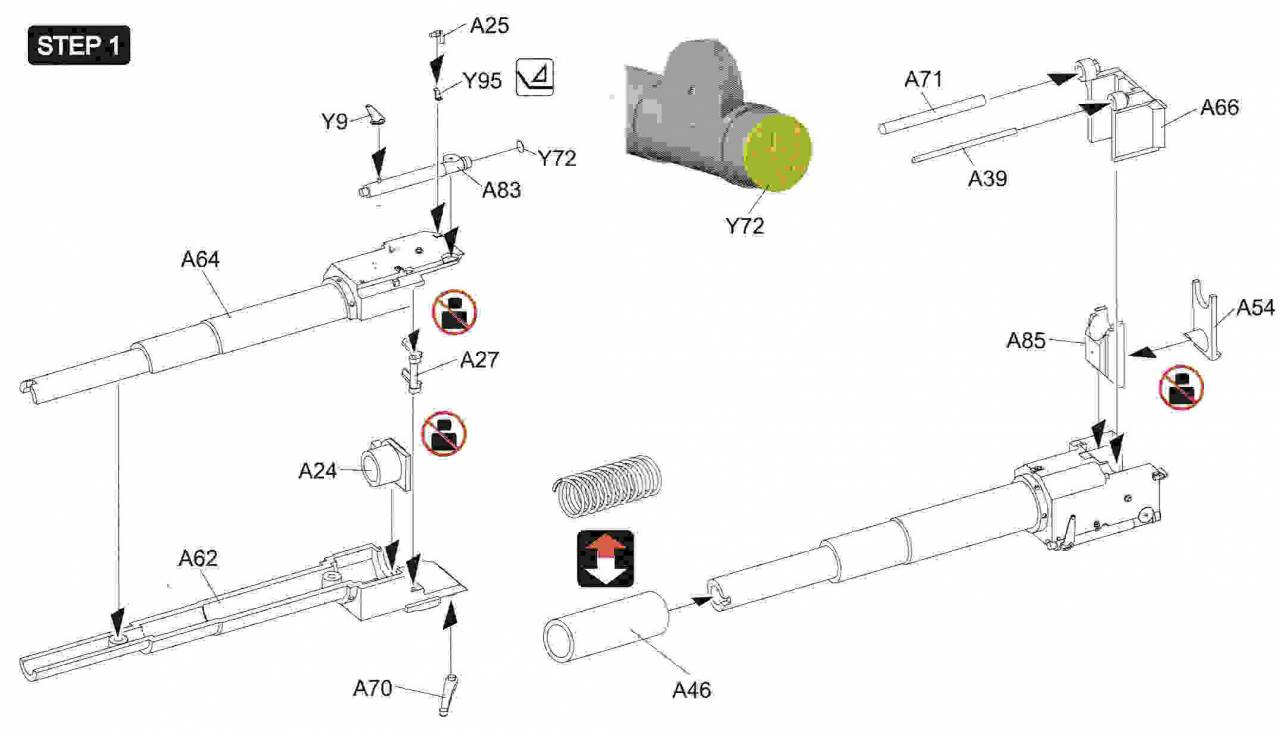
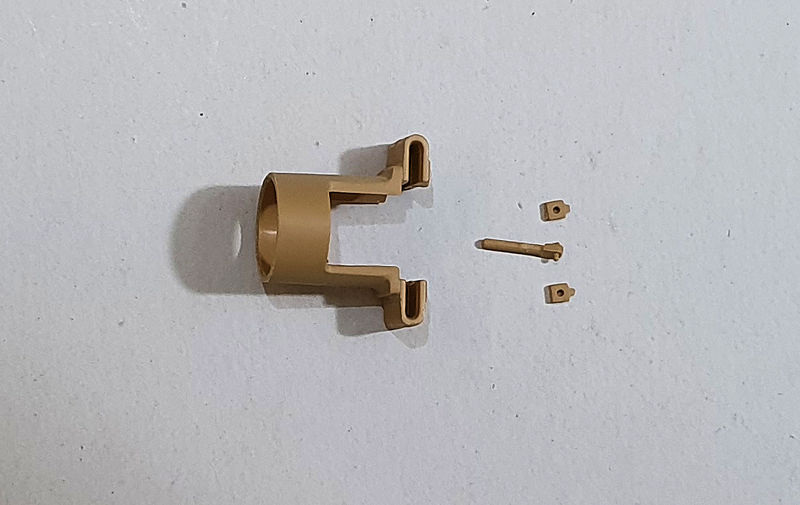
edit: You will need to choose between installing the spring or using part A46. The spring allows the barrel to simulate the recoil effect. I will not be using the spring as it is a little too toy-like for my taste.
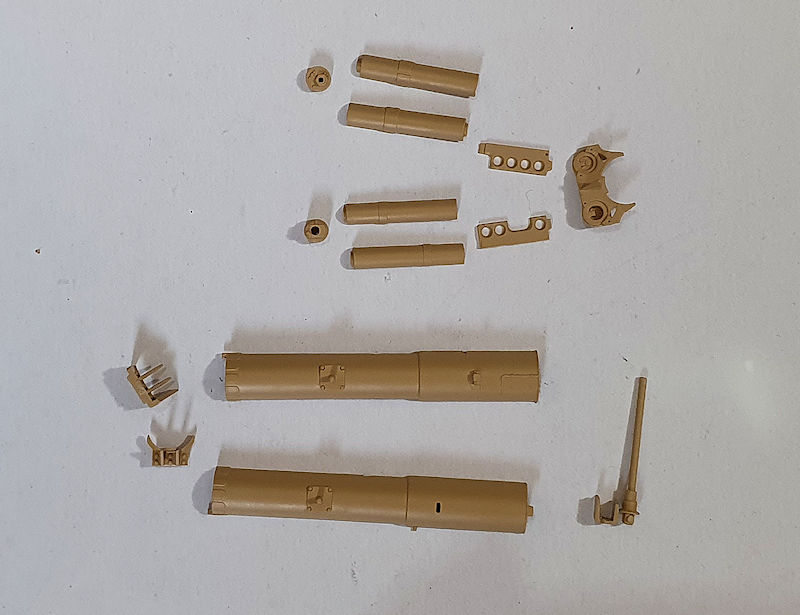
Assembly begins with the main gun. Step 1 looks like this:
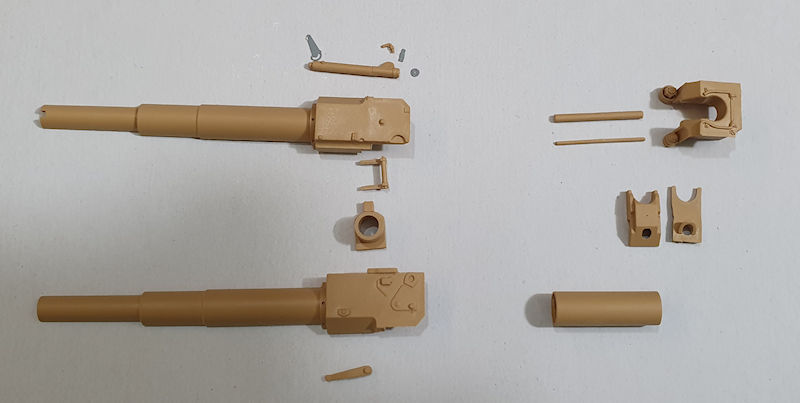
The parts laid-out
PE part Y95 is very small and requires two bends. This one gave me fits. It's not perfect, but, it will do.
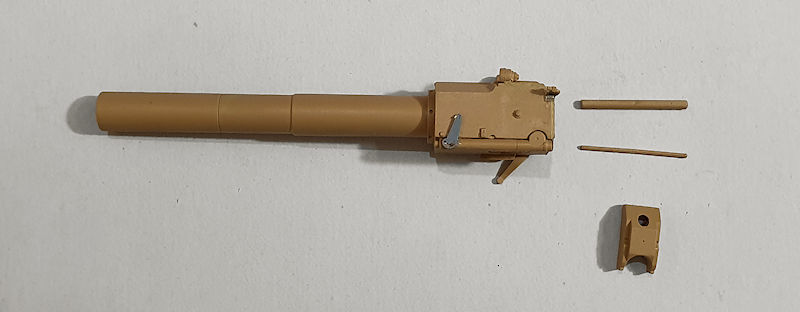
Part painted. The tube doesn't need to be painted as it will slide inside the outer barrel in step 4.
On to Step 2
Bangkok, Thailand / ไทย
Joined: September 17, 2013
KitMaker: 1,617 posts
Armorama: 1,150 posts
Posted: Saturday, May 18, 2019 - 10:10 PM UTC
Interesting and sure will follow the build.
Kind regards,
Robert Jan

#045
South Carolina, United States
Joined: September 23, 2005
KitMaker: 362 posts
Armorama: 350 posts
Posted: Saturday, May 18, 2019 - 11:15 PM UTC
Great Start Mark!!
I normally don't find German WWII Subjects overly interesting
this kit a perked my interest. So I'll be following along.

Eric Rains
Greenwood, SC, USA
#456
Oklahoma, United States
Joined: September 22, 2016
KitMaker: 654 posts
Armorama: 638 posts
Posted: Sunday, May 19, 2019 - 12:14 AM UTC
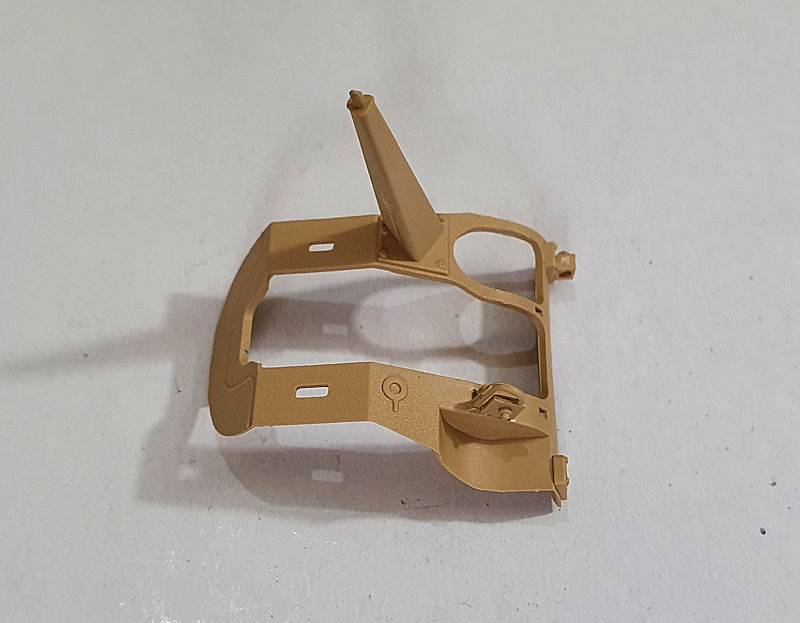
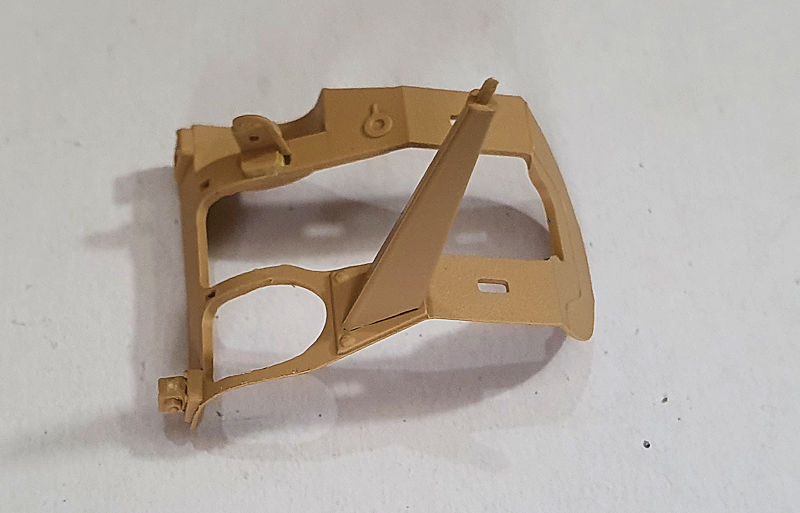
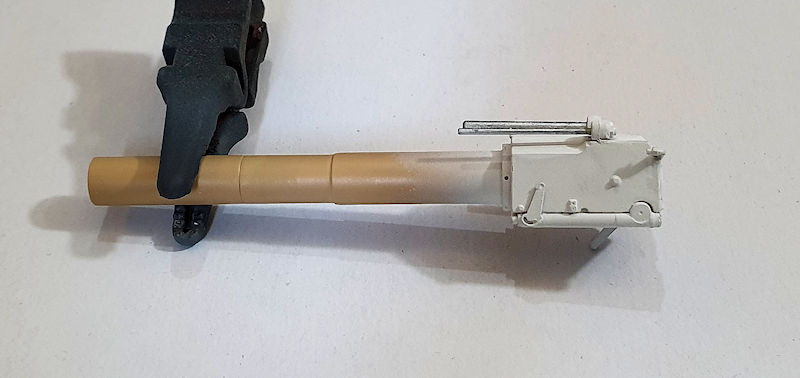
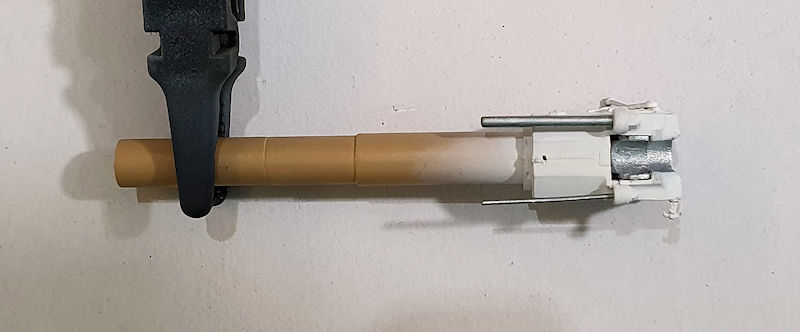
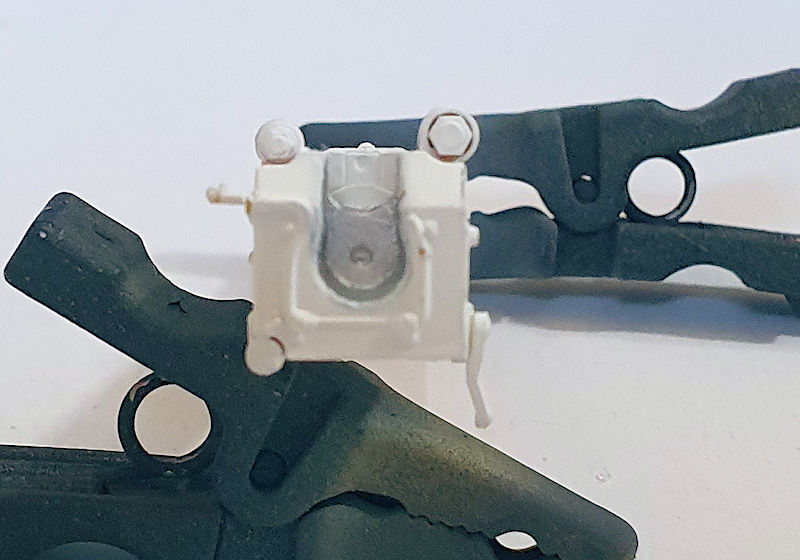
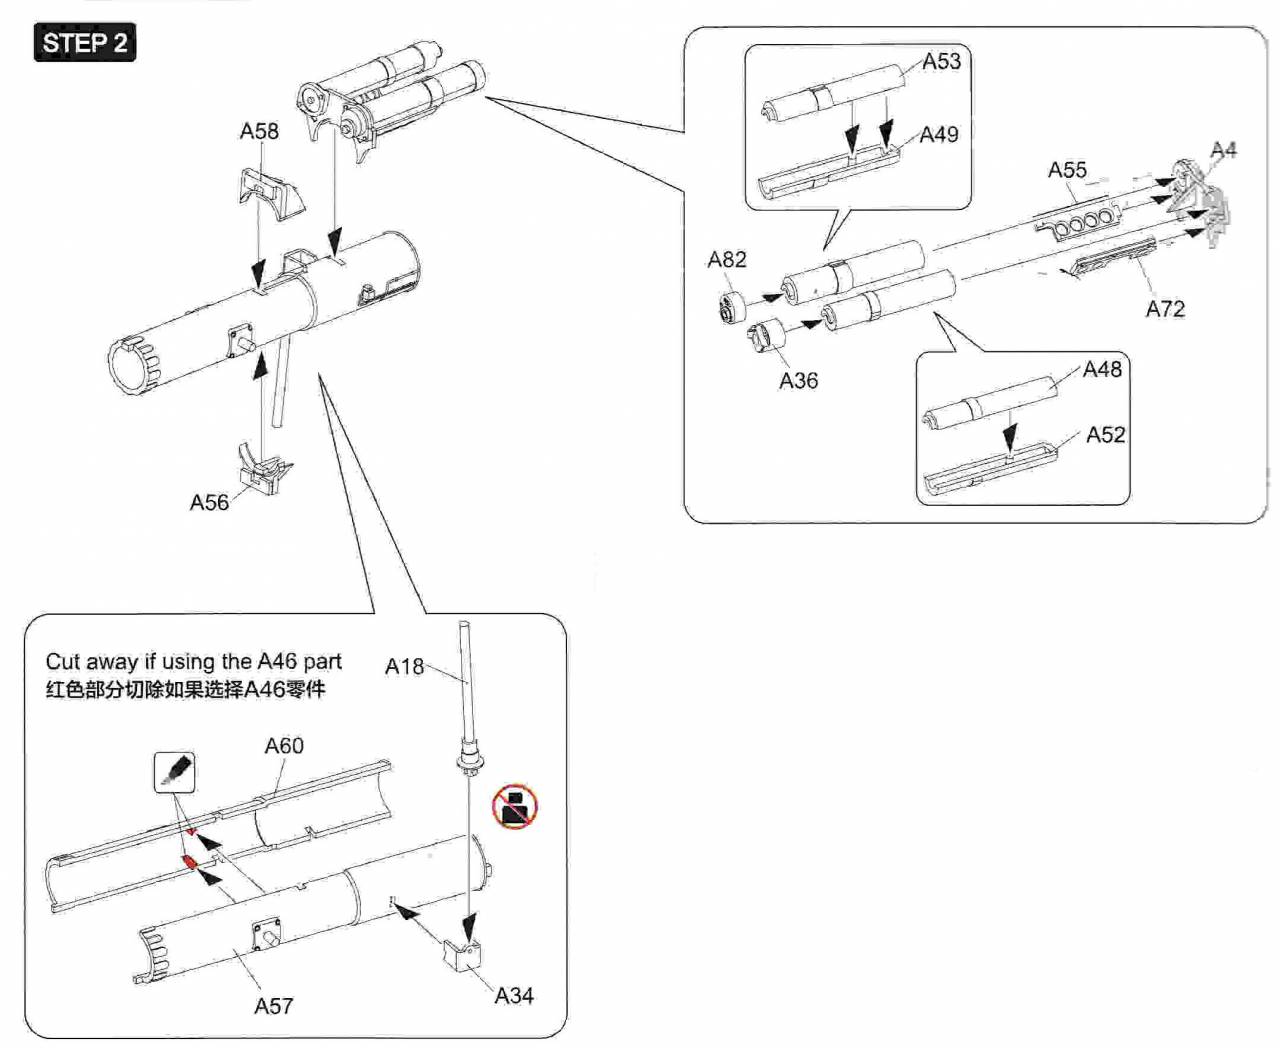
Step 2 is complete. The main thing to pay attention too is the tabs on parts A57 and A60. Leave these tabs in place if you are using the spring, from Step 1. If you are using part A46, as I did, you have to remove the tabs.
Step 2
Parts
Assembled
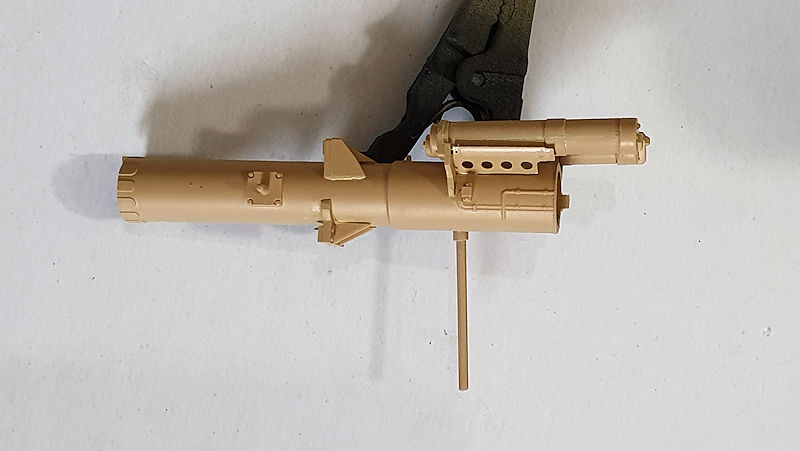
Painted
Missouri, United States
Joined: April 13, 2012
KitMaker: 395 posts
Armorama: 391 posts
Posted: Sunday, May 19, 2019 - 01:08 AM UTC
Hey Mark!
Thanks for doing the build log on this one! I know it's going to be a lot of work and pics but it really helps us guys who know we want the kit but are looking for real experience with it.
ColinEdm
 Associate Editor
Alberta, Canada
Joined: October 15, 2013
KitMaker: 1,355 posts
Armorama: 1,229 posts
Posted: Sunday, May 19, 2019 - 03:16 AM UTC
Looking good so far Mark. I am nearing the end of their cutaway Panther G. Watch the PE for the hull bottom, you will likely have to trim some to fit, and the tolerances are very tight for the interior parts so mask off the connector tabs and mating surfaces - just the thickness of paint will throw off the fit!
The voices are back.....excellent....
Washington, United States
Joined: March 11, 2016
KitMaker: 1,792 posts
Armorama: 1,186 posts
Posted: Sunday, May 19, 2019 - 04:21 AM UTC
In step 1, what is part A46? And why is there a optional spring? Is it to simulate recoil?
ColinEdm
Associate Editor Alberta, Canada
Joined: October 15, 2013
KitMaker: 1,355 posts
Armorama: 1,229 posts
Posted: Sunday, May 19, 2019 - 08:38 AM UTC
Quoted Text
In step 1, what is part A46? And why is there a optional spring? Is it to simulate recoil?
Yep, to simulate recoil, the Panther has the same.
The voices are back.....excellent....
Washington, United States
Joined: March 11, 2016
KitMaker: 1,792 posts
Armorama: 1,186 posts
Posted: Sunday, May 19, 2019 - 11:29 AM UTC
#456
Oklahoma, United States
Joined: September 22, 2016
KitMaker: 654 posts
Armorama: 638 posts
Posted: Sunday, May 19, 2019 - 04:30 PM UTC
Quoted Text
Looking good so far Mark. I am nearing the end of their cutaway Panther G. Watch the PE for the hull bottom, you will likely have to trim some to fit, and the tolerances are very tight for the interior parts so mask off the connector tabs and mating surfaces - just the thickness of paint will throw off the fit!
Colin,
I've been following your build. It's the reason I decided to try a build log for this kit. I've read about the frame fit issues and saw on Andy's YouTube build of the original RFM Ausf. G kit, the issues he had. Will be keeping those issues in the back of my mind when I get to those steps.
#456
Oklahoma, United States
Joined: September 22, 2016
KitMaker: 654 posts
Armorama: 638 posts
Posted: Sunday, May 19, 2019 - 04:42 PM UTC
Quoted Text
In step 1, what is part A46? And why is there a optional spring? Is it to simulate recoil?
Sorry, I forgot to address the spring option in Step 1. I've gone back and added text to highlight this option.
#456
Oklahoma, United States
Joined: September 22, 2016
KitMaker: 654 posts
Armorama: 638 posts
Posted: Monday, May 20, 2019 - 01:02 AM UTC
With my wife away this week, I'm able to make progress more quickly.

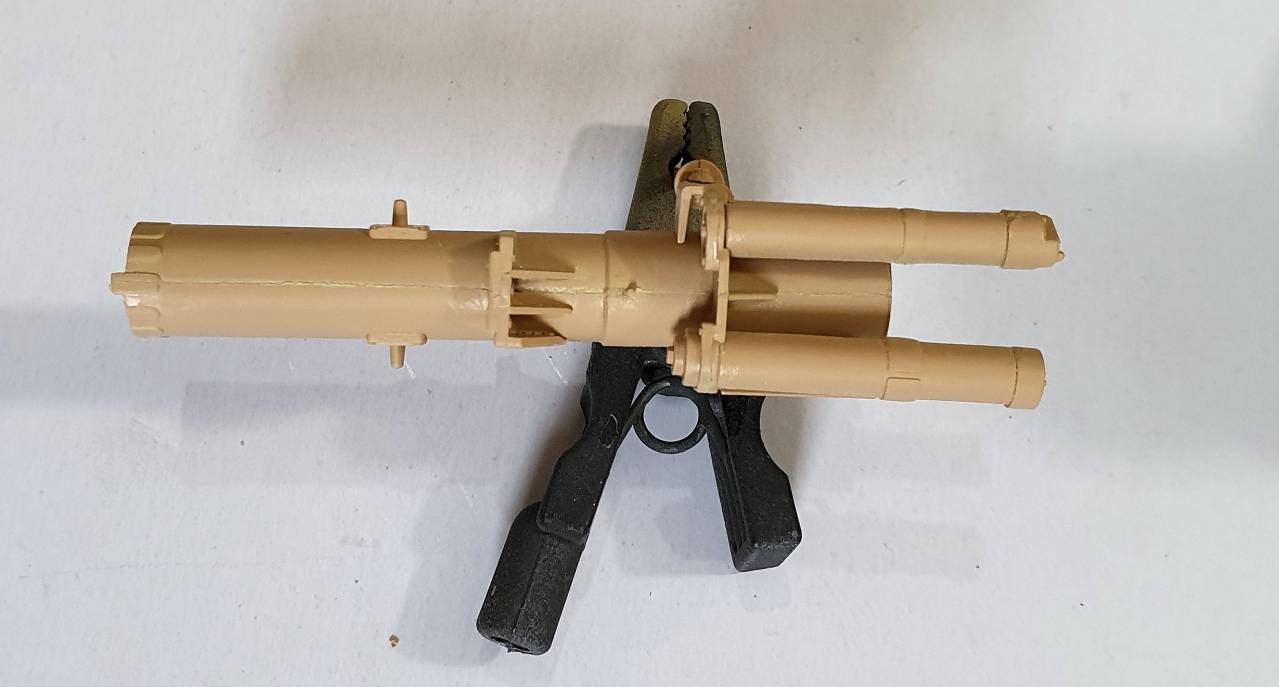
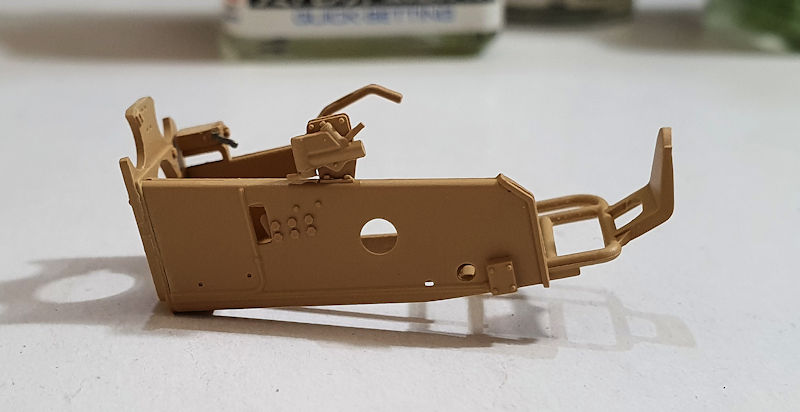
Step 3 is mostly completed. Again, PE part Y44 is small (3mm) and requires two 45 degree bends.
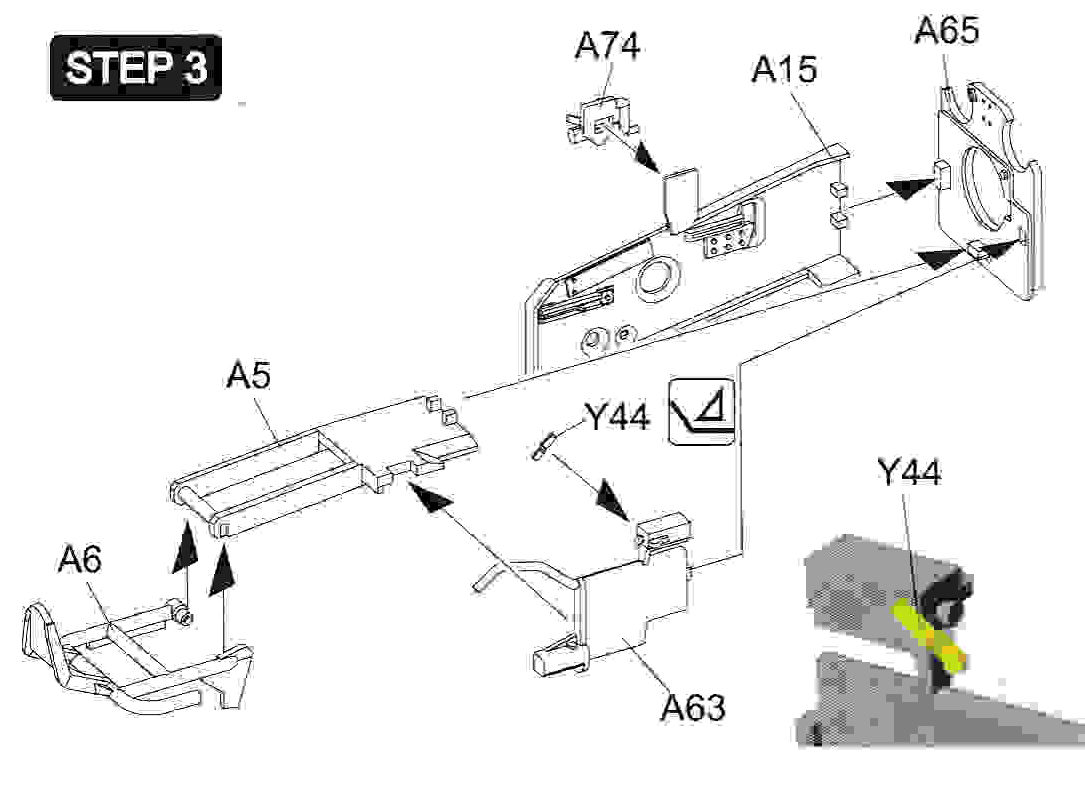
The parts

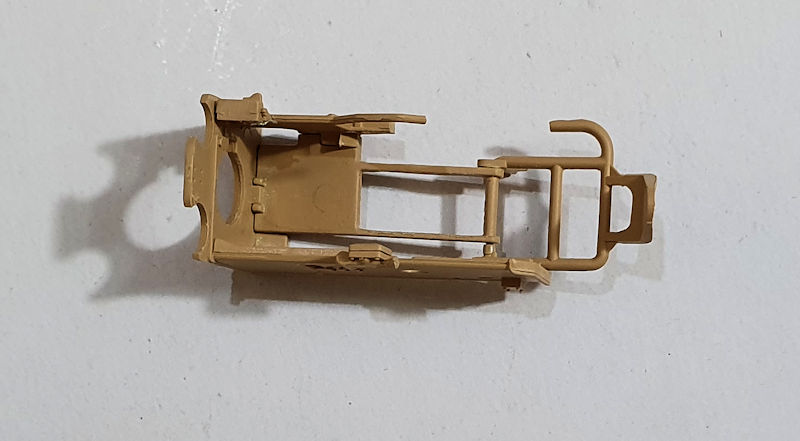
Assembled
I haven't painted this part yet. There are a few bits in Step 4 that need to be attached first. Then I'll spray it.
spongya
Associate Editor Budapest, Hungary
Joined: February 01, 2005
KitMaker: 2,365 posts
Armorama: 1,709 posts
Posted: Monday, May 20, 2019 - 02:06 AM UTC
I shall follow... It is an amazing kit, if their Panther is any indication. However... I am in the process of building both the Takom and the RFM Panthers, and this made me decide on the Takom Jagdpanther. (Probably...)
The RFM Panther is incredibly detailed, but it does feel a bit overcomplicated sometimes, and the hull bottom was not a pleasant exercise to put together. (The hull was tiny bit narrower than the length of the torsion bars and the PE brackets.)
Please visit me at my blog: https://butterfingeredmodelbuilder.wordpress.com/
#456
Oklahoma, United States
Joined: September 22, 2016
KitMaker: 654 posts
Armorama: 638 posts
Posted: Monday, May 20, 2019 - 04:48 AM UTC
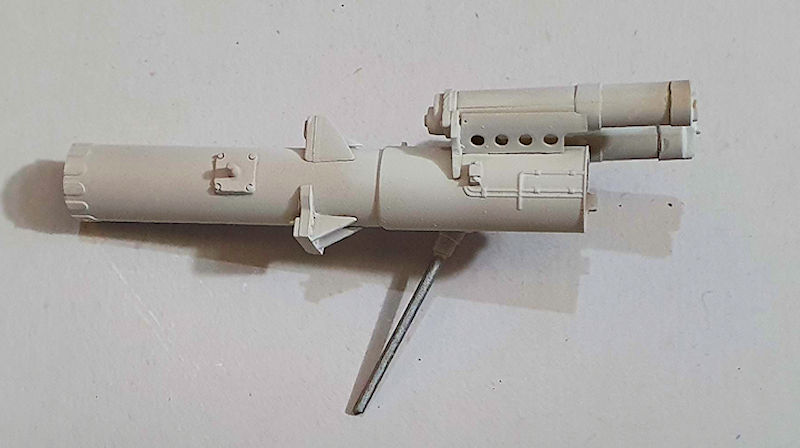
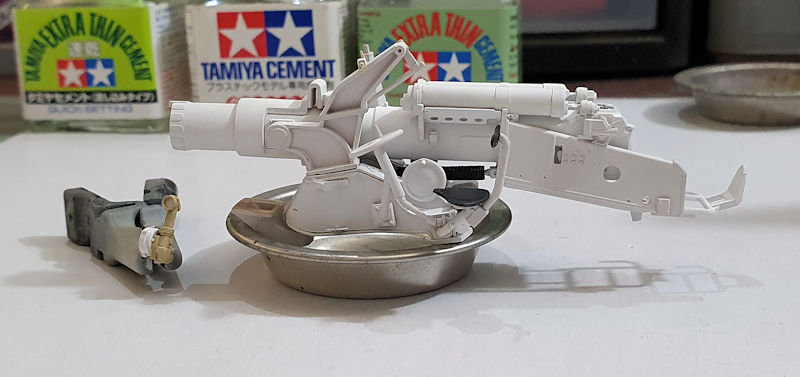
Step 4 is also complete. I have to say that getting the first three assemblies together was not easy. The fit wasn't great and you have to play with it to get everything squared-up. Another point of interest, if you are using the spring (Step 1) then do no glue the breech assembly as indicated in the instructions. If you used part A46, then go ahead and glue it in place.
The instructions
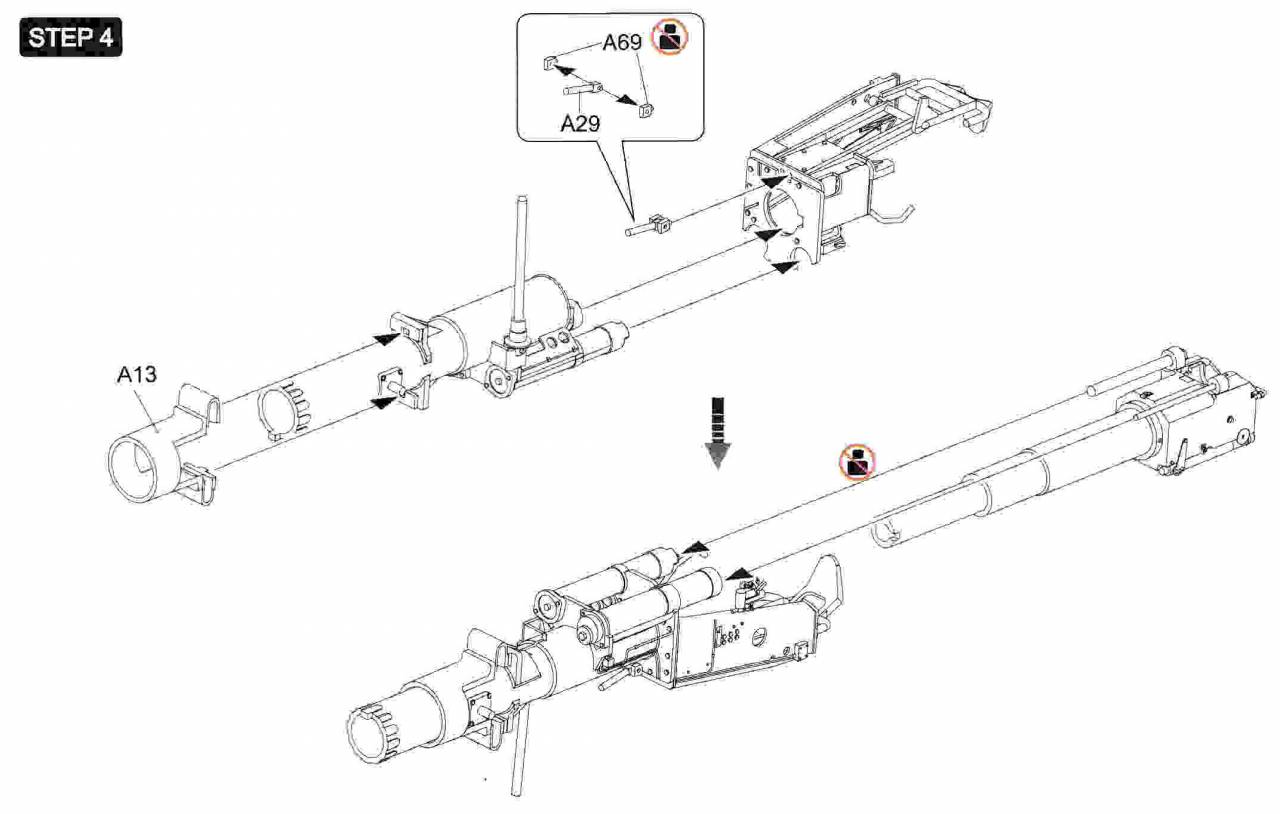
The parts (also the completed assemblies from the first three steps)
The completed assembly
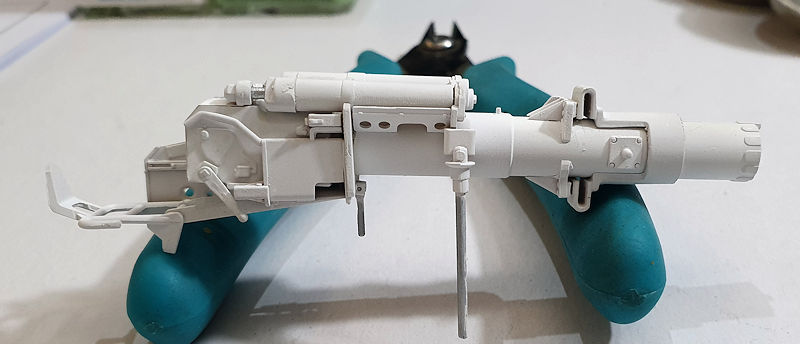
You can see that the PE piece Y95 and the elbow A25 are missing. When trying to fit the breech into the Step 3 assembly, it popped off somewhere onto my table. I'll add it back, if I can find it.
If I were to build this kit again, I would rewrite steps 3 and 4. The way RFM has you do it makes no sense.
For Step 3, I would start with the assembly from Step 2. Attach part A65. Then install the breech assembly from Step 1. This way you can make sure that the barrel is square with A65.
For Step 4, I would then add the rest of the parts from the original Step 3.
#456
Oklahoma, United States
Joined: September 22, 2016
KitMaker: 654 posts
Armorama: 638 posts
Posted: Tuesday, May 21, 2019 - 03:18 AM UTC
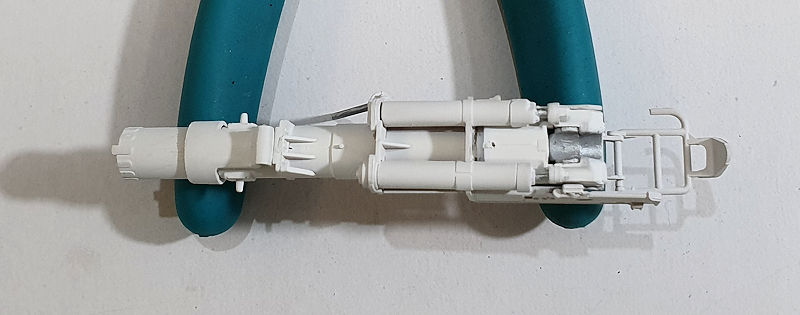
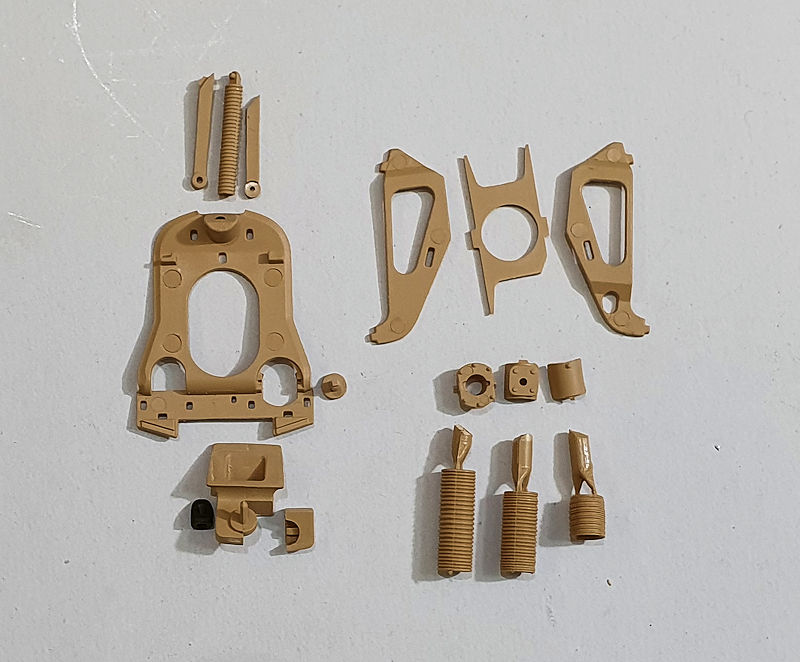
Step 5 is finished. You have the choice of three different "springs" which look to set the vertical positioning of the barrel. I went with A42 to give my barrel some elevation.
The instructions
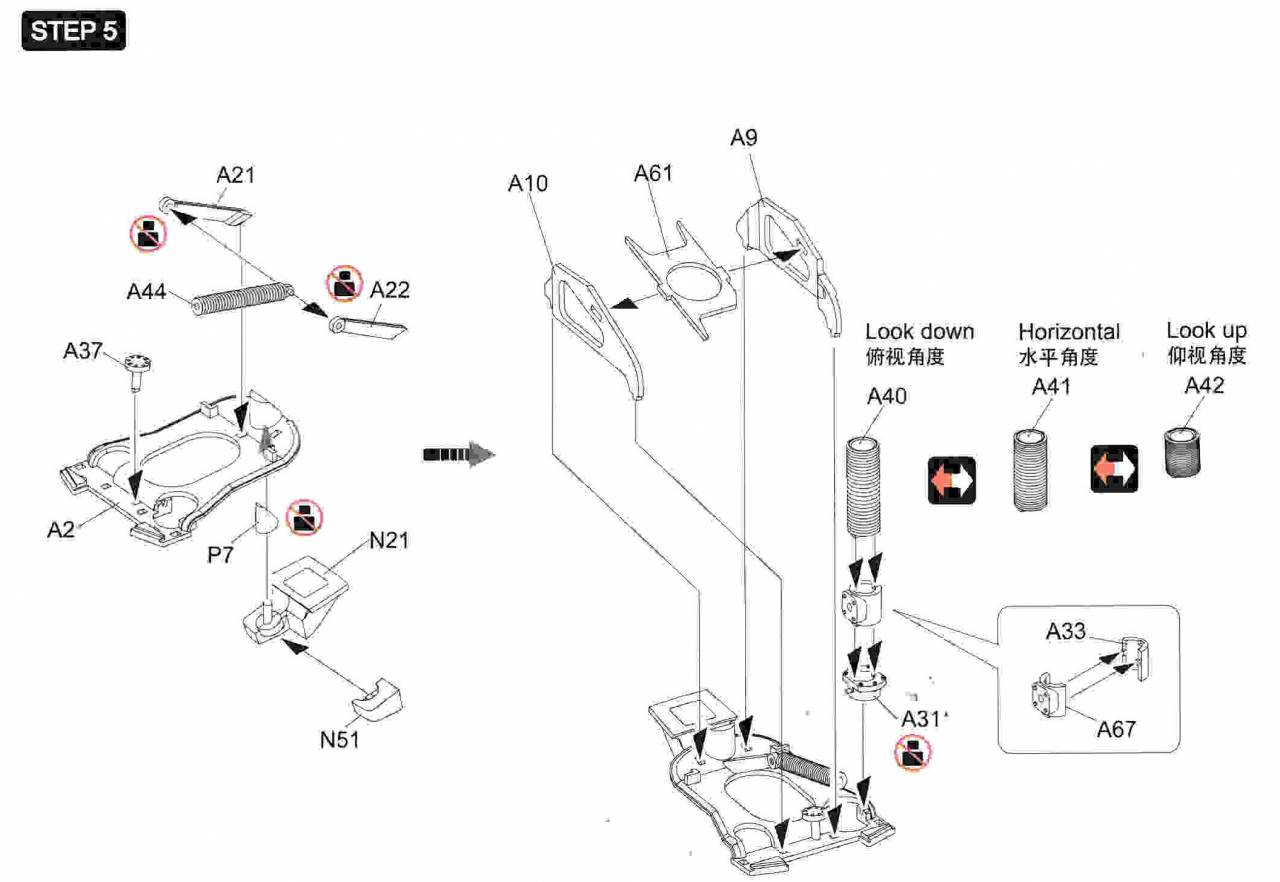
The parts
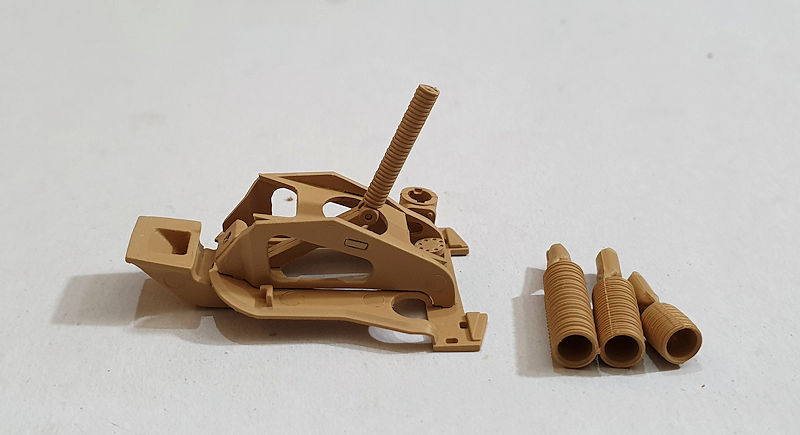
Assembled
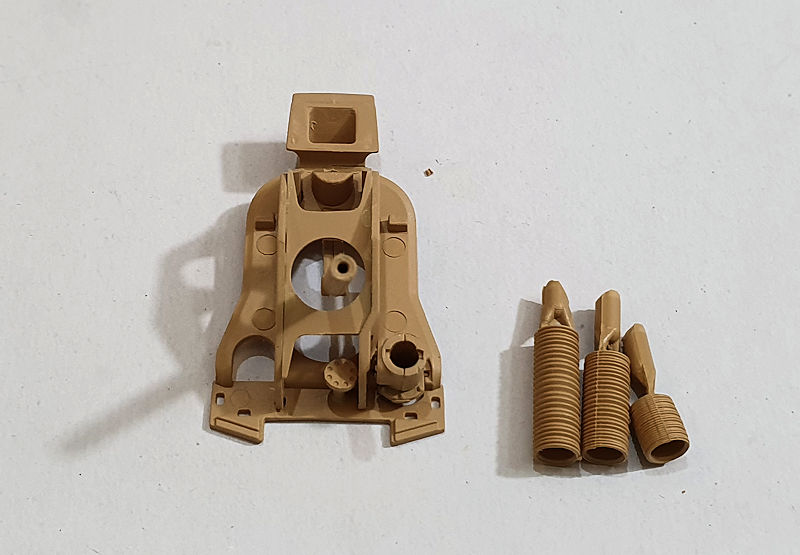
Painted

Test fitting is critical as the slots all had to be opened more to get the mating parts to fit.
#456
Oklahoma, United States
Joined: September 22, 2016
KitMaker: 654 posts
Armorama: 638 posts
Posted: Tuesday, May 21, 2019 - 11:37 PM UTC
United Kingdom
Joined: February 01, 2014
KitMaker: 35 posts
Armorama: 2 posts
Posted: Wednesday, May 22, 2019 - 12:08 AM UTC
great work will follow your build

#456
Oklahoma, United States
Joined: September 22, 2016
KitMaker: 654 posts
Armorama: 638 posts
Posted: Wednesday, May 22, 2019 - 03:56 AM UTC
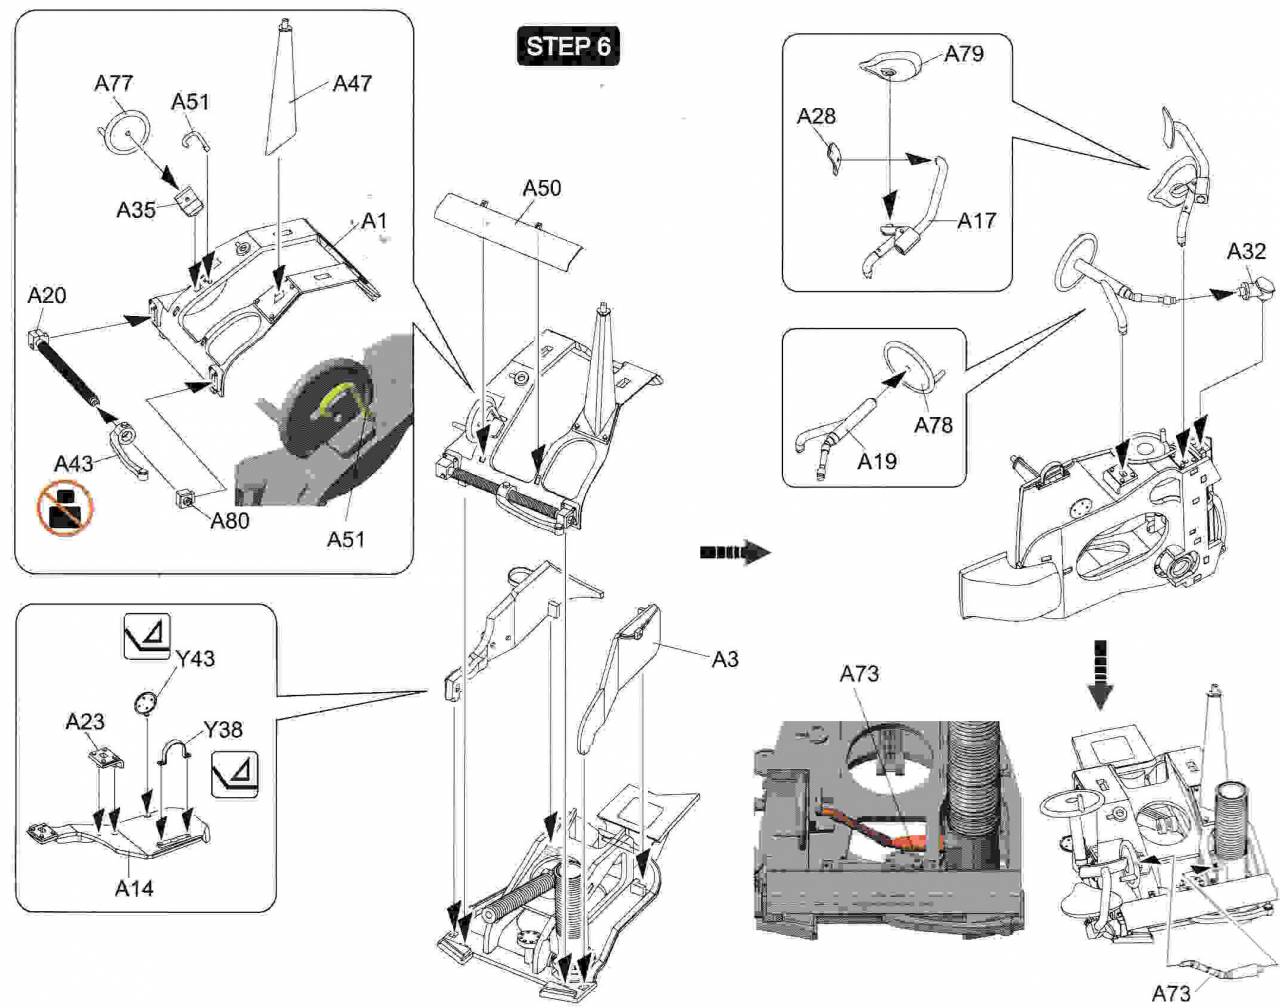
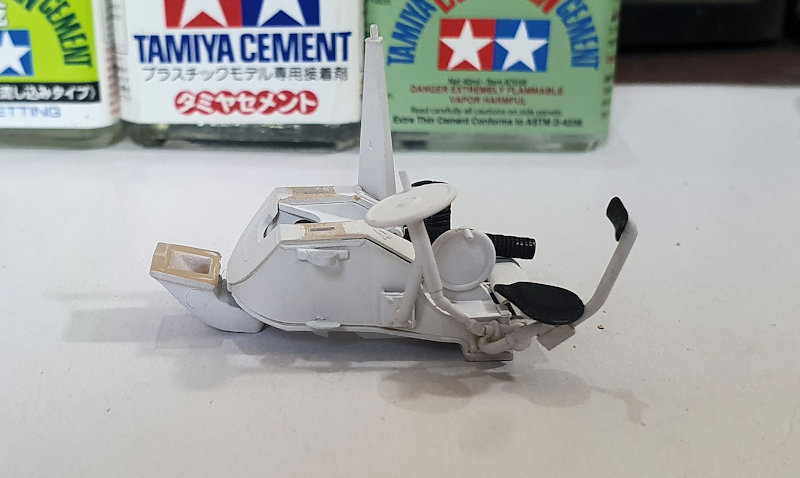
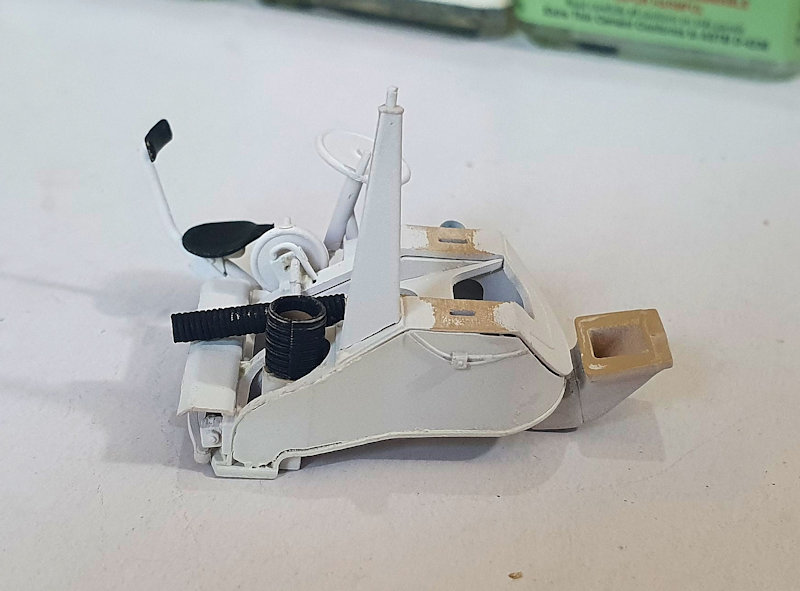
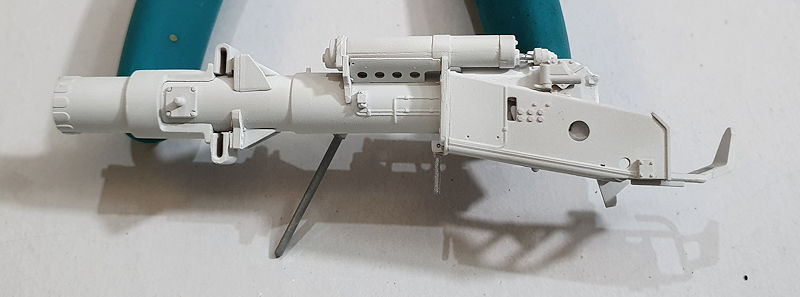
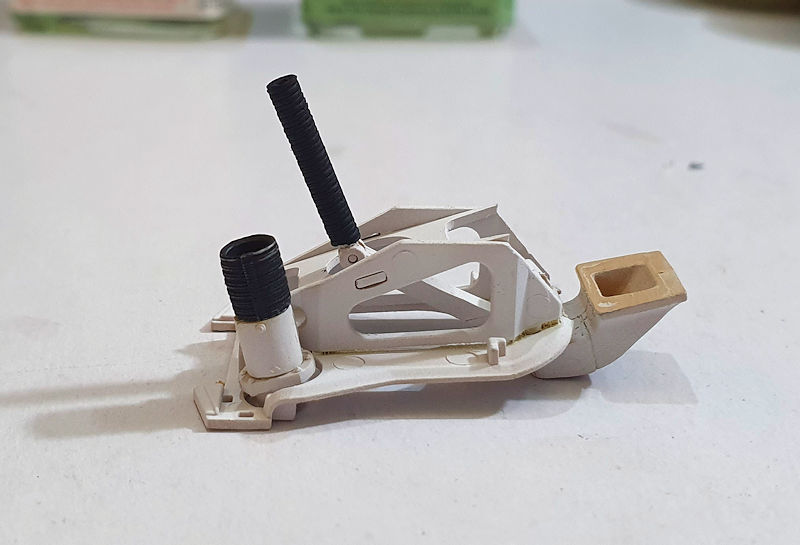
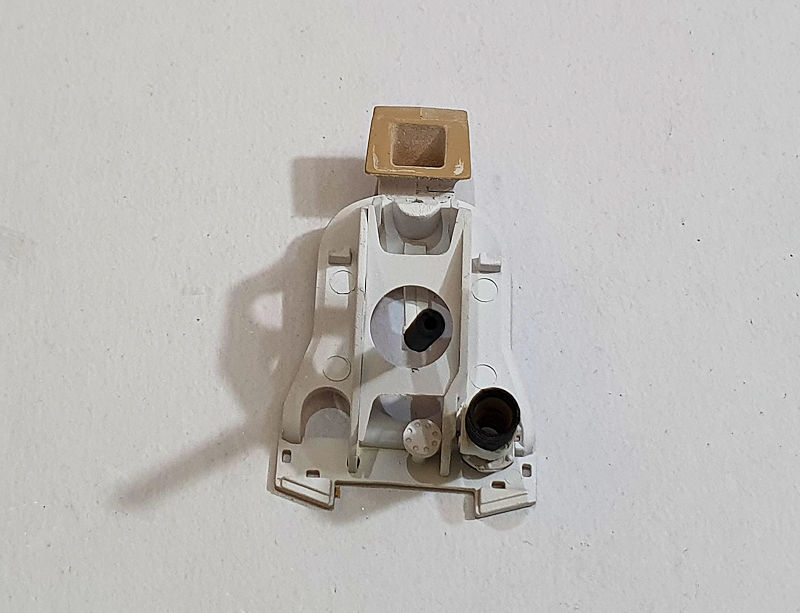
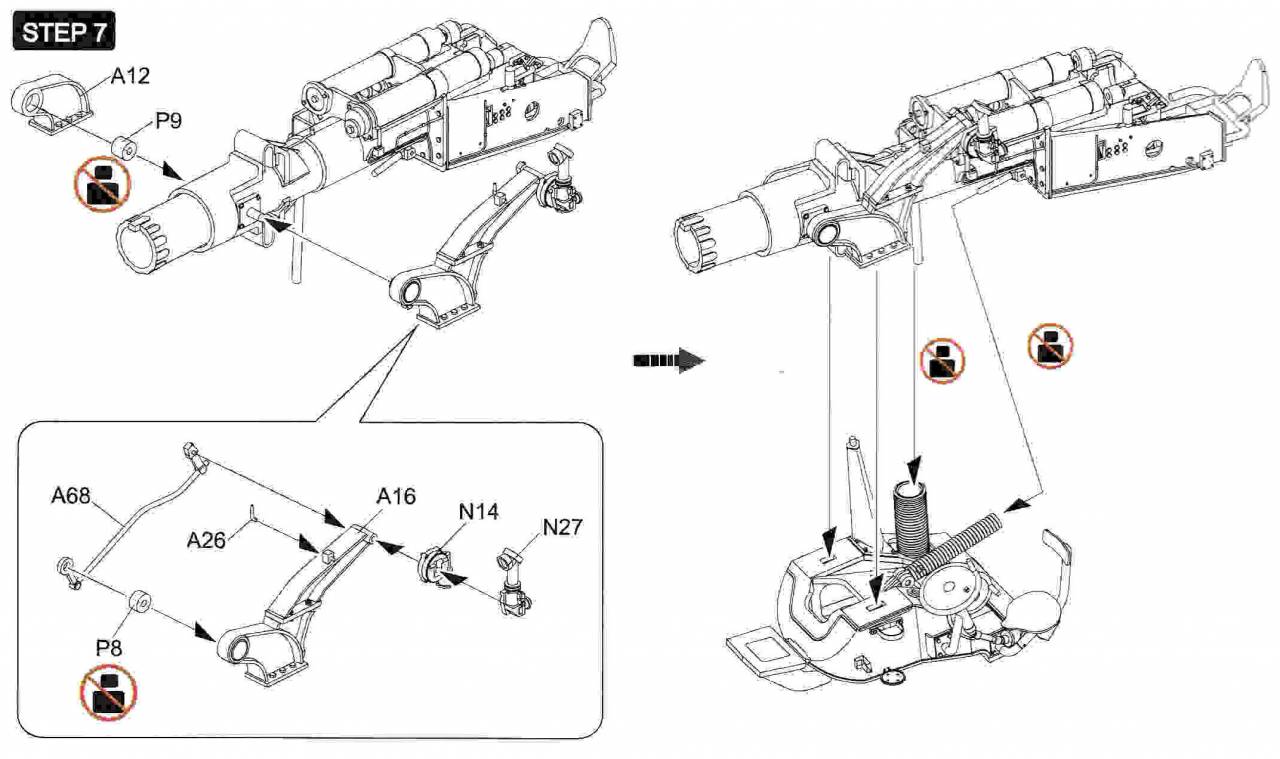
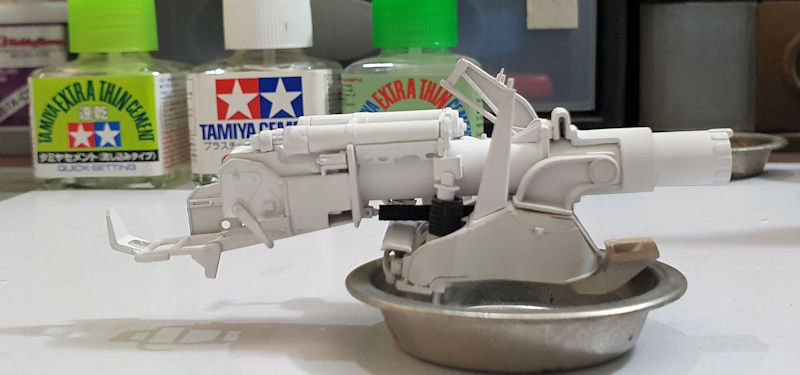
Step 7 is done. There is not many parts in this step. However, the recesses where the polycaps (P8 & P9) fit are too small. I had to drill them out with a 3mm drill bit to get the caps to fit.
I've left off the gunsight for now. That will be installed at the end of the build.
Instructions
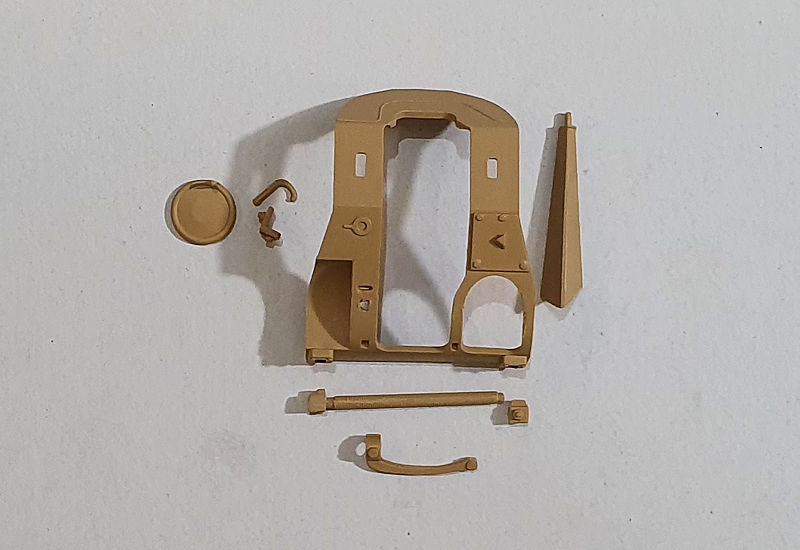
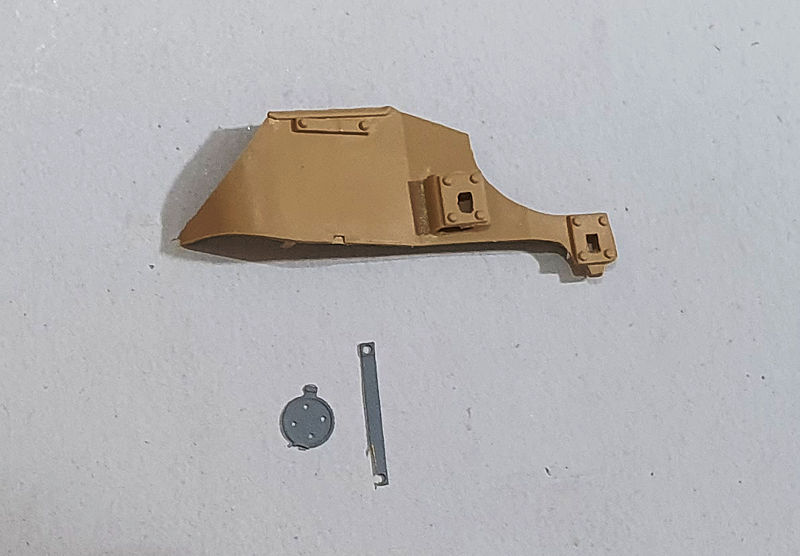
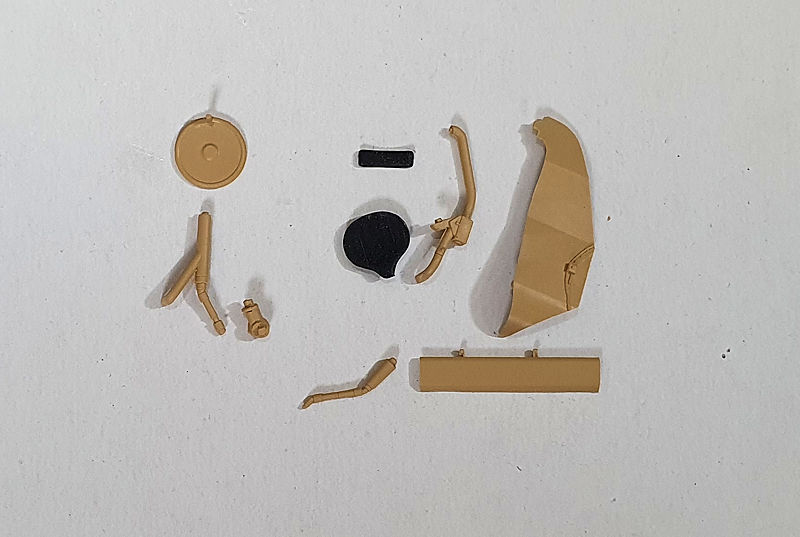
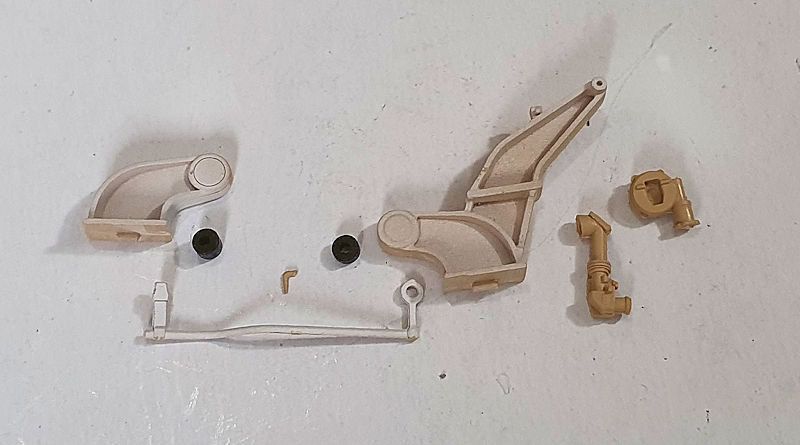
Parts
Completed interior portion of the main gun.

You do have a lot of mold lines that need to be removed for the parts to fit flush with each other.
#456
Oklahoma, United States
Joined: September 22, 2016
KitMaker: 654 posts
Armorama: 638 posts
Posted: Thursday, May 23, 2019 - 02:37 AM UTC
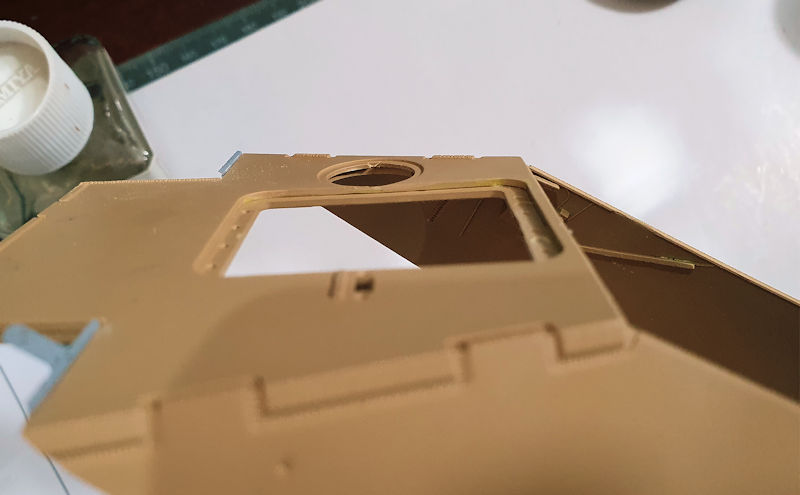
Step 8 begins assembling the superstructure. The two PE parts (Y28 & Y91) require 2 90 degree bends each. It would be nice if the instructions showed better views of the required bends. This is missing throughout the instructions.
Instructions

Parts
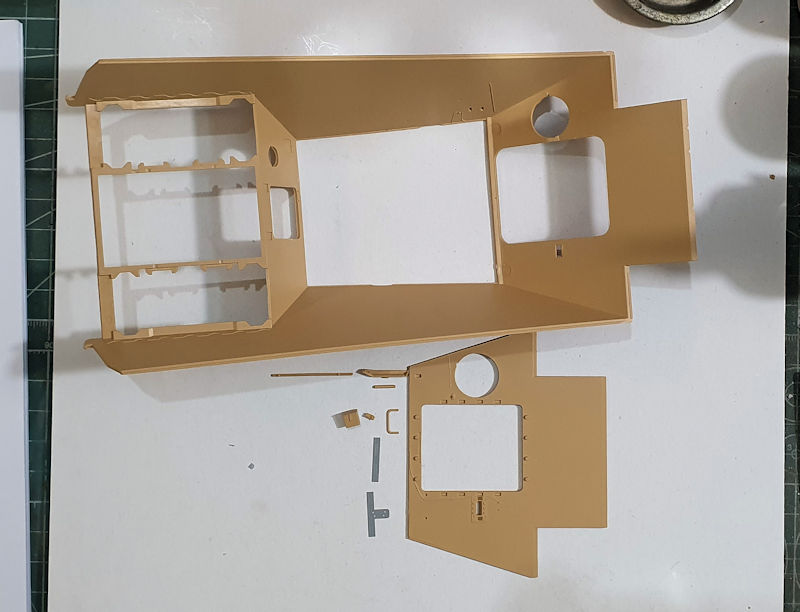
You can see in this pic my superstructure was damaged. Fortunately, it was not broken, only deformed.
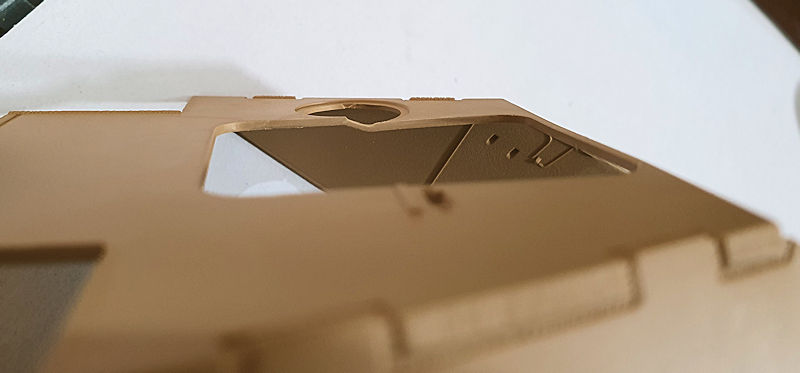
How I clamped part N40 to make sure it was fully seated. The red tipped clamps are ratchet type clamps. I was able to really apply pressure over the deformed area to make sure it was properly glued.
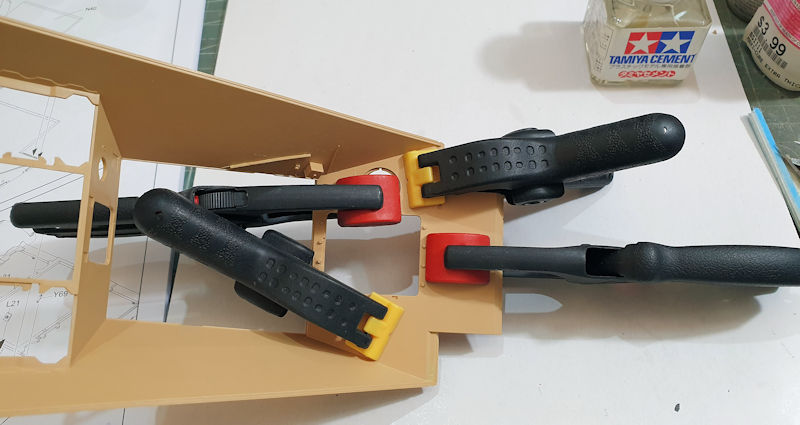
The result is that the deformed area was straightened.
Assembly completed
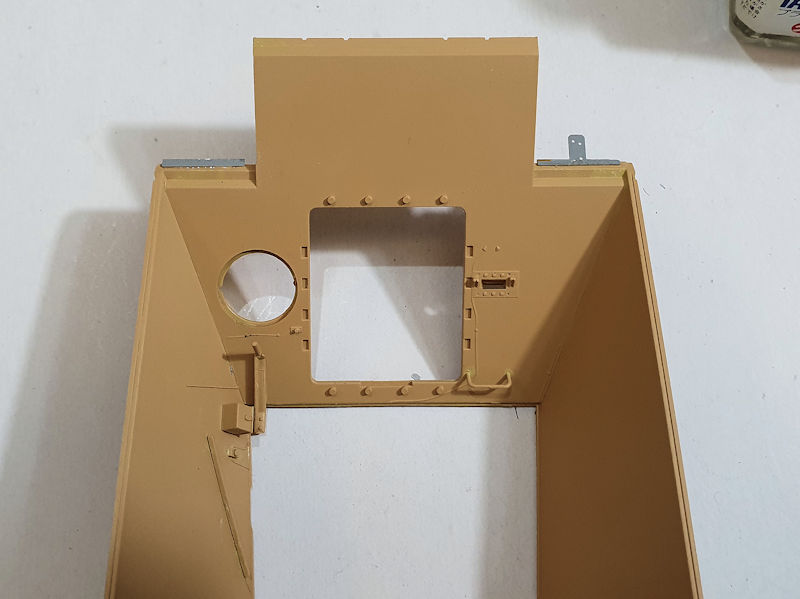
Will paint in a later step.