

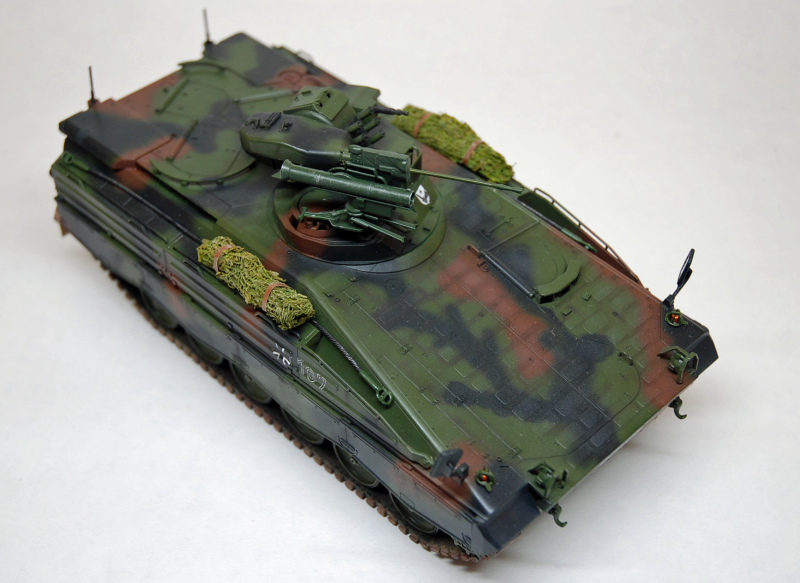
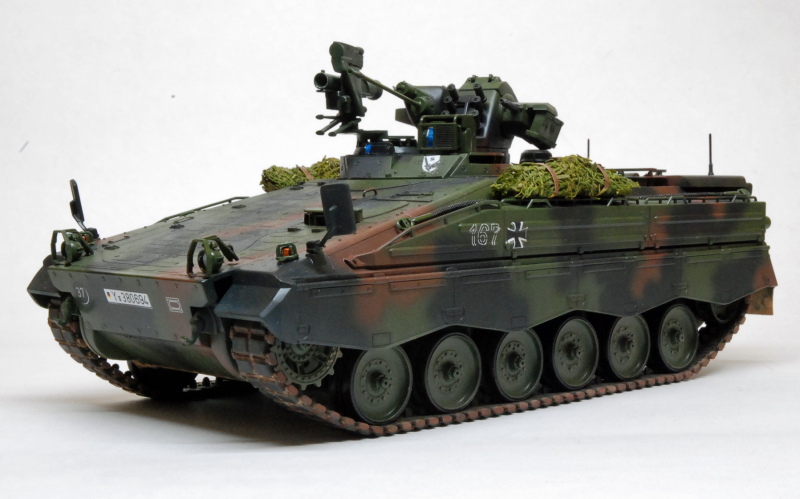
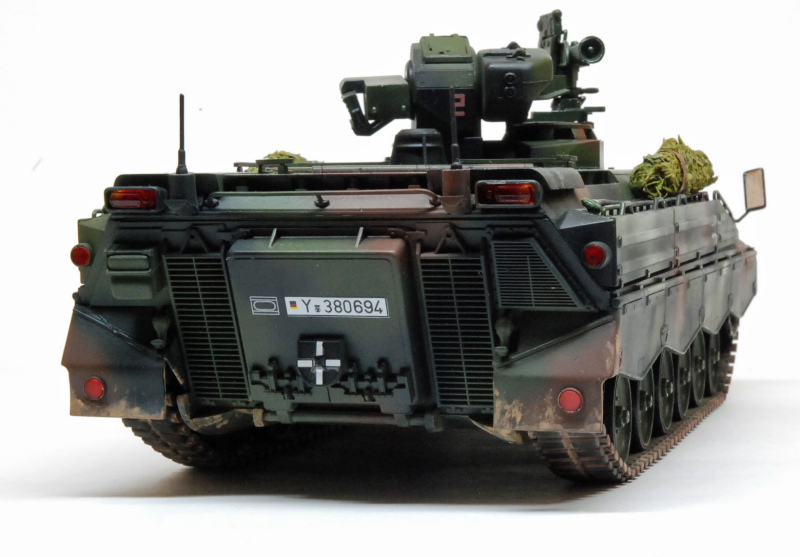
1⁄35Marder1A3
6
Comments


About the Author


FROM: ISTANBUL, TURKEY / TüRKçE
Have been "seriously" modeling since 2002. I build armor and more recently aircraft, as well as some sci-fi when I feel like it.
Comments


Well done!
I have a Spae.Pz. 2 Luchs on the way, I'll finish it next month... which colours did you use?
AUG 22, 2007 - 08:02 AM
Hi all!
James, the colors are Tamiya's Nato Colors, namely XF-67(NATO Green), XF-68 and XF-69 (NATO Black and NATO Brown). I was planning to use Gunze Sangyo's NATO Color set, but a fellow modeller took them from me to paint his Panzerhaubitze 2000. We then put our models side by side to see whether the colors matched. The NATO black from the two producers are the same. The greens are very much alike, Gunze's green is a bit darker. The browns, however, are very different. Tamiya's NATO brown is comparetively lighter than Gunze's. I think for a German Marder, Tamiya's brown does the trick. By the way, there's lots of postshading on the original colors, so it might look different.
The kit is pretty much out of the box except for the camouflage netting, which I made with gauze, herbs and white glue, then painted with oils. It definitely looks better than the plastic things given with the kit. However, my straps did not look good.
By the way, anyone out there wishing to buy a Marder, I would recommend this one rather than Tamiya's Marder1A2. True, that one has an engine and two crewmen, however it is older and the level of detail can not approach Revell's Marder1A3. For the maximum result, maybe you can kitbash the two stealing the engine and the crew from Tamiya (Don't remember if A2 and the A3 variant use the same engine though).
For braille scale, Revell has issued the exact same vehicle in 1/72, it has the same parts and nearly the same amount of detail. I liked it so much that I am building it at the moment (I normally despise 1/72). That one is also a jewel.
AUG 22, 2007 - 09:21 AM

Hi Emre,
Very nice Marder!
What did you use for the camo nets if I may ask?
cheers
Brent
AUG 22, 2007 - 09:38 AM
I used medical gauze dressing, oregano(or thyme, whatever this herb is called) and white glue.
While we are at it, here's a quick description...
First, I took some medical gauze dressing and using the kit supplied nets for guidance, I cut them to desired size...
 Then I diluted white glue with water for easy use,
 which I applied on the spread medical gauze dressings with a brush, till they were really wet.
 At this stage, I stole some oregano(thyme, whatever it is called) from the kitchen. I scattered these on the medical gauze with glue randomly.
 Then came the fun part of rolling. I rolled the net, watching out for excess oregano falling freely. After the "roll", I thought the net could use more oregano, so I applied more glue and more oregano:
 At this stage, the net is wet and you can shape it. However, once the white glue dries completely, you won't be able to change its shape. I recommend giving it its shape at this stage and then letting it dry for a day at a safe place.
After drying, I first applied oil paint, then I sprayed Humbrol No:150 forest green and then I applied a drybrush using Naples yellow.
At this stage, the net is wet and you can shape it. However, once the white glue dries completely, you won't be able to change its shape. I recommend giving it its shape at this stage and then letting it dry for a day at a safe place.
After drying, I first applied oil paint, then I sprayed Humbrol No:150 forest green and then I applied a drybrush using Naples yellow.
 Here they are before they are sprayed Forest green, you can see they really need a few shades of green to look realistic.
 Hope it is helpful. However Brent, since you work with a smaller scale, this might not work for you, you will need something smaller for the net rather than medical gauze dressing.
Then I diluted white glue with water for easy use,
which I applied on the spread medical gauze dressings with a brush, till they were really wet.
At this stage, I stole some oregano(thyme, whatever it is called) from the kitchen. I scattered these on the medical gauze with glue randomly.
Then came the fun part of rolling. I rolled the net, watching out for excess oregano falling freely. After the "roll", I thought the net could use more oregano, so I applied more glue and more oregano:
At this stage, the net is wet and you can shape it. However, once the white glue dries completely, you won't be able to change its shape. I recommend giving it its shape at this stage and then letting it dry for a day at a safe place.
After drying, I first applied oil paint, then I sprayed Humbrol No:150 forest green and then I applied a drybrush using Naples yellow.
Here they are before they are sprayed Forest green, you can see they really need a few shades of green to look realistic.
Hope it is helpful. However Brent, since you work with a smaller scale, this might not work for you, you will need something smaller for the net rather than medical gauze dressing.AUG 22, 2007 - 10:06 AM
Looking good, Emre
Thanks for the small tutorial on the camo netting. I might just steal that idea for my Leopard 1 for the white wash campaign.
Thanks for sharing
AUG 23, 2007 - 07:24 PM
Copyright ©2021 by Emre Efli. Images and/or videos also by copyright holder unless otherwise noted. The views and opinions expressed herein are solely the views and opinions of the authors and/or contributors to this Web site and do not necessarily represent the views and/or opinions of Armorama, KitMaker Network, or Silver Star Enterrpises. All rights reserved. Originally published on: 2007-08-18 00:00:00. Unique Reads: 9204

WEB HOSTING BY


Copyright ©2021 Armorama and Kitmaker Network, a subsidiary of Silver Star Enterprises
All Rights Reserved. Please read our Conditions of Use and Privacy Policy.
All Rights Reserved. Please read our Conditions of Use and Privacy Policy.