

1⁄35T-34/85
2
Comments
Introduction
Hardly anyone who visits this site will need any introduction to the T-34 family of tanks developed and built by the Soviet Union during World War II. Any superlatives I might add regarding the innovative design, effectiveness, or contribution to the war effort by the T-34 would be inadequate so I will dispense with all that. Model manufacturers have been kitting out different versions of the T-34 since nearly the beginning of the plastic scale model building hobby. Dragon has entered the fray on several occasions and has recently dusted off their T-34/85 molds as part of their Orange Box line. As such, the extra detail parts like aluminum turned barrels and photo-etched screens have disappeared in favor of a more no frills, less expensive, approach. Besides the drop in price compared to current releases most Orange Box kits come with a set of figures that would be generally appropriate. When Jim Starkweather contacted me about reviewing this kit (T-34/85 Orange Box kit #46) I asked if rather than an in box or build review if I could just build it as a Feature. Thankfully, Jim agreed, which is good because I didnt make any build notes! Hopefully, my photos will help.The build
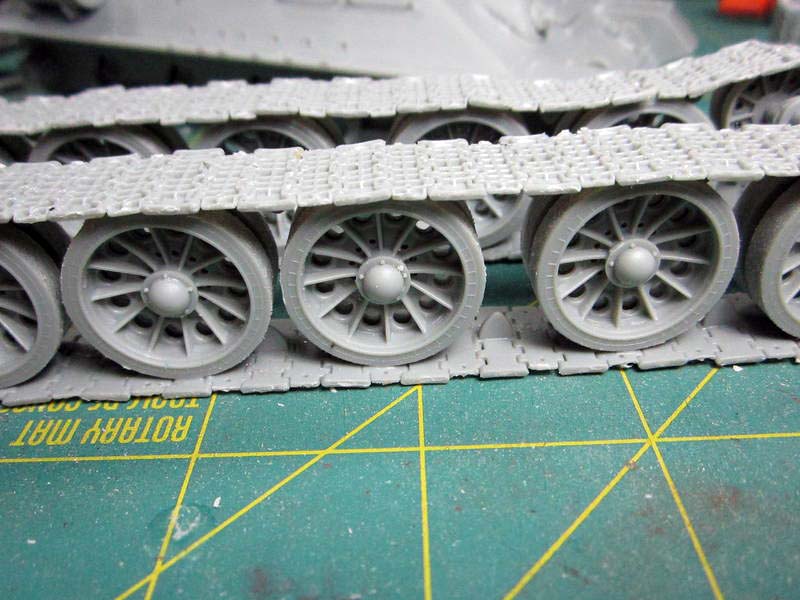
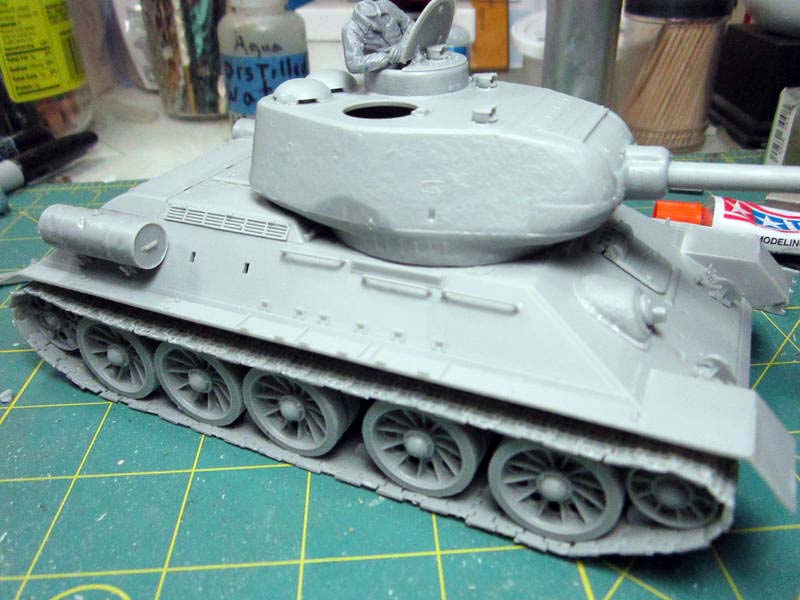
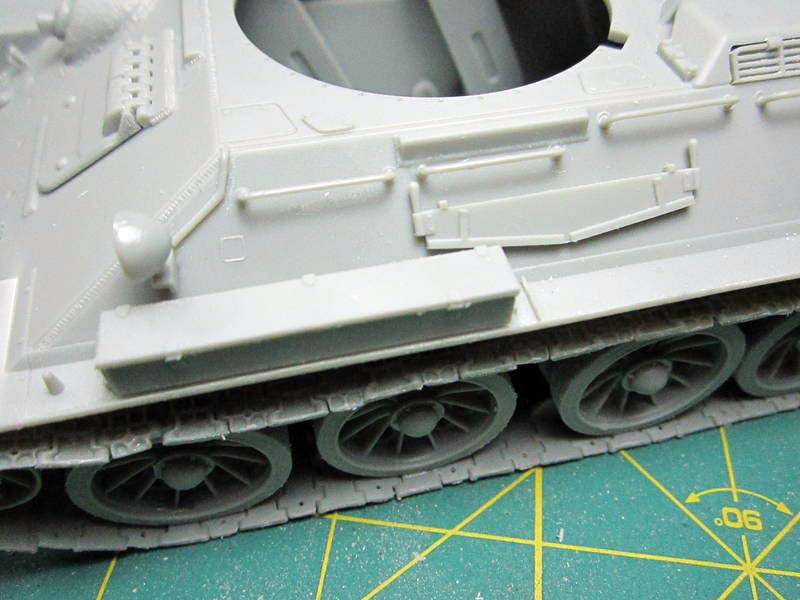
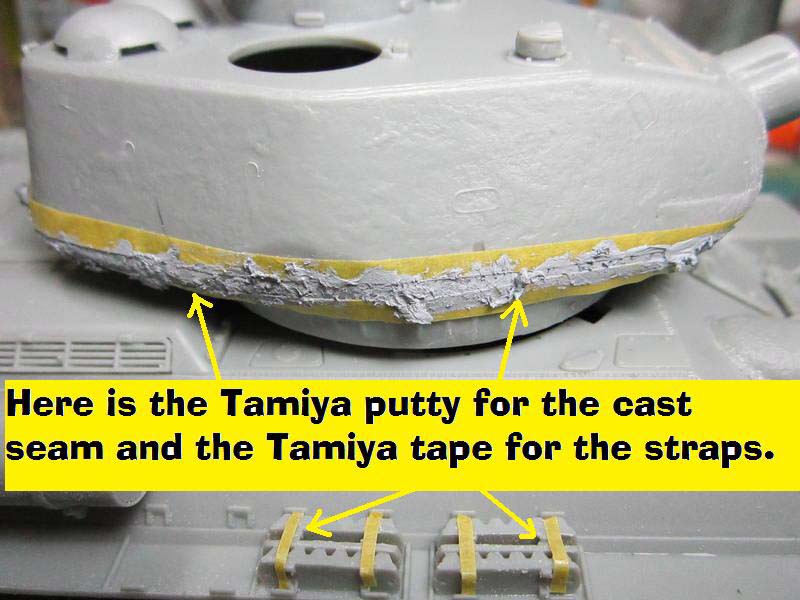
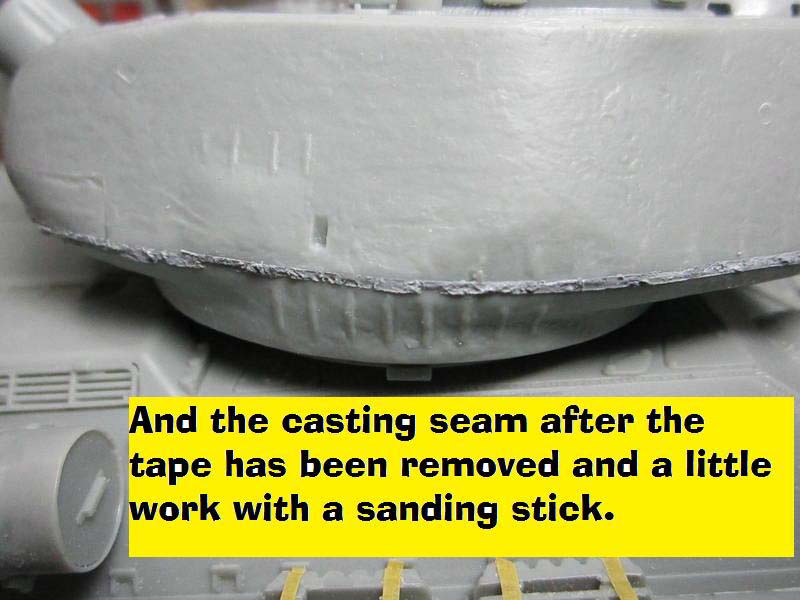
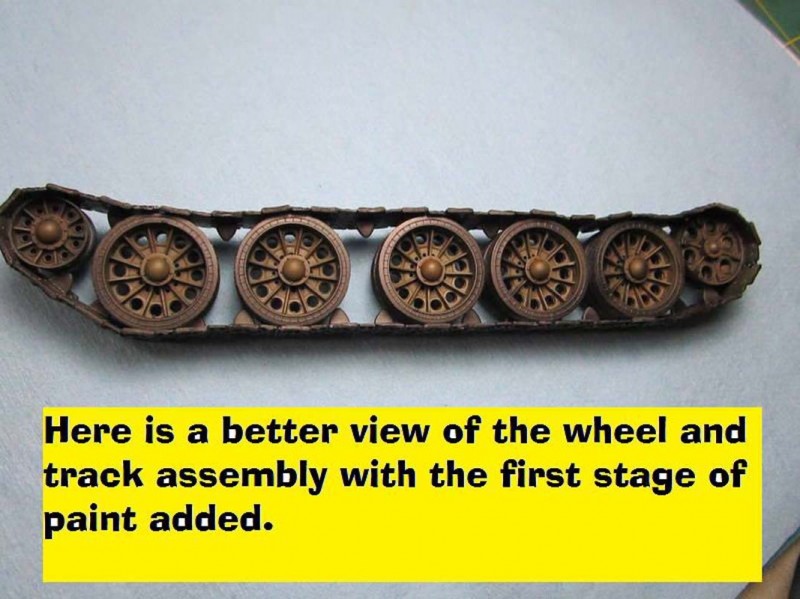
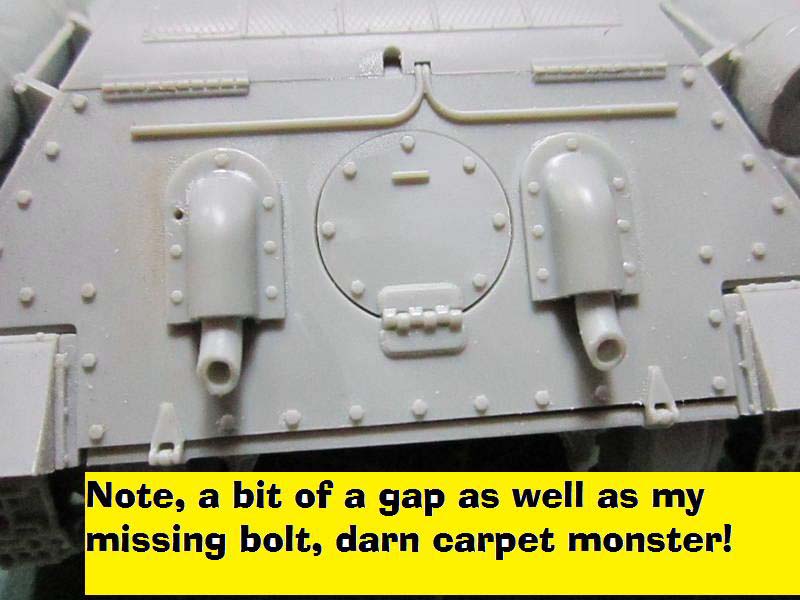
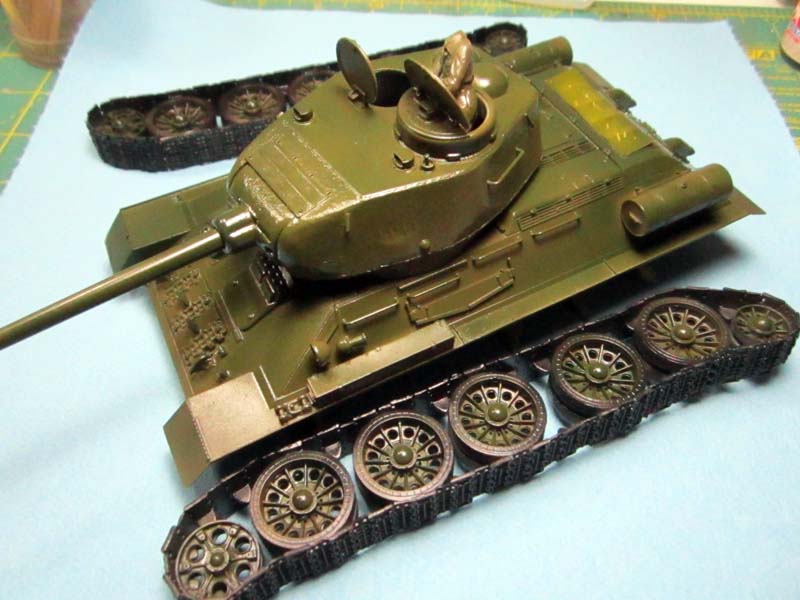
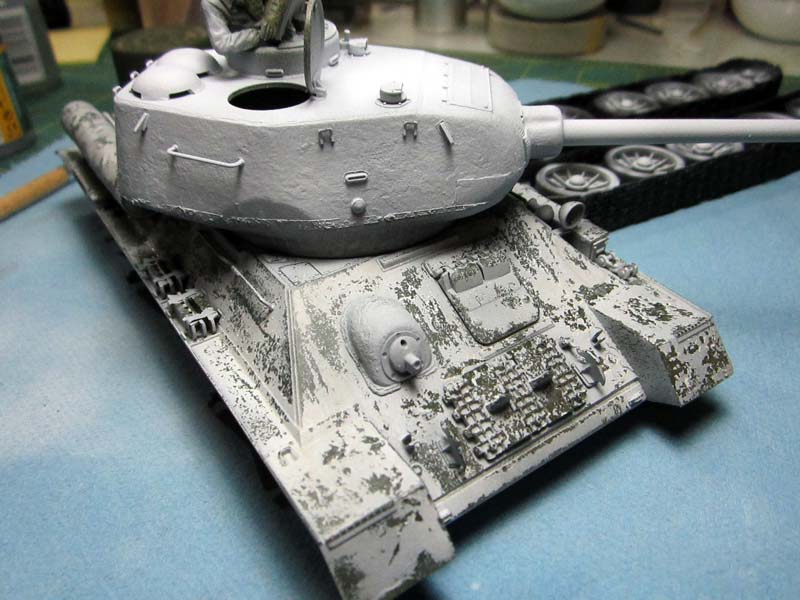
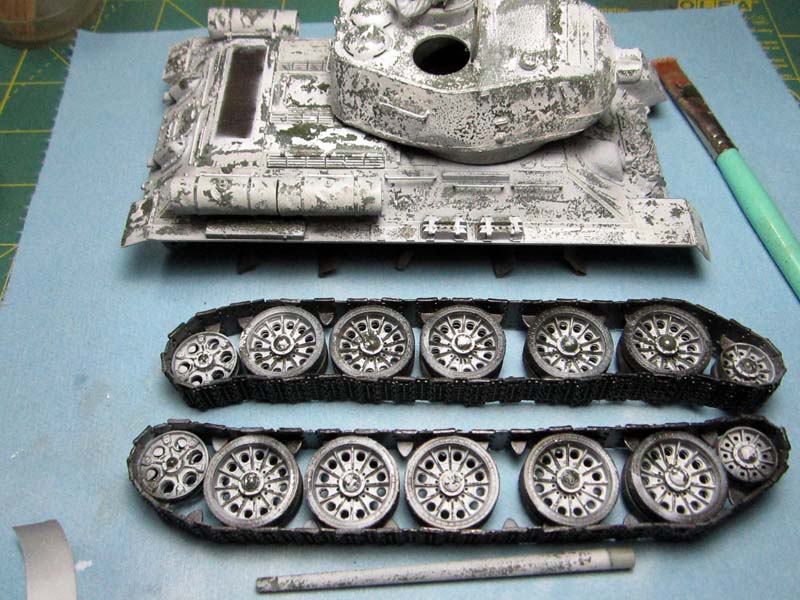
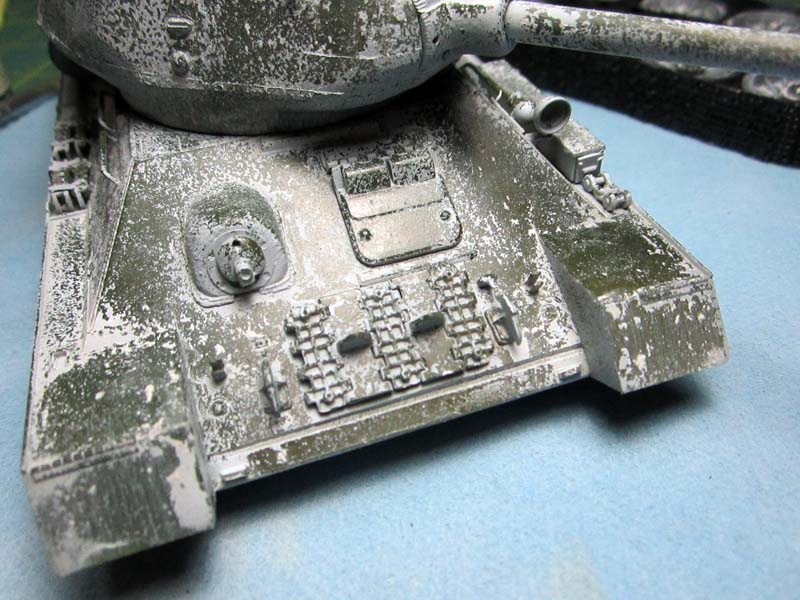
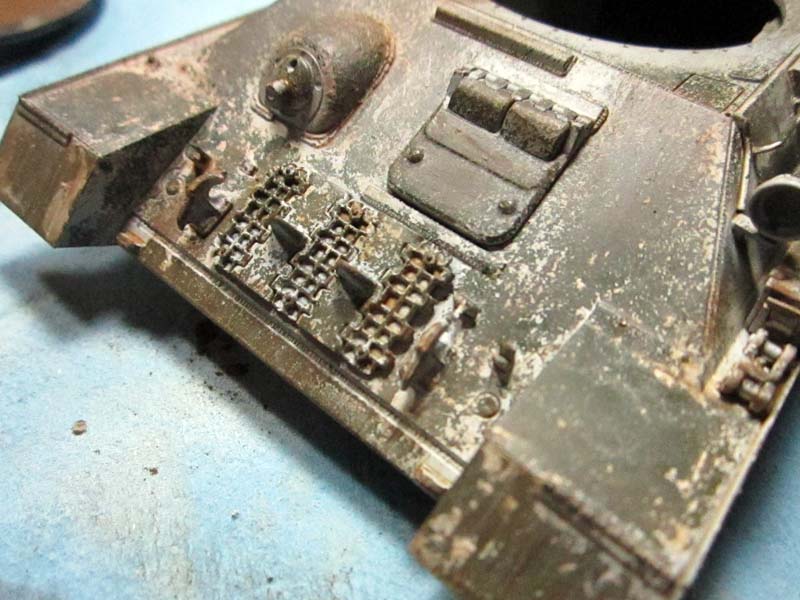
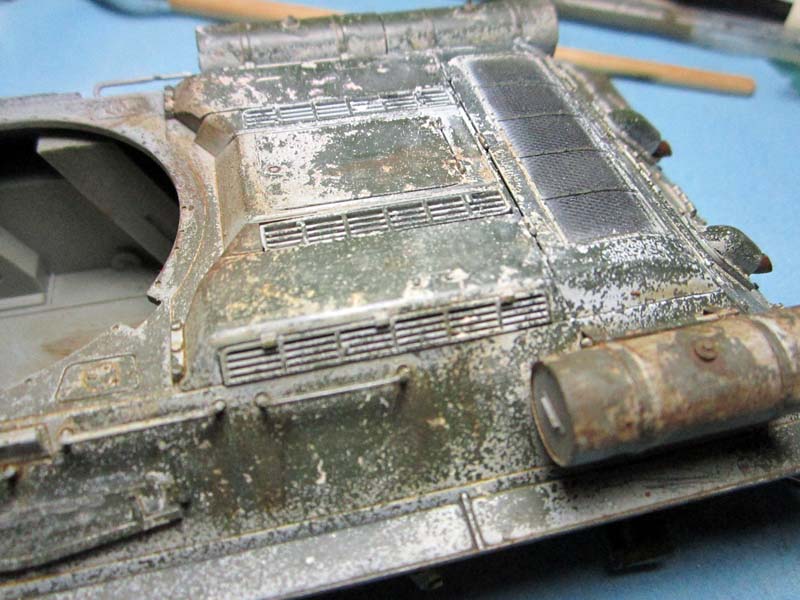
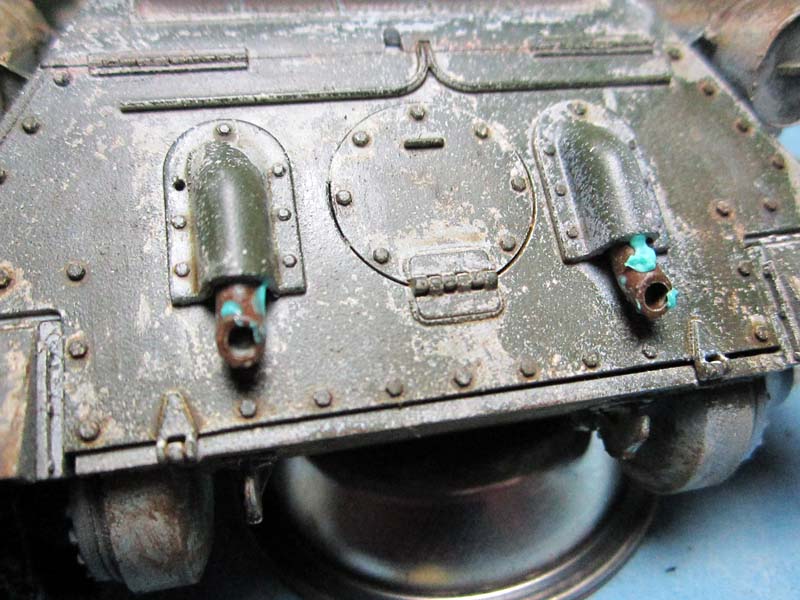
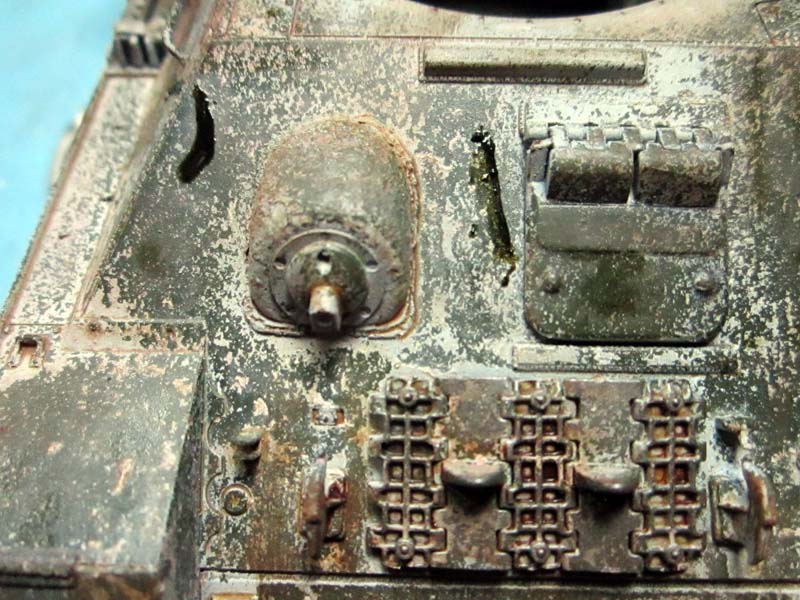
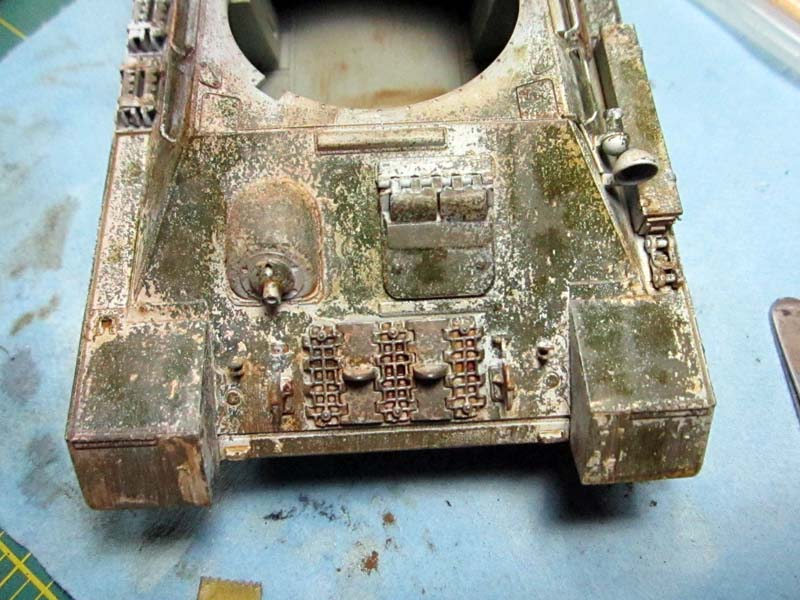
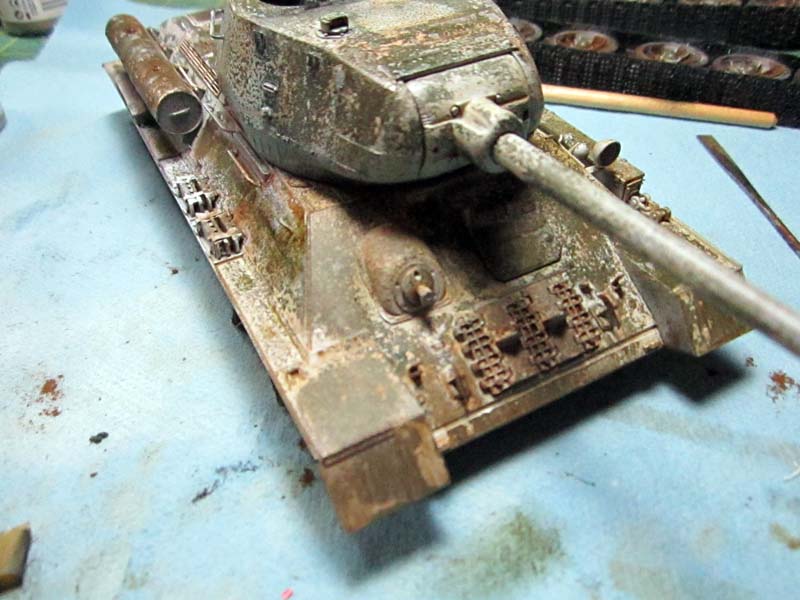
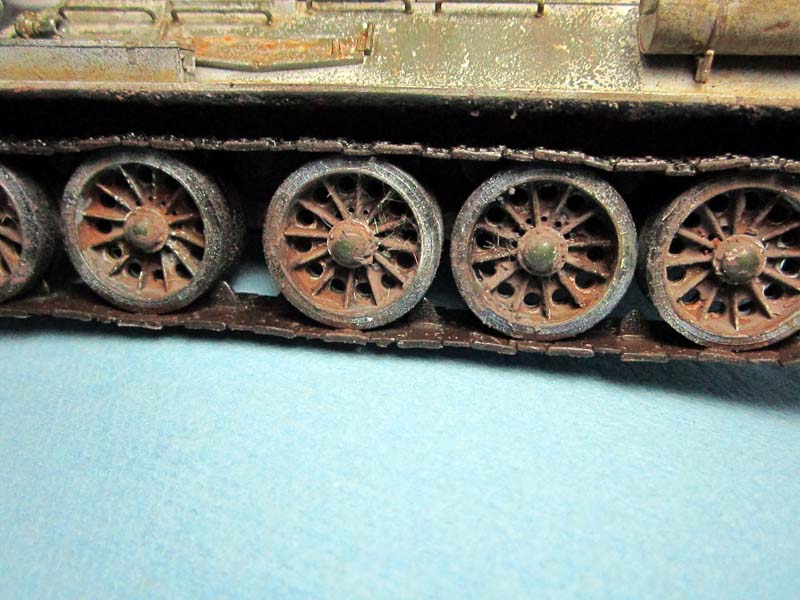
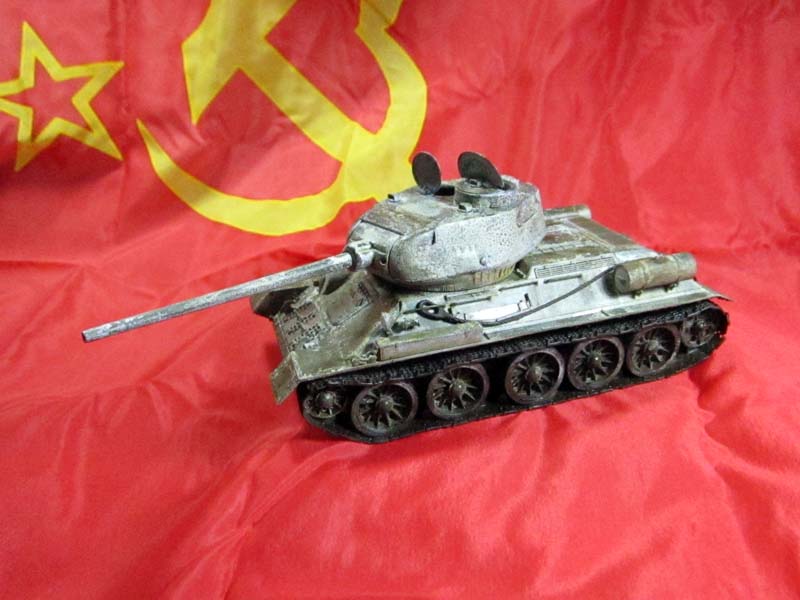
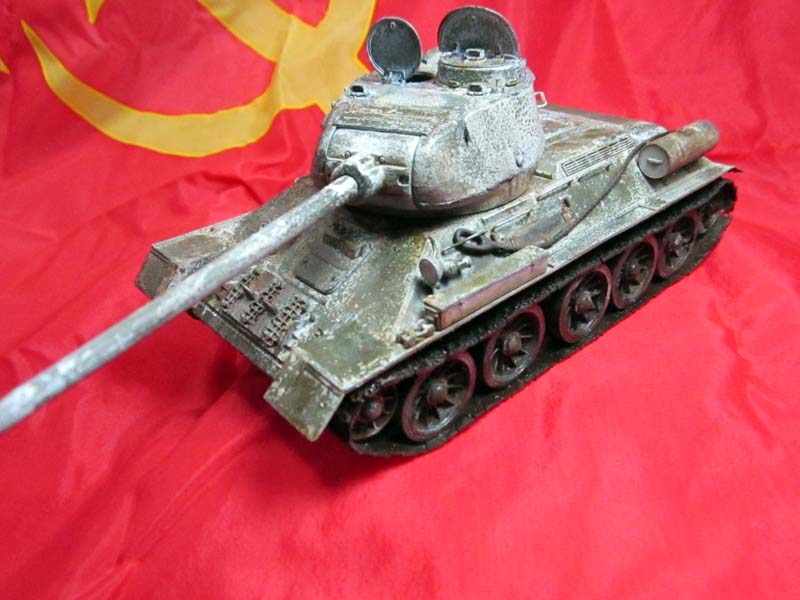
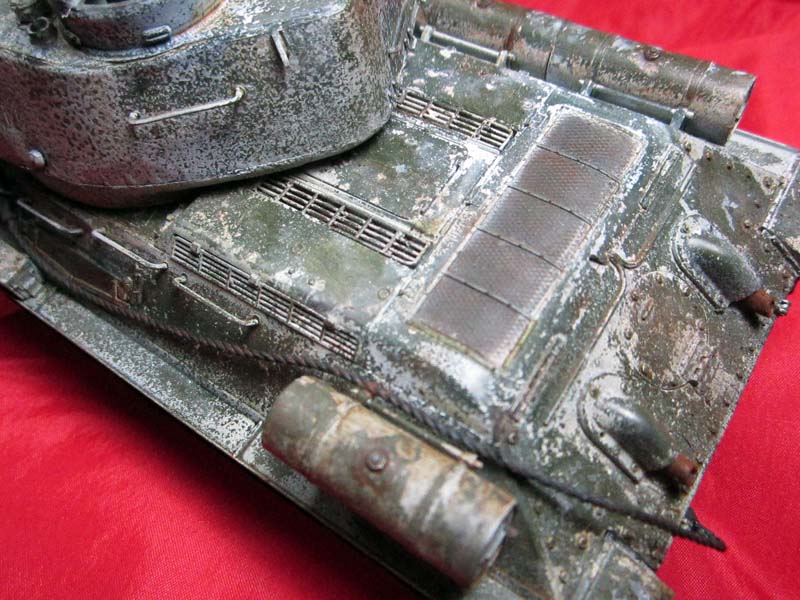
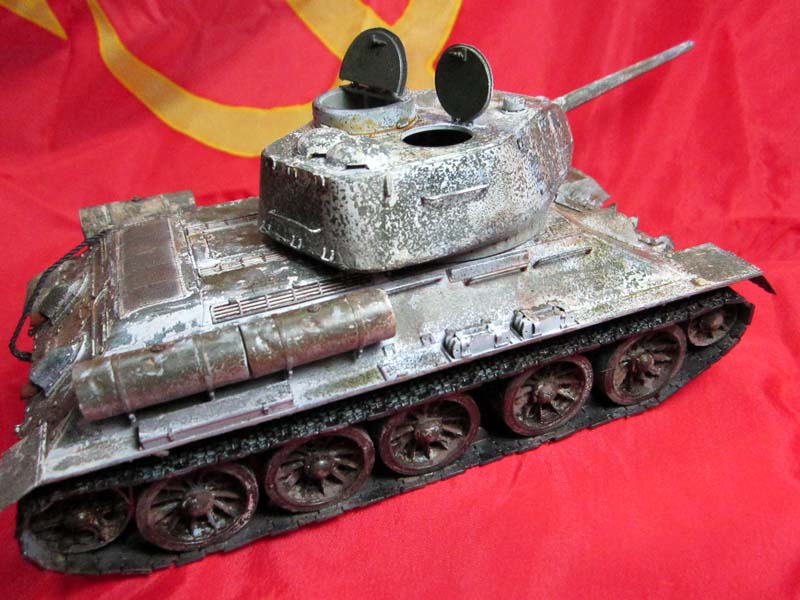
The kit is a getting a bit long in tooth now, it first was released in 1998 (I may be off by a year, but that is pretty close) but still holds up fairly well. I built the kit up rather quickly, a week and a half and it was done. The first thing was the torsion bar axles, Dragon Models came up with a winner in the way the axle housing and spring build into the chassis. I believe that they are still using the same set-up with more recent releases; at least all that I have built still have it. Following that I attached the axle stubs and got ready for the wheels and tracks. I wanted to be able to remove the entire wheel/track assembly for ease of painting and weathering so I needed to have a go at the tracks. No DS tracks here, so if you are not a fan of the new style one piece runs maybe you should tackle this kit! The tracks are actually very well done, easy to construct and robust. I appreciated that the Russians made nice heavy duty tracks, much easier to build then those fiddly Panzer I tracks. The styrene tracks do have a rather thick attachment point, it definitely looked like a fifteen year old kit here, but it was an easy clean up with a good sanding stick. To make the wheel/track assembly removable I needed to clean up and slide the wheels, idlers, and drive sprockets on the axle stubs without gluing them; in fact I use a bit of silicon spray to ease the removal. Once everything is in place I can make the bottom run of track and set the wheels on to the tracks and glue it down with copious amounts of liquid cement. I gave that a full day to dry and then could add the top run, again using way more glue than I probably needed. What I was trying to accomplish was to get a nice solid feel to the whole assembly, that way I wouldnt have any loose parts that could cause problems later down the line. After that the building of the remainder of the hull went quickly. There isnt much to the hull, the only on board piece of equipment is the saw which is cast as one piece, so construction moves rapidly. The external fuel tanks are well done, even pre-dented for you. The end caps of the fuel tanks could probably use a bit of extra detailing as the kit provided examples have solid molded handles which would look much better with an undercut to them. As well, the retaining straps are molded on, not bad but some of you may want to sand them down smooth and add your own from lead foil or your medium of choice. I did have a bit of a problem with the ice cleats that are stored on the right fender. The straps are molded in plastic and you are supposed to bend them around into something of a crescent shape to fit over the cleats. Well, all I accomplished was breaking half of them so I simple used some Tamiya tape to replicate the straps, maybe later I will add some buckle detail to them. Clearly, the biggest drawback of the kit is the rear upper hull. T-34s sported a very large engine intake screen but Dragon Models first kit of the tank used a solid screen. Dragon Models has since rectified the issue with a nice PE addition for virtually all of their T-34 releases but this being an Orange Box line kit you get the old solid molded piece. I thought that my superior modeling skills could overcome this shortcoming in the kit, but in retrospect not so much, maybe Im not as good as I assumed! I would really recommend that you try to dig up a PE example to add to the kit, it makes a big difference. Other than that issue the rest of the rear end went together easily. I drilled out one of the bolt heads on the exhaust shroud just for a bit of fun and some variety. The fit of the upper rear panel and the lower rear panel left a bit of a gap, but nothing that I couldnt live especially when you consider how rough some of the construction was on some of these beauties. The turret also built up quickly and easily (are you catching the theme here?). I believe this is a Factory 183 turret based on the ribbing detail molded into the lower portion of the turret. The turret shell comes in two pieces, pretty standard, but I wanted to add the prominent cast seam to give a bit more detail. I taped off the upper and lower limits of the seam with some Tamiya tape and plopped on some Tamiya plastic putty and left it to dry for a day. After that I removed the tape and knocked down the high points to give a better scale representation. The remainder of the grab handles, pistol ports, hatches went on without any issue. Before I get into the painting and weathering allow me to share some general build observations. Dont be fooled into thinking that the age of the kit means that it is something of a dog to build, just the opposite in fact. The kit goes together quickly and easily with decent detail. Yes, there are some drawbacks, thick sprue attachment points and no PE screens, but at least you dont have to deal with thousands of little plastic nodes from slide molding! However, I would bet most people would have kicked in a couple extra bucks to have the screens included as it really makes a difference.Painting and weathering
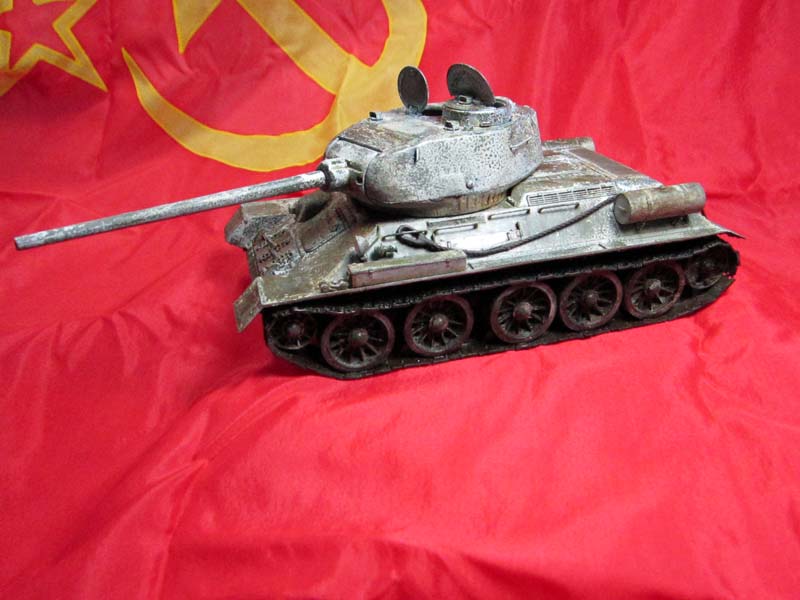
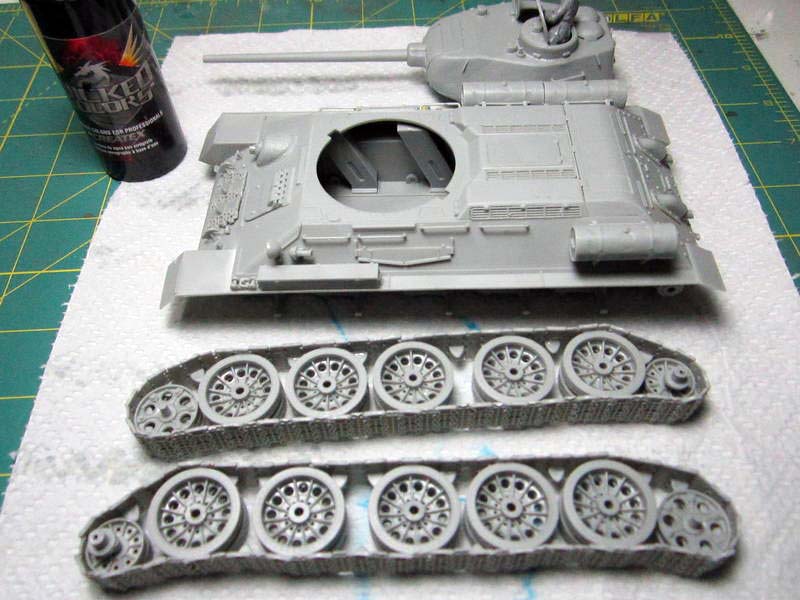
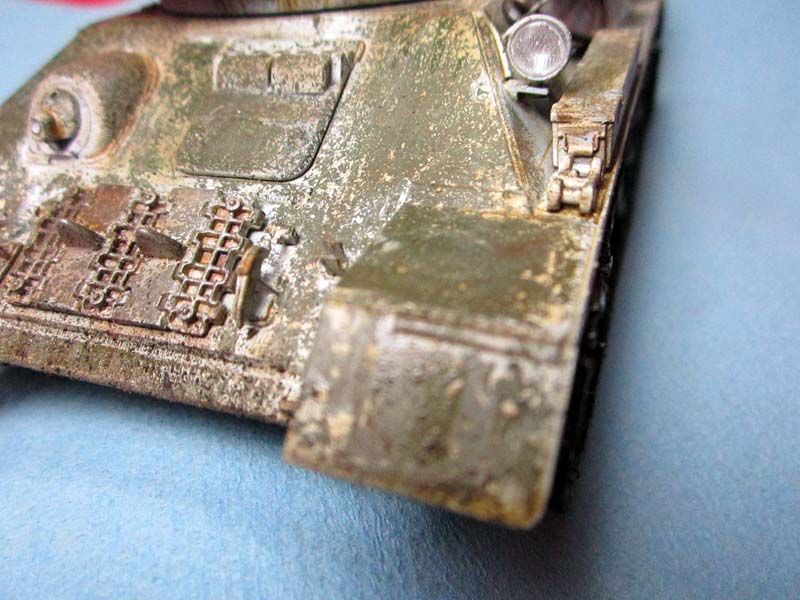
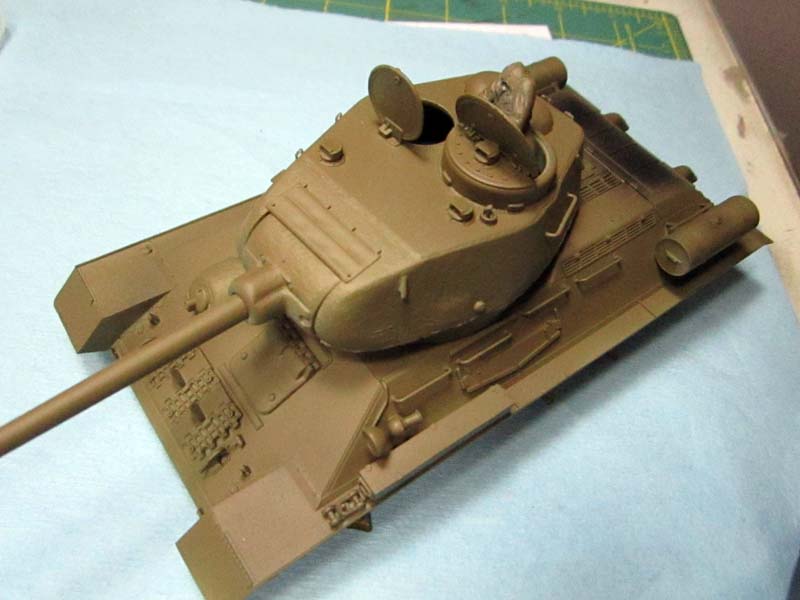
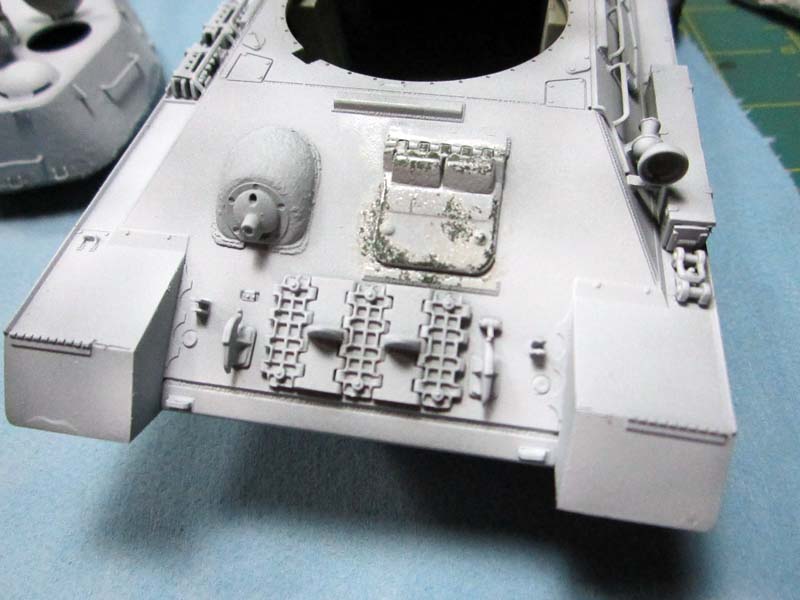
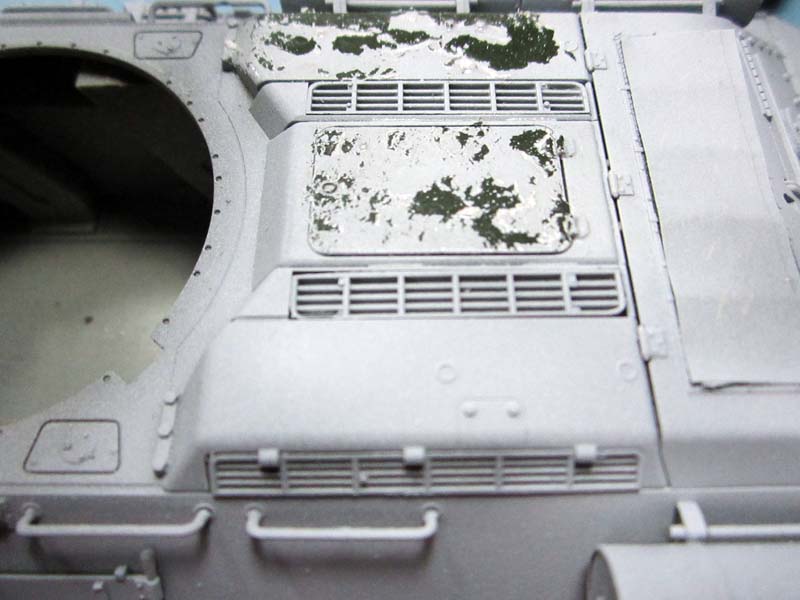
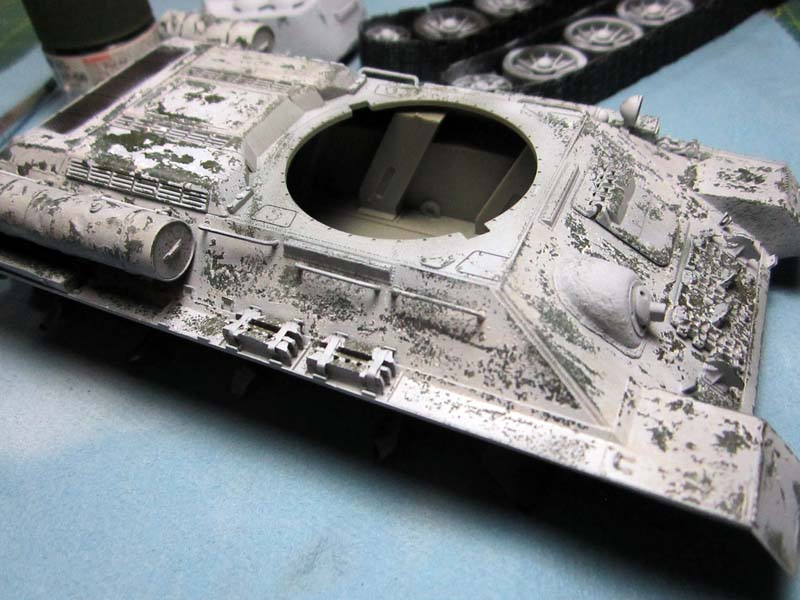
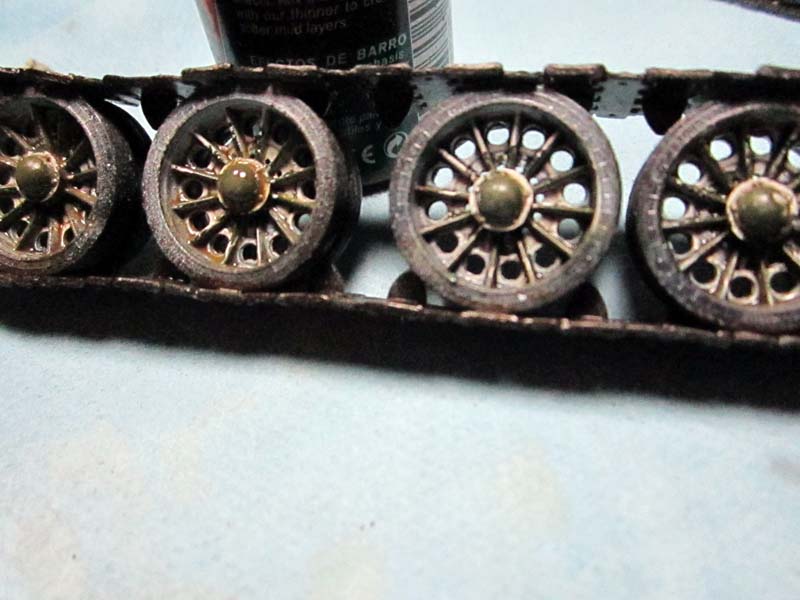
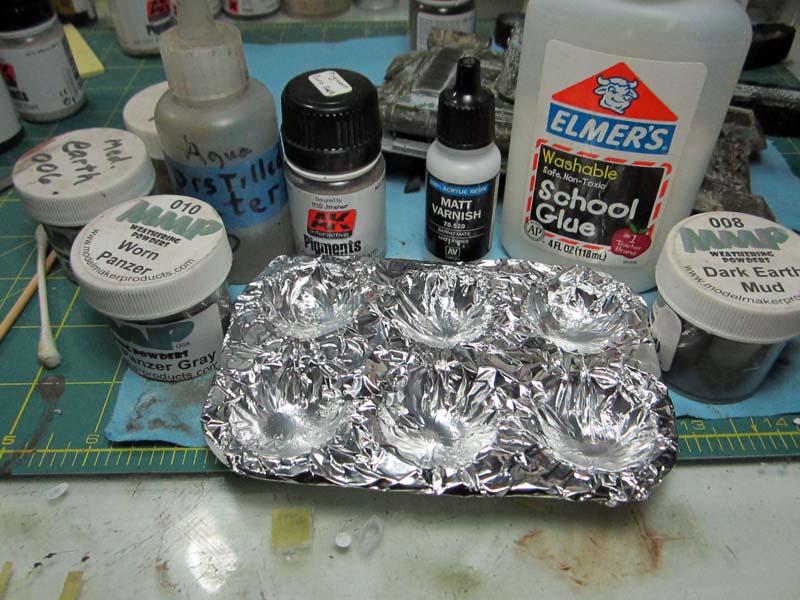
On to the painting and weathering! The photos show the completed kit and the initial layers of paint. I used Vallejo Air 17 Russian Green for the base coat after priming with Vallejo Olive Drab primer. I used AK Interactive Heavy Chipping fluid for the distressed whitewash as it makes the removal of the top layers of white much easier than hairspray does. After the chipping fluid dried I sprayed a couple of light coats of Vallejo White and set it aside to dry for all of 30 minutes. You can see some of the pictures here from the early stages of chipping. I did it in two stages, the first right after laying down the fluid and paint for large areas of worn whitewash and the second stage a day later. I delayed a day so that my second round of chipping would create smaller chips as everything would dry more thoroughly and hold on just a bit tighter than it would in the first hour. From that point I could add some washes and filters, a warm white and a dark earth. After that dried I used an oil pin wash with blue black. The photos with the dark smudges on the front glacis plate are oils for dot filters and mapping. I really like this part of the weathering, I dont know how effective I am with it but it is a lot of fun. After I finished that up I added a few extra oil pin washes and smudges to help add some visual impact. From there I moved onto pigments, again a lot of fun but it can be a bit of a mess (at least when I work with them) I mixed up six or seven different pigments from different manufacturers and went to work. I used white glue, matt varnish, and tap water as my pigment fixer which worked well particularly in the track area. The last few things were picking out the exhaust stubs for extra rusting and the saw for a more metallic finish using pigments. Finally, it was time to try and make the intake look less like a solid piece and more like a real screen, a couple of layers of dark wash into the recesses and some drybrushing (remember that?) to hit the highlights. And yeah, I know, it still looks like a solid piece!! When all that was done the build was at an end and it was time to take some final photos. I broke out the old Soviet flag, a souvenir from a trip many years ago, as an appropriate backdrop for the finished photos. Dont be scared off due to the age of the kit, it goes together easily with far more highlights than drawbacks, although I really would recommend that you pick up a set of photo-etched engine intake screens to really make it pop.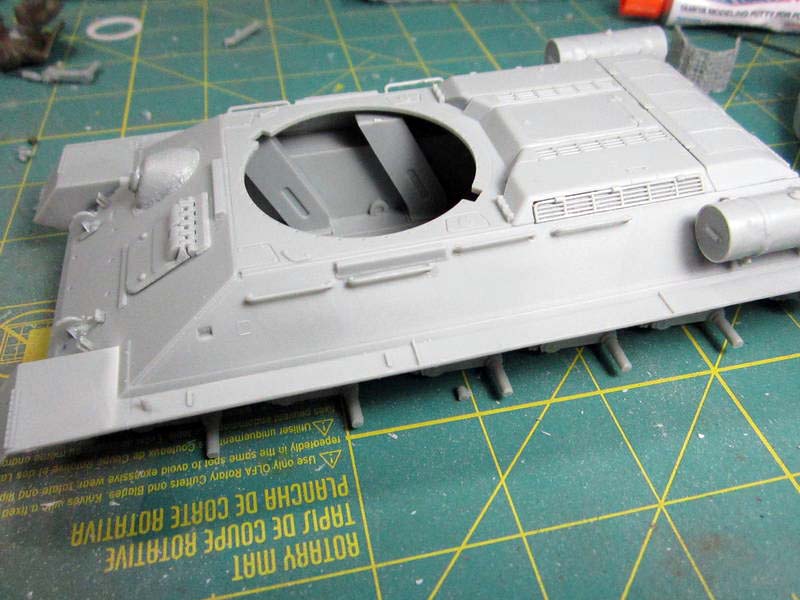


About the Author


FROM: CALIFORNIA, UNITED STATES
I have been modeling for about 30 years now. Once upon a time in another century I owned my own hobby shop; way more work than it was worth. I tip my opti-visor to those who make a real living at it. Mainly build armor these days but I keep working at figures, planes and the occasional ship.
Comments

It was great to see this in the flesh last night Rick. Looks great!
NOV 22, 2013 - 05:06 AM

Copyright ©2021 by Rick Cooper. Images and/or videos also by copyright holder unless otherwise noted. The views and opinions expressed herein are solely the views and opinions of the authors and/or contributors to this Web site and do not necessarily represent the views and/or opinions of Armorama, KitMaker Network, or Silver Star Enterrpises. All rights reserved. Originally published on: 2013-11-20 18:52:46. Unique Reads: 15422

WEB HOSTING BY


Copyright ©2021 Armorama and Kitmaker Network, a subsidiary of Silver Star Enterprises
All Rights Reserved. Please read our Conditions of Use and Privacy Policy.
All Rights Reserved. Please read our Conditions of Use and Privacy Policy.