

1⁄35Cromwell ARV Mk I Conversion
8
Comments
Background
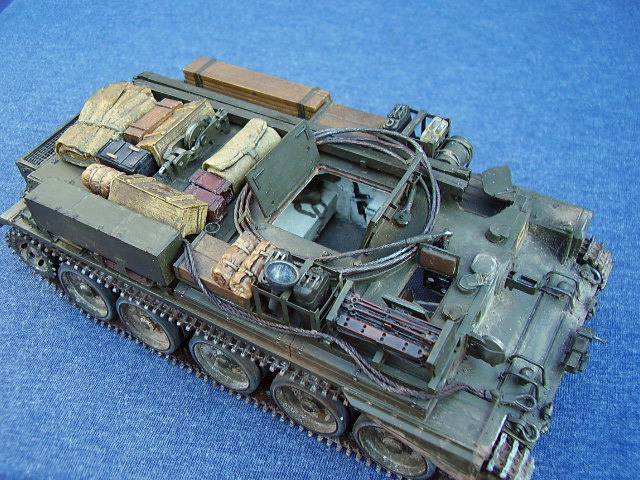
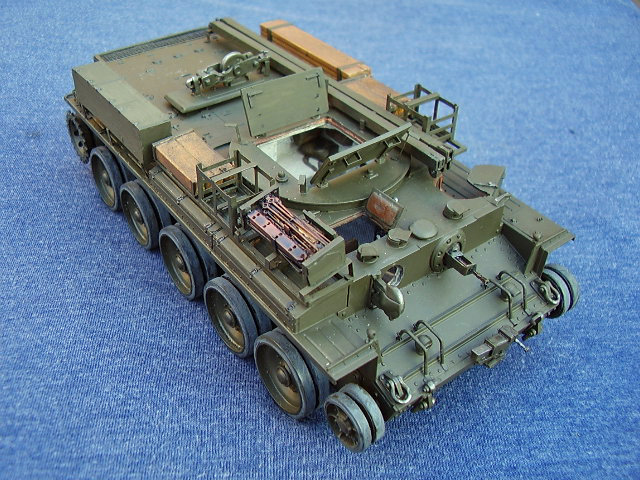
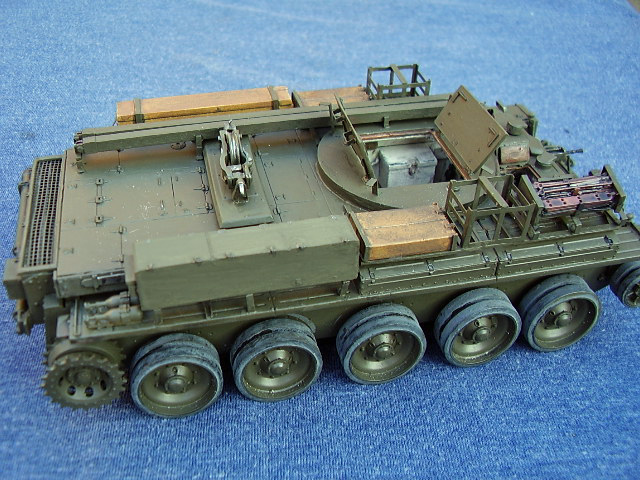
Only 58 Cromwell ARVs were delivered by the end of 1944 so pictures of this vehicle are few and far between. Its development was kept Top Secret due to the Cromwell being the new British Tank and these vehicles were all based on converted existing gun tanks, usually the Mk IV. The ARV saw service from 1944 onward as an Armored Recovery Vehicle both at the Squadron Level and at Divisional Level and were manned by the Royal Electrical and Mechanical Engineers. The Accurate Armour conversion for the Tamiya Cromwell kit has been around for some time. Designed to fit Tamiyas Cromwell Mk IV Gun tank, it gives a reasonably simple and accurate conversion to create the Cromwell ARV Mk I. The Accurate Armour kit No CO52 conversion comes with 39 resin and 24 PE parts plus brass wire and square rod for the lifting arms.The build
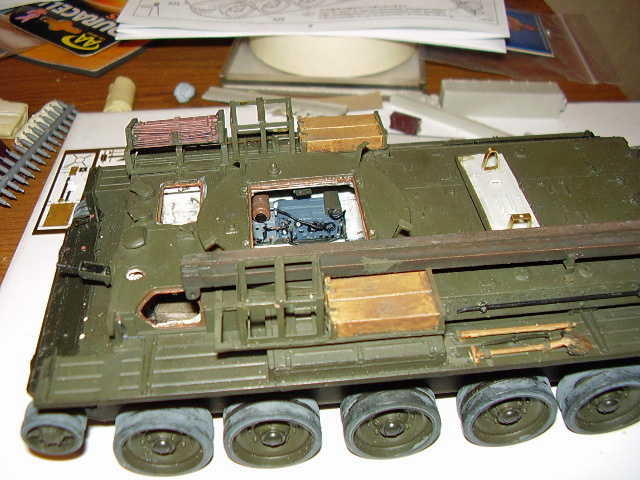
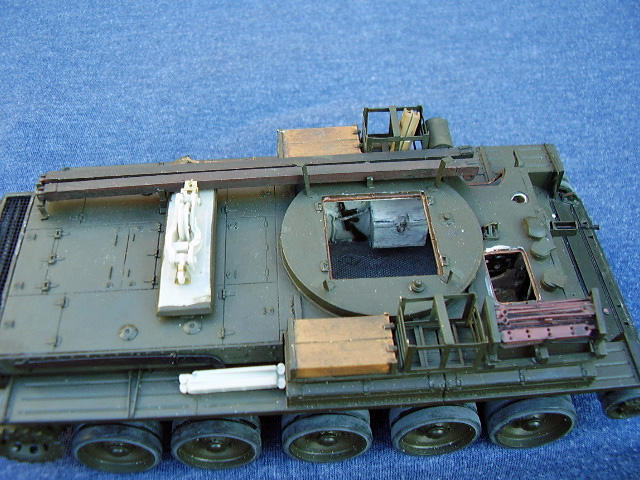
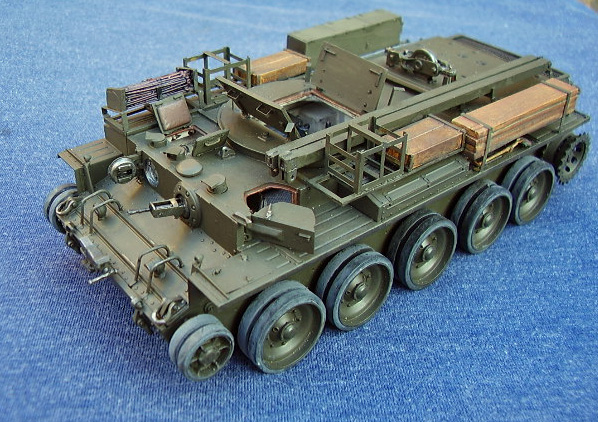
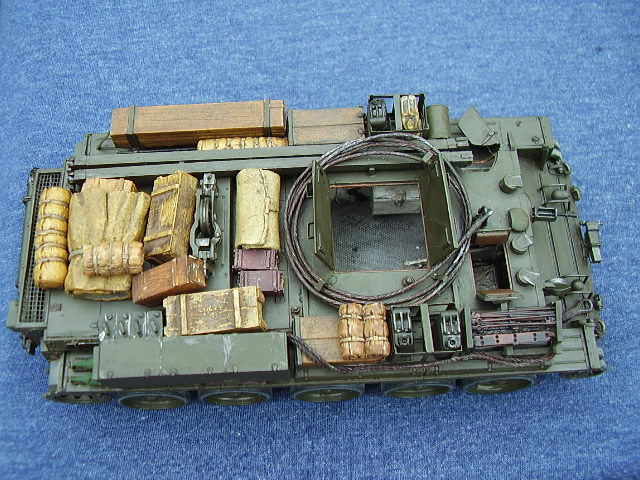
The build is fairly straightforward, following steps 1 to 9 of the Tamiya instructions. The only change needing to be made at the beginning is to replace Tamiya part C29 with the new back plate part B and the removal of the brackets that support Tamiya parts 22. The mold for Tamiya part 17 also needs to be blanked off/filled, so nothing major in terms of cutting is required. Accurate Armour provides a small 8 page booklet complete with pictures and a fairly straightforward set of instructions that outlines the steps needed to be taken to convert the vehicle. The only difficulty I had was with the rear towing hook placement as there is no clear picture of how the parts fit together, so my thanks to Kevin Tucker who clarified that for me. I wanted to build the vehicle with the crew hatches open but no interior conversion is available for this kit that I know of and I was unable to find any specific plans on the layout of the interior of the ARV. I did have plans of the drivers/gunners layout, so started from there to build an interior of sorts, the main purpose being to create the illusion of shadow and shape within the vehicle. For the crew compartment, I used my imagination as to what might reasonably be inside such as a radio, stowage boxes, fittings, wiring etc, using bits from the spares box. There are a lot of sink holes to fill and smooth off if you choose to go down this route. Once I had completed the interior I added a No 19 Radio Set from Formations, painted the interior, and then joined the two parts of the hull remembering to put the mesh grills in before I joined the parts. Wiring and straps were made from lead wire and added as well. The Accurate Armor parts were of good quality, no major bubbles but several were a bit warped and need to be straightened out. The PE is excellent and all the bends are marked so that process was thankfully reasonable easy. I replaced the kit fire extinguishers with a set of Resicast ones, having used the same kit set in the interior, which meant laying them along the side and not across it.Painting and Tracks
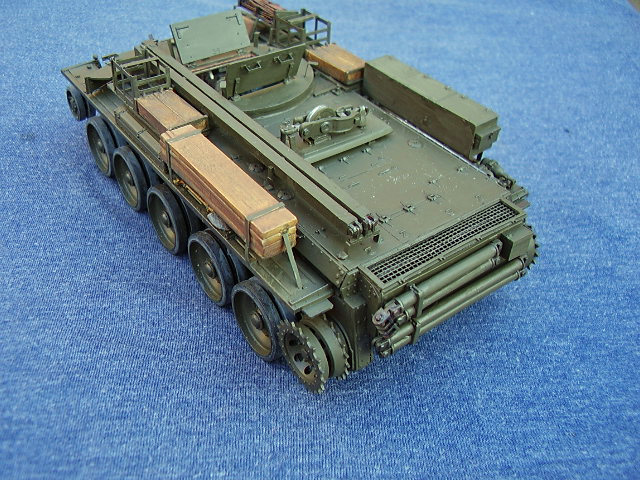
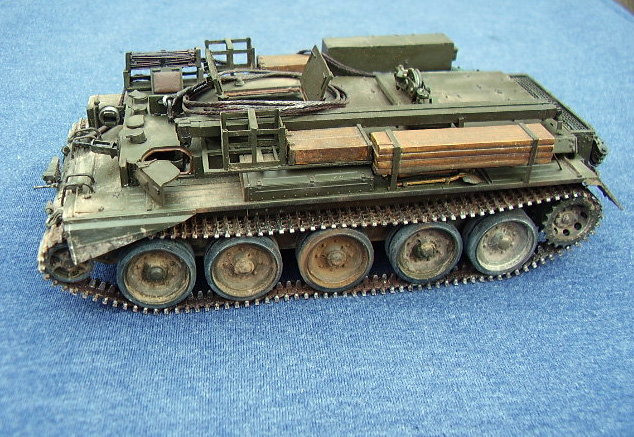
I paint as I build which is just as well as with this vehicle there are a lot of nooks and crannies to get to and, unless you airbrush, it might be difficult to paint the vehicle by hand if you build and then paint. For base colour I used a 50/50 mix of Tamiya Olive Drab and Dark Green with several squires of Vallejo Yellow Ochre, not very scientific, but it works for me. For steel items and to give some pre shading, I used Humbrol matt 70, a bit like red lead, and then build the metal from there. Various fixtures and fitting were treated with small amounts of Metallic Grey and Gun Metal as appropriate. Pin washes were added to small fittings and the runs between the side board. Wooden elements were painted with Vallejo Yellow Ochre as a base coat and then developed with washes of dark brown/black to produce a realistic wood effect. The model received a couple of coats of Mig Filter P245, dark brown for green, to blend the paintwork together. Small exposed steel marks were added with a lead pencil. I opted to use the kit tracks, mainly for convenience, and although they lack inside detail they produce a reasonable representation of the real thing. Some garden mud and Mig pigments were used to finish off the kit.
About the Author


FROM: ENGLAND - EAST ANGLIA, UNITED KINGDOM
Greying slightly, but young at heart. I've been teaching adults off and on for most of my life. Left the services in 85 and first started modelling in about 87 for a few years. Then I had a long spell when I didn't build anything (too busy) and really just got started again during the summer of ...
Comments


Excellent work Alan, thanks for sharing it in this (permament) way
It's also a good example of what could be a good 'starter' for those who have never used a resin conversion set before. Simple, but very effective.
Great work...
SEP 19, 2007 - 09:33 PM

Hi Guys,
Firstly, Bill thanks for putting this together for me.
Pat and Jim, thanks for you comments, much appreciated. You're right Jim it is a good starter kit for those new to resin and PE.
Pat, it would do the business for your engine, but I thought you had elephants on your mind!!!
Cheers
Al
SEP 20, 2007 - 04:36 AM

Alan. you're depressing me!!
You've got to stop pumping out these great builds
No, seriously, your stuff is amazing, keep it up.
Yet another series of photos for my desktop folder.
Cheers
jjumbo
SEP 20, 2007 - 04:38 AM
Evening John,
Thanks and glad you like it. It's an interesting build and making the interior was both fun and a good experiment. I see a few areas on the pics I could improve on, but that's always the way with pics.
It's brother in the form of a Centaur Dozer is on the build block. A more tricky operation as it requires a few major cuts but so far so good.
Cheers
Al
SEP 20, 2007 - 04:51 AM
Hi Guys,
A slight BLUNDER in the typng. The vehicle is in fact an ARV Armoured Recovery Vehicle and fumble fingers here has typed AVR in error
Thanks Paul for pointing that out, I've asked Bill to amend the article as I don't want to sow confusion in the ranks.
Al
SEP 22, 2007 - 09:30 PM

Alan, brilliant work as expected. I had followed your build for sometime. Well done, you didn't leave anything to chatter over. LOL's. Must agree it would be a great way to get started in resin. Resin can be very intimidating for those who have never tried. Clear article very straight forward.
Cheers,
Paul
OCT 01, 2007 - 03:30 AM
Hi Paul,
Many thanks for the feedback on the article, glad it makes sense lol, lol.
Congrats to you both too once again.
Cheers
AL
OCT 01, 2007 - 07:48 AM
Copyright ©2021 by Alan McNeilly. Images and/or videos also by copyright holder unless otherwise noted. The views and opinions expressed herein are solely the views and opinions of the authors and/or contributors to this Web site and do not necessarily represent the views and/or opinions of Armorama, KitMaker Network, or Silver Star Enterrpises. All rights reserved. Originally published on: 2007-09-20 00:00:00. Unique Reads: 24308

WEB HOSTING BY


Copyright ©2021 Armorama and Kitmaker Network, a subsidiary of Silver Star Enterprises
All Rights Reserved. Please read our Conditions of Use and Privacy Policy.
All Rights Reserved. Please read our Conditions of Use and Privacy Policy.