

1⁄3538T Gepard Diorama Nice Shot!
9
Comments
Introduction
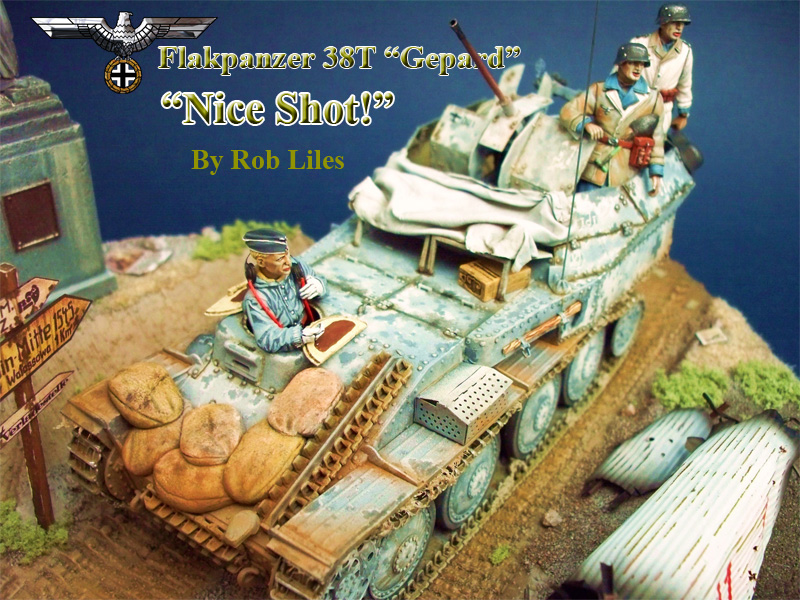
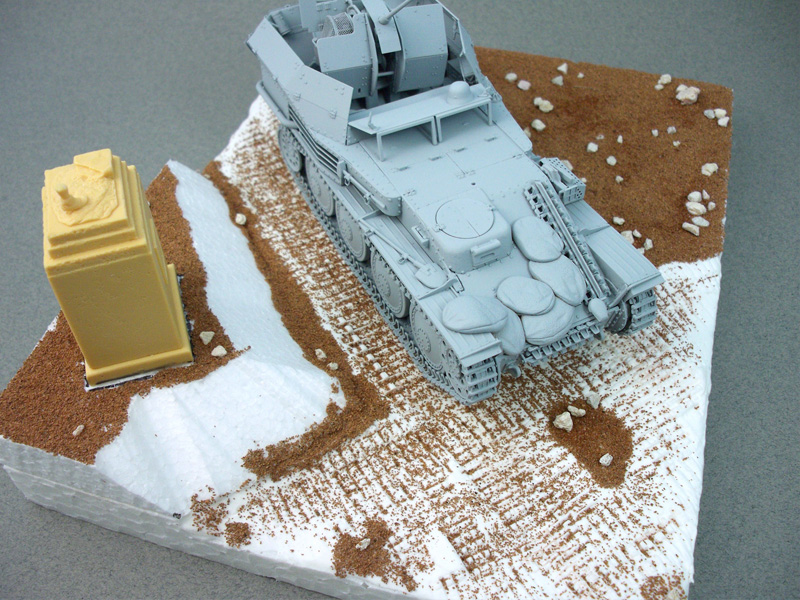
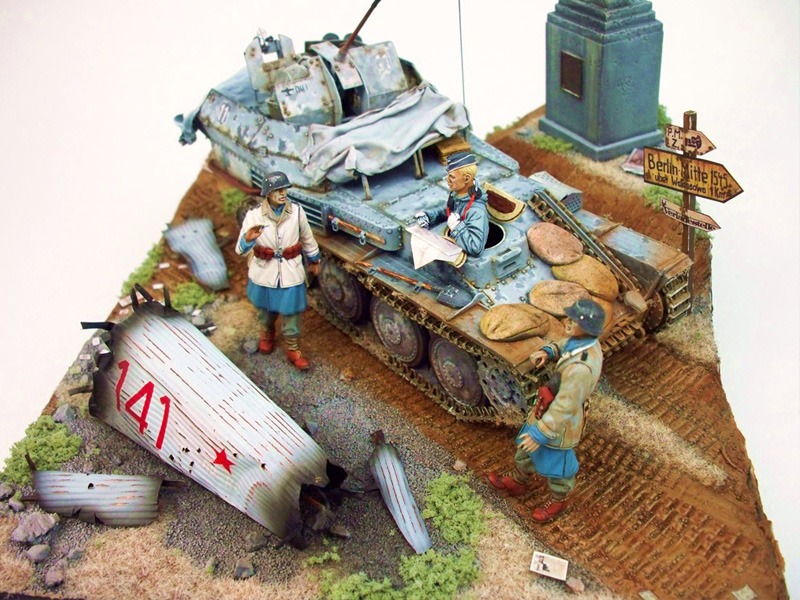
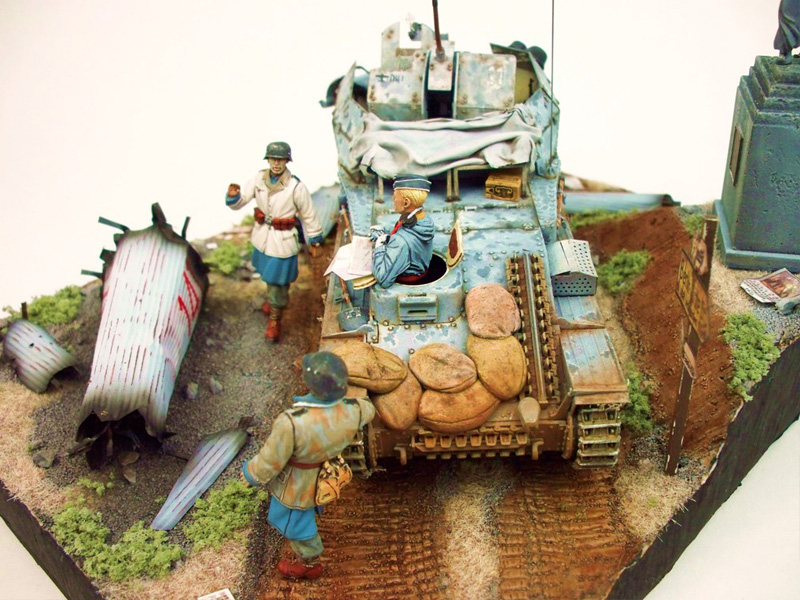
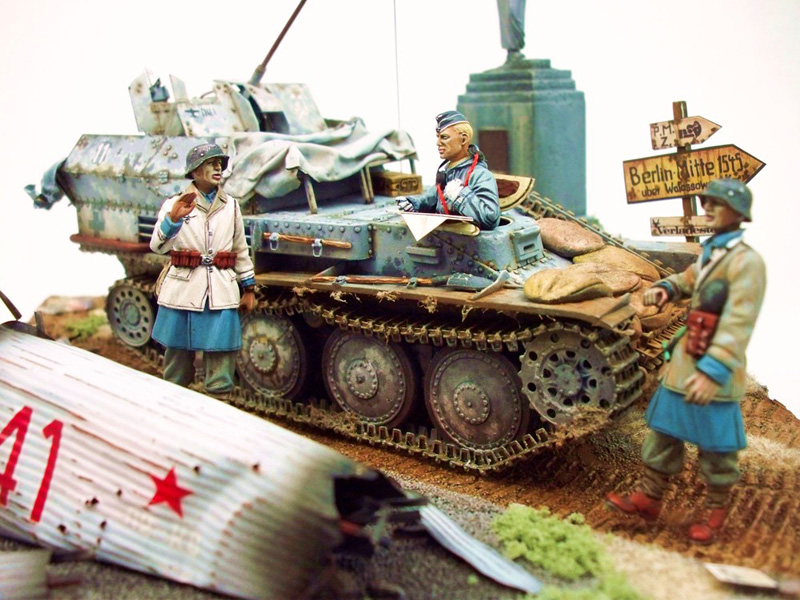
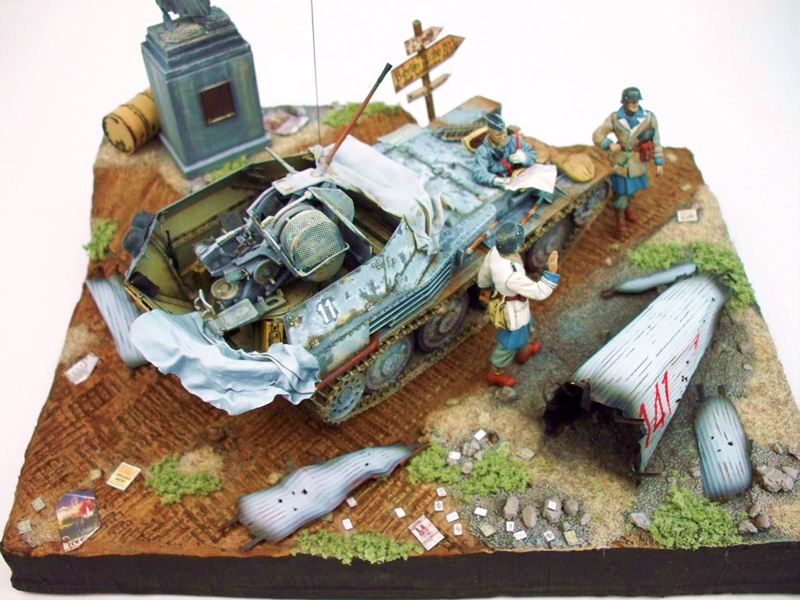
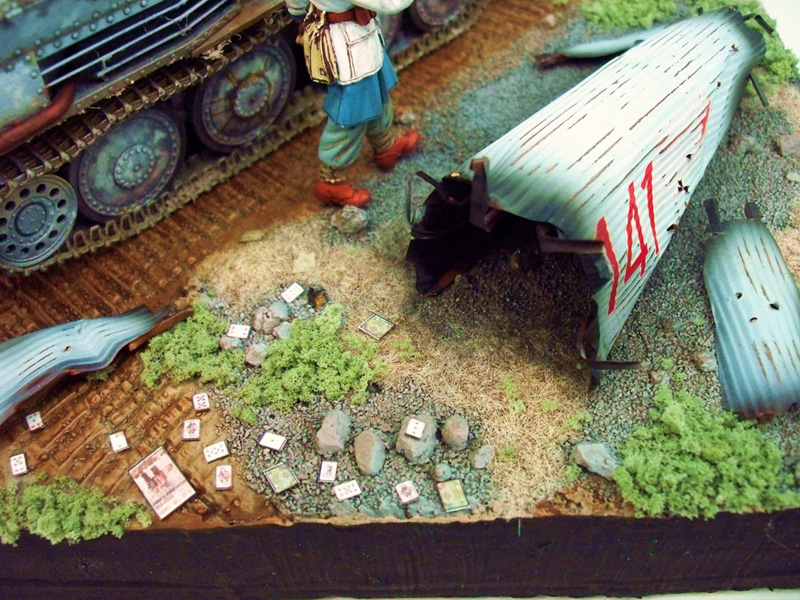
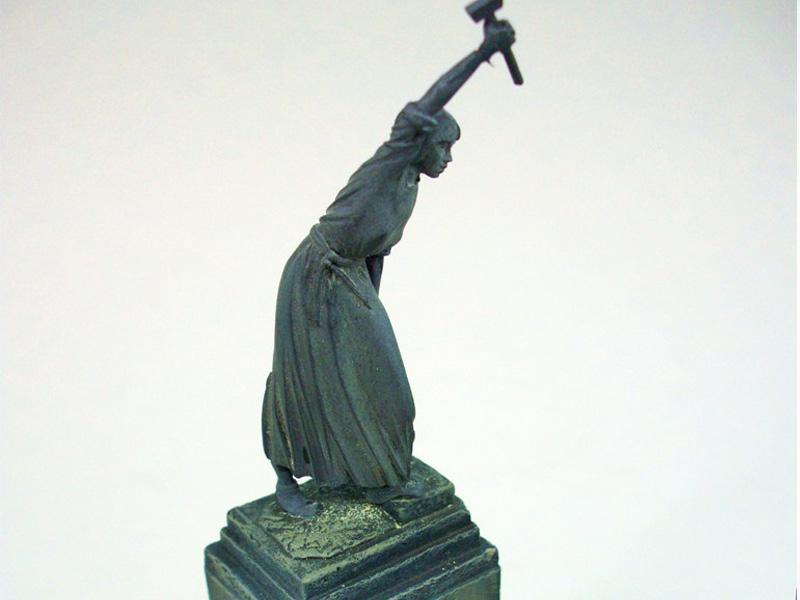
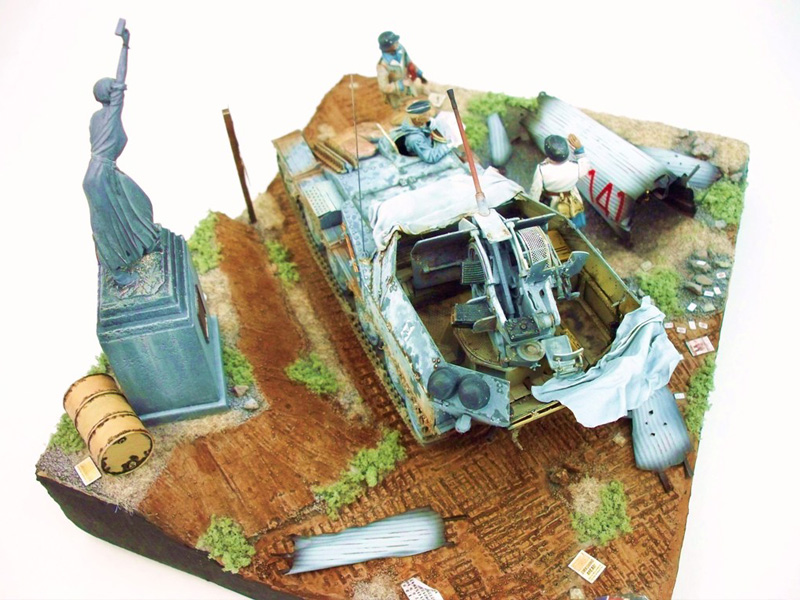
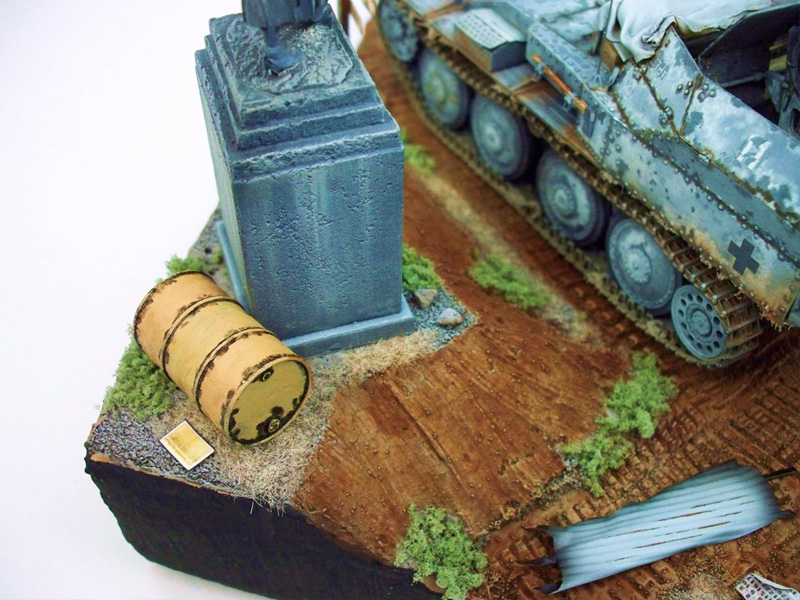
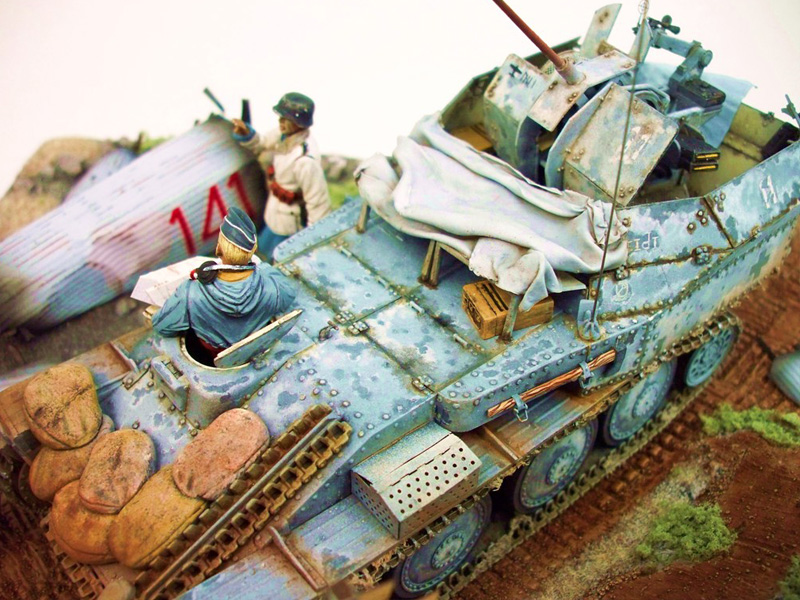
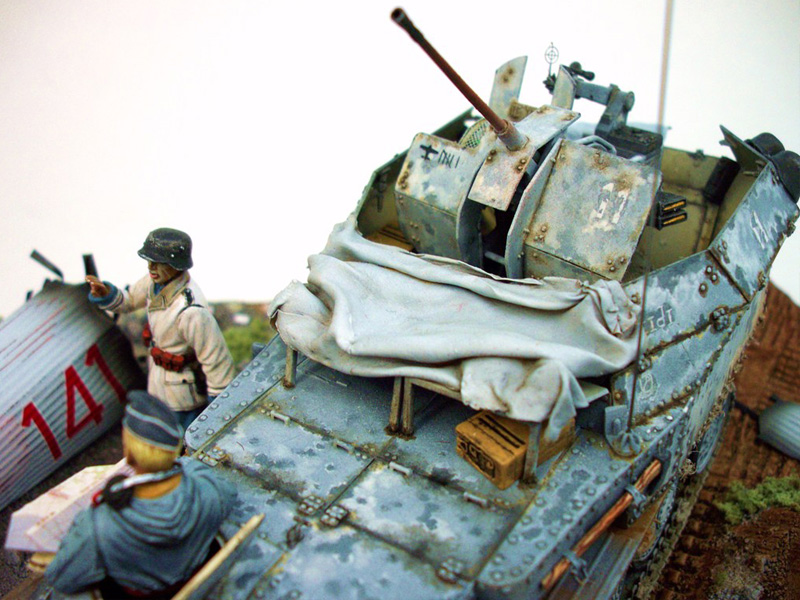
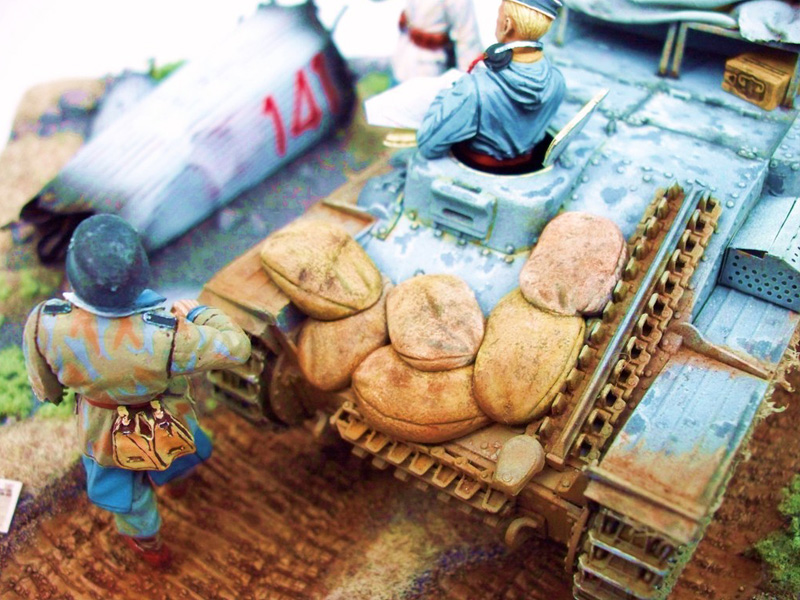
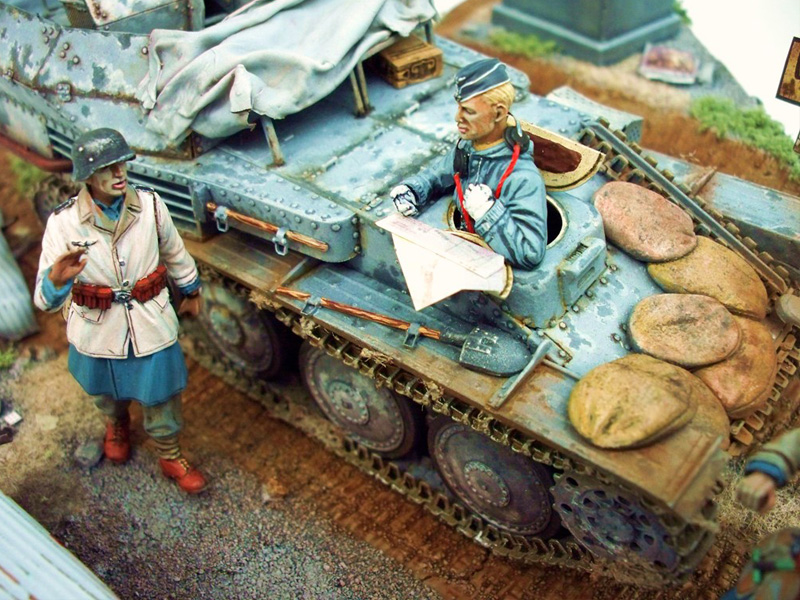
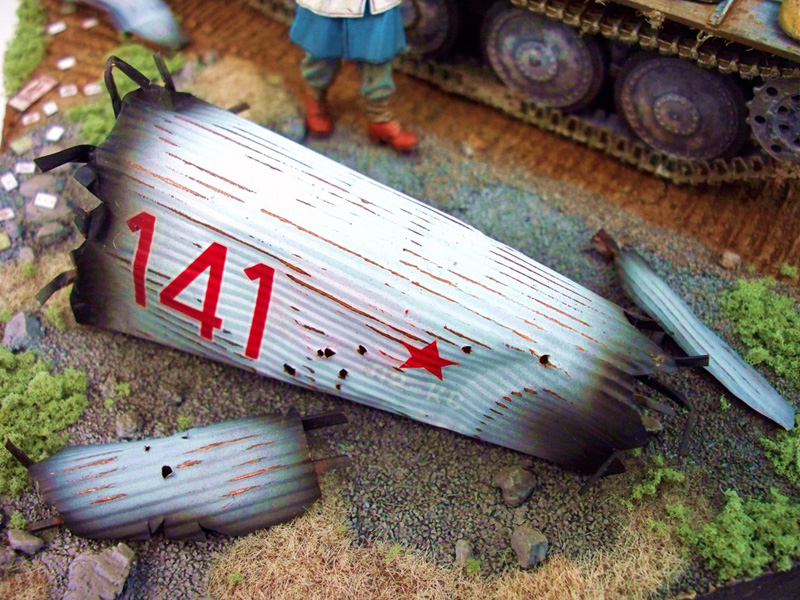
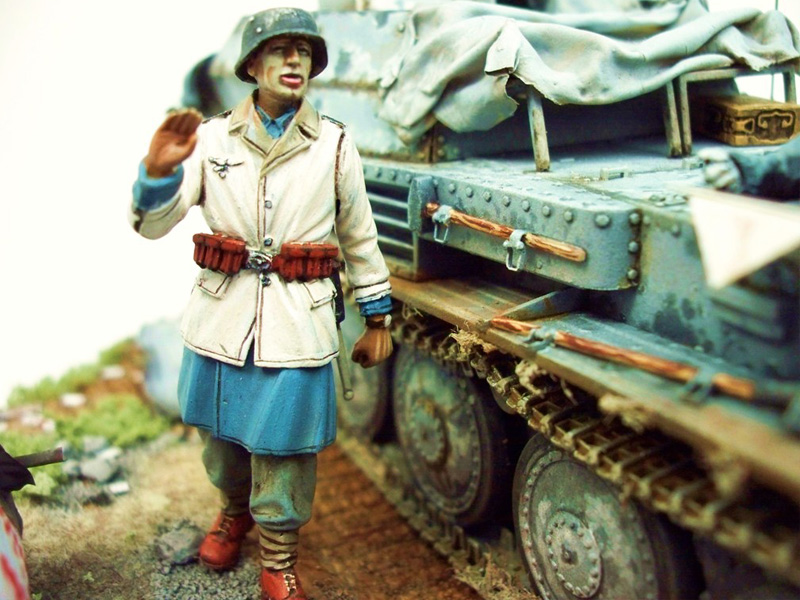
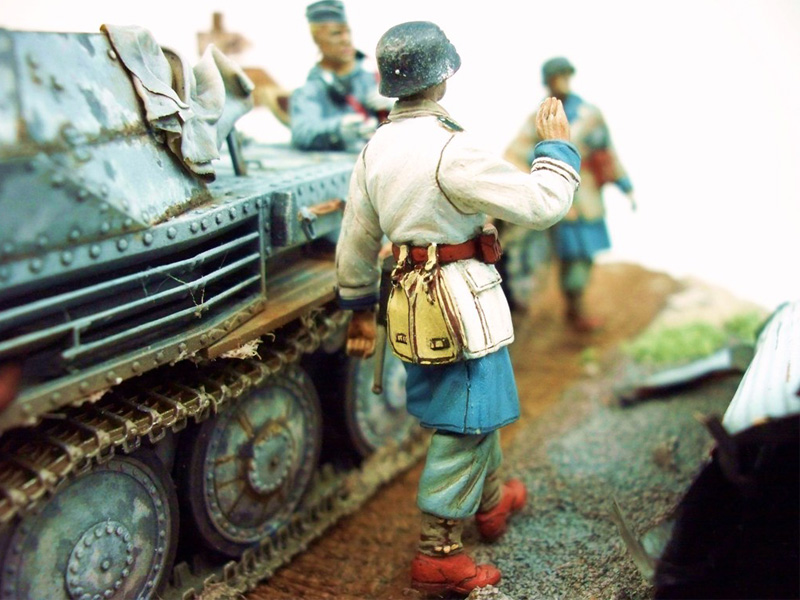
A triumphant mobile anti-aircraft crew in the Luftwaffe has come upon the wreckage of a Russian aircraft they have shot down from some miles away. In the background, a menacing statue of the Motherland is looming over the enemy victors at her feet. By her pose we see she is promising revenge upon the invaders for even this small victory in a sea of defeats.Background
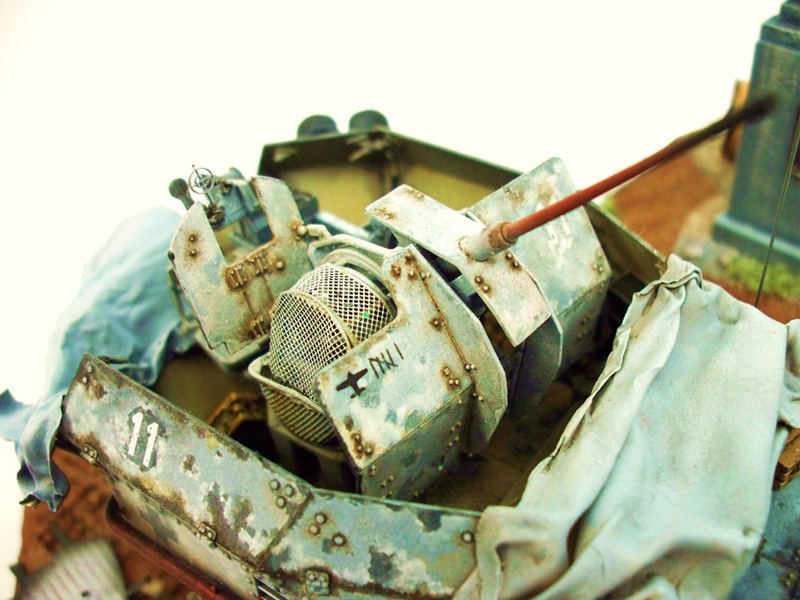
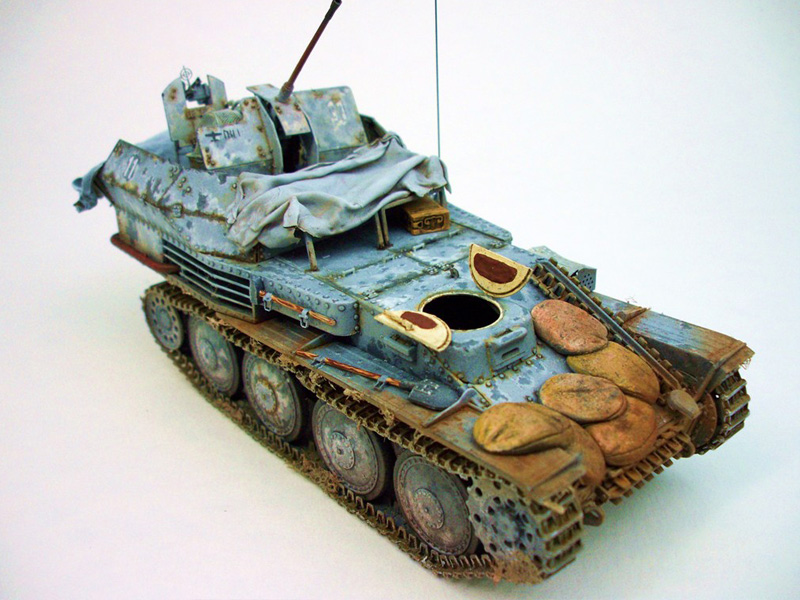
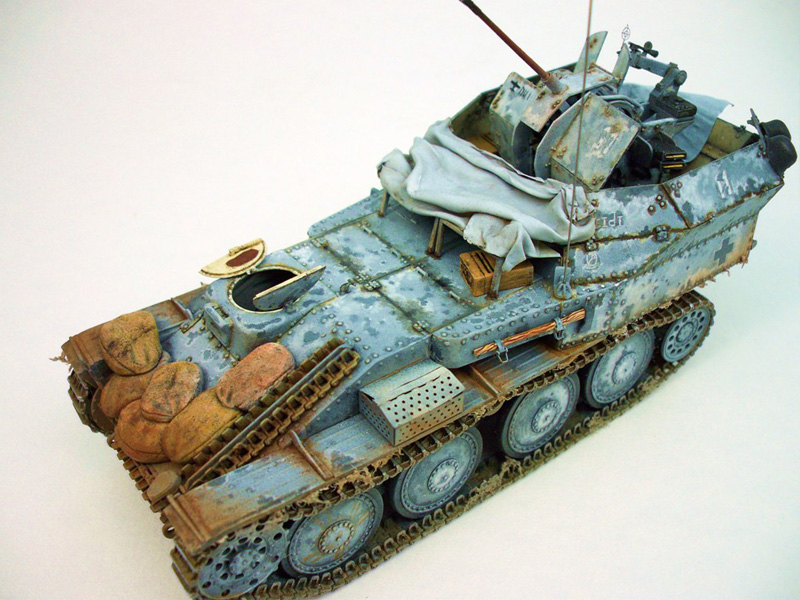
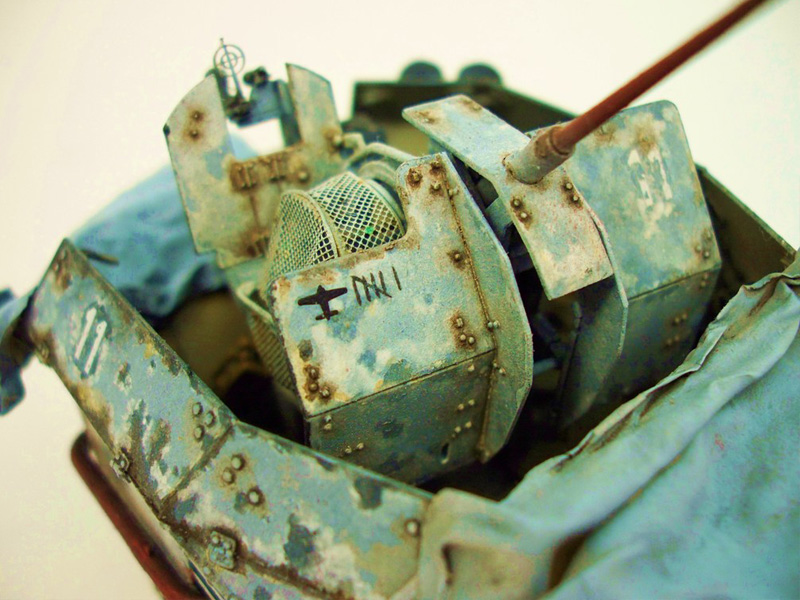
During the Second World War, the German Wehrmacht suffered a series of devastating reverses barely one year into their war on two fronts. Heavy losses on the ground and in the air on all fronts, especially in the East and in North Africa, resulted in loss of air supremacy for the Luftwaffe. The mobile armor columns were particularly vulnerable resulting in Adolf Hitler approving the development of a 3.7 cm Flakpanzer IV. However, the delivery of a flak wagon based upon the Panzer IV could not be expected until sometime in 1944. For the interim, the OKW was forced to order 150 of the more readily available Flakpanzer 38T Gepard. Based upon the hardy Panzer 38t chassis, 140 Gepards were produced from November 1943 to February 1944. The Gepard had a crew of four and featured a 2 cm Flak38 anti-aircraft gun with all-around traverse. The fighting compartment was mounted on the rear of the chassis, similar to the Marder III Ausf. M. A new superstructure was provided with upper panels that could be folded down for easier access to the crew compartment.The Kit
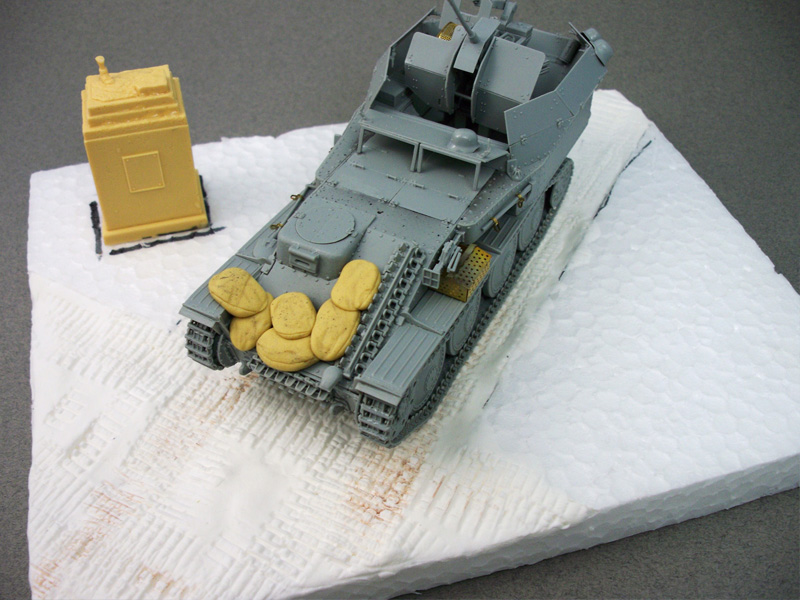
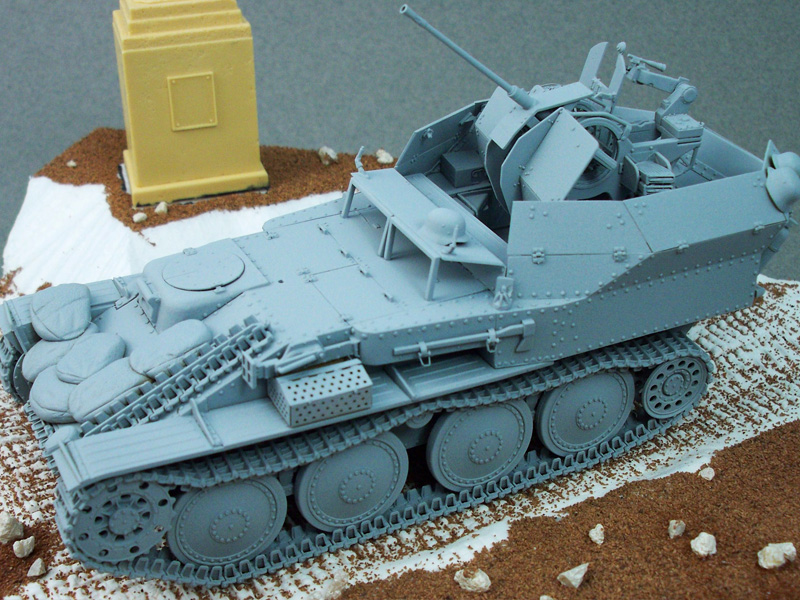
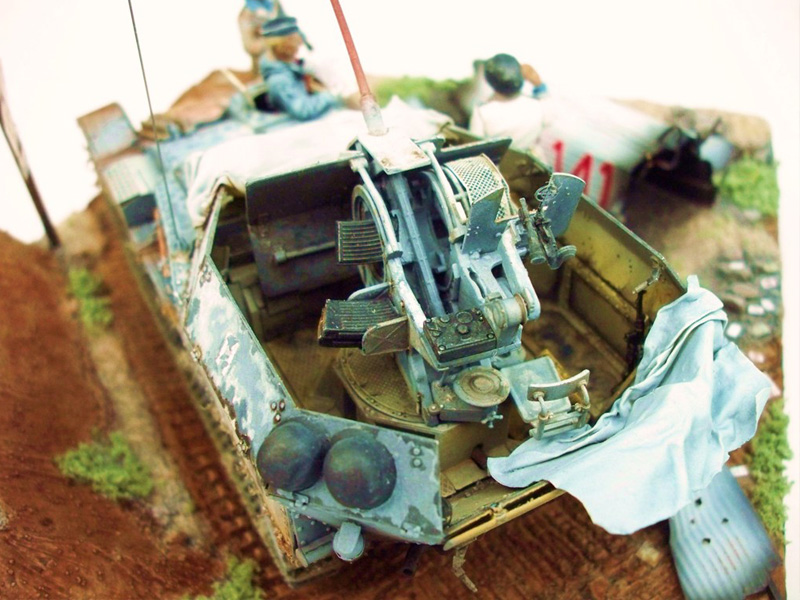
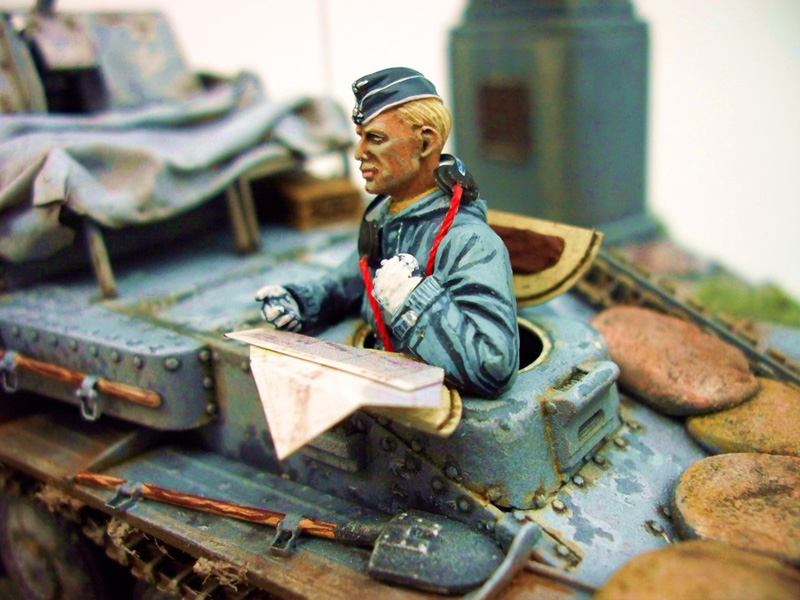
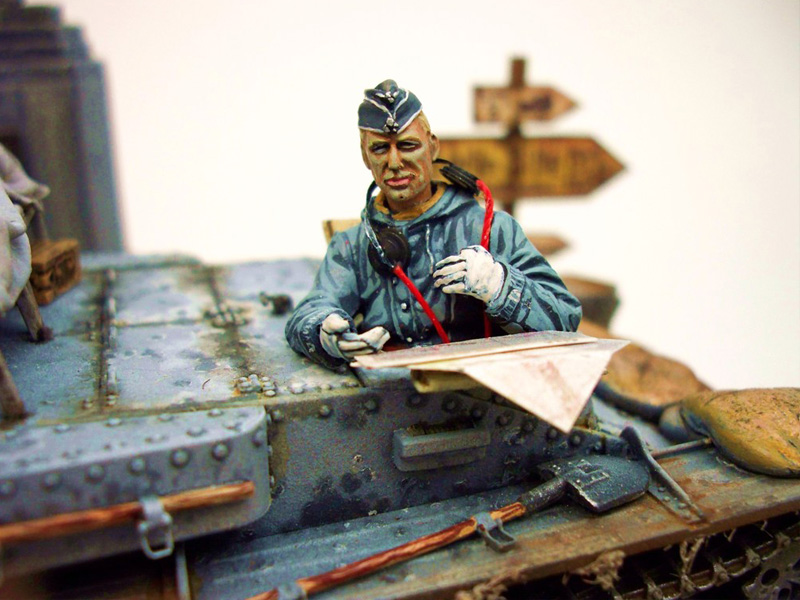
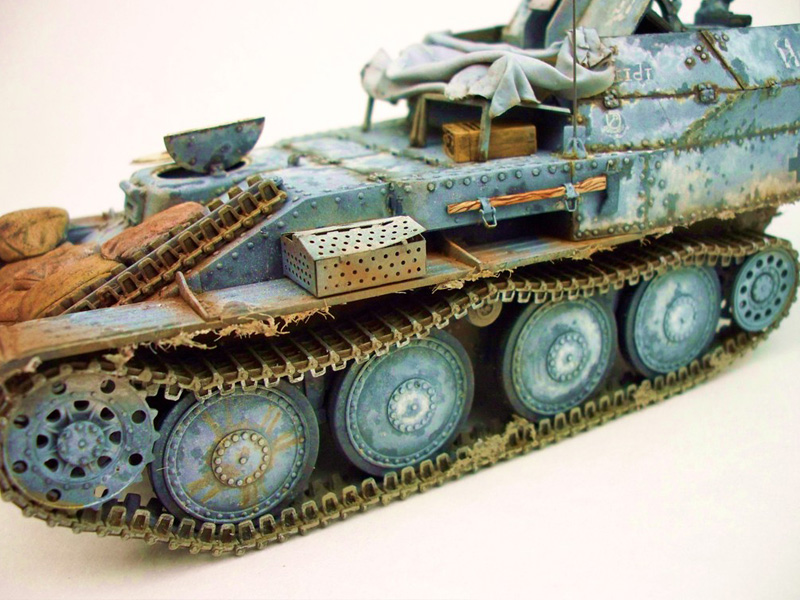
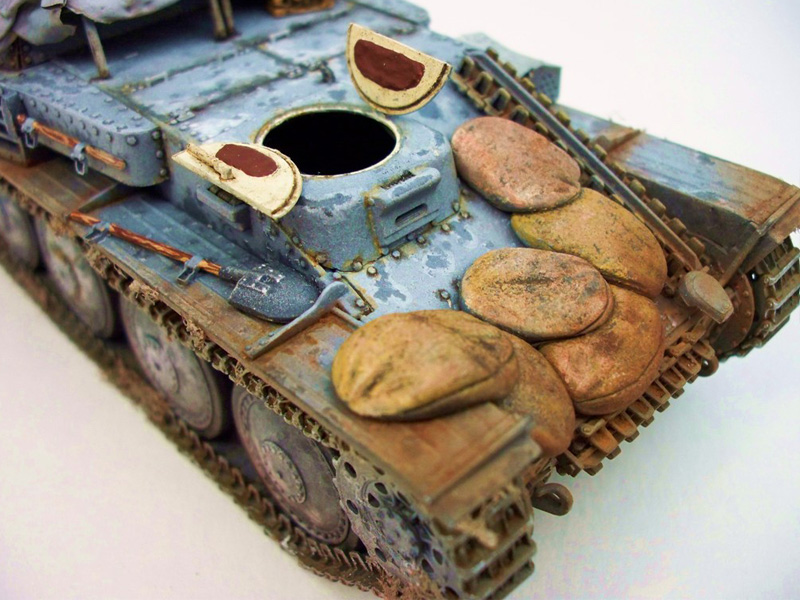
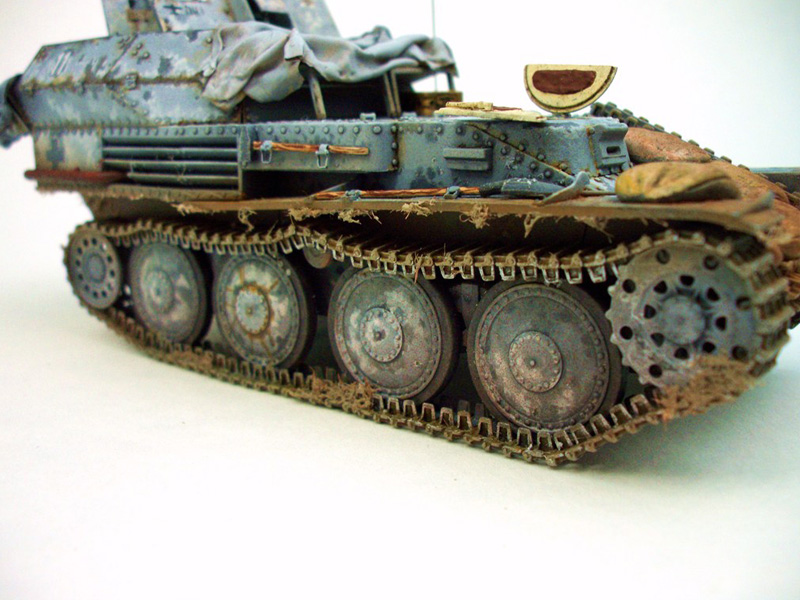
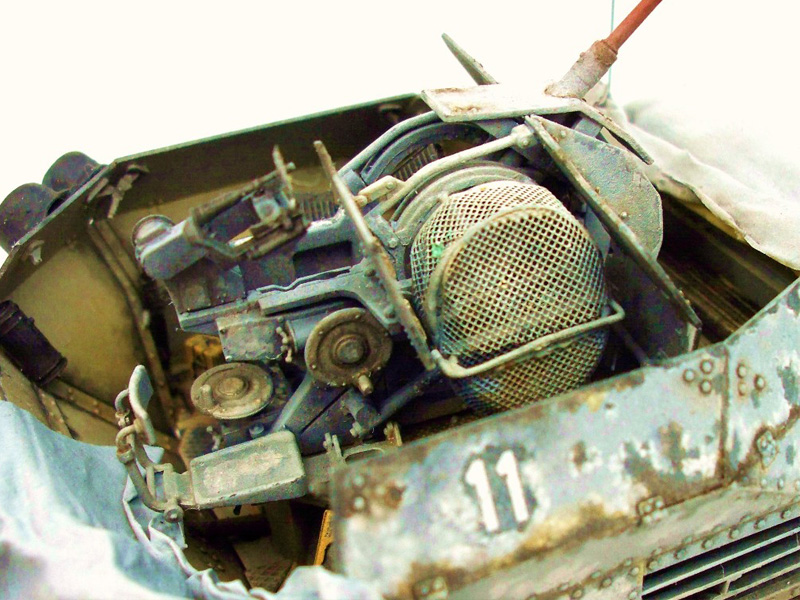
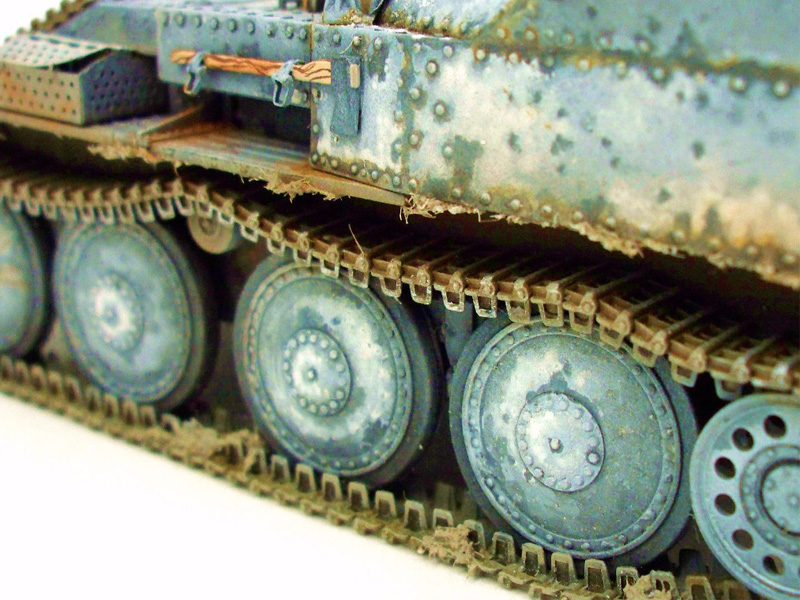
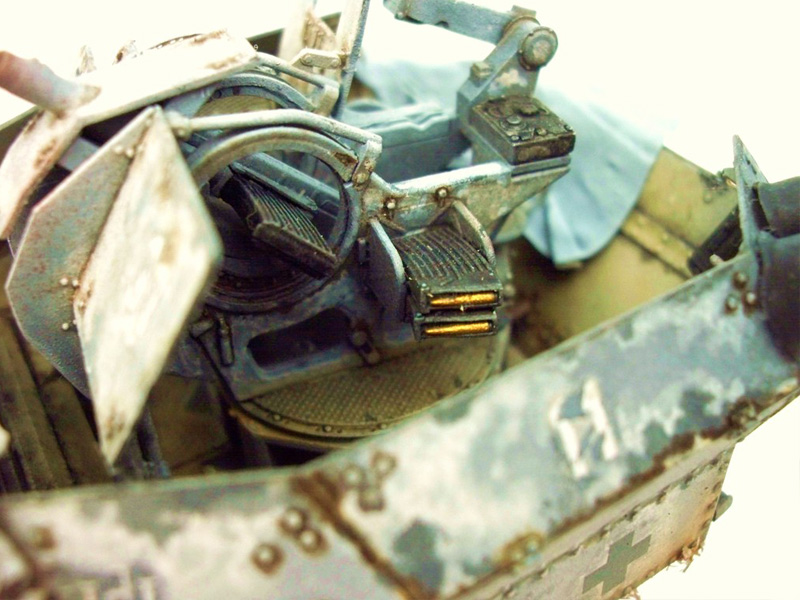
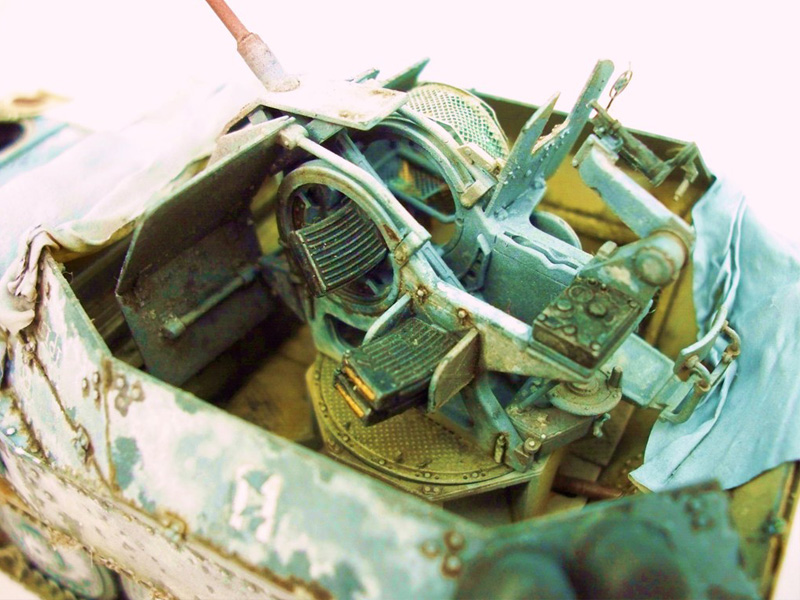
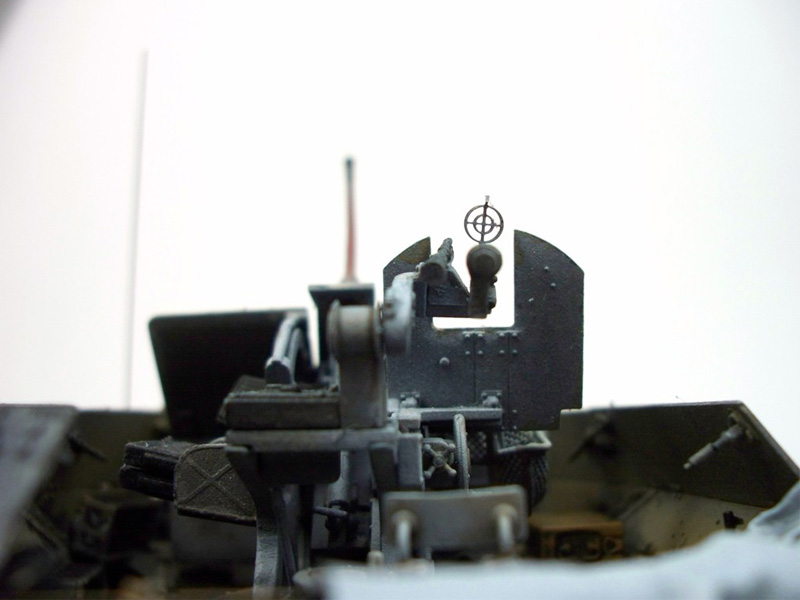
Dragons 1/35 Flakpanzer 38T Gepard Smart Kit No. 6469 was my choice for this completely out of the box build. This kit was very quickly built with generally good fit and easy cleanup owing to Dragons advanced mold technology. The fighting compartment is the most noticeable feature of the vehicle. Dragon carefully studied the dimensions and details of each plate constructing the superstructure. Because of the unique design of the Gepard Dragon employed a lot of new tooling and design work, especially when it came to the interior of the fighting compartment. Though the panels of the superstructure are carefully molded minor sanding is required to ensure all joints are flush. The gun shield is molded to scale thickness with 2cm Flak 38 cannon that can be set to a choice of four different elevations. The slide-molded gun barrel sports a hollow muzzle opening. The platform beneath the gun can receive several 2cm ammo cases. The fighting compartment offers a great area for stowage placement. The lower hull is very well molded and fit is excellent. The idler wheels as well as upgraded road wheels are newly tooled. Magic Track individual track links even have casting numbers molded on every link! The rivets on the hull plate surfaces are very well defined and look amazing during the weathering stage. The almost complete interior provided was not utilized during my build but was very well detailed.Painting and Weathering
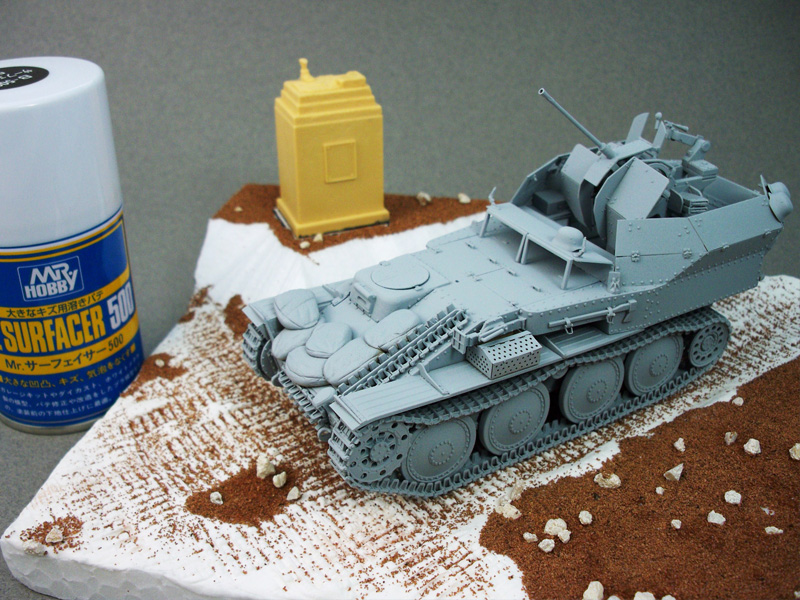
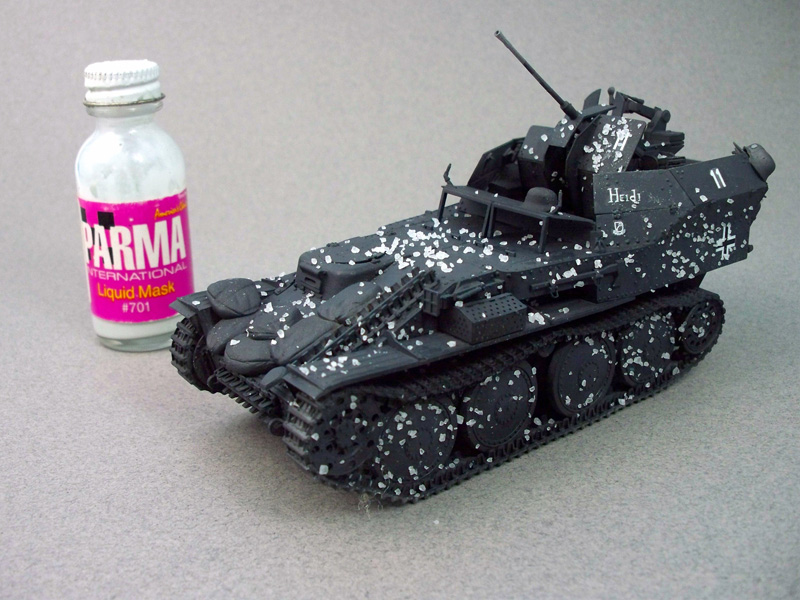
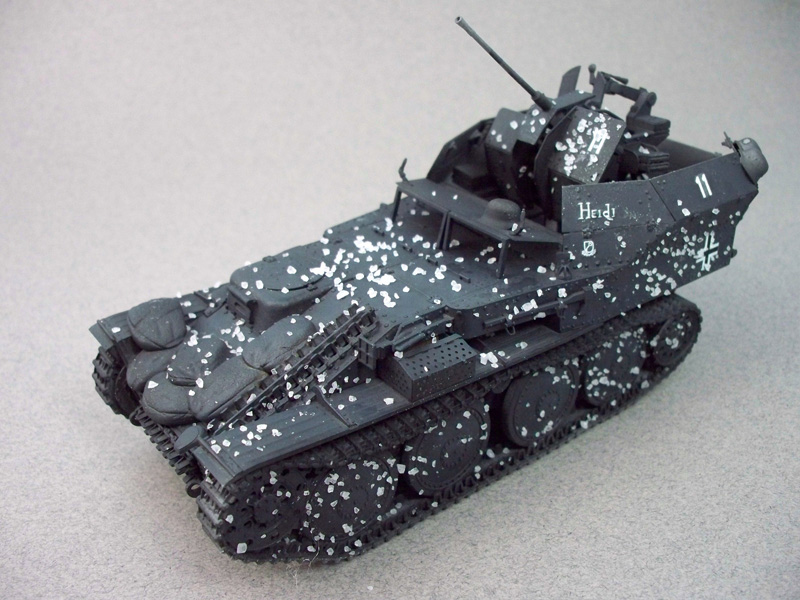
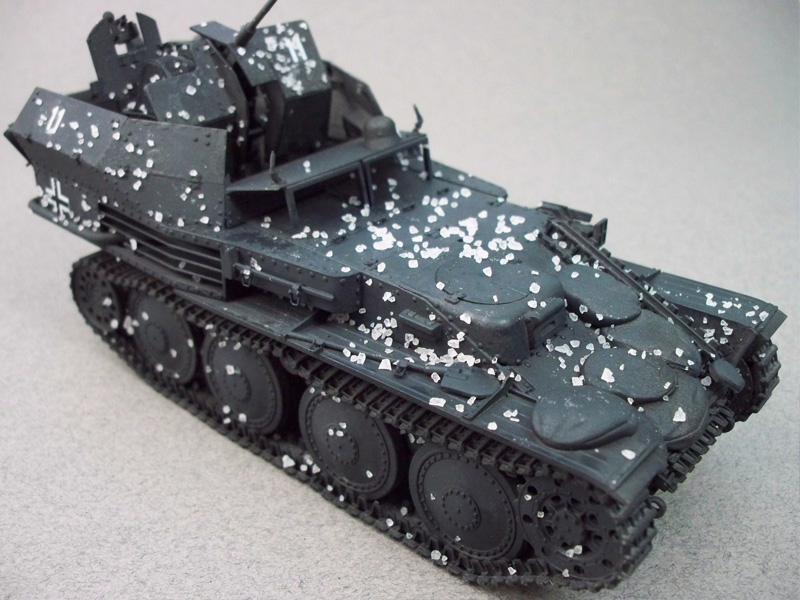
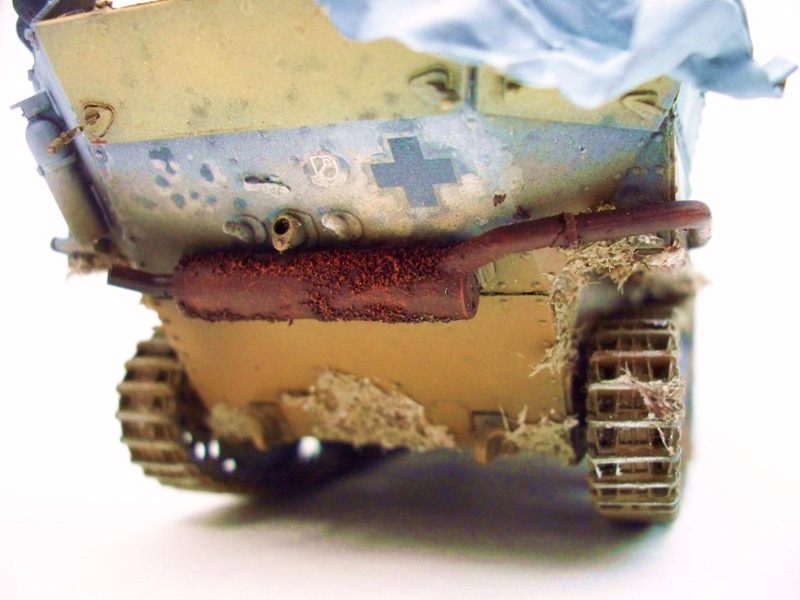
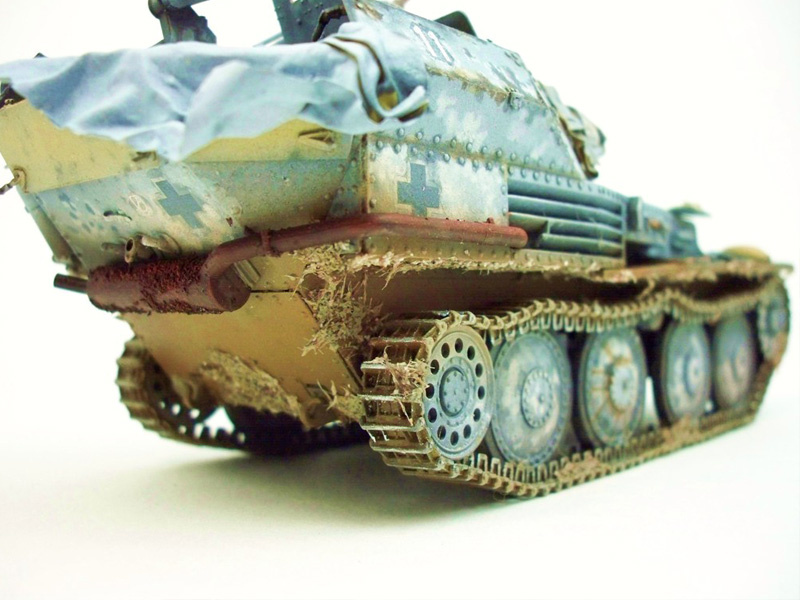
Following completion of the construction phase, I added some sand bags made of Tamiya Quick Type putty to the bow. Then Gunze Mr. Surfacer 500 was used to prime the surface of the Gepard. Mr. Surfacer dries very rapidly allowing me to soon add my basecoat of Tamiya Dark Gray enamel. Allowing the base coat to dry over night, I next add clear coat upon which I applied the kit provided decals with Microsol and Microset. Next is the tricky, and salty, part. Airbrushing a thin coat of water I sprinkled Sea Salt over exterior surfaces of the Gepard. As the water began to dry the partially dissolved salt glues itself to the surfaces of the Gepard. Next, I apply the first coat of Winter Whitewash. About four coats of whitewash were applied, allowing each to dry well in my drying booth to prevent the salt from melting too much. Overnight the paint and salt will meld slightly. The following day the small chunks of salt will next be removed using a small rubber tipped shaping tool. The result of these efforts will produce a very interesting and realistic appearance to the surface. Just be careful of the photo-etch! Next we added oil washes of Raw Umber and MIG Pigments. One of the last things I do is to dry-brush Humbrol Aluminum to the areas of the tracks that come into contact with the ground.Base, Figures, Et al
The Female Soviet Statue CD 6039 was manufactured by Custom Dioramics and the figures were from Jaguar. Each were painted with Vallejo acrylics and weathered with Rembrandt Raw Umber artist oils. Before I began painting, I sprayed each figure with Mr. Surfacer 1000. The uniforms were painted in a variety of shades with darker shades underneath and lighter colors on top. The figure faces were first painted with Vallejo 876 Brown Sand. Highlights were added by combining the base color with Vallejo 70884 Stone Grey. Successive highlights were applied by adding to this mixture Vallejo 70928 Light Flesh. One of the most challenging things for me is NOT going overboard when it comes to highlights. If I do not control myself my figures face does not have the sun-weathered appearance of a field soldier, but more the whitish face of a China Doll! As I do for almost all of my bases, I used standard Styrofoam. The form of the base was cut with a Foam Factory hot wire with the track imprinted road bed shaped from light weight air dry clay. Ground cover was created with Woodland Scenics ballast rock and Winter static grass applied over a coating of Windsor Newton Lightweight modeling paste. The road sign was made of Basswood post and Verlinden German Road Signs/Russia Kit No. 20. Thanks for taking the time to read my article and keep building them till theyre all gone! RL


About the Author


FROM: TEXAS, UNITED STATES
Semi-Amateur modeler. Write for Scale Military Modeler International magazine free-lance. Produce commission work for a few select clients. Judged several IPMS events. Work almost exclusively in WW2 Scale Armor (preferably 1:35 scale). Dioramic subject that I enjoy the most involves tying Air/Ar...
Comments

Woo!
Very beautiful.
Very colorful!
Very classical technique
Looks like a oil paint!
COOL!!!
MAR 23, 2009 - 05:05 PM

I love the juxtaposition of the statue with the victors and their victim. Awesome idea!
You have told an interesting 'story' in your diorama. Well done!
MAR 24, 2009 - 02:04 AM

Great diorama. Very well done. Thanks for sharing. Very nicely done and a cool set up.
MAR 24, 2009 - 10:56 AM


Hi Rob. What makes this little vignette for me is the composition. Love the shot-down Russian aircarft pieces and the statue behind .. really sets the scene. The figures and "Gepard" sit perfectly and again, composed well. Colourwise ... the jury is still out ... but altogether, its a lovely little vignette.
MAR 27, 2009 - 10:33 PM

Actually, ....someone guessed it,......it is oil paint..........mostly. I used Rembrandt Paynes Grey in varying shades on the edges of the body panels. Thanks for the comments guys.
MAR 29, 2009 - 03:03 PM

It's great to see some figures - there's an awful lot of machinery on this site without any. Figures are a different type of challenge.
I also do like the colouring, even if it is a touch on the "vibrant" side, perhaps the lips could do with toning down just a little!
I like it because it is a bit different, and I always admire it when someone actually makes something from raw material, like your scenery, rather than just building the kit.
APR 06, 2009 - 12:02 PM
tyhe composition of this diorama is fantastic. i can't help feel that the colours are a little too much on the blue side but that's probably just me.
MAY 02, 2009 - 10:06 PM
Copyright ©2021 by Rob Liles. Images and/or videos also by copyright holder unless otherwise noted. The views and opinions expressed herein are solely the views and opinions of the authors and/or contributors to this Web site and do not necessarily represent the views and/or opinions of Armorama, KitMaker Network, or Silver Star Enterrpises. All rights reserved. Originally published on: 2009-03-23 00:00:00. Unique Reads: 32252

WEB HOSTING BY


Copyright ©2021 Armorama and Kitmaker Network, a subsidiary of Silver Star Enterprises
All Rights Reserved. Please read our Conditions of Use and Privacy Policy.
All Rights Reserved. Please read our Conditions of Use and Privacy Policy.