

1⁄35M113 TUA Conversion Set
6
Comments
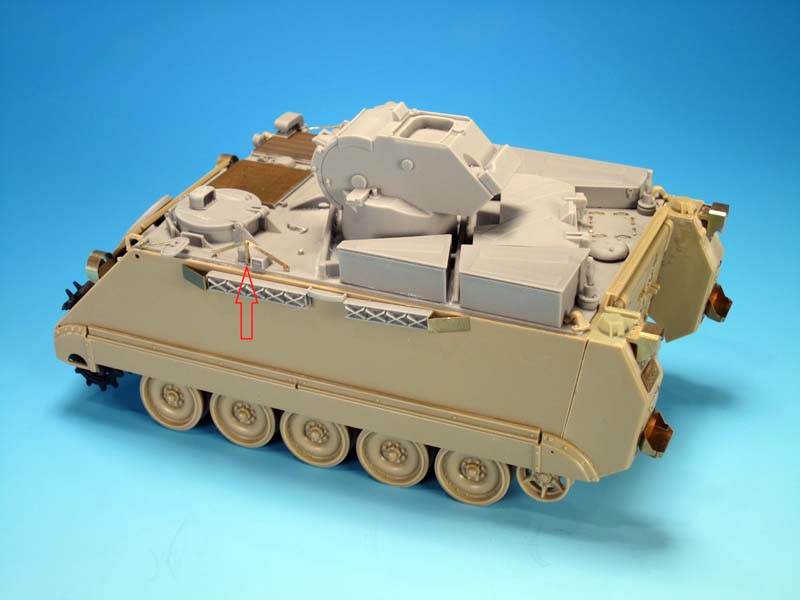
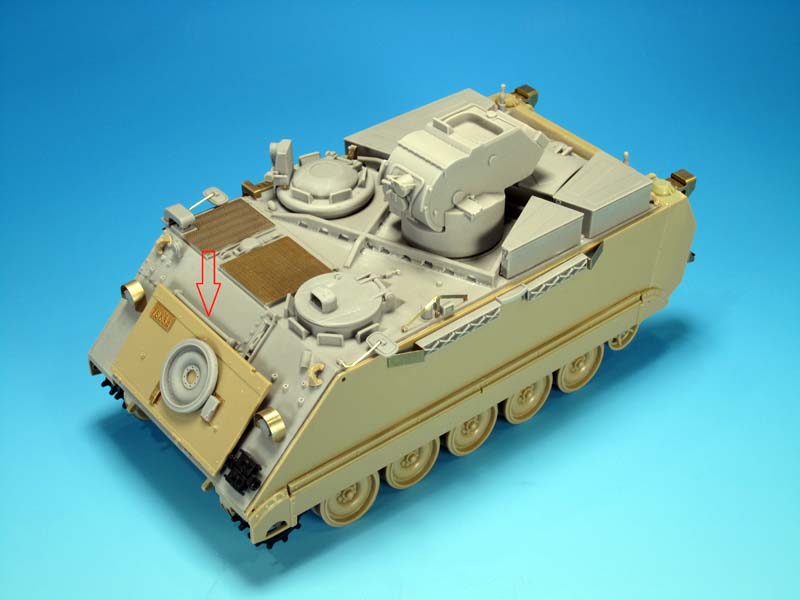
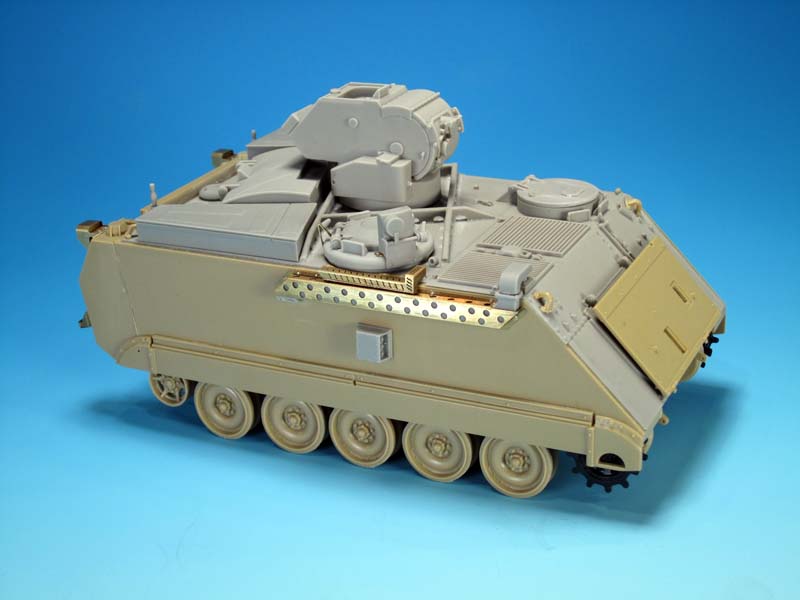
The grousers add detail to the left hull side in this conversion. As with previous parts on the TUA you have to option to attach them as per the instructions or to look at alternatives. The grousers are fitted inside two grouser racks attached to the hull. This allowed for easy access and sensible storage in one place. The grousers slide into the inner open ends. They are held in place with a cable held pin that slide from top to bottom.
The parts consist of:
1. Left grouser rack (resin)
2. Right grouser rack (resin)
3. Centre support (resin)
4. Left brush guard (PE)
5. Right brush guard (PE)
Clean up once again is easy. Just make sure the racks sit flush against the hull sides. Bend the PE parts so they extend only a bit beyond the racks and sit flush against the outer ends of the racks. Alternatives... From 1989 to into the mid late 1990s the TUAs had no grouser racks or were rarely scene. TUAs in Germany and Bosnia with UNPROFOR, IFOR, and SFOR do not appear to have the grouser racks attached. TUAs in Kosovo in 1999/2000 do have the racks attached.
The location of the grouser racks is either as shown in the kit, or on the right side of the hull. To make it even more complicated the racks could be seen centered between the exhaust and side skirts with the right brush guard almost against the glacis plate edge, or, if the TCCCS box was fitted, then the grouser racks were mounted below it. None of the positioning was an absolute and it will depend how you want to build your TUA. Legend only provides instructions for the left hull side placement.
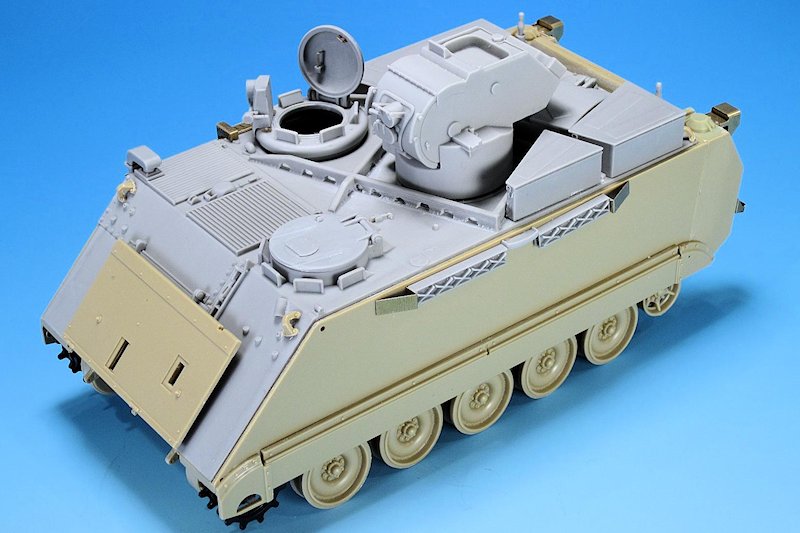
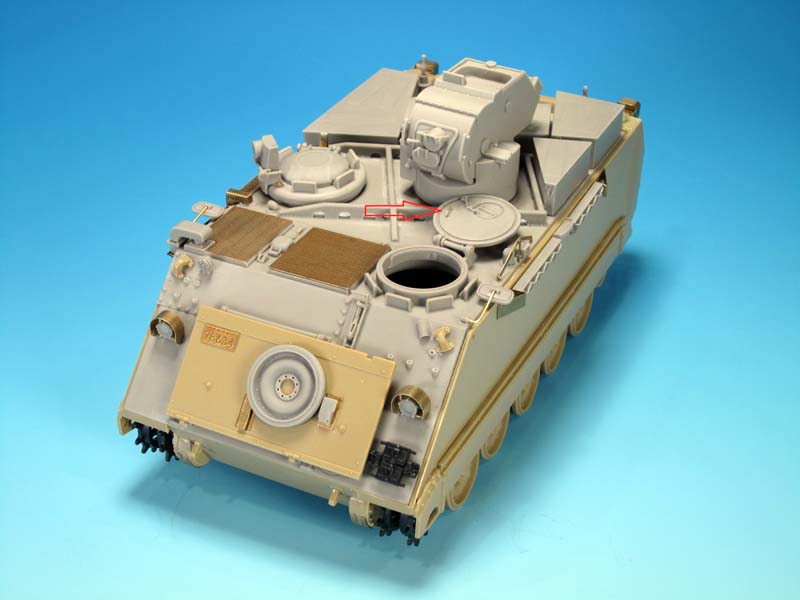
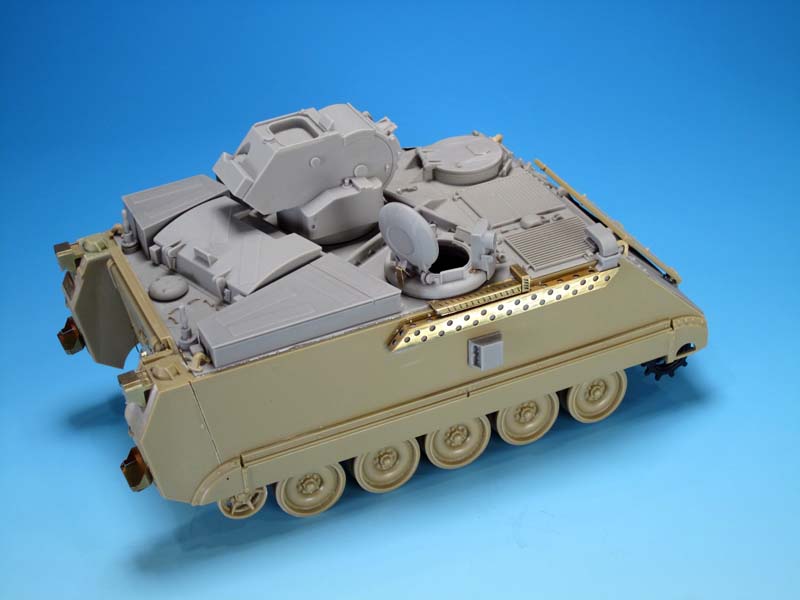
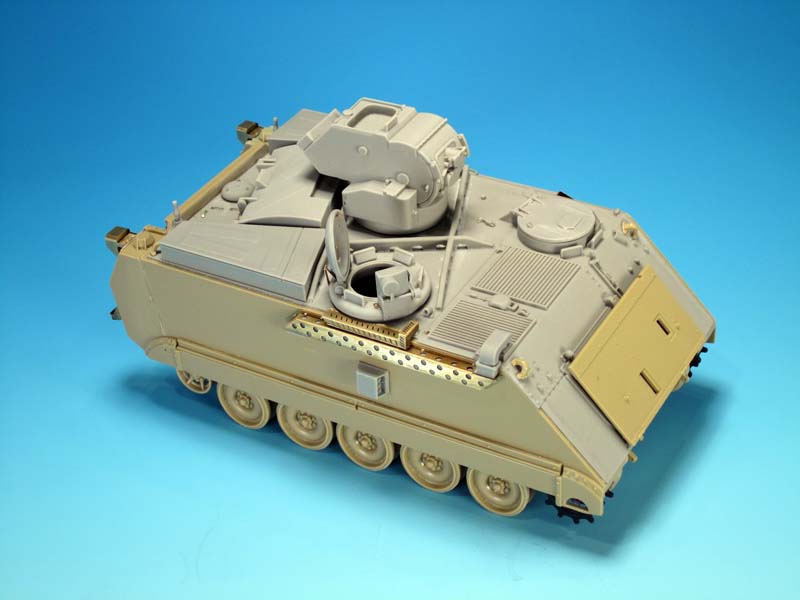
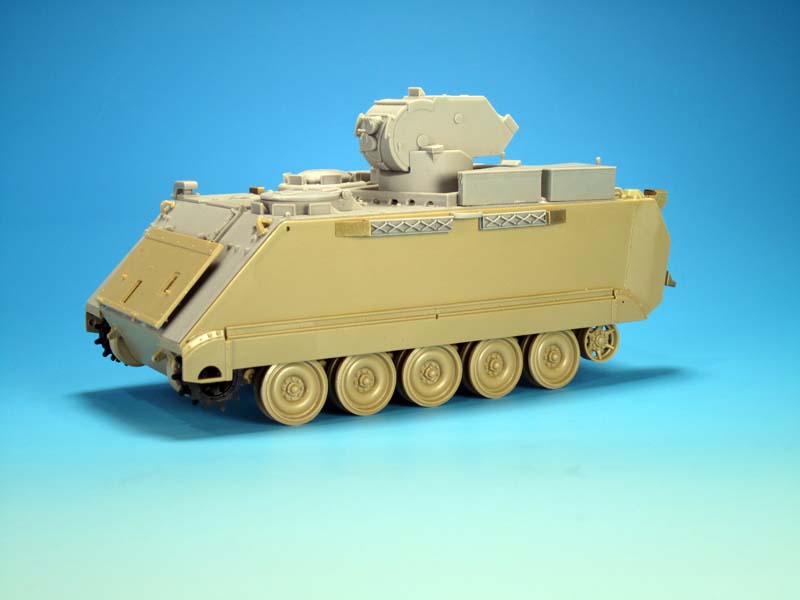
On the M113A2 Tow Under Armour the Commander's Cupola was repositioned to the right side of the hull to the rear of the engine firewall. With the TUA turret this was pretty much the only open space in the hull. On the original TUAs the cupola was essentially a standard M113 cupola minus the machine gun mount. The Commander had full vision with the hatch open and was able to use the periscopes when hatches down. The downside was that the Commander had only the use of the Mk.1 eyeball or binoculars and geographic features to direct the gunner on to new targets. This was very basic gunnery especially when it came to state of art long range anti-tank missile technology. In approximately mid-1994 the CCTAS (Crew Commander's Target Acquisition System) was added to the cupola. The CCTAS permitted the Commander to track a target with optics and then guide the gunner on to the target. Is essence it was a very basic hunter-killer sight.
So, again, you have options for building the cupola depending on the version of the TUA you are building. If you are building a TUA from 1989 to the initial deployment to Bosnia/Croatia with UNPROFOR, leave off the CCTAS and associated parts provided in the conversion. In some cases all green cupolas were mounted to all white TUAs. The CCTAS was retro-fitted to the TUAs during the UNPROFOR mission, so 1994 onwards would be suitable for attaching the CCTAS to the cupola.
Attaching the CCTAS to the cupola requires the removal of one of the periscopes. The clean-up is simple and sets up the attachment of the resin CCTAS and the PE mounts on either side of the CCTAS. Resin bolts top off the PE parts. The monocular optics cover of the CCTAS is cast in place so if you want to position the cover open extra work will be required. A small resin handle on the left side of the CCTAS is for manually opening and closing the optics cover. A PE and resin hatch stop is provided for the rear of the cupola. On the inside of the hatch a small PE handle and hatch lock are provided for final detailing if the hatch is to be posed open. The cupola is open and includes some inner periscope detail. There is no interior detail for the CCTAS. This was a simple straight forward subassembly but an important detail to the TUA build.
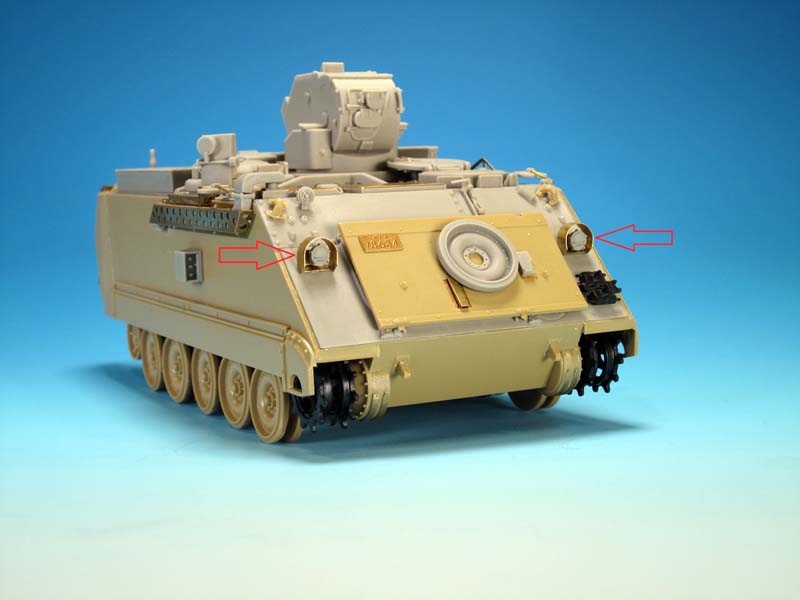
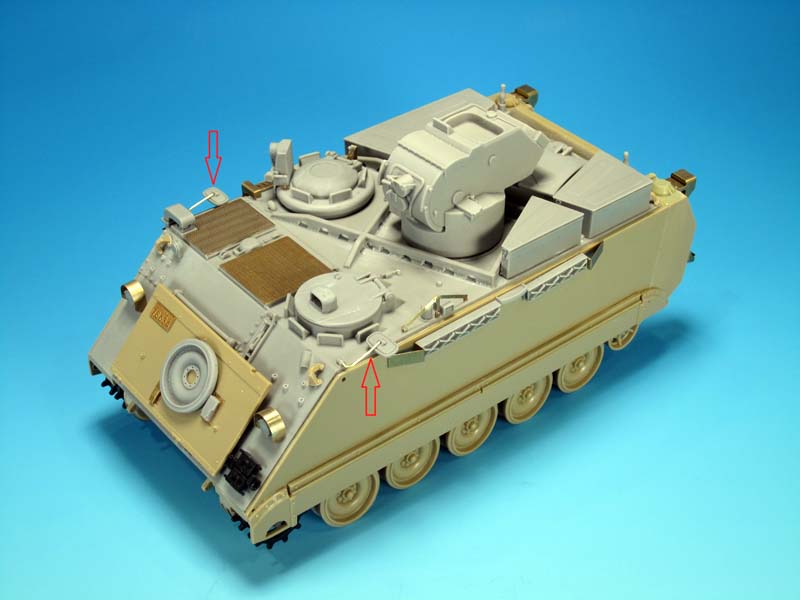
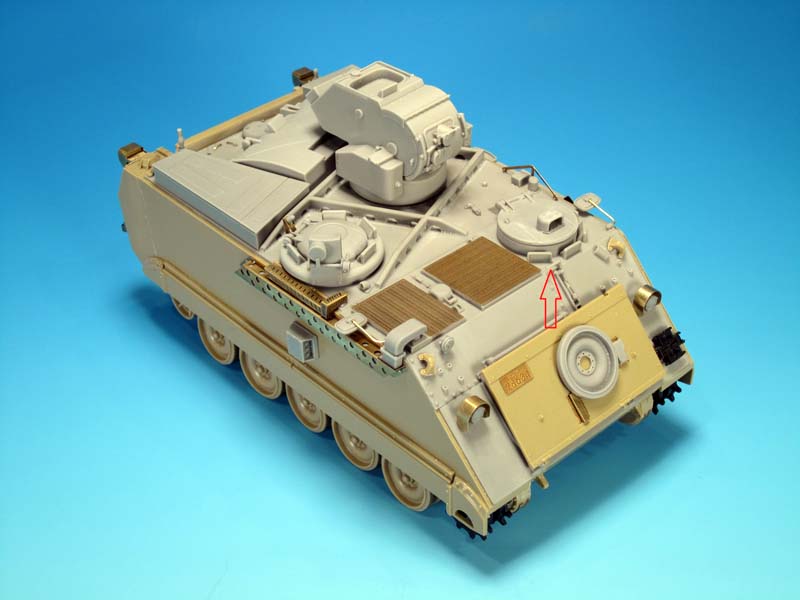
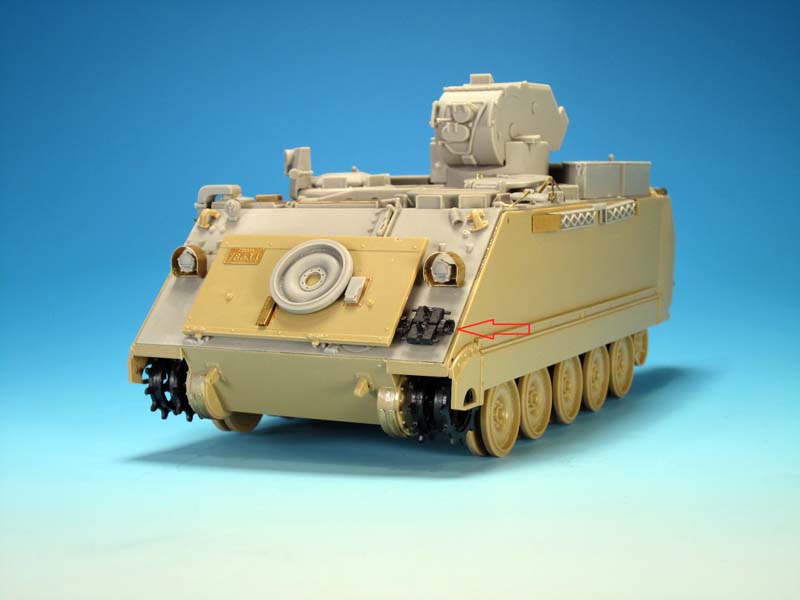
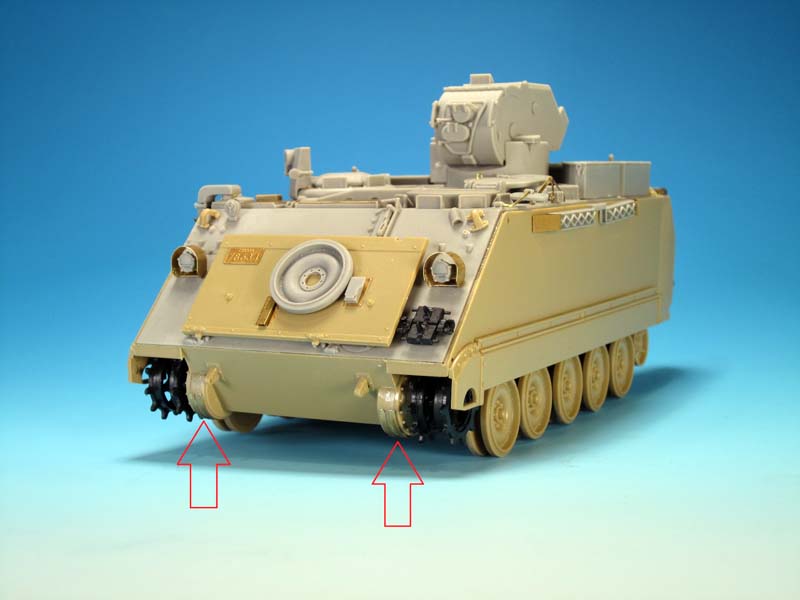
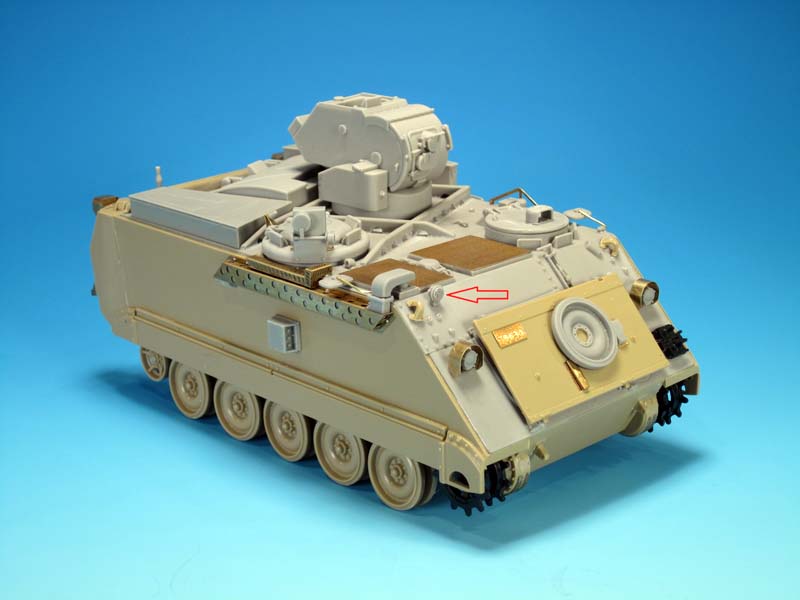
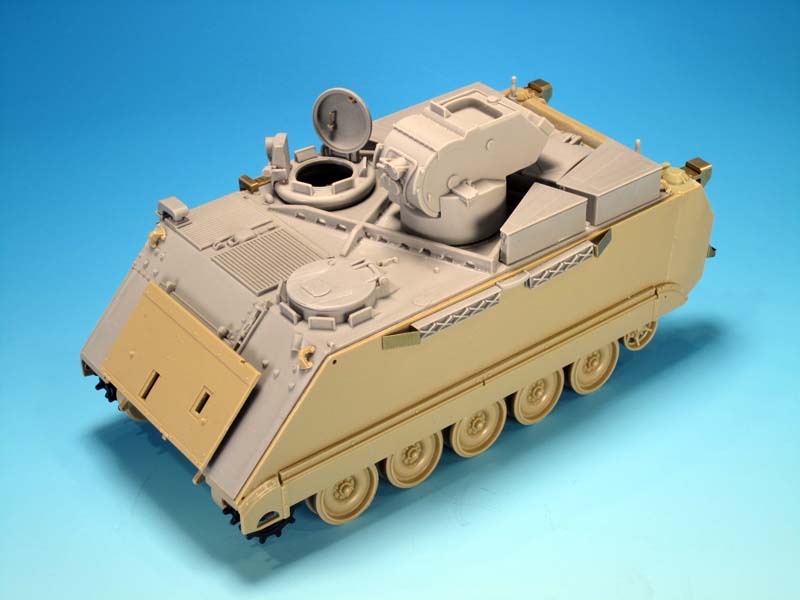
hull front details
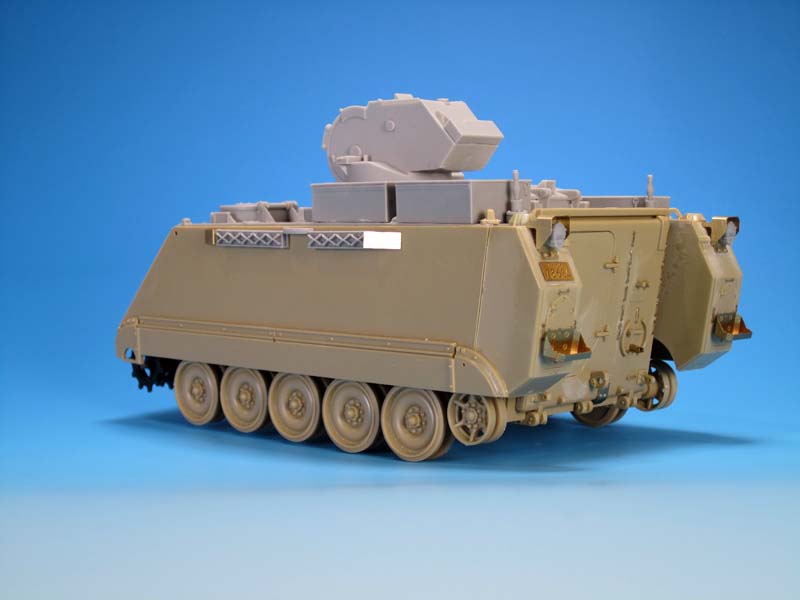
I've broken down the majority of the part additions here with images showing the specific part placements. Starting off is the horn. A simple well detailed resin piece. Placement should be in line with the inner right headlight and above the cable port. Next is the horizontal resin bar for the engine hatch hinge. I would recommend cutting this piece long and then trimming and sanding it down to fit perfectly. The driver's hatch interior gets a splash of detailing with a brass wire handle. I used the supplied 0.3 mm brass wire bent with a Grabhandler tool to form the handle shape. There are pre-drilled holes on the hatch interior to assist with placement. The trim vane gets detailed with a PE licence plate, a spare road wheel, the trim vane release, and the rectangular bracket. These parts all fit into the existing kit trim vane with little to no issue. The road wheel was normally held in place with a simple bolt. There is no mention of this in the conversion so one will simply have to be added. On the left upper hull the fire extinguisher pull handle and the GPS antenna is added. The GPS antenna simply attaches to the existing antenna mount base plate. The GPS antenna was an add-on to the TUA. It was not mounted on the original TUA nor TUAs with UNPROFOR, IFOR, or SFOR. I am not sure if the GPS antenna was on KFOR era (1999/2000) TUAs but it is likely part of the TCCCS upgrade from the early 2000s. The standard M113 style antenna guard is provided in five PE parts and can be a bit tricky to align, assemble, and attach. There is a slight bend to the main guard part. Once in place small bolts/nuts can be added with sprue and bolts of your choice.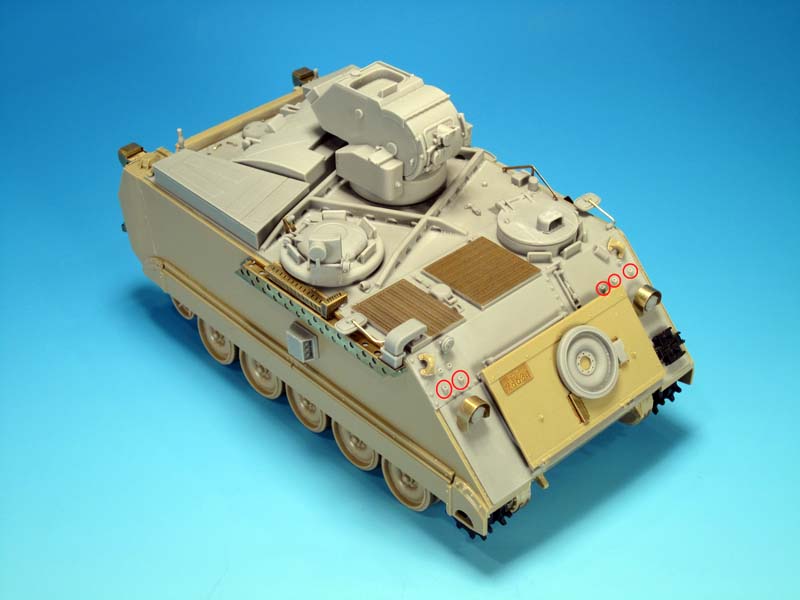


About the Author


Comments

As always Jason nice and precise work and assessment on this product and a good finished product.
NOV 29, 2014 - 08:00 PM
Excellent article, thank you for the detailed build information and great photos.
NOV 30, 2014 - 07:42 AM

A perfect example how the build article should look like. Thanks Jason for all the info provided and absolutely great photos.
Mario
NOV 30, 2014 - 01:21 PM


I just got mine and it's a great conversion. Wish they hadn't molded the TOW tubes sloped down though.
MAY 08, 2015 - 07:31 AM

Copyright ©2021 by Jason Bobrowich. Images and/or videos also by copyright holder unless otherwise noted. The views and opinions expressed herein are solely the views and opinions of the authors and/or contributors to this Web site and do not necessarily represent the views and/or opinions of Armorama, KitMaker Network, or Silver Star Enterrpises. All rights reserved. Originally published on: 2014-11-30 04:47:45. Unique Reads: 19130

WEB HOSTING BY


Copyright ©2021 Armorama and Kitmaker Network, a subsidiary of Silver Star Enterprises
All Rights Reserved. Please read our Conditions of Use and Privacy Policy.
All Rights Reserved. Please read our Conditions of Use and Privacy Policy.