

Hi Folks, I started this build in the Constructive feedback section a while back then discovered this section of the forum. I removed my postings with the intent of shifting over here but then life got in the way!...so forgive me if most of you have seen these already but here goes...
I picked up this kit at my LHS and while I'm not much of an armor builder Ithought it would be a nice change of pace from my usual railroad stuff..
WarWheels Forum
This forum can be used for all topics and discussions on WarWheels!
This forum can be used for all topics and discussions on WarWheels!
Hosted by Al Crawford, Patrick Keenan
Bronco's 1/35 AA Staghound

randyd

Joined: July 04, 2009
KitMaker: 241 posts
Armorama: 199 posts
Posted: Sunday, August 23, 2009 - 02:43 PM UTC
Removed by original poster on 08/24/09 - 01:54:10 (GMT).
randyd
Joined: July 04, 2009
KitMaker: 241 posts
Armorama: 199 posts
Posted: Sunday, August 23, 2009 - 03:05 PM UTC
I'm very impressed with the kit but thought it would be fun to build an interior...After getting a copy of Wings and Wheels No.9 and finding the War Wheels web site it was a go... 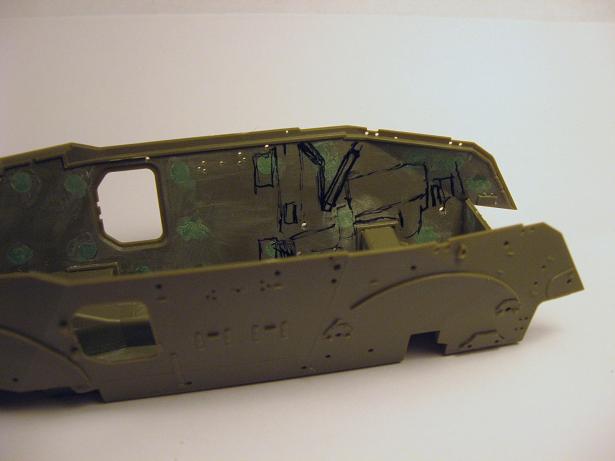
randyd
Joined: July 04, 2009
KitMaker: 241 posts
Armorama: 199 posts
Posted: Sunday, August 23, 2009 - 04:17 PM UTC
Decided to start with the engine compartment.....
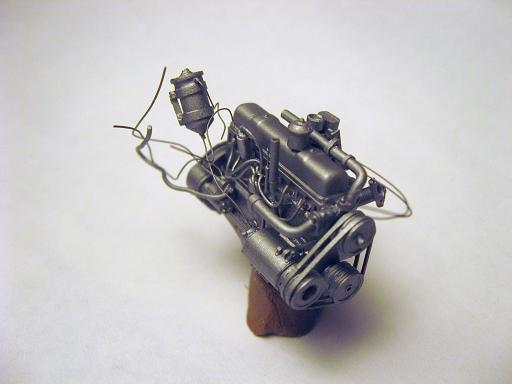
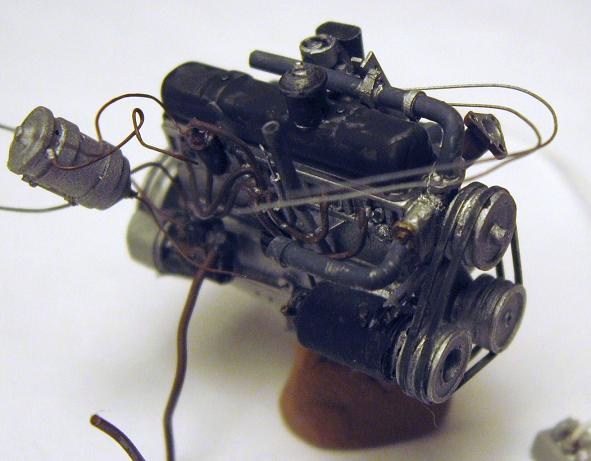
The Staghound came with Chevy clones of the GMC motors that were used in the 21/2 ton cargo truck so after a Tamiya kit donanation I had an engine block that was a starting point. Also test fitting the interior walls...

Engine work begins......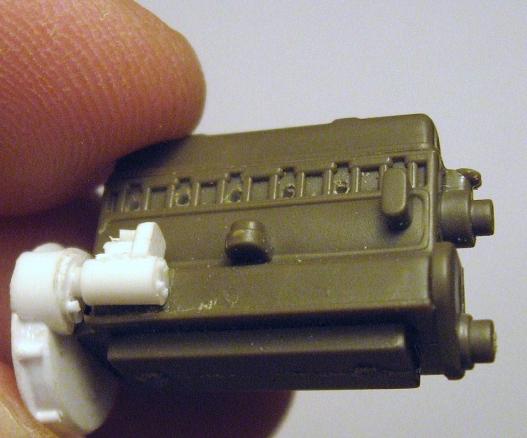
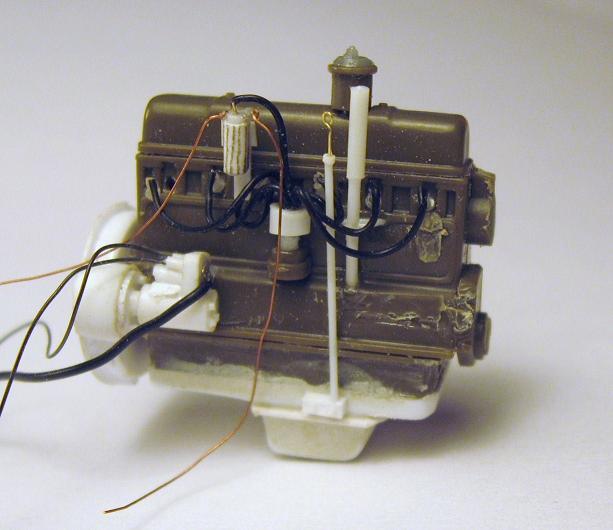
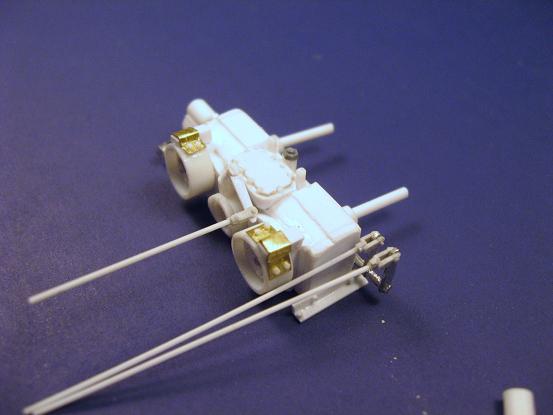
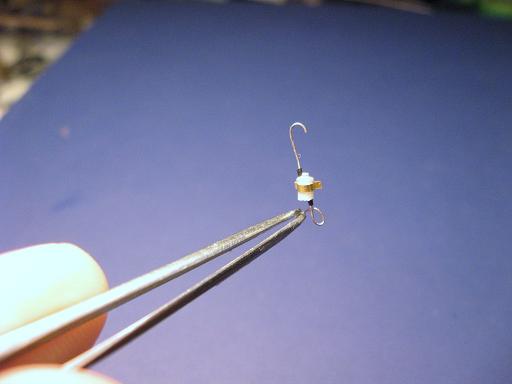
I did decide to wimp out and only show one of the two engines. Putting in some fuel lines and fire suppression lines...
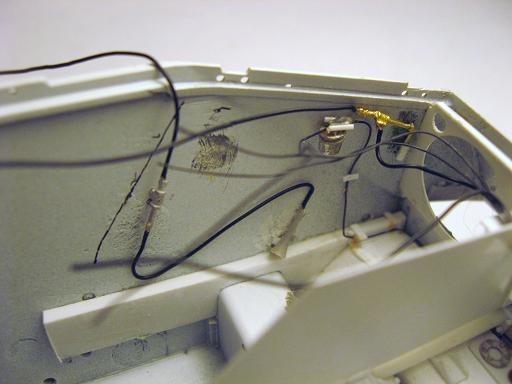
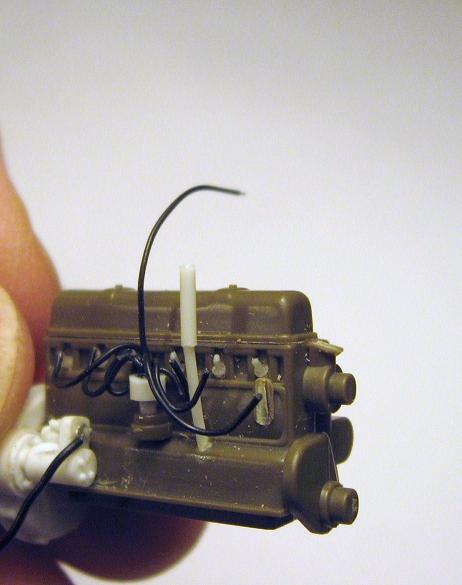
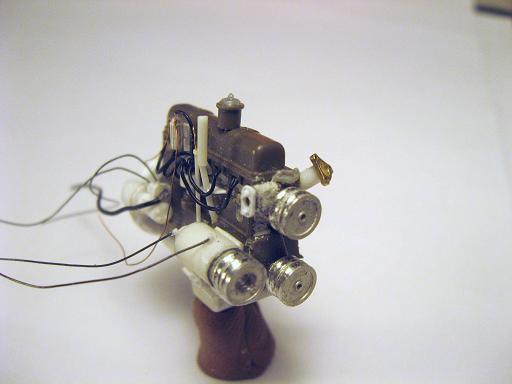
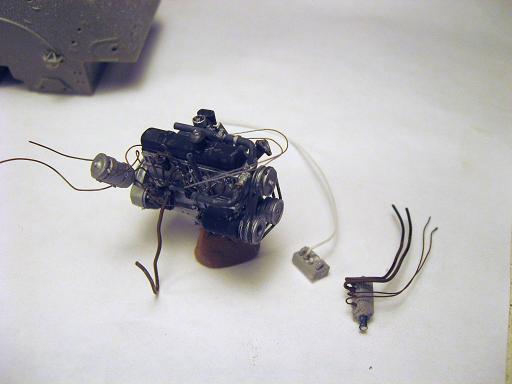
Test fit and working on electrical lines coming from forward compartment.
David H. from War Wheels kindly helped on painting info for the motor...
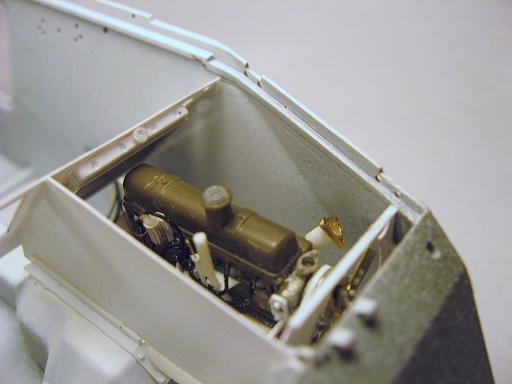
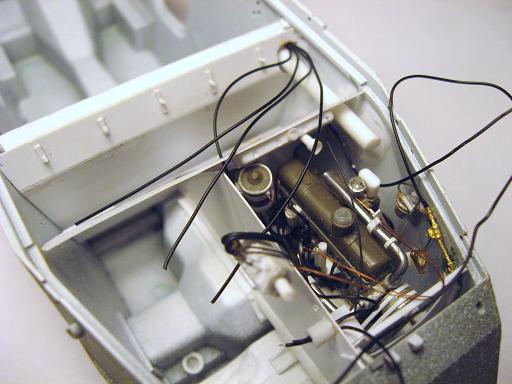
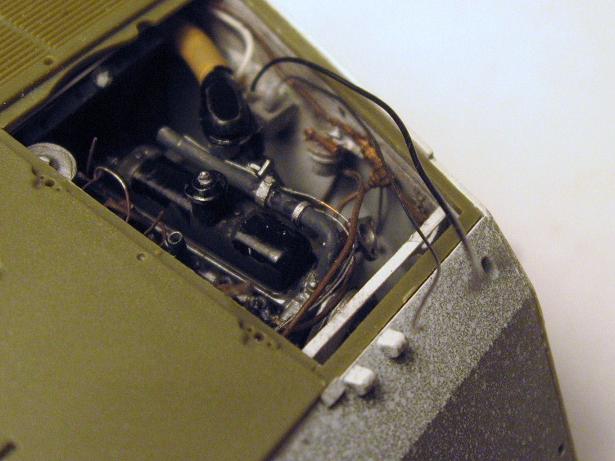
Test fit of hull top to see if radiator fillpipe will line up..
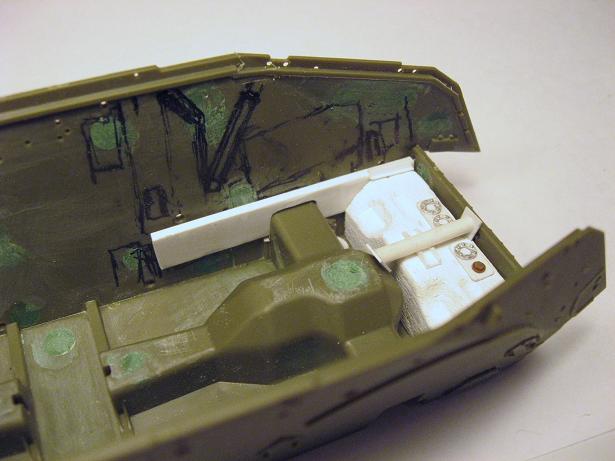
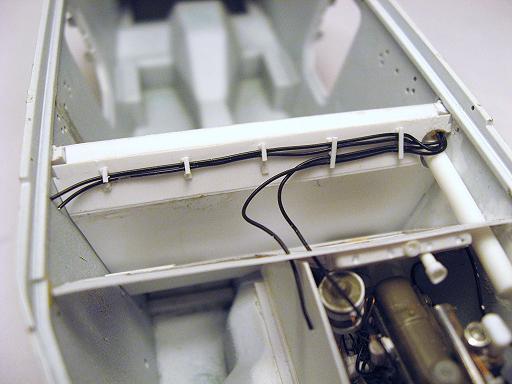
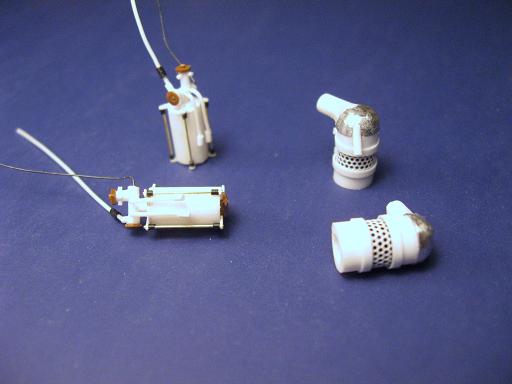
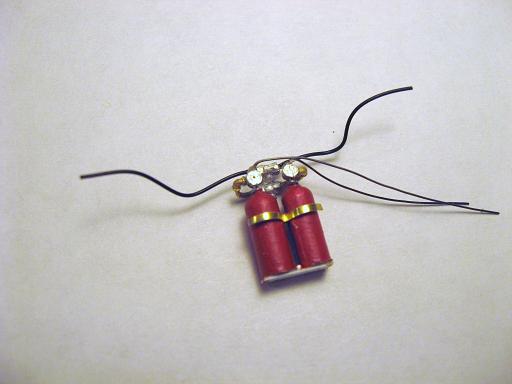
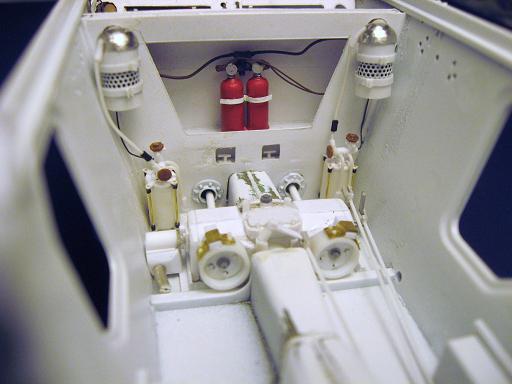
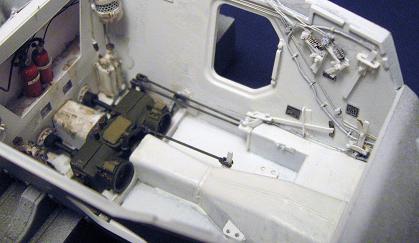
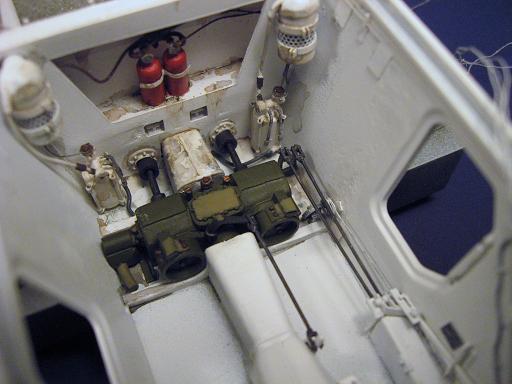
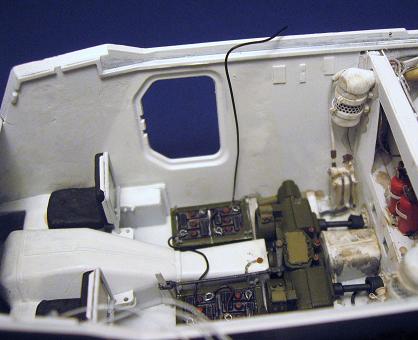
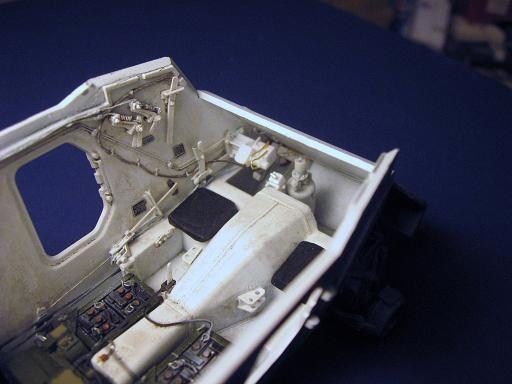
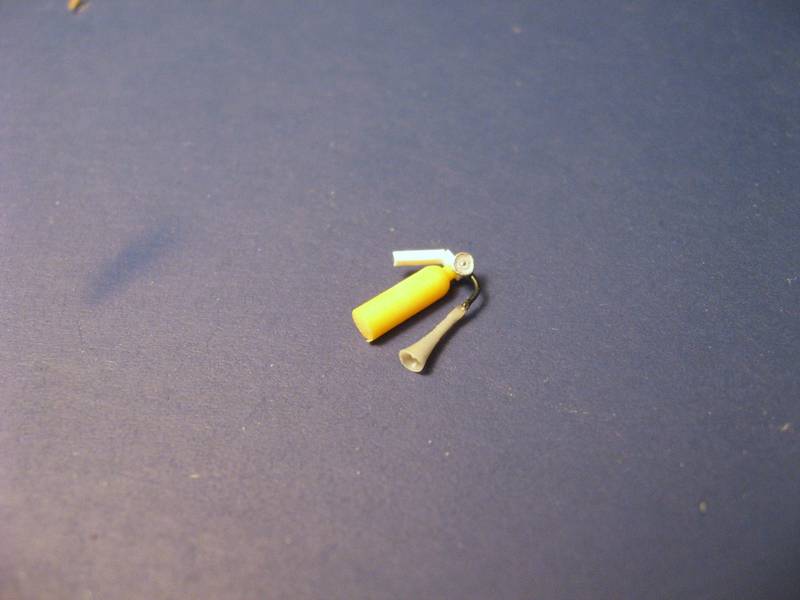
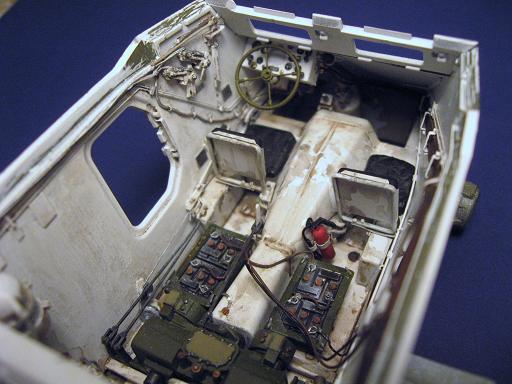
Finally moving on to the main compartment, the back wall section contains the air cleaners, hydraulic pumps and fire extinguishers with the transfer case on the floor...
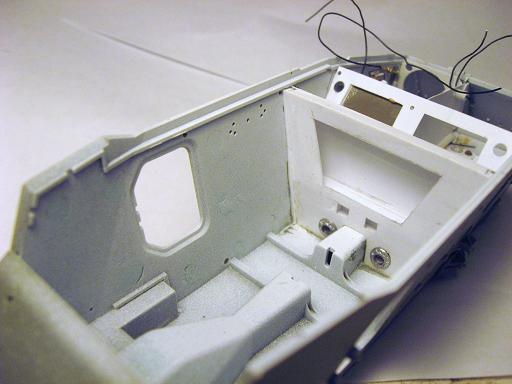
Thats all the phoyos for now, will upload more later, thanks for looking....Randy
The Staghound came with Chevy clones of the GMC motors that were used in the 21/2 ton cargo truck so after a Tamiya kit donanation I had an engine block that was a starting point. Also test fitting the interior walls...
Engine work begins......
I did decide to wimp out and only show one of the two engines. Putting in some fuel lines and fire suppression lines...
Test fit and working on electrical lines coming from forward compartment.
David H. from War Wheels kindly helped on painting info for the motor...
Test fit of hull top to see if radiator fillpipe will line up..
Finally moving on to the main compartment, the back wall section contains the air cleaners, hydraulic pumps and fire extinguishers with the transfer case on the floor...
Thats all the phoyos for now, will upload more later, thanks for looking....Randy
Dangeroo

#023

Joined: March 13, 2009
KitMaker: 2,058 posts
Armorama: 1,656 posts

Posted: Sunday, August 23, 2009 - 07:02 PM UTC
Wow! That is some impressive work there! I wouldn't dare to scratch an interior! I'll be watching this! Keep up the great work!
Cheers
Stef
Cheers
Stef

koenele

Joined: January 17, 2006
KitMaker: 4,194 posts
Armorama: 408 posts

Posted: Sunday, August 23, 2009 - 10:31 PM UTC
fantastic work!

WarWheels
Joined: March 24, 2006
KitMaker: 1,816 posts
Armorama: 1,402 posts
Posted: Monday, August 24, 2009 - 12:25 PM UTC
Very impressive Randy. Thanks for moving the build log over to WW.
I definitely look forward to seeing your further progress.
I definitely look forward to seeing your further progress.
randyd
Joined: July 04, 2009
KitMaker: 241 posts
Armorama: 199 posts
Posted: Tuesday, August 25, 2009 - 04:16 AM UTC
Thank you Stef, I only decided to try the interior because of really good reference photos!
Thanks Koen, Love that Belgium Royal Army Museum.
Thank you Patrick, I've got lots of questions for the good folks on this forum so this should be fun.
More pic's...
Working on the drivers control systems...
Starting on the seats.
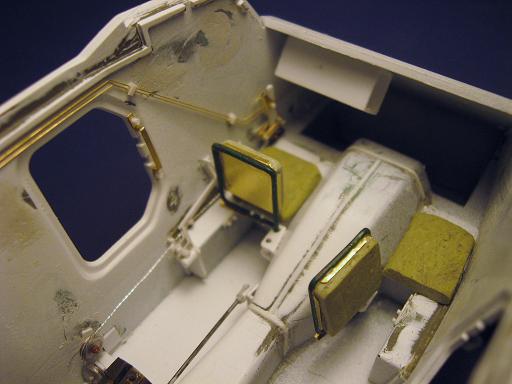
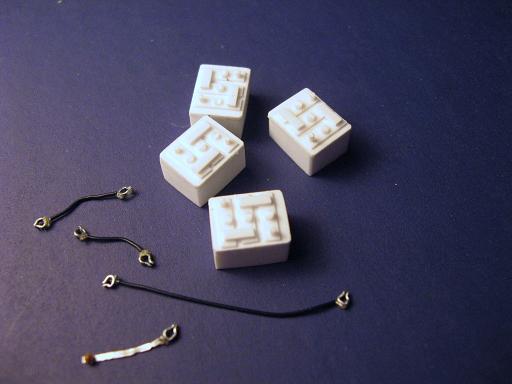
Need some batteries.
I do have a question for all you folks, these cars were built with stuff like small arms(submachine gun) ,canteens, flashlights, and tool kits that were American. Would this be correct for British and Canadian units in WW2? Thanks for looking in.
Randy
Thanks Koen, Love that Belgium Royal Army Museum.
Thank you Patrick, I've got lots of questions for the good folks on this forum so this should be fun.
More pic's...
Working on the drivers control systems...
Starting on the seats.
Need some batteries.
I do have a question for all you folks, these cars were built with stuff like small arms(submachine gun) ,canteens, flashlights, and tool kits that were American. Would this be correct for British and Canadian units in WW2? Thanks for looking in.
Randy

AlanL

Joined: August 12, 2005
KitMaker: 14,499 posts
Armorama: 11,675 posts
Posted: Tuesday, August 25, 2009 - 06:13 AM UTC
Hi Randy,
Really excellent work, seriously impressive. Look forward to developments.
Al
Really excellent work, seriously impressive. Look forward to developments.
Al
randyd
Joined: July 04, 2009
KitMaker: 241 posts
Armorama: 199 posts
Posted: Wednesday, August 26, 2009 - 08:49 AM UTC
Thanks Al, appreciate your comments.
Randy
Randy
randyd
Joined: July 04, 2009
KitMaker: 241 posts
Armorama: 199 posts
Posted: Thursday, August 27, 2009 - 05:20 AM UTC
Morning Folks, A Few more updates....
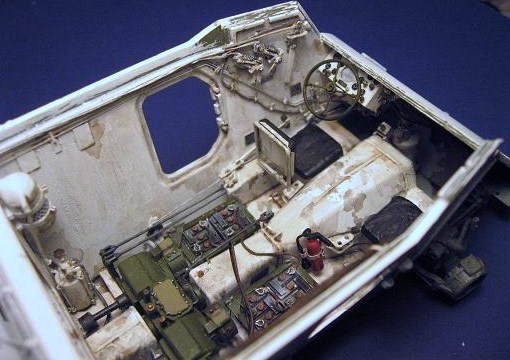
Putting in the rest of the driver's controls
Lots of metal placards with operating instructions in this area that had me stumped until I found some Archer products, not perfect but about the best I can do...
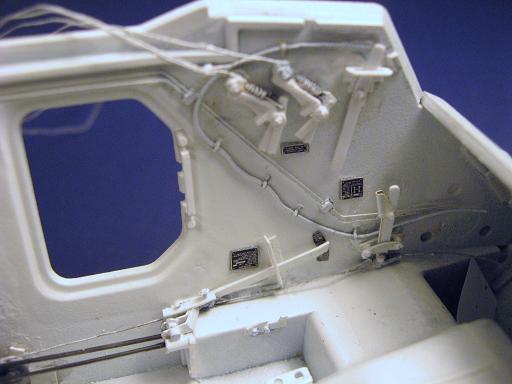
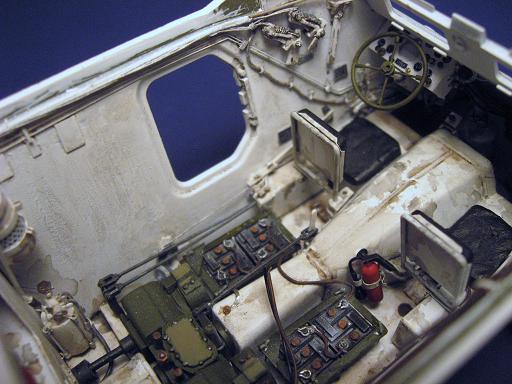
The transfer case and control linkages are added along with the first layer of grime..
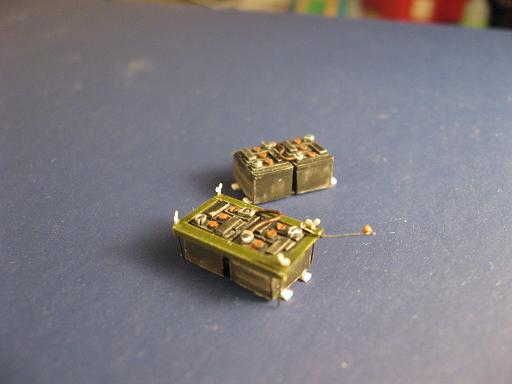
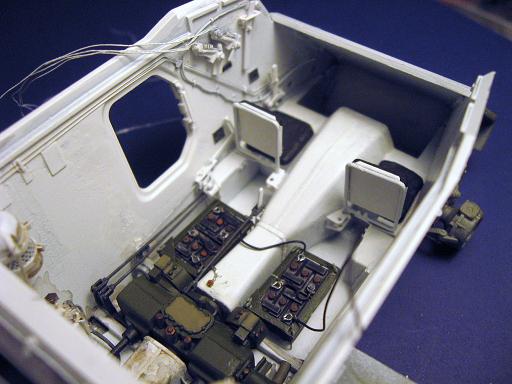
Batteries installed....
Working in the driver's footwell adding the pedals and siren footbutton...
Checking the fitt of the steering box amd powersteering pumps and fittings
Thats all I've got time for, all comments welcome. Thanks for looking in.
Randy
Putting in the rest of the driver's controls
Lots of metal placards with operating instructions in this area that had me stumped until I found some Archer products, not perfect but about the best I can do...
The transfer case and control linkages are added along with the first layer of grime..
Batteries installed....
Working in the driver's footwell adding the pedals and siren footbutton...
Checking the fitt of the steering box amd powersteering pumps and fittings
Thats all I've got time for, all comments welcome. Thanks for looking in.
Randy
WarWheels
Joined: March 24, 2006
KitMaker: 1,816 posts
Armorama: 1,402 posts
Posted: Thursday, August 27, 2009 - 07:23 AM UTC
Again, truly amazing.... Great job as it almost looks like a real vehicle.
randyd
Joined: July 04, 2009
KitMaker: 241 posts
Armorama: 199 posts
Posted: Friday, August 28, 2009 - 10:39 AM UTC
Thanks for commenting Patrick, A Small update.....
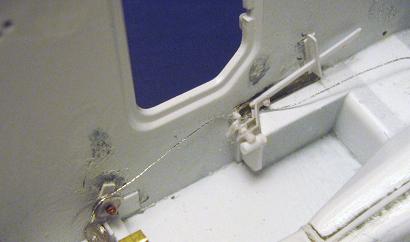
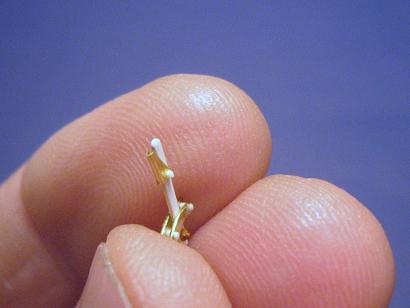
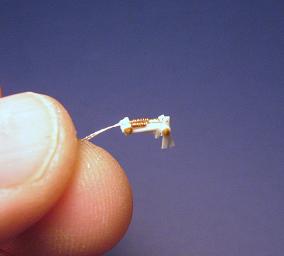
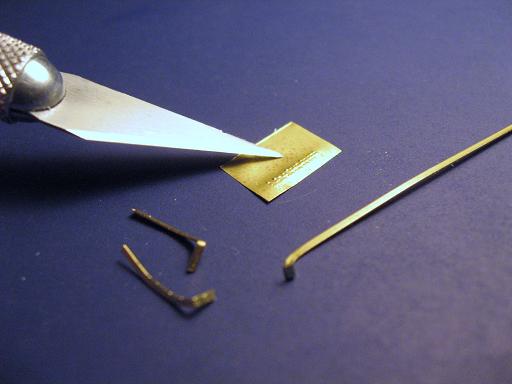
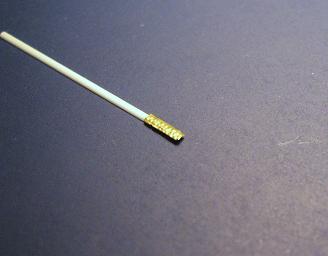
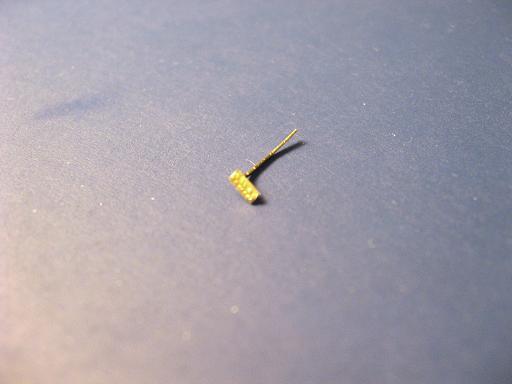
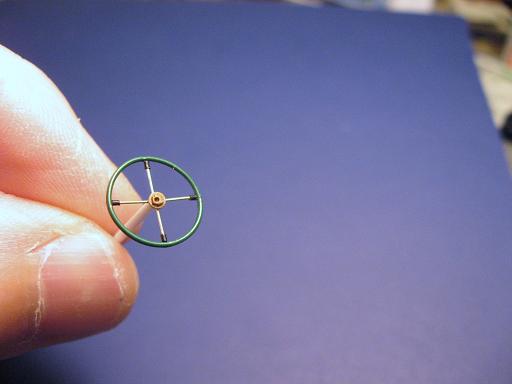
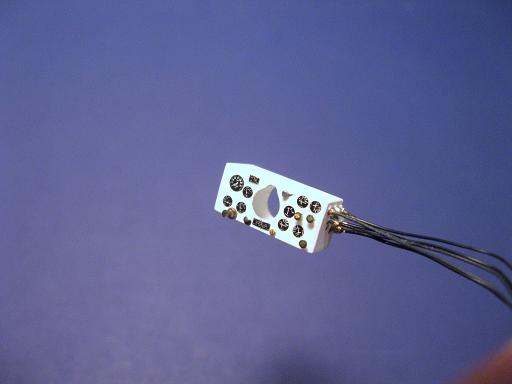
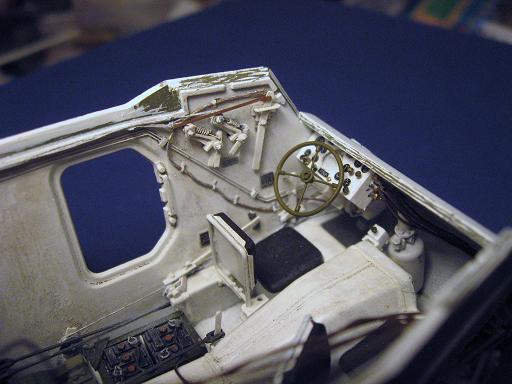
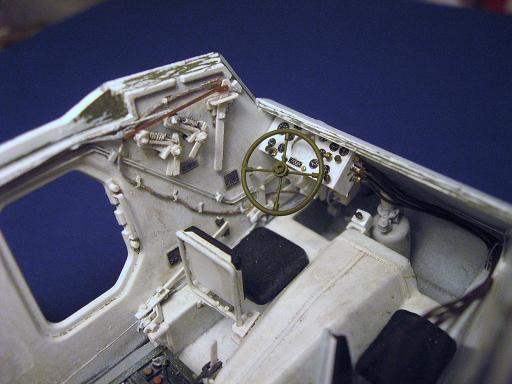
Building the steering wheel....

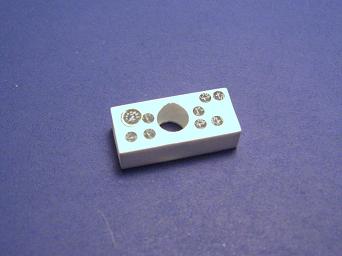
Next is the dashboard and wiring harness, the gauge faces are from an Archer dry transfer set.....

Installed in the the car....
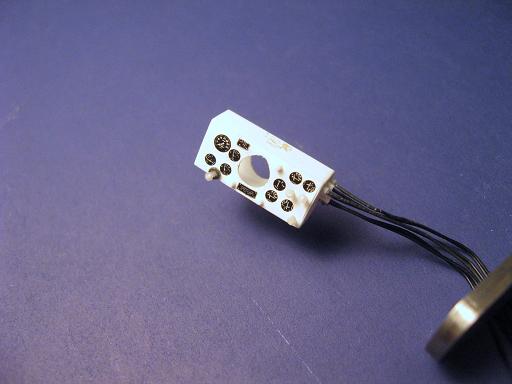
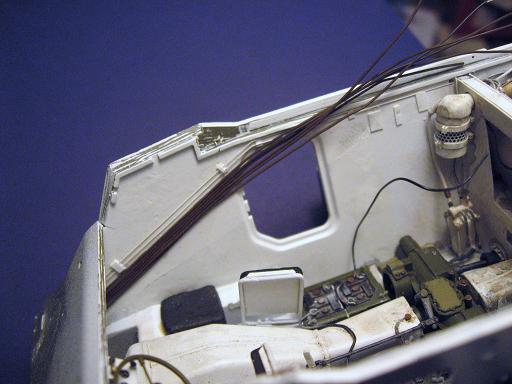
Wiring harness coming up the right side..
I do have a request from you guys...I have the US Army tech manual for the T17E1 version but need the supplement that is for this AA variant...Actually just the number for it would work as I could download from the AHCO site. Have tried searching this site for it but keep getting hundreds of choices and no way of knowing what I've got until you download (slowly of course) then open. Any help would be appreciated.
As always thanks for looking in and all comments are welcome.
Randy
Building the steering wheel....
Next is the dashboard and wiring harness, the gauge faces are from an Archer dry transfer set.....
Installed in the the car....
Wiring harness coming up the right side..
I do have a request from you guys...I have the US Army tech manual for the T17E1 version but need the supplement that is for this AA variant...Actually just the number for it would work as I could download from the AHCO site. Have tried searching this site for it but keep getting hundreds of choices and no way of knowing what I've got until you download (slowly of course) then open. Any help would be appreciated.
As always thanks for looking in and all comments are welcome.
Randy
Dangeroo
#023
Joined: March 13, 2009
KitMaker: 2,058 posts
Armorama: 1,656 posts
Posted: Saturday, August 29, 2009 - 08:10 PM UTC
Absolutely stunning work! It's always great to see a master at work!
As for the manual, you might want to try this site, it has all kinds of manuals on it: http://www.scribd.com/
HTH!
Cheers
Stef
As for the manual, you might want to try this site, it has all kinds of manuals on it: http://www.scribd.com/
HTH!
Cheers
Stef
randyd
Joined: July 04, 2009
KitMaker: 241 posts
Armorama: 199 posts
Posted: Sunday, August 30, 2009 - 02:31 PM UTC
Stef, Thanks for your comments and the useful link! (still have not found what I was looking for but found lots of good stuff for future projects.
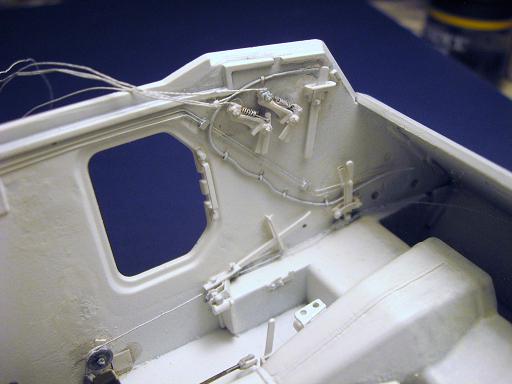
Just a small update tonite....
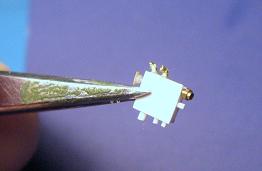
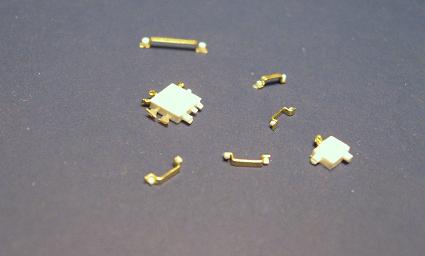
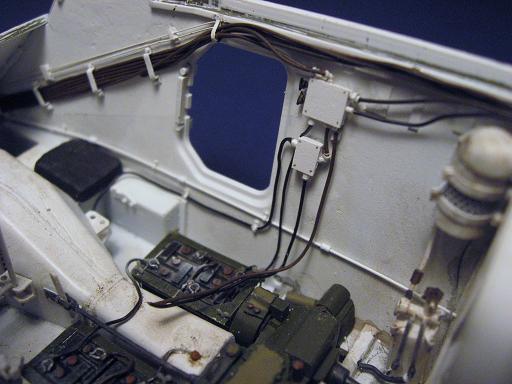
Working on the right side of the car adding the junction boxes and wiring.
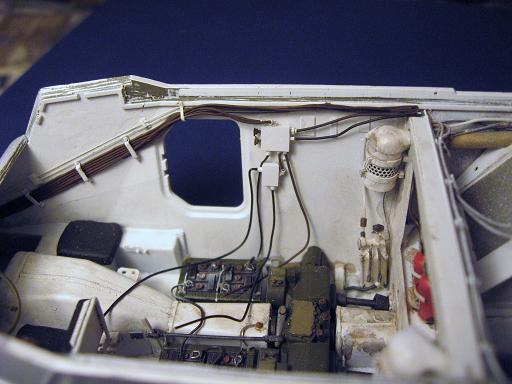
Thanks for looking in and comments are always welcome.
Randy
randyd
Joined: July 04, 2009
KitMaker: 241 posts
Armorama: 199 posts
Posted: Tuesday, September 01, 2009 - 02:25 AM UTC
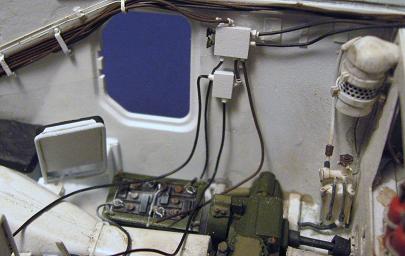
Good Morning all...Small details still going in ....


Some weathering as I go as it is getting harder to get to some spots..
Thats all I've got for today. As always thanks for looking in.
Randy
Some weathering as I go as it is getting harder to get to some spots..
Thats all I've got for today. As always thanks for looking in.
Randy

Thommie

Joined: December 13, 2004
KitMaker: 189 posts
Armorama: 65 posts

Posted: Tuesday, September 01, 2009 - 03:37 AM UTC
HI Randy,
This is some of the most impressive scratching I've seen.. It is as if I am looking at pics from an actual vehicle instead of a scale model. The amount of detail is astonoshing.
Keep it coming!
This is some of the most impressive scratching I've seen.. It is as if I am looking at pics from an actual vehicle instead of a scale model. The amount of detail is astonoshing.
Keep it coming!
tankfan1

Joined: December 16, 2007
KitMaker: 13 posts
Armorama: 12 posts

Posted: Tuesday, September 01, 2009 - 04:35 AM UTC
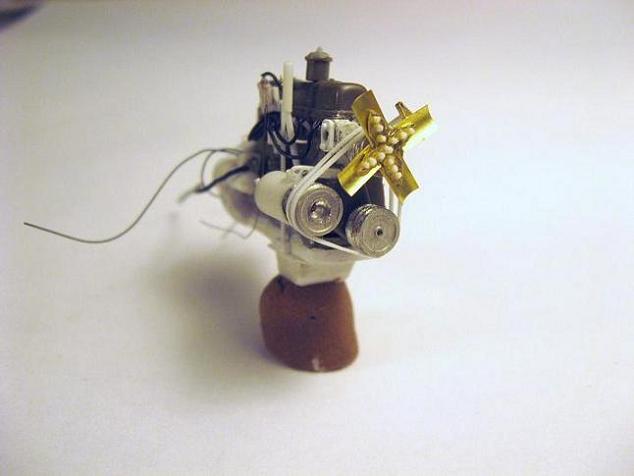
Truly amazing work, especially the engine. Have you fired it up yet?
My wife wants know how many hours into the build so far and I want to know what you used for the engine pulleys. keep the pics coming.
mike
My wife wants know how many hours into the build so far and I want to know what you used for the engine pulleys. keep the pics coming.
mike
randyd
Joined: July 04, 2009
KitMaker: 241 posts
Armorama: 199 posts
Posted: Tuesday, September 01, 2009 - 05:32 AM UTC
Thank you Thomas, I'm glad you like it so far.
Thanks Mike, for the comments. I started this a couple of months ago and right now it's all I'm working on. I usually try to build a few small bits then call it good for the day, maybe an hour or two at a time.
The pulleys are a white metal casting from Western Scale Models. I've been a railroad modeller for a long time and have a good stash of detail parts. These have come in handy at times so far in this build.
Randy

dhaugh
Joined: September 30, 2005
KitMaker: 12 posts
Armorama: 7 posts

Posted: Wednesday, September 02, 2009 - 02:29 PM UTC
Randy, I'm sure glad you didn't go crazy with this interior project. Best, Dave Haugh
randyd
Joined: July 04, 2009
KitMaker: 241 posts
Armorama: 199 posts
Posted: Thursday, September 03, 2009 - 01:02 AM UTC
Dave, If I was going to go crazy I would try an model the light bulbs in the dome lights or something silly like that

Randy
randyd
Joined: July 04, 2009
KitMaker: 241 posts
Armorama: 199 posts
Posted: Thursday, September 03, 2009 - 01:11 AM UTC
Seriusly Dave I do appreciate WarWheels and your willingness to help!!
Randy

panzerIV

Joined: January 02, 2007
KitMaker: 781 posts
Armorama: 676 posts
Posted: Thursday, September 03, 2009 - 01:48 AM UTC
randy
this staghoud is absolutely fantastic n the interior work is amazing its like lil miniature soldiers have put it together for you.. you have alot of patience and skill to be able to do this * thumbs up *
have you made that light bulb ?? if you have my hat goes off to you cos any1 who can create something so small and look so good deserves a trophy for skill.
are you going to be putting the staghound in a vignette or dio?
keep up the good work will keep an eye on the build
tony
randyd
Joined: July 04, 2009
KitMaker: 241 posts
Armorama: 199 posts
Posted: Thursday, September 03, 2009 - 03:15 AM UTC
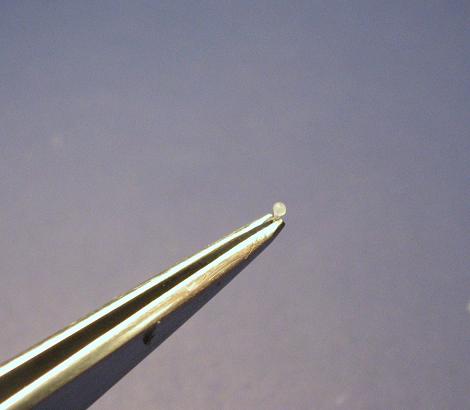
Thank you Tony for the kind words. I did not scratch the light bulb, its a 1/87th scale casting from Grant Line (more on that later).
I will put the stag in a small dio showing some work being done on it in a small machine shop in Belgium maybe? Something like using the newly liberated small town's local craftmen to repair something.
Got the idea after seening a gentleman named Spencer P post some great stuff on a modern machine shop dio on other forums.
Here are some photos of a 1930's era shop I built for my 1/48th scale railroad layout.
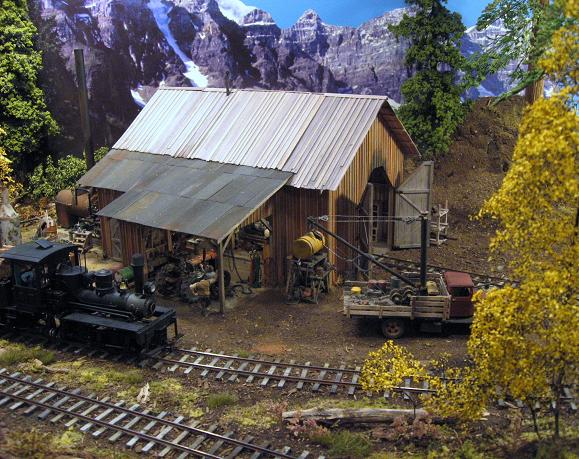
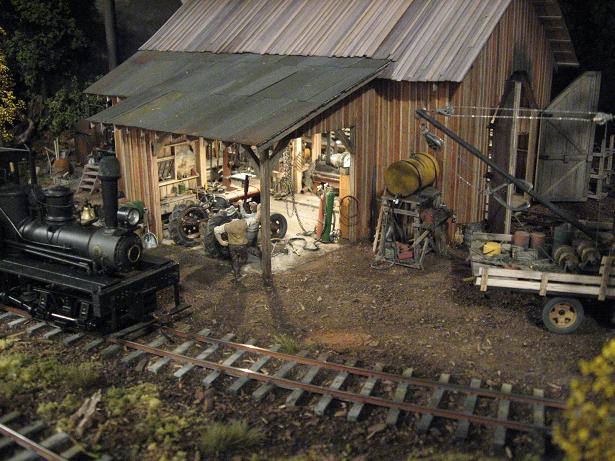

So something like this with the stag and its crew and a civilian working working on it.
Randy
I will put the stag in a small dio showing some work being done on it in a small machine shop in Belgium maybe? Something like using the newly liberated small town's local craftmen to repair something.
Got the idea after seening a gentleman named Spencer P post some great stuff on a modern machine shop dio on other forums.
Here are some photos of a 1930's era shop I built for my 1/48th scale railroad layout.
So something like this with the stag and its crew and a civilian working working on it.
Randy

Uruk-Hai

Joined: January 31, 2003
KitMaker: 795 posts
Armorama: 472 posts

Posted: Thursday, September 03, 2009 - 03:40 AM UTC
Lovely work on the engine and interior!
Im stunned.
Cheers
Im stunned.
Cheers
 |

WEB HOSTING BY


Copyright ©2021 Armorama and Kitmaker Network, a subsidiary of Silver Star Enterprises
All Rights Reserved. Please read our Conditions of Use and Privacy Policy.
All Rights Reserved. Please read our Conditions of Use and Privacy Policy.