

Shaun....and any others building / have built the Dragon 8-ton......part B1.....got a pic how that rascal attaches?
As usual.....I caught that one after installing the winch and had to snake it in / through and under after the fact.....sheesh.....at least on the next 2 I will do better...lol
Thanks
Armor/AFV
For discussions on tanks, artillery, jeeps, etc.
For discussions on tanks, artillery, jeeps, etc.
Hosted by Darren Baker, Mario Matijasic
Sd.Kfz.7 8t Late Production Build

Firecaptain

Joined: November 03, 2006
KitMaker: 165 posts
Armorama: 118 posts
Posted: Friday, October 02, 2009 - 04:29 AM UTC

keenan
Joined: October 16, 2002
KitMaker: 5,272 posts
Armorama: 2,844 posts
Posted: Friday, October 02, 2009 - 05:47 AM UTC
Furnace guys came today and I guess I am getting a $3500 furnace for Christmas.
Guys will be working done there Monday but I will put my parka on an stay with it.
Shaun


Guys will be working done there Monday but I will put my parka on an stay with it.
Shaun

keenan
Joined: October 16, 2002
KitMaker: 5,272 posts
Armorama: 2,844 posts
Posted: Saturday, October 03, 2009 - 04:08 AM UTC
Yeah,
It is 60 degrees in my house everywhere but the master bedroom with the space heater. I don't anticipate getting much modeling done until the new heat delivery thingy is installed and running by Tuesday.
Shaun
It is 60 degrees in my house everywhere but the master bedroom with the space heater. I don't anticipate getting much modeling done until the new heat delivery thingy is installed and running by Tuesday.
Shaun

c5flies
Joined: October 21, 2007
KitMaker: 3,684 posts
Armorama: 2,938 posts
Posted: Saturday, October 03, 2009 - 09:55 AM UTC
Should have invited me over, I would have put that furnace in for ya.
Build is looking real sharp, hopefully you'll be continuing soon
Build is looking real sharp, hopefully you'll be continuing soon


newfish

Joined: June 23, 2008
KitMaker: 2,329 posts
Armorama: 2,110 posts

Posted: Saturday, October 03, 2009 - 10:58 AM UTC
HI Shaun well done on the first blog you seem to be a natural at it. Great start on these and your photo quailty is rather good. Keep it up. Also as for the appendix out I think i'll pass on that  .
.
Jaymes.

.Jaymes.

keenan
Joined: October 16, 2002
KitMaker: 5,272 posts
Armorama: 2,844 posts
Posted: Tuesday, October 06, 2009 - 12:51 PM UTC

Done and done. Got everything straightened up.
Sorry for the rather expensive delay...
Shaun
/It is toasty and quiet...
Firecaptain
Joined: November 03, 2006
KitMaker: 165 posts
Armorama: 118 posts
Posted: Friday, October 09, 2009 - 10:37 AM UTC
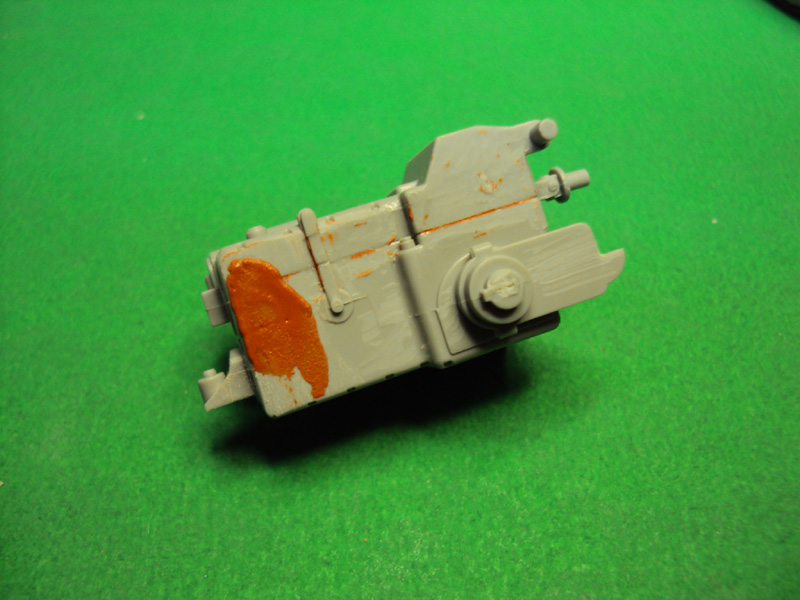
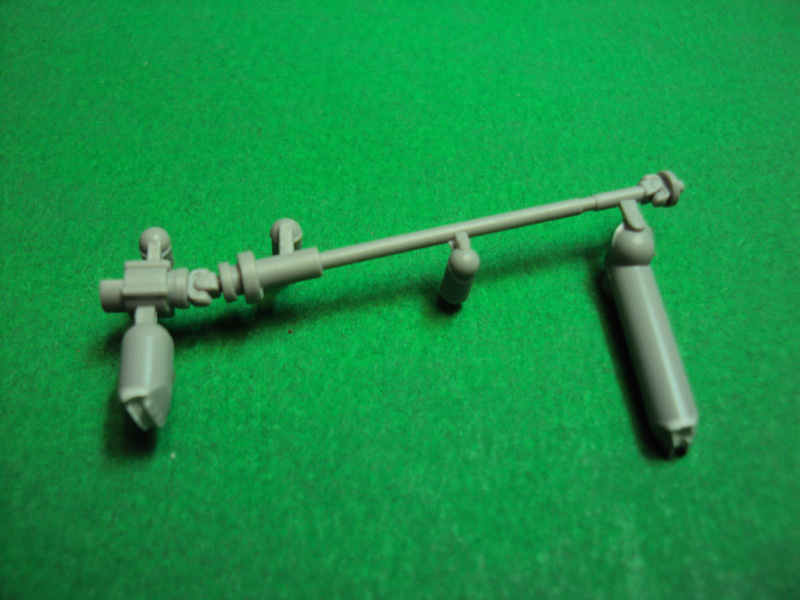
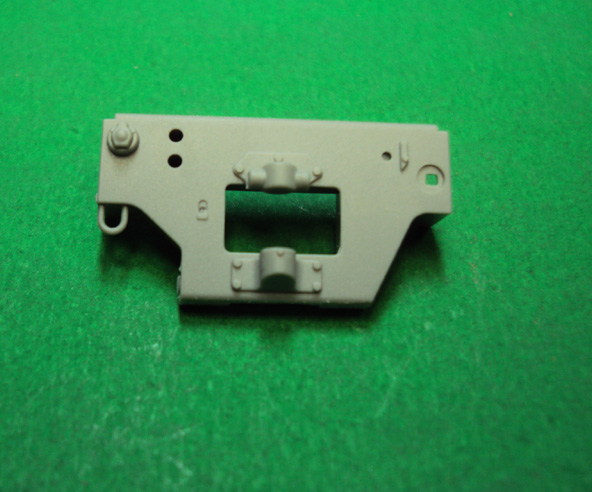
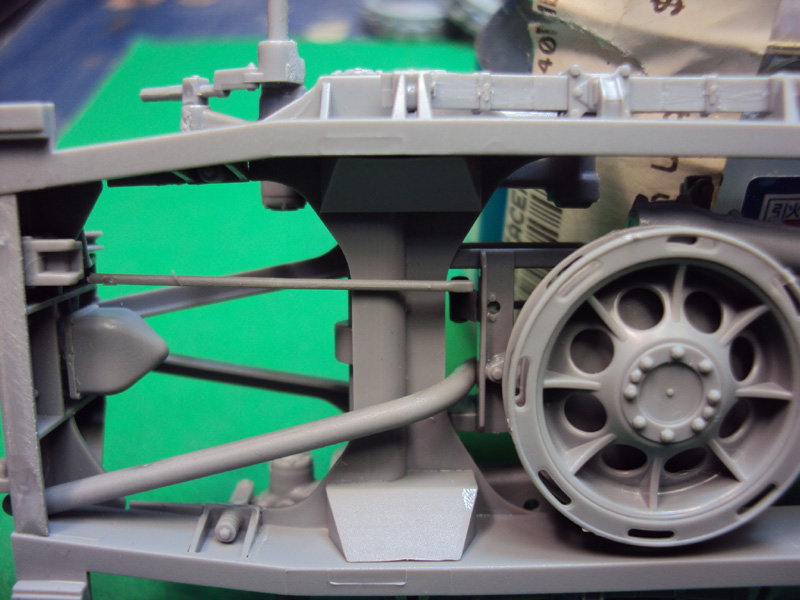
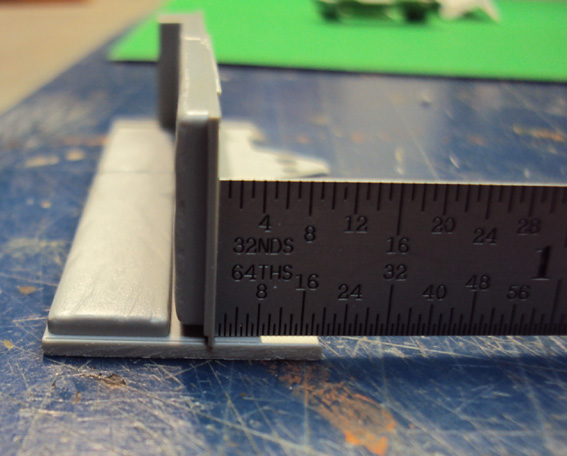
During some building "down-time" I found this.....
I couldn't figure out how this part fit.........thanks to IPMS USA member Mr Downen for figuring out the puzzle.
Build #1 I had to install it after the fact.....not fun and I guessed how it went (it was wrong).
Will try it this other way on the next 2 builds.
Anyone care to guess what area of the end frame member the other end of the rod goes to?
http://www.ipmsusa2.org/reviews2/mil-veh/kits/dragon_35_sdkfz7-flak4/step7detail.jpg
keenan
Joined: October 16, 2002
KitMaker: 5,272 posts
Armorama: 2,844 posts
Posted: Saturday, October 10, 2009 - 02:56 AM UTC
I'm back...
Step 4:
I filled a pretty big seam between B23 and B 29. Not bad considering this was only the second time I got the filler out:

Subassembly B finished:

Shaun
Step 4:
I filled a pretty big seam between B23 and B 29. Not bad considering this was only the second time I got the filler out:
Subassembly B finished:
Shaun
keenan
Joined: October 16, 2002
KitMaker: 5,272 posts
Armorama: 2,844 posts
Posted: Saturday, October 10, 2009 - 03:38 AM UTC
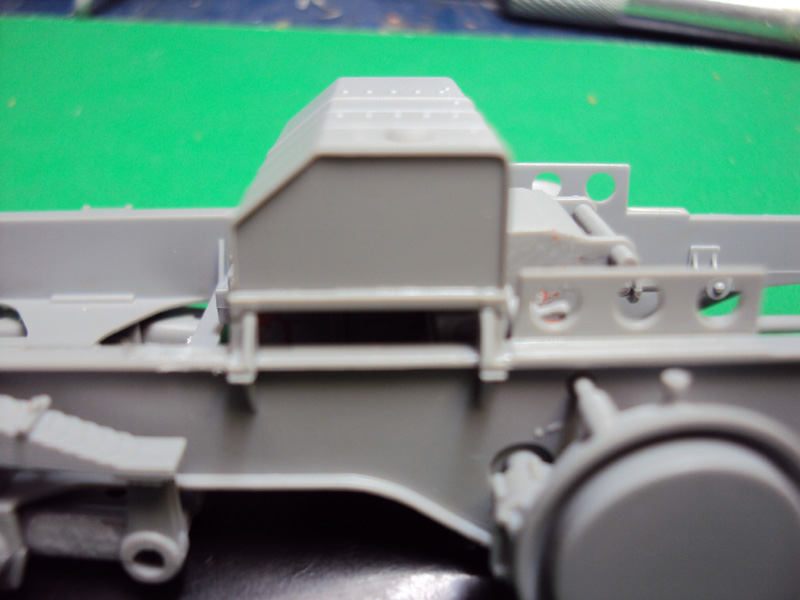
Part of step 6:
Subassembly B tucked into place. It took me about five minutes to figure out how to get it in there but it does fit.

Parts B55 & 56:
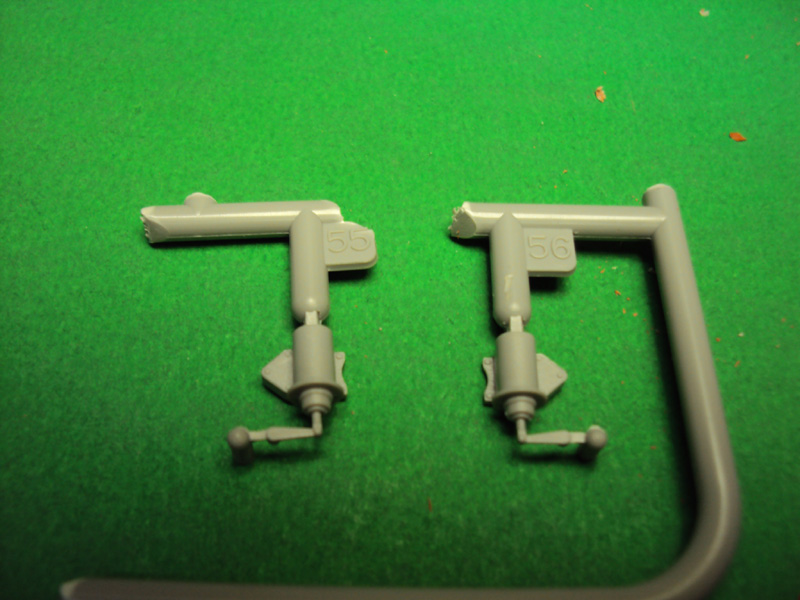
The location of these wasn't really "positive" on the frame. There is a lot of slop but I think I have them in the right place.

Parts B15 &16 added:
Parts B53 & 54 added. I am going to fill some of those seams.

The story so far:

One to subassemblies C,E, G and D, parts B10, 11 and 12.
Don't forget to add part B2 before you add D and G...
Shaun
Subassembly B tucked into place. It took me about five minutes to figure out how to get it in there but it does fit.
Parts B55 & 56:
The location of these wasn't really "positive" on the frame. There is a lot of slop but I think I have them in the right place.
Parts B15 &16 added:
Parts B53 & 54 added. I am going to fill some of those seams.
The story so far:
One to subassemblies C,E, G and D, parts B10, 11 and 12.
Don't forget to add part B2 before you add D and G...
Shaun
keenan
Joined: October 16, 2002
KitMaker: 5,272 posts
Armorama: 2,844 posts
Posted: Thursday, October 15, 2009 - 12:03 PM UTC
Another step:
B41,32,39 and 33...
No issues with the assembly.
I am fairly certain it should look like this:
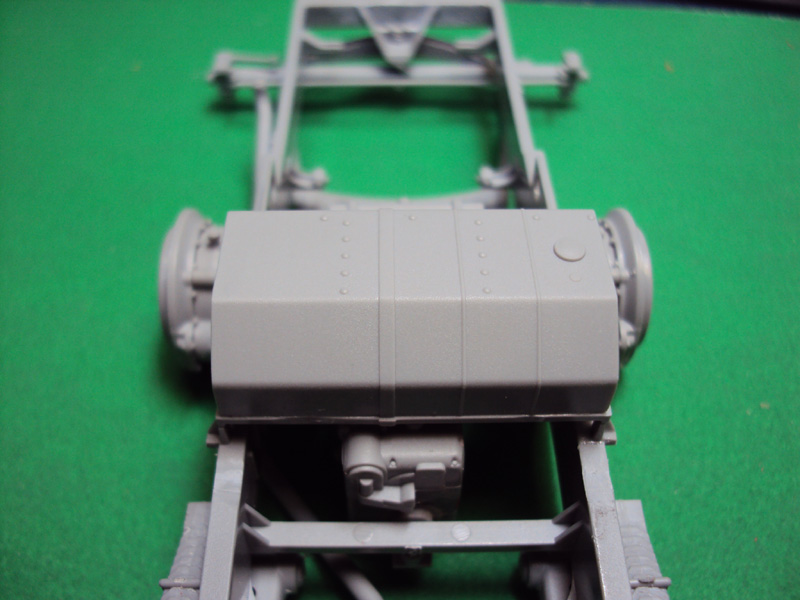
I decided to build the chassis first and add the the running gear later so I skipped ahead and and added part B4 and assembly C.
Couple of pics of that:

I am going to move to the big step 7 next. I am leaving the the running gear parts until finally priming, painting and assembly.
Shaun
B41,32,39 and 33...
No issues with the assembly.
I am fairly certain it should look like this:
I decided to build the chassis first and add the the running gear later so I skipped ahead and and added part B4 and assembly C.
Couple of pics of that:
I am going to move to the big step 7 next. I am leaving the the running gear parts until finally priming, painting and assembly.
Shaun
keenan
Joined: October 16, 2002
KitMaker: 5,272 posts
Armorama: 2,844 posts
Posted: Sunday, October 18, 2009 - 03:58 AM UTC
Step 7:
I installed part B4 and assembly C in the previous step so this section entails B5 and all the parts attached to it.
Some minor clean up was needed on B5, but not much.
There is no good attachment point for part B46. Mine may be a little crooked. Added B49, B50 and B7. The instructions are confusing here. B50 and B7 are supposed to float but that is not indicated in the instructions.
Added B48 and B6.

The orientation of part B13 is not very clear in the instructions. Consult your references.
I left off parts B37 and B14. I will add them later so there is less chance of them getting lost or broken.
Subassembly:
Added to the chassis:
Watch this space.
Shaun
I installed part B4 and assembly C in the previous step so this section entails B5 and all the parts attached to it.
Some minor clean up was needed on B5, but not much.
There is no good attachment point for part B46. Mine may be a little crooked. Added B49, B50 and B7. The instructions are confusing here. B50 and B7 are supposed to float but that is not indicated in the instructions.
Added B48 and B6.
The orientation of part B13 is not very clear in the instructions. Consult your references.
I left off parts B37 and B14. I will add them later so there is less chance of them getting lost or broken.
Subassembly:
Added to the chassis:
Watch this space.
Shaun
Firecaptain
Joined: November 03, 2006
KitMaker: 165 posts
Armorama: 118 posts
Posted: Sunday, October 18, 2009 - 09:08 AM UTC
Did you wrestle with that part B1 yet?
keenan
Joined: October 16, 2002
KitMaker: 5,272 posts
Armorama: 2,844 posts
Posted: Sunday, October 18, 2009 - 09:52 AM UTC
Nope. Getting ready to head downstairs and do that...
Left the best part for last.
Shaun
Left the best part for last.
Shaun

jimz66
Joined: December 15, 2006
KitMaker: 1,165 posts
Armorama: 1,105 posts
Posted: Sunday, October 18, 2009 - 02:13 PM UTC
Hope you got all things are settled in the basement. Your Halftrack is looking very good. Keep the updates coming.
keenan
Joined: October 16, 2002
KitMaker: 5,272 posts
Armorama: 2,844 posts
Posted: Saturday, October 24, 2009 - 03:06 PM UTC
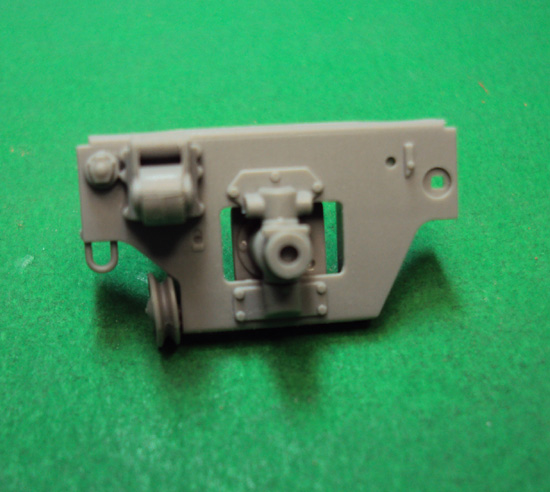
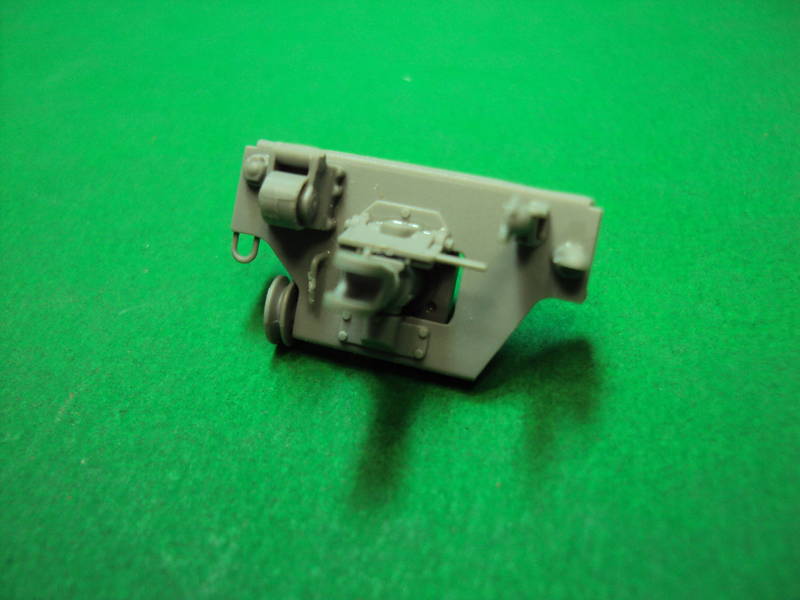
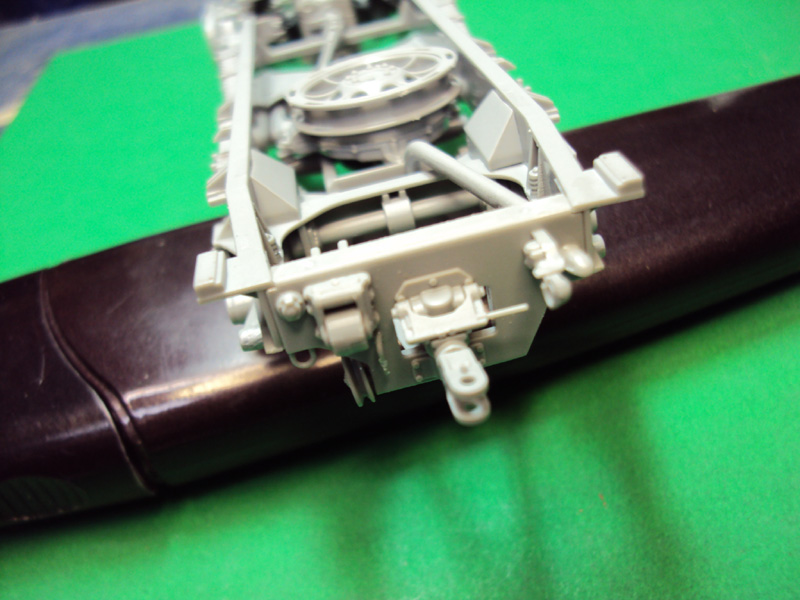
I think I have the infamous B1 in the right place. Couple of pictures of the over and under.
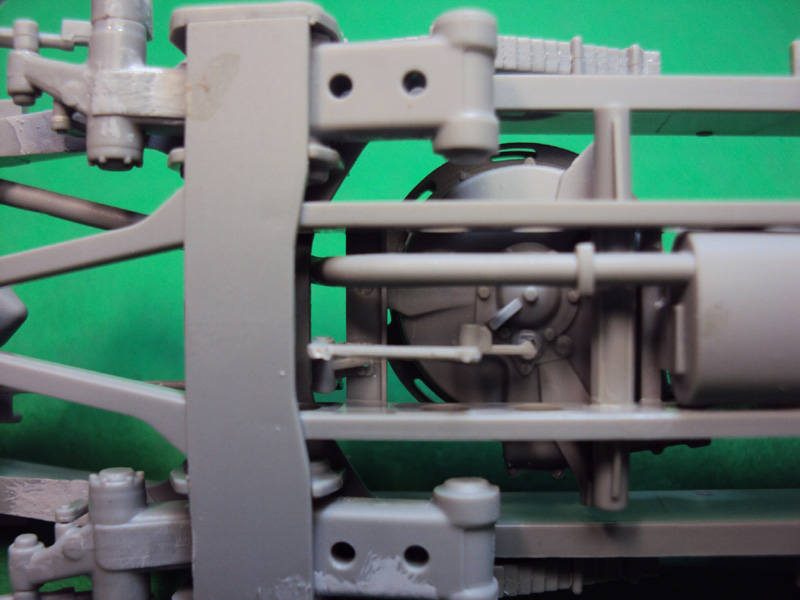
I never would have figured it out without Firecaptain's link. I printed it out and had to take it downstairs to cypher where B1 went. Thanks FC.
I never would have figured it out without Firecaptain's link. I printed it out and had to take it downstairs to cypher where B1 went. Thanks FC.
keenan
Joined: October 16, 2002
KitMaker: 5,272 posts
Armorama: 2,844 posts
Posted: Saturday, October 24, 2009 - 03:15 PM UTC
Now for some house cleaning:
Assembly D and E are dicey. You need to be careful cleaning the sprue attachment points from the I/D and the O/D. It is really easy to shave off one of the guide teeth, trust me...
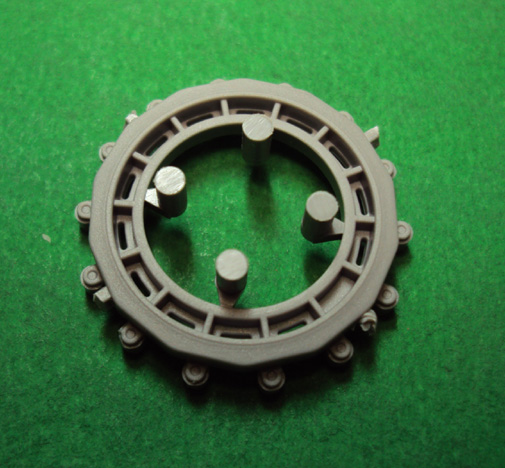
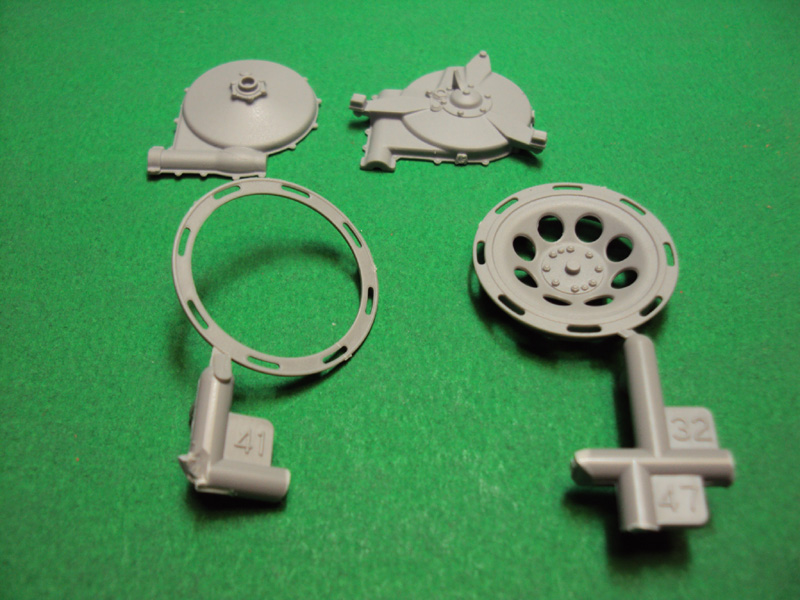
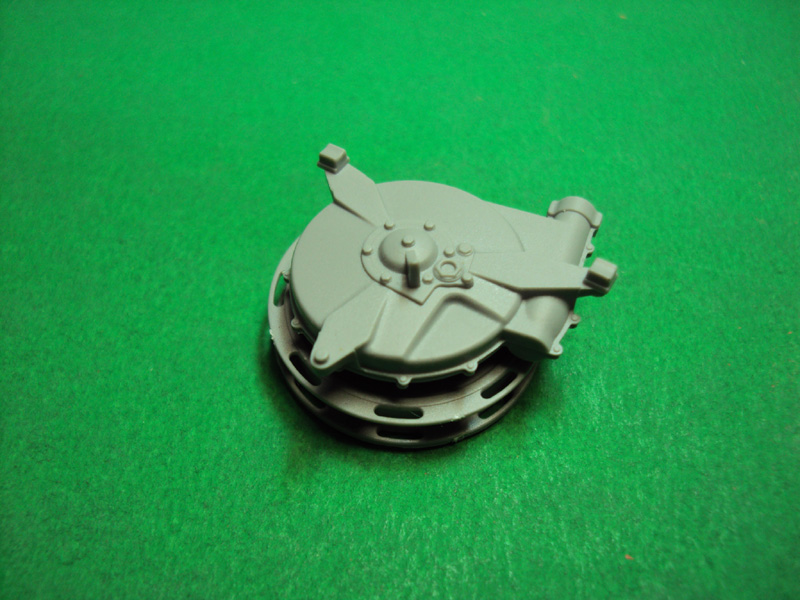
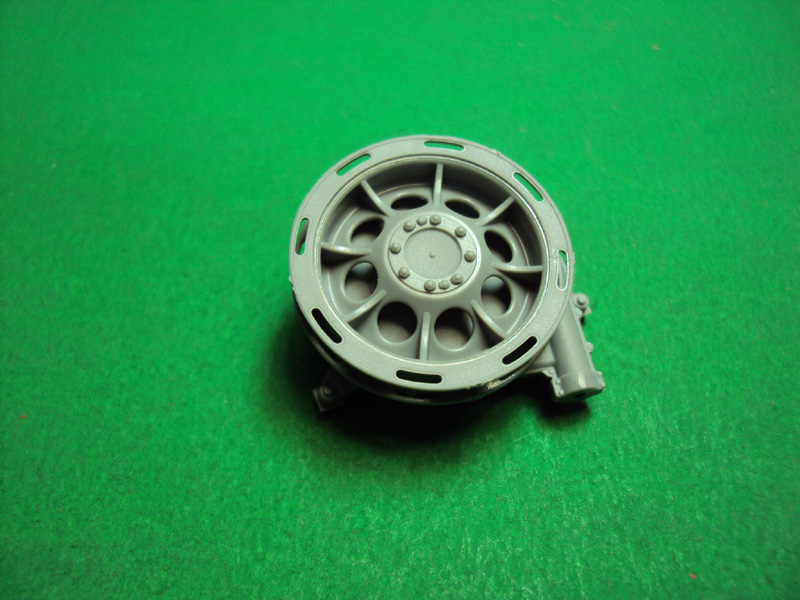
Finished drive sprocket:

As much as I love this kit I am ready for the "fun" stuff. On to the front fender assembly in the next step. I am kinda tired of the chassis.
Thanks for bearing with the delays. They were unavoidable.
Shaun
Assembly D and E are dicey. You need to be careful cleaning the sprue attachment points from the I/D and the O/D. It is really easy to shave off one of the guide teeth, trust me...
Finished drive sprocket:
As much as I love this kit I am ready for the "fun" stuff. On to the front fender assembly in the next step. I am kinda tired of the chassis.
Thanks for bearing with the delays. They were unavoidable.
Shaun
jimz66
Joined: December 15, 2006
KitMaker: 1,165 posts
Armorama: 1,105 posts
Posted: Sunday, October 25, 2009 - 02:51 AM UTC
Looking good Shaun. Keep it coming.
Firecaptain
Joined: November 03, 2006
KitMaker: 165 posts
Armorama: 118 posts
Posted: Sunday, October 25, 2009 - 05:46 AM UTC
Looking good Shaun....
FWIW........
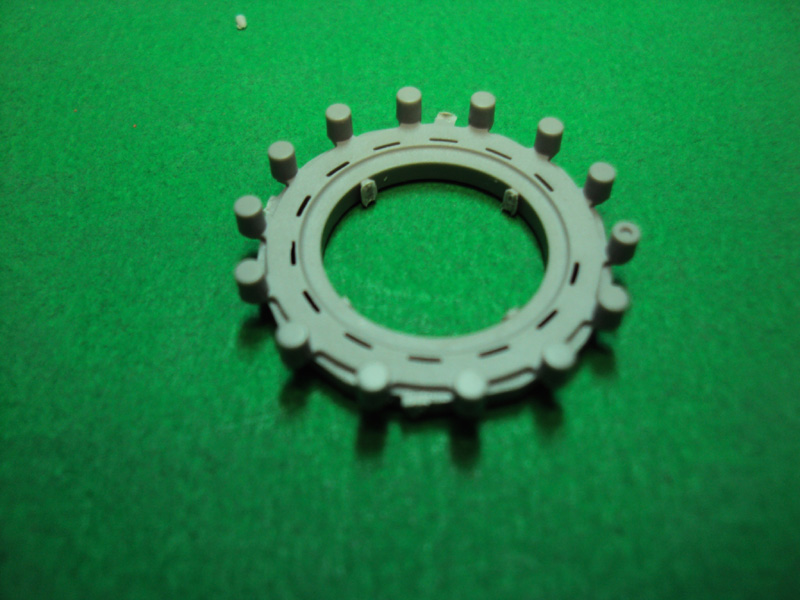
On the drive sprockets.....one set I just cleaned up the inside nib remainders and the sprocket fit good and snug (if for whatever reason you did not want to glue it).
On my second one I cleaned it all up, sanded etc, and it falls off.....no friction fit on this one...they'll have to be glued,
FWIW........
On the drive sprockets.....one set I just cleaned up the inside nib remainders and the sprocket fit good and snug (if for whatever reason you did not want to glue it).
On my second one I cleaned it all up, sanded etc, and it falls off.....no friction fit on this one...they'll have to be glued,
keenan
Joined: October 16, 2002
KitMaker: 5,272 posts
Armorama: 2,844 posts
Posted: Thursday, November 05, 2009 - 12:18 PM UTC
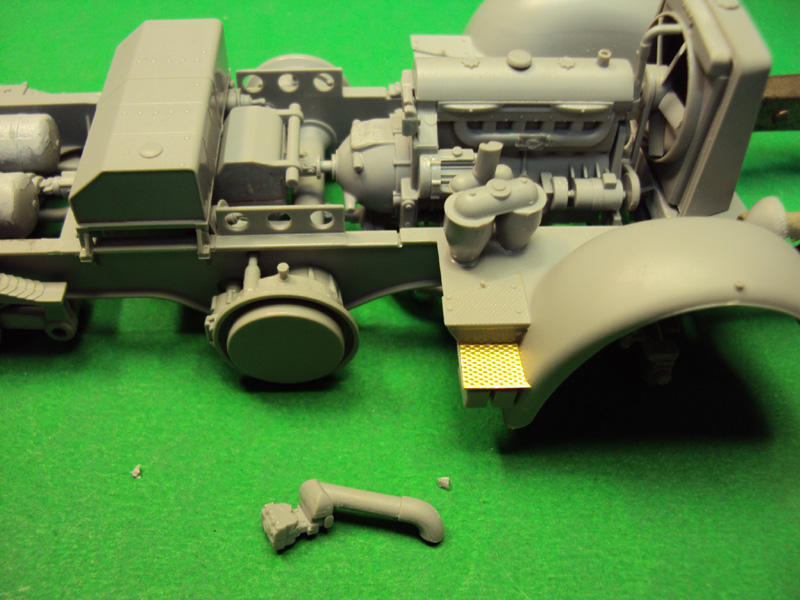
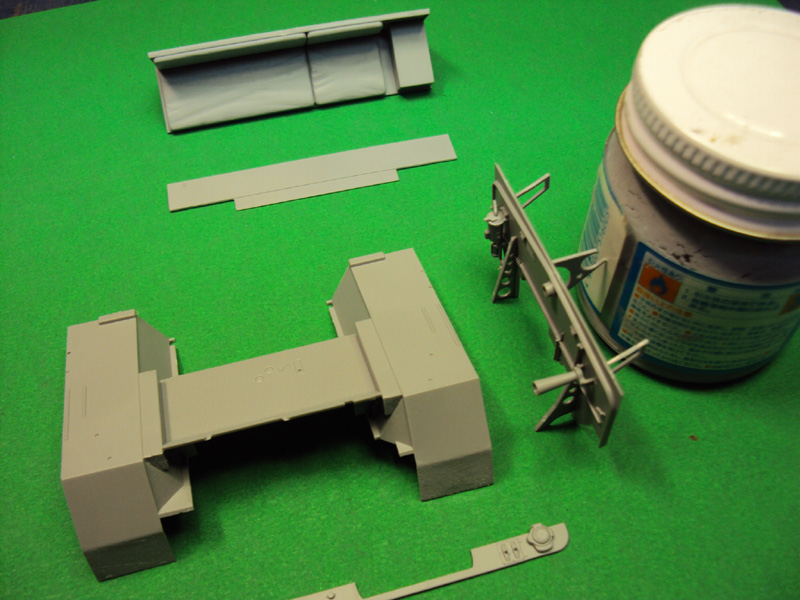
Part of Step 8:
G21, 22 and 26 on the sprue...

D46 and D7:

There is, again, no really good way to locate parts D46 and D7 together. Pretty much a by guess and by God type maneuver. Hopefully I have them together correctly.
I did get to add the first two PE parts, numbers MA14 and MA13.


On to the other side of the front fender assembly. If I can stuff everything together in step 9 I will feel like I actually accomplished something...
Shaun
G21, 22 and 26 on the sprue...
D46 and D7:
There is, again, no really good way to locate parts D46 and D7 together. Pretty much a by guess and by God type maneuver. Hopefully I have them together correctly.
I did get to add the first two PE parts, numbers MA14 and MA13.
On to the other side of the front fender assembly. If I can stuff everything together in step 9 I will feel like I actually accomplished something...
Shaun
keenan
Joined: October 16, 2002
KitMaker: 5,272 posts
Armorama: 2,844 posts
Posted: Tuesday, November 17, 2009 - 11:57 AM UTC
Bad step. Had many troubles here, many of which I think were my fault... 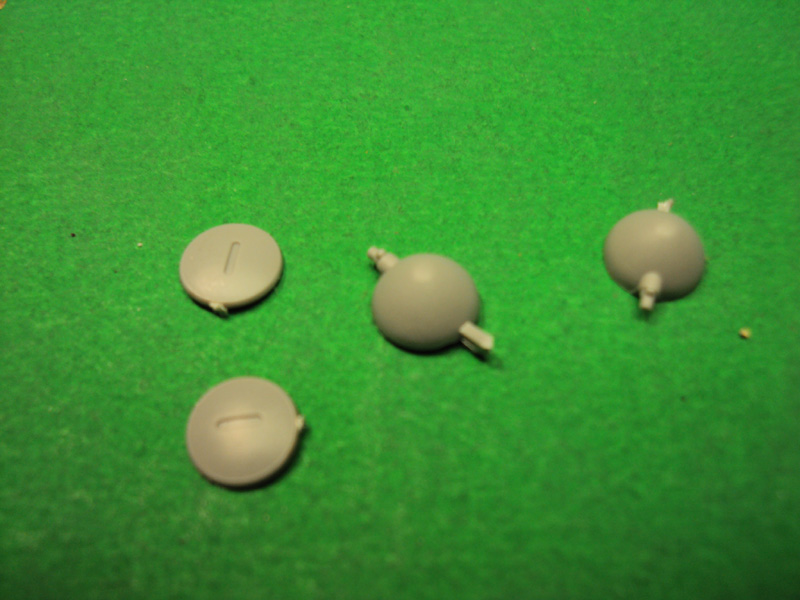
There is no good way to hold parts C5 and A22 after they are glued together. Cleaning up the seam, one of the pair flew across the basement floor never to be seen again. My fault. So this rascal is going to have at least some minor battle damage.
Cleaning up the sprue attachment points on the Notek light was dicey, again, not much to hang on to. Folding PE part MA5 was easy and this assembly went together fairly well and I am happy with the result.

Now for the part I hard real problems with, stuffing the engine onto the frame and getting the front fenders to sit square. I had to trim, sand, test fit, trim and sand again. I am happy with the way everything ended up so far but I broke off part D56 and will have to see if I can get it back on correctly. To be honest, I almost gave up adding the engine since most of will not be seen anyway.
Step 9 completed (sort of) photos...
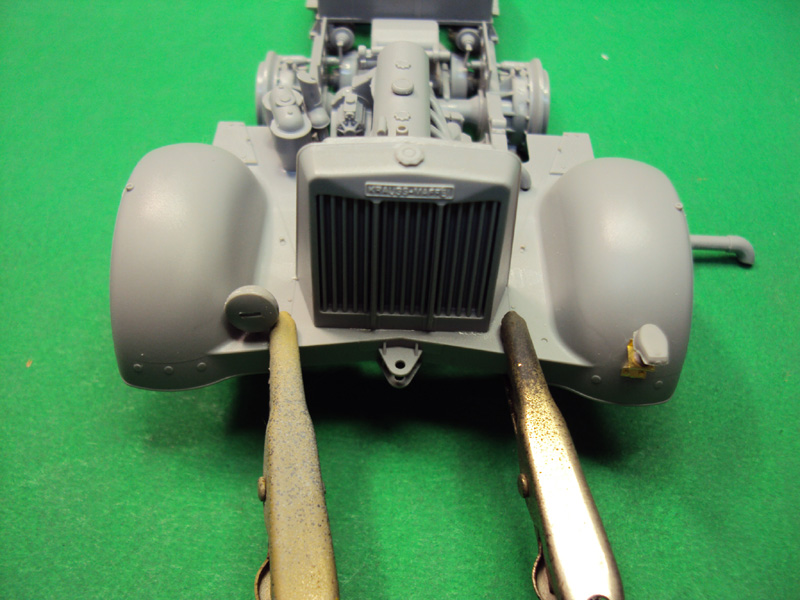
So this is the build log so far warts and all. Sorry for the infrequent updates. Now that things have gotten back down to a low roar at work and most of the house is sealed up for the winter I ought to be able to knock this out.
Shaun
There is no good way to hold parts C5 and A22 after they are glued together. Cleaning up the seam, one of the pair flew across the basement floor never to be seen again. My fault. So this rascal is going to have at least some minor battle damage.
Cleaning up the sprue attachment points on the Notek light was dicey, again, not much to hang on to. Folding PE part MA5 was easy and this assembly went together fairly well and I am happy with the result.
Now for the part I hard real problems with, stuffing the engine onto the frame and getting the front fenders to sit square. I had to trim, sand, test fit, trim and sand again. I am happy with the way everything ended up so far but I broke off part D56 and will have to see if I can get it back on correctly. To be honest, I almost gave up adding the engine since most of will not be seen anyway.
Step 9 completed (sort of) photos...
So this is the build log so far warts and all. Sorry for the infrequent updates. Now that things have gotten back down to a low roar at work and most of the house is sealed up for the winter I ought to be able to knock this out.
Shaun
c5flies
Joined: October 21, 2007
KitMaker: 3,684 posts
Armorama: 2,938 posts
Posted: Tuesday, November 17, 2009 - 01:56 PM UTC
Even with the minor troubles, this one is looking real good so far, Shaun.
keenan
Joined: October 16, 2002
KitMaker: 5,272 posts
Armorama: 2,844 posts
Posted: Tuesday, November 17, 2009 - 02:07 PM UTC
Spent two hours on my hands and knees looking for that damn headlight. Really looking forward to shooting some paint on some of the sub assemblies.
Thanks for the feedback,
Shaun
Thanks for the feedback,
Shaun

cach7
Joined: October 13, 2002
KitMaker: 444 posts
Armorama: 439 posts
Posted: Tuesday, November 17, 2009 - 04:12 PM UTC
Shaun, iam building the same kit. I had some fit issues wth the seat and cab. Maybe it s just me but let us know.
keenan
Joined: October 16, 2002
KitMaker: 5,272 posts
Armorama: 2,844 posts
Posted: Saturday, November 21, 2009 - 11:57 AM UTC
Funny you should mention that Mike.
Step 10:
D63,13,14,15, and E5:
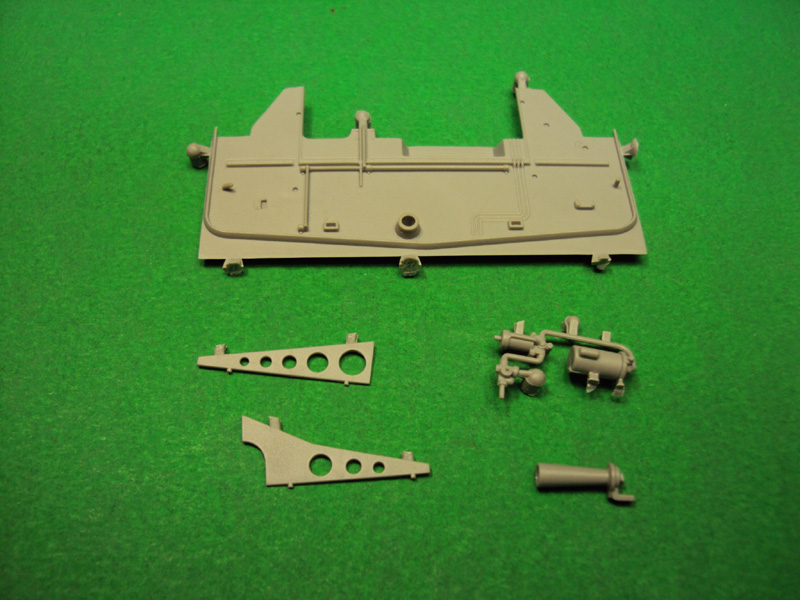
Be careful cleaning up D63, it is fragile.

Front half of the firewall assembled. I set this aside to dry while I worked on seats, fenders and floor board.

Parts E7,8,15,16,19 &20
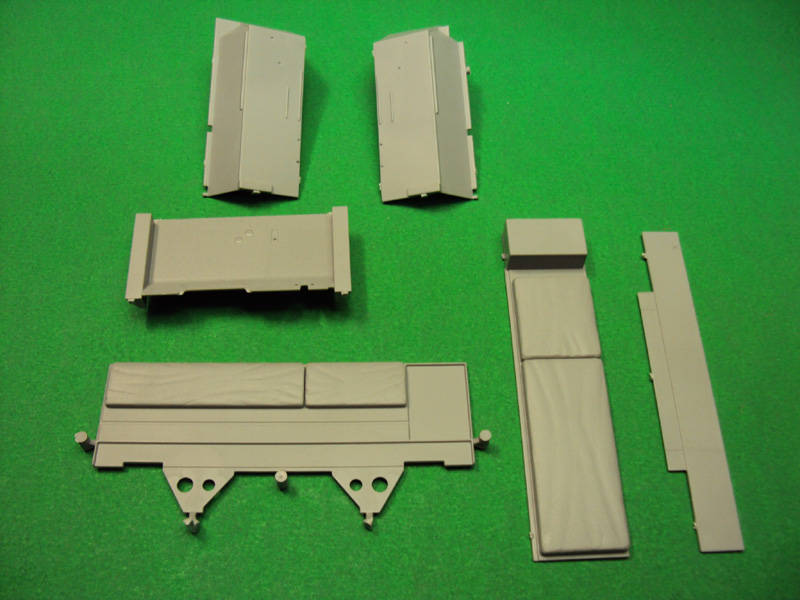
I cleaned everything up and had to page forward in the instructions to get an idea of how E8 and E19 went together. Some better attachment points would have been helpful here. I glued them together and checked to make sure the joint was square and set those two parts aside to dry.
Assembled E15,16, and 20, and set them aside...

Added D29, 30 and 31 to the inside of the firewall and set everything aside to dry over night.
Like Mike mentioned, there is no "good" way to locate E7 to E19 and then to the front fender assembly. Throw the firewall in the mix and the tomorrow may be dicey...
It is starting to look like a "big hauler" and I don't have any major complaints so far.
Input always welcome.
Shaun
Step 10:
D63,13,14,15, and E5:
Be careful cleaning up D63, it is fragile.
Front half of the firewall assembled. I set this aside to dry while I worked on seats, fenders and floor board.
Parts E7,8,15,16,19 &20
I cleaned everything up and had to page forward in the instructions to get an idea of how E8 and E19 went together. Some better attachment points would have been helpful here. I glued them together and checked to make sure the joint was square and set those two parts aside to dry.
Assembled E15,16, and 20, and set them aside...
Added D29, 30 and 31 to the inside of the firewall and set everything aside to dry over night.
Like Mike mentioned, there is no "good" way to locate E7 to E19 and then to the front fender assembly. Throw the firewall in the mix and the tomorrow may be dicey...
It is starting to look like a "big hauler" and I don't have any major complaints so far.
Input always welcome.
Shaun
cach7
Joined: October 13, 2002
KitMaker: 444 posts
Armorama: 439 posts
Posted: Saturday, November 21, 2009 - 01:09 PM UTC
Shaun i didnt have a square. I just followed instructions. Like you said that lip for the bench seat could be better. After i assembled it and placed it on the cab,you could see it pitched forward. So i took it apart and and cut away on part E19(lower bench). Still had to work  to get it to cab to come together. My suggestion to anyone starting this kit is not to skip around on build. Especialy the cab!! I would like to have it towing something other then a gun. I was thinking a fieldkitchen. Anybody have thoughts on that?
to get it to cab to come together. My suggestion to anyone starting this kit is not to skip around on build. Especialy the cab!! I would like to have it towing something other then a gun. I was thinking a fieldkitchen. Anybody have thoughts on that?  |

WEB HOSTING BY


Copyright ©2021 Armorama and Kitmaker Network, a subsidiary of Silver Star Enterprises
All Rights Reserved. Please read our Conditions of Use and Privacy Policy.
All Rights Reserved. Please read our Conditions of Use and Privacy Policy.