_GOTOBOTTOM
Armor/AFV: Canadian Armor
Discuss all types of Canadian Armor of all eras.
Hosted by Darren Baker
Canadian Firefly VC and NNSH Figgies WIP
SdAufKla
Visit this Community
South Carolina, United States
Joined: May 07, 2010
KitMaker: 2,238 posts
Armorama: 2,158 posts
Posted: Sunday, May 23, 2010 - 04:45 PM UTC
Since I've been asking for help on this project, I thought I'd post a couple of WIP photos.

I'll break the post down into a couple of sections. This first one is for the tank.

I'm using the Tasca Firefly VC. With it, I'm using the Voyager PE set (at least some of the parts since the kit's so nice many of the PE parts are actually no improvement). I'm also using the Aber barrel which is a drop-fit for the kit part. And finally, I'm adding the Panda (RHPS) tracks.

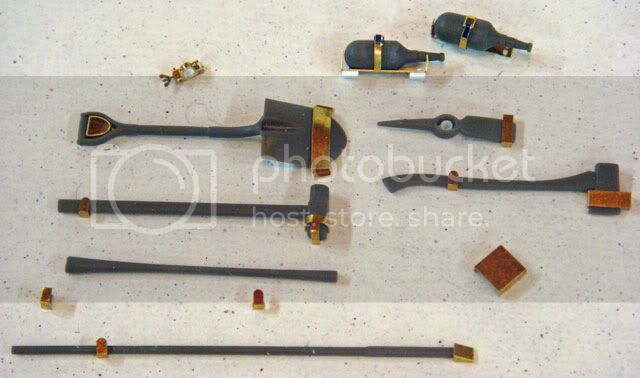
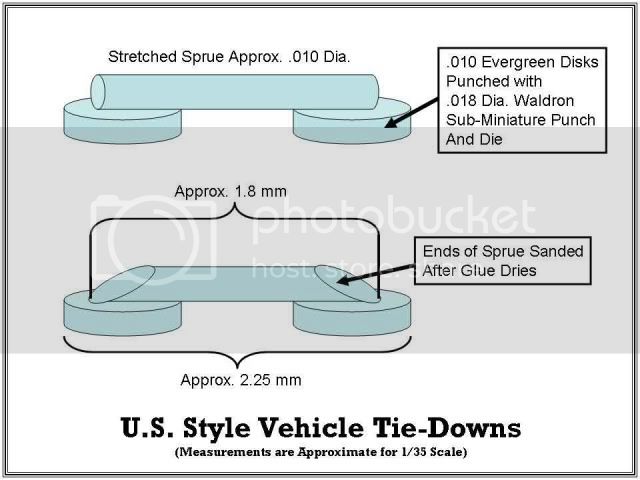
In this pics you can see that I haven't added a lot of the details, but I usually work in multiple sub-assemblies, so most of the details are ready to glue on. Right now though, I have to add all of the footman loops (tie-downs for the tools) before I can really get to finish.

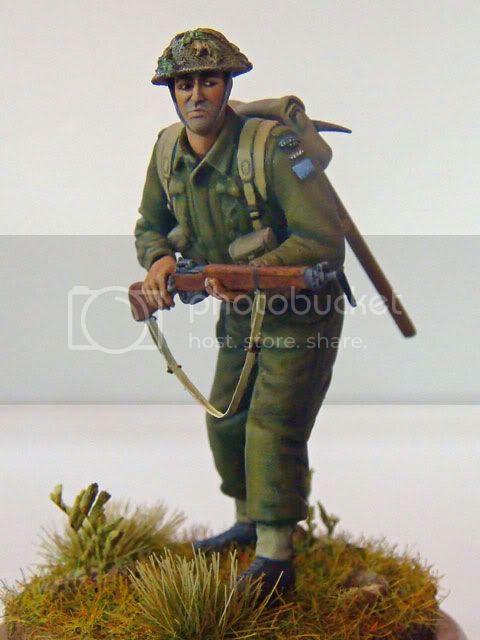
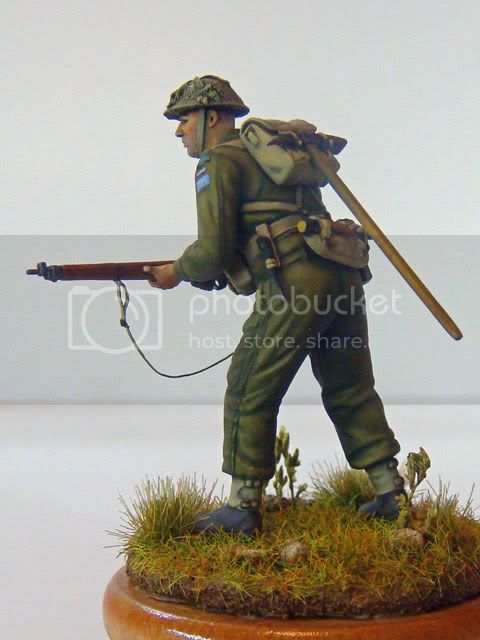
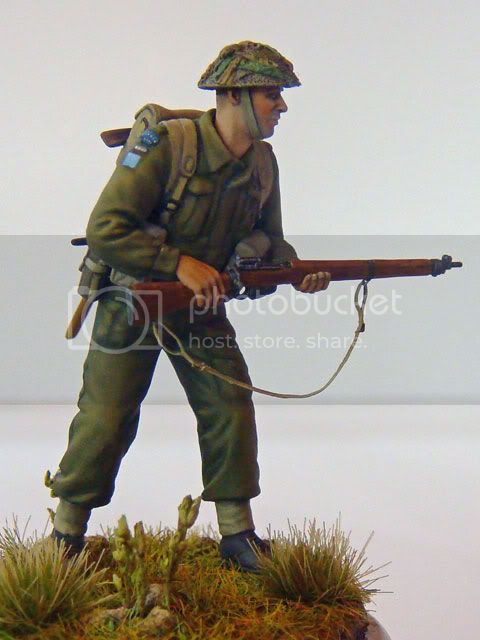
Also, I'm working on a couple of figgies for the turret, and so I'm holding off on most of the rest of the turret details since I'm handling it a lot right now.

Here is an overview:


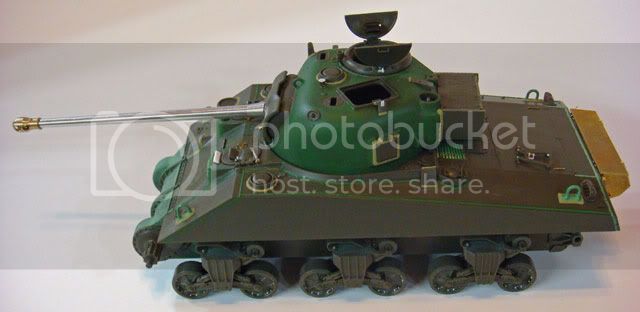
I have re-done all the weld beads and added a bit of "bulk" to the driver's and co-driver's hoods. I've also done some preliminary painting in the exhaust area.

Here's a close-up of the driver's hood and hatch. I still have the periscope guard to add later.


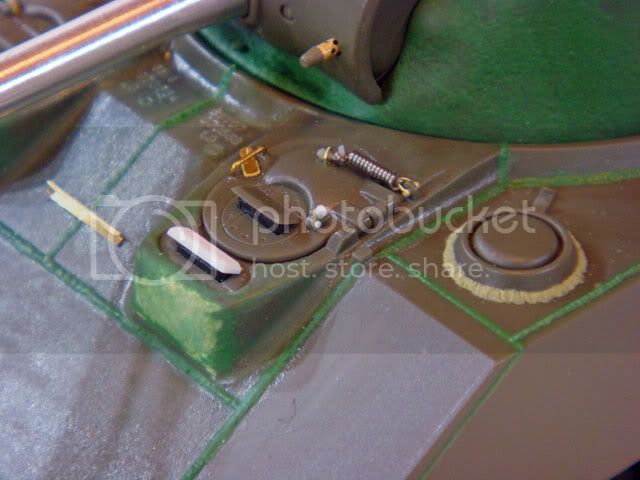
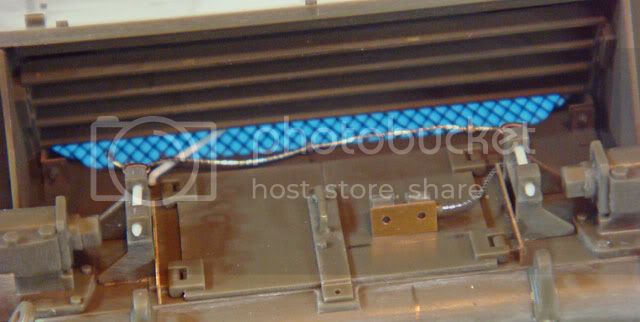
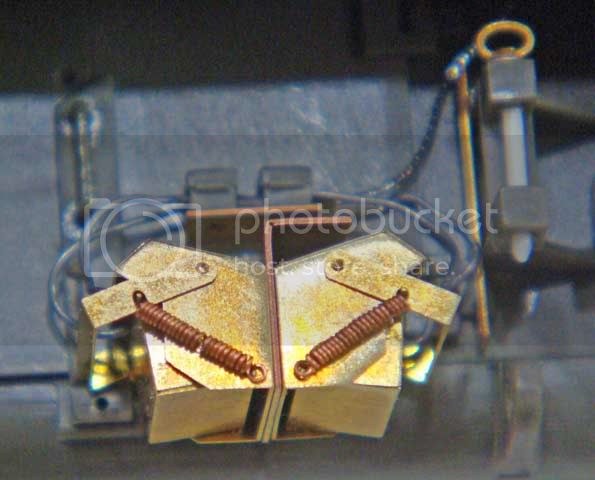
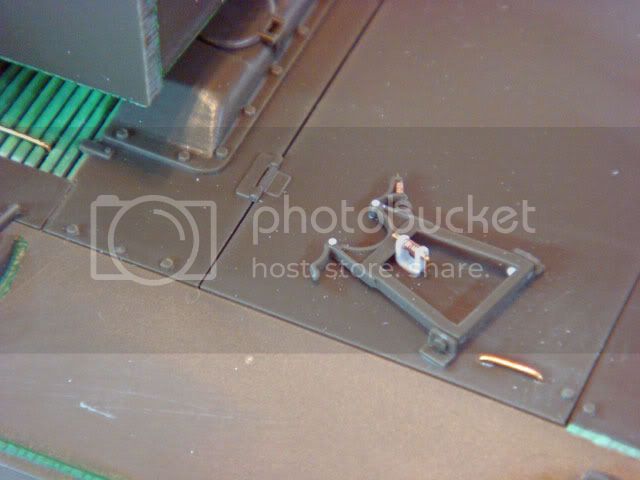
Next is the engine deck area with the gun travel lock. Voyager gives you a complete replacement for the kit travel lock. But I think with just a few details the kit part looks just fine.


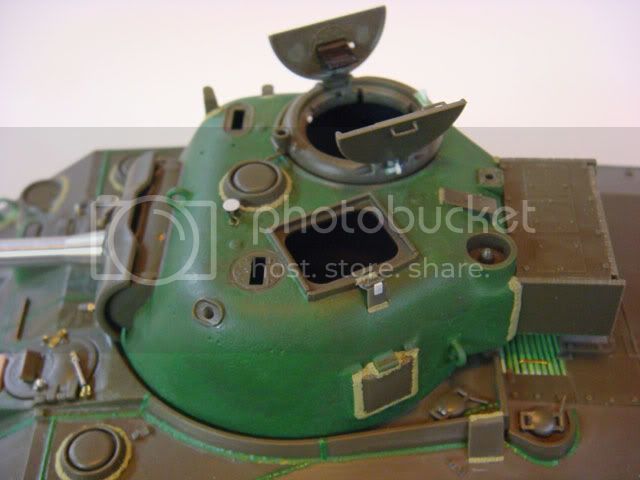
Here is the turret area. I've "welded up" the shell ejection / pistol port which seems to be the most common configuration.


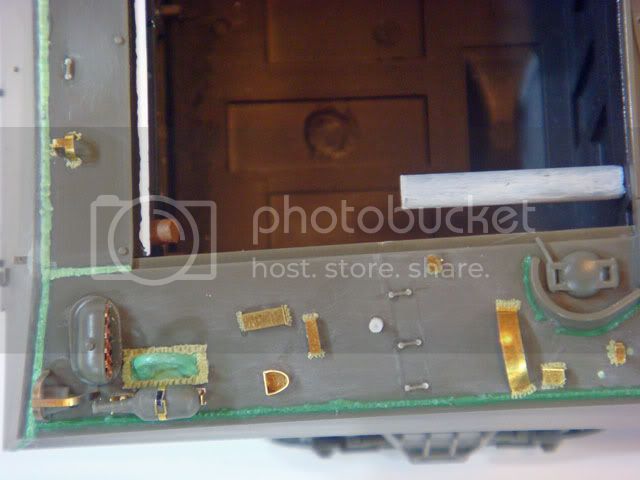
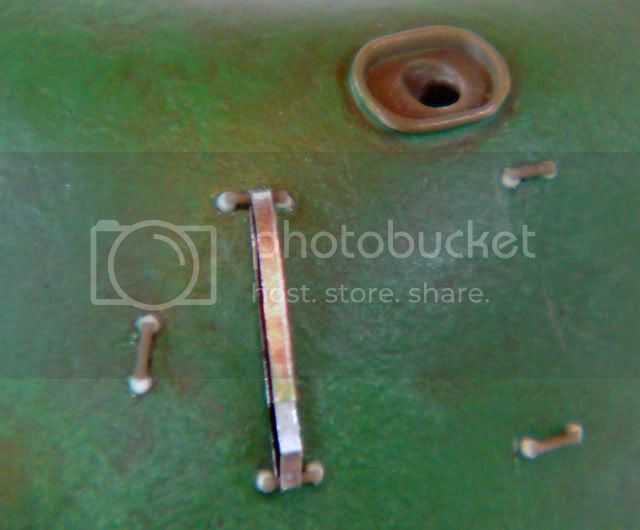
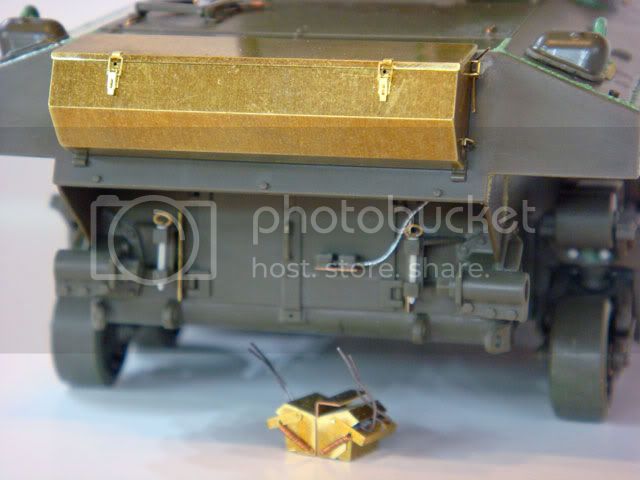
Finally, here's the rear hull area. I've added the engine block breather tube, the wiring for the smoke candles, and the pins for the towing fixture. The brass smoke candles and box are the Voyager parts.


Sorry for the spotty quality of the photography, but it's the best my little Sony Ciber Shot will do.

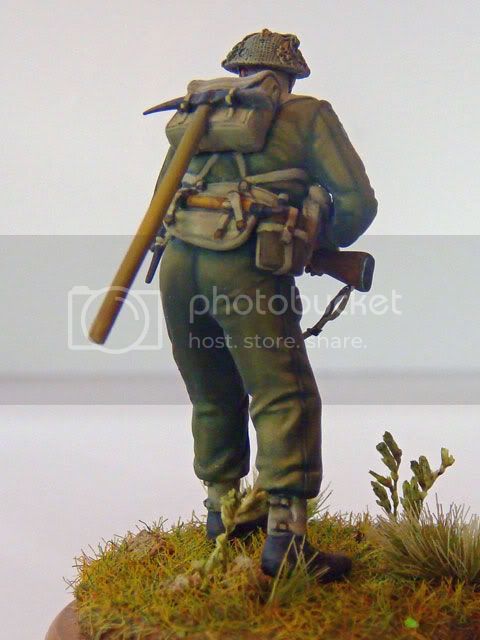
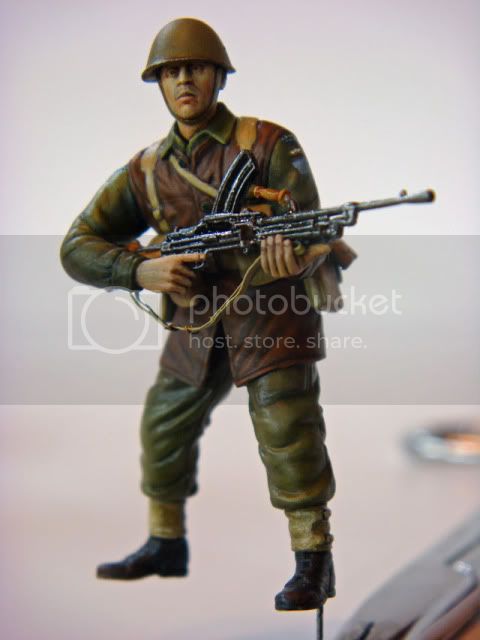
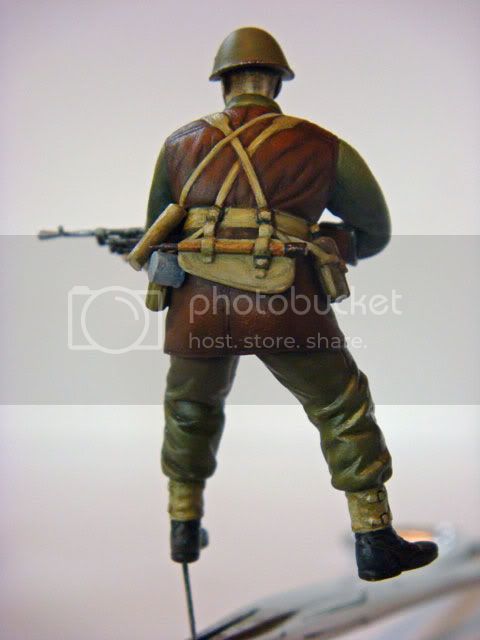
I'll show the dio figgies in the next post.

Mike
SdAufKla
Visit this Community
South Carolina, United States
Joined: May 07, 2010
KitMaker: 2,238 posts
Armorama: 2,158 posts
Posted: Sunday, May 23, 2010 - 05:06 PM UTC
Here are two of the North Nova Scotia Highlanders (NNSH) figures that I plan to use on the dio.

The tank will be finished as a Fort Garry Horse vehicle (10th Armoured Regiment, 2nd Canadian Armoured Brigade (Independent)) with attacked with the Canadian 3rd Infantry Division as part of Operation Totalize. During the first part of the advance, the FGH tanks were working with the NNSH.

Here's a shot of an original NNSH Battle Dress fully badged out for reference for the regimental flash, division sign and Canada flash. Canadian units wore the "Canada" tab is their regimental titles did not include either of the words "Canada" or "Canadian."


Here's the first figure. He's completed and pinned on a temporary plinth.


This is the second figure. He's still a WIP, and has a bad case of the glossy's until later when I will shoot him with Dullcote.


Both figures are from the DML set, Commonwealth Troops in Northwest Europe. I've replaced both heads with Hornet heads and the hands on the first figure with Hornet hands.

The weapon slings are heavy foil. The weapons themselves are DML. The webbing is only so-so anc very softly molded. I have added some straps (for the canteens, for example) and I replaced a couple bits of the kit with Tamiya parts to keep them from looking too much alike.

I paint wet-on-wet with oils over acrylic base coats. For the acrylics, I use what ever I have at hand. Usually Tamiya (airbrushed) for the major uniform areas and Citadel paints for the flesh and details. For oils, I use Grumbacher and Windsor & Newton.

For the tank, I have a couple of Miniart figures that are in the "Frankenstein" stages. They're way too ugly for public debut right now.

That's all for now. More to follow as I get things done.

Your comments, thoughts and observations are very welcome.

Mike
ppawlak1
Visit this Community
Victoria, Australia
Joined: March 14, 2006
KitMaker: 1,973 posts
Armorama: 1,843 posts
Posted: Sunday, May 23, 2010 - 05:15 PM UTC
Great work Mike !

The second figure's helmet doesn't look right. It looks Soviet...

Am I missing something ?

Cheers

Paul
SdAufKla
Visit this Community
South Carolina, United States
Joined: May 07, 2010
KitMaker: 2,238 posts
Armorama: 2,158 posts
Posted: Sunday, May 23, 2010 - 05:27 PM UTC
Thanks, Paul.

The second figure's helmet is the British Mk III. This was an up-dated design that was begining to be fielded just before the invasion. The Canadian 3rd Infantry Division receieved some number of them although they were far from universal.

The Mk III helmet is actually more common in photos that I first thought until I started looking hard at photos. Then I started seeing them quite often, though, like I said, they were far from universal and with a cammo net can be a bit difficult to tell from the Mk II (the modernized "Brodie" WWI design). The Canadians and the Aussies fielded their own indigenous manufactured Mk II helmets, but as far as I know, never made the Mk III design.

At any rate, I added that helmet just because it was so unusual.

Glad you noticed.

Mike
ppawlak1
Visit this Community
Victoria, Australia
Joined: March 14, 2006
KitMaker: 1,973 posts
Armorama: 1,843 posts
Posted: Sunday, May 23, 2010 - 05:36 PM UTC
Thanks for the clarification Mike, I thought about the Mk III but didn't think it was so round...

The Firefly looks great, and the figs look awesome also...

Join the Sherman Campaign with your next Shermie

Cheers

Paul
AlanL
Visit this Community
England - East Anglia, United Kingdom
Joined: August 12, 2005
KitMaker: 14,499 posts
Armorama: 11,675 posts
Posted: Sunday, May 23, 2010 - 05:38 PM UTC
Hi Mike,

Great progress on the Firefly. Figures look terrific, excellent work.

Al
gcdavidson
Visit this Community
Ontario, Canada
Joined: August 05, 2003
KitMaker: 1,698 posts
Armorama: 1,563 posts
Posted: Monday, May 24, 2010 - 04:53 AM UTC
Very clean build on the firefly and the Novies are looking great!
Zaltar
Visit this Community
British Columbia, Canada
Joined: May 03, 2008
KitMaker: 272 posts
Armorama: 264 posts
Posted: Monday, May 24, 2010 - 05:19 AM UTC
Wow, that looks great! A lot better than the one I'm making for the Canadian Campaign.

zaltar
recceboy
Visit this Community
Alberta, Canada
Joined: July 20, 2006
KitMaker: 706 posts
Armorama: 665 posts
Posted: Monday, May 24, 2010 - 07:34 AM UTC
Mike

Like the look of the troops, and will wait and see the progress with the firefly.

Well done.

Anthony
Keef1648
Visit this Community
South Carolina, United States
Joined: January 23, 2008
KitMaker: 1,240 posts
Armorama: 1,192 posts
Posted: Tuesday, May 25, 2010 - 12:52 AM UTC
Mike.
Thanks for bringing your beastie and figures to the store for me to look at.

As usual an amazing amount of detail upgrades and work has been added at this point with more to come. The putty wash on the turret really makes a difference and the weld seams just about as perfect as you can get in that scale.

As for your figures, you forgot to paint the 'stitching' on the upper arm patches

Keep up the brilliant work Mike and I look forward to seeing more as you move on with this.

Keith.
SdAufKla
Visit this Community
South Carolina, United States
Joined: May 07, 2010
KitMaker: 2,238 posts
Armorama: 2,158 posts
Posted: Tuesday, May 25, 2010 - 03:14 AM UTC
Thanks for all the kind words, guys! I'll try to post some more WIP photos when I have a bit more to show.

I'm still researching the unit mods and markings for the FGH in the late July / early August '44 time frame. If anyone turns up any info on the suject, I would certainly appreciate a heads-up.

Keith: As for you my friend, you're just a hard task master... I'll try to do better on the patch stiching next time! Thanks again for ram rodding that book order through for me. The Armor Color Gallery (Model Centrum Progress) Canadian Armored Vehicles in WWII, Parts 1 and 2 were right on time. (Note my plea for help above.)

Mike
AlanL
Visit this Community
England - East Anglia, United Kingdom
Joined: August 12, 2005
KitMaker: 14,499 posts
Armorama: 11,675 posts
Posted: Tuesday, May 25, 2010 - 08:13 AM UTC
Hi Mike,

Just and observation on the chap with the pick. The shaft looks very thick, might need thinned downa bit.

Al
RedwingNev
Visit this Community
England - East Midlands, United Kingdom
Joined: February 07, 2004
KitMaker: 911 posts
Armorama: 348 posts
Posted: Tuesday, May 25, 2010 - 10:01 AM UTC
First figure is absolutely awesome. 5 o clock shadow and everything!
Totalize
Visit this Community
Ontario, Canada
Joined: February 04, 2009
KitMaker: 743 posts
Armorama: 549 posts
Posted: Tuesday, May 25, 2010 - 10:23 AM UTC
Mike, excellent job on the VC. Welds look very neat and clean and the detail on drivers/radioman's hatches are very good.

I particularly like the detail on the rear hull, smoke candles wiring and engine block breather lines. I did a Sherman V and did not add these so this is a welcome bit of additional detail.

Great job thus far! Figures are nice too.
basiltank
Visit this Community
British Columbia, Canada
Joined: May 07, 2010
KitMaker: 23 posts
Armorama: 22 posts
Posted: Tuesday, May 25, 2010 - 02:01 PM UTC
Great looking build, inspirational. Can't wait to see what its gonna look like painted up.
I've got a Tamiya 1/48 Ic Firelfly in my stash, but can't seem to find any Canadian decals for it. Anybody know where to look?
SdAufKla
Visit this Community
South Carolina, United States
Joined: May 07, 2010
KitMaker: 2,238 posts
Armorama: 2,158 posts
Posted: Wednesday, May 26, 2010 - 03:41 AM UTC

Quoted Text

Hi Mike,

Just and observation on the chap with the pick. The shaft looks very thick, might need thinned downa bit.

Al


Indeed, Al, going by that rear view the haft does look a bit "thickish." I think the majority of that is caused by the camera angle and slight out-of-focus of the end of the haft nearest the camera (a depth of field issue). In person its overall appearance isn't quite so bad.

However, if I were to do another I'd certainly consider thinning it down some. The mattock is the DML part pretty much stock for anyone else considering a similar subject.

I found the worst problem with that figure was the somewhat incorrect strapping of the P37 web gear. The rear straps for the haversack shouldn't be connected to the buckles on the belt but rather should route back up under the arms and connect back to the bottom of the haversack. The front straps are also incorrectly routed but not so obviously bad.

Here's a photo of the uniform in my collection that shows the correct routing for the straps of the small haversack:


I was really disapointed in the quality of the sculpting and molding on this DML figure set. One would think that they could get at least the basics right and also mold the equipment and hardware in sharp relief. On the other hand, the weapons are beautifully done.

That's one reason that I'm looking forward to getting my hands on some of the Resicast British Tank Riders that you've been reviewing. Painting nicely sculpted figures is much more enjoyble that struggling along with half-hearted attempts by manufacturers.

Mike
jjumbo
Visit this Community
British Columbia, Canada
Joined: August 27, 2006
KitMaker: 2,012 posts
Armorama: 1,949 posts
Posted: Wednesday, May 26, 2010 - 06:07 AM UTC
Hey Mike,
You might have been better to start with figures from this set instead of that ancient Dragon set you used.
DML's #6055 and #6055X Canadian Infantry NW Europe (The Algonquin Regiment) was one of their first British/Commonwealth figure sets and definitely not one of their best efforts.
Still, you've done amazing work with the two you've presented.
Cheers

jjumbo

SdAufKla
Visit this Community
South Carolina, United States
Joined: May 07, 2010
KitMaker: 2,238 posts
Armorama: 2,158 posts
Posted: Wednesday, May 26, 2010 - 07:05 AM UTC

Quoted Text

Hey Mike,
You might have been better to start with figures from this set instead of that ancient Dragon set you used.
DML's #6055 and #6055X Canadian Infantry NW Europe (The Algonquin Regiment) was one of their first British/Commonwealth figure sets and definitely not one of their best efforts.
Still, you've done amazing work with the two you've presented.
Cheers

jjumbo


Arghhhh...!!!!!!!!

Ain't that just the way it goes sometimes? I didn't know DML had done a Gen 2 set of Brit / Commonwealth figures or I'd surely have started out with them instead!

A bit of personal history on this project: I actually started research and assembling materials well over a year ago and made my initial start over a year ago. Then I wound up on several extended overseas business trips and only re-started the project about 2 months ago. I do wish I had found those Gen 2 figures sooner though.

Thanks for the heads-up on those. I'll be ordering some with my next vist to my LHS.

Mike
AlanL
Visit this Community
England - East Anglia, United Kingdom
Joined: August 12, 2005
KitMaker: 14,499 posts
Armorama: 11,675 posts
Posted: Wednesday, May 26, 2010 - 07:24 AM UTC
Hi Mike,

I tend to use the old Tamiya Infantry set for equipment, they sell here very cheaply and the pouches, packs, picks etc are pretty good plus you get some extra body parts Mind you the helmets are wick.

Enjoy the Resicast figures when they come, I'm looking forward to seeing what comes next.

The infantry you're doing were DMLs first British Infantry I think and agreed somewhat disappoijnting although for a long time the only kids on the block other than Tamiya's set.

Lots of great stuff going on here, look forward to developments.

Al

Keef1648
Visit this Community
South Carolina, United States
Joined: January 23, 2008
KitMaker: 1,240 posts
Armorama: 1,192 posts
Posted: Thursday, May 27, 2010 - 05:10 AM UTC

Quoted Text

Great work Mike !

The second figure's helmet doesn't look right. It looks Soviet...

Am I missing something ?

Cheers

Paul


Another view of the Mk.3 Helmet.


Keith.
SdAufKla
Visit this Community
South Carolina, United States
Joined: May 07, 2010
KitMaker: 2,238 posts
Armorama: 2,158 posts
Posted: Friday, May 28, 2010 - 02:44 AM UTC
That's a fantastic helmet, Keith! That's a scarce bit of kit that you don't see too many good references on.

Thanks for posting the picture.

Mike
AlanL
Visit this Community
England - East Anglia, United Kingdom
Joined: August 12, 2005
KitMaker: 14,499 posts
Armorama: 11,675 posts
Posted: Friday, May 28, 2010 - 09:25 AM UTC
Hi Mike,

Ultracast do a ncioe set of Camo Mk III Helmets

http://www.ultracast.ca/products/35/041/default.htm

Hornet and Wolf has a good set too

http://www.greenwichgateway.com/hornetandwolf/Hornet/headsets/pages/HBH07.htm

Al
SdAufKla
Visit this Community
South Carolina, United States
Joined: May 07, 2010
KitMaker: 2,238 posts
Armorama: 2,158 posts
Posted: Friday, May 28, 2010 - 10:47 AM UTC

Quoted Text

Hi Mike,

Ultracast do a ncioe set of Camo Mk III Helmets

http://www.ultracast.ca/products/35/041/default.htm

Hornet and Wolf has a good set too

http://www.greenwichgateway.com/hornetandwolf/Hornet/headsets/pages/HBH07.htm

Al


Al,

Yes, the head that I used is one of the Hornet ones. I have several of the Ultracast sets, but not the one with the MkIII helmets.

Ultracast's sets with the MKI (I think it's a MKI) tanker helmets are very nice. I plan on using a couple of the ones with just liners in them on the turret of this project.

Mike
SdAufKla
Visit this Community
South Carolina, United States
Joined: May 07, 2010
KitMaker: 2,238 posts
Armorama: 2,158 posts
Posted: Friday, May 28, 2010 - 11:03 AM UTC
I've been making some steady progress and thought I'd post a few snap shots to up-date the build.

I generally work in sub-assemblies and hold off gluing parts to the main tank assembly as long as possible. This is what I did with the tools and their clamps / mounts, etc.

Here's a pic of the tools for the Firefly:


You can see that the tools are the kit parts with the molded on brackets, etc removed. The brass PE clamps and mounts are from the Voyager set. The Voyager PE set is very nice and fairly easy to use as far as PE goes. There are more or less useful bend lines, parts fit very precisely, and assembly generally easy.

After I built the tools and brackets, I dry fit them to determine the exact placement of the brackets. Once I determine this, the tools are removed and the brackets are glues in place one at a time. The tools are used to check the placement of each subsequent bracket to keek the spacing and placement correct.

This shot shows the tools and brackets. The brackets are gleued in place using expoxy, but the tools are still lose to facilitate painting later.


Once I have the tools and brackets placed right, I can then add the "footman loops" for the tool tie-downs.

Here's a shot the footman loops in place:


You can also see the expoy putty "weld beads" added to the tool brackets. The tools have once again been removed to allow me room to work around the footman loops and brackets.

Here's a quick diagram of how I made the footman loops. It's faily self-explanatory. Just to set the record straight, this is a old, tried-and-true method that has been used by modelers for decades. I first saw it described in Shep Pain's Building Armor Models and his book on dioramas. Most recently (that I know of), Steve Zaloga has also shown this in his several Osprey books on modelling different US tanks.


More to follow, but I'd better hit the "reply" button before my internet connection gets hinky.

Mike
SdAufKla
Visit this Community
South Carolina, United States
Joined: May 07, 2010
KitMaker: 2,238 posts
Armorama: 2,158 posts
Posted: Friday, May 28, 2010 - 01:27 PM UTC
OK, two-hours and one gi-normous thunderstorm later... maybe I can keep a stable satallite internet connection.

Here's a snap shot of the footman loops on the turret side. I added these at the same time as the ones for the tools. These were used to hold (on the official storage plan) a cammo net.


I used the same technique as the previous post. BTW, the loop that looks like it's out of plumb is actually straight and parallel to the opening on the turret front. I should have maybe re-composed the photo since the combine angles of the turret front corner and the camera make it look crooked.

Oh well, it's about model building and not photography.

Here's a picture for Dave DeSilva showing the engine block breather tube and brackets holding the louvers under the exhaust.


And one more showing the smoke candle boxes mounted. These are the Voyager parts. The Voyager bracket (the part between the two boxes) is about .5-.75 mm too narrow. For me, this meant that I ran into some clearance problems between the smoke candle box assembly and the hinges for the engine access door. The Voyager part could be easily replaced using some K&S brass sheet. (A simple rectangle with a single bend.)


I'll see if this up-date posts, and if all's OK, I'll continue in the next one.

Mike
 _GOTOTOP