_GOTOBOTTOM
Armor/AFV
For discussions on tanks, artillery, jeeps, etc.
How to make realistic bullet holes
Buck_Compton
Visit this Community
Limburg, Netherlands
Joined: October 04, 2009
KitMaker: 155 posts
Armorama: 102 posts
Posted: Friday, October 21, 2011 - 11:55 AM UTC
Hey guys,

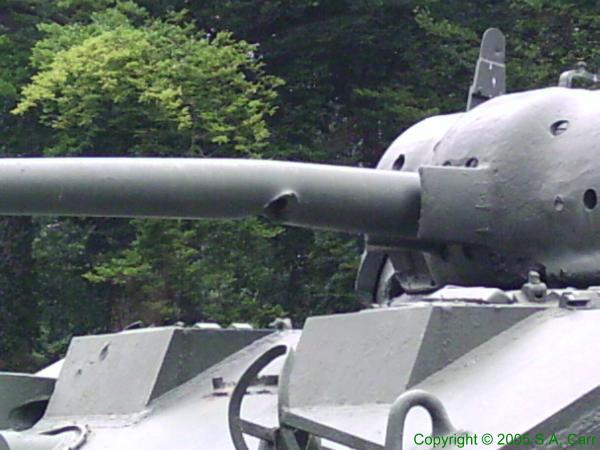
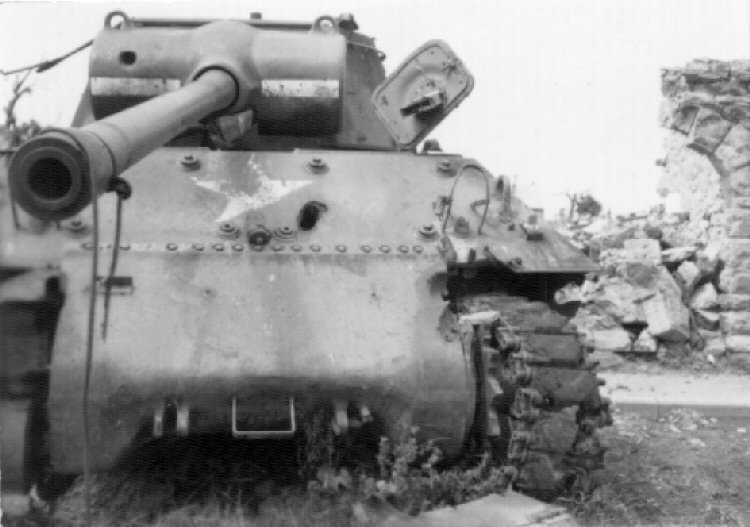
I'd like to know how to achieve realistic ammo damage to a sherman hull? I've tried a couple of things like using mini drill bits but the hole is to regular... any suggestion to make it look like the ones in the next photo:


Cheers Remi
HeavyArty
Visit this Community
Florida, United States
Joined: May 16, 2002
KitMaker: 17,694 posts
Armorama: 13,742 posts
Posted: Friday, October 21, 2011 - 01:04 PM UTC
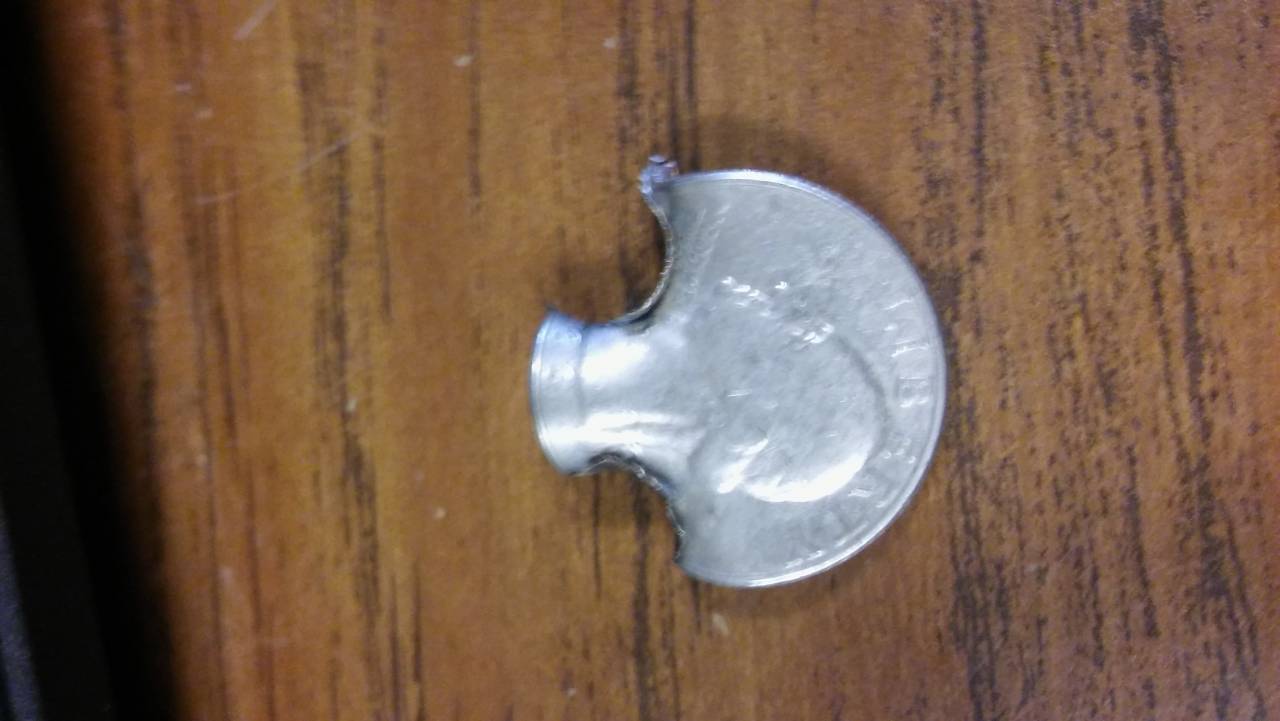
The most realistic way is with a hot pin or soldering iron (pyrogravure?). When a round hits hardened steel, it displaces the steel by melting it and pushing it out of the way. This leaves raised areas aound the hole or, more commonly, the dent, since most small caliber rounds will not actually penetrate.

You can see what I mean below.


pseudorealityx
Visit this Community
Georgia, United States
Joined: January 31, 2010
KitMaker: 2,191 posts
Armorama: 1,814 posts
Posted: Friday, October 21, 2011 - 01:05 PM UTC
By 'bullet holes', what type of weapon are you thinking? MG? small caliber cannon? Tank/anti-tank hits?
Buck_Compton
Visit this Community
Limburg, Netherlands
Joined: October 04, 2009
KitMaker: 155 posts
Armorama: 102 posts
Posted: Friday, October 21, 2011 - 10:52 PM UTC
Hey guys thanks for the help so far!

What i'm looking for is the following. Its a sherman tank involved in a heavy urban combat setting. I'd like to riddle the side of the tanks with mg bullet damage and maybe one or two small at round wich jumped of the side. Something similar as to be seen on the sherman tank from dragon!

Cheers Remi
OLDDOG78
Visit this Community
New Zealand
Joined: September 22, 2019
KitMaker: 38 posts
Armorama: 19 posts
Posted: Tuesday, October 22, 2019 - 05:43 PM UTC

Quoted Text

Hey guys thanks for the help so far!

What i'm looking for is the following. Its a sherman tank involved in a heavy urban combat setting. I'd like to riddle the side of the tanks with mg bullet damage and maybe one or two small at round wich jumped of the side. Something similar as to be seen on the sherman tank from dragon!

Cheers Remi


Following this. Would like to put a couple of bullet holes in bustle bins of Sho't Kal Centurion. Have Tamiya drill but would this be a go? What size bits?
RobinNilsson
Staff MemberTOS Moderator
KITMAKER NETWORK
Visit this Community
Stockholm, Sweden
Joined: November 29, 2006
KitMaker: 6,693 posts
Armorama: 5,562 posts
Posted: Tuesday, October 22, 2019 - 06:41 PM UTC

Quoted Text


Quoted Text

Hey guys thanks for the help so far!

What i'm looking for is the following. Its a sherman tank involved in a heavy urban combat setting. I'd like to riddle the side of the tanks with mg bullet damage and maybe one or two small at round wich jumped of the side. Something similar as to be seen on the sherman tank from dragon!

Cheers Remi


Following this. Would like to put a couple of bullet holes in bustle bins of Sho't Kal Centurion. Have Tamiya drill but would this be a go? What size bits?


I would start thinking about replacing parts of the plastic in those bins with aluminium foil.
If you make a hole in the plastic part there will be too much material and the hole will look as if the bullet has penetrated armour instead of flimsy sheet metal.

Try some different thicknesses and use a needle or pointed metal rod to punch holes. Hold the sheet over a small hole drilled in a piece of wood to avoid too much buckling of the foil when you punch through it or stab it REALLY quickly, like 700 meters per second ....


Ask Google about: sheet metal bullet hole


/ Robin
varanusk
Staff MemberManaging Editor
ARMORAMA
Visit this Community
Santa Cruz de Tenerife, Spain / Espaņa
Joined: July 04, 2013
KitMaker: 1,288 posts
Armorama: 942 posts
Posted: Tuesday, October 22, 2019 - 08:39 PM UTC
Not an expert here, but I doubt an MG shot would do much to a Sherman side armour...
RobinNilsson
Staff MemberTOS Moderator
KITMAKER NETWORK
Visit this Community
Stockholm, Sweden
Joined: November 29, 2006
KitMaker: 6,693 posts
Armorama: 5,562 posts
Posted: Tuesday, October 22, 2019 - 08:43 PM UTC

Quoted Text

Not an expert here, but I doubt an MG shot would do much to a Sherman side armour...


They would only scratch the paint
but Ben asked about "bullet holes in bustle bins of Sho't Kal Centurion"

/ Robin
varanusk
Staff MemberManaging Editor
ARMORAMA
Visit this Community
Santa Cruz de Tenerife, Spain / Espaņa
Joined: July 04, 2013
KitMaker: 1,288 posts
Armorama: 942 posts
Posted: Tuesday, October 22, 2019 - 09:06 PM UTC

Quoted Text


They would only scratch the paint
but Ben asked about "bullet holes in bustle bins of Sho't Kal Centurion"


Yep, my reply was for the original question.

That's the problem of hijacking other's thread
Biggles2
Visit this Community
Quebec, Canada
Joined: January 01, 2004
KitMaker: 7,600 posts
Armorama: 6,110 posts
Posted: Wednesday, October 23, 2019 - 03:12 AM UTC
IMHO, any caliber solid-shot would just penetrate sheet metal (such as stowage bins), leaving a round hole and small indentation. Paint would be chipped around the indentation. You could replace the kit part with thin sheet brass (if PE parts are involved, it makes it so much easier), or aluminum, or even thin sheet styrene. If losing detail is at stake, you can Dremel out the back side of the plastic part with a grinding tool until the plastic is paper-thin (carefully - you don't want to melt through!) then punch your holes through.
Bullet strikes on armor just results in chipped paint!

panzerbob01
Visit this Community
Louisiana, United States
Joined: March 06, 2010
KitMaker: 3,128 posts
Armorama: 2,959 posts
Posted: Wednesday, October 23, 2019 - 04:59 AM UTC
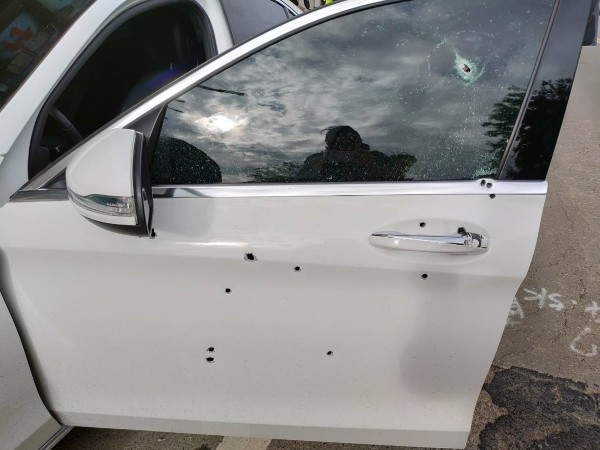
Let photos of real bullet strikes and perforations - such as those examples posted in this thread - be your guide as to what you want such IMPACT & PERFORATION "entry-wound" damage to look like. The posted photos clearly show versions of what small-calibre bullet strikes do to thin / sheet-metal surfaces.

There are likely many, many photos which show - at least in black & white - small-cal strikes on heavier steel... Armored vehicles, etc. Refer to such photos to get good ideas about what the "entry-wound" damage looks like.

The "entry-wound" aspect is what most modelers are seeking to achieve. "Exit-wounds" are a whole different set of appearances - both in sheet-metal and on thicker steel walls, and of course the type of projectile and the type of thicker metal being penetrated matter a great deal in this.

For those doing 1/35 "targets", keep in mind that a pistol or rifle-cal bullet would likely make a hole in sheet metal that is about 10 x 1/1000inch dia. A 0.5 cal hole would be about 15 x 1/1000in.

IMHO, for modeling "sheet-metal" damage, making appropriately tiny holes in the styrene with a drill, followed by a small amount of trimming with a newish #11 knife-tip (to remove the pushed-up plastic and shape / round in the hole at the impact surface) produces a fine-looking "entry-wound". Keeping in mind that the hole is actually very small... Paint the "wound hole" black, followed by a tiny bit of some silvery color (to show the new bare metal at the hole-rim) and some additional color(s) for rust and paint around the rim, if desired. Unless you are also able to view the "exit side" (in which case you need to model that aspect...), the blackened hole through the styrene will provide nicely. No need for any PE, tin-foil, or other efforts when modeling "only entry-wounds". "Exit-wound" modeling can, on the other hand, benefit greatly from using such approaches.

Modeling small-cal bullet-strikes on steel armor walls generally amounts to basically paint-scrapes revealing bare metal. But armor strikes can get complicated, as "armor" covers a multitude of sin and effects. A 0.30 cal rifle bullet hitting the side of a modern MBT turret means a tiny paint-scratch. The same bullet hitting the 10mm - thick steel "armor" of a "tankette", German Pz.1, older armored-car, or similar means possible penetration, cracked "armor", etc. A similar bullet hitting the side of an aluminum-sided M113 APC means yet another thing... So photos showing types of such impacts on one's desired "target" will be your guide to what you want to model as impact damage. Again, unless you are viewing the "exit-wound" side, you are modeling the "entry-wound", and the styrene will usually serve just fine. You will be making a tiny gouge in most cases. I use that #11 tip for both the tiny gouges and tiny dents caused on thicker armor by small-cal strikes. IF there is penetration - that #11 tip will yield a nice tapered or conical hole - and again, keep the hole size appropriate to the calibre of strike...

In brief; IMHO, use the photos as your guide, keep the holes tiny for small penetrations, keep it simple when you can. And be prepared to see show-judges being negative about what you accomplish - Many show judges have no real idea what the real damage should look like on a 1/35 scale model!

And have FUN as you recreate this interesting detail of battle-worn equipment!

Cheers! Bob
Kornbeef
Visit this Community
England - South East, United Kingdom
Joined: November 06, 2005
KitMaker: 1,667 posts
Armorama: 48 posts
Posted: Wednesday, October 23, 2019 - 06:52 AM UTC
You also have the option of thinning the kit part with a dremel or similar from behind (for sheet steel not armour obviously) then punch, drill or use a sharp knife to pare a torn type of hole, this works well for exit holes especially or shrapnel damage.
TopSmith
Visit this Community
Washington, United States
Joined: August 09, 2002
KitMaker: 1,742 posts
Armorama: 1,658 posts
Posted: Wednesday, October 23, 2019 - 02:55 PM UTC
I wanted to put some bullet holes in a T62 fender fuel tank. The problem with the plastic fuel tank was it was too thick for a realistic look. I solved the problem by forming some heavy duty aluminum foil to the top of the fuel tank so that it was an exact match in shape. I then removed some of the plastic from the fuel tank and put the foil back over the top of the fuel tank. I then put 3 bullet holes with a straight pin into the foil and it really looked authentic. Practice beforehand on some foil. You might need to put something like a sponge behind the foil before puncturing.
You should puncture the foil at an angle because odds of bullets hitting at 90 degrees is much less than at an angle.
amoz02t
#192
Visit this Community
Kentucky, United States
Joined: November 25, 2009
KitMaker: 1,383 posts
Armorama: 1,281 posts
Posted: Thursday, October 24, 2019 - 12:26 AM UTC
a .308 makes nice holes...

joepanzer
Visit this Community
North Carolina, United States
Joined: January 21, 2004
KitMaker: 803 posts
Armorama: 740 posts
Posted: Thursday, October 24, 2019 - 02:05 AM UTC
"Hit it twice before it even hit the ground!"
Biggles2
Visit this Community
Quebec, Canada
Joined: January 01, 2004
KitMaker: 7,600 posts
Armorama: 6,110 posts
Posted: Thursday, October 24, 2019 - 05:00 AM UTC

Quoted Text

I solved the problem by forming some heavy duty aluminum foil to the top of the fuel tank so that it was an exact match in shape. I then removed some of the plastic from the fuel tank and put the foil back over the top of the fuel tank.


An alternative to this (in some cases) is to use thin sheet lead foil for modeling purposes. It is softer and more malleable than aluminum foil, and crushes up more convincingly for damage.
OLDDOG78
Visit this Community
New Zealand
Joined: September 22, 2019
KitMaker: 38 posts
Armorama: 19 posts
Posted: Thursday, October 24, 2019 - 07:23 PM UTC
Thanks for all the input guys!! Guess i need to try and find some lead foil...
Removed by original poster on 10/25/19 - 10:10:06 (GMT).
Biggles2
Visit this Community
Quebec, Canada
Joined: January 01, 2004
KitMaker: 7,600 posts
Armorama: 6,110 posts
Posted: Friday, October 25, 2019 - 02:51 AM UTC
As I remember, Swix ski wax used to be wrapped in very thin lead foil (although I haven't gone skiing in almost 30 yrs!). This kind:

https://skiisandbiikes.com/products/swix-v20-green-8degc-to-18degc-wax?variant=45924805518¤cy=CAD&gclid=EAIaIQobChMIitKV1dS35QIVi56zCh3rFQb9EAQYBCABEgIgKvD_BwE
Although the tube looks a little different as it did so maybe no longer lead foil!

 _GOTOTOP