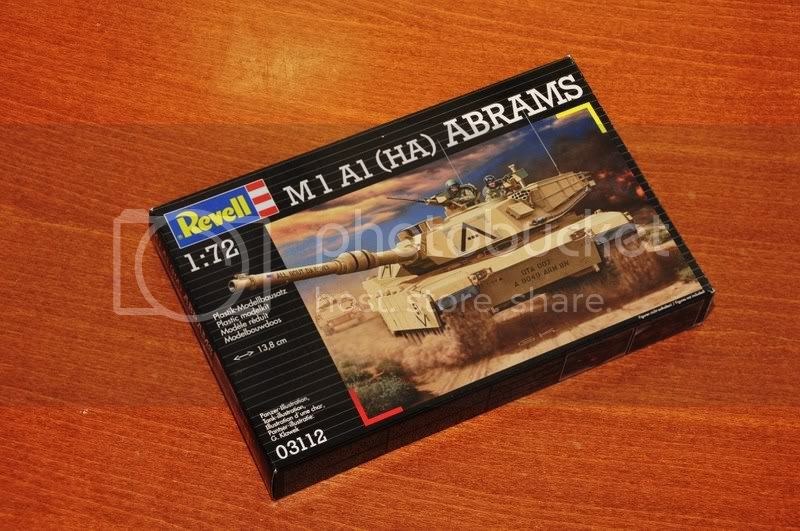
_GOTOBOTTOM
Armor/AFV: Braille Scale
1/72 and 1/76 Scale Armor and AFVs.
Hosted by Darren Baker
Revell M1A1 Abrams
r2d2
Visit this Community
England - South East, United Kingdom
Joined: April 13, 2006
KitMaker: 424 posts
Armorama: 419 posts
Posted: Saturday, April 28, 2012 - 09:16 AM UTC
Just finished a long project and again I found my self hooked. I promised myself to have a break but here I go again. Nothing much to say about the kit itself and a lot of you guys know the ups and down. This again is a big task (TUSK) for me. Converting this old kit to M1A2 with a little twist. So sit back and enjoy the ride.

The kit......


The conversion........
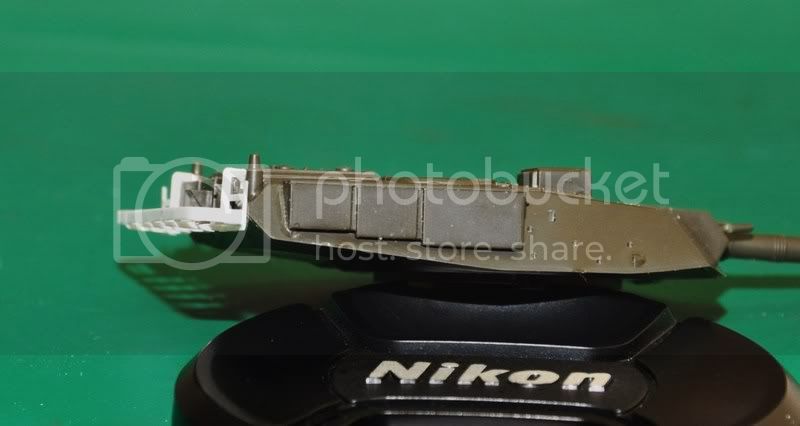
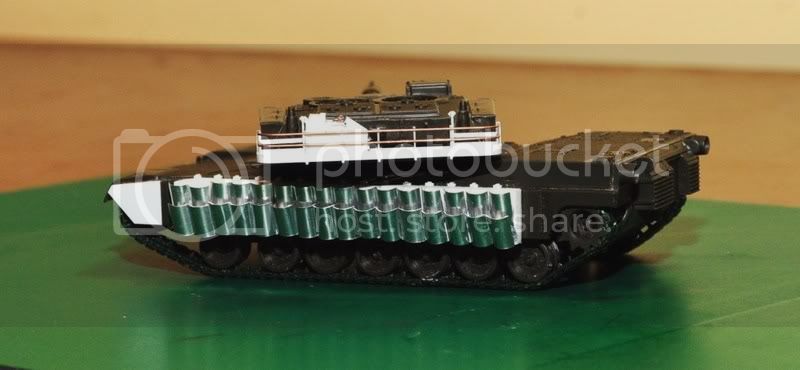
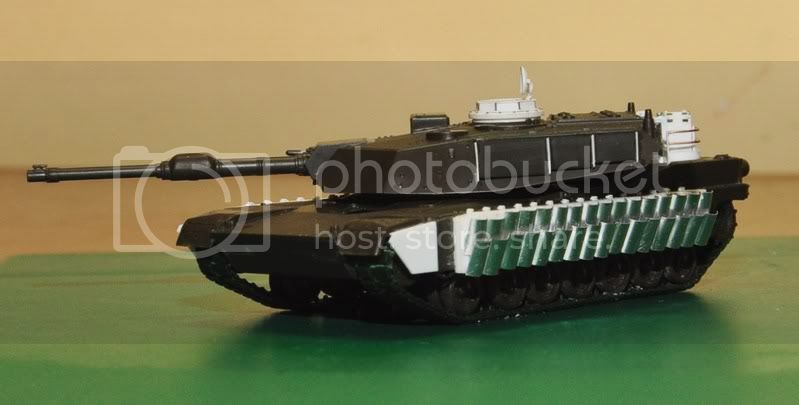
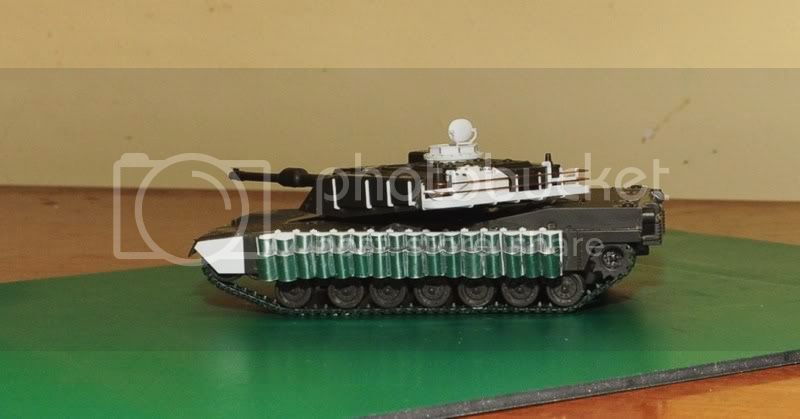
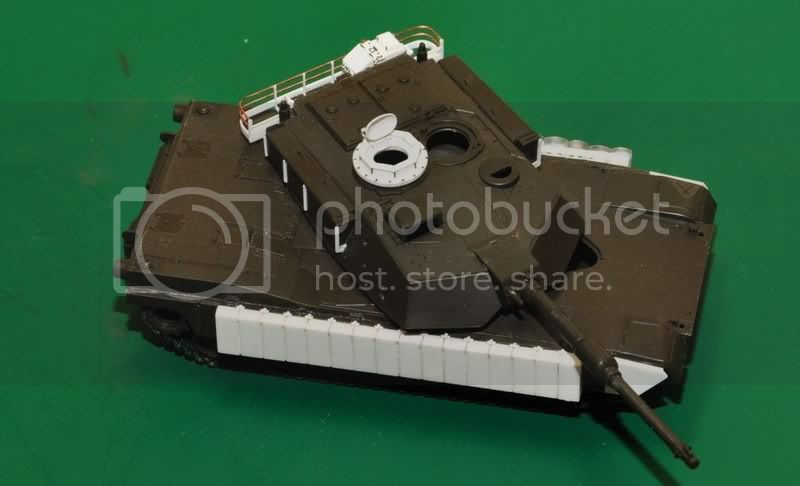
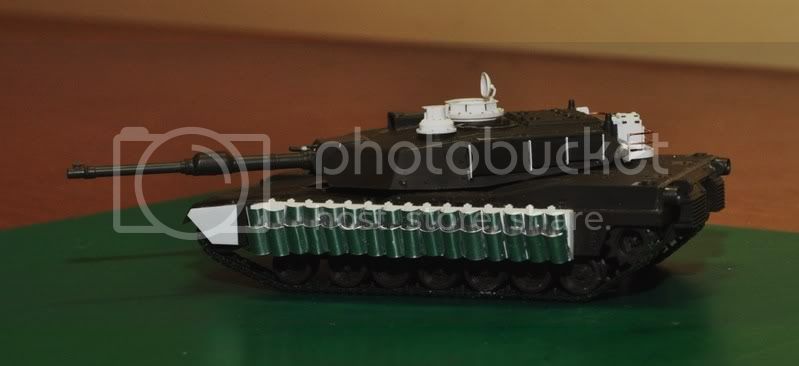
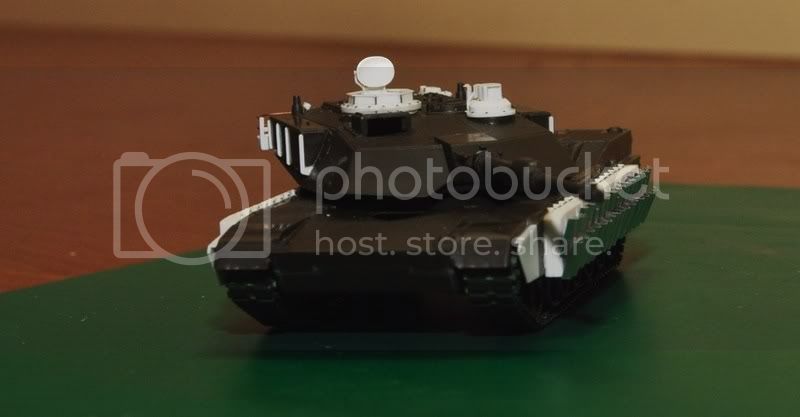
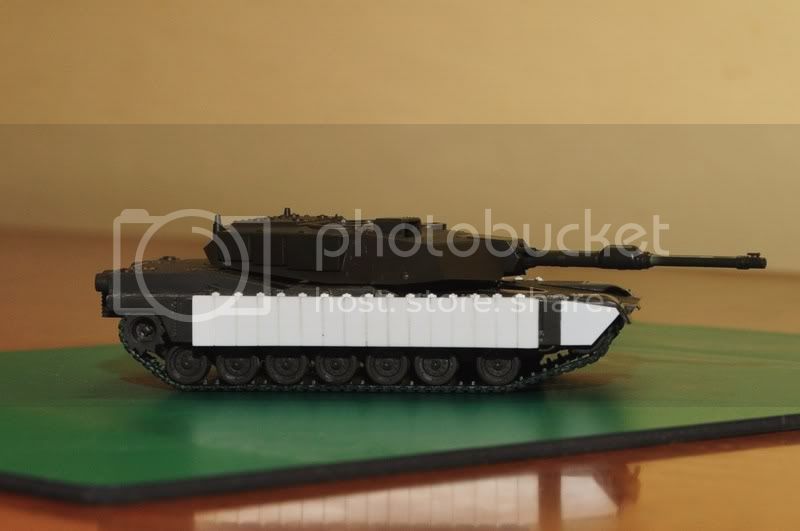
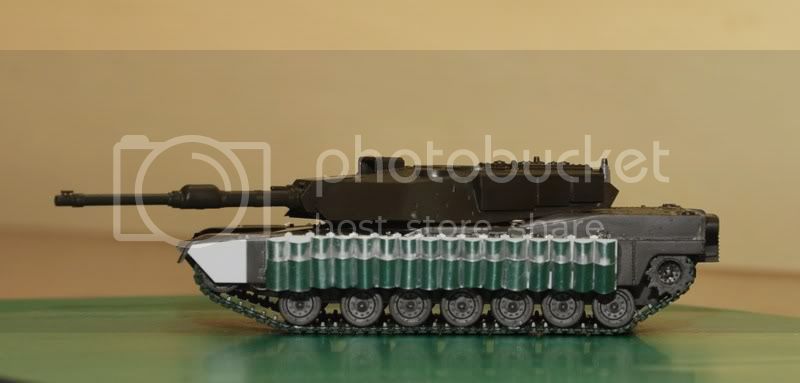
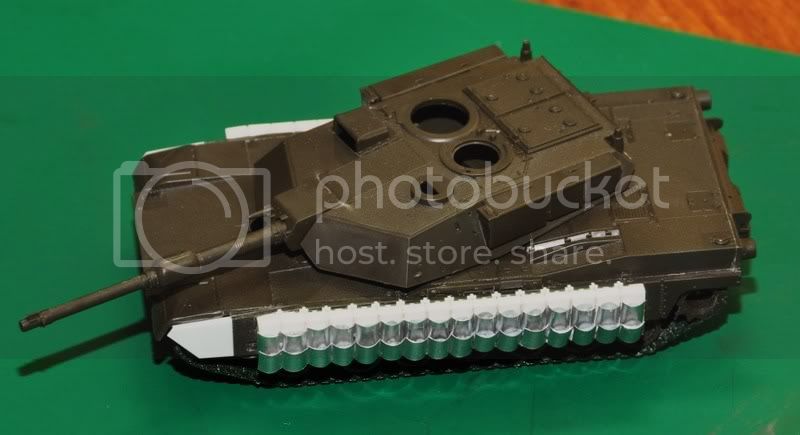
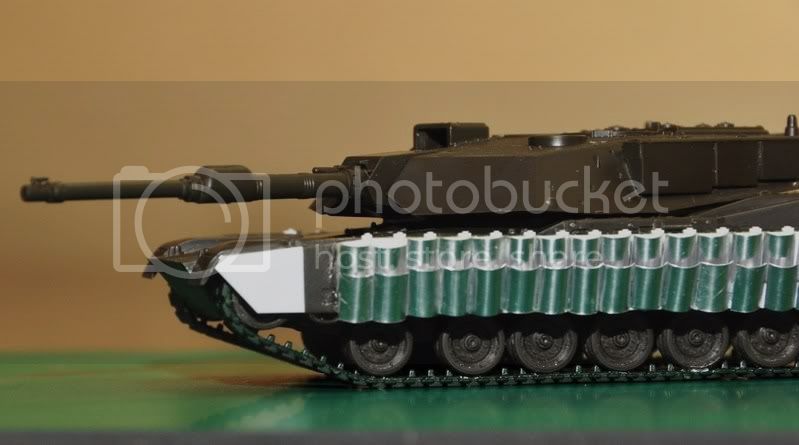
Getting the distance of the first road wheel to the rest of the wheels is crucial as the kit's stock looks strange. I have to cut it out and set the distance right. Next is the tracks, no aftermarket parts so I dig my spares and got me an updated big foot track.


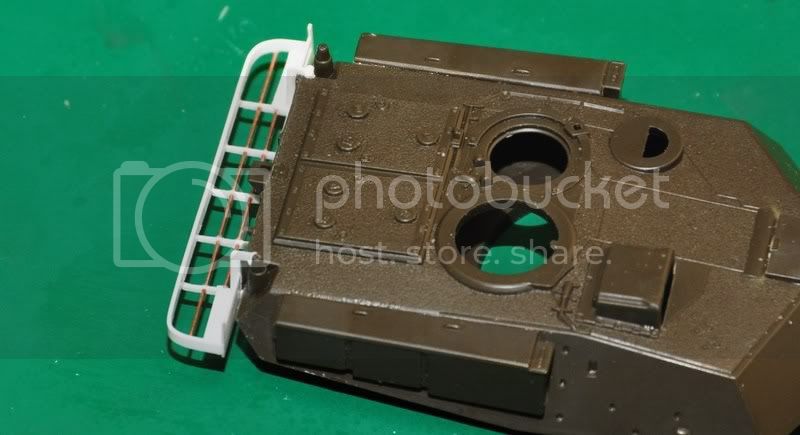
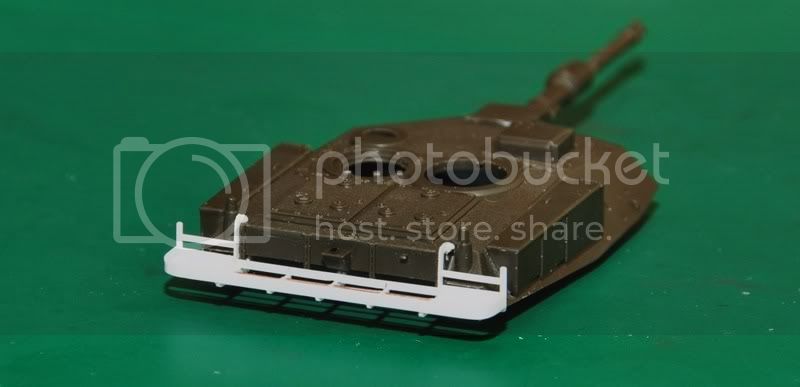
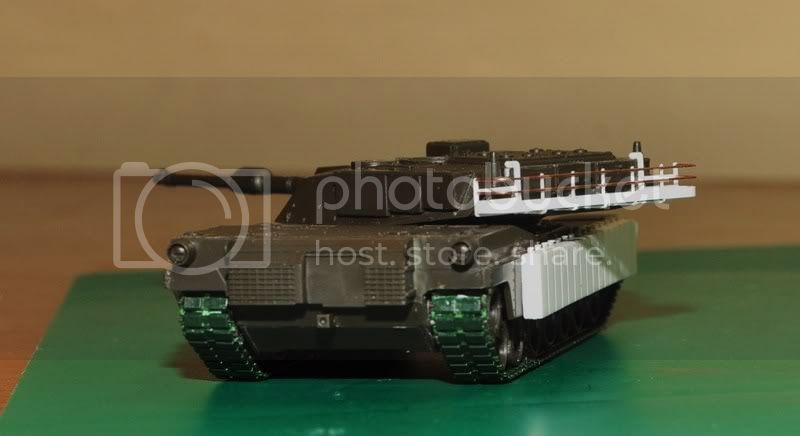
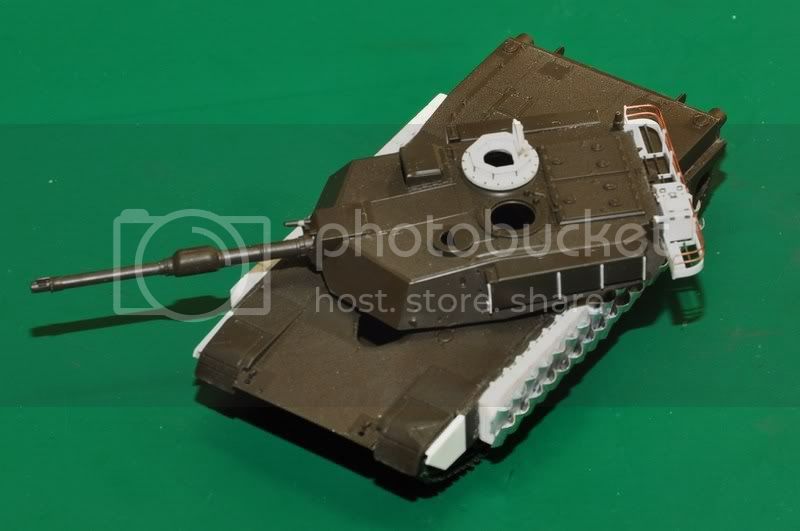
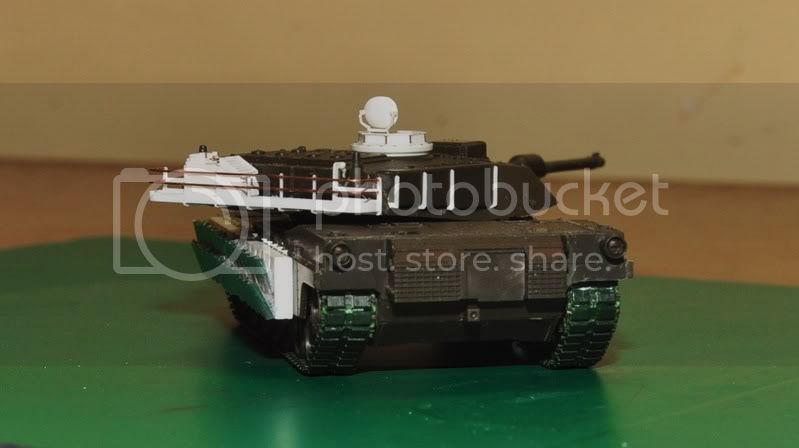
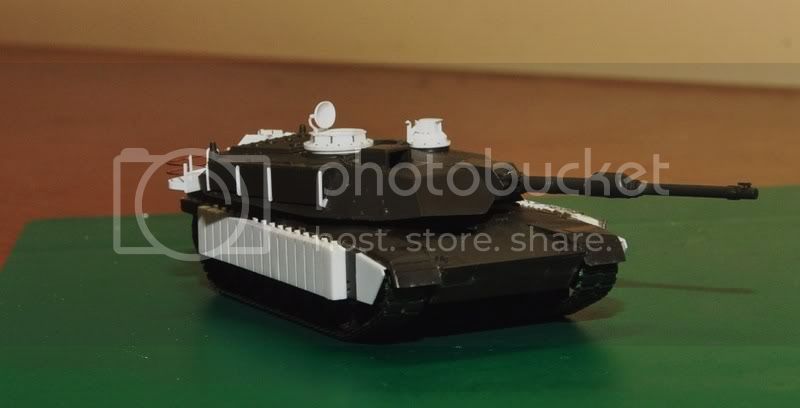
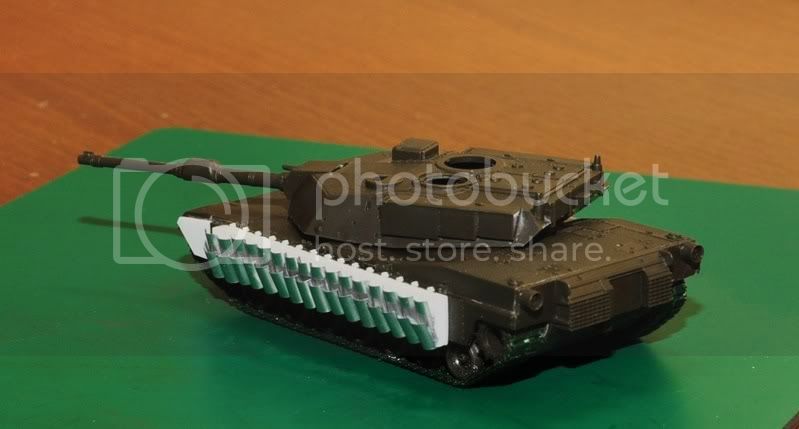
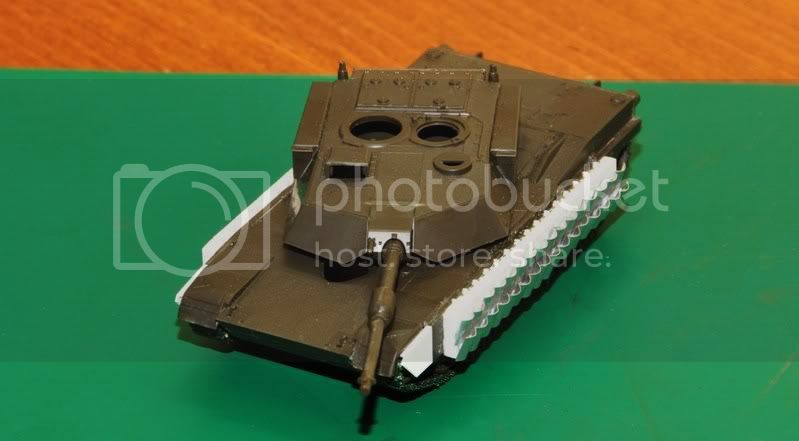
Here you can see the changes made to the front side skirt. I will fill a couple of areas in the fender as the current M1 don't have this stiffening "X" on it.


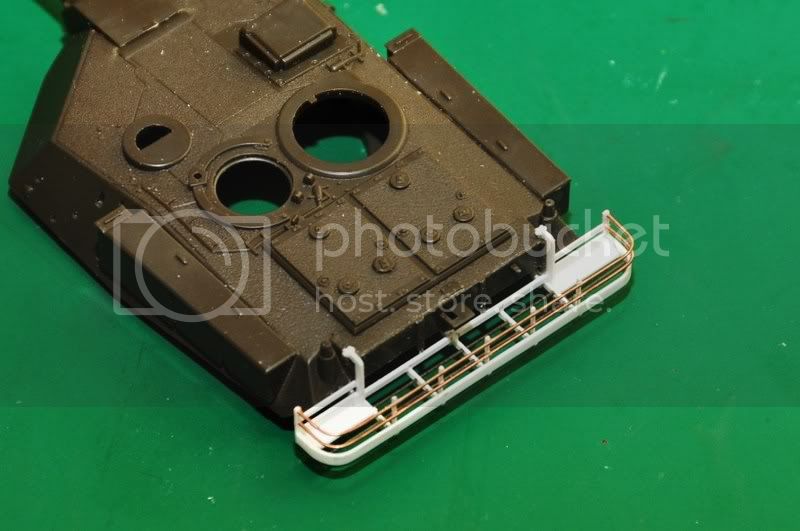
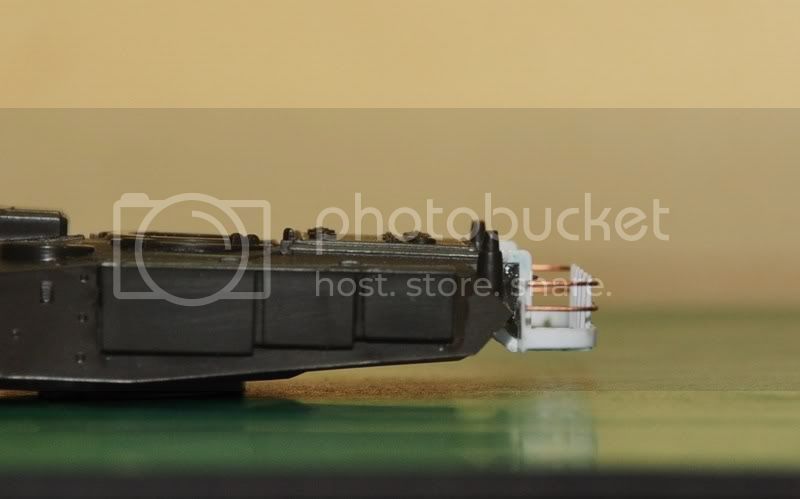
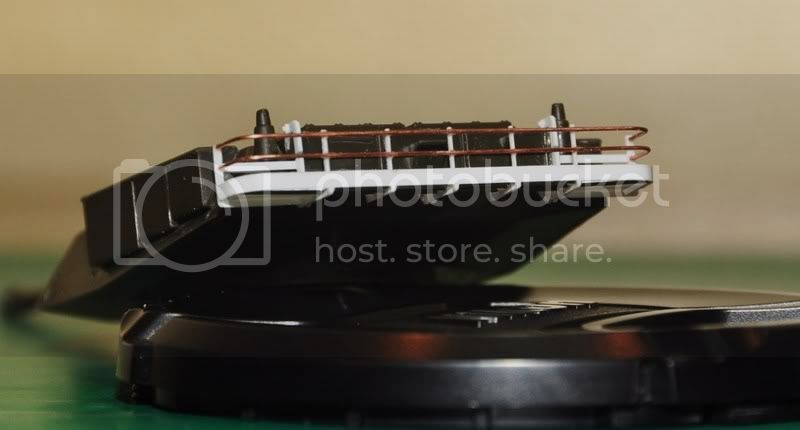
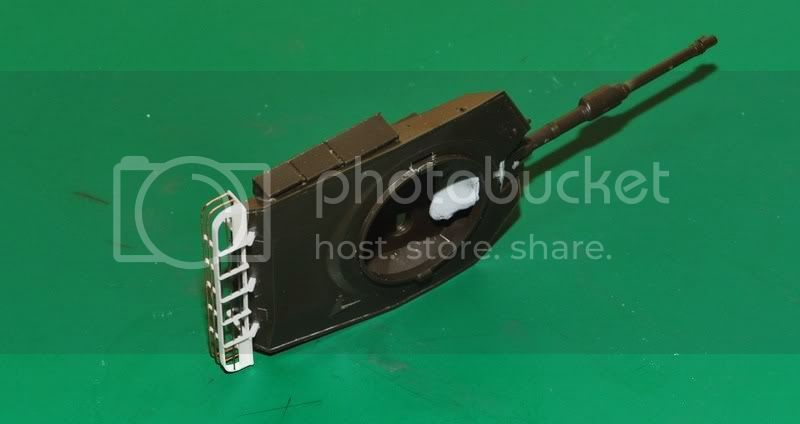
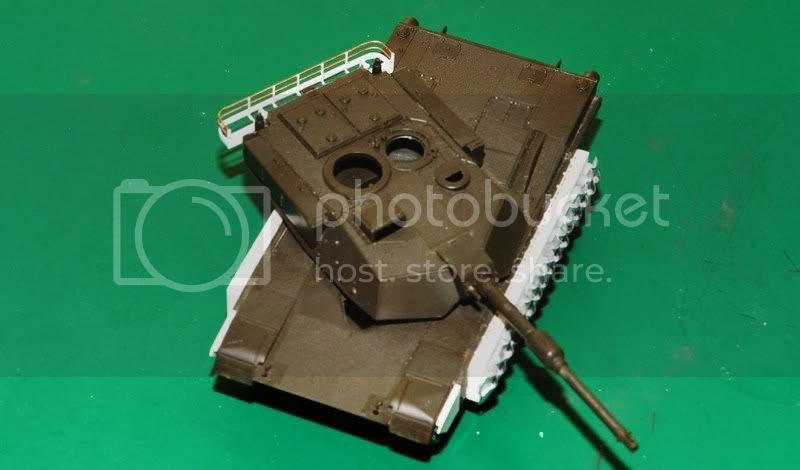
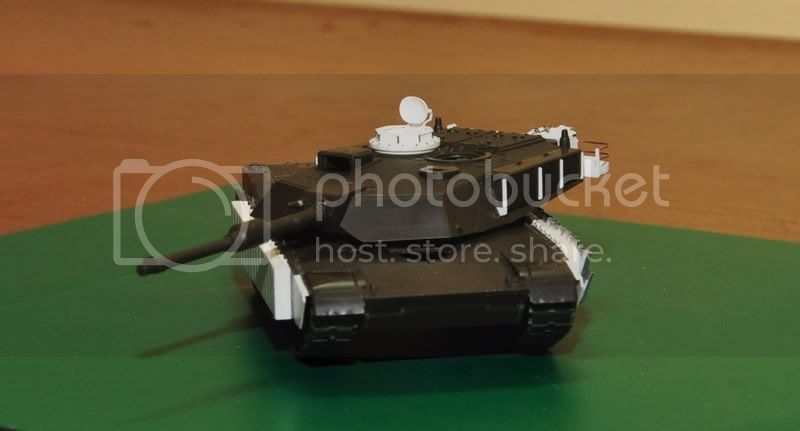
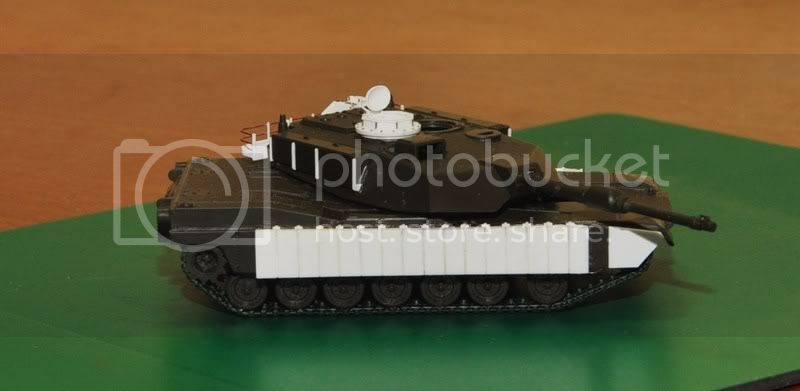
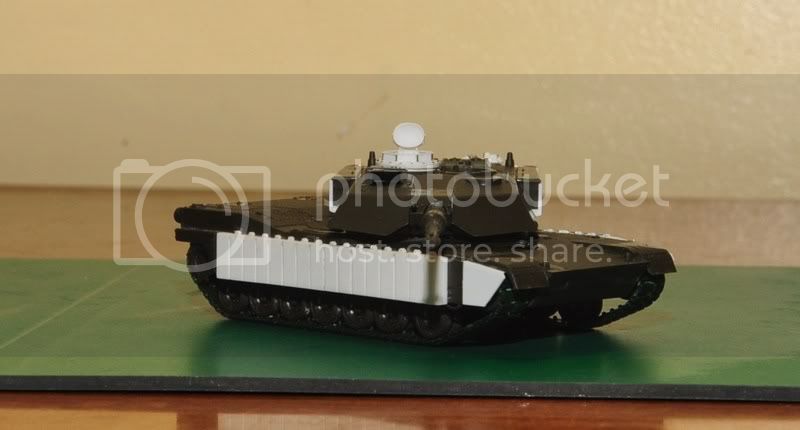
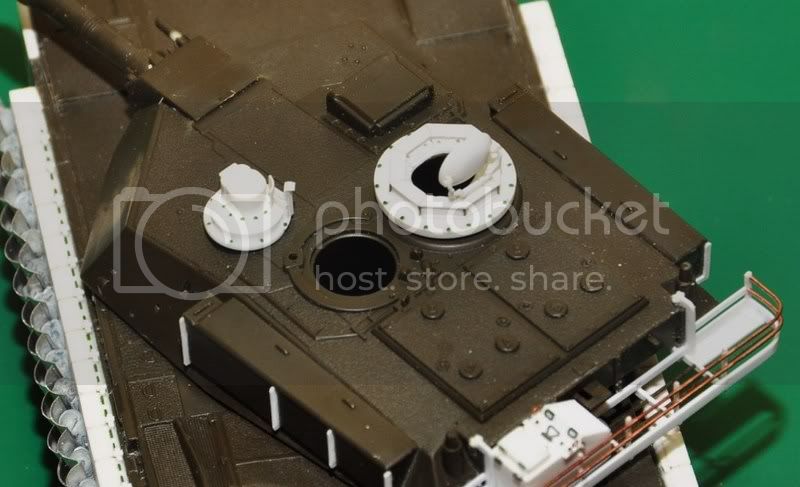
Now the fun part......I have added a "mock up" ARAT 2 tiles and this will be the version I'm going to make. This is temporarily tacked. This is going to be a full conversion and ofcourse in 1/72nd. No after market parts to be added.


This is going to be a long and slow build, stay tune fellas.
Panther64
#261
Visit this Community
North Carolina, United States
Joined: September 12, 2005
KitMaker: 395 posts
Armorama: 365 posts
Posted: Saturday, April 28, 2012 - 02:20 PM UTC
WooHoo Val!!! You just don't quit! This is another dream build for me! I'll definetly be following this! Good luck my Friend!
r2d2
Visit this Community
England - South East, United Kingdom
Joined: April 13, 2006
KitMaker: 424 posts
Armorama: 419 posts
Posted: Saturday, April 28, 2012 - 10:23 PM UTC

Quoted Text

WooHoo Val!!! You just don't quit! This is another dream build for me! I'll definetly be following this! Good luck my Friend!


Thanks Kerry! Well hopefully I can pull this through. I will cram as much details as I can. There are a lot of things to change, add, subtract and modify. Working in this scale is very difficult, space is everything here in England and in this scale I could managed to save a lot.
firstcircle
Visit this Community
England - South East, United Kingdom
Joined: November 19, 2008
KitMaker: 2,249 posts
Armorama: 2,007 posts
Posted: Sunday, April 29, 2012 - 08:54 AM UTC
Val, I well remember your entry in the Braille Battlefield campaign, seems like this well be very involved again. I'm staying tuned for techniques and general admiration.
r2d2
Visit this Community
England - South East, United Kingdom
Joined: April 13, 2006
KitMaker: 424 posts
Armorama: 419 posts
Posted: Monday, April 30, 2012 - 02:42 AM UTC

Quoted Text

Val, I well remember your entry in the Braille Battlefield campaign, seems like this well be very involved again. I'm staying tuned for techniques and general admiration.


Thanks Matthew! Braille GB was very good. All of the participants are winners and show case the best braille builder I have seen. Hope we could have part 2 (paging Jan!). After my Challenger and Leopard build I was hoping to have a break but you guys inspires me a lot that I straight away pop open the box and start cutting plastics. Anyway, I will update as I go along. Keep building guys!
tread_geek
Visit this Community
Ontario, Canada
Joined: March 23, 2008
KitMaker: 2,847 posts
Armorama: 2,667 posts
Posted: Monday, April 30, 2012 - 06:56 AM UTC
Val,

You just can't leave well enough alone, can you! I agree wholly about your assessment about this scale, it doesn't take up much space. Then again, it is, in its own right, perhaps a little more daunting than larger scales due to its size.


Quoted Text

.... Braille GB was very good. All of the participants are winners and show case the best braille builder I have seen. Hope we could have part 2 (paging Jan!)... Keep building guys!


Subtle or perhaps not so subtle hint? It's a little early to think about another Braille Battlefield campaign, I'm still on medication after the last one. Then again, nothing stops you from presenting a campaign and leading it! Though I doubt you'd have much time to build one of your monster conversions during it. BTW, to all those that were involved in the campaign, it has now risen to #6 in the TOP 10 list.

I'bb drop in from time to time to see how this beast develops.

Cheers,
Jan
erhntly
Visit this Community
Izmir, Turkey / Türkçe
Joined: June 11, 2004
KitMaker: 1,426 posts
Armorama: 464 posts
Posted: Monday, April 30, 2012 - 09:29 AM UTC
hımmm a new Braille Battlefield campaign good idea but at first, we are making a Matchbox for Matchbox campaign...

Hi Val, I'm watching with interest your Abrams ... Regards..
SchoeniR6
Visit this Community
Germany
Joined: November 21, 2010
KitMaker: 189 posts
Armorama: 189 posts
Posted: Monday, April 30, 2012 - 08:39 PM UTC
Hi

YES! THIS is Great! Like it.
Why you don´t buy the Revell Abrams M1A2? The kit is not bad.
I used it for my Abrams here in armorama.
Waiting for new pictures. :-)

P.S.: How it looks? I see you are from england. Maybe you can have a journey to Heiden Germany in 6. Oct. to the "International small scale converntion". Hove a look in the internet for it. :-) A lot smallscalers i know will be there.

Cheers Daniel
r2d2
Visit this Community
England - South East, United Kingdom
Joined: April 13, 2006
KitMaker: 424 posts
Armorama: 419 posts
Posted: Friday, May 04, 2012 - 11:00 AM UTC
Thanks guys!

Jan, I don't have the skills to lead a GB unlike you. Needs dedication and commitment in which you excell. If there would be another Braille GB it should be you who will lead again.


Daniel, wish I could visit you there and attend the convention however I'm too tied up in work and family time. Maybe someday I will drop by, who knows and also I wanted to visit Germany. I'm always at EuroMilitaire which is a couple of miles from where I lived.
r2d2
Visit this Community
England - South East, United Kingdom
Joined: April 13, 2006
KitMaker: 424 posts
Armorama: 419 posts
Posted: Friday, May 04, 2012 - 11:15 AM UTC
Small updates: the stock rear turret basket had to be replaced. I have to totally rebuild this slowly in order to improve and enhance the details. Here is how it looks so far. I have to add the auxillary power pack before attaching the rest of the parts to be sure its fit is spot on.

Details replicated based on reference photos.


Scale comp of the rear bustle rack.


On the hull...
weathering_one
Visit this Community
Ontario, Canada
Joined: April 04, 2009
KitMaker: 458 posts
Armorama: 456 posts
Posted: Friday, May 04, 2012 - 12:28 PM UTC
Fascinating build and great work but definitely a major step beyond my capabilities and perhaps those of many that hang out here. On the other hand, I'll be watching to see if there isn't something that might be used in the future.

Regards,
AJ
r2d2
Visit this Community
England - South East, United Kingdom
Joined: April 13, 2006
KitMaker: 424 posts
Armorama: 419 posts
Posted: Sunday, May 06, 2012 - 08:36 AM UTC
Thanks AJ!

UPDATES: I accidentally drop the whole turret assembly during the final detailing of the rear turret bustle rack and the whole thing collapse. I have to re-do everything from the start to produce a very good alignment. I spend the whole day doing it again but managed to finish it this time without an accident.


r2d2
Visit this Community
England - South East, United Kingdom
Joined: April 13, 2006
KitMaker: 424 posts
Armorama: 419 posts
Posted: Sunday, May 06, 2012 - 08:45 AM UTC
I have to scratchbuilt the M1A2 SEP rear turret cooling unit. The build took me 8 hours to build. I took my time and accurately measuring as I go along. All details are so tiny and very difficult to do. All details are done with my naked eye as I find it difficult to use a head lens. My eyes are still working fine though .

Here it is on top of a Tamiya Acrylic bottle for size ref.


Couple of shots added on the rear BR. I will scratchbuilt all the bottom attachment at the end.


Till the next updates.....
firstcircle
Visit this Community
England - South East, United Kingdom
Joined: November 19, 2008
KitMaker: 2,249 posts
Armorama: 2,007 posts
Posted: Sunday, May 06, 2012 - 11:02 AM UTC
Val, I agree with AJB, your scratching is second to none at this scale, particularly with these very tiny details; so very neat and tidy, something I find I normally don't achieve. I normally make do with an impression of detail at this scale, while you seem to represent it fully.
Matthew
majjanelson
Visit this Community
South Carolina, United States
Joined: December 14, 2006
KitMaker: 1,355 posts
Armorama: 979 posts
Posted: Sunday, May 06, 2012 - 01:37 PM UTC
Val,

EXCELLENT! Your scratch-built items are superb. I was going to suggest you get the PART PE set which comes with the Turret Bustle Rack, but yours is far better. Also, after seeing your VCS unit I'm very interested to see if you scratch the improved CDR's hatch.

Keep 'em coming!
r2d2
Visit this Community
England - South East, United Kingdom
Joined: April 13, 2006
KitMaker: 424 posts
Armorama: 419 posts
Posted: Sunday, May 06, 2012 - 11:43 PM UTC

Quoted Text

Val, I agree with AJB, your scratching is second to none at this scale, particularly with these very tiny details; so very neat and tidy, something I find I normally don't achieve. I normally make do with an impression of detail at this scale, while you seem to represent it fully.
Matthew


Thanks Matthew! Its though and very challenging especially at this scale. I use to do 1/35th exclusively but when I witnessed a very well done 1/72nd armour I never looked back. Braille had the "wow" factor and the level of details we are seeing in todays 72nd kit is just amazing.
r2d2
Visit this Community
England - South East, United Kingdom
Joined: April 13, 2006
KitMaker: 424 posts
Armorama: 419 posts
Posted: Sunday, May 06, 2012 - 11:45 PM UTC

Quoted Text

Val,

EXCELLENT! Your scratch-built items are superb. I was going to suggest you get the PART PE set which comes with the Turret Bustle Rack, but yours is far better. Also, after seeing your VCS unit I'm very interested to see if you scratch the improved CDR's hatch.

Keep 'em coming!


Thanks Jeff, feel free to give your opinion and suggestions, any help I get from you guys are very much welcome as this will help me with this build. I will do my best to replicate the correct CDR's hatch.

Oh, by the way Jeff do you have a clear picture of the left rear panel details of the A2 SEP's containing the aux power unit or the hawkers battery and a close up detail difference between the two? Thanks!

Cheers,

Val
r2d2
Visit this Community
England - South East, United Kingdom
Joined: April 13, 2006
KitMaker: 424 posts
Armorama: 419 posts
Posted: Tuesday, May 08, 2012 - 09:47 AM UTC
Do anybody here had a very good picture of the rear left panel on the M2 SEP where the UA aux power unit/ Hawker battery? I need a clear pictures to replicate this and is this area is also covered by non skid surface?

Thanks in advance!
Grillmaster
Visit this Community
Berlin, Germany
Joined: November 20, 2007
KitMaker: 41 posts
Armorama: 40 posts
Posted: Wednesday, May 09, 2012 - 07:02 PM UTC
Hi there!

Following your build closely, as I always intended to follow up on my M1A1 TUSK (its here somewhere buried in the past threads...) with an M1A2 TUSK. I just checked the Tankograd book (highly recommended...), but alas, it has no pics of the deck of the M1A2.

Here are some useful pics (scroll down)

https://armorama.kitmaker.net/forums/144907&ord=&page=7

there are also some 1/35 builds of the Dragon-kit on the net that feature pics of said rear deck, but I have not found any real photos of that yet - if you find one, plz. post it in here - I am looking for that too!

Apart from that - great build! Also the Cally and the Leo 2!

Looking foward for updates!!
r2d2
Visit this Community
England - South East, United Kingdom
Joined: April 13, 2006
KitMaker: 424 posts
Armorama: 419 posts
Posted: Thursday, May 10, 2012 - 05:18 AM UTC

Quoted Text

Hi there!

Following your build closely, as I always intended to follow up on my M1A1 TUSK (its here somewhere buried in the past threads...) with an M1A2 TUSK. I just checked the Tankograd book (highly recommended...), but alas, it has no pics of the deck of the M1A2.

Here are some useful pics (scroll down)

https://armorama.kitmaker.net/forums/144907&ord=&page=7

there are also some 1/35 builds of the Dragon-kit on the net that feature pics of said rear deck, but I have not found any real photos of that yet - if you find one, plz. post it in here - I am looking for that too!

Apart from that - great build! Also the Cally and the Leo 2!

Looking foward for updates!!


Thanks Grillmaster! Yes I saw your excellent work also! Thanks for the link though I also have yet to see the actual photo of that area, the Dragon SEP would do for now and I will do it last just in case somebody here shares a very good picture. And yes I also have the Tankograd reference for the TUSK but it lacks that specific area. As far as I know there are no braille kit of the M1A2 SEP so this has to be done the hard way which is the only way.
r2d2
Visit this Community
England - South East, United Kingdom
Joined: April 13, 2006
KitMaker: 424 posts
Armorama: 419 posts
Posted: Saturday, May 12, 2012 - 09:28 AM UTC
UPDATES: I have finished scratch building the improved CMDR hatch specific for the M1A2 including the cover which was made from thick styrene which I carved out. I will add the armour plate cover later showing you the details I made. I have to add all the detials inside the hatch cover (handle/locks etc) next time.
Folowing pics shows the completed part and details.


Size comparison. Note the added armour for the hatch.

r2d2
Visit this Community
England - South East, United Kingdom
Joined: April 13, 2006
KitMaker: 424 posts
Armorama: 419 posts
Posted: Saturday, May 12, 2012 - 09:32 AM UTC
On the turret..... note the replace brackets for the turret guard rails.


This is all for now...
majjanelson
Visit this Community
South Carolina, United States
Joined: December 14, 2006
KitMaker: 1,355 posts
Armorama: 979 posts
Posted: Saturday, May 12, 2012 - 04:22 PM UTC
Val,

Sorry for not replying earlier, but I've been out of town for the past week.

The link that GrillMaster posted shows some images from Prime Portal of a M1A2. Since it was my post, I'm re-posting them here for your convenience, and if you save the images to your hard drive you can zoom in the appropriate areas:

Some of the M1A2 SEPs have a hull mounted Under Armor Auxilliary Power Unit (UAAPU) while others have Hawker Batteries, either of which are inside the hull over the left track and to the left of the engine compartment where a fuel cell was located. There may even be a few without either. This picture shows the rear portion of the space in the hull with the cover removed:


These pictures show the UAAPU in a M1A2 SEP, indicated by the 4-bolt plate on the side of the hull and the black colored vent/exhaust plate on the rear hull between the left tail light and the engine grates:


This image I believe shows an M1A2 SEP with the Hawker batteries instead (no 4-bolt plate):


This image shows sort of a view of the top of the UAAPU on the M1A2 in the background (images also from Prime Portal):


This one is a closer view of the front part:


Those are about the best I can find for now. I hope this helps.

Your Commander's Hatch is very well done, especially considering the scale. Have you seen Vodnik's article on improving the 1:35 scale DML M1A2SEP kit? I believe you may find some useful information. His article also shows the top area of the hull for the UAAPU.

Keep up your great work!
r2d2
Visit this Community
England - South East, United Kingdom
Joined: April 13, 2006
KitMaker: 424 posts
Armorama: 419 posts
Posted: Saturday, May 12, 2012 - 09:12 PM UTC
Thanks so much Jeff, this additional pictures is just what I need. The link you have given me is also a bonus as it highlights some of the important things for this version. I will try to do the Hawkers battery instead. Is it true that they have issues with the performance of the UAAPU? Again your inputs are much appreciated!

Cheers!

Val
r2d2
Visit this Community
England - South East, United Kingdom
Joined: April 13, 2006
KitMaker: 424 posts
Armorama: 419 posts
Posted: Friday, May 18, 2012 - 08:58 AM UTC
Time for some small (very small) updates:
I have scratchbuilt the CITV for this build. I have the Revell M1A2 but looking at the CITV, the details are soft and looks just like an outline. I have to do it the hard way to improve this. This is how it looks after endless hours of building.
Note the CITV cover guard and the GPS mount.


It would snuggly fit on top of my finger tip!


This is how it looks on the turret. So far the essential parts of turning this tank into a M1A2 is almost complete.


What do you think?

Thanks for viewing.....more to come
 _GOTOTOP