_GOTOBOTTOM
Armor/AFV: Allied - WWII
Armor and ground forces of the Allied forces during World War II.
Hosted by Darren Baker
WIP - M3A1 Stuart
maestromae
Visit this Community
Lodz, Poland
Joined: September 03, 2011
KitMaker: 19 posts
Armorama: 19 posts
Posted: Thursday, August 16, 2012 - 07:55 AM UTC
Hi!

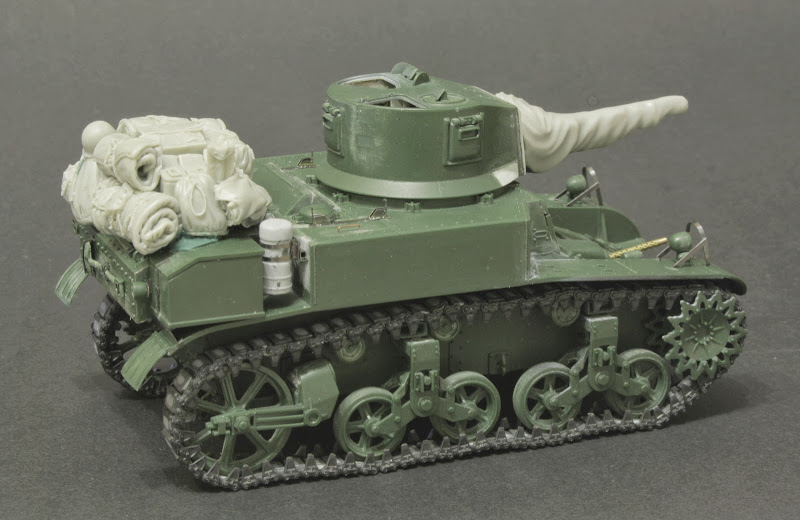
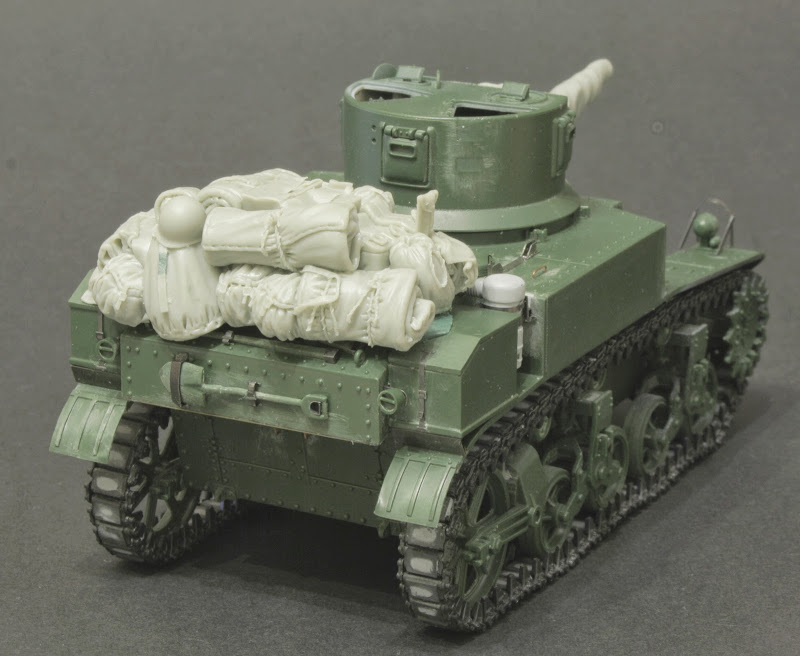
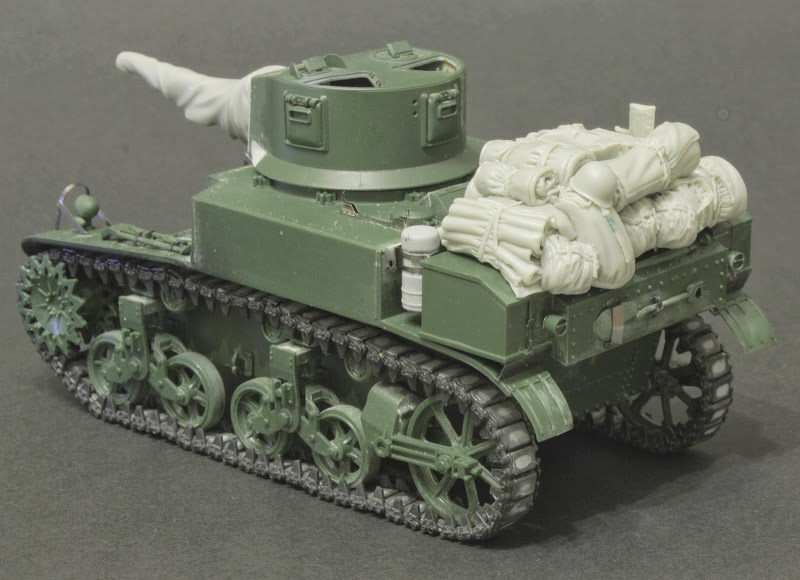
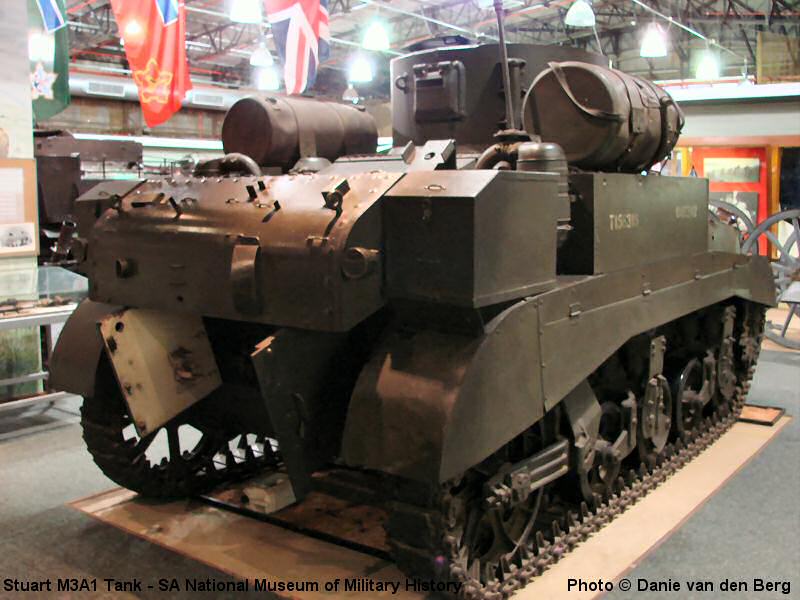
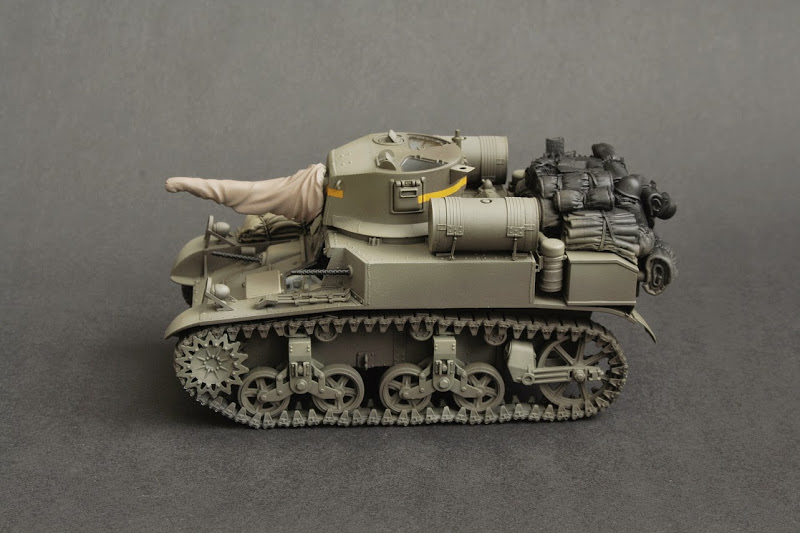
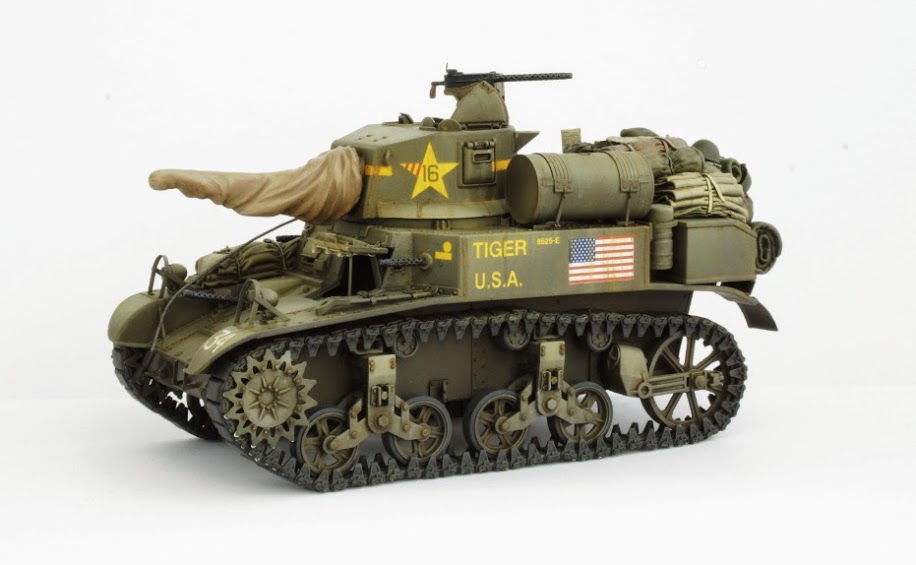
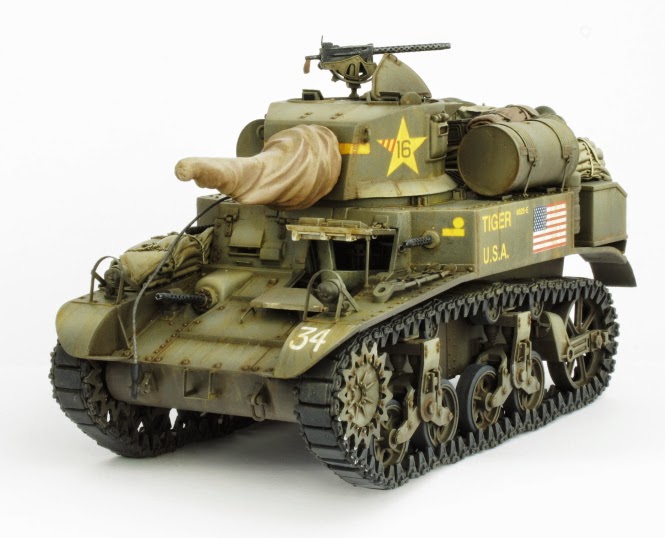
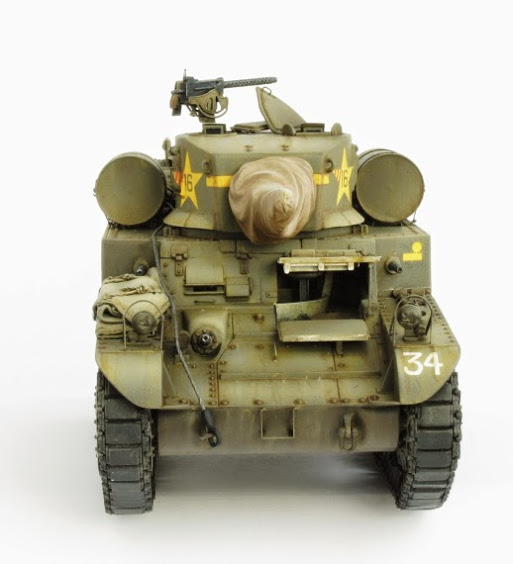
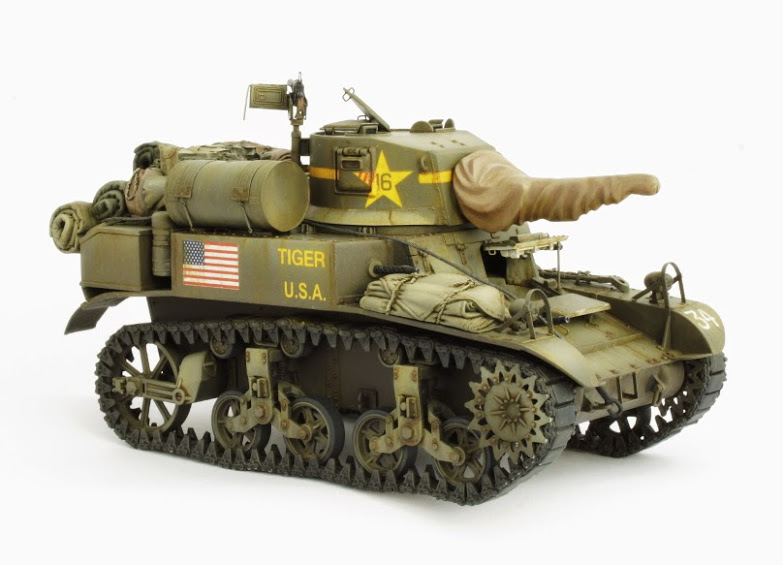
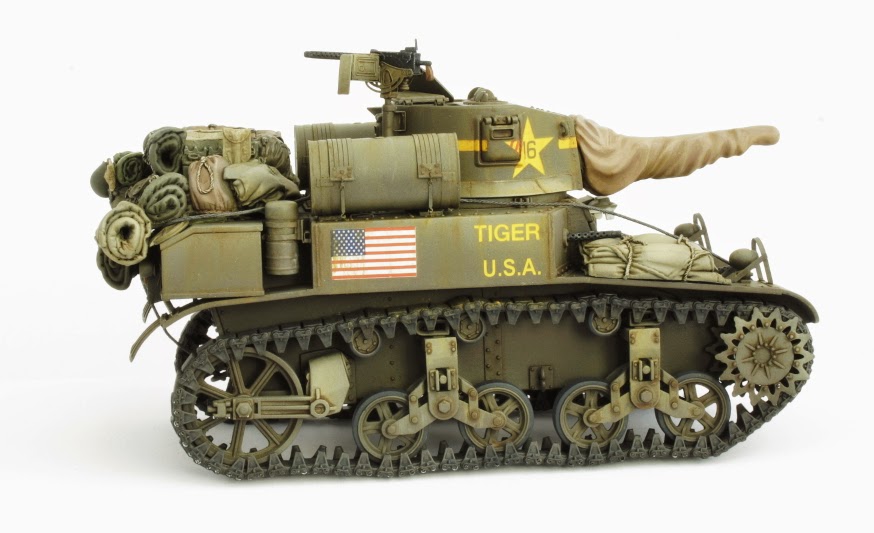
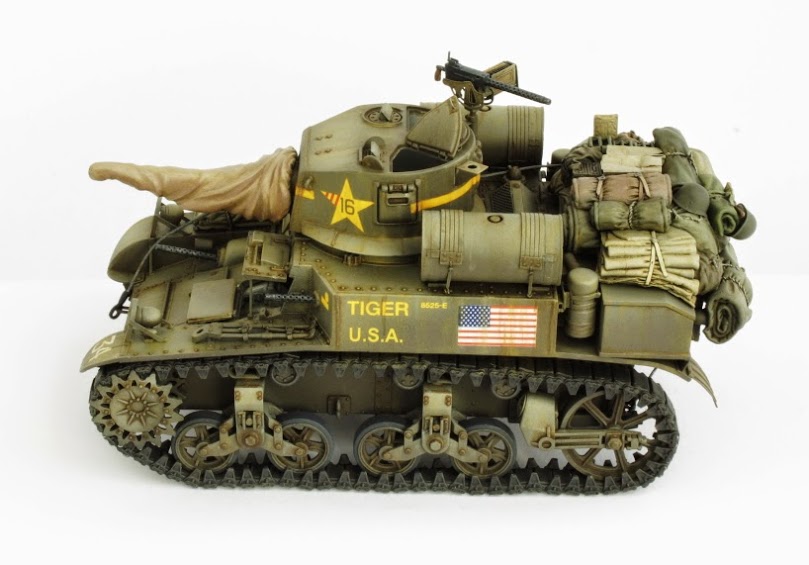
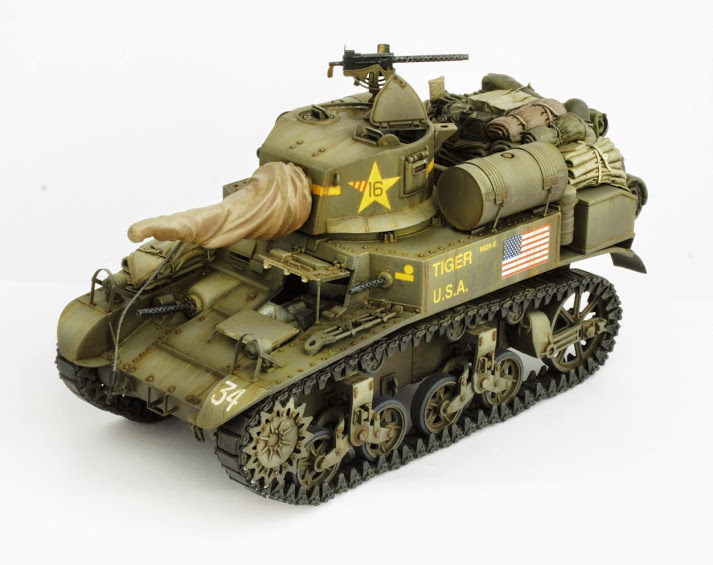
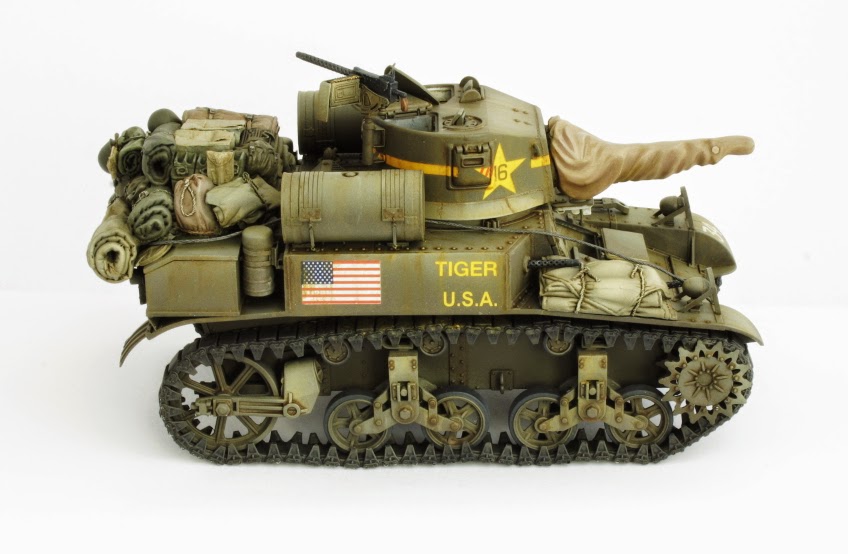
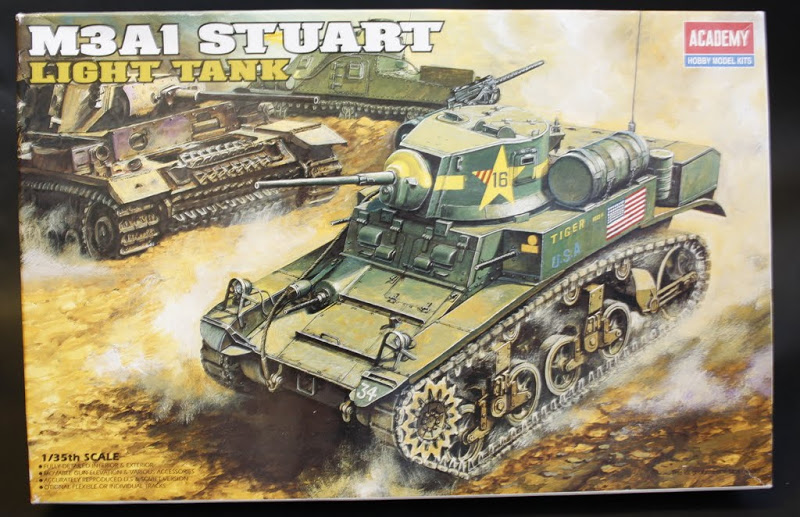
Recently I've started building M3A1 Stuart from Academy.


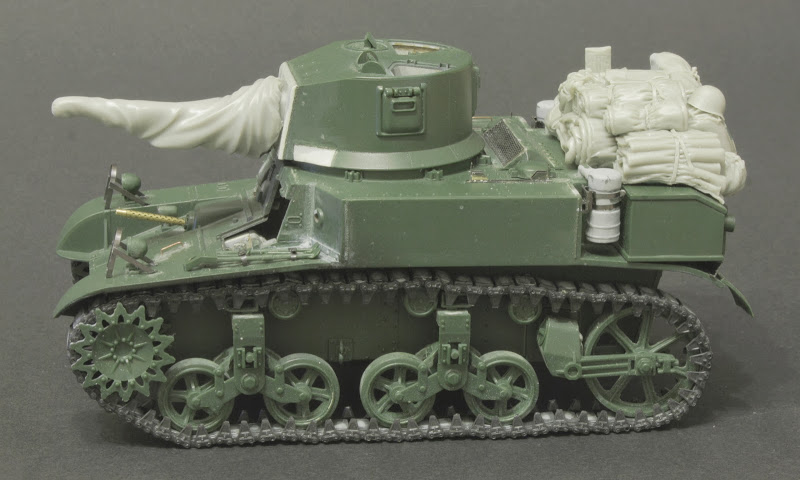
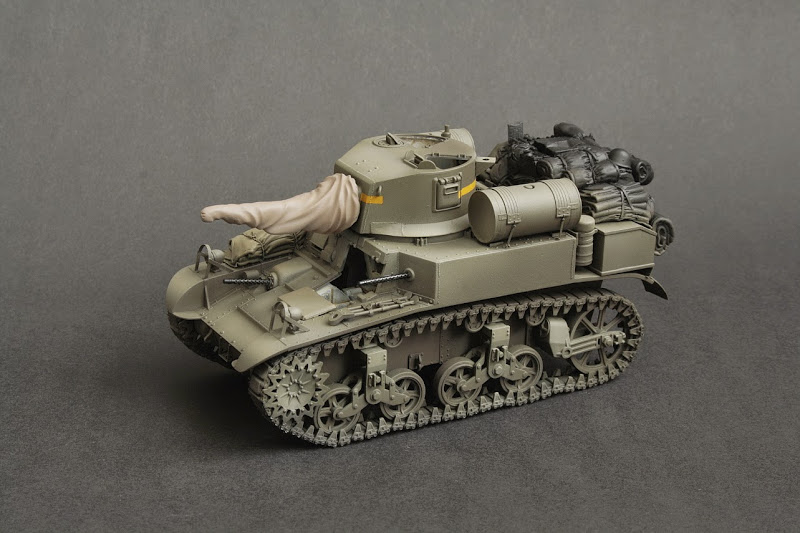
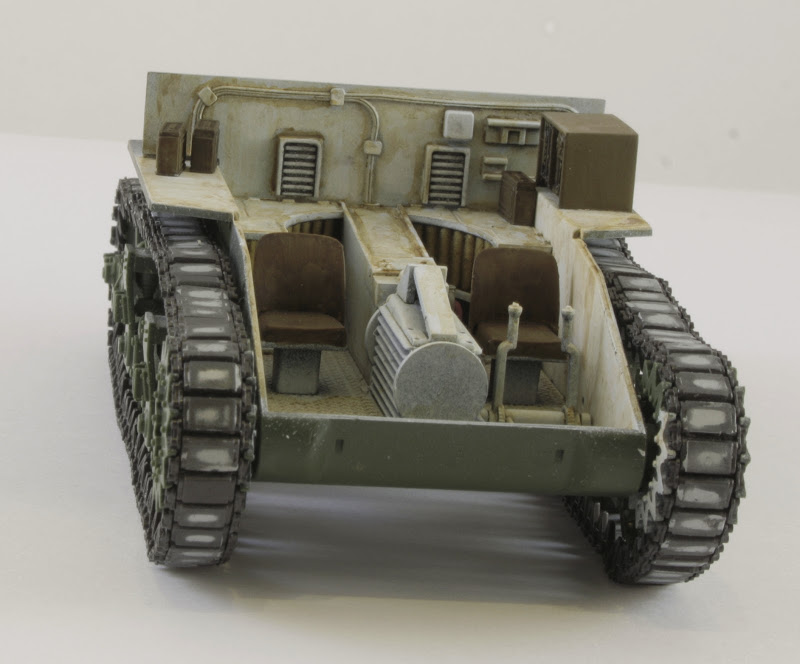
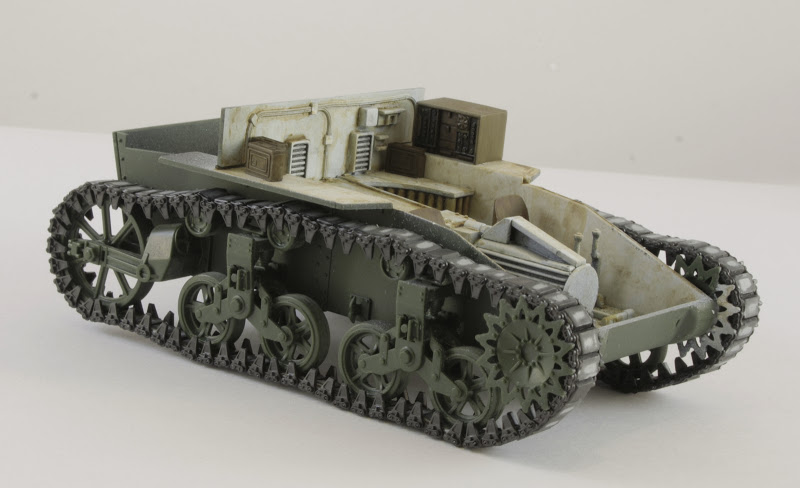
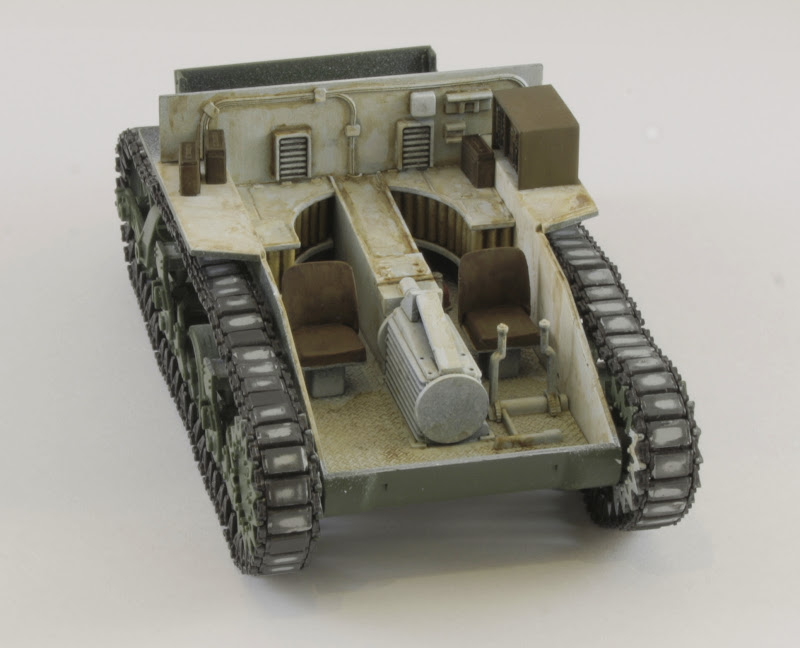
I managed to build interior of the hull, and suspension with separate links tracks. Tracks needed some putty, but the final effect is good enough 
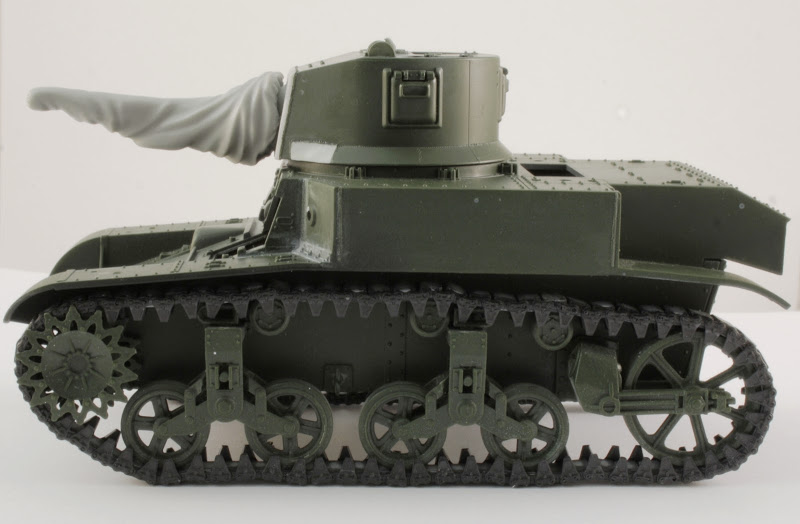
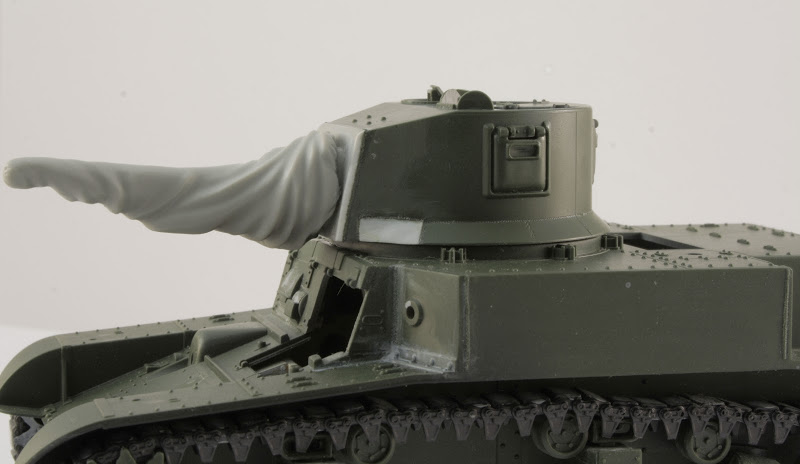
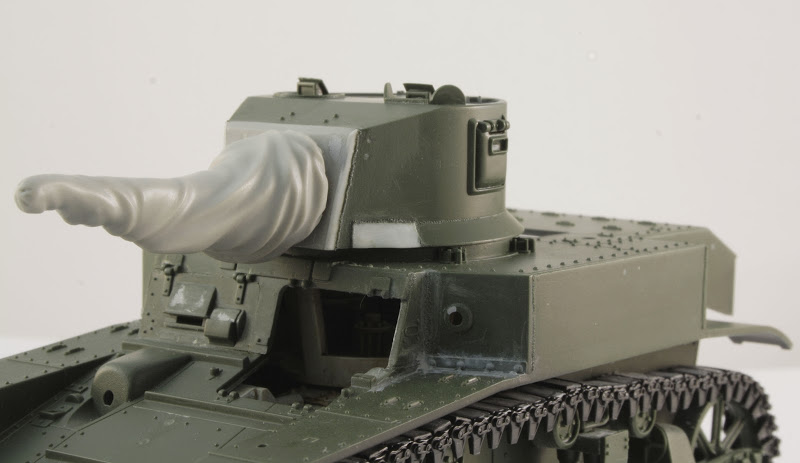
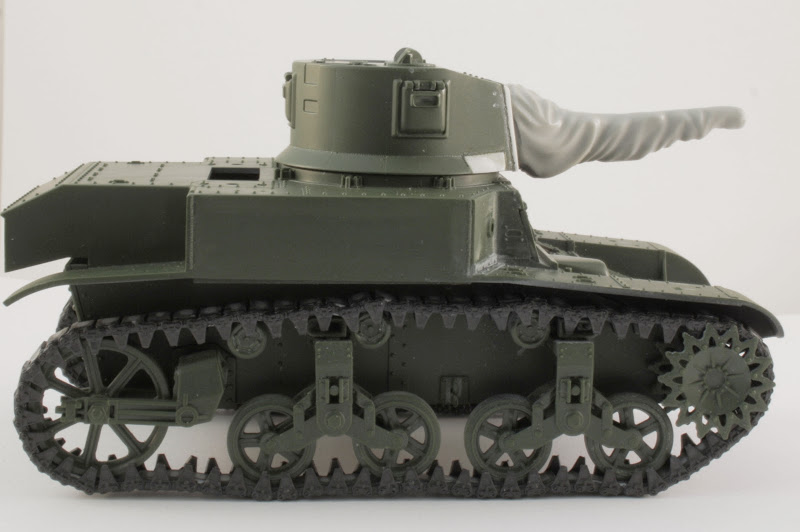
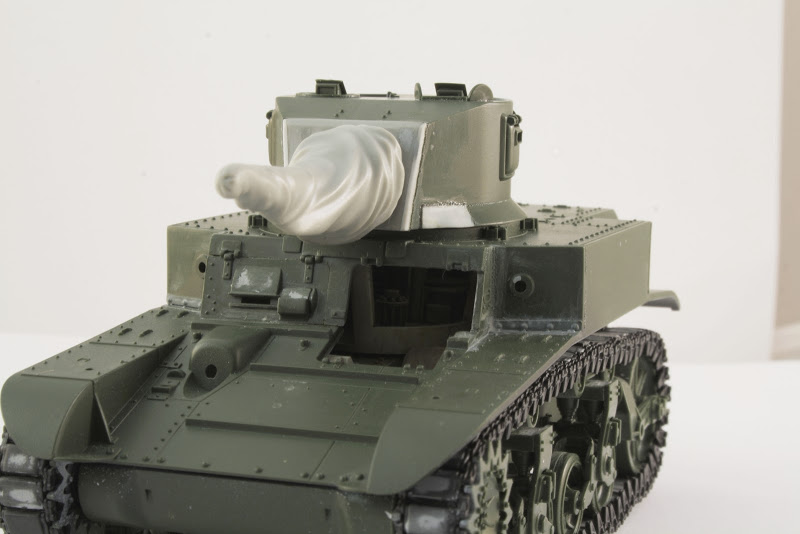
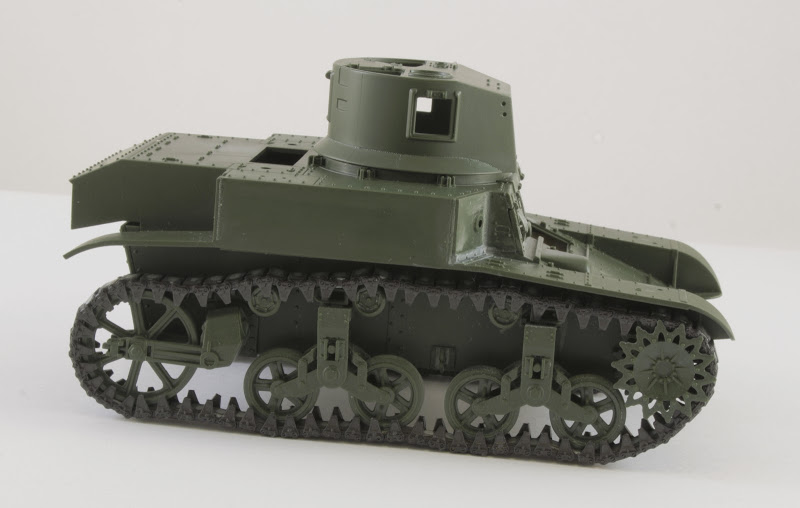
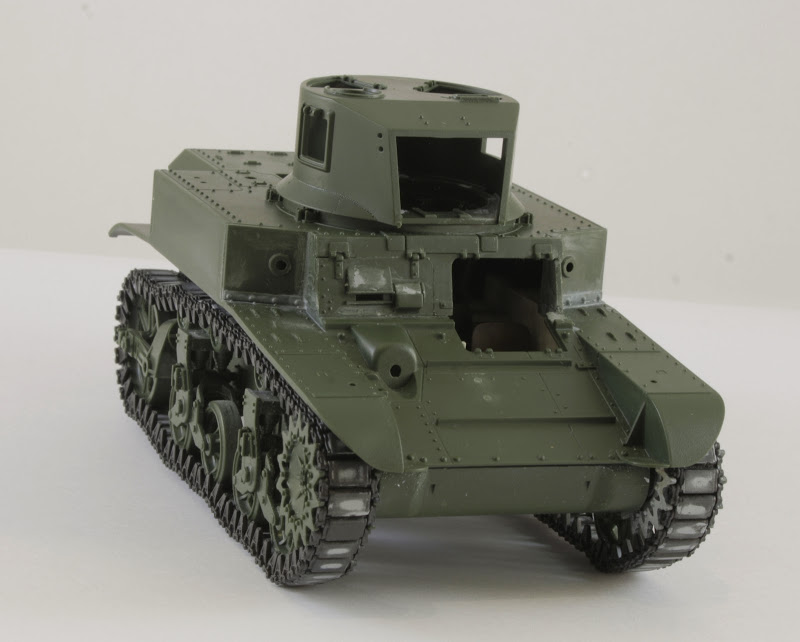
I've removed some rivets, that were not suitable for the M3A1 version, and added some weldings.

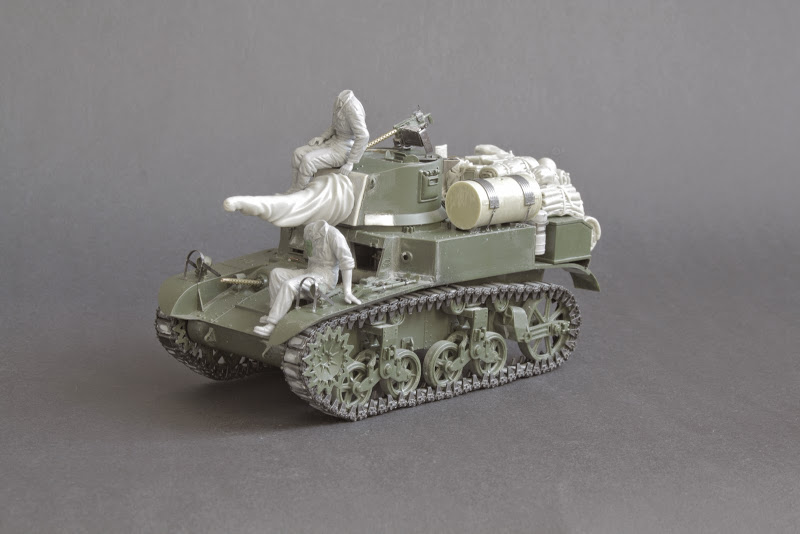
That's how it looks right now:


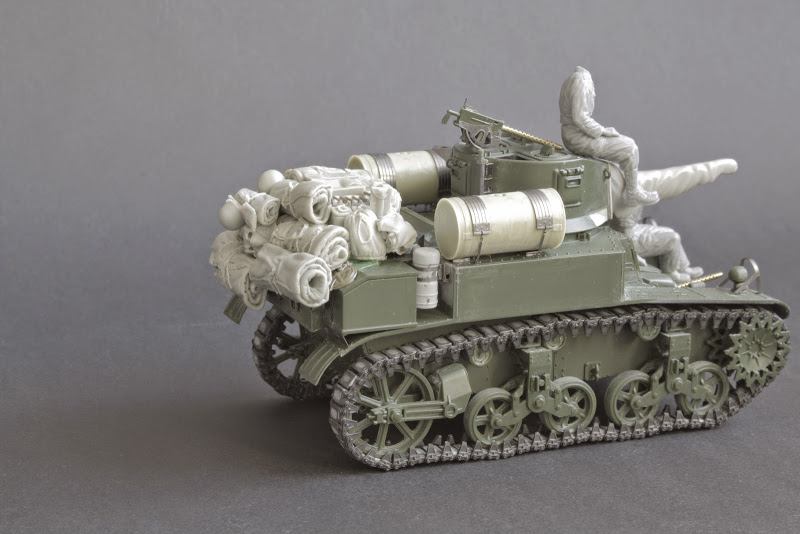
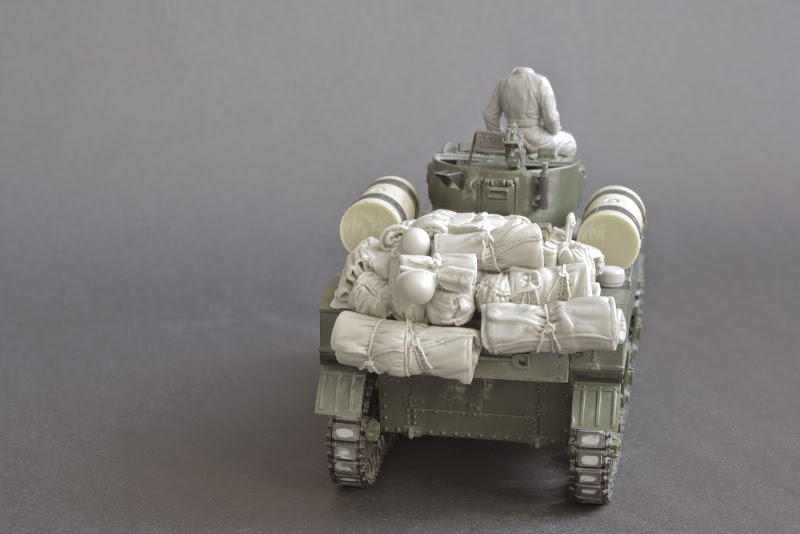
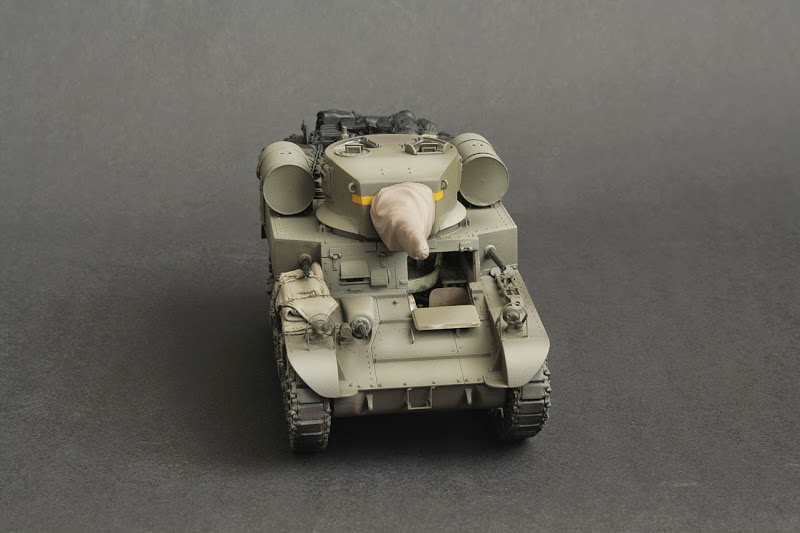
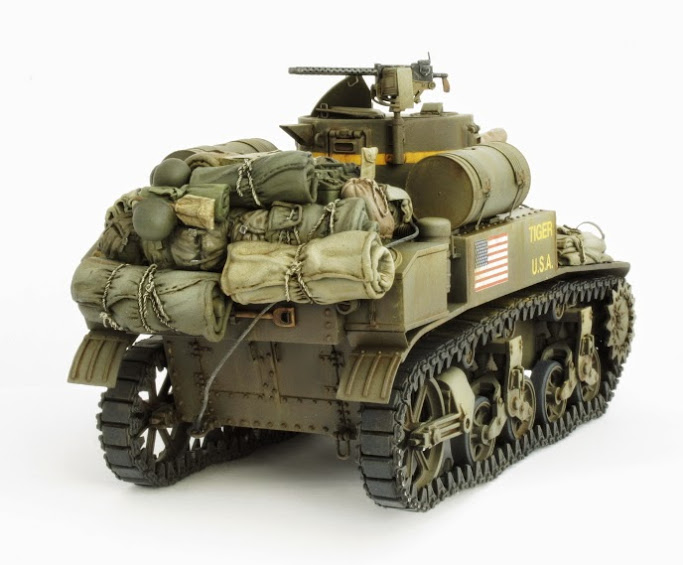
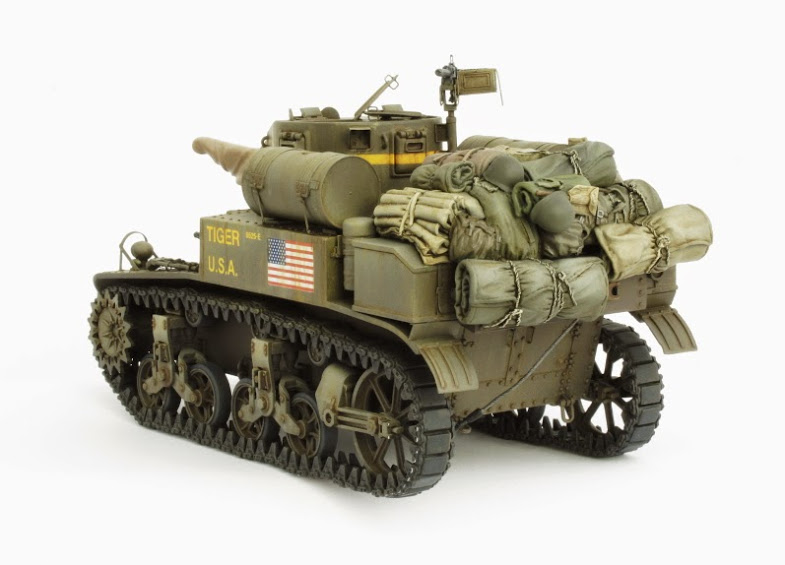
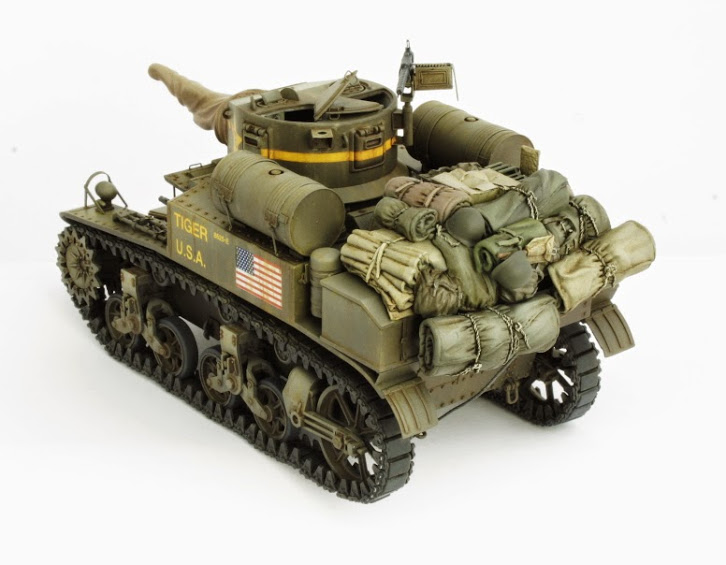
My first idea was to build it out-of-the-box, but finally I bought some accessories:


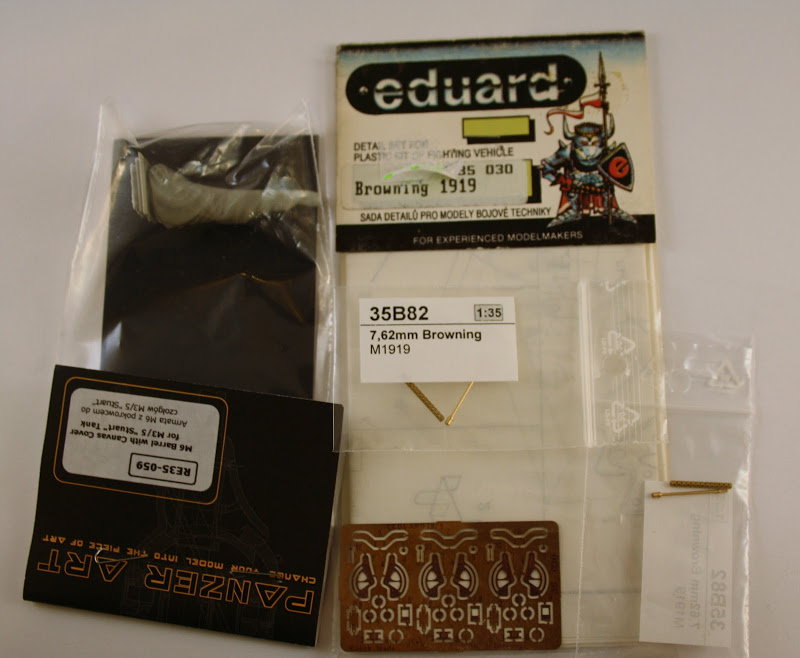
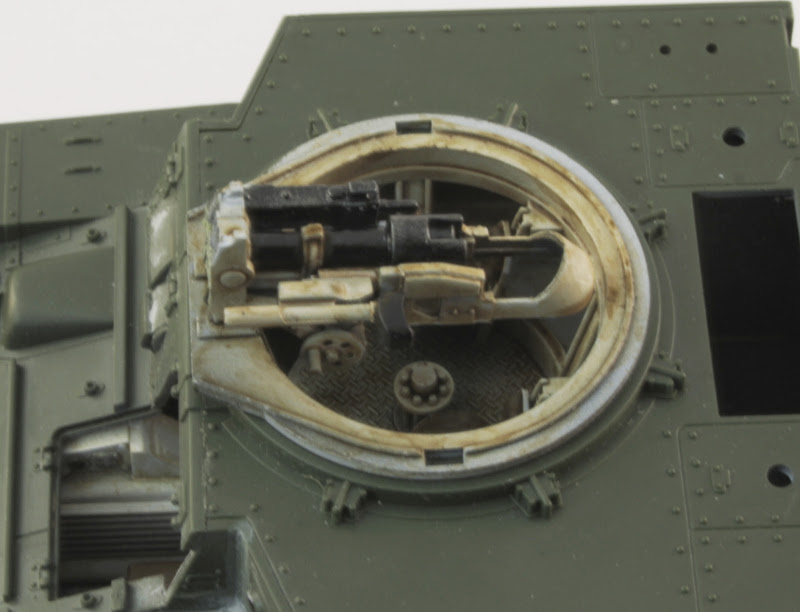
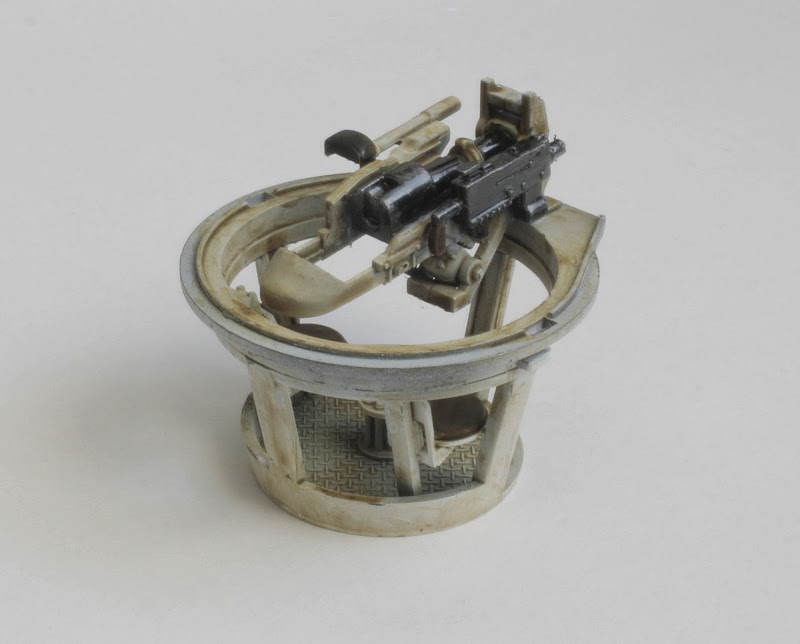
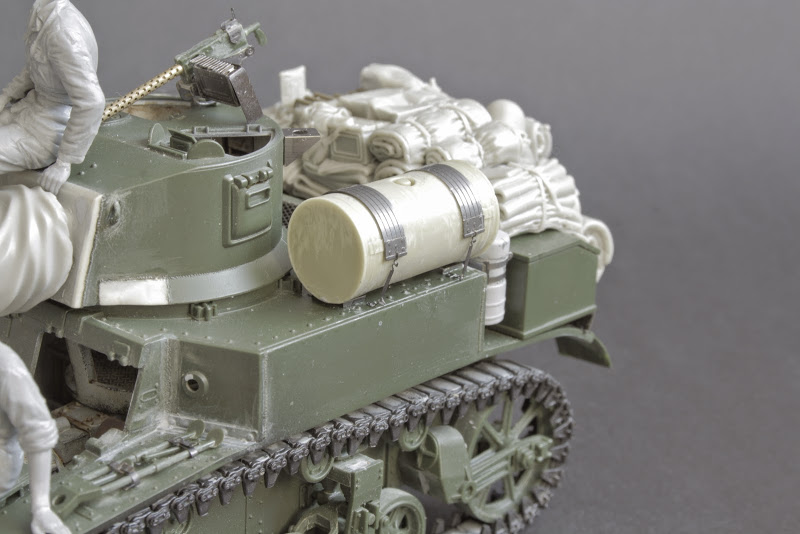
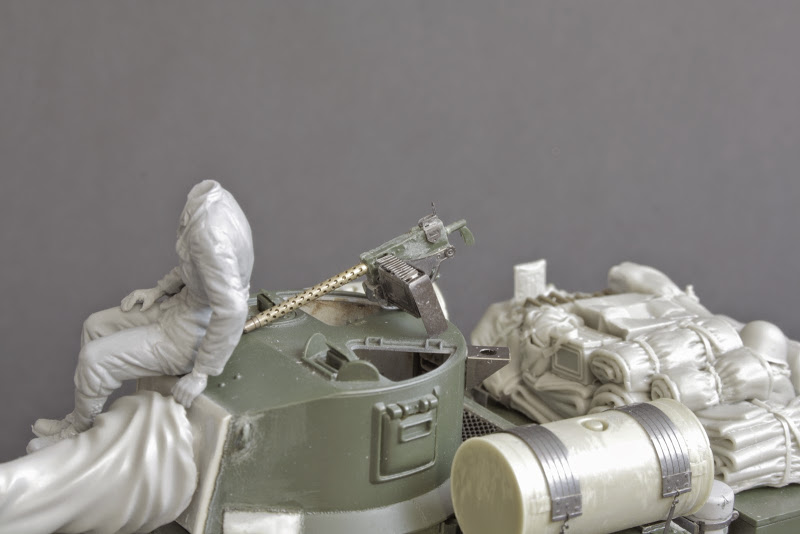
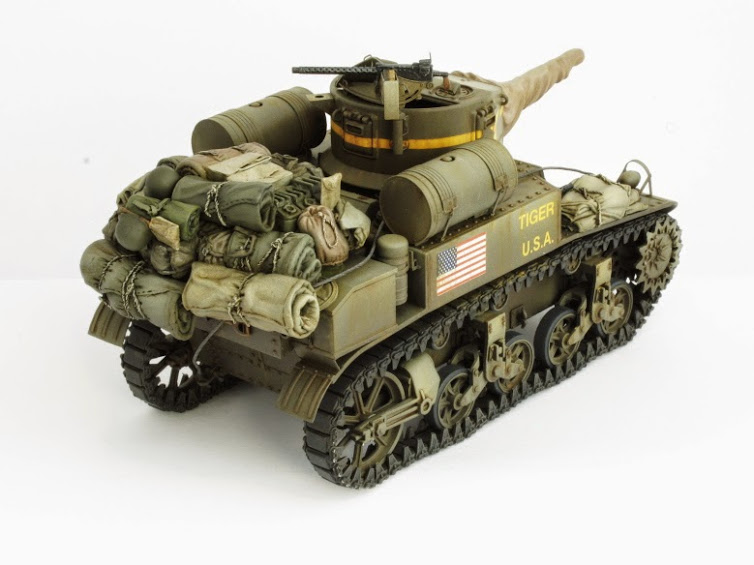
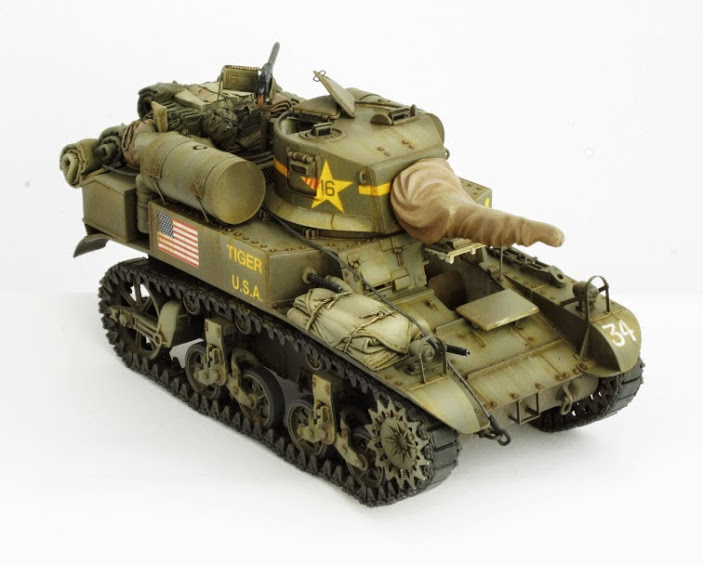
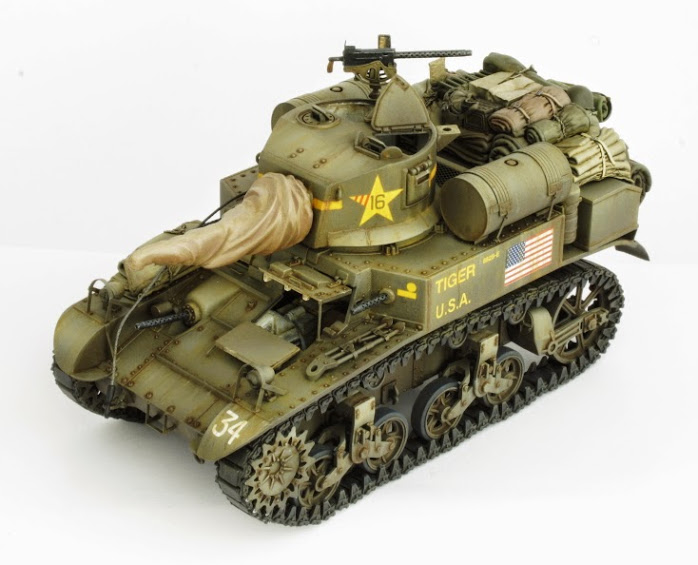
RB model Browning barrels, M6 barrel with canvas cover from Panzer Art, and Eduard Browning mounts.

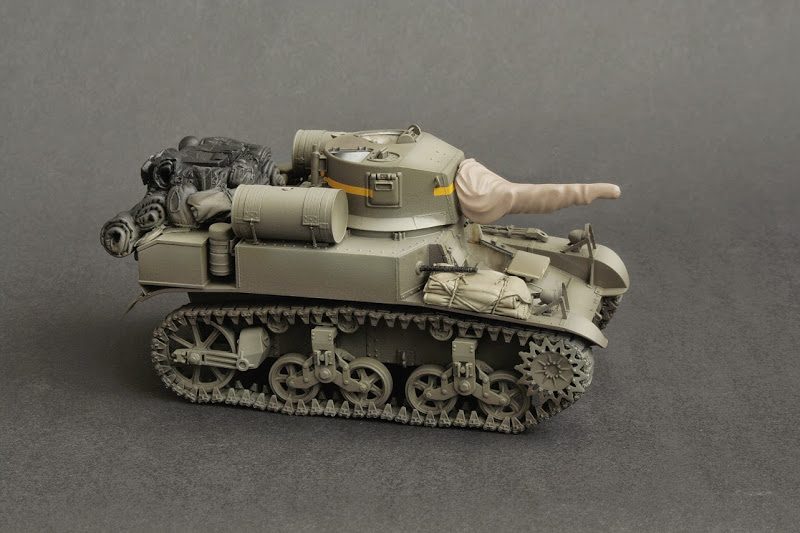
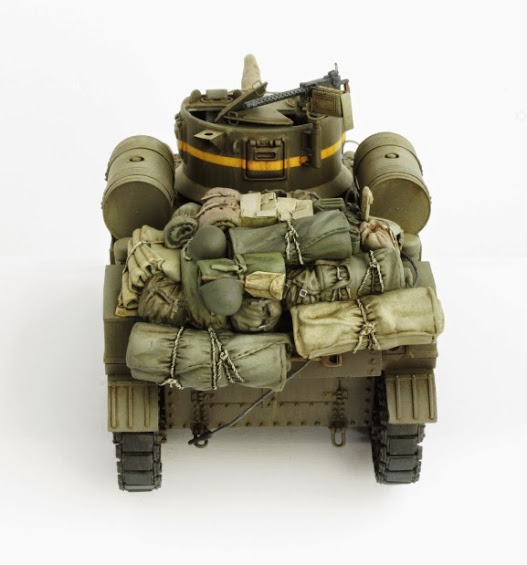
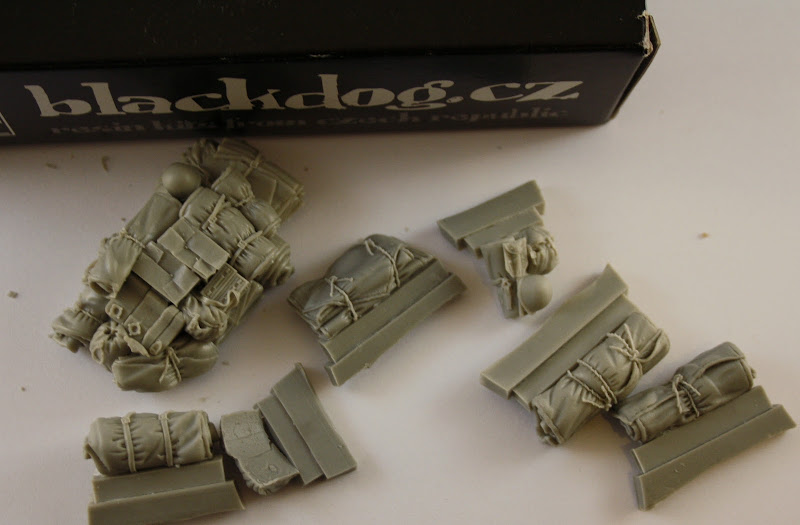
I've bought also some additionall stuff from Black Dog:


Right now I'm waiting for a courier with Eduard photo etched parts for this kit.

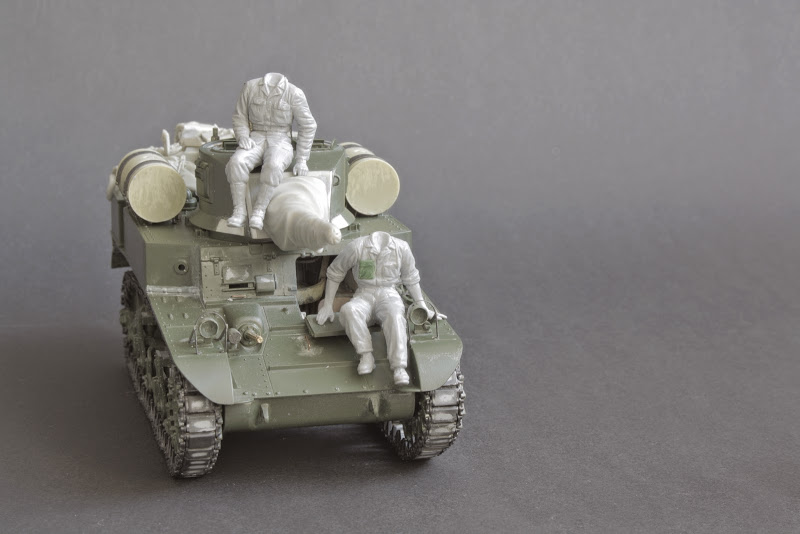
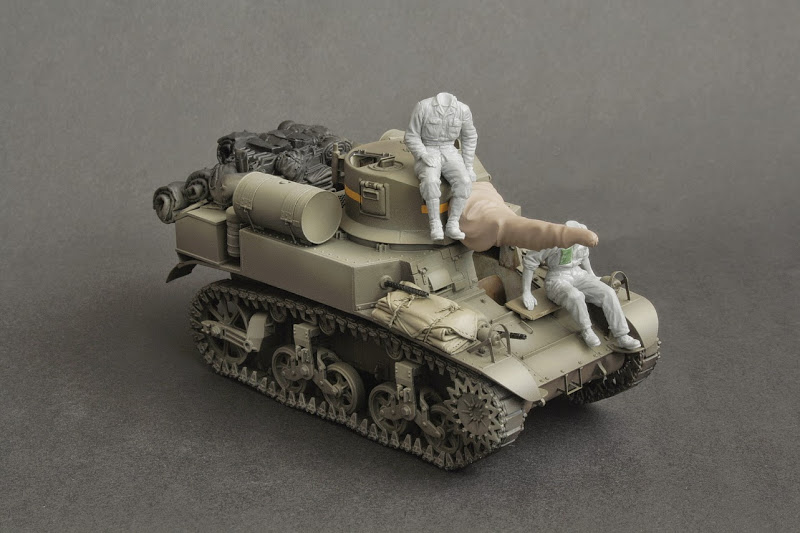
I want to build the tank with markings from Tunisie 1942, and I've bought a set of tank crew from Miniart: click. Will this set be suitable for Tunisie?

Thanks!
ericadeane
Visit this Community
Michigan, United States
Joined: October 28, 2002
KitMaker: 4,021 posts
Armorama: 3,947 posts
Posted: Thursday, August 16, 2012 - 09:16 AM UTC
Yes that set will work for you. ONe thing to consider is this: the Stuart's tracks were very tight. No visible sagging.
Dangeroo
#023
Visit this Community
Zurich, Switzerland
Joined: March 13, 2009
KitMaker: 2,058 posts
Armorama: 1,656 posts
Posted: Thursday, August 16, 2012 - 10:27 PM UTC
Nice work so far! Looking forward to more! I agree with the tracks, they should be very tight, unless you're building a wreck.

Cheers!
Stefan
maestromae
Visit this Community
Lodz, Poland
Joined: September 03, 2011
KitMaker: 19 posts
Armorama: 19 posts
Posted: Friday, August 17, 2012 - 01:20 AM UTC
Thanks for your comments. I agree, that the tracks should be tighter. I'v seen very few photos where sagging is visible, and I've tried to stretch the tracks, but with no success. Probably that's why Italeri presents M3A1 on their box with sagging :/

I've got two choices: leave it as it is with some sagging, or switch to the rubber tracks, which are worse than the plastic ones. Difficult decision :/
maestromae
Visit this Community
Lodz, Poland
Joined: September 03, 2011
KitMaker: 19 posts
Armorama: 19 posts
Posted: Friday, August 17, 2012 - 05:37 AM UTC
I've mounted M6 barrel, and itroduced some changes to the turret. Turret interior is initially painted. I've also reduced tracks sagging, and I think they look acceptable now. What do you think?


maestromae
Visit this Community
Lodz, Poland
Joined: September 03, 2011
KitMaker: 19 posts
Armorama: 19 posts
Posted: Monday, November 11, 2013 - 08:27 AM UTC
It's been a while since the last update. Current status:


ericadeane
Visit this Community
Michigan, United States
Joined: October 28, 2002
KitMaker: 4,021 posts
Armorama: 3,947 posts
Posted: Monday, November 11, 2013 - 09:18 AM UTC
Good progress! I've got a question about that tarp on the barrel -- can you point to where you've seen something like that? I just don't recall any US tank that would have need for a canvas shroud for its gun tube.
maestromae
Visit this Community
Lodz, Poland
Joined: September 03, 2011
KitMaker: 19 posts
Armorama: 19 posts
Posted: Monday, November 11, 2013 - 09:38 AM UTC


M3 tank, USA 1942
source: Wydawnictwo Militaria 044 - M3 Stuart Light Tank
PlasticGeezer
Visit this Community
Louisiana, United States
Joined: September 17, 2013
KitMaker: 28 posts
Armorama: 27 posts
Posted: Monday, November 11, 2013 - 10:24 AM UTC
Looking good! Gonna need a lot of different shades of green for the stowage, though. Looking forward to more updates.
Railspltr
Visit this Community
United States
Joined: March 19, 2010
KitMaker: 96 posts
Armorama: 62 posts
Posted: Monday, November 11, 2013 - 01:18 PM UTC
You have the exterior PE! I built one of these before I knew that that kind of PE existed and scratch-built the external fuel tank hardware. I also put in the wiring for the front head lamps. It's a fun kit with a little bit of work you can make a nice model.
tankmodeler
#417
Visit this Community
Ontario, Canada
Joined: March 01, 2004
KitMaker: 3,123 posts
Armorama: 2,539 posts
Posted: Monday, November 11, 2013 - 03:34 PM UTC
Damian,

Before you glue down the stowage, take a look at these photos of the aft end of M3A1s:


The rear overhang of the M3A1s is actually curved and then screwed down to the undelying franework with nearly flush head screws.

Also, the 25 gal fuel tanksin the kit do not have the universally seen rubberised outer layer & handles, as shown in the last photo.

It's a shame, but the Academy kits are not very good and in some ways are not as good as the older Tamiya kit.

Paul
maestromae
Visit this Community
Lodz, Poland
Joined: September 03, 2011
KitMaker: 19 posts
Armorama: 19 posts
Posted: Monday, January 05, 2015 - 05:40 PM UTC
I'm back with stuart update

Indeed the back of academy's stuart is incorrect, but it won't be visible on my model. However it may be correct for the Tunisian "Tiger", as on photos it has side brownings, something that was rather present on M3 tanks.

Current state:


SiStorey
Visit this Community
England - North East, United Kingdom
Joined: March 14, 2014
KitMaker: 242 posts
Armorama: 161 posts
Posted: Monday, January 05, 2015 - 05:46 PM UTC
Looking really good so far Damian, specially the interior. What washes did you use??
maestromae
Visit this Community
Lodz, Poland
Joined: September 03, 2011
KitMaker: 19 posts
Armorama: 19 posts
Posted: Saturday, January 24, 2015 - 05:47 PM UTC
Well I washed the interior two years ago so I don't remember much but I'm sure I used lavado wash from Vallejo

First session with airbrush:


Cheers
ericadeane
Visit this Community
Michigan, United States
Joined: October 28, 2002
KitMaker: 4,021 posts
Armorama: 3,947 posts
Posted: Saturday, January 24, 2015 - 08:16 PM UTC
Looking nice Damian. Just check the length of the sponson .30 cal MG barrels. They seem too long by a few millimeters.
tankmodeler
#417
Visit this Community
Ontario, Canada
Joined: March 01, 2004
KitMaker: 3,123 posts
Armorama: 2,539 posts
Posted: Sunday, January 25, 2015 - 04:47 AM UTC

Quoted Text

Looking nice Damian. Just check the length of the sponson .30 cal MG barrels. They seem too long by a few millimeters.


Given that it's an M3A1, there shouldn't be any sponson MG barrels or even any indication of MGs at all. The M3A1s were never fitted with the MGs and the sponson front plates never had the mounts or the holes.

Paul
Removed by original poster on 01/26/15 - 07:14:01 (GMT).
maestromae
Visit this Community
Lodz, Poland
Joined: September 03, 2011
KitMaker: 19 posts
Armorama: 19 posts
Posted: Sunday, January 25, 2015 - 12:14 PM UTC

Quoted Text

Looking nice Damian. Just check the length of the sponson .30 cal MG barrels. They seem too long by a few millimeters.


Yup you're right. I will fix it, thanks!
maestromae
Visit this Community
Lodz, Poland
Joined: September 03, 2011
KitMaker: 19 posts
Armorama: 19 posts
Posted: Sunday, January 25, 2015 - 12:16 PM UTC

Quoted Text


Quoted Text

Looking nice Damian. Just check the length of the sponson .30 cal MG barrels. They seem too long by a few millimeters.


Given that it's an M3A1, there shouldn't be any sponson MG barrels or even any indication of MGs at all. The M3A1s were never fitted with the MGs and the sponson front plates never had the mounts or the holes.

Paul


If they never had so, then how could it be:


Welded hull, m3a1 turret - I think it is M3A1.
jrutman
Visit this Community
Pennsylvania, United States
Joined: April 10, 2011
KitMaker: 7,941 posts
Armorama: 7,934 posts
Posted: Sunday, January 25, 2015 - 07:46 PM UTC
Gret job so far on one of my favorite tanks
J
tankmodeler
#417
Visit this Community
Ontario, Canada
Joined: March 01, 2004
KitMaker: 3,123 posts
Armorama: 2,539 posts
Posted: Sunday, January 25, 2015 - 10:38 PM UTC

Quoted Text


If they never had so, then how could it be:


Welded hull, m3a1 turret - I think it is M3A1.


Well it looks like an M3A1, to be sure, but it's hard to know unless you see inside.

Some of the last M3s had the M3A1 turret and I think (I'll check tonight after I get home from work) some of those last M3s had welded sponsons. The real way to tell is if the tank has a turret basket, only M3A1s had those. And I believe (believe mind, I could be wrong) that almost all M3A1s had flat faces to the sponsons, i.e. no MGs with some of the very earliest having the MG hole but a round plate welded over it at the factory.

Like Shermans, the manufacturing details chaged with time so there are some transitional units between most of the different official variants.

Paul
robw_uk
Visit this Community
England - North East, United Kingdom
Joined: June 22, 2010
KitMaker: 1,224 posts
Armorama: 1,207 posts
Posted: Sunday, February 08, 2015 - 10:12 PM UTC
really nice work - love you all that load looks on such a small tank... look forward to more progress
MikeyBugs95
Visit this Community
New York, United States
Joined: May 27, 2013
KitMaker: 2,210 posts
Armorama: 1,712 posts
Posted: Sunday, February 08, 2015 - 10:40 PM UTC
Damian, I notice some gradiation in the OD in some places. How did you achieve this? Pre-shading?
maestromae
Visit this Community
Lodz, Poland
Joined: September 03, 2011
KitMaker: 19 posts
Armorama: 19 posts
Posted: Friday, February 20, 2015 - 07:31 PM UTC

Quoted Text

Damian, I notice some gradiation in the OD in some places. How did you achieve this? Pre-shading?


I'm not using preshading, just mixing colors and making different tones

Update for today:


Academy decals were terrible to put on. I've used Wamod acrylics remover to put them in place.

Hope you like it!

Cheers
AFVNEWS
Visit this Community
Ontario, Canada
Joined: June 14, 2006
KitMaker: 17 posts
Armorama: 15 posts
Posted: Saturday, February 21, 2015 - 02:01 AM UTC
One thing that always seems to get overlooked on the Academy M3A1 is the fact that the right hand MG should be moved more to the outer edge of the sponson. Both MGs were fed from the left side, so the right sponson MG had to be shifted over to the outside of the sponson.
 _GOTOTOP