_GOTOBOTTOM
Armor/AFV: Modern - USA
Modern Armor, AFVs, and Support vehicles.
Hosted by Darren Baker
M1A1 Abrams - All Bout Da Bones -Thunder Run
ProfessorP
Visit this Community
Minnesota, United States
Joined: February 20, 2007
KitMaker: 339 posts
Armorama: 325 posts
Posted: Wednesday, July 24, 2013 - 01:46 PM UTC
Well, time to try my hand at a piece of modern armor. This build is part of the group build that is going to be displayed at the Fort Stewart Museum as part of the commemoration of the 3rd ID Thunder Run (TR) into Baghdad in 2003. Specifically, as indicated in the title, I'm doing "All Bout Da Bones, an Abrams that was in the column for that first TR.

This will be a pretty straight forward out-of-the-box build with exceptions only to represent specific features of the tank as it would have appeared during the TR.


However, having said that, the Dragon kit is a monster with over 750 pieces in the box! Actually, I think they include the individual track links in that count but still...


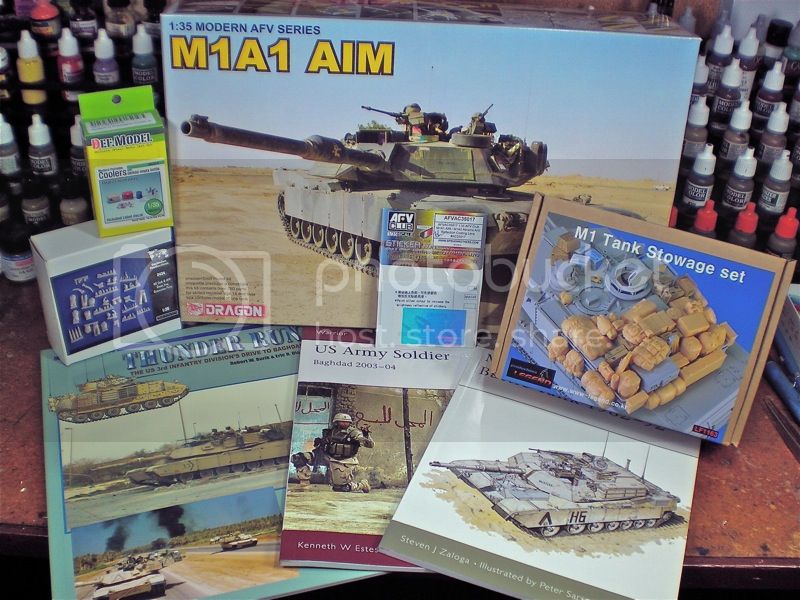
So, as you can see from the photo, I'm using the following:
• Dragon kit #3535 M1A1 AIM
• Legend M1 Tank Stowage set (LF1163)
• AFV Club #AC35017 - M1A1 AIM / M1A2 Abrams Anti Reflection • Coating Lens stickers
• Def.Model Modern Portable Coolers
• Verlinden US Tank & AFV Crews-Iraq (2434)

I picked up Bob Burik's Concord publication on Thunder Run which will be my main reference along with some specific photos of All Bout Da Bones. Also grabbed Osprey's book on the Abrams (just in case) as well as their book on the US Army Soldier in Baghdad 2003-4. I'll use the latter for reference on the crew uniforms, gear and equipment.

Only thing left to pick up are the .50 cal shells and clips from LiveResin. Apparently the crews fired ALOT of .50 cal rounds and these will be prominently displayed on the turret.

So that's it. Hoping to start this weekend and we'll see where it goes!

Cheers!
retiredyank
Visit this Community
Arkansas, United States
Joined: June 29, 2009
KitMaker: 11,610 posts
Armorama: 7,843 posts
Posted: Wednesday, July 24, 2013 - 01:52 PM UTC
Your photo link appears to be broken.
ProfessorP
Visit this Community
Minnesota, United States
Joined: February 20, 2007
KitMaker: 339 posts
Armorama: 325 posts
Posted: Wednesday, July 24, 2013 - 01:58 PM UTC
Oops, sorry. Fixed it!
M4A1Sherman
Visit this Community
New York, United States
Joined: May 02, 2013
KitMaker: 4,403 posts
Armorama: 4,078 posts
Posted: Wednesday, July 24, 2013 - 02:57 PM UTC

Quoted Text

Well, time to try my hand at a piece of modern armor. This build is part of the group build that is going to be displayed at the Fort Stewart Museum as part of the commemoration of the 3rd ID Thunder Run (TR) into Baghdad in 2003. Specifically, as indicated in the title, I'm doing "All Bout Da Bones, an Abrams that was in the column for that first TR.

This will be a pretty straight forward out-of-the-box build with exceptions only to represent specific features of the tank as it would have appeared during the TR.


However, having said that, the Dragon kit is a monster with over 750 pieces in the box! Actually, I think they include the individual track links in that count but still...


So, as you can see from the photo, I'm using the following:
• Dragon kit #3535 M1A1 AIM
• Legend M1 Tank Stowage set (LF1163)
• AFV Club #AC35017 - M1A1 AIM / M1A2 Abrams Anti Reflection • Coating Lens stickers
• Def.Model Modern Portable Coolers
• Verlinden US Tank & AFV Crews-Iraq (2434)

I picked up Bob Burik's Concord publication on Thunder Run which will be my main reference along with some specific photos of All Bout Da Bones. Also grabbed Osprey's book on the Abrams (just in case) as well as their book on the US Army Soldier in Baghdad 2003-4. I'll use the latter for reference on the crew uniforms, gear and equipment.

Only thing left to pick up are the .50 cal shells and clips from LiveResin. Apparently the crews fired ALOT of .50 cal rounds and these will be prominently displayed on the turret.

So that's it. Hoping to start this weekend and we'll see where it goes!

Cheers!


Hi, All! Don, your 761st M4A3 is looking good! The DRAGON M1A1 AIM #3535 contains the individual track links; The DRAGON M1A2 SEP #3536 has the "DS" tracks, which are just as good as the individual links- I prefer them, for US AFVs, anyway.

Most US tracked AFVs use "Live Tracks", which actually coil up on themselves, thereby reducing track wear, aiding fuel economy, and extending track life. Live tracks are always adjusted as tightly as possible, short of binding up the running gear. Live tracks have been used on US AFVs since before WWII- Our basic M4 Medium had an average track life of 2500 miles, whereas GERMAN armor, such as Panthers and Tigers, could only wring 500 miles out of their tracks, provided they survived that long...

Enjoy!!!
panamadan
Visit this Community
Minnesota, United States
Joined: July 20, 2004
KitMaker: 1,513 posts
Armorama: 1,449 posts
Posted: Wednesday, July 24, 2013 - 03:43 PM UTC
I'll be watching Don!
Dan
Captin_Caveman_III
Visit this Community
Louisiana, United States
Joined: October 20, 2008
KitMaker: 1,069 posts
Armorama: 1,062 posts
Posted: Thursday, July 25, 2013 - 02:12 AM UTC
Can't wate to see the progress photos for this build.
ProfessorP
Visit this Community
Minnesota, United States
Joined: February 20, 2007
KitMaker: 339 posts
Armorama: 325 posts
Posted: Tuesday, September 10, 2013 - 02:05 PM UTC
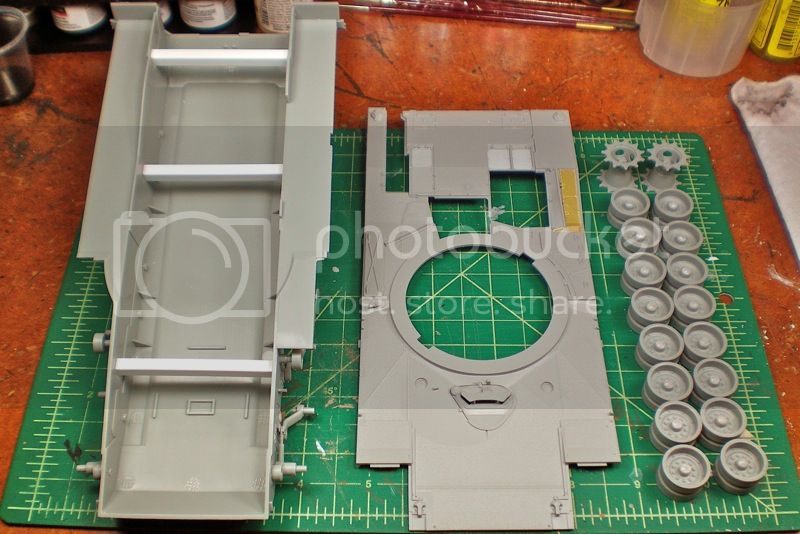
Work finally got underway a couple weeks ago but this is the first chance I've had to take a photo. Road wheels and suspension are assembled. Lower hull was badly warped which I suspected but didn't know how badly until I attempted to align the wheels and suspension arms. Cross braces glued into the tub helped quite a bit but still didn't get it perfect. Once the upper hull is clamped and glued into place I'm certain it will straighten out that last tiny bit.


Work has begun on the upper hull. Still trying to decide how far to go with it before attaching to the lower hull. I might do that next since I anticipate several clamping points needed to get it to fit properly. Once it's in place it will be easier to get the multiple rear deck pieces aligned. Speaking of which, I think it's a really poor design for Dragon to have the rear deck assembled in several pieces when one or two would have done the trick. The term "over engineered" comes to mind.

Road wheels will need some chunking on the tires and I have to start on the tracks as well. There are punch marks on the inside of each tread piece that need to be sanded off and the rubber road surface will need some chunking depicted too. Others who have gone before me seem to have a pretty good method for doing this but I'll have to pick up a soldering iron first. I guess that will come in handy when I get around to the PE baskets anyway.

That's it for now.
ProfessorP
Visit this Community
Minnesota, United States
Joined: February 20, 2007
KitMaker: 339 posts
Armorama: 325 posts
Posted: Monday, October 07, 2013 - 04:30 PM UTC
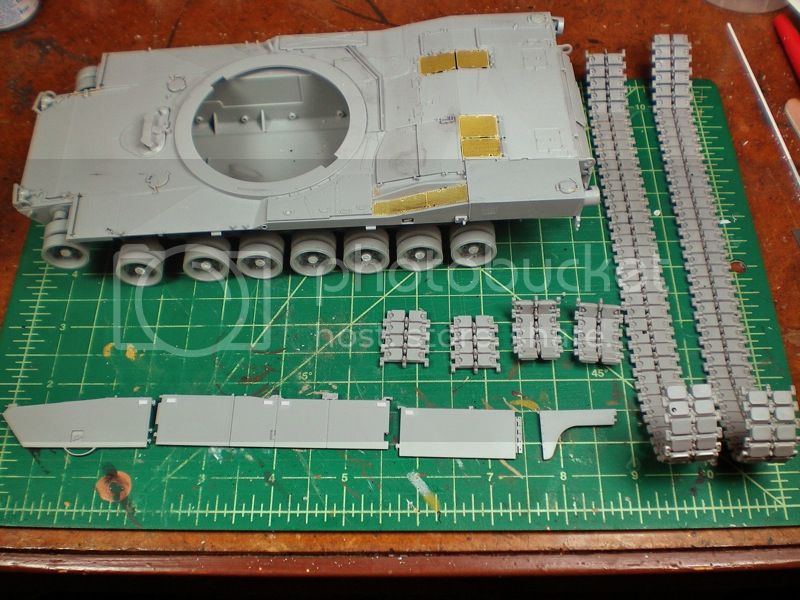
Update: Well, I've had some time at the bench lately and managed to make some progress. This kit is really testing my patience however as the instructions are really unclear about the actual placement of some parts and everything seems to fit rather poorly.


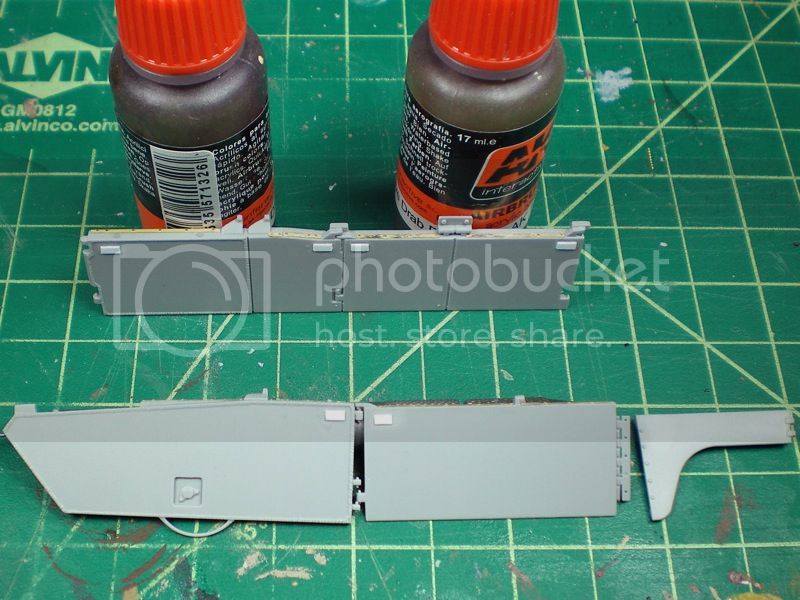
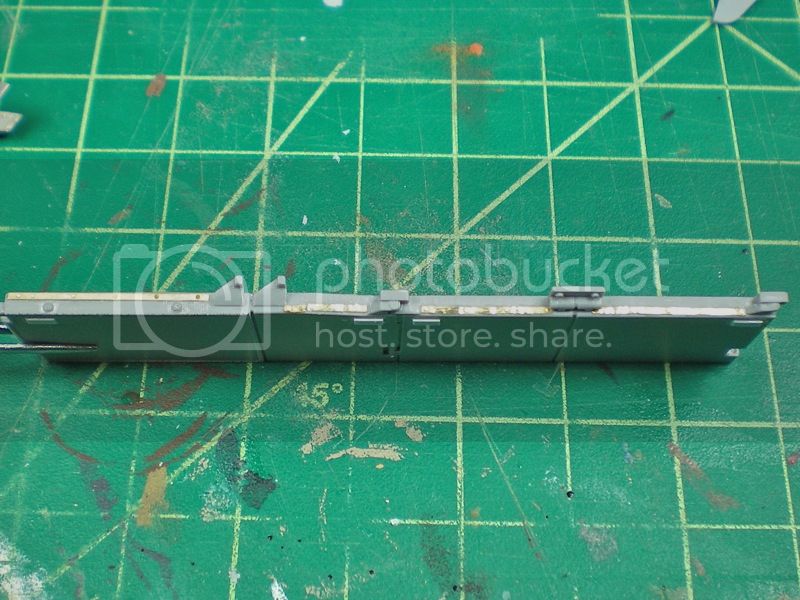
Despite that, the lower chassis is now complete with the exception of the right side armor skirts which still need the PE bolt strips added across the top. One thing to take note of here is that the bolt strips for the front half of the skirt should be attached to the inner part of the top whereas the bolt strips near the back half of the skirts should be attached on the outer half of the top. This is not in any way indicated in the instructions and only by accident did I run across a photo showing where the bolts are actually placed. I also added the skirt ID panels with strip styrene as well as substitute larger plastic bolts from MENG for the PE ones that come in the kit.


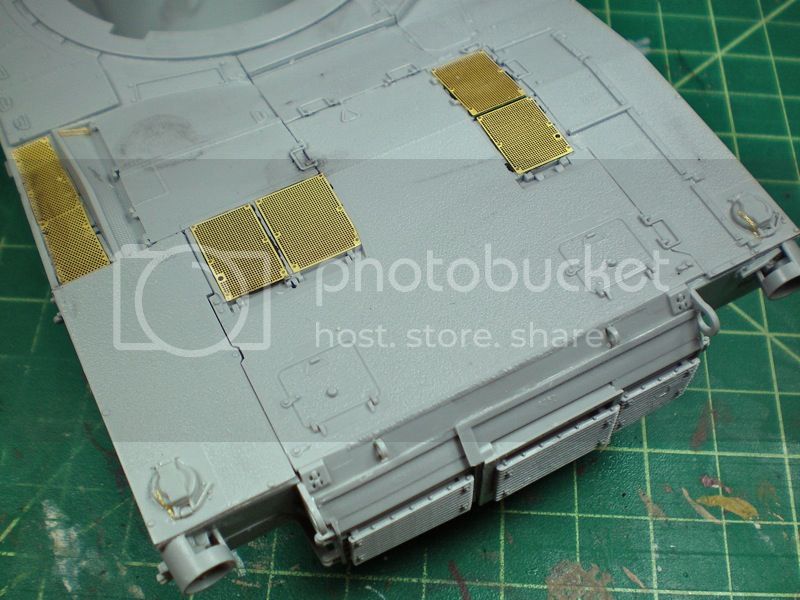
The rear deck was really a pain because it's made up of about 6-7 separate pieces, all relying on a tight fit. But, because if the warped lower hull, they didn't fit exactly, requiring some trimming of the plates, even though I had previously attempted to straighten the hull with some internal bracing. The rear exhaust hatches were also affected by this same problem. Everything is in there nice and snug now but it was more difficult than it needed to be. I can't imagine what this would have looked like had I not attempted to fix the warpage.


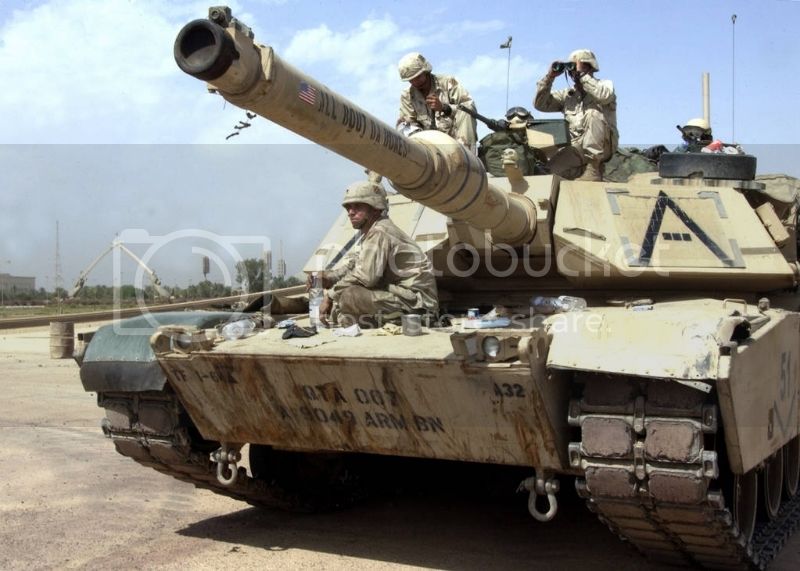
Two items specific to "All Bout Da Bones" are the damaged front left fender and the skull attached to the top of the main gun. You can see both of these clearly in the first photo of this blog. I replicated the fender damage by cutting off what I assume is a rubber flap and adding a strip of drilled styrene to show the bracket that would hold it. But first I thinned the fender from the inside with a rotary cutting bit, dipped it in boiling water and gently bent it so it was slightly deformed.


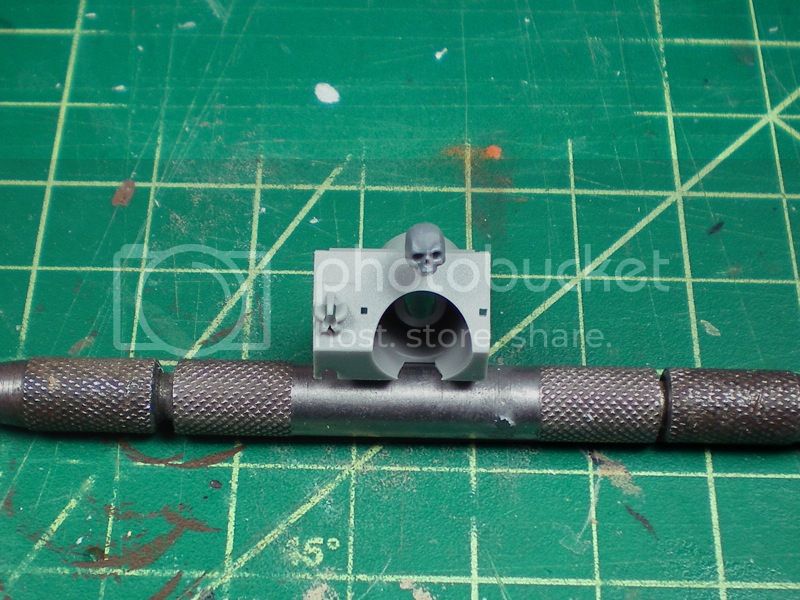
For the skull, I found an extra Warhammer skull which appeared to be about the right size and glued it on. The one in the photos is clearly much smaller than a real human skull so I think the one I used should work nicely since it's scaled for 28mm rather than 1/35.


I'm traveling for work over the next week so more progress will have to wait until I return. Next up, I'll get to the turret and stowage racks.
Thanks for following along.
ProfessorP
Visit this Community
Minnesota, United States
Joined: February 20, 2007
KitMaker: 339 posts
Armorama: 325 posts
Posted: Thursday, December 05, 2013 - 04:27 PM UTC
Jeeeez....talk about a break from the project! Anyway, I'll dispense with the excuses and get right to the updates.

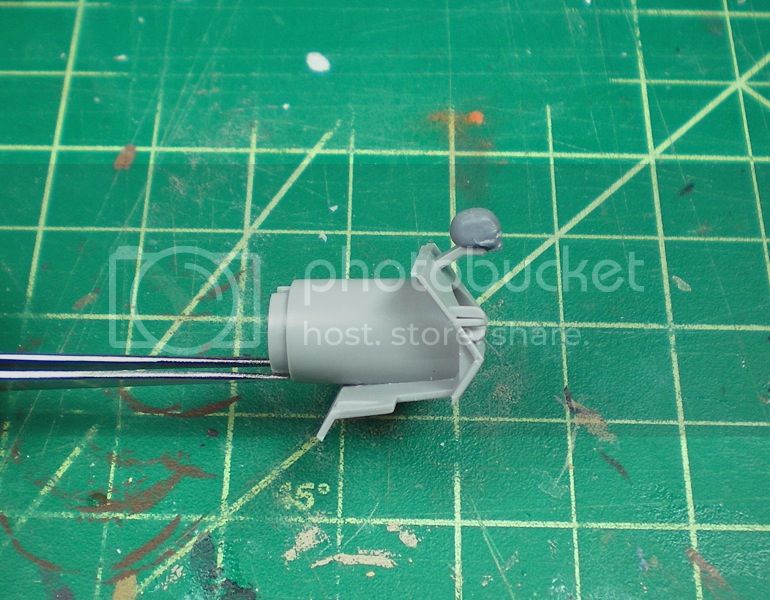
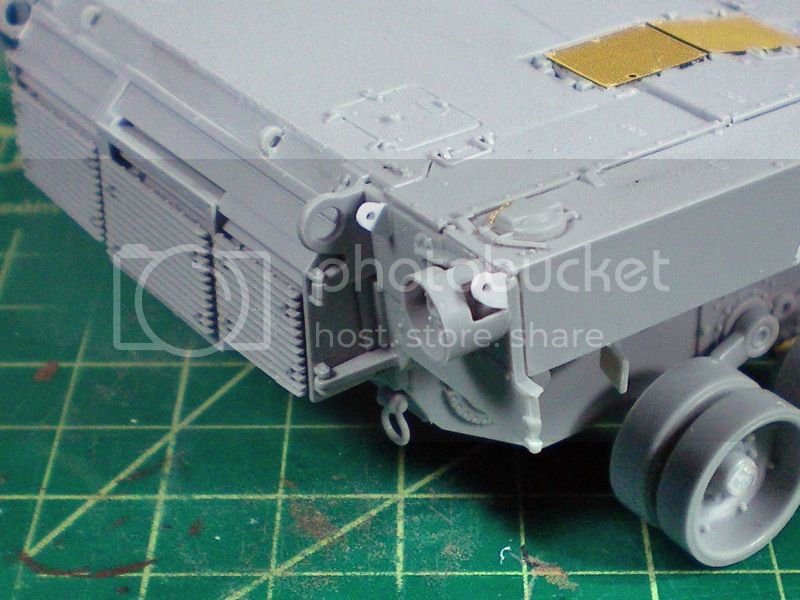
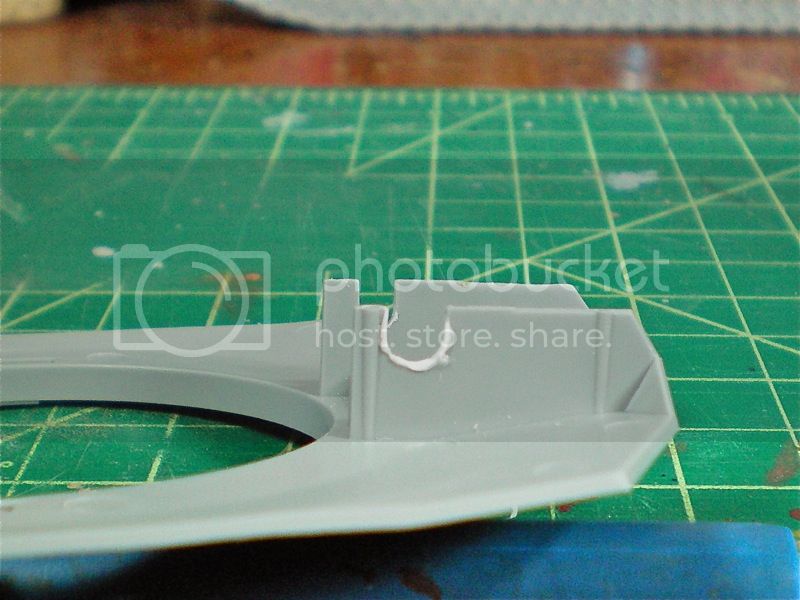
Another member of this build group discovered an interesting feature that was visible on some but not all of the Abrams used in the Thunder Run. It seems that the tanks were not the same tanks the 3rd ID trained with at Ft. Stewart but were instead drawn from prepositioned stocks already overseas. Apparently some of these still had the mounting brackets for the hull mounted Auxiliary Power Units (APU) that were used during the 80's and 90's. A quick inspection of a rear shot of "All 'Bout Da Bones" (unit ID "A32") showed that this tank was one of those that had these brackets. Using a Dremel tool with a small cylindrical cutting bit, I cut a hole in the right side rear light shroud, fabricated two mounting brackets out of .30 styrene and attached them in the proper locations. You can see them here in white:


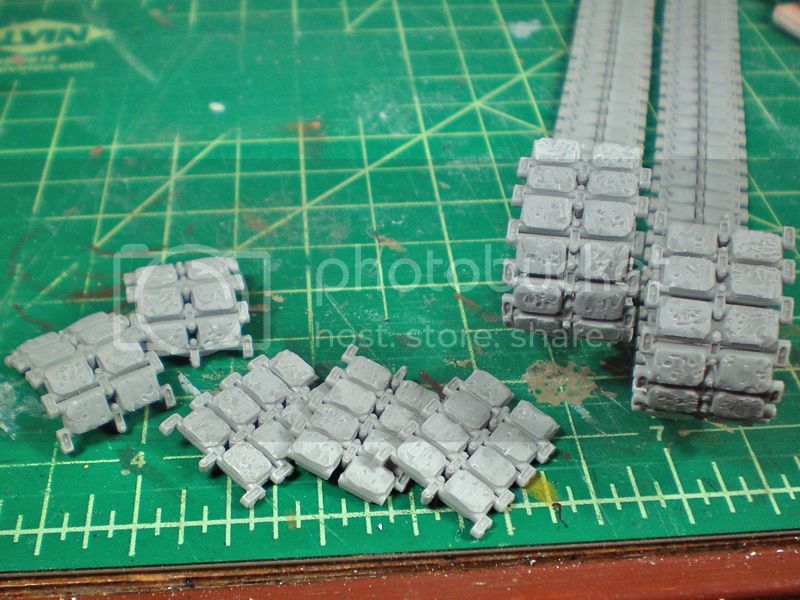
Next, I had to go back and rough up the rubber tread blocks on the tracks. The tracks took a lot of abuse during the days and weeks prior to the first TR and the crews did not have time to impart the necessary maintenance so they were pretty torn up by the time they made the run.
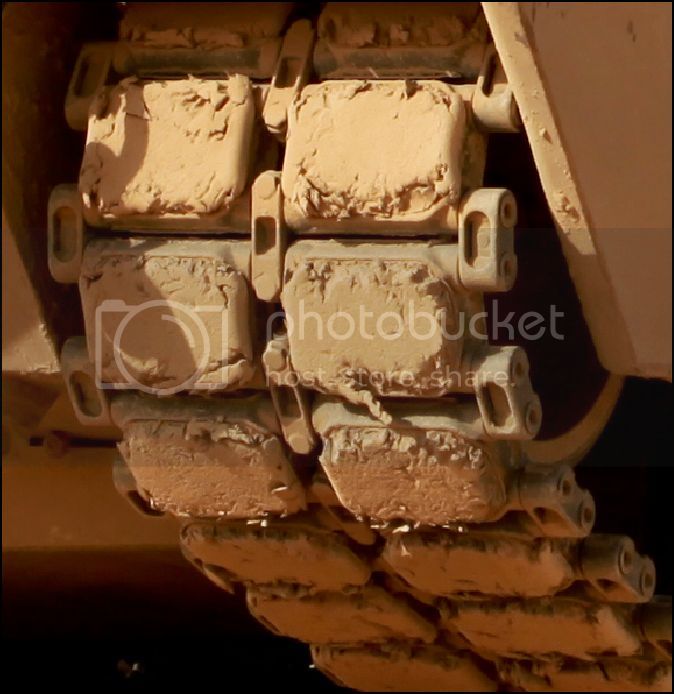


To replicate this I used the same technique described by Robert Burik in his fantastic build of A13 "Another Episode". I started with a fine point soldering iron to apply the chips and dings and then used a flat bladed soldering iron with an x-acto chisel blade wired onto it to carve off the edges of the blocks for a delaminated look. Once this was done, I used a very rough emery board to file everything down smooth. It still looks a little overdone here so I will probably file it a bit more in places.


The road wheels were also pretty damaged but I don't have any reference shots of these so I have still to come up with a way to do them.

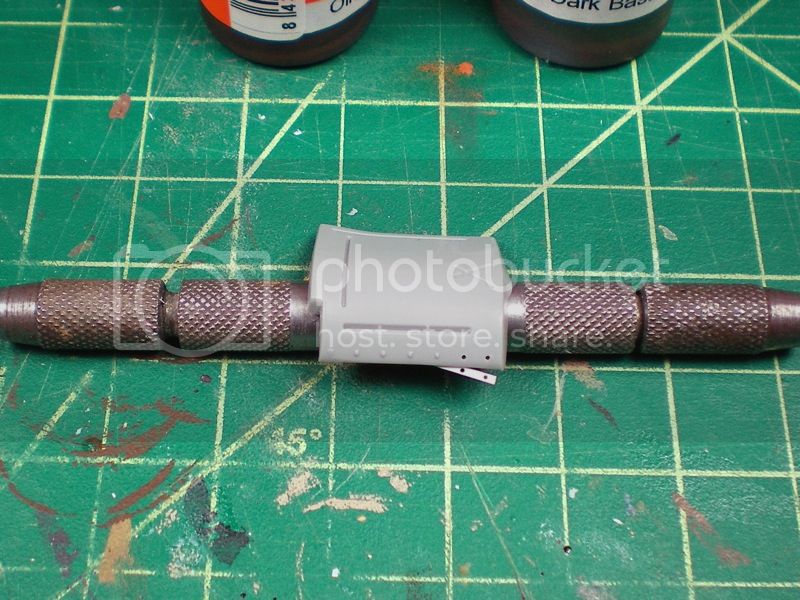
Moving on to the main gun assembly, I decided to use the plastic parts rather than the turned aluminum barrel since the plastic pieces actually had better detail such as rivets and bolt heads molded on. They are also slide-molded in tube form so there are no barrel halves to assemble and more importantly, no tricky seams to fill and sand. Just some careful sanding of the sprue mounting points to avoid flat spots and even more careful alignment of the sections to get a nice straight gun tube.
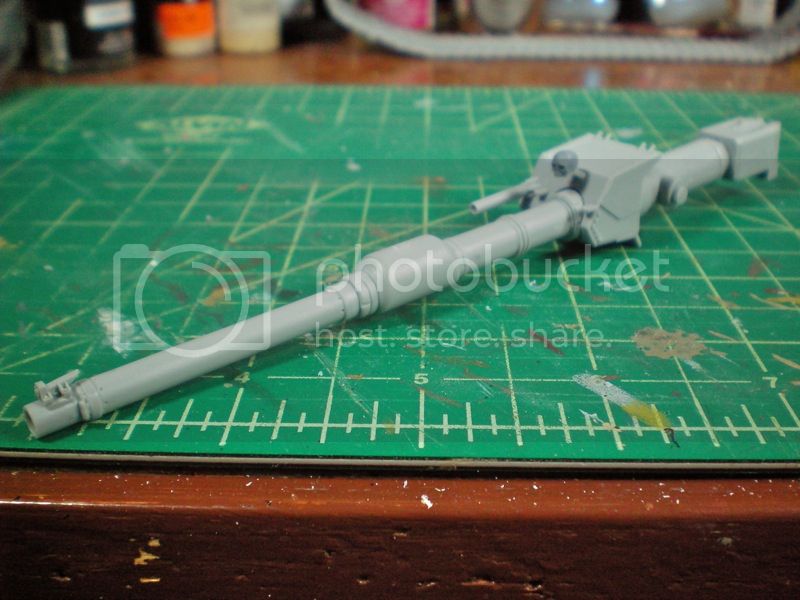


Even so, the mantlet didn't quite fit correctly into it's allotted space in the upper half of the turret. This required me to make a sort of shim in the right mounting bracket raising the right side of the gun so that top of the mantlet would square up on both sides of the turret.
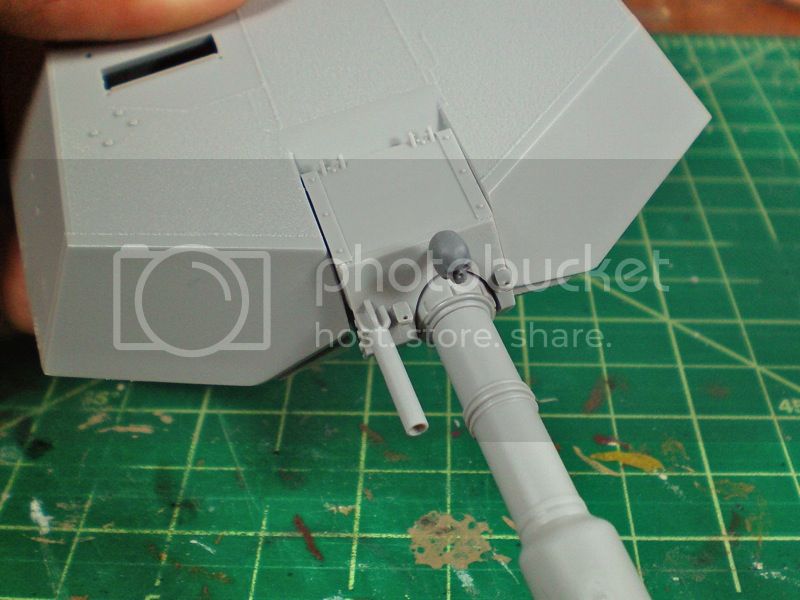


Also, quite a bit of sanding was required where the sides of the mantlet contact the sides of the turret since the multi-part mantlet assembly (6 pieces) apparently was not perfectly aligned during assembly. Thanks Dragon, for over-complicating what should have been a simple 2-piece assembly.

So now it's on to the remaining turret assembly and installing the photo-etched extended bustle rack and jerry can racks.
errains
#045
Visit this Community
South Carolina, United States
Joined: September 23, 2005
KitMaker: 362 posts
Armorama: 350 posts
Posted: Thursday, December 05, 2013 - 05:03 PM UTC
Awesome Don!!!

I was starting to wonder how this project was coming along. Looking to be another great build!
ProfessorP
Visit this Community
Minnesota, United States
Joined: February 20, 2007
KitMaker: 339 posts
Armorama: 325 posts
Posted: Monday, December 09, 2013 - 07:15 AM UTC
Hey Eric. Thanks for checking in! As always, I appreciate the comments. Assembly on this thing is tedious so it's hard to stay excited about it. However, the others that have already been completed make for a pretty impressive models so I'll keep plugging away. Can't wait to get to the painting stage on this one though!

Stay tuned!
ZETMAN
Visit this Community
Thessaloniki, Greece / Ελλάδα
Joined: February 01, 2006
KitMaker: 65 posts
Armorama: 48 posts
Posted: Saturday, December 14, 2013 - 07:37 AM UTC
Simply awesome Don,it will turn into a piece of art.Well done.
pilote14
Visit this Community
Pas-de-Calais, France
Joined: November 01, 2010
KitMaker: 459 posts
Armorama: 432 posts
Posted: Saturday, December 14, 2013 - 07:42 AM UTC
Good job ! with nice add-on

i've build mine simply from the box :
http://airplastique.jimdo.com/blindés/u-s-a/abrams-m1a1hc/
olivier
Tiger_213
Visit this Community
California, United States
Joined: August 10, 2012
KitMaker: 1,510 posts
Armorama: 1,443 posts
Posted: Friday, December 20, 2013 - 09:02 PM UTC
Should be interesting to follow, regardless of how long it takes you to build it (I'm thinking of that long M4 build).
ProfessorP
Visit this Community
Minnesota, United States
Joined: February 20, 2007
KitMaker: 339 posts
Armorama: 325 posts
Posted: Sunday, December 29, 2013 - 04:30 PM UTC
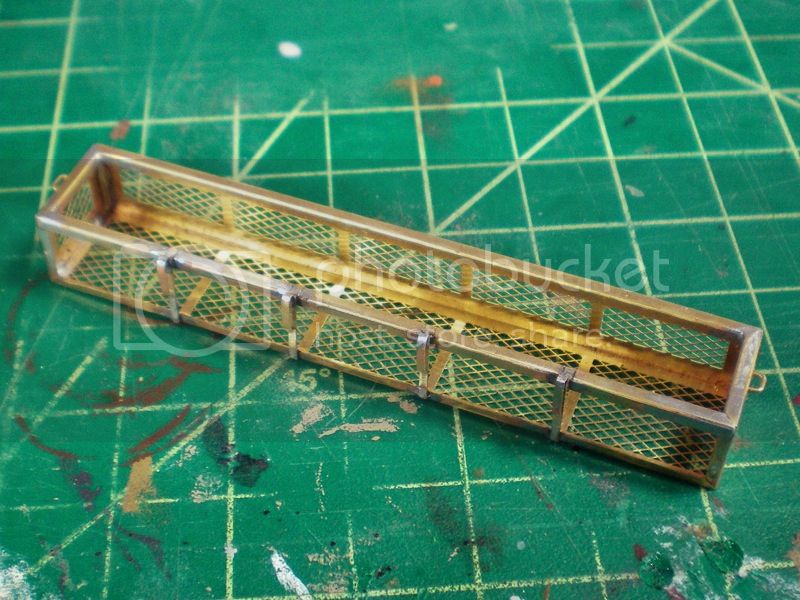
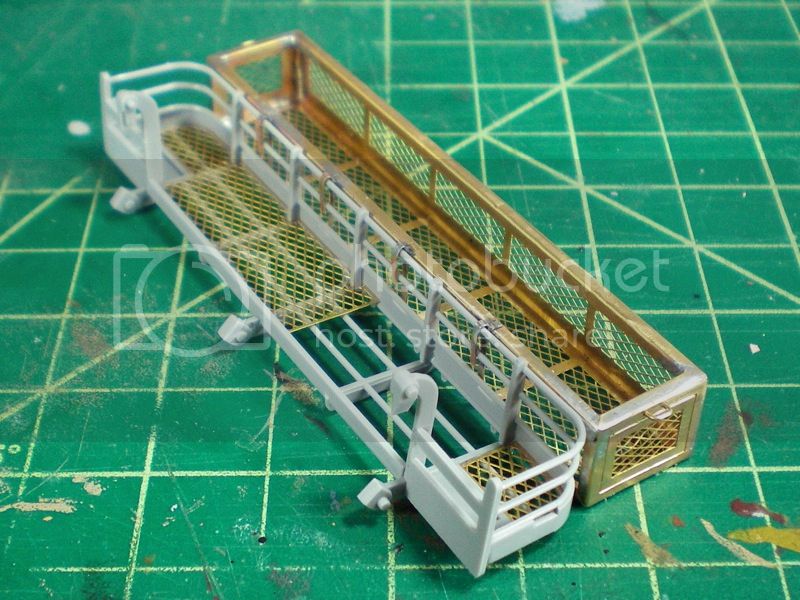
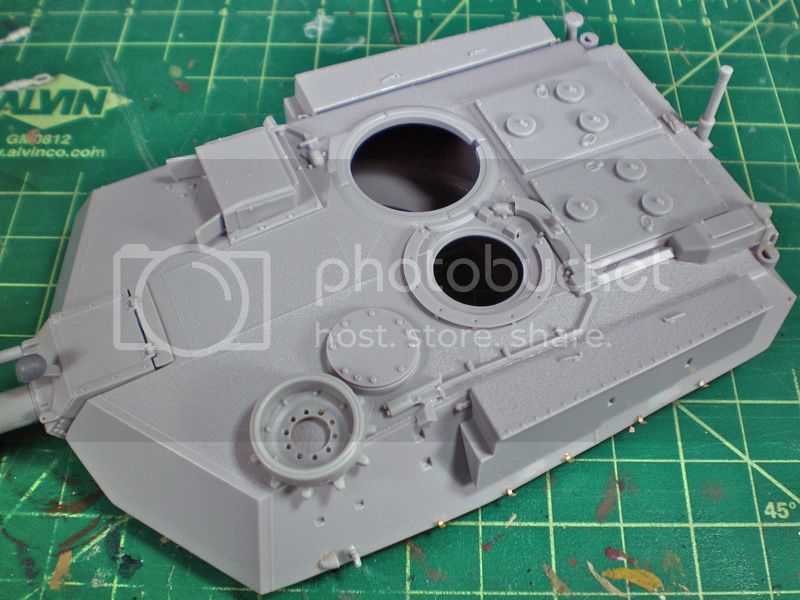
Some progress since last time. Been working on the turret and am about 90% done I think. The PE extended bustle rack was a bit of a chore since I have never soldered before. I think it turned out OK.


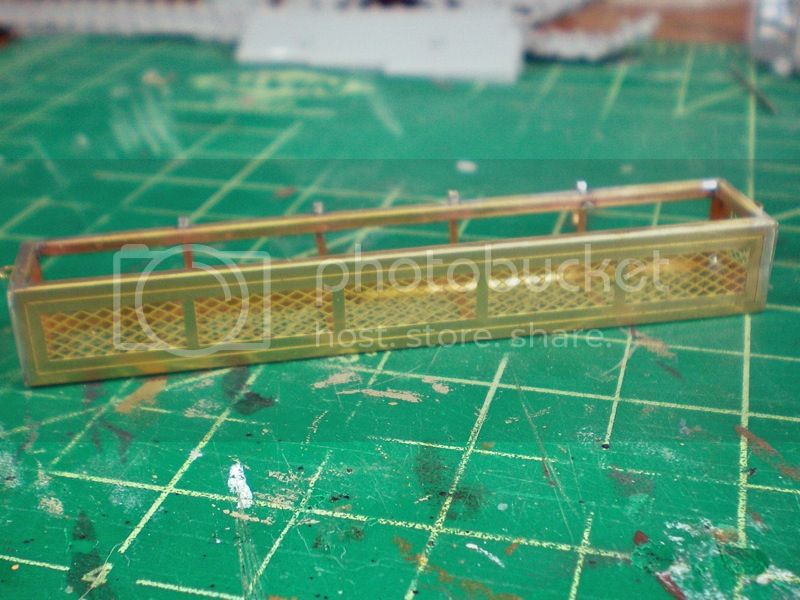
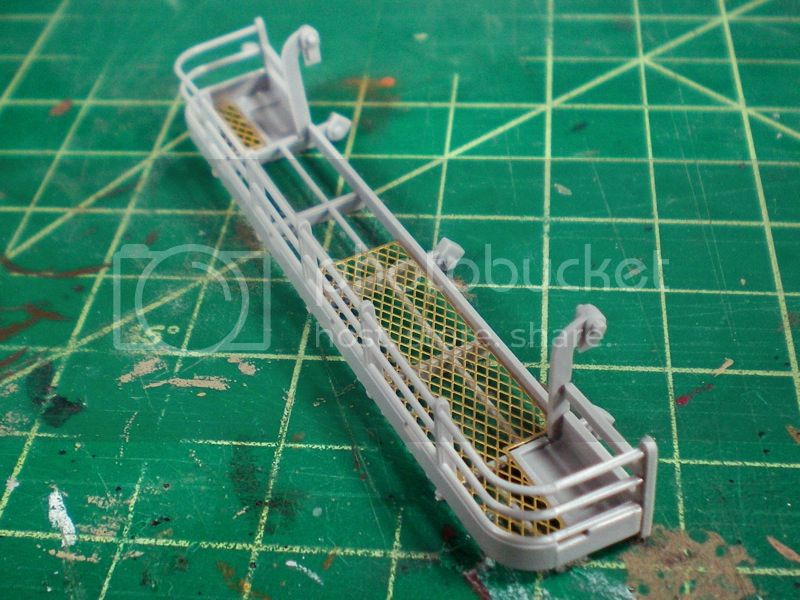
The main bustle rack is assembled and ready to be attached to the turret along with the side pieces.

The two pieces will eventually be attached together like so:


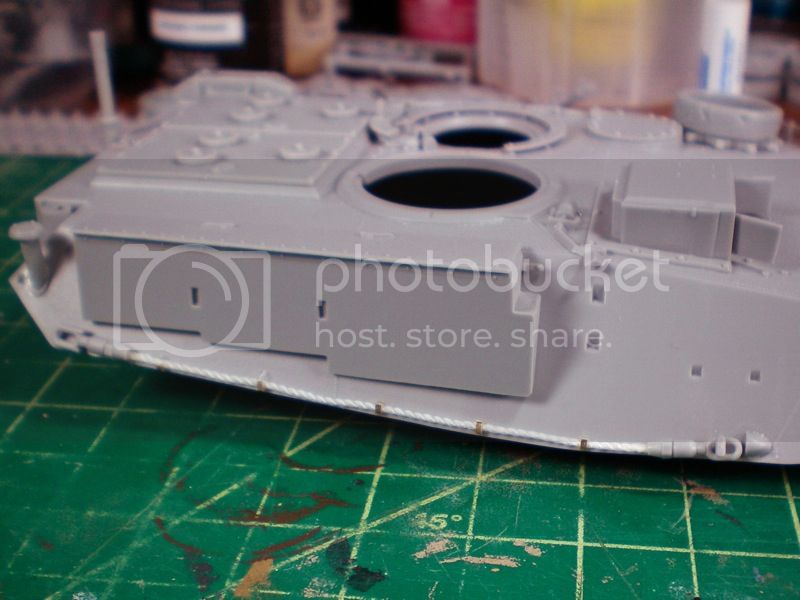
In a moment of OCD weakness, I decided to ditch the pre-formed styrene tow cables and use PE clips and nylon cable instead. It looks better but cost me a ton of time. I still have to fab up the cable on the other side.


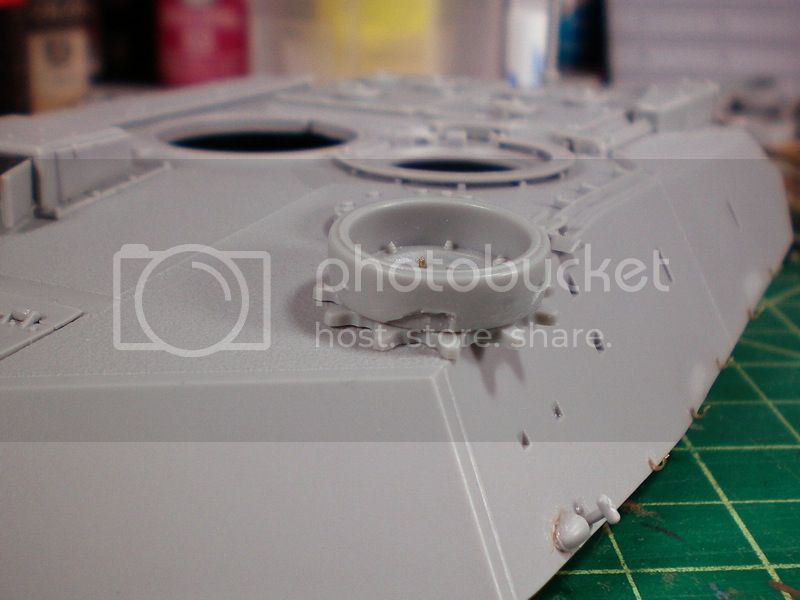
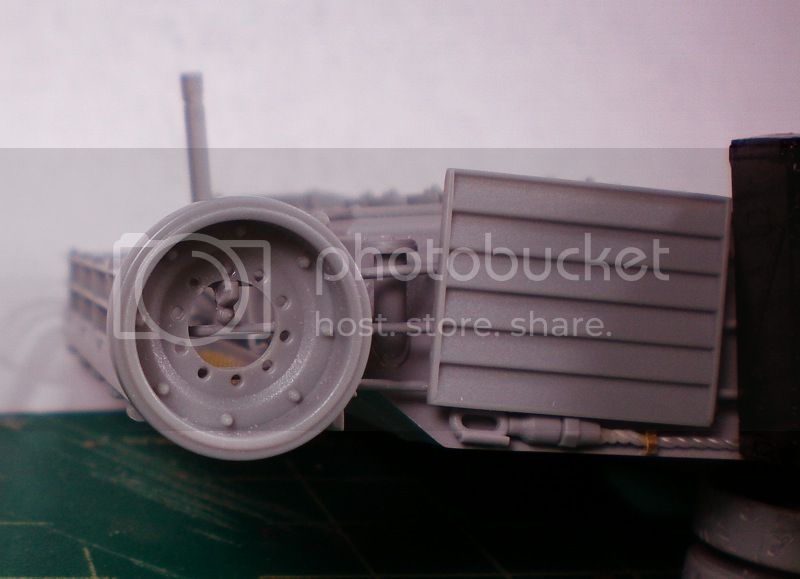
One of the details of A32 is the damaged stowed road wheel and spare sprocket bolted to the top of the turret. I replicated the damage to the wheel as seen in the first photo of this build log and attached it to a spare sprocket. A piece of brass rod helps locate it for now and after painting, an appropriately sized bolt head will cover the rod.


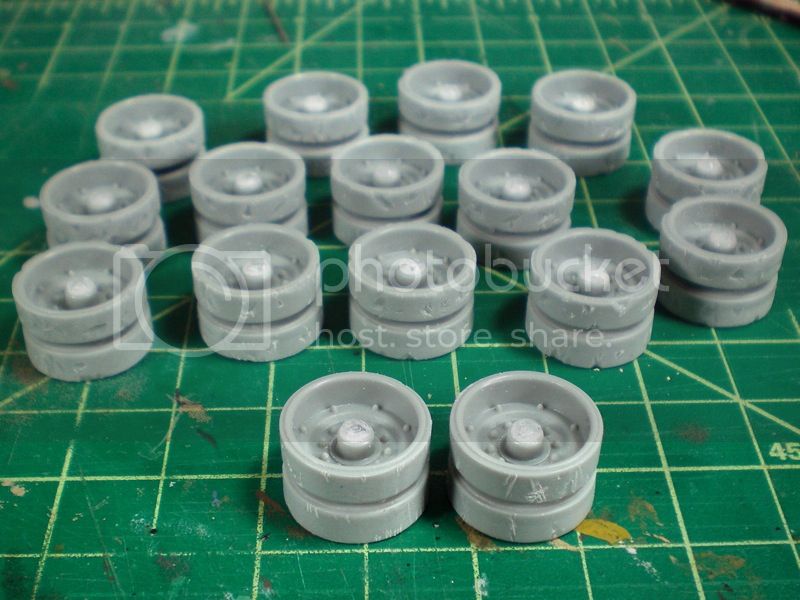
All the other road wheels have been chunked to replicate the heavy travel damage these tanks sustained. The two in the front will be the idlers and according to the vets, these were much less likely to be damaged so they haven't been chunked as much.


Still have the commander's and loader's stations to complete as well as final assembly of the side and bustle racks which will complete the turret. Following that, I'll have to begin figuring out the stowage as well as crew figures and the aerials.
wing_nut
Visit this Community
New Jersey, United States
Joined: June 02, 2006
KitMaker: 1,212 posts
Armorama: 674 posts
Posted: Monday, December 30, 2013 - 01:25 PM UTC
Diggin' those road wheels. Love the match on the wheel on the turret. Nice.
redleg12
Visit this Community
New Jersey, United States
Joined: March 11, 2007
KitMaker: 872 posts
Armorama: 831 posts
Posted: Tuesday, December 31, 2013 - 12:54 AM UTC
Moving along nicely, looking good

Rounds Complete!!
badger66
Visit this Community
Texas, United States
Joined: April 09, 2005
KitMaker: 251 posts
Armorama: 232 posts
Posted: Tuesday, December 31, 2013 - 01:49 AM UTC
Looking Good Don
BeanStorm
Visit this Community
United States
Joined: January 23, 2010
KitMaker: 25 posts
Armorama: 21 posts
Posted: Monday, January 06, 2014 - 05:02 AM UTC
I totally agree Dragon's instructions are the worse, given that they share about 50% of the armor market you would think they would give a hoot. They could update them and offer them as a PDF file on their site, I recommended that three years ago. Any how enough complaining. I want to tackle a M1, did the PE parts come with the kit or was this a after market. By the way you have done a excellent job via the tracks, I saw a lot of M1's when I was there for the first war. I saw a lot of T 55's and BTR's of course they were in crap shape. I will book mark your WIP, thank so much for sharing, it does help.
ProfessorP
Visit this Community
Minnesota, United States
Joined: February 20, 2007
KitMaker: 339 posts
Armorama: 325 posts
Posted: Wednesday, January 08, 2014 - 04:28 PM UTC
Aaron, this kit does come with some decent PE add-ons such as some engine deck screens, the extended bustle rack, a single jerry can rack (the tank I'm building had two so I'll have to scratch them) and a few other items. It doesn't include things like the stowage box handles and other small details. For those, you will need to find an aftermarket kit or scratch build them.
errains
#045
Visit this Community
South Carolina, United States
Joined: September 23, 2005
KitMaker: 362 posts
Armorama: 350 posts
Posted: Wednesday, January 08, 2014 - 06:46 PM UTC
Hey Don your making great progress!!! The details are top notch as usual!
zorrolobo
Visit this Community
Distrito Federal, Mexico
Joined: May 31, 2013
KitMaker: 1,457 posts
Armorama: 1,440 posts
Posted: Wednesday, January 08, 2014 - 07:26 PM UTC
great work!
ProfessorP
Visit this Community
Minnesota, United States
Joined: February 20, 2007
KitMaker: 339 posts
Armorama: 325 posts
Posted: Wednesday, January 22, 2014 - 02:25 PM UTC
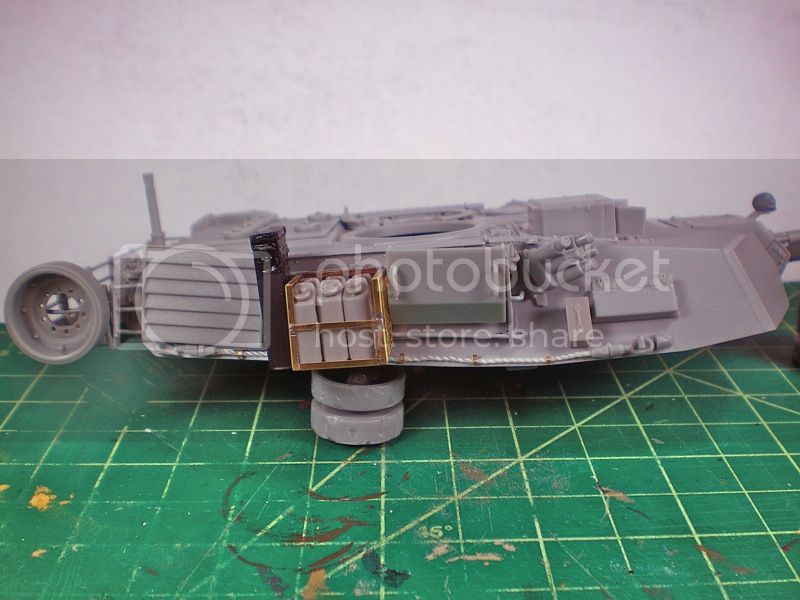
Quick update. Work continues on the details of the turret. I soldered the jerry can rack using the kit provided PE. Apparently each crew was given two but a recently revealed photo of A32's left side indicates that there was no rack on that side so, I don't have to scratch a second one. The tall black thing is a 120mm storage canister. I'm not sure what the crews stowed there but most of the tanks had them. On the right side of the jerry can rack is the exhaust deflector. None of these things are attached at this time, just placed there for the photo.


On the bustle rack, there was a spare road wheel. This was apparently held on using a track center guide link. I cut one off of a spare track piece, drilled holes where it would bolt up and then cut it across the holes leaving two pieces to clamp onto the bustle like the real ones. I wasn't exactly clear on how this held the wheel on but it appears that the bolt was just run through a hole in the wheel and tightened to hold the wheel in place. No photos this time but it actually worked out pretty slick so I'll do another and show the process for anyone else that wants to take a crack at it.


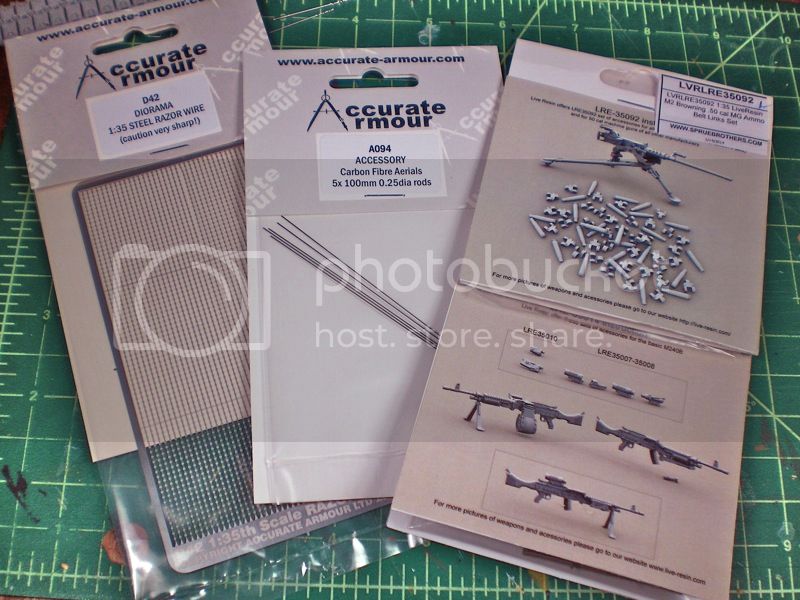
Lastly, I got a couple of shipments this week.


The razor wire will be mounted on the rear as each tank carried two rolls and the pickets needed to install the wire. I bought the carbon aerials because they are supposed to be more flexible and durable. We'll see. Finally, the Live Resin .50 links will be strewn all over the turret (along with spent shells) to show how much work the TC was doing with that gun. I plan to use the M240 to replace the kit one on the loader's station but it will need a little work since the tank version doesn't have the pistol grip and stock.

Work will continue on the left side of the turret, as well as the TC and loader's stations.

That's it for now. Thanks for looking!
errains
#045
Visit this Community
South Carolina, United States
Joined: September 23, 2005
KitMaker: 362 posts
Armorama: 350 posts
Posted: Wednesday, January 22, 2014 - 07:07 PM UTC
SUPER SWEET!!!!
The level of detail that you will have on the Bones is going to be total awesomeness!! Keep up the great work Don!
flugwuzzi
Visit this Community
Lower Austria, Austria
Joined: November 02, 2007
KitMaker: 633 posts
Armorama: 599 posts
Posted: Wednesday, January 22, 2014 - 08:57 PM UTC
Nice details, Don.
Your work so far is top notch and looking very clean.

Keep on the good work.

cheers
Walter
 _GOTOTOP