_GOTOBOTTOM
Dioramas: Making Bases
Discuss all aspects of making bases.
Hosted by Darren Baker
Making a flower garden...then trash it!
minas-ithil
#110
Visit this Community
Florida, United States
Joined: September 20, 2005
KitMaker: 248 posts
Armorama: 224 posts
Posted: Tuesday, August 27, 2013 - 09:07 AM UTC
To One and All,
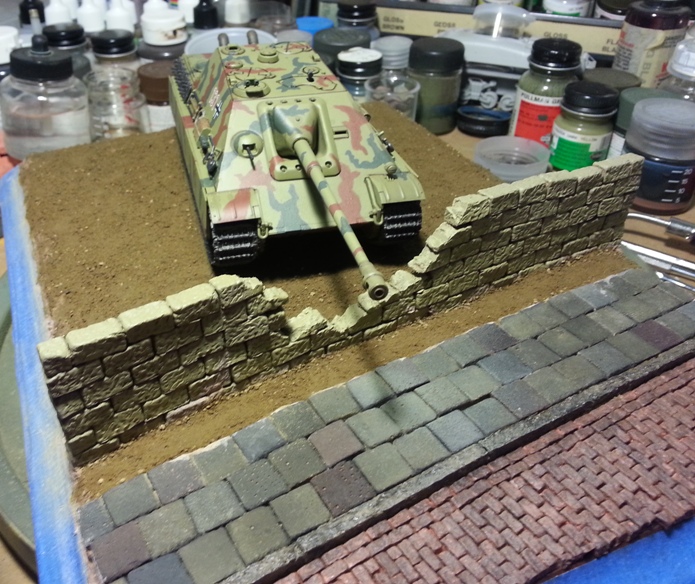
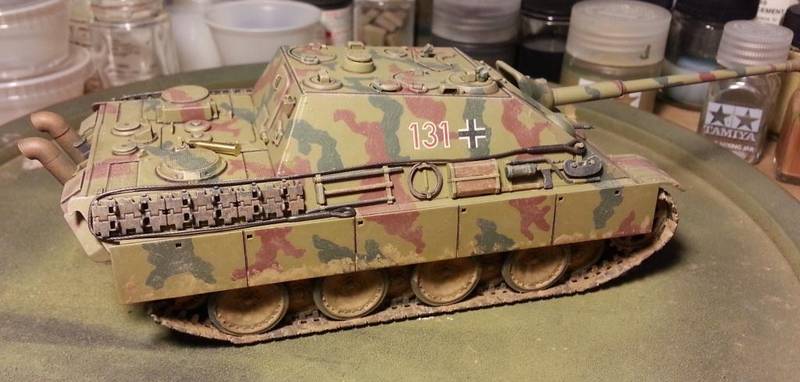
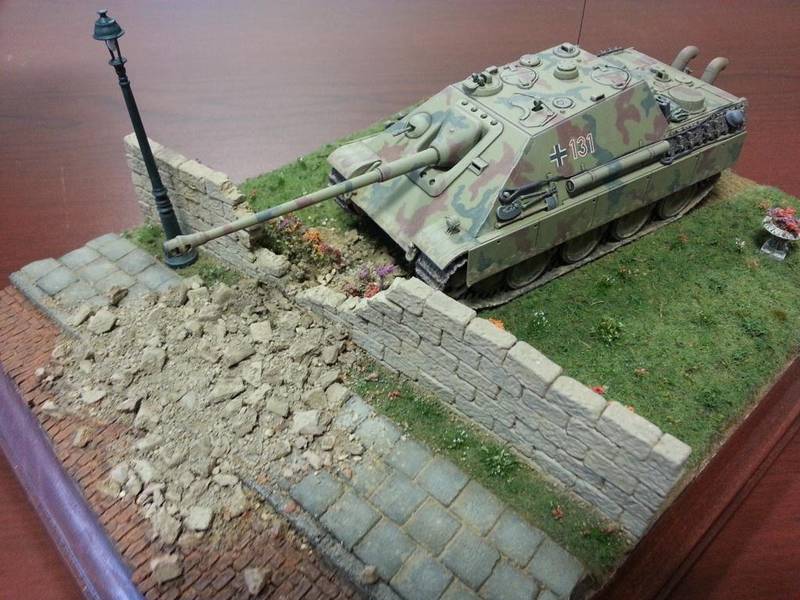
This is my first build log, so I hope to keep it interesting. I recently completed a Tamiya 1/48 Jagdpanther in the v.3 1/48 Campaign. I wanted to give this big cat a home, so time to make a diorama base. I have always liked the old Matchbox 1/76 Jagdpanther that had the base with the vehicle bashing trough a wall. I would like to use that as inspiration for this build.

Let us start with the scene planning.I started with a wooden base, stained and sealed. I then used some small tiles, cast wall parts and some styrofoam sheet to get the 'feel' of things.


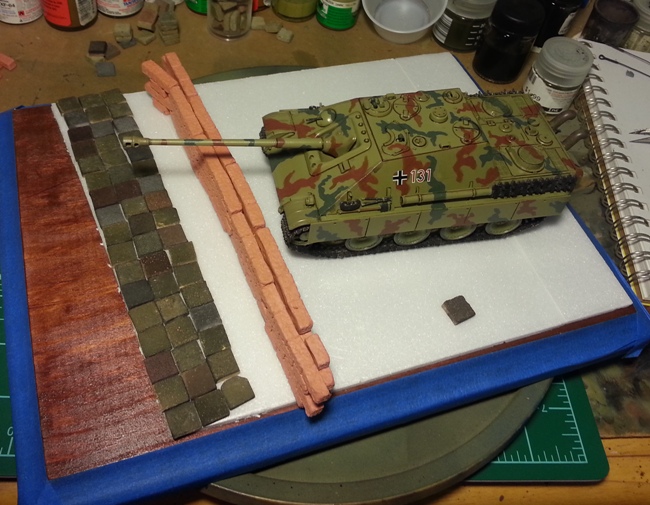
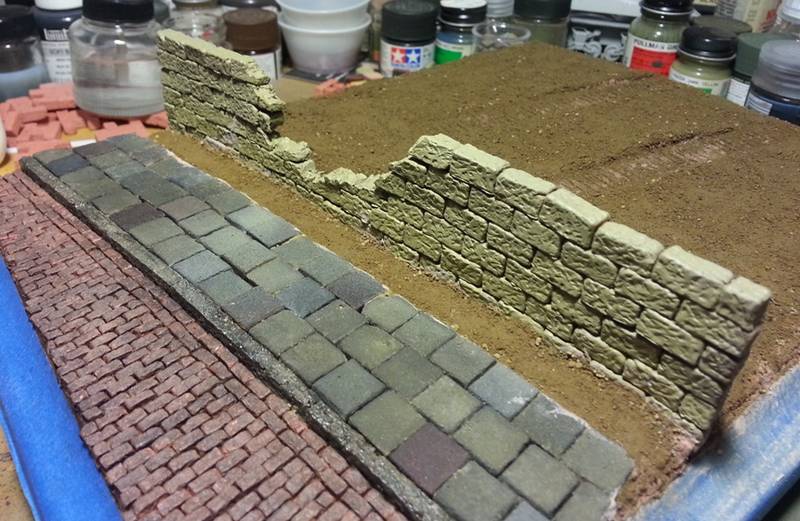
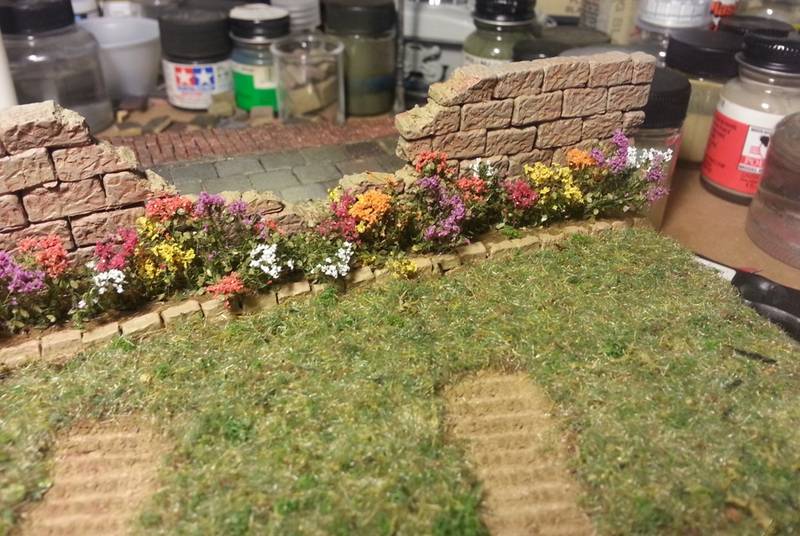
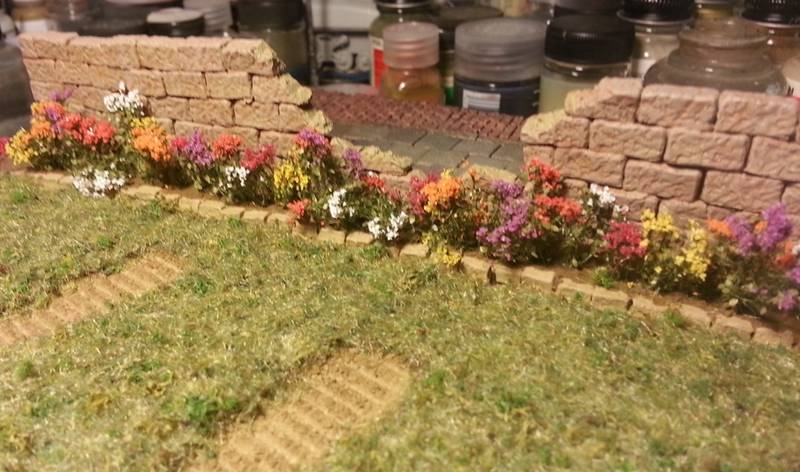
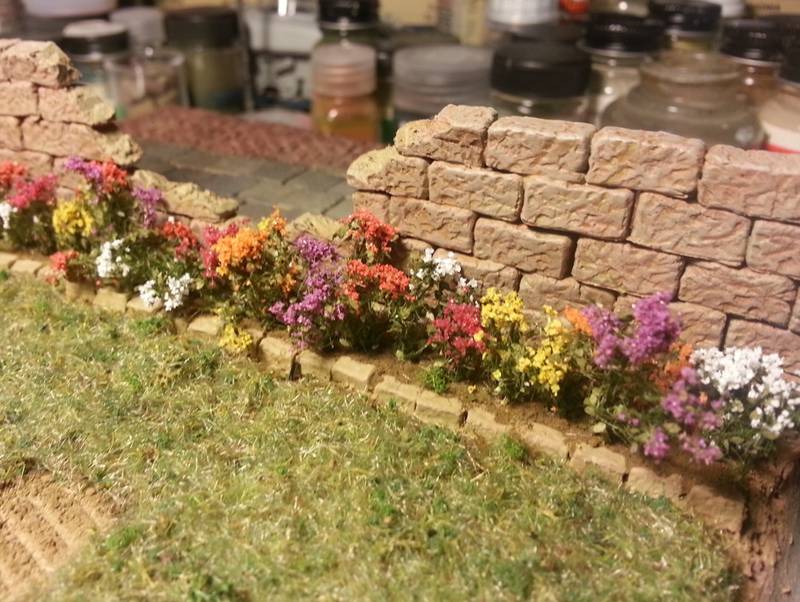
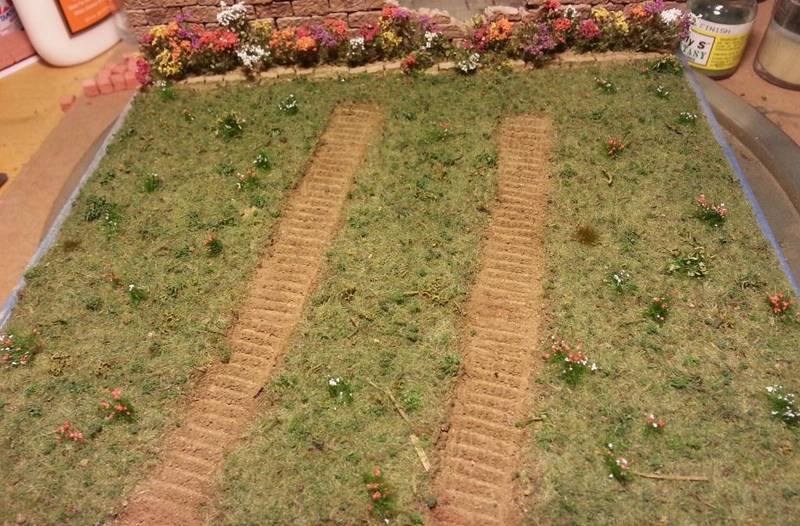
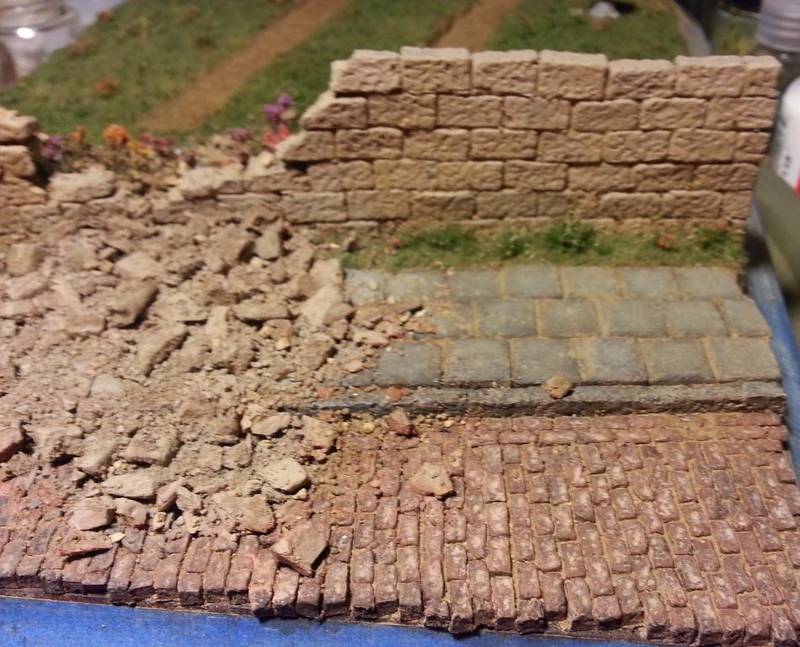
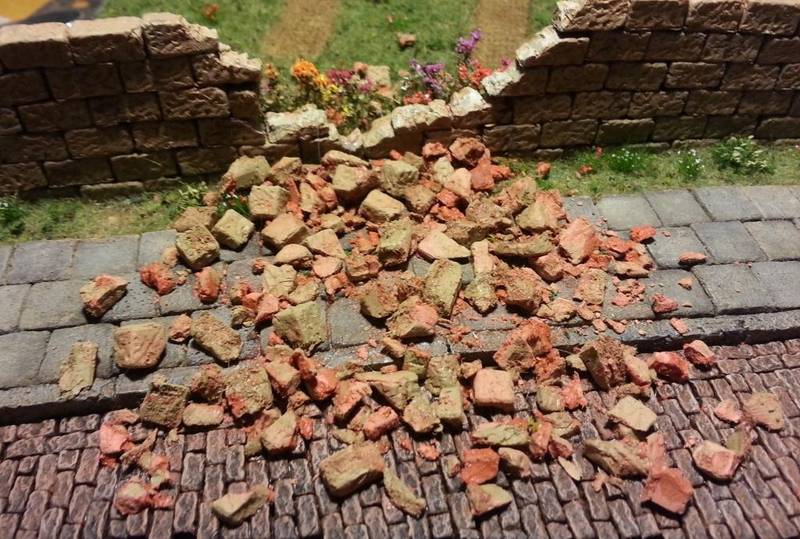
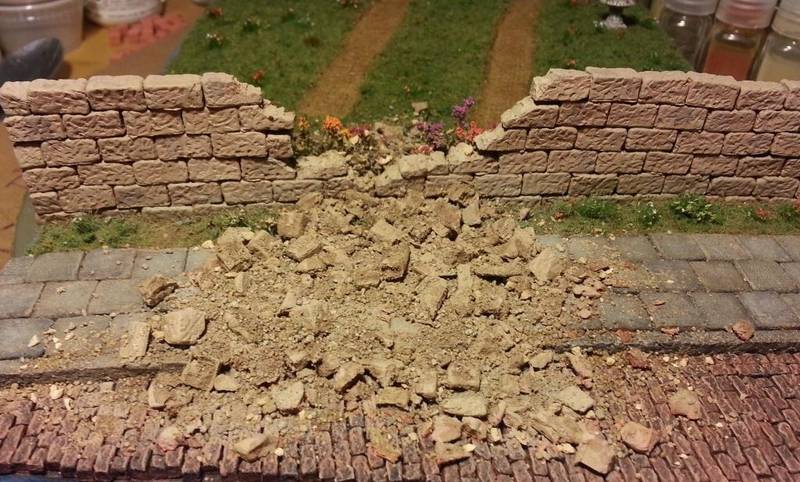
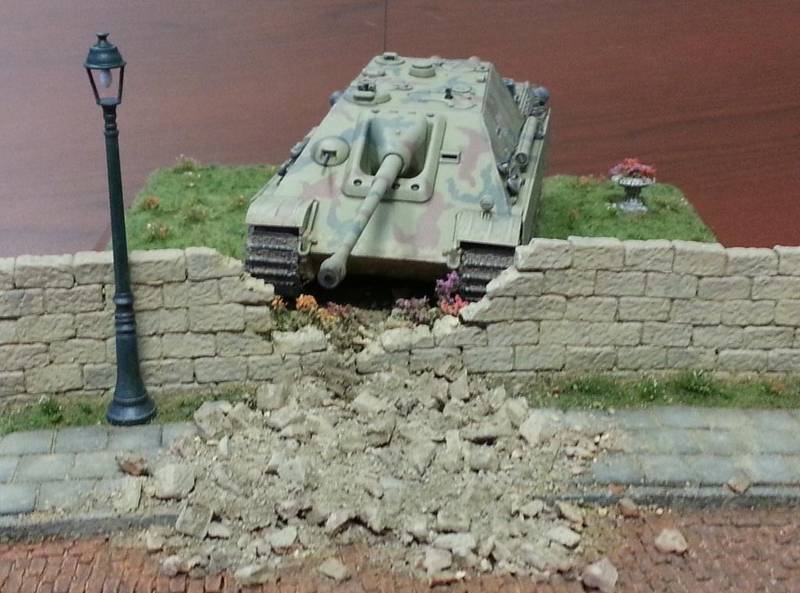
The area to the left of the tiles will be a cobblestone street. The tiles will be the sidewalk, raised up on the foam. The wall will be the wall that the AFV has blown a hole in. Inside the walled area will be a garden-type yard or park.

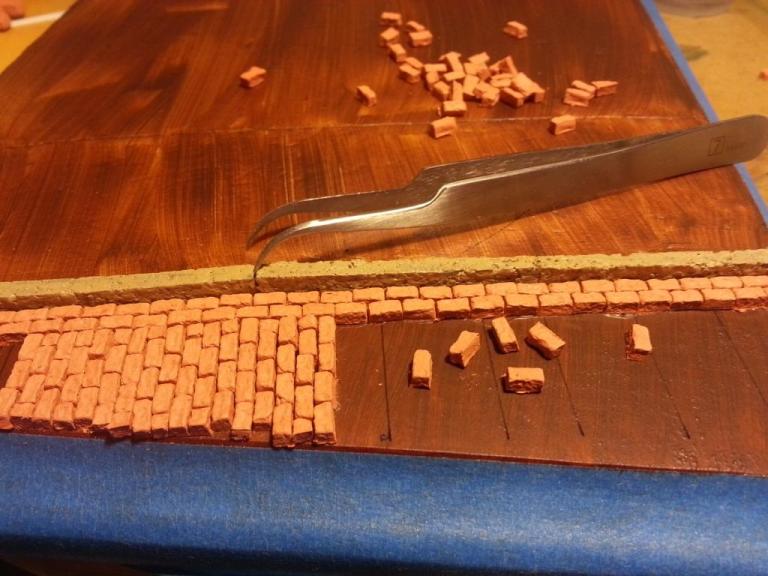
Using the excellent molds from Diorama Debris in the UK, I cast a ton of cobblestones out of DAS clay - found in any craft store. Here is the start of the tedious process of laying cobblestones.


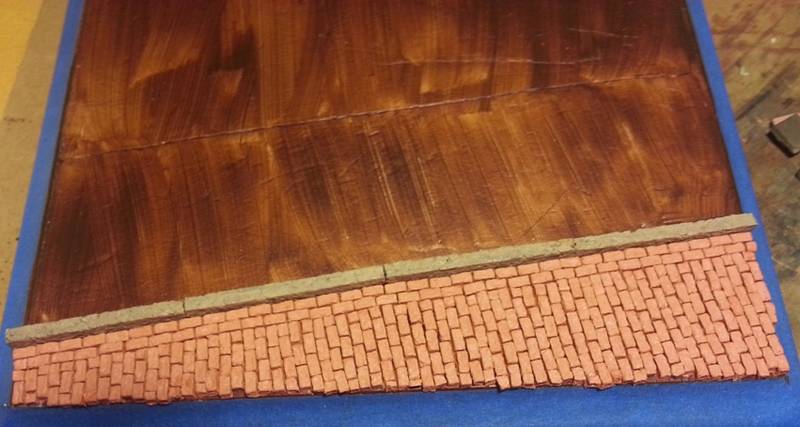
After a couple of sessions, here is the completed street.


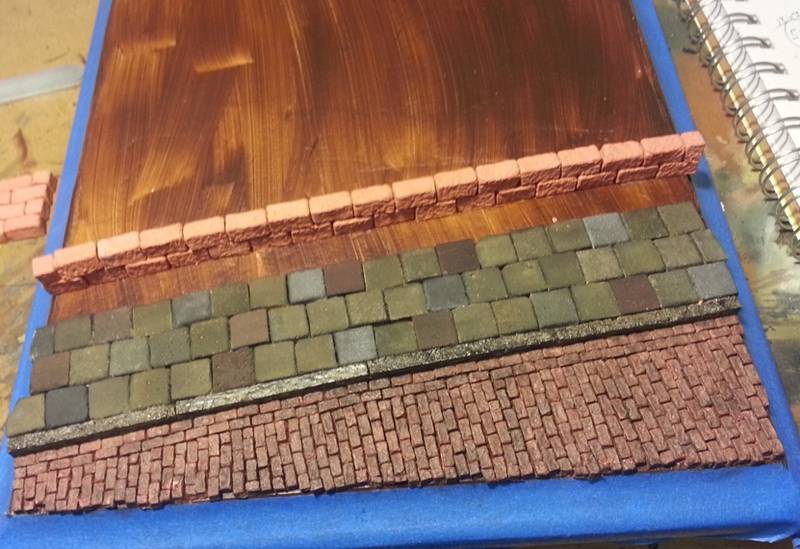
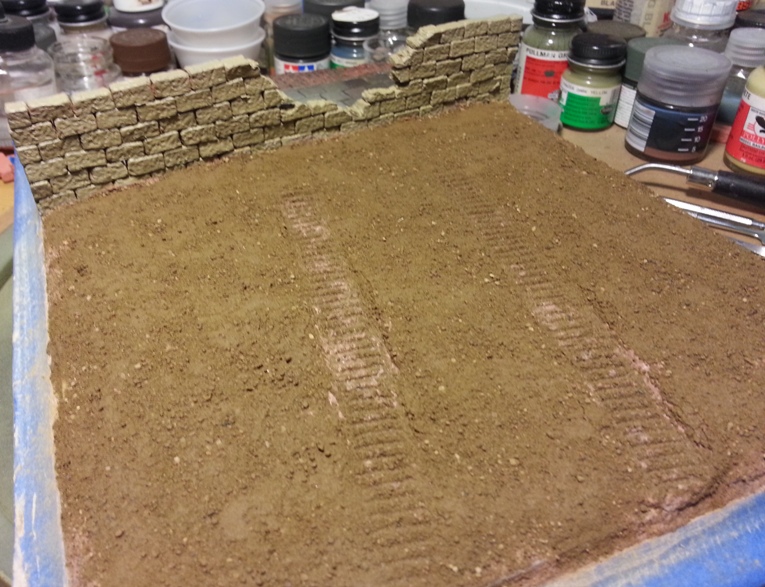
Next I painted the glued down styrofoam a dark brown, so that there will be no 'white' peeking through as the build continues. I used these very bright colored stone tiles for the sidewalk. I found these at a craft store.


I hit these with some dark washes, which toned them down nicely. Here the sidewalk is installed, with a curb made out of cork. The cobblestones have their basecoat and the first two courses of the wall is up. Things are starting to take shape. The wall blocks are from the HirstArts company that make molds mainly for the miniature gaming community, but still handy. In 1/48, these blocks are 1'x2'x1', so usable.


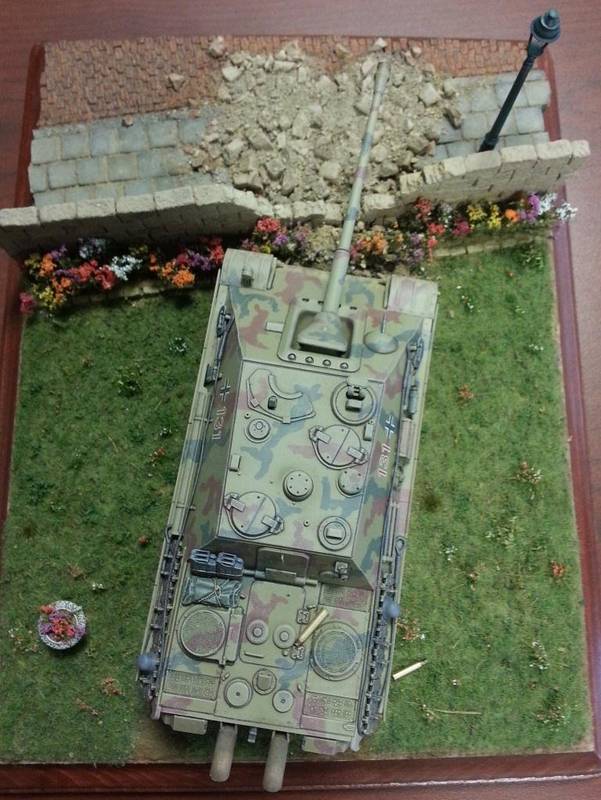
Here is the start of the diorama. Please leave any comments and I will continue to post more as things progress.

Thanks,
Stephen
ltb073
Visit this Community
New York, United States
Joined: March 08, 2010
KitMaker: 3,662 posts
Armorama: 3,078 posts
Posted: Tuesday, August 27, 2013 - 03:09 PM UTC
Great looking Jagdpanther and I love the step by step details that you are giving us as your build progress
Looking forward to seeing more
minas-ithil
#110
Visit this Community
Florida, United States
Joined: September 20, 2005
KitMaker: 248 posts
Armorama: 224 posts
Posted: Wednesday, August 28, 2013 - 12:12 AM UTC
Thanks for the comments Sal. Now for a bit more progress.

The wall has been built, with a major hole in it from a Jagdpanther shell. The base was covered with a mixture of Sculptamold, white glue and dark brown paint. This was then 'painted' with water-thinned white glue and ScenicExpress' Fine Dirt was sprinkled over all of the natural areas. Once mostly set, the tank was pressed ito the soil to get the treadmark depressions that we all know and love!


Now comes the time to plant the lawn. I mixed up three shades of static grass and added a few pinches of the Scenic Express Adirondack Blend for some variety in the texture. Glue was spread and the grass mixture added and tapped down to stick well.


Here is a shot of the grass border by the wall.


Now comes the colorful part. Since in most AFV dioramas, the main colors are drab. Browns, greens, dark rubble and mud. I wanted to add some color, so the Jagdpanther, like most outdoor cats, needs a garden to play in! Coming from Germany, the land of awesome model railroad stuff, are flowers from the company of Silflor. I bought their flower sample pack and received a bunch of flowers in all different colors. I decided to use some of them all. I built a brick border next to the wall. Mixed up a little more of the Sculptamold goop and filled the flowerbed. Sprinkled on some more of the dirt and it was time to plant. I cut the flowers apart, dipped the end in glue, and planted them. After they dried I was quite pleased with the resulting look. Here is an overall flower shot and closer looks at each end of the garden.


Now that the flower garden is well underway, next will come the rubble work and then to add some wildflowers and such to the lawn. That will come in the next installment and as always, comments are most welcomed.

To sum up, here are the main items so far...


Thanks,
Stephen (Minas-Ithil)
anti-hero
Visit this Community
Tennessee, United States
Joined: March 20, 2005
KitMaker: 420 posts
Armorama: 307 posts
Posted: Wednesday, August 28, 2013 - 12:56 AM UTC
Hey there Stephen.
I like it. It looks good.
The grass isn't too uniform, both in the length of the grass and the colors. Both pluses.
The street and the sidewalk look good. The cobbles look really good. The only thing I think I would do, is maybe use some pigments or even some fine sand or something like that and sprinkle it across the stones. Then wipe it across the stones forcing it into the spaces, just to add a LITTLE bit of sand/dirt between the stones.
The flowers also look pretty damn good, BUT I think you should have put them on the other side of the wall, as a border along the sidewalk. That would've made them much more eye-catching. And you are right, there is not usually a lot of color in our military dios, that would have really made the flowers a focal point.

Keep up the good work! It's looking really good so far.
I'll keep watching for updates.
Bill.
Tojo72
Visit this Community
North Carolina, United States
Joined: June 06, 2006
KitMaker: 4,691 posts
Armorama: 3,509 posts
Posted: Wednesday, August 28, 2013 - 01:58 AM UTC
Excellent tutorial,looks good so far.
All_You_Can_Kit
Visit this Community
Jakarta Raya, Indonesia
Joined: August 22, 2012
KitMaker: 599 posts
Armorama: 527 posts
Posted: Wednesday, August 28, 2013 - 02:06 AM UTC
Excellent learning material! I learn a lot from your presentation and thanks for sharing, very very useful for me!

Regards,


Garry
Audren_Dbo
Visit this Community
Rio de Janeiro, Brazil
Joined: June 16, 2010
KitMaker: 69 posts
Armorama: 57 posts
Posted: Wednesday, August 28, 2013 - 02:15 AM UTC
Stephen, the job looks is going to be amazing, the flowers will give a special touch, but maybe should be better damage and defoliate some of the near the broken section of the wall. The stunning flowers are nice inside the wall, I guess is not needed to put then outside, but the grass between the sidewalk and wall looks awkward, normally the wall starts (or end) aligned with the sidewalk, no further. Or if you put a border like Bill say gonna be good too.
I agree with Bill about put some dirt between the rocks, looks more convincing. And dont forget to put the dust and debris, especially near the broked wall.

Following with great interest, keep us updated

Tchau!!!

Audren_Dbó
Biggles2
Visit this Community
Quebec, Canada
Joined: January 01, 2004
KitMaker: 7,600 posts
Armorama: 6,110 posts
Posted: Wednesday, August 28, 2013 - 02:20 AM UTC
Wouldn't the flowers below the hole in the wall be all messed up as a result of the explosion? Or is that yet to come?
minas-ithil
#110
Visit this Community
Florida, United States
Joined: September 20, 2005
KitMaker: 248 posts
Armorama: 224 posts
Posted: Wednesday, August 28, 2013 - 02:21 AM UTC
Anthony C and Ricky G - Thanks for the comments, I am glad that you may glean something from this project.

Bill K - Actually I will be sort-of grouting in the cracks in the sidewalk as we move along, especially with the rubble and dust phase. I thought about the flowers in front of the wall, but with the wall collapse and a planned streetlight along with a possible figure or two, I did not think there would be space. In the next post, I do add some wild flowers (read weeds) to the front, so it does brighten up a bit! Thanks for the suggestions and interest - I really appreciate it.

Biggles2 and Audren - The flowers are currently 'pre-explosion'. Once I begin the rubble and further details all should begin to fall into place. Half the fun is building something intact and then to 'blow it up'!

Stephen (Minas-Ithil)
strongarden
Visit this Community
Florida, United States
Joined: May 14, 2012
KitMaker: 730 posts
Armorama: 624 posts
Posted: Wednesday, August 28, 2013 - 07:19 AM UTC
@Stephen- Thanks for taking the time to present this!

Overall it is coming along nicely. You've already commented on the two things I noticed.
-The absence of mortar between the wall/sidewalk/street stones.
-The narrow strip of grass btwn the wall and sidewalk.

Really enjoy the three types of stonework, a very nice touch. I'll def follow your progress!

Cheers
Dave
mmeier
Visit this Community
Nordrhein-Westfalen, Germany
Joined: October 22, 2008
KitMaker: 1,280 posts
Armorama: 1,015 posts
Posted: Wednesday, August 28, 2013 - 11:41 AM UTC
No mortar in the sidewalk and street is ok. Those are laid in sand and then "swamped in" using a lot of sand and water to fill the cracks. Over time the sand gets lost at least on the upper layer.

The wall is the type of stone where you expect mortar. Trockenmauern (lit: Dry Walls) typically use a different type of stone like here

Assuming germany "flowers on the inside of the wall" are more common than the other way round. Walls typically extend right up to the footpath but footpath where rare outside a city. Without a footpath a "soft shoulder" was common between the wall and the road, the one at my parents can hold a 1990s "Ford Mondeo" parallel parked.

minas-ithil
#110
Visit this Community
Florida, United States
Joined: September 20, 2005
KitMaker: 248 posts
Armorama: 224 posts
Posted: Monday, September 09, 2013 - 06:52 AM UTC
To One and All,
Sorry for the long delay in posting. Some work got in the way and, by popular demand, I needed to 'fill in the cracks' of the sidewalk, street and wall. So here it goes. First of all some updates on the flora - I added some wildflowers and/or weeds to the grassy areas to add some color and different textures.


I also found this cool planter/birdbath to use to help convey the 'garden theme.


Now for the main critique of this piece - the mortar, or lack thereof. I filled the street, sidewalk and wall with the fine 'dirt' from Scenic express and then 'fixed' it with watered down white glue. There are still a few gaps in the wall, mainly adjacent to the blown out section, where it has been knocked loose. We will start with the before mortar and then a couple of post-mortar pictures.


As was pointed out, the 'fill' around the cobbles and sidewalk tiles was usually just compressed sand that would get weathered away over time, so these cracks are filled, but not all the way filled. I hope that will give the proper effect. The cobblestones will need some more washes and drybrushing to 'bring them out', but the wall and sidewalk are pretty good - they may need some minor touchup.

With that oversight on my part addressed, next we have the rubble from the wall. I took the appropriate number of blocks that would have been in the wall section, smashed them and made the piles. This way there is the 'right amount' of debris. To me, nothing looks worse than a ruined building with a little pile of rubble. Once the main rubble was fixed, again with white glue, I added some small talus and some of the medium and fine dirt to add the 'fine debris'. All of this was painted with washes and a little airbrushing. The rubble on the inside of the wall was added and the flowers were crunched down a bit with the 'rocks and stuff.


Next items are a streetlight next to the wall, weathering up the Jagdpanther to match the groundwork, and maybe a figure or two. I am still debating that. My first plan was to have some GI's on the streetside of the wall, but the area is pretty tight, so I may have a couple of German infantry moving along with the Jagdpanther. As before, comments are welcome.

Thanks,
Stephen (Minas-Ithil)
minas-ithil
#110
Visit this Community
Florida, United States
Joined: September 20, 2005
KitMaker: 248 posts
Armorama: 224 posts
Posted: Wednesday, September 11, 2013 - 05:19 AM UTC
To One and All,
After a small marathon session to complete this for a club build, the scene is done! I may add a figure or two down the road, but the main build is completed. First I weathered up the Jagdpanther to fit the scene, as shown below.


When this was completed I painted and weathered the lamppost from the Tamiya sign set. I added a couple empty shells, from Aber if I recall correctly, to the back deck and the ground. Hopefully this will help folks figure out what the shell ejection port is on the back of the superstructure. I added a little bit of stowage to the AFV, some helmets, a couple of Jerrycans and a tarp, since usually Jagdpanthers were pretty clean. A number of side and top views follow.


Thanks for the interest. I hope that some of you may have learned a new trick or two. Comments are always welcome, as some were helpful on this project. Keep the plastic building!

Stephen (Minas-Ithil)
communityguy
#280
Visit this Community
Texas, United States
Joined: May 14, 2012
KitMaker: 493 posts
Armorama: 358 posts
Posted: Saturday, April 05, 2014 - 12:02 PM UTC
Great work! I love how it's come together!

Two questions:

1. You say you "cast" the street bricks/cobblestones from DAS clay using something from Diorama Debris.... would you mind explaining this a bit further? I can't imagine using DAS clay to "cast" something.

2. Where did you source the Silflor flowers? I can't seem to find a source here in the US, but maybe I'm just dense...?

Thanks!
parrot
Visit this Community
Ontario, Canada
Joined: March 01, 2002
KitMaker: 1,607 posts
Armorama: 1,581 posts
Posted: Sunday, April 06, 2014 - 05:18 AM UTC
Like it alot Stephen.
Those are the best flowers I've seen and I think they should be on the inside of the wall.Makes more sense.No one would plant flowers outside their property,also makes the container seem right as if the tank ran through a back yard.
Just my opinion,but adding some figures would really bring it to life.
Nice work.

Tom
Paulinsibculo
Visit this Community
Overijssel, Netherlands
Joined: July 01, 2010
KitMaker: 1,322 posts
Armorama: 1,239 posts
Posted: Sunday, April 06, 2014 - 05:51 AM UTC
Hi Stephen, good looking dio you made!
I can remember a leo, running through a well kept garden during an exercise in Germany. This could happened here as well, thus ending up at the inside part of the wall.
But............
All bricks and debries lay on the street, therefore, the force would have come from inside the garden. The flowers are still upright in front of the gap, so, it looks like it has been thorn down from the street side.The AFV is still too far from the wall, so, it is not the cause. (I presume that you do not want to suggest that the canon was used as a sledge hammer!!!)
So, what is my point?
It lacks logic!
Make a clear relation between the debries and the situation. That would improve your dio even more.

I hope you allow my thoughts!

Looking forward to read your comment,

Cheers.

P.
 _GOTOTOP