


I'm using the Tasca/Auska M4A1 late kit as the base for the lower hull, the T23 turret from the Tasca/Auska M4A3(76) kit and other bits and pieces from it also. I would have bought the sprues directly from Tasca/Auska, but they are out of stock on their English site, but not the Japanese site

I'm also using New TMD M4A1 late upper big hatch hull on this build, but I'm waiting on a recasted part due to what I think was shrinkage/manufacturing boo-boo on Joe's part. The original part I got seriously pinched in the lower hull sides making it useless, even after me trimming parts to make it fit.
I'm starting off with the turret, which was modified one of the 400 or so built with out the rear turret ventilator fan casing on the back of the turret.
Here is a shot of one in France...it might be the sole surviving example of this turret, since I never see one else where. It also has some post war mods done to it (filled in mortar port, mantle cover mounting hardware, welded in place loaders hatch), but it was a good example to base my work on.

I stared with the T23 turret from the Tasca M4A3(76) kit and filled in the fan ventilator port area with some magicsulpt, did some minor reshaping near the turret front and added the fillet between the turret hatches.

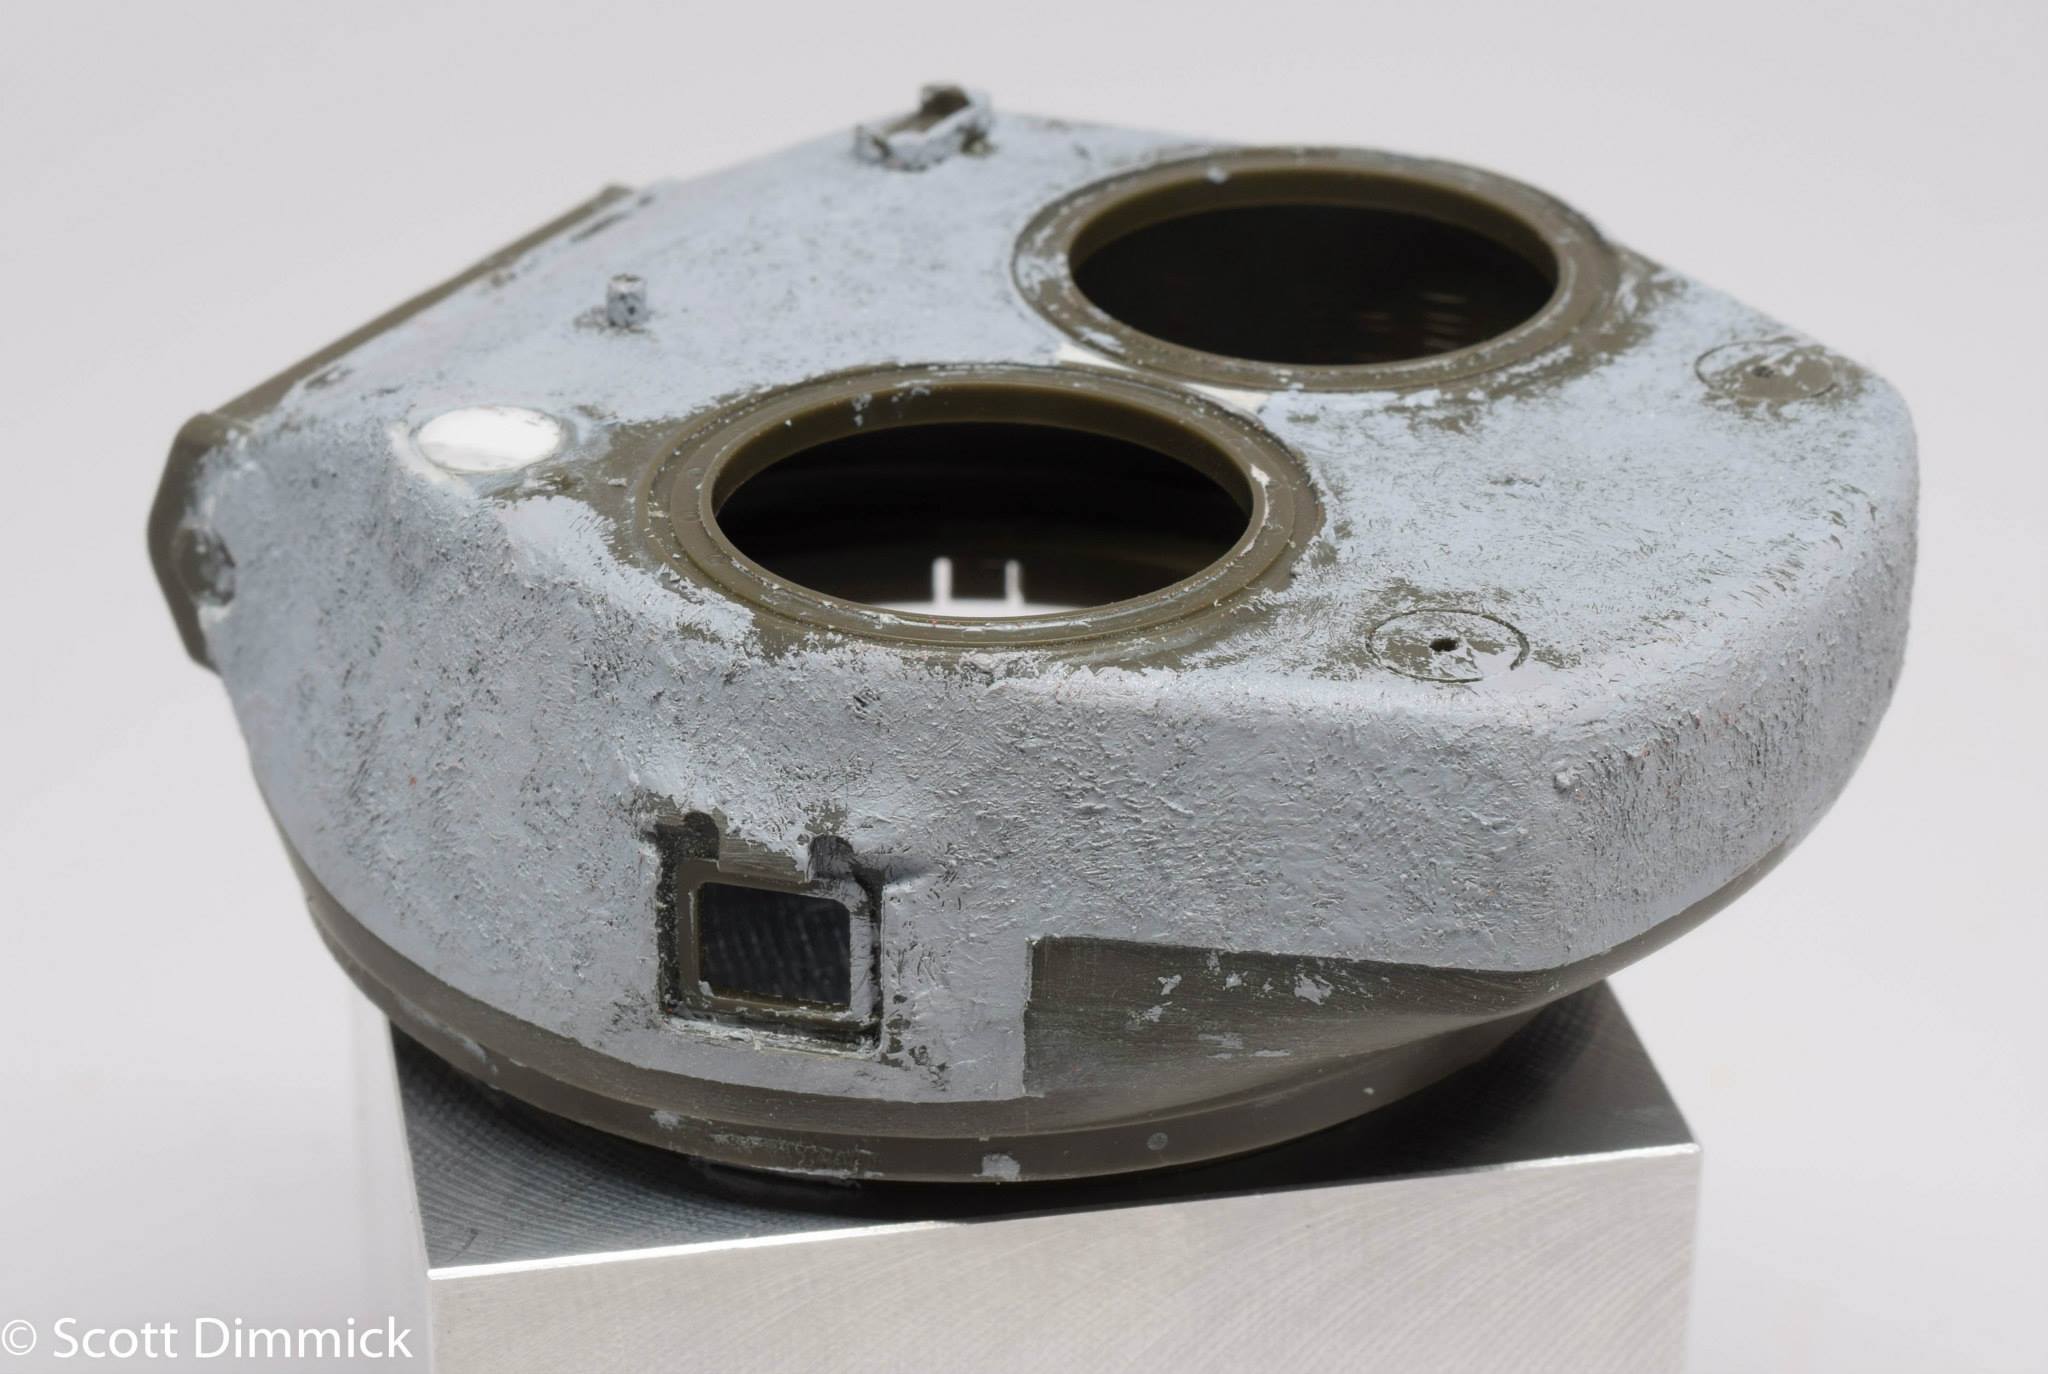
I used a 3M tape to mask for the casting ridges on the turret. Its a plastic type tape thats about 1/16 wide that I got in Michaels craft store years ago. Its slightly thicker then most masking style tapes. I applied then then took some Tamiya Grey putty and spread it over the top of it to make a ridge.
After that setup, I took some Tamiya Grey Putty mixed with MEK to thin it a bit to make a rough casted texture on the upper parts the turret and sides. That was left to set up for an hour or so, then I took a medium grade sanding stick to cut back on the roughness of it, which IMO give you a better looking sand casting in 1/35 scale.
I also repositioned the .50 mounting hardware on the rear of the turret and added a .50 Cal gun brace from a Dragon kit on the back. I thinned it down little bit to make it more in scale with the Tasca item. The loaders hatch was modified to the Push Pin style hatch using some bits of plastic and .50 rivets for the push pins.


The lower part of the turret below the hard lines I did with the 3M tape and Tamiya putty was casted using MR Surfacer 500, so the lip effect wasn't lost.
I also added the redundant antenna mount and reshaped the budge it had on the turret using some scrap styrene and MagicSculpt. I goofed on the antenna opening when I was originally scribing it, so I winded up rescribing it in its correct position, cutting the hole out and filling it in with a disc done with a punch and die set...I was quite happy with the result since it looked better then my scribing I did the first time around. You can also see the Archer Casting Numbers I used (with proper codes, outside of the ones on the hatch doors
 ) in these shots.


