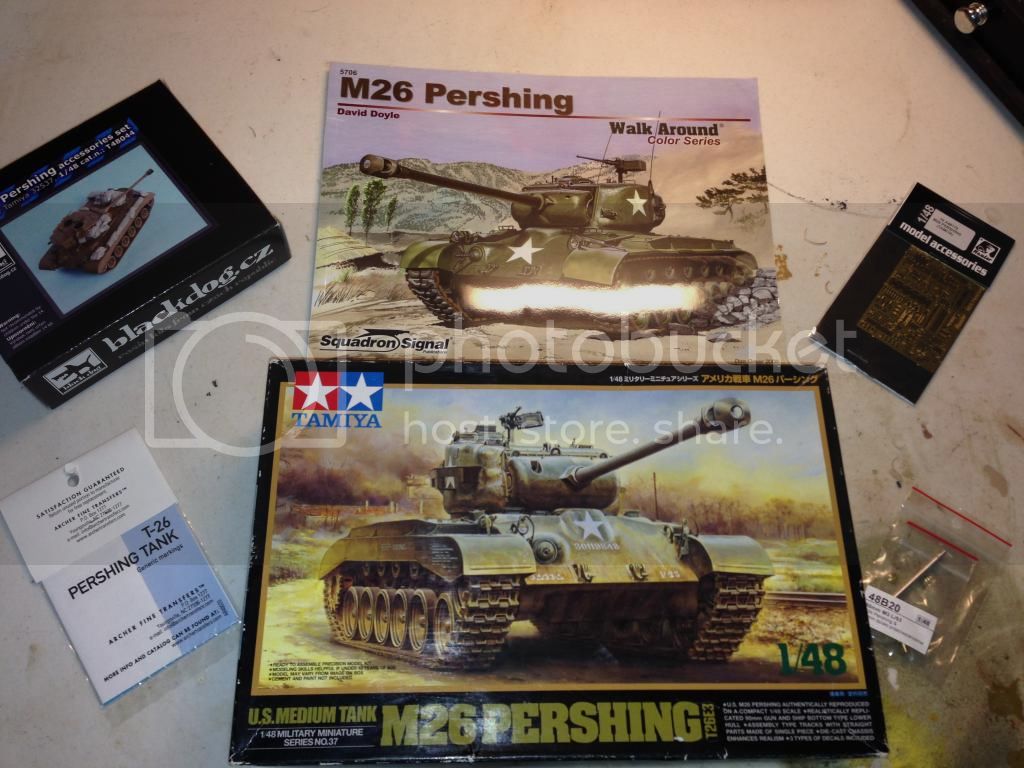
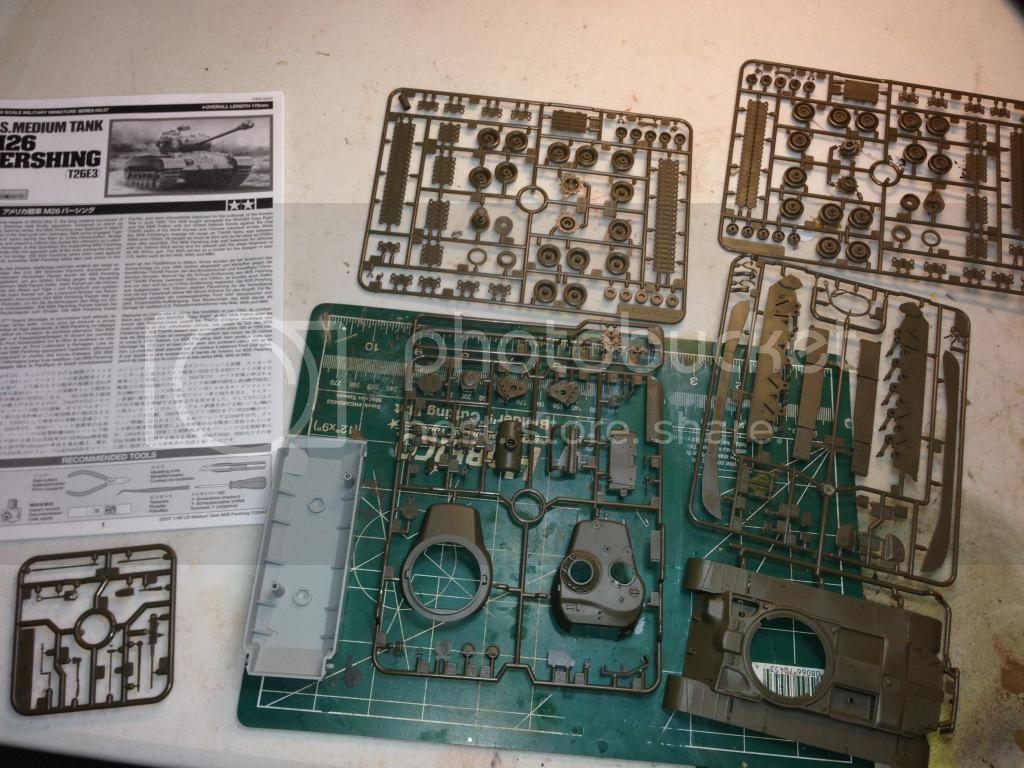
Hello all! I've been visiting this forum for a while now and finally decided to post a build log. I primarily build 1/48 scale armor and this is my current project: Tamiya's M26 Pershing. The plan is to build it up as a T26E3 serving in the last months of WWII. I'll be using Squadron's M26 Pershing Walk Around by David Doyle as my primary reference. Aftermarket mods will be a Hauler PE set, Black Dog stowage, RB metal barrel, and Archer dry transfer markings. Thanks for looking!
Matt
TankSGT
New Jersey, United States Joined: July 25, 2006
KitMaker: 1,139 posts
Armorama: 946 posts
You picked a good kit, I built it a while back and had a fun build. If you drill out the cupola vision blocks and fill with Kystal Clear real adds to the look of the kit.
Tom
"ALLONS" 11TH ACR BLACKHORSE
"Death Before Dismount"
19K40/ Dino Rider 19F10
ericadeane
Michigan, United States Joined: October 28, 2002
KitMaker: 4,021 posts
Armorama: 3,947 posts
1) make sure you blend in C27 to the turret wall. The lip around the shell ejection hatch was part of the turret casting. 2) Phone box B15 and B16 was a postwar mod. Not seen in WW2 Europe.
I'm not sure on this, but I do not think that WII T-26s had the turnbuckles reinforcing the the fenders to the hull either. They are supplied in the Hauler set.
Modelling is not just a hobby, it's an addiction.
mdbond148
Arkansas, United States Joined: March 29, 2013
KitMaker: 24 posts
Armorama: 23 posts
Great advice guys, thanks! Like ya'll said it does not appear that the WWII tanks has either the phone box or the turnbuckles on the fenders. I'll be leaving those off.
Matt
mdbond148
Arkansas, United States Joined: March 29, 2013
KitMaker: 24 posts
Armorama: 23 posts
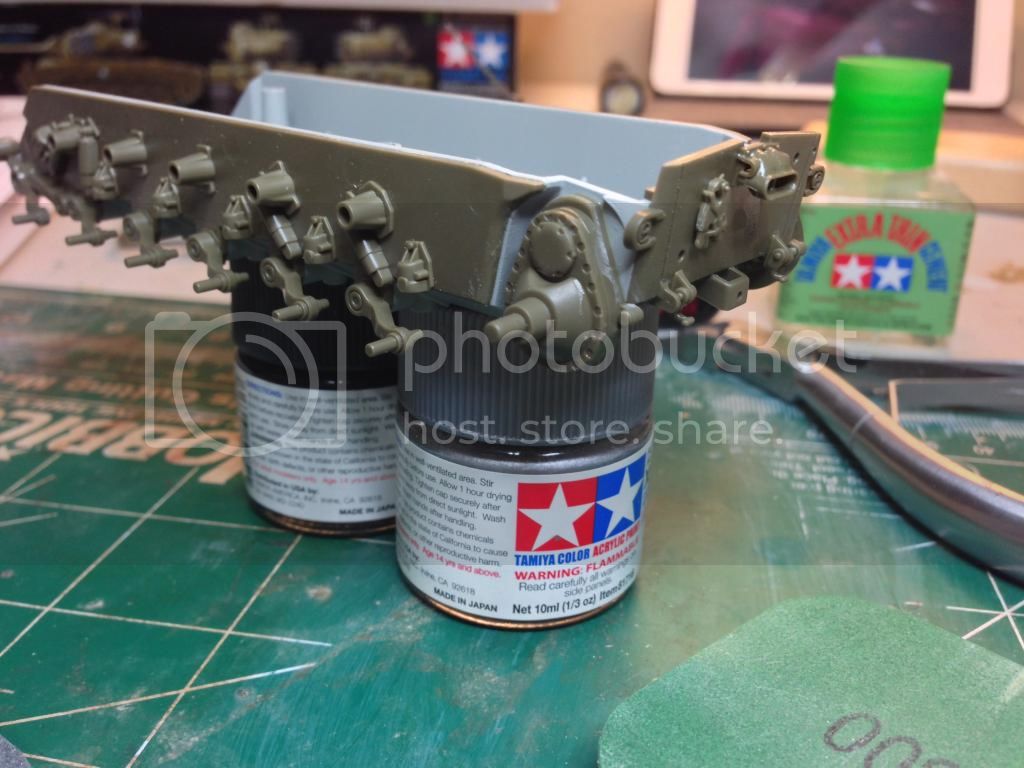
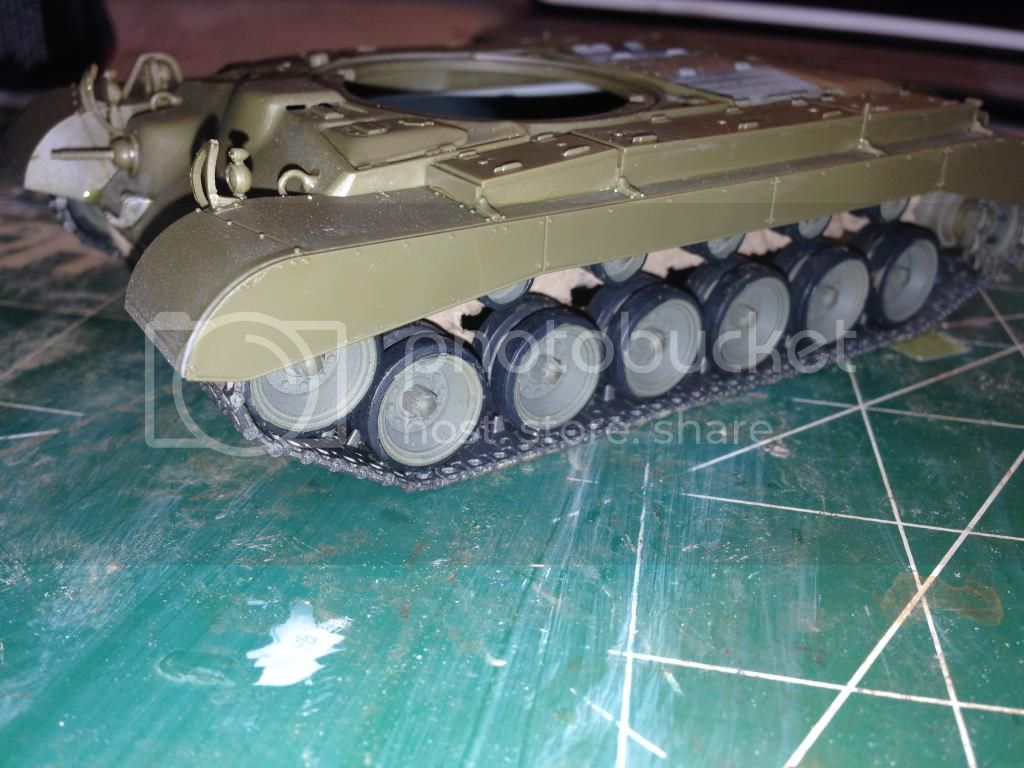
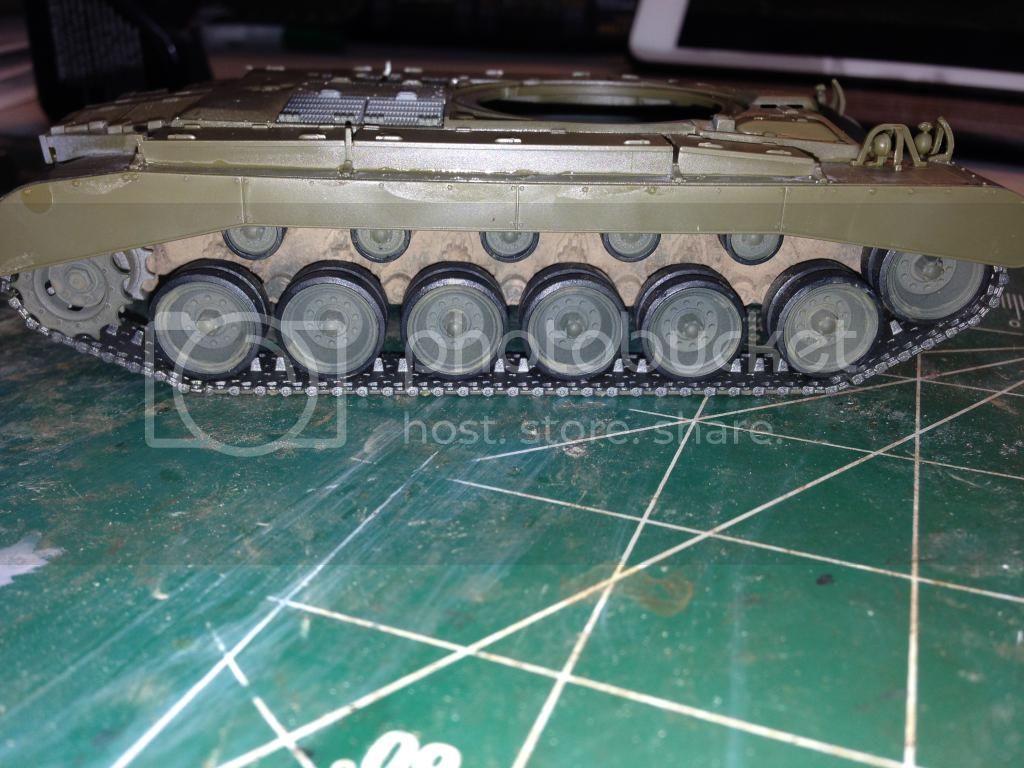
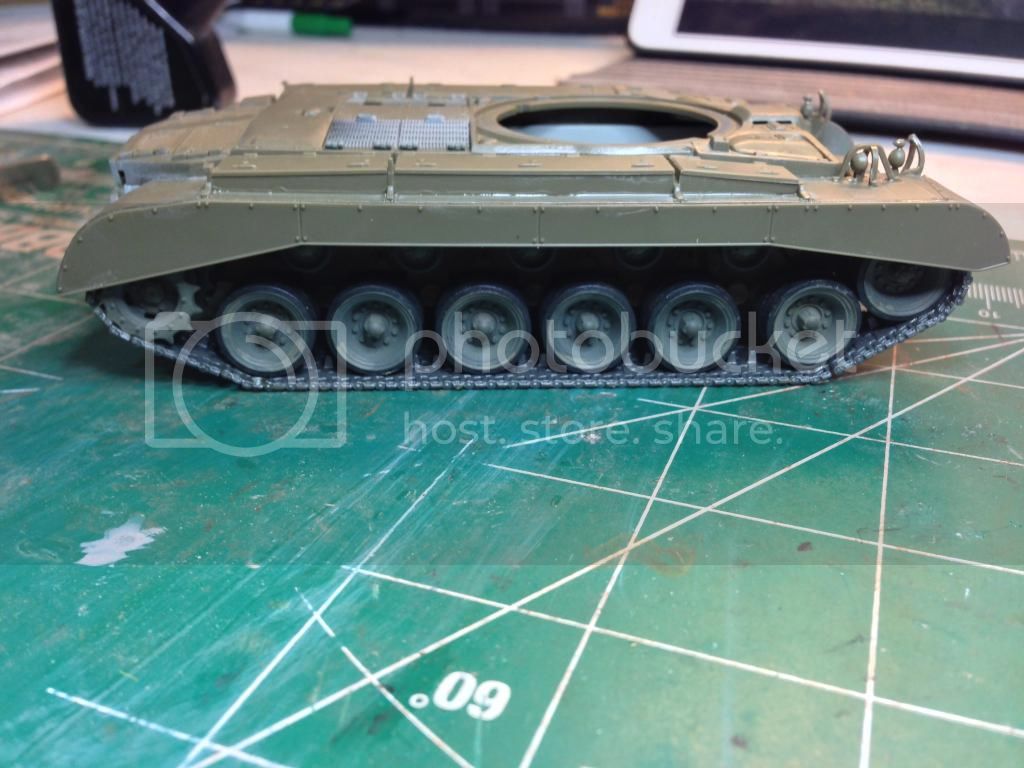
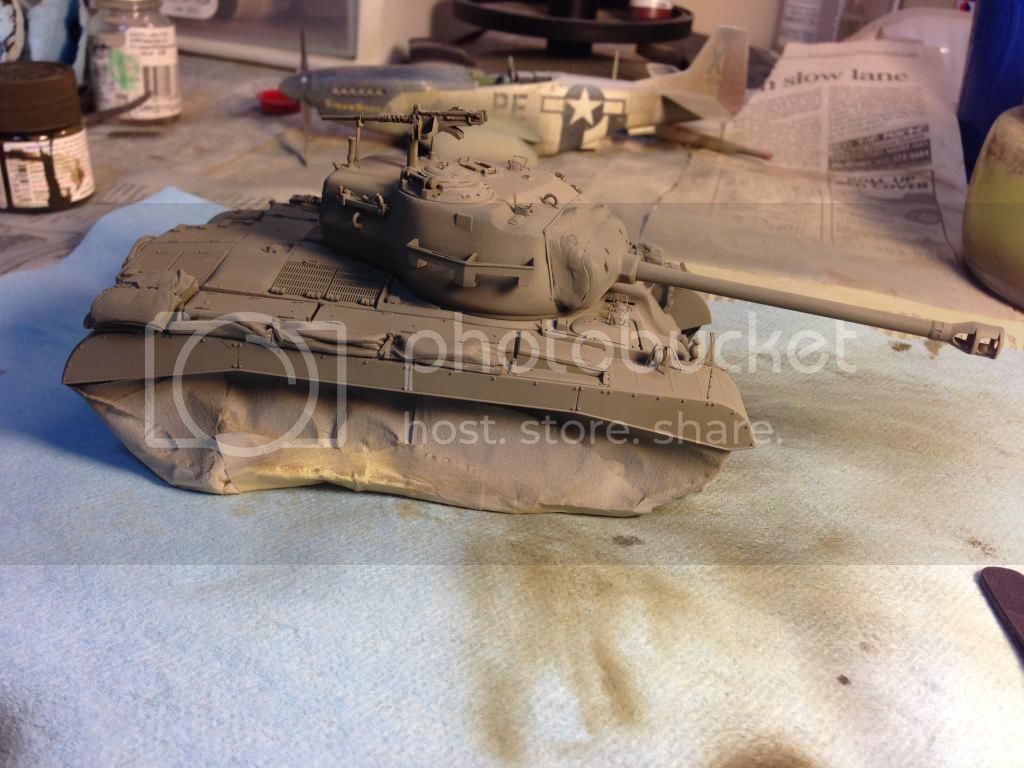
I made good progress this week. I painted and assembled the running gear and did an initial round of weathering on the sides and bottom of the hull. At this point the hull is mostly complete except for the rear and PE.
mdbond148
Arkansas, United States Joined: March 29, 2013
KitMaker: 24 posts
Armorama: 23 posts
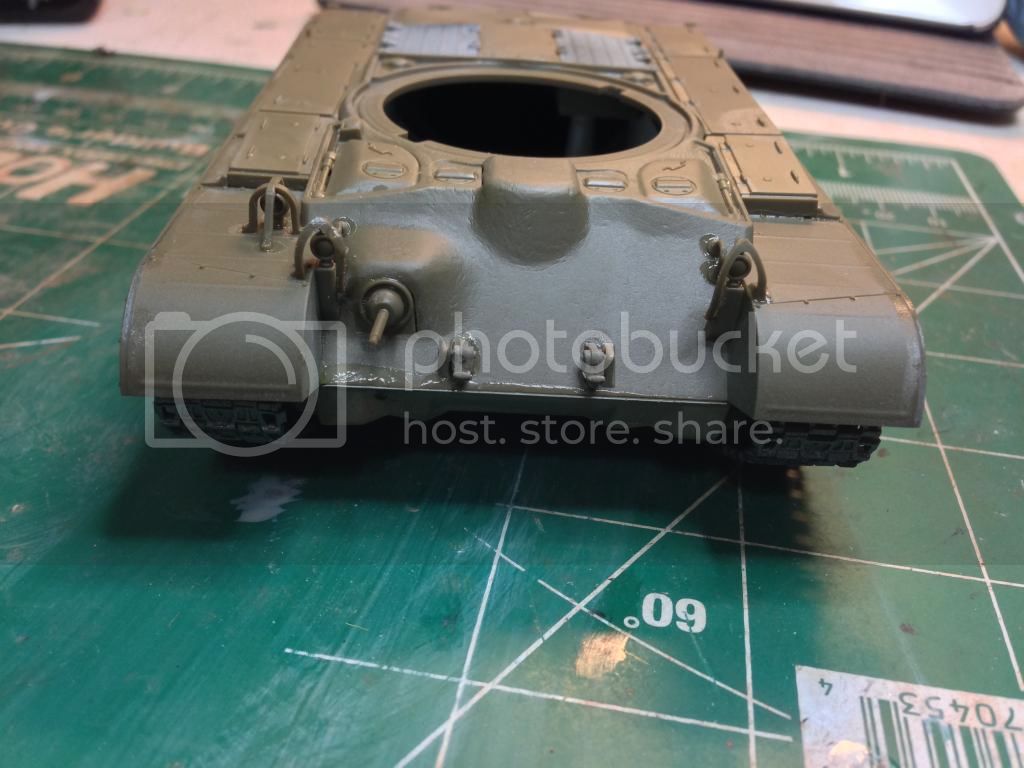
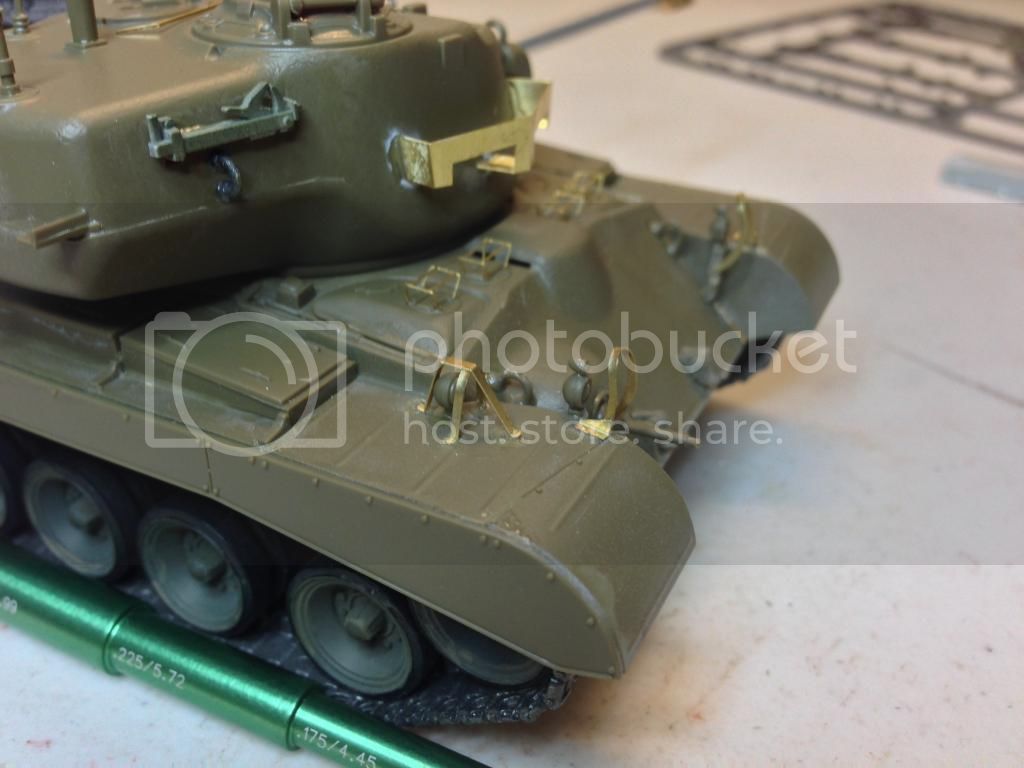
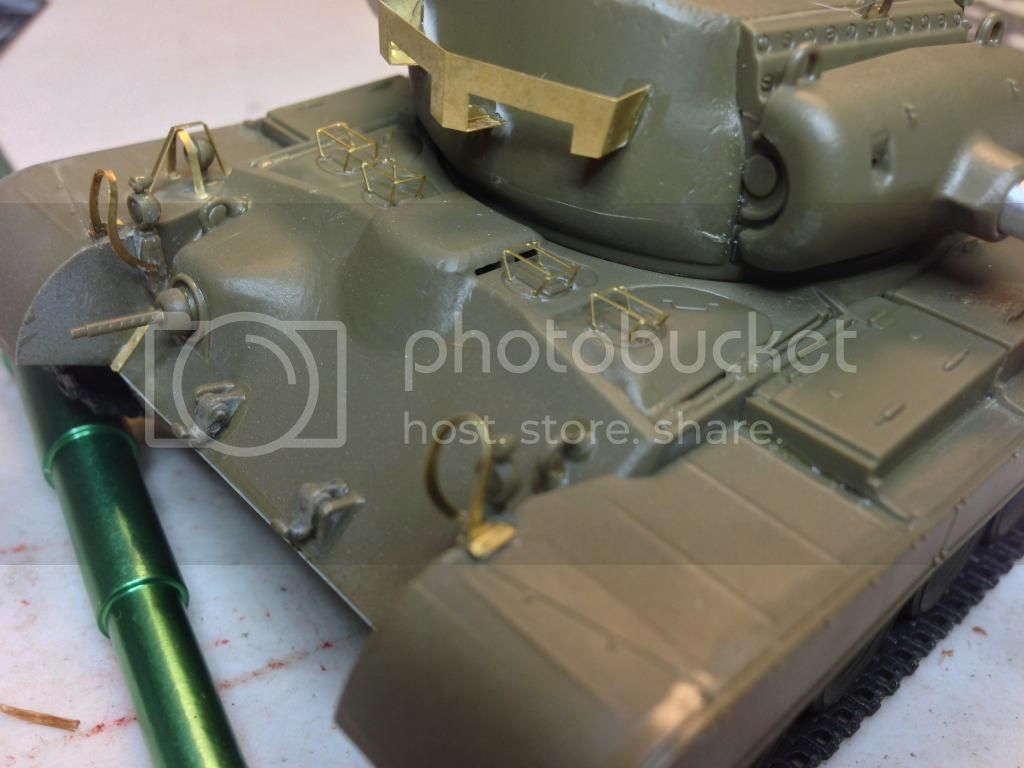
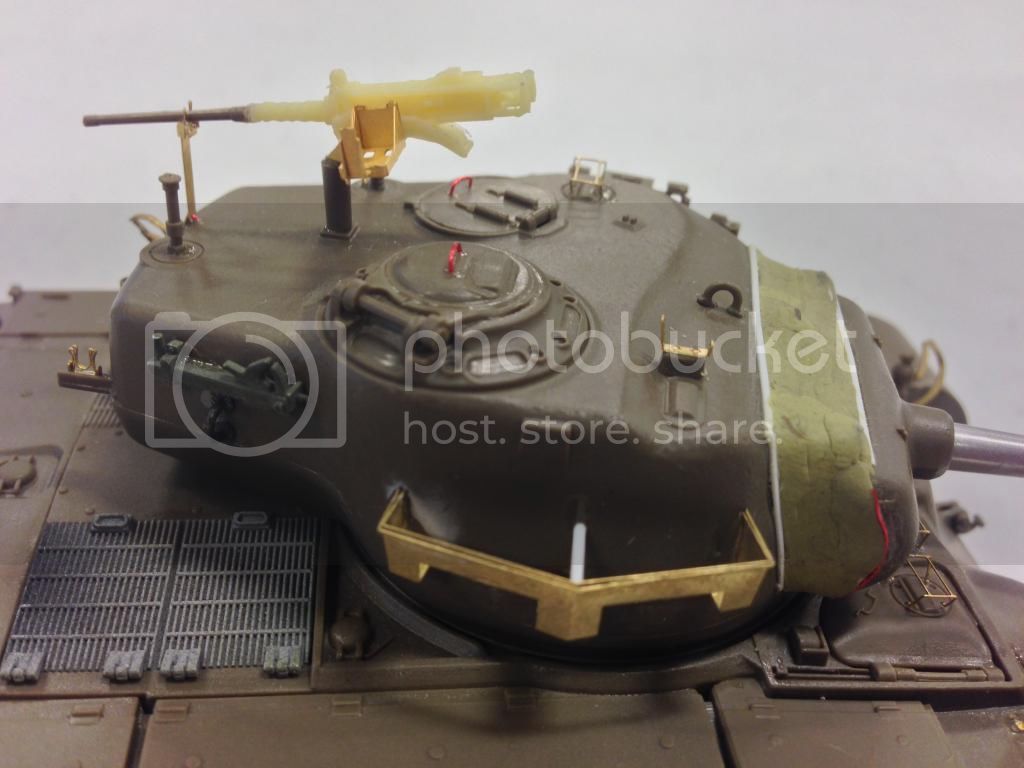
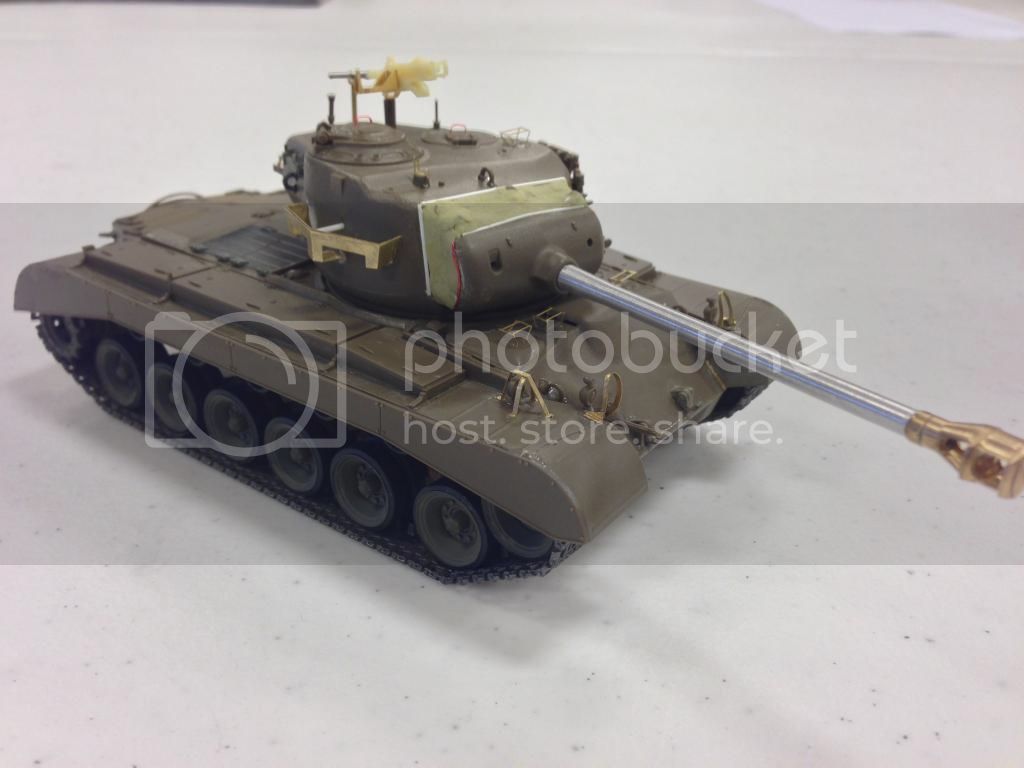
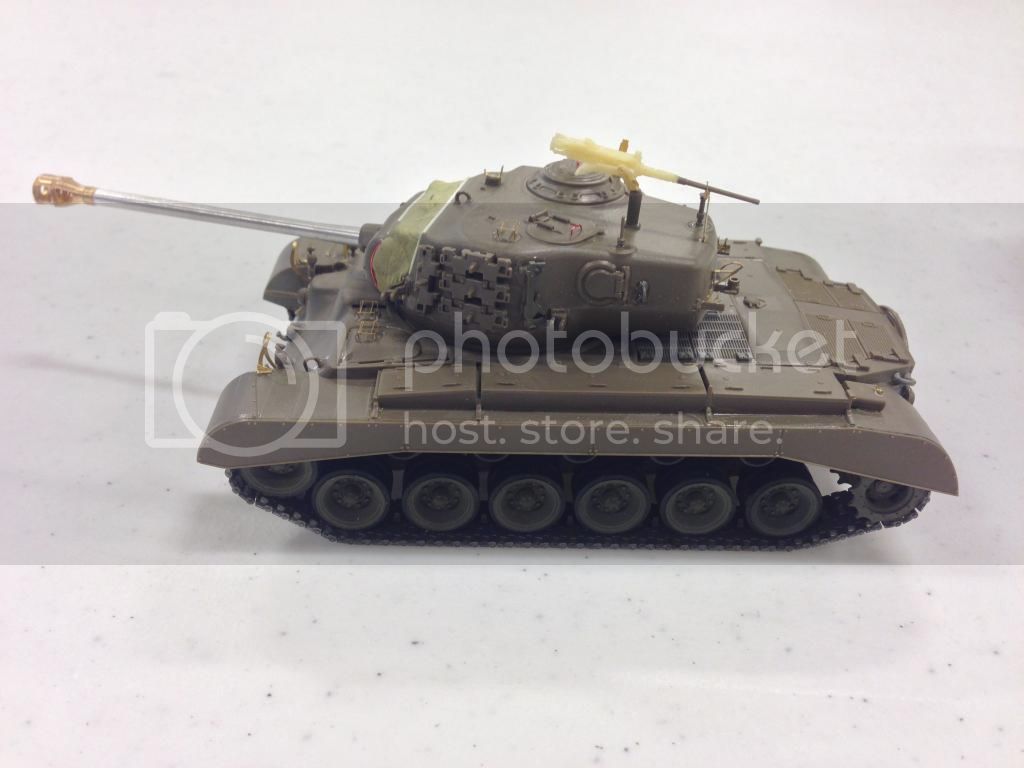
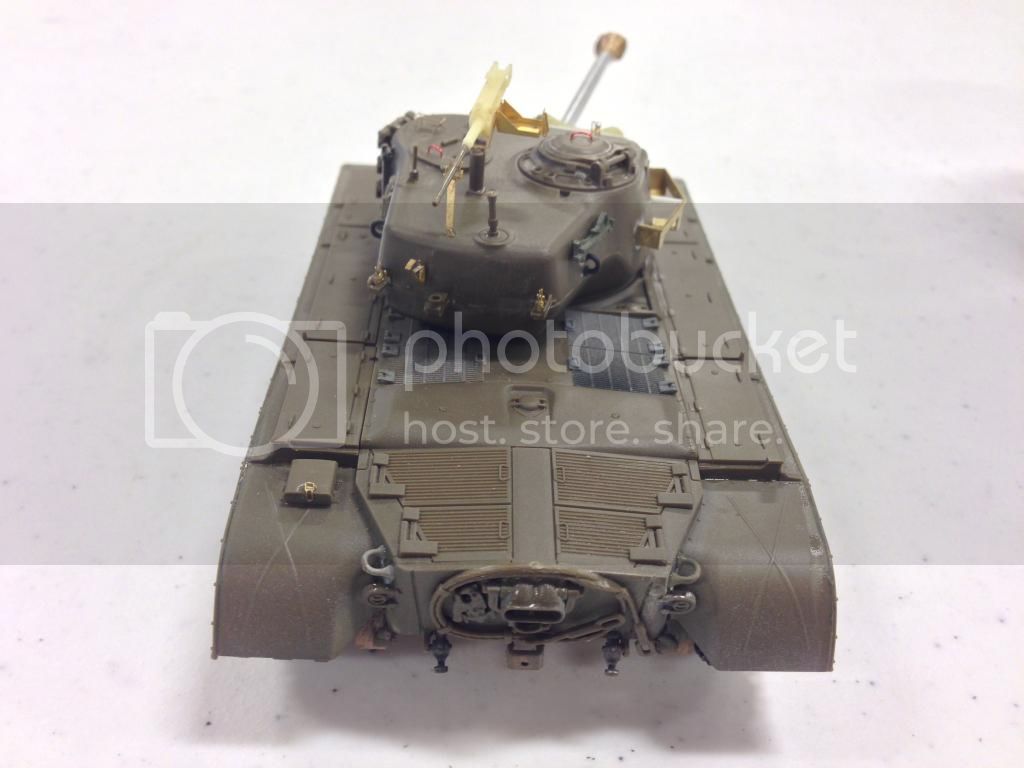
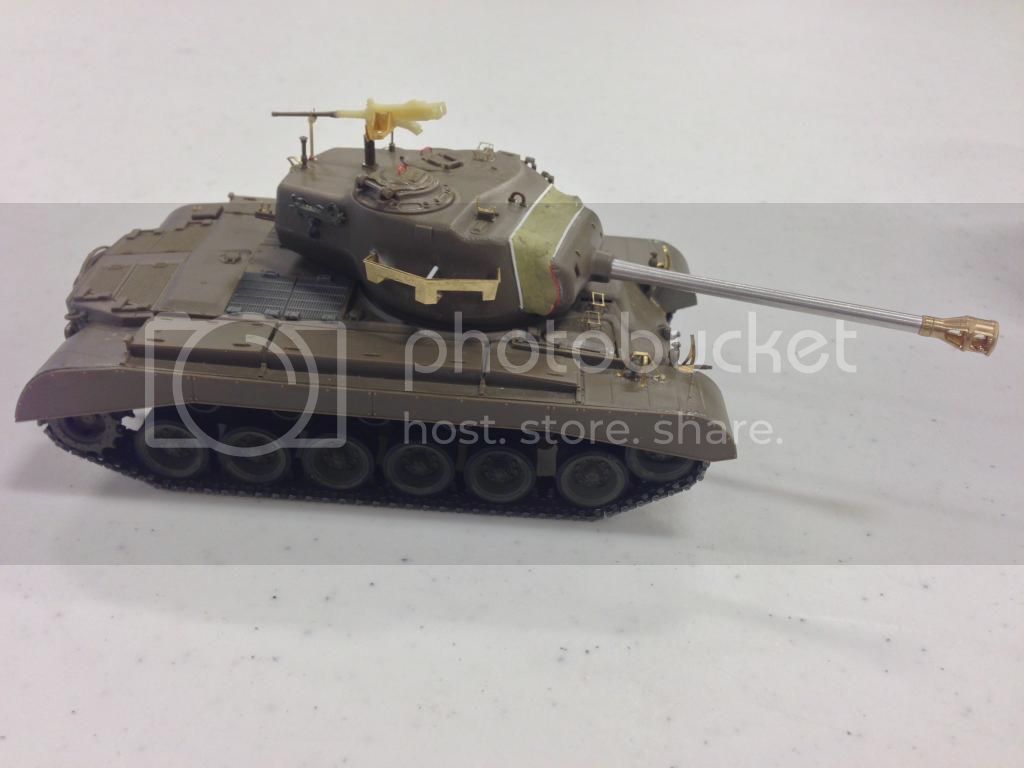
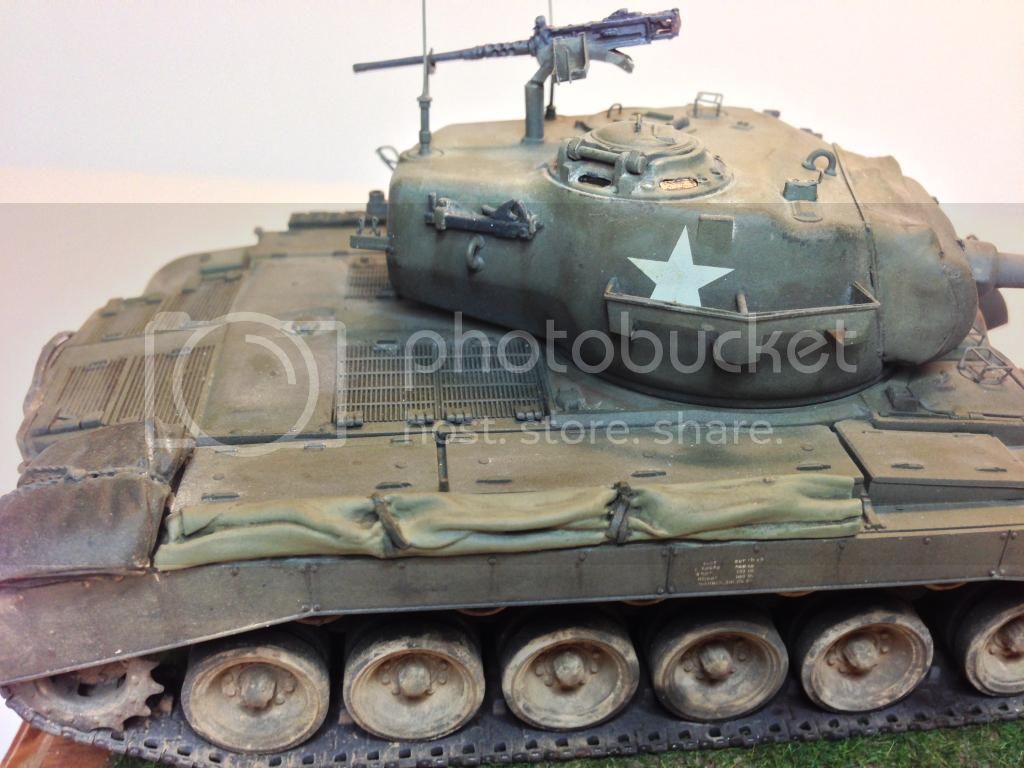
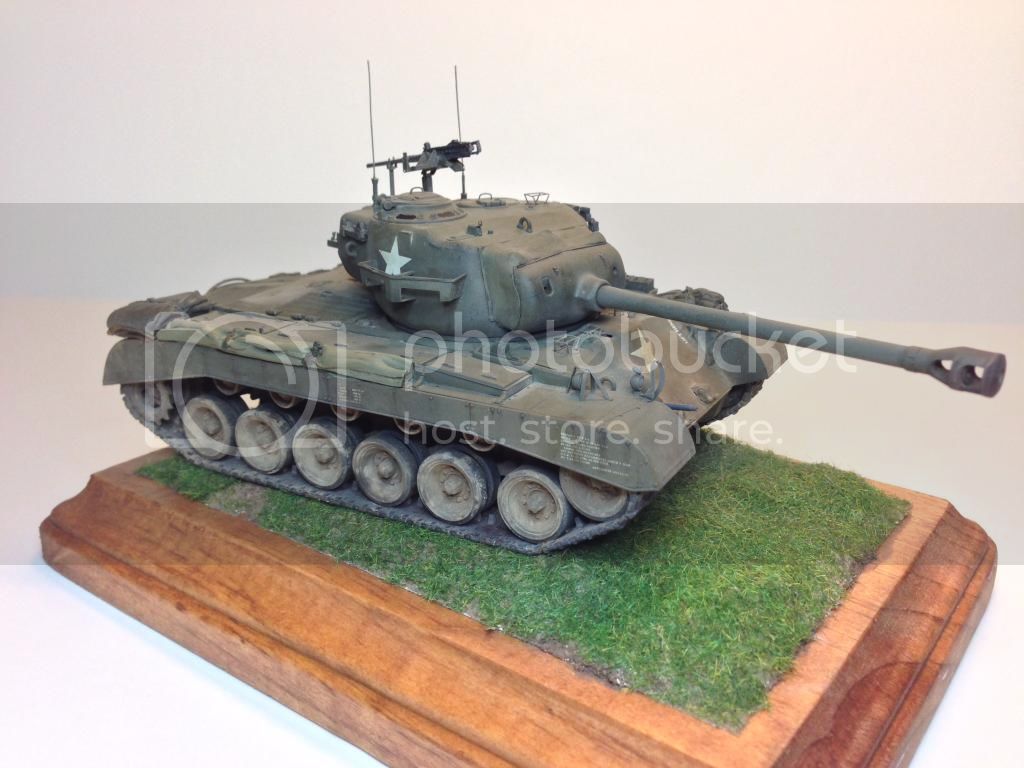
Well the Pershing is about ready for priming. I came to my senses and deleted the overly thick light guards and went with the PE. I used a Mission Models PE tool to get the rounded shapes and it made a huge difference. I really like how the guards came out.
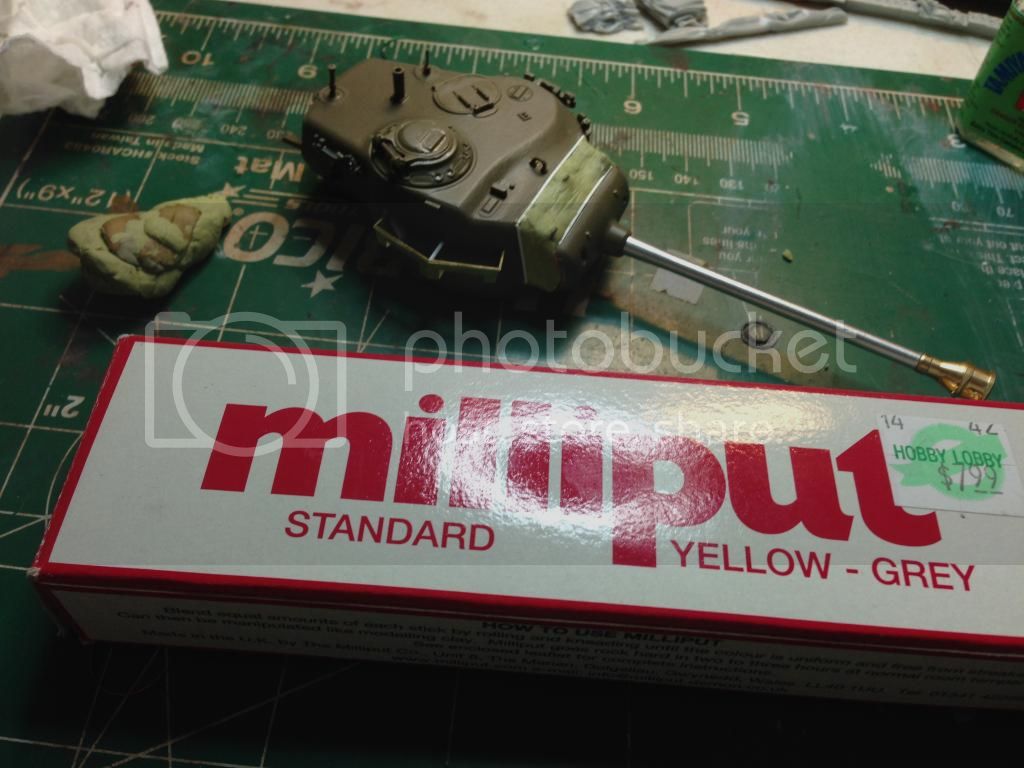
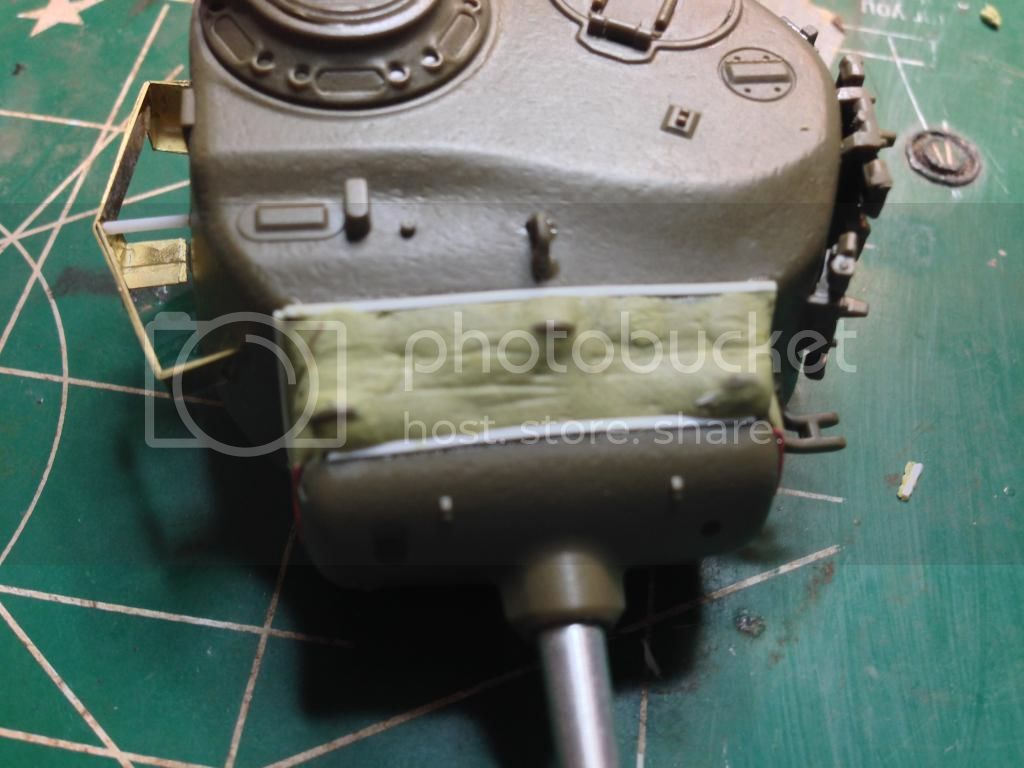
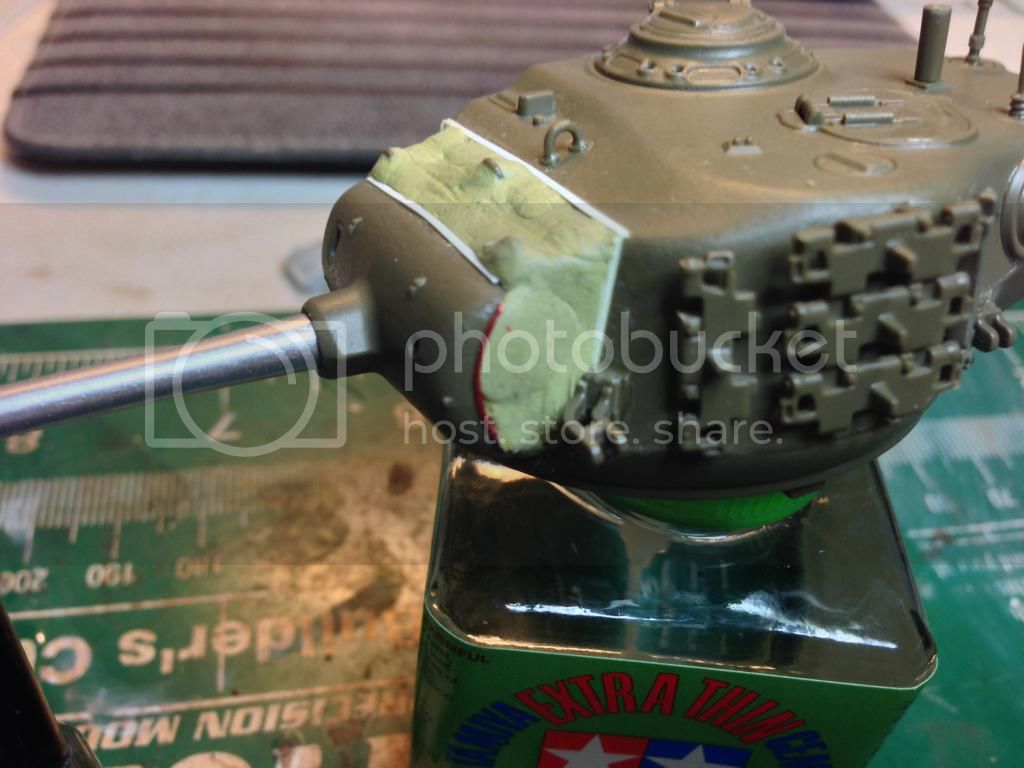
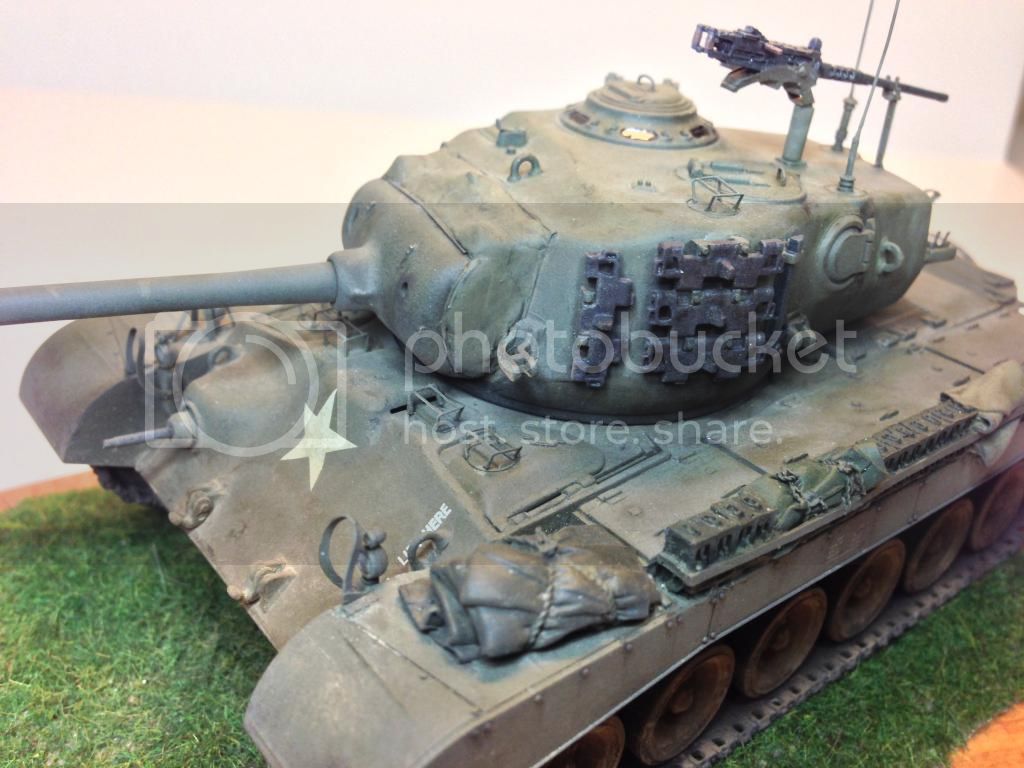
The next challenge was the partial mantlet cover. All Pershings sent to the ETO had these covers so it was necessary to add it to my model. I've never done one of these before so I did some searching online and found good advice on how to use epoxy putty to replicate a cover and went with that. The cover is Milliput putty and the brackets that held the cover in place are simulated with plastic rod and magnet wire.
Once that was done it was on to the remaining PE and the .50 cal. I "Frankensteined" the .50 using a Hualer PE mount and a Verlinen resin body. The resin barrel was bent and I wasn't sure if I could drill out the barrel so I cut it off at the cooling jacket and stuck part of the stock barrel on. I am pretty satisfied with the result.
Well so far so good. Hopefully I will get it primed this weekend and start the paint process. The goal is to finish this by September 27 which is when my club has our annual show. Thanks for looking!
Before you prime, maybe you should rework the mantlet cover with more folds and creases, and there is a glue spill on the lower right glacis, right under the MG which, it is CA, will still be visible under the primer.
ericadeane
Michigan, United States Joined: October 28, 2002
KitMaker: 4,021 posts
Armorama: 3,947 posts
Your long D40733 CRADLE AND PINTLE ASSEMBLY wouldn't be fitted to the roof pintle.
2) Add some putty to the seam around part C27 (shell ejection port). That lip was part of the turret wall's casting -- look at your references and you'll see what I mean.
Roy Chow
Join AMPS!
www.amps-armor.org
mdbond148
Arkansas, United States Joined: March 29, 2013
KitMaker: 24 posts
Armorama: 23 posts
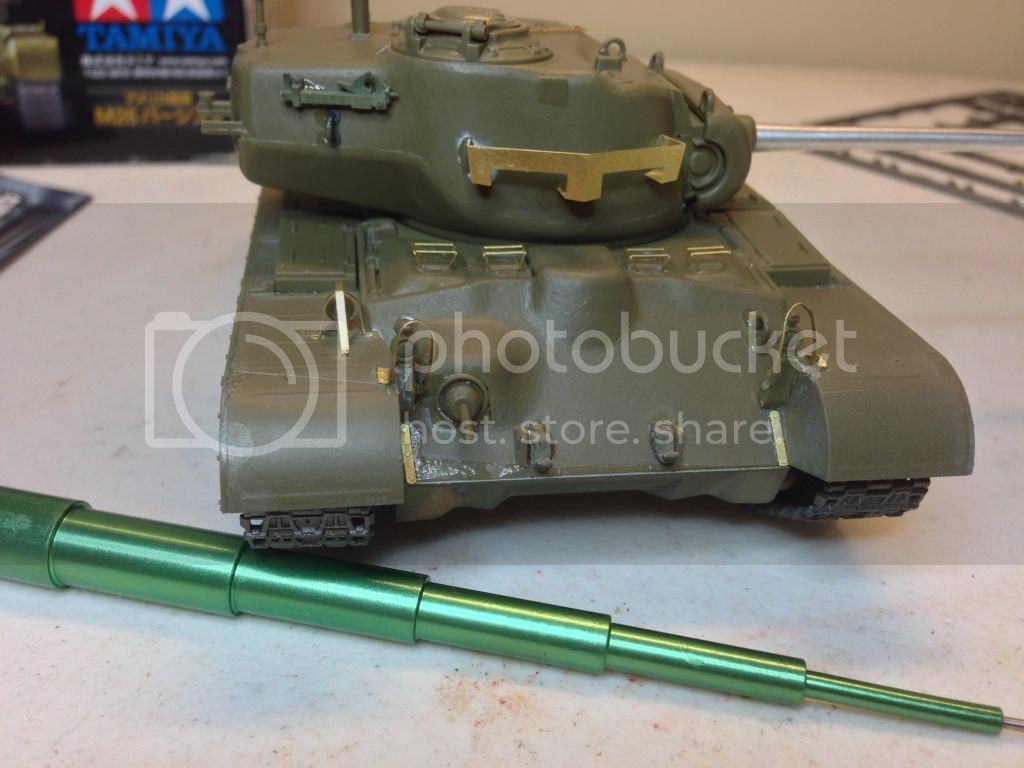
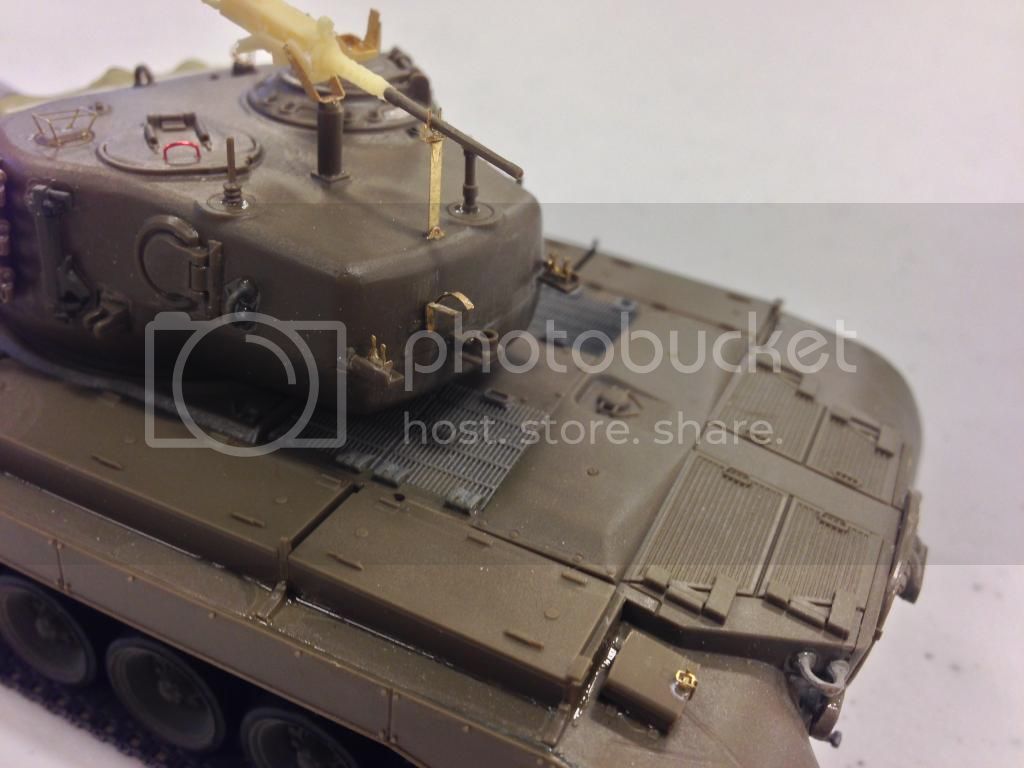
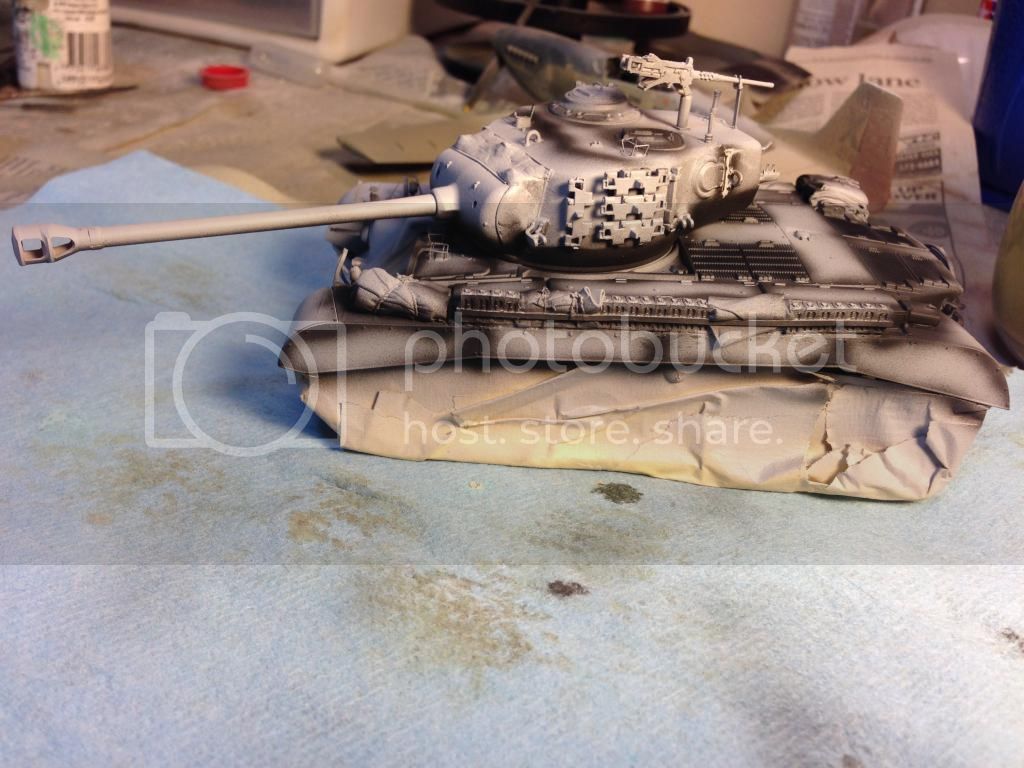
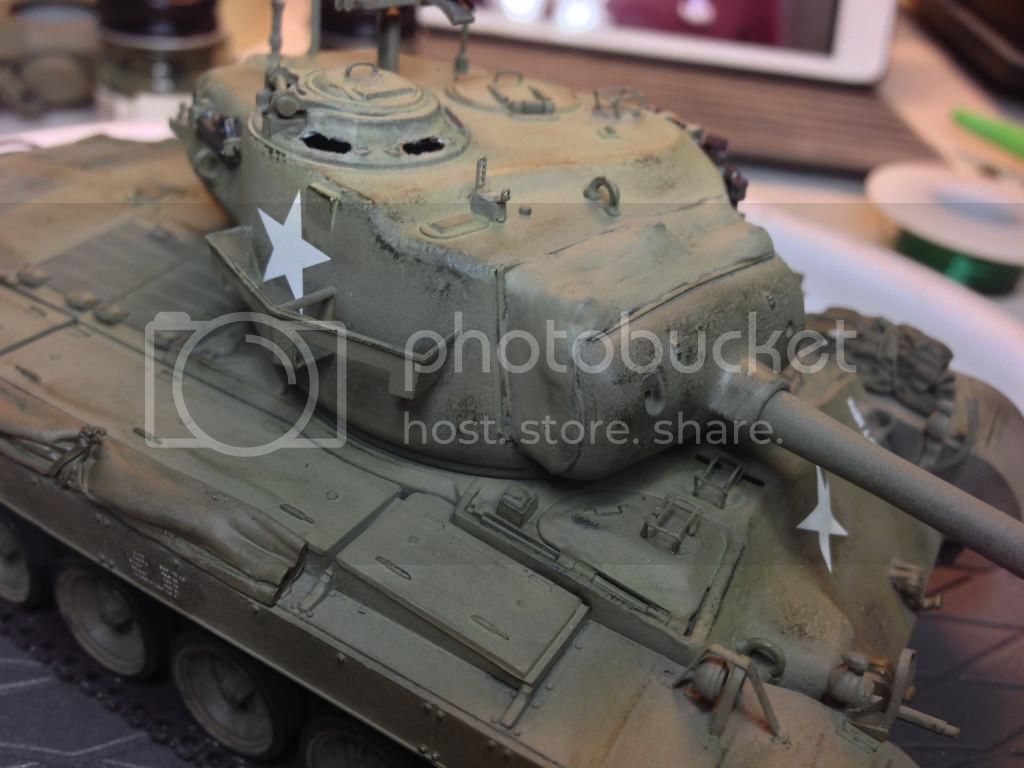
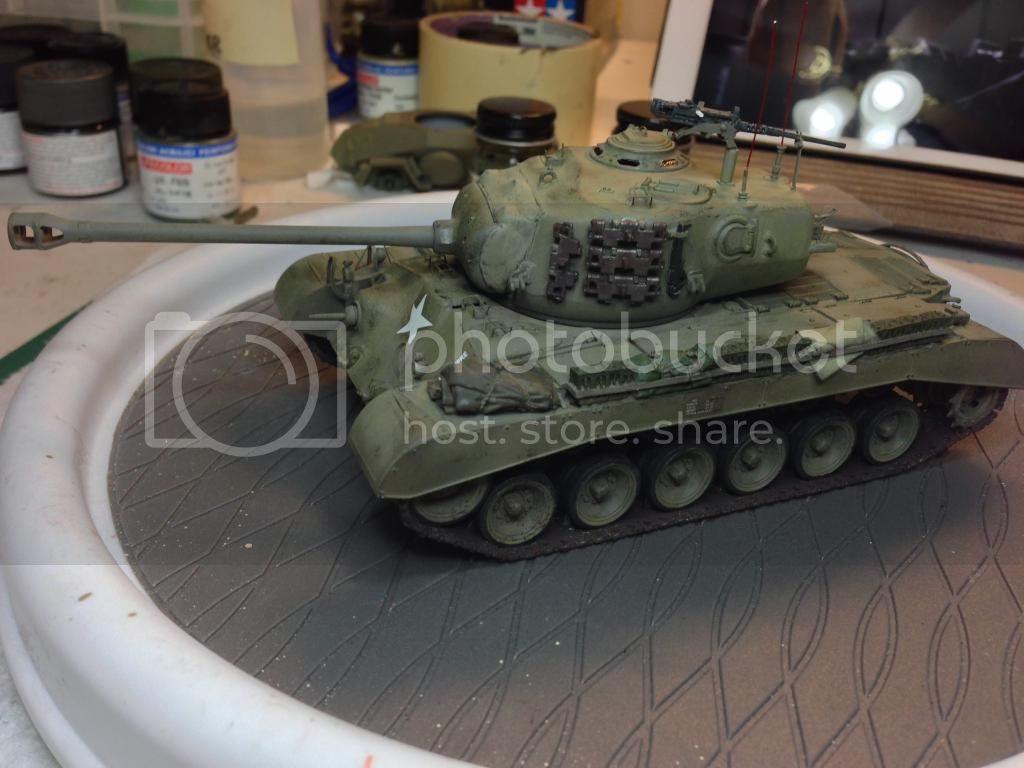
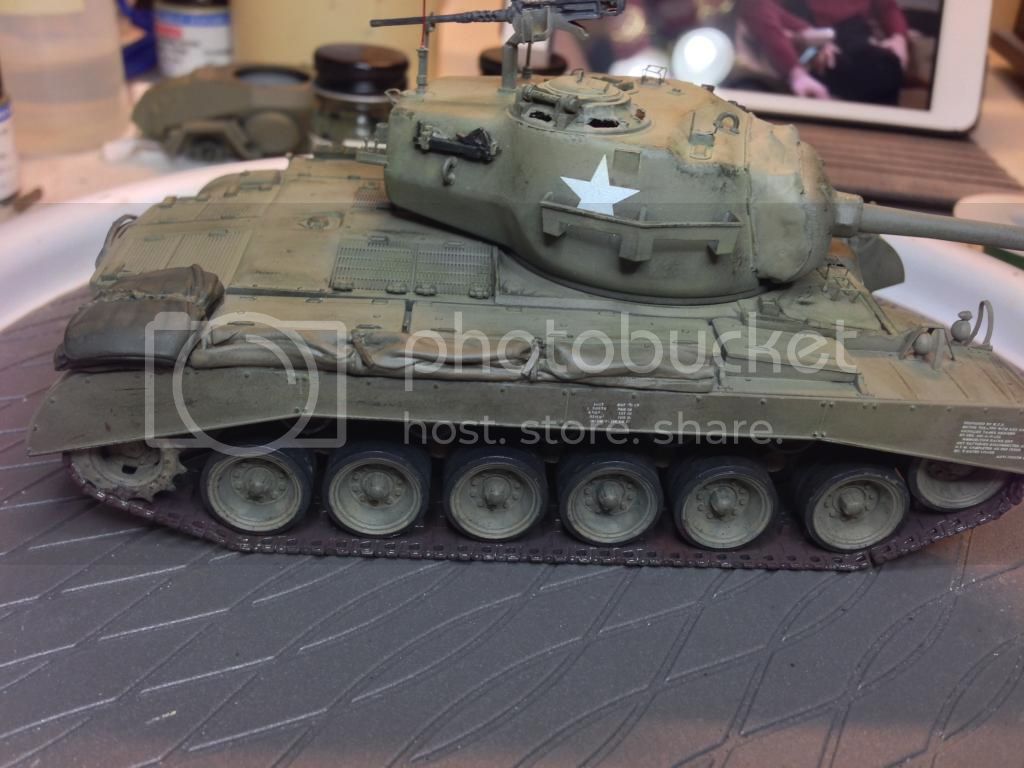
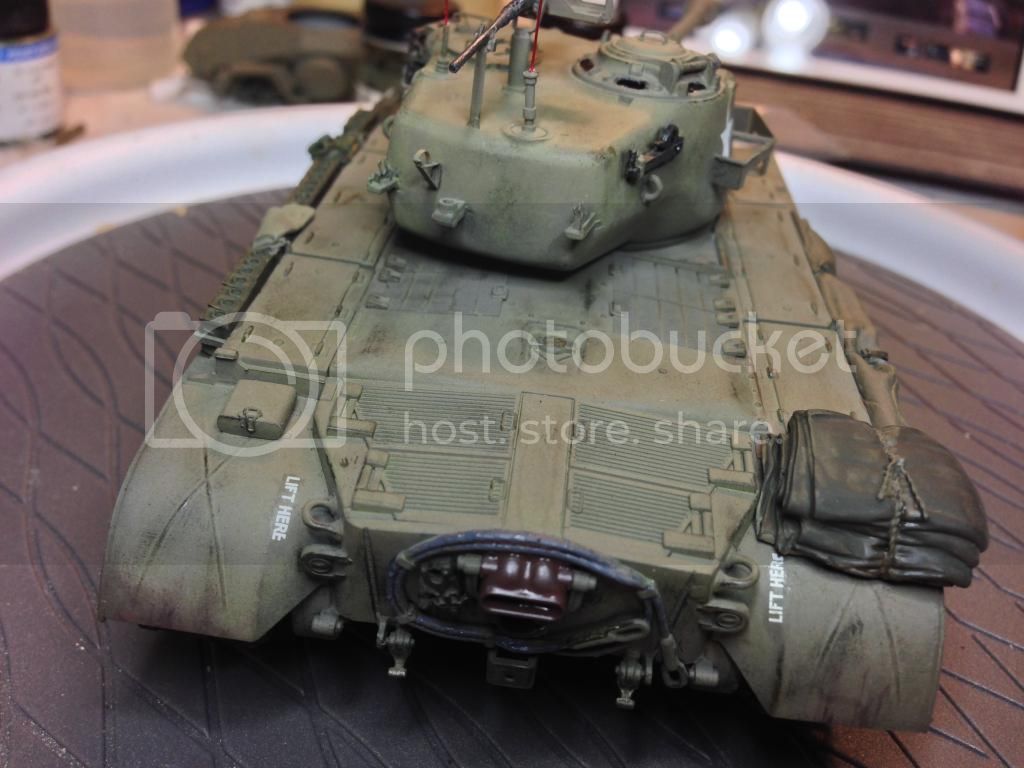
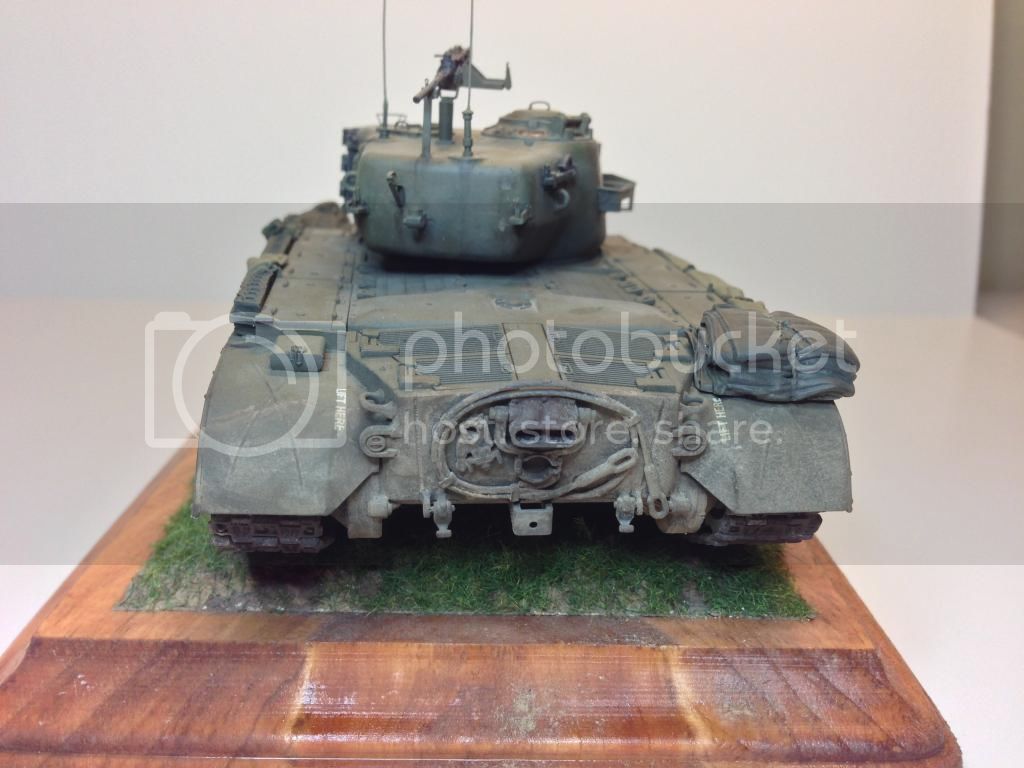
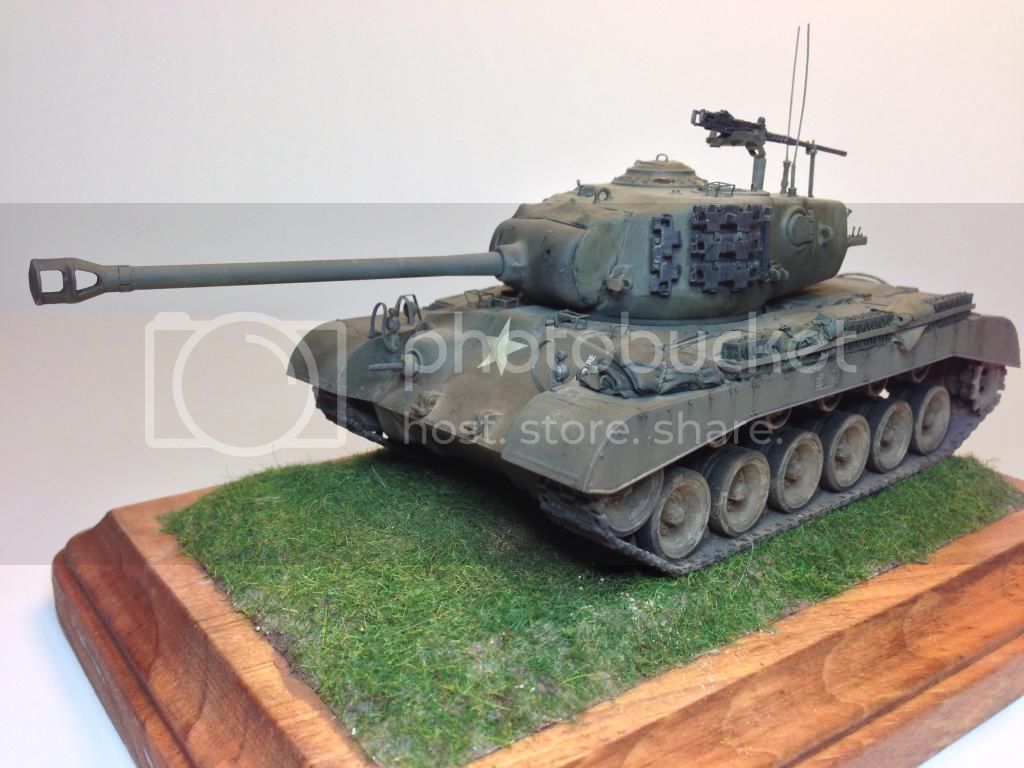
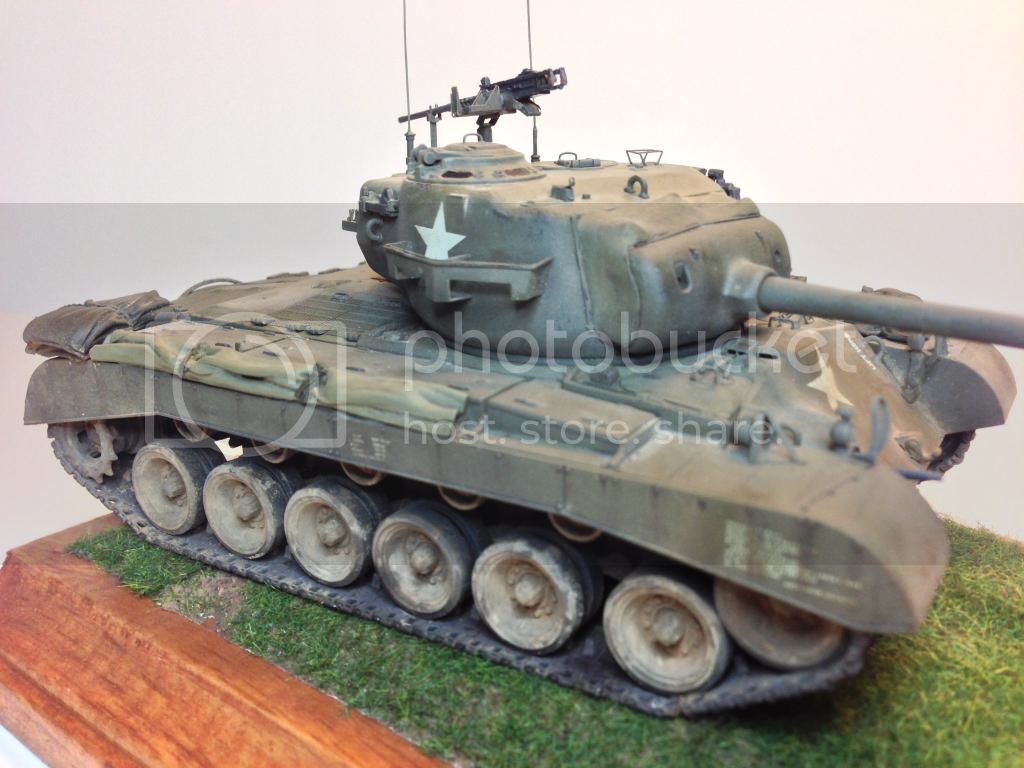
Hey guys! I've made a lot more progress on the Pershing in the last couple weeks. Construction is complete, painting is almost done, and an initial round of weathering has been applied. I have been going through Michael Rinaldi's Tank Art Vol 2 and he features this model kit in one of the chapters. So I decided to try some of the techniques that he used on my kit. Mainly I wanted to try his method for rendering worn olive drab. Therefore, after priming and pre-shading, I painted the model with Tamiya Olive Drab (XF 62), and then sprayed Lifecolor OD (UA 005) on top.
Then I did what Rinaldi calls 'Lacquer Thinner Dry-Brushing' to show wear. Basically what this does is wear away the lighter Lifecolor OD and allow the darker Tamiya OD to show. Next I applied markings using Archer Dry Transfers followed by a couple applications of The Filter: Green for Allied Tanks. This was my first time using either of these products and it came out pretty well.
So far I am pretty happy with how the project is turning out. I still have some details to paint and then it will be time for my favorite step; weathering. Thanks for looking!
Matt
mdbond148
Arkansas, United States Joined: March 29, 2013
KitMaker: 24 posts
Armorama: 23 posts
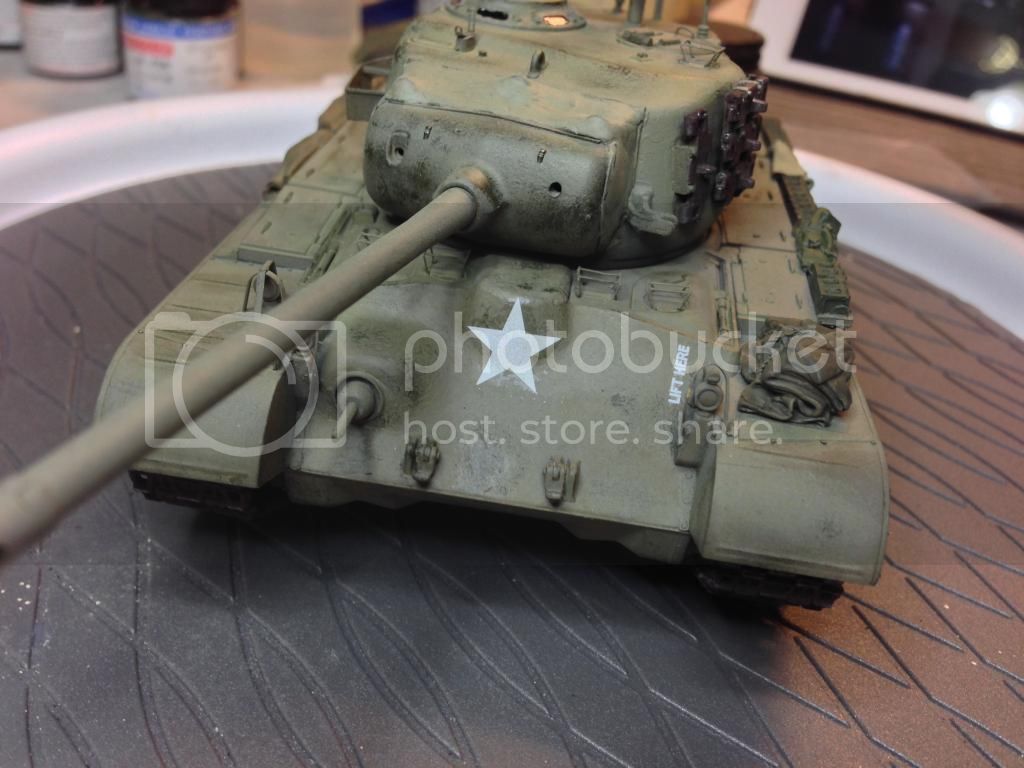
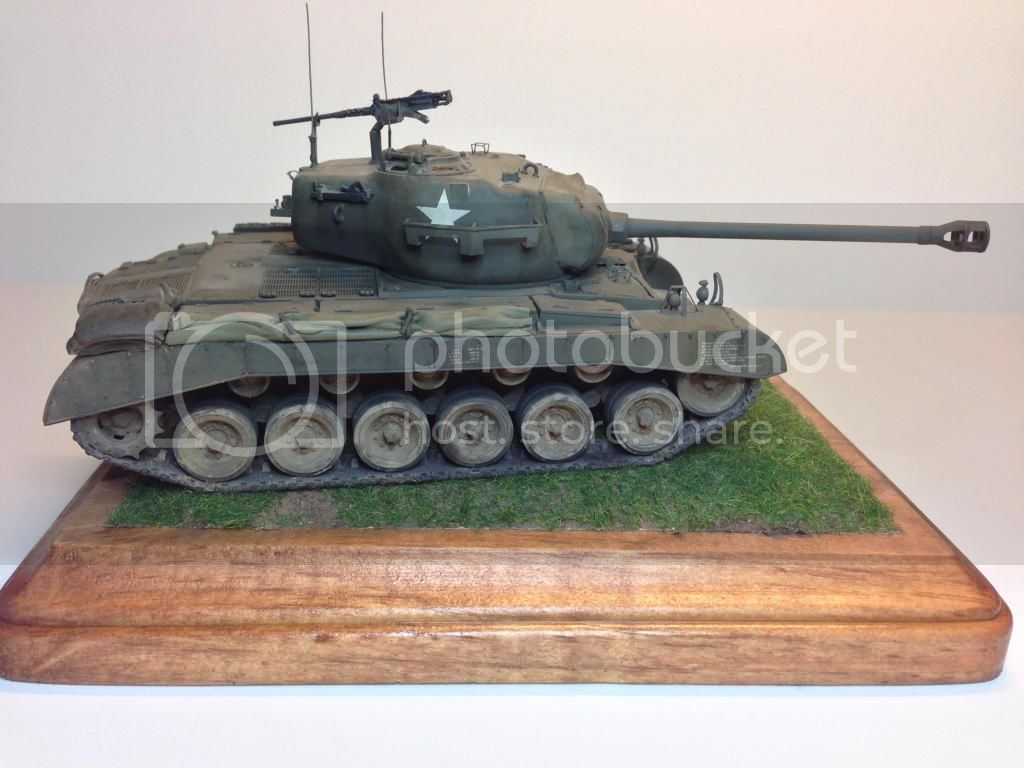
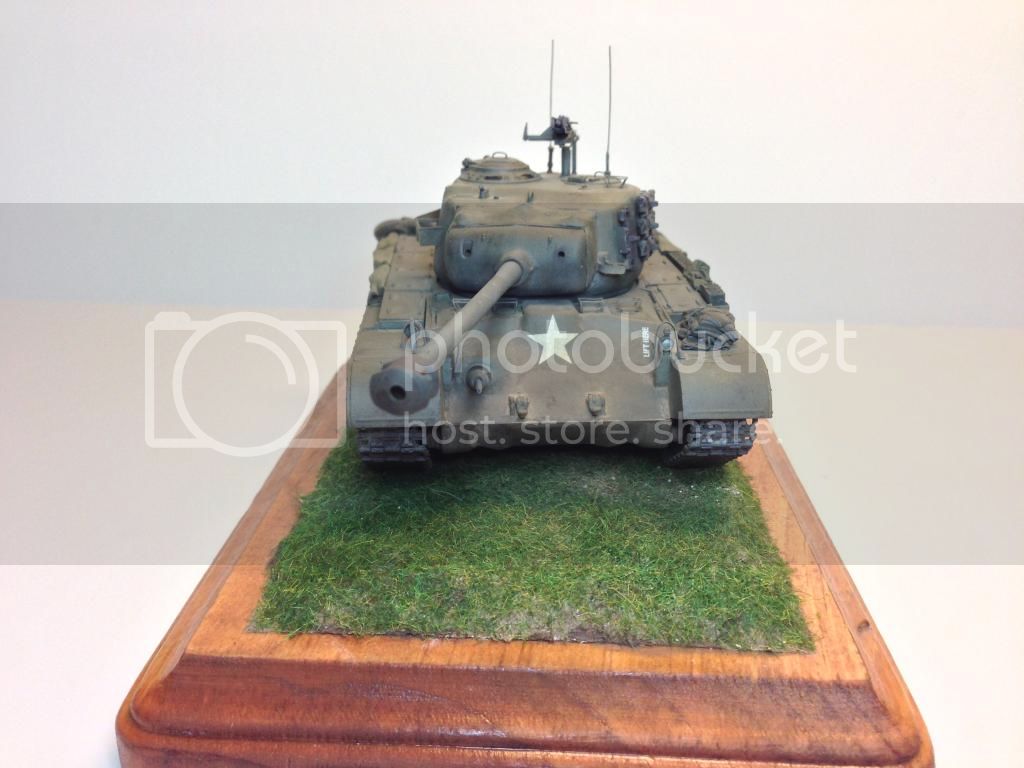
I put the finishing touches on the Pershing this weekend. This was a great kit and I am really happy with how it turned out. I weathered it with MiG and homemade filters, oil-color washes, and MiG and AK pigments. Thanks for looking! Matt