_GOTOBOTTOM
Armor/AFV
For discussions on tanks, artillery, jeeps, etc.
M113 - Tamyia - 1:35 + addons
Stojkovic1987
Visit this Community
Wojewodztwo Slaskie, Poland
Joined: March 26, 2015
KitMaker: 255 posts
Armorama: 254 posts
Posted: Thursday, July 09, 2015 - 07:56 PM UTC
Hi All,

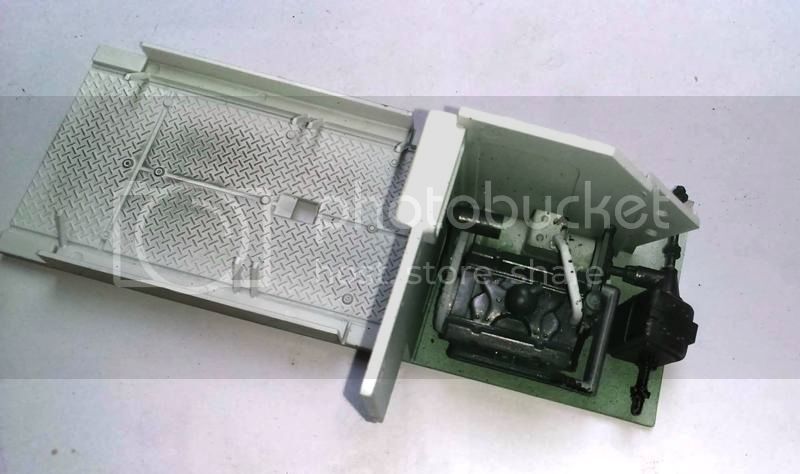
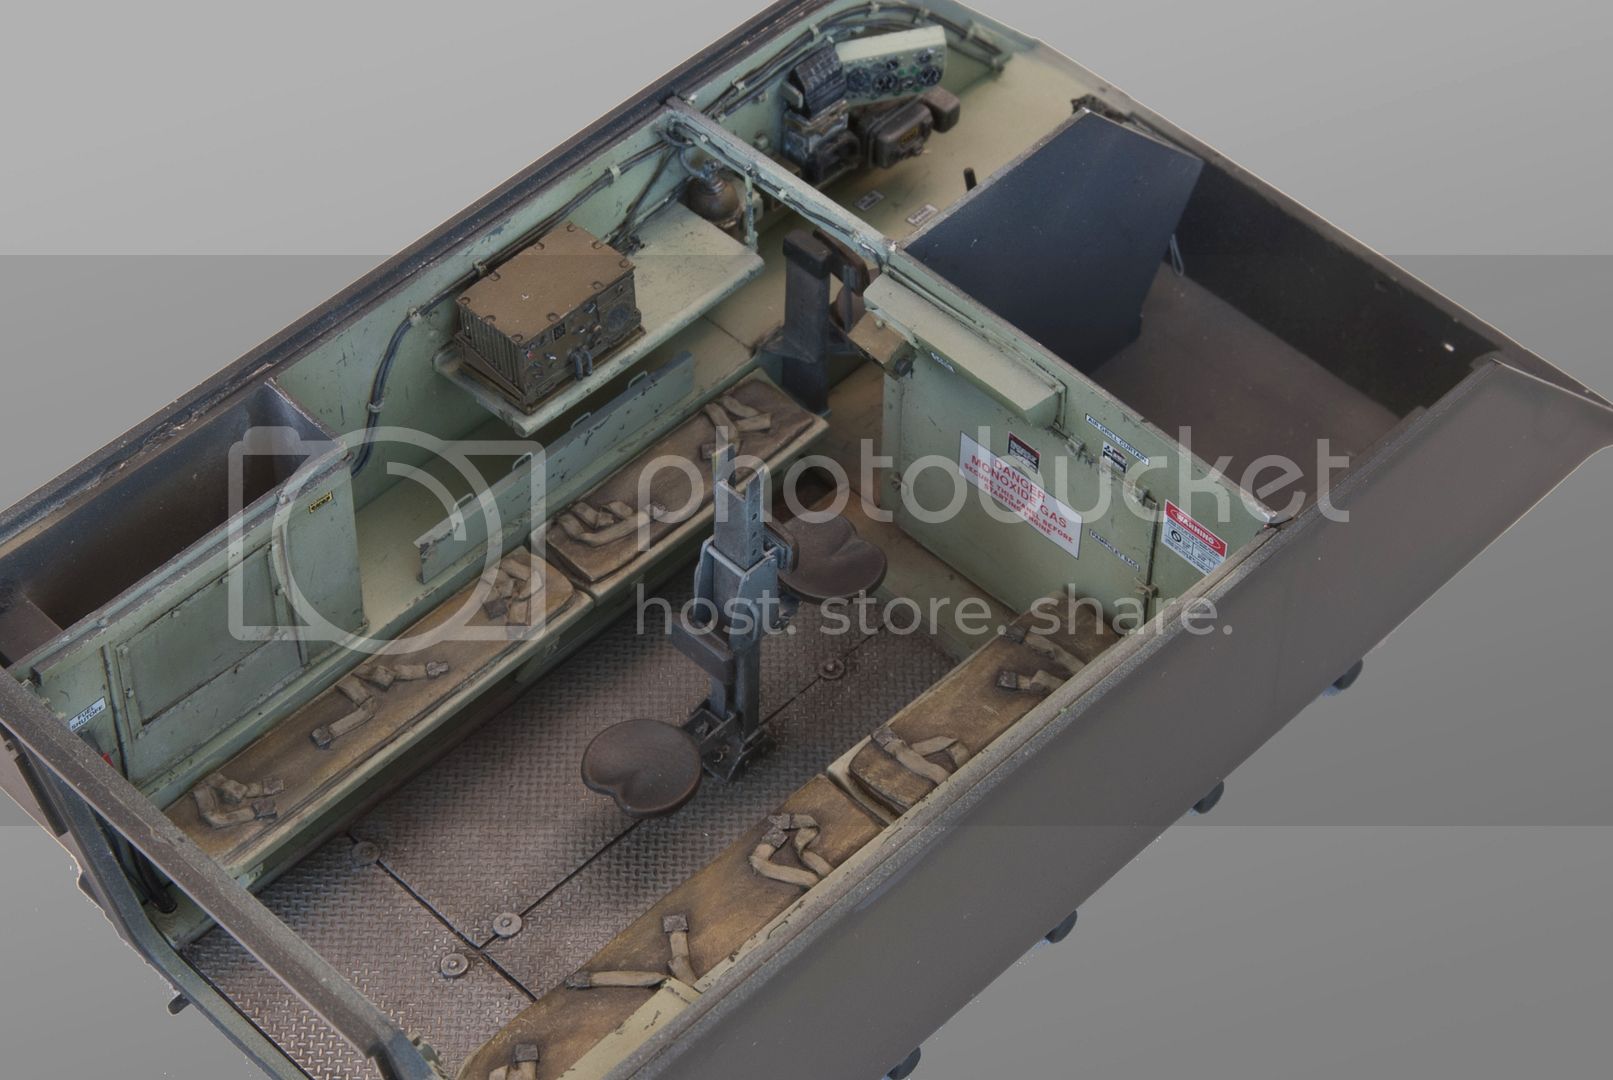
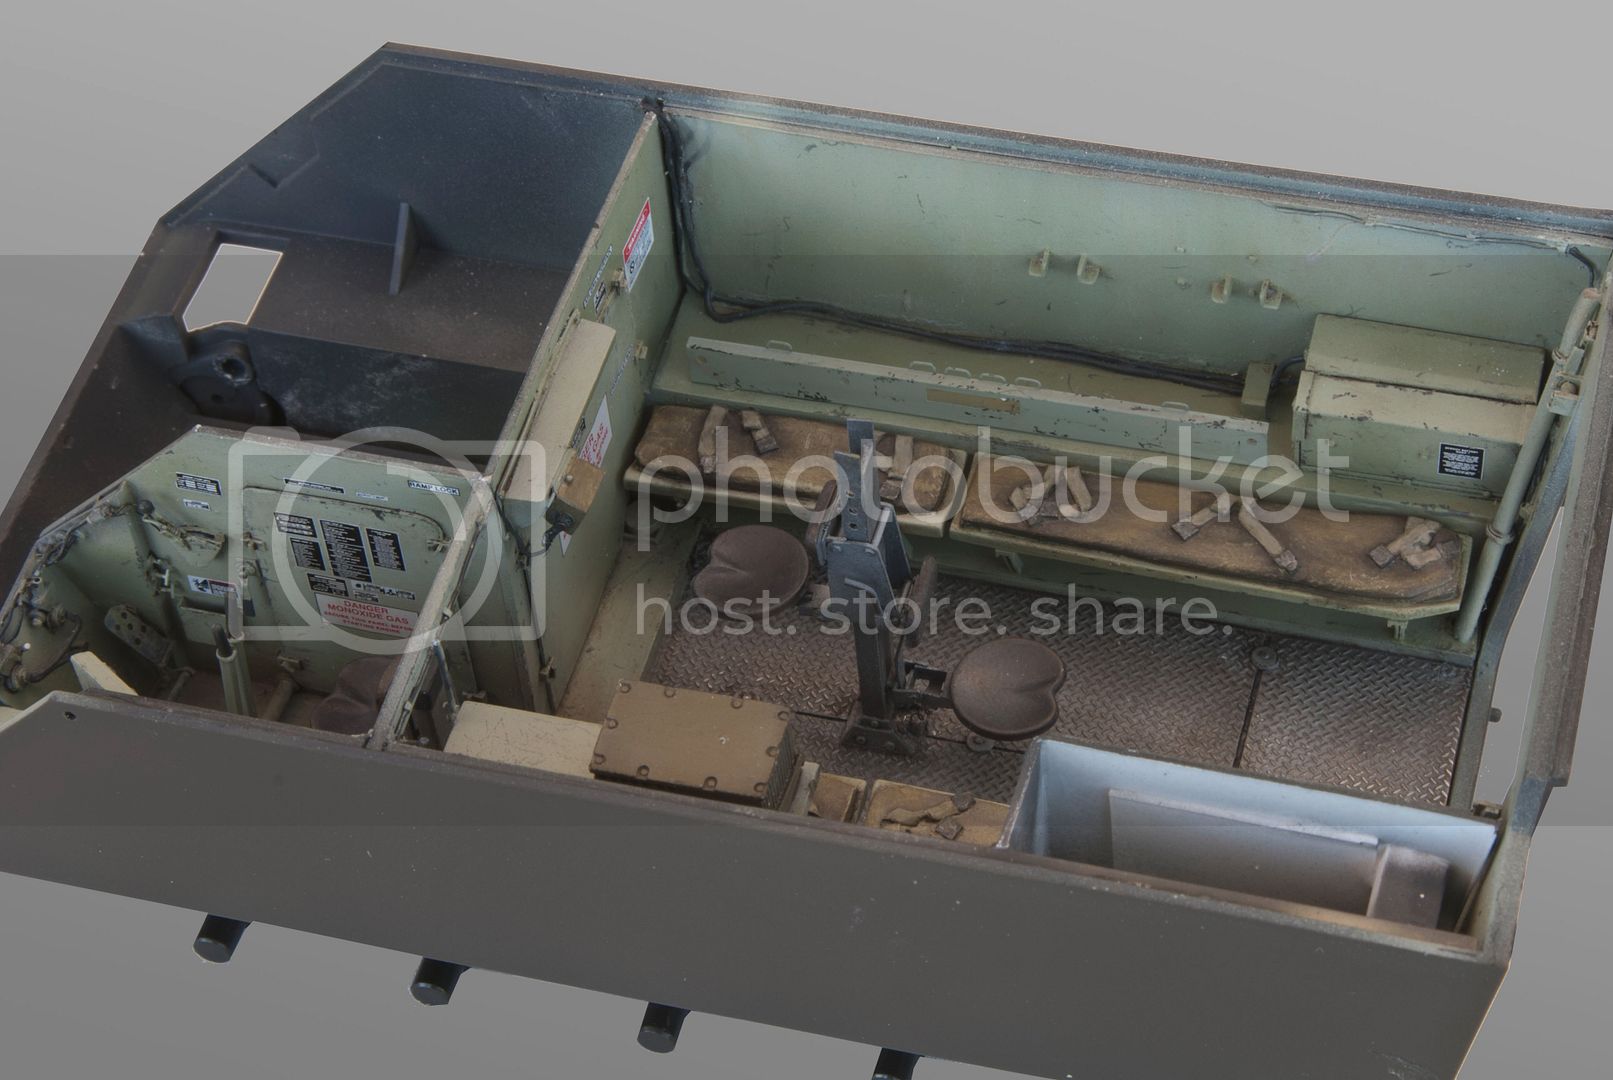
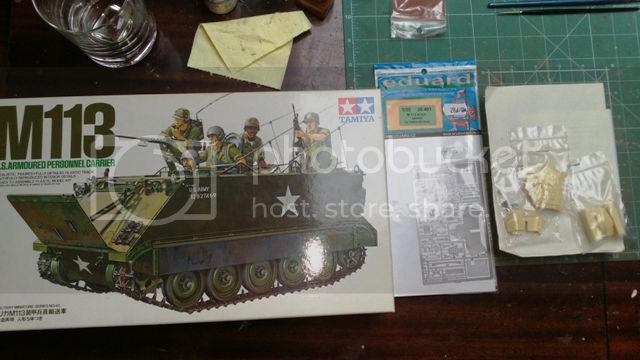
I'm actualy starting a new build of M113 from Vietnam.


At the moment I'm working with the interior


Keep finger crossed for me.

Cheers.
Cookiescool2
Visit this Community
Georgia, United States
Joined: May 09, 2014
KitMaker: 273 posts
Armorama: 270 posts
Posted: Thursday, July 09, 2015 - 09:36 PM UTC
It looks amazing, will wait for the next update!
jvazquez
Visit this Community
New Jersey, United States
Joined: September 26, 2006
KitMaker: 857 posts
Armorama: 811 posts
Posted: Thursday, July 09, 2015 - 10:48 PM UTC
Looking sweet so far!!

Looking forward to more!
tankglasgow
Visit this Community
Scotland, United Kingdom
Joined: October 04, 2010
KitMaker: 275 posts
Armorama: 260 posts
Posted: Thursday, July 09, 2015 - 10:59 PM UTC
It looks good so far, nice finish on the decking. Built this waaaaay back (before after market parts), one of my favourite models ever, got lost/wrecked many moves ago. Keep the posts coming.
Stojkovic1987
Visit this Community
Wojewodztwo Slaskie, Poland
Joined: March 26, 2015
KitMaker: 255 posts
Armorama: 254 posts
Posted: Friday, July 10, 2015 - 01:55 PM UTC
Got one question about the interior benches. What kind of material was it made of? Metal, wood, or some kind of other thing?

Next question is about the color of the benches, the istruction shows the white as a color of all interior equipment. In other versions I saw Olve Drab, buff or khaki as the colours. What is the real version used in the Nam?

young_sven
Visit this Community
Skåne, Sweden
Joined: May 14, 2010
KitMaker: 749 posts
Armorama: 743 posts
Posted: Friday, July 10, 2015 - 03:12 PM UTC
Hello Lukasz,

I am excited about your build, M113 is one of my personal favourite vehicles. :-)

Regarding the benches, the framework and backrests of the benches are metal and on top are "cushions" usually made of vinyl. The framework should be painted the same colour as the rest of the interior, and the cushions are often olive drab or black in colour.

Just a few notes regarding the Tamiya M113. This kit depicts an early, petrol engined version of the vehicle, and there are some differences between this one and the diesel engine vehicle which was the most common in Vietnam (M113A1). If you wish to build a more common version of the vehicle in Vietnam, one of the more obvious things you need to replace is the interior fuel tank.

The exterior is similar to the Tamiya kit as far as I know.

The white interior colour was only used on very early vehicles as far as I know, and most were painted in a very light green colour (Tamiya "Sky" is a pretty good match).

I have recently completed a build of a fairly early petrol engined M113, if you like I can post some pics of the interior here for you (please let me know, as I do not want to post my pics in your blog without your permission :-) ).

I do not claim to be an expert on the M113, I know there are many modellers who visit Armorama who served on this vehicle and can give you much better information than me :-)

Stojkovic1987
Visit this Community
Wojewodztwo Slaskie, Poland
Joined: March 26, 2015
KitMaker: 255 posts
Armorama: 254 posts
Posted: Saturday, July 11, 2015 - 12:45 AM UTC
Dear Sven,

I will be very happy to see your progres with M113 as I want to build fin reprezentation of vehicle thaht fight back then in Vietnam.

I heard the bad news about the light green color of the interior and will repaint it soon.

Im not going to change engine because Im totally a grenhorn in that topic. Maybe if you show me some pics of the differences it will be easier to look at that issue.

?Thanks for reply aabout the benches.
young_sven
Visit this Community
Skåne, Sweden
Joined: May 14, 2010
KitMaker: 749 posts
Armorama: 743 posts
Posted: Saturday, July 11, 2015 - 12:19 PM UTC
Hello again Lukasz!

I am happy if I can help.

Here are a couple of pics of the differences between the interior the fuel tank on the M113 (early, petrol) and M113A1 (diesel).

The later fuel tank was also removable, that is why there are straps around it.

Petrol tank (there are some variations, but most are pretty similar to this one):


Diesel tank:

https://armorama.kitmaker.net/forums/151123&page=1

Sorry about the angles of the pictures, I was not able to find better pictures of the internal fuel tanks.

Here are some interior pics of my Swedish M113 (petrol engine). I scratchbuilt most of the interior, and when I was almost finished Verlinden released a beautiful M113A1 interior (typical). I have used some of the Verlinden parts as well.

As you can see, I chose not to mount the engine.


If my blogg can be of help to you, it can be found here:

https://armorama.kitmaker.net/forums/214442

By the way, since I built the petrol engined version, I have a diesel fuel tank to spare from the interior set I used. If you are interested and would like to have it, just send me a PM and I can send it to you.

If you plan to show your engine, then it is better you use the Tamiya fuel tank.

I look forward to following your build!
Stojkovic1987
Visit this Community
Wojewodztwo Slaskie, Poland
Joined: March 26, 2015
KitMaker: 255 posts
Armorama: 254 posts
Posted: Saturday, July 11, 2015 - 05:28 PM UTC
Hello,

I just repainted the interior as it should be according to the materials.

Now I can instal the Diesel fuel tank (engine will be closed).


Now I'm woking with the interior elements as seats etc.
ReconTL3-1
Visit this Community
Texas, United States
Joined: June 07, 2006
KitMaker: 726 posts
Armorama: 687 posts
Posted: Saturday, July 11, 2015 - 11:11 PM UTC
Lucasz,
Things are looking good so far.

Sven, I am glad you posted that picture of the older petrol tank. I am currently working on several diorama projects representing elements from 2d Battalion, 47th Infantry (Mechanized), 9th Infantry Division in Vietnam and the M113 they had in 1967 and early 1968 were primarily the gasoline powered older versions of the M113 with white interiors. Luckily I have a friend who served as a driver and gunner in 2/47th Infantry who hasbeen helpful with the details for that version. Since the latest playmate centerfold was usually displayed on the gas tank, a full view of the access panel was not found. Your picture helped alot. You did an excellent job on making the petrol tank for your interior.

Cheers,
James
Stojkovic1987
Visit this Community
Wojewodztwo Slaskie, Poland
Joined: March 26, 2015
KitMaker: 255 posts
Armorama: 254 posts
Posted: Saturday, July 11, 2015 - 11:45 PM UTC
Thanks for support.

Hopefuly at the end of the build this will be similar to M113
GeraldOwens
Visit this Community
Florida, United States
Joined: March 30, 2006
KitMaker: 3,736 posts
Armorama: 3,697 posts
Posted: Sunday, July 12, 2015 - 12:24 AM UTC
Maybe it's the camera, but the green looks very saturated and dark. Sea Foam Green is a very soft, pale green intended to reduce anxiety in cramped conditions (similar colors are used in hospitals and school bus interiors). British Sky Type S (used on the bottoms of Fleet Air Arm aircraft at one time) is a reasonable starting point. Humbrol offers it, and I am told that Tamiya Sky is similar.

If the photo matches the real model, you should cut the green with some white and repaint. In some cases, vehicle floors were left in bare aluminum.
PantherCharlie
Visit this Community
Maryland, United States
Joined: June 13, 2011
KitMaker: 48 posts
Armorama: 47 posts
Posted: Sunday, July 12, 2015 - 01:39 AM UTC
James' friend checking in, here. I second the opinion on the green of your interior being too dark. The correct color was something close to lime sherbet - perhaps even lighter. I was in the 509th Abne (Mech) in West Germany before my tour in Vietnam with the 2/47th Panthers. After RVN I was assigned to the 6th ACR at Ft. Meade, so I spent virtually my entire 5 year + Army stint in M113 tracks. As James says, we had white interiors in our gas-fueled tracks in Vietnam. I was there March '67 to '68, shortly after the Division arrived in-country. Not long after I DEROSed the battalion got the much safer Diesel A1 models. I can't say what color interior they had, but both the 509th and 6th ACR had that light green interior.

If you take a look at this page on my site (URL below), you'll see a diorama I built of my track, many years ago, before add-ons. There are also photos, including one of me cleaning the "Ma Deuce" that shows the white track interior.

I would consider stripping out the folding seats and the commander's seat and pedestal for your Vietnam track. No grunt in his right mind rode inside over there! That leaves out the poor driver (me for six of my 12 months) who had no choice in the matter. We replaced our sets with large wooden books to hold ammo and demo, then threw the original seat cushions on top to give the two senior grunts a semi-comfy bed - if sleeping on top of high explosives is your idea of comfort!

Good luck on your project and let me know if I can give you any help.

http://www.cibthebook.com/real_panthers.htm
PantherCharlie
Visit this Community
Maryland, United States
Joined: June 13, 2011
KitMaker: 48 posts
Armorama: 47 posts
Posted: Sunday, July 12, 2015 - 01:52 AM UTC
Wow! Sven! Masterful work! This old Mech-Grunt and Armored Cavalryman would feel right at home in your track interior. As a driver, I especially appreciate the amazing detail in the driver's compartment. Congratulations!
Stojkovic1987
Visit this Community
Wojewodztwo Slaskie, Poland
Joined: March 26, 2015
KitMaker: 255 posts
Armorama: 254 posts
Posted: Sunday, July 12, 2015 - 12:26 PM UTC
Hello Bill,

Thanks for Your reply. It is a great help to understand the way crew in Vietnam used the M113.

So if I understand it well: - light green (lighter a bit than mine) for Diesel versions and late vehicles in the Nam.

- white for early M113 and only petrol versions with the gas tank inside.

So it will be reasonable to put the stripes for the crew on the benches like Sven did, and add some blankets on the benches?
young_sven
Visit this Community
Skåne, Sweden
Joined: May 14, 2010
KitMaker: 749 posts
Armorama: 743 posts
Posted: Sunday, July 12, 2015 - 01:13 PM UTC
Hello Lukasz,

I think the pics of the real vehicle I posted further up in this thread is a good representation of the real green colour used. I used Tamiya XF21 Sky as the base and lightened/darkened it slightly to create variation (shadows and highlights).

The picture of the real fuel tank is taken here in Sweden of the only M113 ever trialed by the Swedish armed forces, an early vehicle with the green interior.

So, you can paint an early, petrol driven vehicle with either green or white interior.

M113A1's (diesel) and later versions should have green interior.

For Vietnam (petrol or diesel version) the green interior is a safe choice.

James and Bill, thanks for your kind comments, very much appreciated.

Lukasz, back to your build! :-)
PantherCharlie
Visit this Community
Maryland, United States
Joined: June 13, 2011
KitMaker: 48 posts
Armorama: 47 posts
Posted: Sunday, July 12, 2015 - 04:51 PM UTC
Hi Lukasz,

Sorry, something was lost in translation. I said stripping, meaning removing, rather than striping. The useless folding troop seats were removed. It was too dangerous to ride inside the poorly armored M113 because of mines and RPGs. Our company replaced the folding seats with large boxes, as you can see in this picture, containing our ammo. This left the shelves over the sponsons for our waterproof bags of clothing and other gear.

The floor where the track commander's and gunner's seat pedestal used to be was usually stacked with C-rations, and in the case of my track, 90mm and 106mm recoilless rifle ammo.

You have to keep in mind that in Vietnam, the APC was not used as a "battlefield taxi", which was the original intent of the designers. The ten Mechanized Infantry battalions and the 11th ACR and eight other battalions of Armored Cavalry (not all in Vietnam at the same time) were almost constantly in the field. The mech-grunts and cav troopers lived in their vehicles for weeks and even months at a time. So space was always at a premium, and useless appendages, such as the folding seats were often removed.

I can only tell you that our battalion's tracks had white interiors. I'll let other units' veterans, or photographic evidence, attest to the color of theirs.

http://www.cibthebook.com/images/cleaning%20M2.jpg
young_sven
Visit this Community
Skåne, Sweden
Joined: May 14, 2010
KitMaker: 749 posts
Armorama: 743 posts
Posted: Sunday, July 12, 2015 - 06:20 PM UTC
Awesome picture, Bill, I will deinfitely be bookmarking that one :-)

Kilo_Uniform
Visit this Community
Gauteng, South Africa
Joined: July 03, 2015
KitMaker: 280 posts
Armorama: 135 posts
Posted: Sunday, July 12, 2015 - 07:58 PM UTC
Watching with interest - got a few Vietnam era M113's I want to build myself
Stojkovic1987
Visit this Community
Wojewodztwo Slaskie, Poland
Joined: March 26, 2015
KitMaker: 255 posts
Armorama: 254 posts
Posted: Sunday, July 12, 2015 - 09:37 PM UTC
Bill,

Your photo gave me more informations than 10 000 words. Now I get it!

I will try to represent some of the exaples in the picture in my model.

I also found the special set for the Nam vehicles including this special color for APC.

http://archiwum.allegro.pl/oferta/ammo-of-mig-jimenez-7135-vietnam-colors-set-i5082739564.html

I forgot that I bought it on some modeling event to try with next Nam build.

Having Veterans in my build as suport makes me think about hard work with the interior now.

I also will use the figures of two soldiers - those afroamericans as below:

https://www.pinterest.com/pin/534661786986124257/

Where there a lot of afroamericans as a APC crew?
PantherCharlie
Visit this Community
Maryland, United States
Joined: June 13, 2011
KitMaker: 48 posts
Armorama: 47 posts
Posted: Monday, July 13, 2015 - 07:22 PM UTC
My pleasure, gentlemen. I'll be happy to help with anything I can. I'm always spotting things on various Vietnam M113 models on-line that drive me nuts. I'll mention two of my pet peeves, here:

1. Remove the rubber track shrouds! They were about the first item discarded in-country by most American mech and cav units. They hindered preventive maintenance and complicated replacing a thrown track - which happened a lot when you were jungle-busting - breaking trail through the woods using your track as a bull-dozer.

An aside here: An M113 veteran almost, at least during my service, never called his vehicle by that official nomenclature in everyday conversation. Nor did he call it an APC, Armored Personnel Carrier, "Gavin". Some of the Cav guys called them ACAV's, once in a while. But we all simply called them "tracks". I know this can cause confusion, especially when we are talking about the tracks (caterpillar treads)of our tracks (vehicles). We "Delta" types were "track drivers" who had to attend to track tension, lest our tracks depart the track! Everybody clear about that? Clear as paddy water, at least?

That brings me to my next gripe:

2. Pay close attention to the track tension on your model. This is a critical issue on the full-scale M113. Too much and you bend or break track pins and eventually break the track. Too little and you will throw a track off the road wheels with the slightest nudge on the side, usually while turning on rough terrain.

Here is an examples of a correctly adjusted track...

https://flic.kr/p/dvcJWG

The top of the track follows a smooth catenary curve from the sprocket to the third road-wheel. It NEVER touches the first road-wheel, comes close or just kisses the second, and makes solid contact with the remaining three wheels.

Here's a shot of a track that is too tight:

https://www.flickr.com/photos/zippo132/6904645765/in/photostream/

The top of the track is nearly a straight line from the sprocket to the idler wheel. Having said that, this one appears to be underway, and track tension must be checked at rest on a level surface to be accurate. Under hard acceleration that top curve might straighten a bit, but the relaxed gunner sitting on the edge of his armor tub says otherwise.

Here is a track that is too loose...

https://upload.wikimedia.org/wikipedia/commons/f/f2/M113-batey-haosef-2.jpg

It's difficult to find a shot of this in the field, perhaps because it's so easy to throw a track this way. Once you have done this, and gone through all the blood, sweat, and tears of getting it back on, it tends to drive the lesson home. So I have resorted to this museum shot. It needs no further explanation.

The track tension, in case you did not know, is adjusted by using a grease gun to pump up a cylinder attached to the idler wheel.

Finally...

https://flic.kr/p/dxJg9y

Track Drivers spent a lot of time doing PM, especially on their tracks, if they knew what was good for them and their buddies. Check out the maintenance supervisor looking down from the driver's hatch.

Hope this helps. I welcome questions.

Panther Charlie One-Four Delta, out.


young_sven
Visit this Community
Skåne, Sweden
Joined: May 14, 2010
KitMaker: 749 posts
Armorama: 743 posts
Posted: Monday, July 13, 2015 - 08:17 PM UTC
Sorry to hijack your thread again, Lukasz, but just have to comment on Bill's post.

Bill, awesome pics you have there in your flikr album. The pic you posted last in your text has some very cool details. The .50 mounted beside the rear roof hatch, the broom fastenened on the rear plate etc etc.

Some of the the other pics show even more cool stuff. The M113 (oops I mean "track" :-) ) with the minigun mounted at the commanders position, for example.

So many great variations when building a Vietnam vehicle.

Thanks for sharing! :-)
PantherCharlie
Visit this Community
Maryland, United States
Joined: June 13, 2011
KitMaker: 48 posts
Armorama: 47 posts
Posted: Monday, July 13, 2015 - 09:29 PM UTC
Hi Sven. Thanks for the kind comments. To give credit where credit is due - and I'm about to reveal a goldmine for those M113 aficionados who have not discovered it previously - all but the museum shot are from Jerzy Krzemiński's extensive collection of photos of the M113 and its variants on Flickr.

I too apologize for hijacking your thread, Łukasz. It was certainly not my intention. Sorry too for missing your last question to me. Our war pre-dated the common use of the Afro-American label. They proudly called themselves "brothers", and so did we, their white brothers-in-arms. Yes, black soldiers were commonly assigned to mech and cav outfits, just like any other troops. A look through Jerzy's album will show many of them.

Here's a shot of my squad about mid-way in my tour of duty. I was still the .50 gunner at this point, and moved into the driver's seat when Bud Tucker, the shirtless guy, moved up to drive C-06, the Company Commander's track, a post I would take over from him for my last couple of months in-country.

https://www.flickr.com/gp/132974504@N07/V0B0Q0


Stojkovic1987
Visit this Community
Wojewodztwo Slaskie, Poland
Joined: March 26, 2015
KitMaker: 255 posts
Armorama: 254 posts
Posted: Monday, July 13, 2015 - 10:16 PM UTC
Hi guys,

I see your replies not as hijacking but like a great value of information for anyone who would like to build an M113.

In my opinion scale modeling is not only about gluing parts together and painting it, but first of all it is for searching the history of the war machines and stories people who tasted the real war and dangerous tasks during it.

I'm just delighted to read such interesting posts. I'm going to use the friulmodel link tracks so the info about the measure of the tracks in M113 will be essential.

And of course such cool stories about the words and names of each vehicle, equipment as the soldiers in Nam used to call.

Anyway, Im trying to paint the two crewmen but the results are... poor I would say for now.

I will post next photos of my build soon, so You can feel fre to comment and add anything that could be helpful.

Thanks again for the lots of photos Bill!
PantherCharlie
Visit this Community
Maryland, United States
Joined: June 13, 2011
KitMaker: 48 posts
Armorama: 47 posts
Posted: Monday, July 13, 2015 - 11:00 PM UTC
Thanks,Łukasz. Great attitude, and since you are the thread owner, I'll continue to stick my oar in the water every so often. I feel free to use this nautical phrase since I qualified as a submarine track driver. My track sank in a river during the monsoon. Long, messy, and aggravating story. You can read about it in my book, if you like.

Now, a couple questions for Sven, and anyone else who wants to dive in. Let me preface this by saying that, although I think I can claim a fair amount of experience with the M113, I have none with the A1.

Your photos above and those on your blog show what I assume is a set of steering levers and their associated mechanism mounted to the front slope. I have never seen this arrangement before. I am only familiar with the floor mounted lateral levers in the gas-powered tracks. These acted upon the disc brakes attached to the final drives which both stop and steer the track. So what is the story on these small (hydraulic?) levers in your build?

Second question to anyone who knows: Is there an external giveaway, something visible, in other words, that would indicate at a glance that a track is Diesel powered? We'll assume the track is parked, engine off, and buttoned up, so black exhaust, clattering engine sounds, and bulging fuel tanks are out of the equation. Any other clues?

Cheers, Bill

P.S. Just posted a bunch of my other photos on my own Flickr page.

https://www.flickr.com/photos/132974504@N07/
 _GOTOTOP