Tamiya M10 Wolverine Build
ColinEdm
 Associate Editor
Alberta, Canada
Joined: October 15, 2013
KitMaker: 1,355 posts
Armorama: 1,229 posts
Posted: Saturday, August 06, 2016 - 07:23 AM UTC
Hi all, in parallel to my Leopard build blog, I will also be doing a build of Tamiya's recent M10 Wolverine tank destroyer:
Stay tuned!
The voices are back.....excellent....

#424
Queensland, Australia
Joined: April 23, 2015
KitMaker: 4,648 posts
Armorama: 2,248 posts
Posted: Saturday, August 06, 2016 - 07:25 AM UTC
Gonna follow this one, too
"Artillery adds dignity, to what would otherwise be an ugly brawl."
Frederick The Great
ColinEdm
Associate Editor Alberta, Canada
Joined: October 15, 2013
KitMaker: 1,355 posts
Armorama: 1,229 posts
Posted: Saturday, August 06, 2016 - 08:46 PM UTC
Wide awake at 6 am on a Sunday...wth is wrong with me? Ah well, a couple cups of strong coffee and time to crack on with the M10 (I figure it will be more forgiving to some caffeine induced shakes than Mengs Leopard...

).
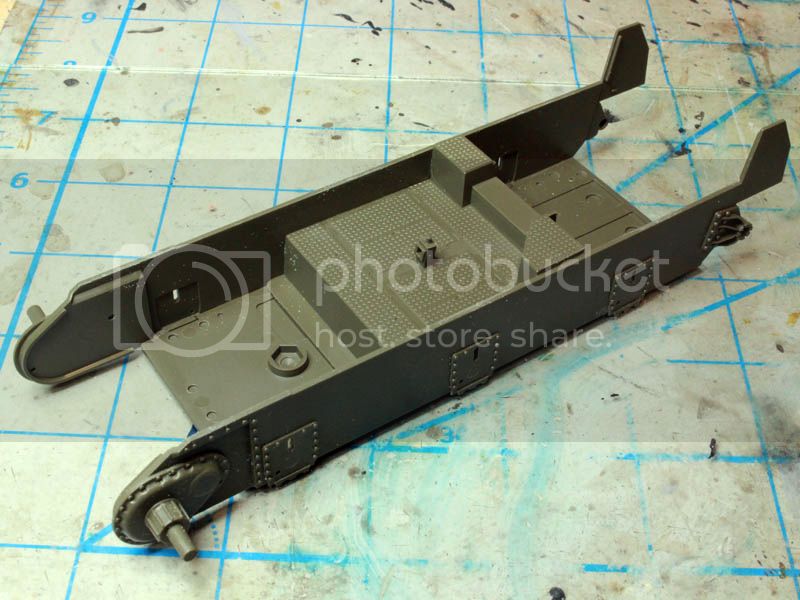
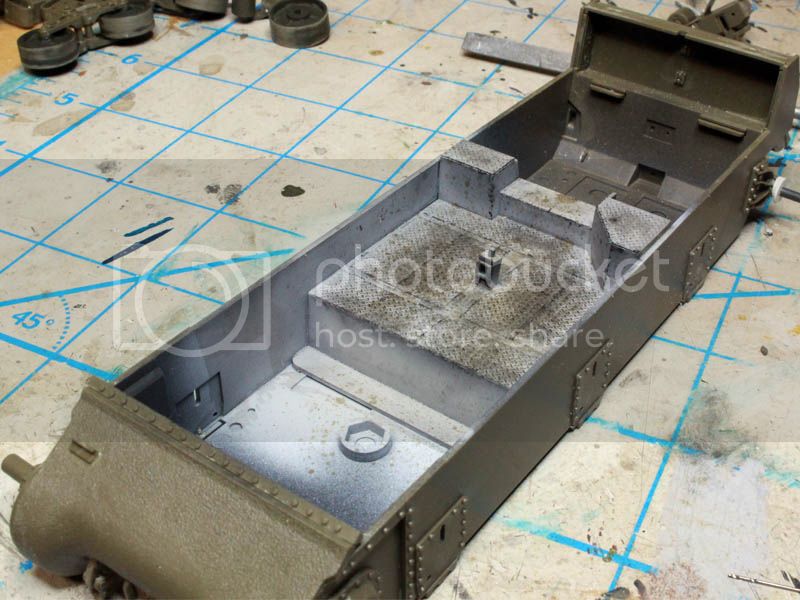
Step 1 is the assembly of the lower hull. Tamiya has gone with a multi-part hull assembly instead their typical molded tub. I was a bit put off by this at first because of a previous less than optimal experience with a multi-part lower hull...OK,OK..it was Mirror Models ZiS-30 SPG so no comparison...I needn't have worried, everything fell together with typical excellent Tamiya fit and ease of assembly.
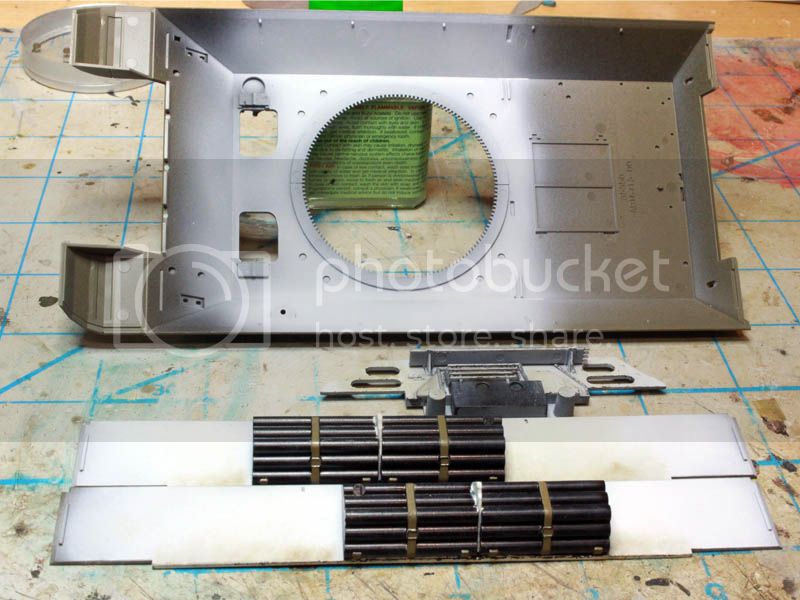
Steps 2 and 3 are the transmission cover and rear cover:
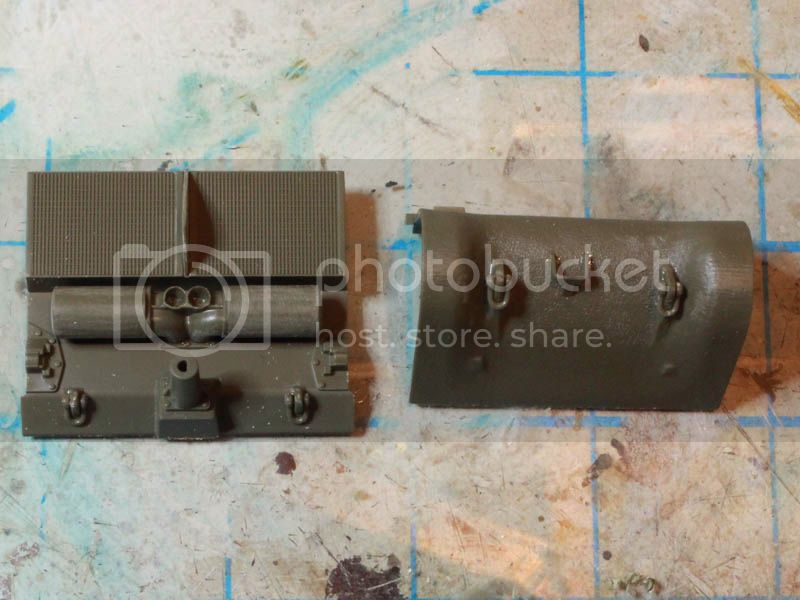
Then put them all together. No fuss, no muss.
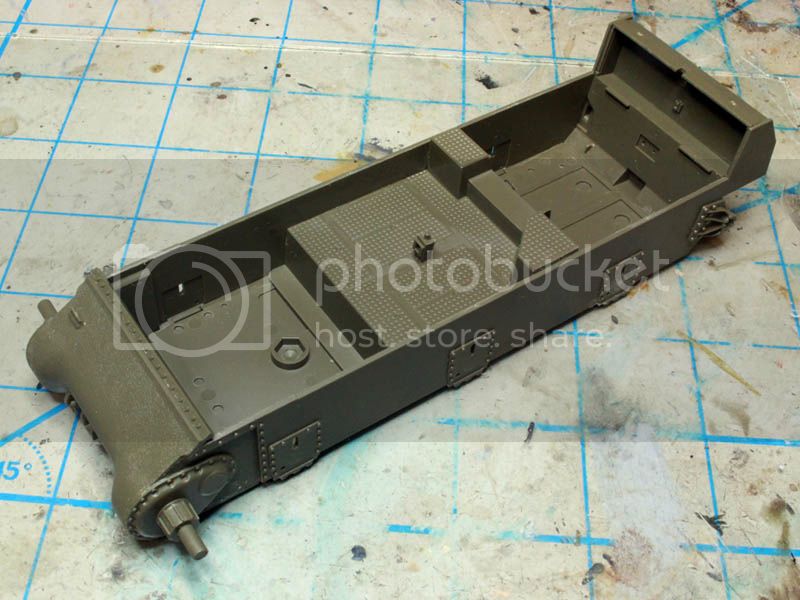
Time to prime and paint the interior of the lower hull and on to running gear.
The voices are back.....excellent....
#424
Queensland, Australia
Joined: April 23, 2015
KitMaker: 4,648 posts
Armorama: 2,248 posts
Posted: Sunday, August 07, 2016 - 02:26 AM UTC
Those moldings look great!
"Artillery adds dignity, to what would otherwise be an ugly brawl."
Frederick The Great
tatbaqui
News Writer #040
Metro Manila, Philippines
Joined: May 06, 2007
KitMaker: 2,713 posts
Armorama: 2,451 posts
Posted: Sunday, August 07, 2016 - 04:53 AM UTC
Saw a build video of this, indeed the builder was saying / showing it went on well, fit and all. Look forward to your progress Colin. Cheers, Tat
New Mexico, United States
Joined: June 16, 2014
KitMaker: 681 posts
Armorama: 603 posts
Posted: Sunday, August 07, 2016 - 04:58 AM UTC
Look forward to seeing how this kit goes and your impressions of it. I've got everything together to do an Academy Achilles with a whole lot of extras, but since I'll want to do an American M10 to sit beside it, this may be the one...
Cheers,
Paul H

On the Bench
MiniArt Grant Mk I with Interior
IBG Marmon-Herrington MKII
Kansas, United States
Joined: September 25, 2014
KitMaker: 11 posts
Armorama: 11 posts
Posted: Sunday, August 07, 2016 - 05:16 PM UTC
Do you have plans for extra detail? I'm hoping the aftermarket people start producing so I can do mine as planned over the winter. I especially think the interior will need extra help.
ColinEdm
Associate Editor Alberta, Canada
Joined: October 15, 2013
KitMaker: 1,355 posts
Armorama: 1,229 posts
Posted: Monday, August 08, 2016 - 04:25 AM UTC
So far I am impressed, we'll see if it continues as the build progresses. I have no extra detail plans right now, strictly OOB right now, but things can change...
The voices are back.....excellent....
California, United States
Joined: June 01, 2010
KitMaker: 143 posts
Armorama: 116 posts
Posted: Monday, August 08, 2016 - 04:30 AM UTC
Excellent thread. I just picked this kit up today, looking forward to how yours will turn out!
North Carolina, United States
Joined: June 06, 2006
KitMaker: 4,691 posts
Armorama: 3,509 posts
Posted: Monday, August 08, 2016 - 04:32 AM UTC
Can't beat a nice Tamiya build,its like comfort food.
ColinEdm
Associate Editor Alberta, Canada
Joined: October 15, 2013
KitMaker: 1,355 posts
Armorama: 1,229 posts
Posted: Thursday, August 11, 2016 - 10:10 AM UTC
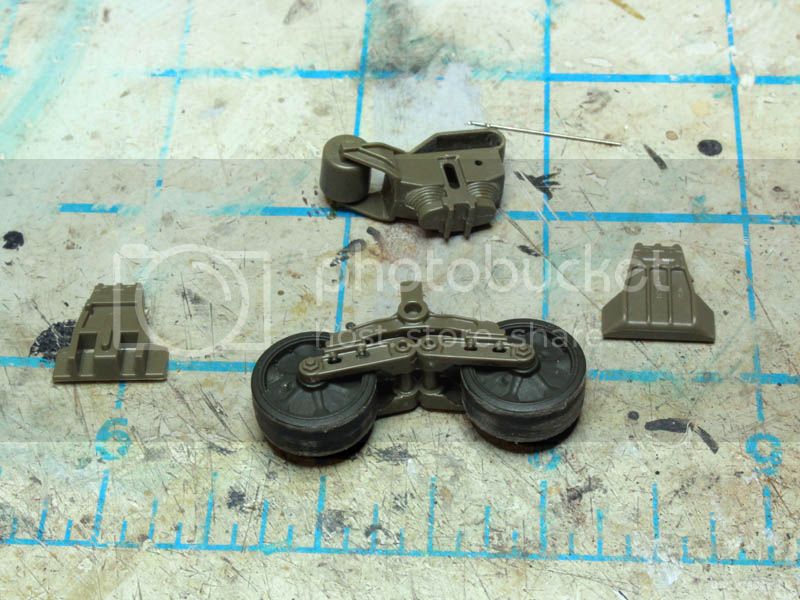
A minor disaster...lost a piece, part A22, one of the idler shafts.
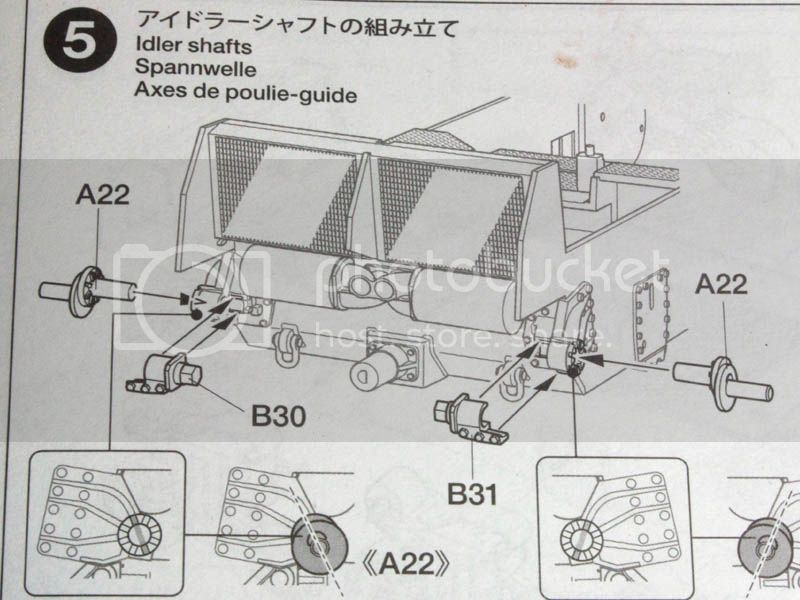
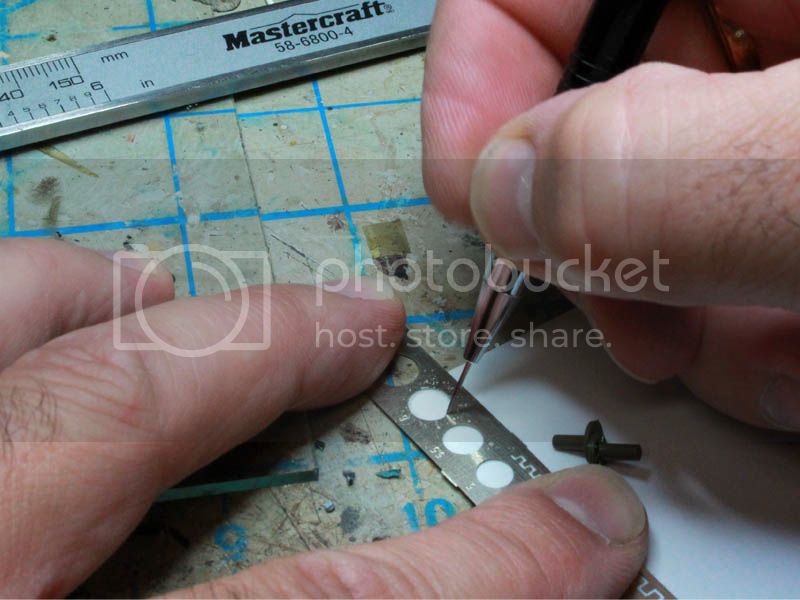
Not sure how, went to cut it off the sprue and only one was there, searched all over but couldn't find it, so have to make a new one! Got out some sheet styrene, template and my handy scribing tool (a needle in a mechanical pencil - works like a damn) and scribed out some circles.
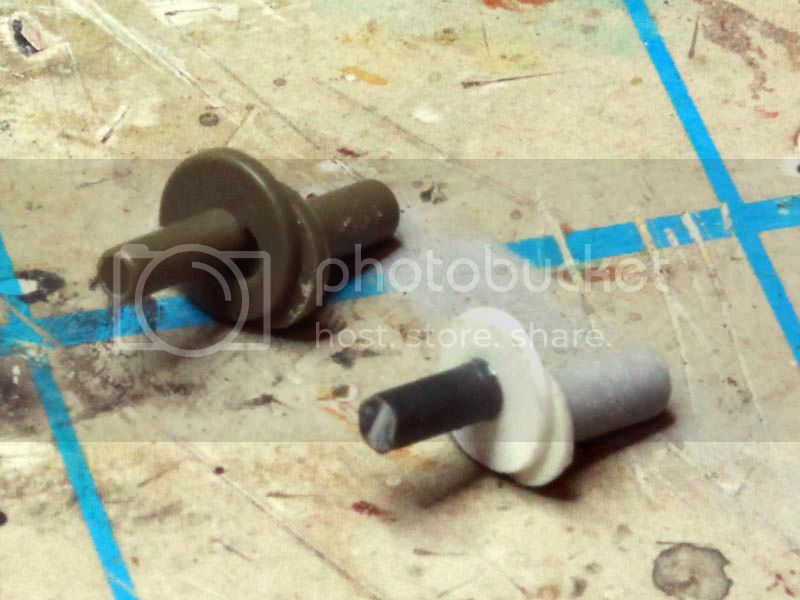
Used a portion of one of the extra torsion arms from my Leopard 2A7 build for the axle and a part from the spare parts bin for the mounting rod. Fits perfectly and looks the part when in.
The voices are back.....excellent....
New Mexico, United States
Joined: June 16, 2014
KitMaker: 681 posts
Armorama: 603 posts
Posted: Thursday, August 11, 2016 - 10:22 AM UTC
Ah yes, the old can't find the $@$&!!?$ part and now I have to make one trick! Nice recovery! Glad I'm not the only one who makes well engineered kits into an adventure...
Cheers,
Paul H
On the Bench
MiniArt Grant Mk I with Interior
IBG Marmon-Herrington MKII
Malaysia
Joined: March 28, 2016
KitMaker: 157 posts
Armorama: 140 posts
Posted: Thursday, August 11, 2016 - 10:22 AM UTC
Good save there. This build looks to be shaping up nicely.
I have to try out that homemade scribing tool. It all makes sense so suddenly....
New York, United States
Joined: May 02, 2013
KitMaker: 4,403 posts
Armorama: 4,078 posts
Posted: Thursday, August 11, 2016 - 02:32 PM UTC
I wish I had a DOLLAR for every part that I've lost over nearly 60 years of model-building!!!
Do you still have the original plastic bag that Part A22 was in..? Sometimes parts work themselves loose from the runners and get trapped in one of the corners of the bag unnoticed, and the bag is tossed into the garbage with the part still in the bag! I KNOW I've been guilty of that through my own carelessness. In my case, overly enthusiastic to get the kit started, maybe..?
Very Nice Recovery!

I'll be buying this kit soon, and I'll be following this thread with much interest!

ColinEdm
Associate Editor Alberta, Canada
Joined: October 15, 2013
KitMaker: 1,355 posts
Armorama: 1,229 posts
Posted: Thursday, August 11, 2016 - 08:41 PM UTC
Unfortunately the bags are long gone in the recycling. I have made a habit of checking the bags for loose bits before I throw them out but still could have missed it, or just knocked it off into the netherworld during washing/handling. Oh well, it's not a major issue and am moving on to the suspension and running gear.
The voices are back.....excellent....
Ontario, Canada
Joined: March 01, 2002
KitMaker: 1,607 posts
Armorama: 1,581 posts
Posted: Thursday, August 11, 2016 - 10:36 PM UTC
Just lost a headlight yesterday.Should have been easy to find.Nowhere to be found

.
Will have to cover the space with stowage.Think I need a large white tray with 4" walls around it I can put my stool on.Think I'll research that,there must be something out there???
Anyway.Back to the point Colin.Just bought this kit Sat.
After building the new Sherman Easy Eight which was the best kit ever I had to see if the M10 is the same standard.
My post is on here of the finished kit.
I'll follow your build and be just behind.
Glad your doing it.
Tom

North Carolina, United States
Joined: September 16, 2004
KitMaker: 1,281 posts
Armorama: 1,222 posts
Posted: Thursday, August 11, 2016 - 11:52 PM UTC
Per Murphy, now that you've gone to the trouble of creating that part, the original will surface. Nice save BTW.
ColinEdm
Associate Editor Alberta, Canada
Joined: October 15, 2013
KitMaker: 1,355 posts
Armorama: 1,229 posts
Posted: Friday, August 12, 2016 - 04:40 AM UTC
Quoted Text
Per Murphy, now that you've gone to the trouble of creating that part, the original will surface. Nice save BTW.
Oh, undoubtedly! And thanks all!
The voices are back.....excellent....
ColinEdm
Associate Editor Alberta, Canada
Joined: October 15, 2013
KitMaker: 1,355 posts
Armorama: 1,229 posts
Posted: Friday, August 12, 2016 - 10:00 AM UTC
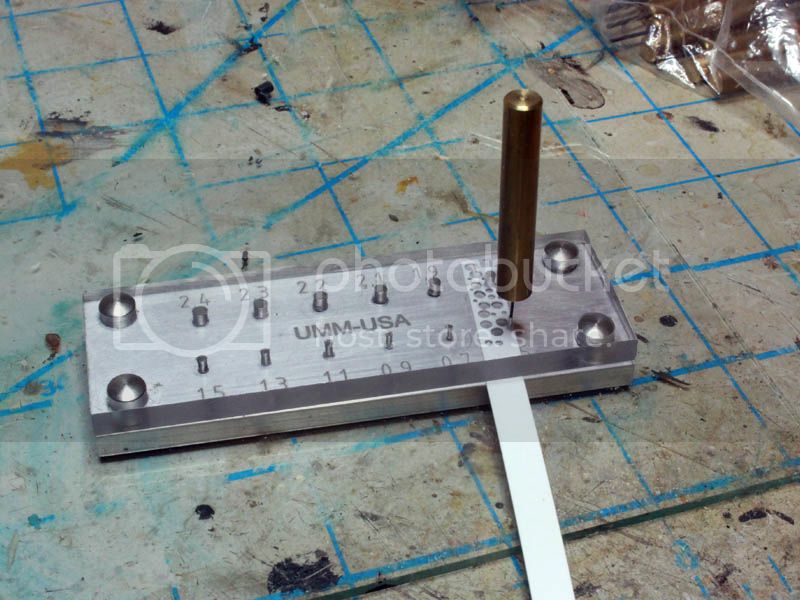
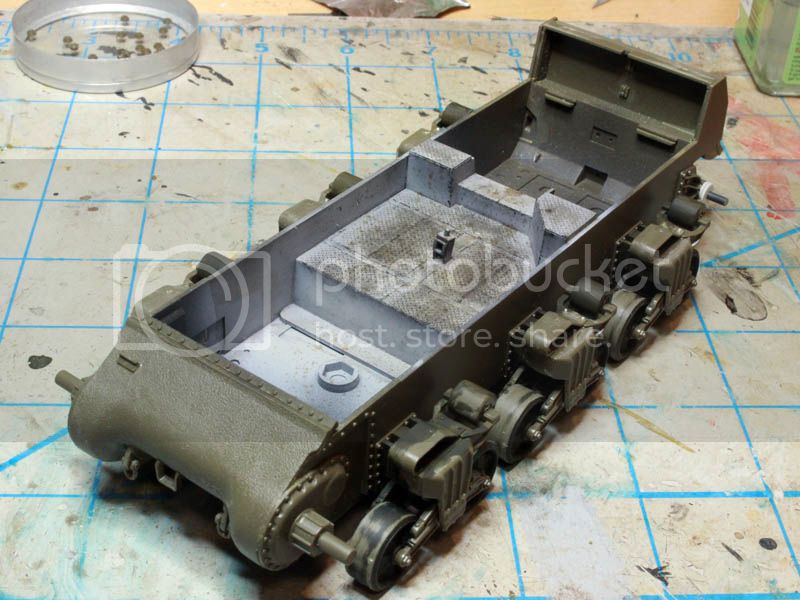
On to the running gear. Each bogie assembly consists of 14 parts for the wheels and suspension. Everything is molded with front and back pieces so a seam runs down the middle of the track support skids so a fair bit of cleanup is required to get them looking like a single piece with no seam. Also, the bolts that hold the track support skids to the top of the volute suspension bracket are missing as usual so out comes the punch and die set to make a bunch of 0.5 mm bolt heads:
These are then fitted the track support skids:
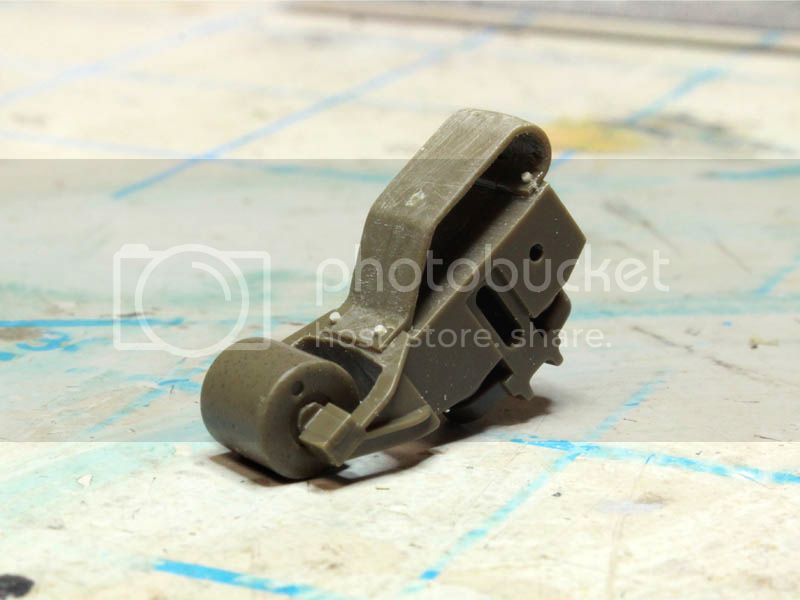
Then I added the 4 mounting holes for the support roller bracket:
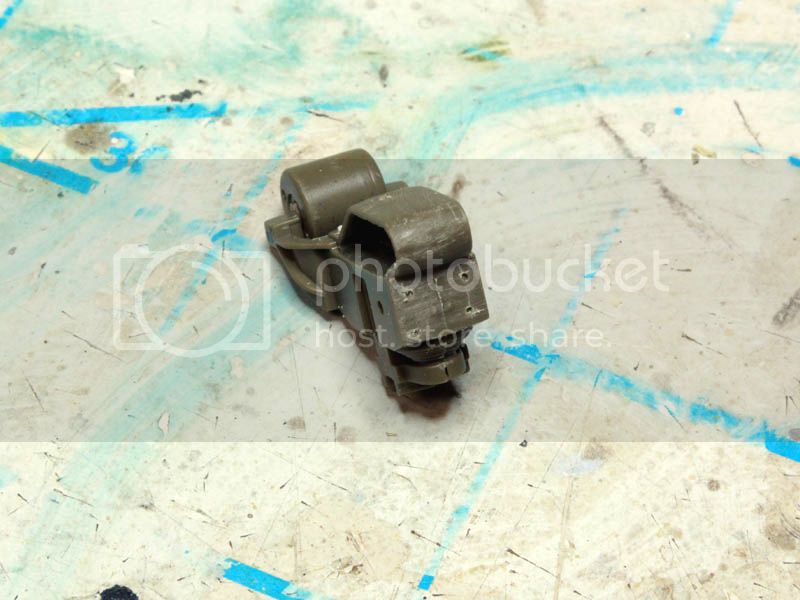
Then put the bits together...
Right and left handed bogie assemblies:
Also painted and weathered the bottom hull interior:
The voices are back.....excellent....
New York, United States
Joined: May 02, 2013
KitMaker: 4,403 posts
Armorama: 4,078 posts
Posted: Friday, August 12, 2016 - 06:16 PM UTC
LOOKING GOOD!
Judging from their color alone, it looks like you're using the ACADEMY M4/M10-type Stamped Road Wheels..? A good choice, IMO. The ASUKA/TASCA Suspension Sets are very nice, BUT EXPENSIVE!!!
:-H
ColinEdm
Associate Editor Alberta, Canada
Joined: October 15, 2013
KitMaker: 1,355 posts
Armorama: 1,229 posts
Posted: Friday, August 12, 2016 - 06:36 PM UTC
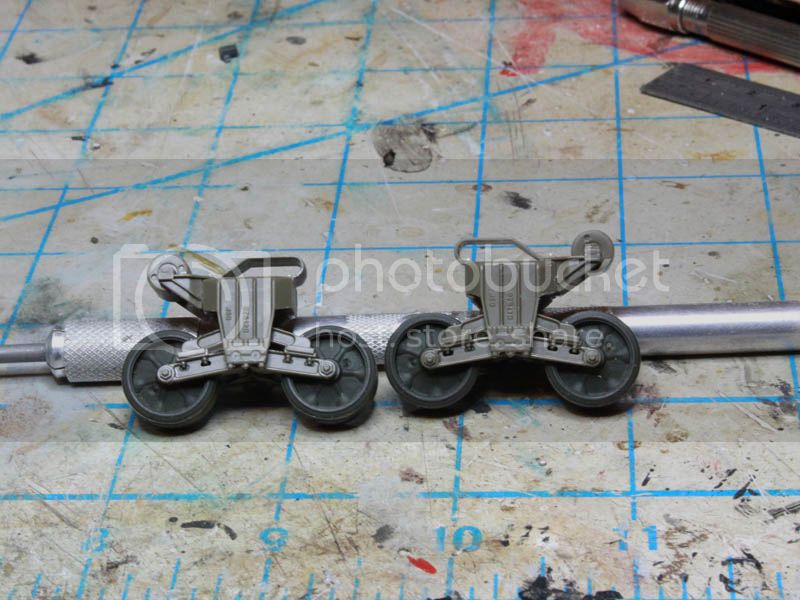
Thanks, actually I am using the kit wheels, I just pre-painted them and the inside of the suspension arms before assembly as it is hard to get good coverage when all together.
The voices are back.....excellent....
New York, United States
Joined: May 02, 2013
KitMaker: 4,403 posts
Armorama: 4,078 posts
Posted: Saturday, August 13, 2016 - 02:05 AM UTC
Quoted Text
Thanks, actually I am using the kit wheels, I just pre-painted them and the inside of the suspension arms before assembly as it is hard to get good coverage when all together.
Gotcha!
You sure had ME fooled!

ColinEdm
Associate Editor Alberta, Canada
Joined: October 15, 2013
KitMaker: 1,355 posts
Armorama: 1,229 posts
Posted: Sunday, August 21, 2016 - 10:02 AM UTC
A bit of an update, attached the running gear to the lower tub:
Then worked on the interior of the upper hull and sponsons:
Everything fit together very nicely as is expected with Tamiya kits:
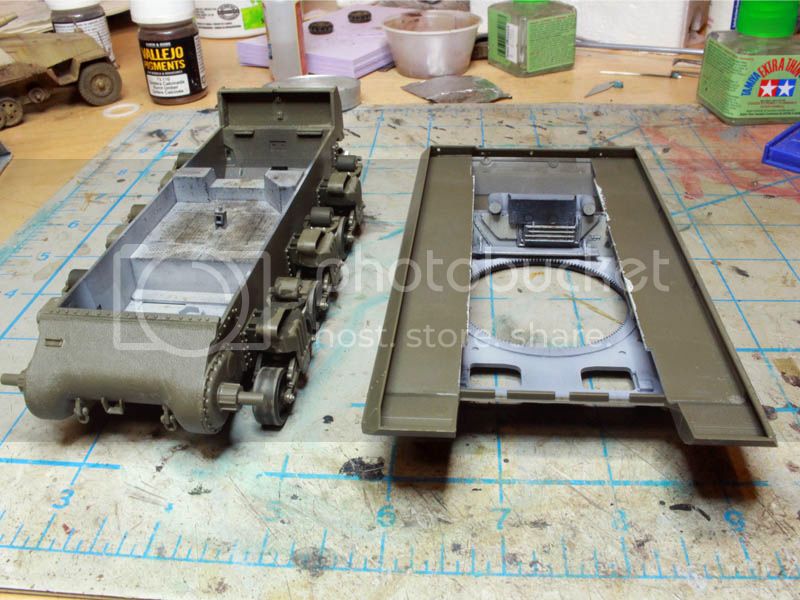
Just test fitting:

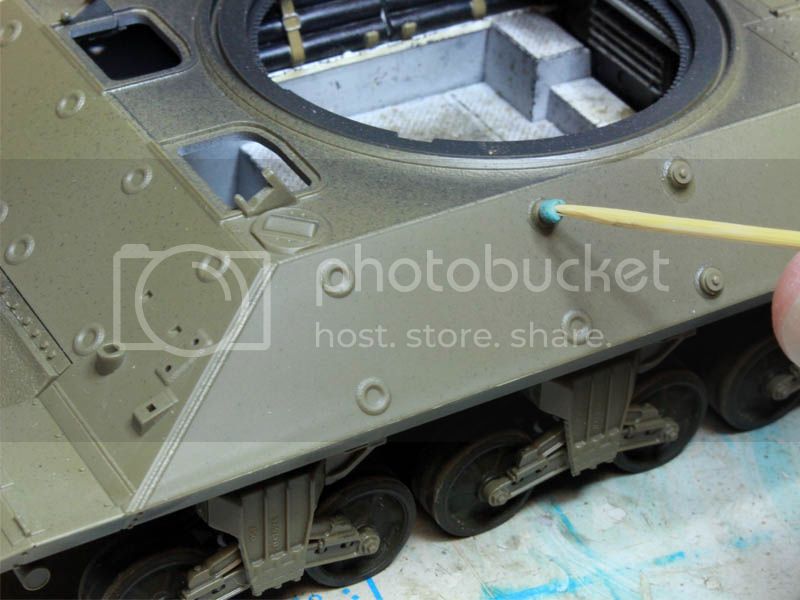
Now time for the auxiliary armour bosses, there are 20 of these little suckers on the hull alone...
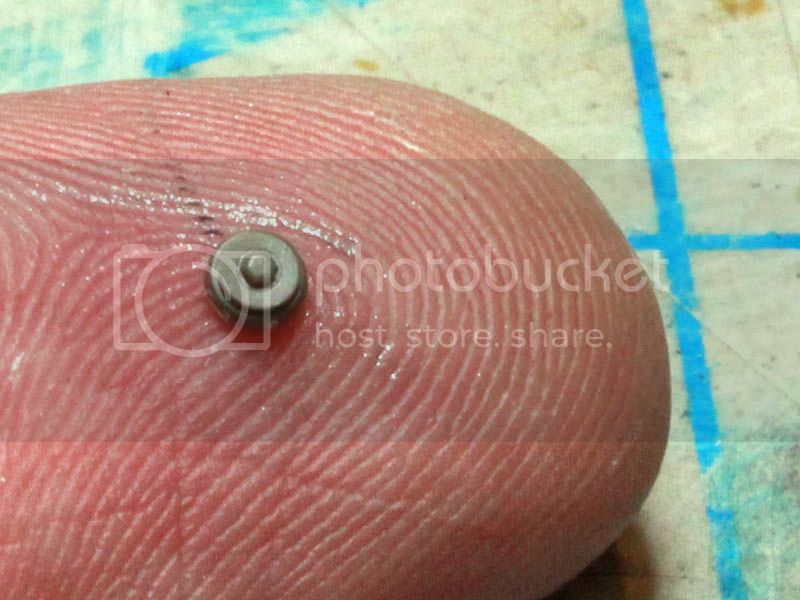
And with two sprue gates each, that is a lot of tiny bits to clean up! I used a toothpick with a bit of blue-tac to hold the bosses and place them on the hull, my fingers are way too big to attempt and tweezers just make them go shooting off as offerings to the carpet monster.
The voices are back.....excellent....
#424
Queensland, Australia
Joined: April 23, 2015
KitMaker: 4,648 posts
Armorama: 2,248 posts
Posted: Sunday, August 21, 2016 - 10:53 AM UTC
Nice looking interior! Good idea with the blutack. Now that blutack is stuff you really don't want embedded in your carpet.
"Artillery adds dignity, to what would otherwise be an ugly brawl."
Frederick The Great
England - North East, United Kingdom
Joined: June 22, 2010
KitMaker: 1,224 posts
Armorama: 1,207 posts
Posted: Monday, August 22, 2016 - 03:31 PM UTC
I am in the process of building the AFV Club version - looking forward to more progress


