

I have the original Dragon M5A1 and I understand that there are some problems with the kit. I can't afford the new Asuka kits (just not going to be in the budget).
I have a chanced to pick up the Tank Workshop M4A1 hull. Is it worth it?
Gord
Hosted by Darren Baker
Dragon M4A1

Grrdzilla

Joined: July 10, 2016
KitMaker: 72 posts
Armorama: 70 posts
Posted: Friday, September 23, 2016 - 08:07 AM UTC
Bravo1102

Joined: December 08, 2003
KitMaker: 2,864 posts
Armorama: 2,497 posts

Posted: Friday, September 23, 2016 - 11:48 AM UTC
It was the driver's hoods. Check out the review on the old PMMS site. There was a fix if you were into sawing and filling.
M4A1Sherman
Joined: May 02, 2013
KitMaker: 4,403 posts
Armorama: 4,078 posts
Posted: Friday, September 23, 2016 - 04:45 PM UTC
[quote]I have the original Dragon M5A1 and I understand that there are some problems with the kit. I can't afford the new Asuka kits (just not going to be in the budget).
I have a chanced to pick up the Tank Workshop M4A1 hull. Is it worth it?
Gord[/
Hi, Gord!
As Steve says, the old PMMS site offers a low cost fix to the DRAGON M4A1 Hull- DRAGON made several kits of US and British M4A1s, (I forget the British designation).
Which DRAGON M4A1 kit do you have?
TANK WORKSHOP makes several different replacement M4A1 Upper Hulls, as does The New TMD, which means more money that you will have to spend in correcting your -A1.
It is also important for you to realize that the basic M4A1 Upper Hulls were manufactured in TWO distinctly DIFFERENT configurations, i.e, the earlier 56-degree "Small Hatch" Hull, where the Drivers' Hatches are oriented "fore-and-aft", in parallel to the Upper Hull's longitudinal axis. The later 47-degree "Big Hatch" Hull, which has the Glacis set at a steeper angle when viewed from the sides, has the Drivers' Hatches are oriented in oblique-angles to the longitudinal axis of the Hull- Consequently, you'll want to make sure that your possible acquisition of the TANK WORKSHOP M4A1 Replacement Hull is the proper one for your particular kit...
If you care to supply me with the kit number of your DRAGON -A1, and the part number of your prospective TANK WORKSHOP (TWS) -A1 Replacement Upper Hull, I'll be glad to ascertain for you if the TWS Upper Hull is the right one for your DRAGON Sherman. I can also cross-reference info for you if the TWS -A1 in question turns out to be incorrect for your particular application. I MAY even have the proper Upper Hull in my spare parts inventory for your Sherman, if things don't work out for you...
Another thought:
I've seen ASUKA M4A1 Upper Hulls for sale on ebay, and these aren't very expensive, so that route may well be a good alternative for you...
Good Luck, in any case...

ericadeane
Joined: October 28, 2002
KitMaker: 4,021 posts
Armorama: 3,947 posts
Posted: Friday, September 23, 2016 - 05:04 PM UTC
Dennis: If I may, I think it's incorrect to apply the glacis angle/hatch size identifications to the M4A1 hulls. Those are correct for the switchover for the small hatch welded hulls over to the large hatch welded hulls -- but given the rounded nature of both the small and large hatch M4A1 cast hulls -- to simply say the small hatch hull had a 56 degree slope while the large hatch had the 47 degree slope is incorrect.
In the cast hulls, the forward aft to fore bulge of the small hatch certainly differed from the lesser bulge created by the periscope housing of the large hatch but the overall forward portion of both cast hulls had similar if not exactly the same, slope. If you put both side to side, you'll see what I mean.
Great suggestions to Gord however on his question. I built the old DML 75mm M4A1 kit and it simply looks too beefy. I didn't correct it though.
M4A1Sherman
Joined: May 02, 2013
KitMaker: 4,403 posts
Armorama: 4,078 posts
Posted: Friday, September 23, 2016 - 06:07 PM UTC
Quoted Text
Dennis: If I may, I think it's incorrect to apply the glacis angle/hatch size identifications to the M4A1 hulls. Those are correct for the switchover for the small hatch welded hulls over to the large hatch welded hulls -- but given the rounded nature of both the small and large hatch M4A1 cast hulls -- to simply say the small hatch hull had a 56 degree slope while the large hatch had the 47 degree slope is incorrect.
In the cast hulls, the forward aft to fore bulge of the small hatch certainly differed from the lesser bulge created by the periscope housing of the large hatch but the overall forward portion of both cast hulls had similar if not exactly the same, slope. If you put both side to side, you'll see what I mean.
Great suggestions to Gord however on his question. I built the old DML 75mm M4A1 kit and it simply looks too beefy. I didn't correct it though.
Hi, Roy!
Thanks for your input!
With all due respect, I HAVE compared the 56-degree and 47-degree Hulls "side-by-side" and their respective angles from the horizontal plane of the Glacis AND the Upper Hull sides are readily apparent between the 47-degree and 56-degree Hulls. I really don't want to be argumentative, but the differences in the frontal angle of their Glacis' are quite obvious to me, ESPECIALLY the welded Upper Hulls of the 47-degree M4A2, M4A3, etc, as compared to the earlier 56-degree Hulls of the M4 and initial M4A2, and M4A3s etc, are concerned...
Though the differences in the Glacis angles are not quite as obvious in the CAST M4A1-series Upper Hulls as they are in the welded Hulls, there is still a difference between the Glacis angles, if one looks a bit closer. The differences in the Glacis angles resulted because of the incorporation of much larger Drivers' Hatches, which in turn, necessitated longer forward Top Hull Plates in the welded Hull Shermans, and the longer forward top surfaces of the cast Hull -A1s, along with steeper Glacis angles...
In all amicability, I suggest that you compare the Glacis angles of the welded 47-degree Hulls to the welded 56-degree Hulls, side by side on a flat table, and you'll see what I've been blathering about. All one needs is a ruler and a protractor for the comparison between the respective Upper Hull dimensions and angles.
Just to be sure, check out any technical drawings and/or comparison photos in your references- If by chance you have SQUADRON's "Sherman In Action" book, this publication shows these differences in Glacis angles quite plainly, in the many side-view drawings of the various Shermans throughout this quite informative little book, without having to do any exhaustive searches through some other heavy tomes...
As ever, a lively discussion between us is ALWAYS welcome!

PS- AGREE heartily that the ancient DRAGON M4A1 Hull looked "too beefy"!!!

ericadeane
Joined: October 28, 2002
KitMaker: 4,021 posts
Armorama: 3,947 posts
Posted: Friday, September 23, 2016 - 08:16 PM UTC
Perhaps I wasn't clear. I agree with you that the welded hull 56 and 47 degree hulls' differences are clear.
What I'm saying is that the glacis angle of the cast hull small hatch M4A1 vs large hatch M4A1 hulls are very similar save for where the drivers' bulges are.
This is what I feel is in error: "It is also important for you to realize that the basic M4A1 Upper Hulls were manufactured in TWO distinctly DIFFERENT configurations, i.e, the earlier 56-degree "Small Hatch" Hull, where the Drivers' Hatches are oriented "fore-and-aft", in parallel to the Upper Hull's longitudinal axis. The later 47-degree "Big Hatch" Hull, which has the Glacis set at a steeper angle when viewed from the sides, has the Drivers' Hatches are oriented in oblique-angles to the longitudinal axis of the Hull- "
As a quick comparison, note that on both small hatch M4A1s and 56 degree welded hull glacis plate -- that their front faces were parallel to the angle of the FDA. When you see the introduction of the 47 degree, big hatch welded glacis hulls, there's a step between the FDA and the glacis due to the increased angle slope of the new glacis.
Now look at large hatch M4A1s -- no step. Without getting out and measuring, that tells me that its slope is much more akin to the 56 degree slope of its small hatch predecessor. This applies to M4 Composite cast glacises too. Hope this makes sense.
Grrdzilla
Joined: July 10, 2016
KitMaker: 72 posts
Armorama: 70 posts
Posted: Friday, September 23, 2016 - 11:35 PM UTC
Many thanks Steve and Dennis and Roy,
"Beefy" that's the word I remember in connection to the M4A1! I guess that will probably set all other considerations aside.
I have #6048 which I believe is the original release, bought new off the shelf and stuck in the closet after reading about problems with the kit. Then I forgot it for 20 odd years (sometime very odd) until my recent re-organisation drive. So I am trying to get all my ducks in a row.
I have a lot of Sherman's to build!
The GG's (or Governor Generals Horse Guards also know as "God's Gift to Homely Girls) used Sherman II's (M4A1). The Sherman II is rare in Canadian service, and I do like the unique (even if it is only unique to what I build).
Although the Canadian army used mostly Mk. V's (M4A4) there are quite a few variants to delight the heart of any Shermanoholic (sp) like me.
The Sherbrooke Fuseliers had "Bomb" a Sherman III DV that survived combat from D-Day until the end of the war. Bomb was rescued from a scrapyard and brought back to Canada and now sits on a plinth in Sherbrooke Quebec.
The South Alberta's, the Foot Guards (and others used) Firefly 1c's (17pdr armed composite hull).
A lot of regiments used Sherman 105's (Sherman 1b?), notably the TRR (Trois Rivieres Regiment) and I still need a definitive photo (ie not from the rear) of a Canadian 105 armed Sherman (I think I have all the bits I need)
And of course the ubiquitous Sherman V (M4A4) (to Commonwealth service), as Firefly's ARV's DD's and good old 75mm's.
And we used Easy Eights in Korea.
I could really spend a lifetime building just Sherman's and friends: like Rams and SP's: (M10 and Achilles M10 17pdr), Priests (early), Kangaroo, (de-frocked Priest), Sexton, Ram OP, Badger, Kangaroo, Grizzly, Skink, might even do a Centurion one day.
So believe me when I tell you that your help and advice is very much appreciated.
All the best
Gord
barkingdigger

#013

Joined: June 20, 2008
KitMaker: 3,981 posts
Armorama: 3,403 posts
Posted: Saturday, September 24, 2016 - 12:43 AM UTC
Hi Gordon,
IIRC kit #6048 was the grand-daddy of DML Shermans! The big issue is that the upper hull is too wide (by about 4 scale " IIRC) and that gives it a very chunky look. The sides of the real thing are sloped slightly, and no amount of surgery will fix it. You can either a) live with it - as long as it isn't parked next to a Tasca kit nobody will notice! Or b) seek a replacement hull. I think the old TWS hull was just a resin copy - your best bet for a decent scale hull is to get one from the Asuka online shop. This has two advantages - it is plastic, and it is very accurate! TMD offers resin replacements based on the Tasca hull too.
IIRC there are also issues with the mantlet location being too high on the turret face of kit #6048...

RobinNilsson

Joined: November 29, 2006
KitMaker: 6,693 posts
Armorama: 5,562 posts
Posted: Saturday, September 24, 2016 - 12:55 AM UTC
Asuka 35026-HH sells for 400 Japanese Yen + postage
http://tasca-shop.ocnk.net/product/280
You may want to add more sprues to get the turret and hull parts.
/ Robin
http://tasca-shop.ocnk.net/product/280
You may want to add more sprues to get the turret and hull parts.
/ Robin

m4sherman
Joined: January 18, 2006
KitMaker: 1,866 posts
Armorama: 1,808 posts

Posted: Saturday, September 24, 2016 - 04:00 AM UTC
Quoted Text
Hi Gordon,
IIRC kit #6048 was the grand-daddy of DML Shermans! The big issue is that the upper hull is too wide (by about 4 scale " IIRC) and that gives it a very chunky look. The sides of the real thing are sloped slightly, and no amount of surgery will fix it. You can either a) live with it - as long as it isn't parked next to a Tasca kit nobody will notice! Or b) seek a replacement hull. I think the old TWS hull was just a resin copy - your best bet for a decent scale hull is to get one from the Asuka online shop. This has two advantages - it is plastic, and it is very accurate! TMD offers resin replacements based on the Tasca hull too.
IIRC there are also issues with the mantlet location being too high on the turret face of kit #6048...
Tom,
When I made the original M4A1 hull for Tank Workshop (actually it was for Panzer Concepts) there was no DML/Dradon M4A1. I based it off the Nichimo M4A1 kit that was available at the time. Not sure what has been done to that master over the last 15 years or so, but the DML might have been a better option! I did rework it when the "new" Tamiya M4 came out if I remember correctly. Amazing how time has flown by.
I also suggest getting a Taska/Asuka M4A1 hull. They are cheap from the online sprues shop.
Grrdzilla
Joined: July 10, 2016
KitMaker: 72 posts
Armorama: 70 posts
Posted: Saturday, September 24, 2016 - 10:05 AM UTC
Ok What a day.
The store was packed all day, Canada beat Russia 5-3 at the world cup, Chinese take out for dinner and my wonderful wife did the dishes (since I treated) and to top it off I bought 5 Sherman hulls on the Asuka website.
Thanks for all the great advice and information
I will keep you posted.
Gord
The store was packed all day, Canada beat Russia 5-3 at the world cup, Chinese take out for dinner and my wonderful wife did the dishes (since I treated) and to top it off I bought 5 Sherman hulls on the Asuka website.
Thanks for all the great advice and information
I will keep you posted.
Gord
M4A1Sherman
Joined: May 02, 2013
KitMaker: 4,403 posts
Armorama: 4,078 posts
Posted: Saturday, September 24, 2016 - 02:14 PM UTC
Quoted Text
Quoted TextHi Gordon,
IIRC kit #6048 was the grand-daddy of DML Shermans! The big issue is that the upper hull is too wide (by about 4 scale " IIRC) and that gives it a very chunky look. The sides of the real thing are sloped slightly, and no amount of surgery will fix it. You can either a) live with it - as long as it isn't parked next to a Tasca kit nobody will notice! Or b) seek a replacement hull. I think the old TWS hull was just a resin copy - your best bet for a decent scale hull is to get one from the Asuka online shop. This has two advantages - it is plastic, and it is very accurate! TMD offers resin replacements based on the Tasca hull too.
IIRC there are also issues with the mantlet location being too high on the turret face of kit #6048...
Tom,
When I made the original M4A1 hull for Tank Workshop (actually it was for Panzer Concepts) there was no DML/Dradon M4A1. I based it off the Nichimo M4A1 kit that was available at the time. Not sure what has been done to that master over the last 15 years or so, but the DML might have been a better option! I did rework it when the "new" Tamiya M4 came out if I remember correctly. Amazing how time has flown by.
I also suggest getting a Taska/Asuka M4A1 hull. They are cheap from the online sprues shop.
You know,it's funny that you brought up the old NICHIMO 1/35 M4A1 Upper Hull-
About 137 years ago, I converted a TAMIYA M4 (#35190, I believe), into an Early Production M4A1, using the old and moldy NICHIMO M4A1 "Small Hatch" Upper Hull. I "updated" the NICHIMO Upper Hull to Mid-Production standards, as many earlier M4A1s were, shortly before the Normandy Invasion; I did this by adding the extra "welded-on" armor plates on the right and left Upper Hull sides, (two "add-on" plates on the right side, and one on the left), and by adding "Cheek Armor" to the right front quarter of the Turret. The earlier 3-piece Transmission Case was used in lieu of the Mid and Late-production single-piece Transmission Case- Not all earlier -A1s received the "ballistically-better" single-piece Transmission Case. I also used the newer "full-width" M34A1 Main Gun Mantlet, as supplied in the TAMIYA M4 kit, as a part of the "update", plus the "square" Air Cleaners that I scrounged from an old ITALERI Late M4A1(76mm)W kit. I remember reading somewhere that DRAGON used this old ITALERI M4A1 kit, (supposedly with ITALERI's permission), to form the basis of their old M4A1(76)W "Operation Cobra" kit- I DON'T know if this story is true, BTW, but the parts are VERY similar, if compared side by side. I also used the Early-production Sprockets from the TAMIYA M4 kit, plus the 5 open-spoked "welded/manufactured" Road Wheels & 6 open-spoked Rear Idlers, the Return Rollers, and Bogie Assemblies, from the same TAMIYA M4 kit. I used the Track Skids from the ABER M4/M4A1 PE set, along with a lot of the other PE bits and pieces out of that particular detail/update set. I also chose to mount an air-cooled M1919 .30cal, with .30cal. Ammo already fed into the receiver "just in case", in lieu of an M2 ".50". I mounted this .30 on a .50-type pedestal, to the rear of the Commander's "Split-Hatch" Cupola. I used the AFV CLUB T51 Rubber Block Tracks, with Standard End Connectors. I used stowage and M1 Helmets from various sources, and I gave this particular Tank a bit more weathering than I usually do- It was ROUGH in Normandy, and being cognizant of that fact, I also added a Culin Hedgerow Device to the nose.
To top this project off, I added a Commander figure, half-sitting in his open Split Hatches, plus the Driver and his Assistant Driver in the two opened Drivers' Hatches, which I detailed with a few scratch-built details, such as Locking and Grab Handles, some of the pertinent ABER PE parts, my own "home-made" Hatch counter-balance Springs, and resin Periscopes by VERLINDEN. Some interior details were also added, i.e, those that could be seen even with the three Crew Members in place...
This was actually my first "in-depth" Sherman-build, which turned me into a WWII US/Allied fan, for good!
barkingdigger
#013
Joined: June 20, 2008
KitMaker: 3,981 posts
Armorama: 3,403 posts
Posted: Saturday, September 24, 2016 - 03:28 PM UTC
Quoted Text
Tom,
When I made the original M4A1 hull for Tank Workshop (actually it was for Panzer Concepts) there was no DML/Dradon M4A1. I based it off the Nichimo M4A1 kit that was available at the time. Not sure what has been done to that master over the last 15 years or so, but the DML might have been a better option! I did rework it when the "new" Tamiya M4 came out if I remember correctly. Amazing how time has flown by.
I also suggest getting a Taska/Asuka M4A1 hull. They are cheap from the online sprues shop.
Hi Randall,
Nichimo, eh? Wow! Time has surely flown! Any idea how it compares dimensionally to the DML and Asuka offerings? I still see the TWS hulls at shows here in the UK - one trader has a ton of TWS stock.
m4sherman
Joined: January 18, 2006
KitMaker: 1,866 posts
Armorama: 1,808 posts
Posted: Saturday, September 24, 2016 - 10:07 PM UTC
Quoted Text
Quoted TextTom,
When I made the original M4A1 hull for Tank Workshop (actually it was for Panzer Concepts) there was no DML/Dradon M4A1. I based it off the Nichimo M4A1 kit that was available at the time. Not sure what has been done to that master over the last 15 years or so, but the DML might have been a better option! I did rework it when the "new" Tamiya M4 came out if I remember correctly. Amazing how time has flown by.
I also suggest getting a Taska/Asuka M4A1 hull. They are cheap from the online sprues shop.
Hi Randall,
Nichimo, eh? Wow! Time has surely flown! Any idea how it compares dimensionally to the DML and Asuka offerings? I still see the TWS hulls at shows here in the UK - one trader has a ton of TWS stock.
Hi Tom,
I don't know! I haven't been part of TWS for a long time. Since Asuka, Dragon and Tamiya have done all the Shermans I wanted, I pretty much stopped getting resin stuff. My preference is to work with plastic. I got really tired of resin after a decade of casting.
I did compare the Dragon M4A1 to the Taska kits, and over-all the Taska/Asuka is a better model. Parts of the Dragon are crisper, but for fit and assembly Asuka is much better.
m4sherman
Joined: January 18, 2006
KitMaker: 1,866 posts
Armorama: 1,808 posts
Posted: Saturday, September 24, 2016 - 10:23 PM UTC
[/quote]
You know,it's funny that you brought up the old NICHIMO 1/35 M4A1 Upper Hull-
About 137 years ago, I converted a TAMIYA M4 (#35190, I believe), into an Early Production M4A1, using the old and moldy NICHIMO M4A1 "Small Hatch" Upper Hull. I "updated" the NICHIMO Upper Hull to Mid-Production standards, as many earlier M4A1s were, shortly before the Normandy Invasion; I did this by adding the extra "welded-on" armor plates on the right and left Upper Hull sides, (two "add-on" plates on the right side, and one on the left), and by adding "Cheek Armor" to the right front quarter of the Turret. The earlier 3-piece Transmission Case was used in lieu of the Mid and Late-production single-piece Transmission Case- Not all earlier -A1s received the "ballistically-better" single-piece Transmission Case. I also used the newer "full-width" M34A1 Main Gun Mantlet, as supplied in the TAMIYA M4 kit, as a part of the "update", plus the "square" Air Cleaners that I scrounged from an old ITALERI Late M4A1(76mm)W kit. I remember reading somewhere that DRAGON used this old ITALERI M4A1 kit, (supposedly with ITALERI's permission), to form the basis of their old M4A1(76)W "Operation Cobra" kit- I DON'T know if this story is true, BTW, but the parts are VERY similar, if compared side by side. I also used the Early-production Sprockets from the TAMIYA M4 kit, plus the 5 open-spoked "welded/manufactured" Road Wheels & 6 open-spoked Rear Idlers, the Return Rollers, and Bogie Assemblies, from the same TAMIYA M4 kit. I used the Track Skids from the ABER M4/M4A1 PE set, along with a lot of the other PE bits and pieces out of that particular detail/update set. I also chose to mount an air-cooled M1919 .30cal, with .30cal. Ammo already fed into the receiver "just in case", in lieu of an M2 ".50". I mounted this .30 on a .50-type pedestal, to the rear of the Commander's "Split-Hatch" Cupola. I used the AFV CLUB T51 Rubber Block Tracks, with Standard End Connectors. I used stowage and M1 Helmets from various sources, and I gave this particular Tank a bit more weathering than I usually do- It was ROUGH in Normandy, and being cognizant of that fact, I also added a Culin Hedgerow Device to the nose.
To top this project off, I added a Commander figure, half-sitting in his open Split Hatches, plus the Driver and his Assistant Driver in the two opened Drivers' Hatches, which I detailed with a few scratch-built details, such as Locking and Grab Handles, some of the pertinent ABER PE parts, my own "home-made" Hatch counter-balance Springs, and resin Periscopes by VERLINDEN. Some interior details were also added, i.e, those that could be seen even with the three Crew Members in place...
This was actually my first "in-depth" Sherman-build, which turned me into a WWII US/Allied fan, for good! [/quote]
Sounds like a nice Nichimo build. Those were poorly designed kits to put it mildly. But the only game in town at the time. As I recall, some of the early Dragon M4's used the Italeri lower hulls and a lot of parts.
My only Nichimo M4A1 that was finished, was part Italeri, part Tamiya and part Nichimo. It was made for the Italian theater, with M3 suspension. It went missing many years ago. For some reason I have very little memory from that time of my life. I suspect the concussion from getting rear ended and bashing my head on the back window of my truck.
You know,it's funny that you brought up the old NICHIMO 1/35 M4A1 Upper Hull-
About 137 years ago, I converted a TAMIYA M4 (#35190, I believe), into an Early Production M4A1, using the old and moldy NICHIMO M4A1 "Small Hatch" Upper Hull. I "updated" the NICHIMO Upper Hull to Mid-Production standards, as many earlier M4A1s were, shortly before the Normandy Invasion; I did this by adding the extra "welded-on" armor plates on the right and left Upper Hull sides, (two "add-on" plates on the right side, and one on the left), and by adding "Cheek Armor" to the right front quarter of the Turret. The earlier 3-piece Transmission Case was used in lieu of the Mid and Late-production single-piece Transmission Case- Not all earlier -A1s received the "ballistically-better" single-piece Transmission Case. I also used the newer "full-width" M34A1 Main Gun Mantlet, as supplied in the TAMIYA M4 kit, as a part of the "update", plus the "square" Air Cleaners that I scrounged from an old ITALERI Late M4A1(76mm)W kit. I remember reading somewhere that DRAGON used this old ITALERI M4A1 kit, (supposedly with ITALERI's permission), to form the basis of their old M4A1(76)W "Operation Cobra" kit- I DON'T know if this story is true, BTW, but the parts are VERY similar, if compared side by side. I also used the Early-production Sprockets from the TAMIYA M4 kit, plus the 5 open-spoked "welded/manufactured" Road Wheels & 6 open-spoked Rear Idlers, the Return Rollers, and Bogie Assemblies, from the same TAMIYA M4 kit. I used the Track Skids from the ABER M4/M4A1 PE set, along with a lot of the other PE bits and pieces out of that particular detail/update set. I also chose to mount an air-cooled M1919 .30cal, with .30cal. Ammo already fed into the receiver "just in case", in lieu of an M2 ".50". I mounted this .30 on a .50-type pedestal, to the rear of the Commander's "Split-Hatch" Cupola. I used the AFV CLUB T51 Rubber Block Tracks, with Standard End Connectors. I used stowage and M1 Helmets from various sources, and I gave this particular Tank a bit more weathering than I usually do- It was ROUGH in Normandy, and being cognizant of that fact, I also added a Culin Hedgerow Device to the nose.
To top this project off, I added a Commander figure, half-sitting in his open Split Hatches, plus the Driver and his Assistant Driver in the two opened Drivers' Hatches, which I detailed with a few scratch-built details, such as Locking and Grab Handles, some of the pertinent ABER PE parts, my own "home-made" Hatch counter-balance Springs, and resin Periscopes by VERLINDEN. Some interior details were also added, i.e, those that could be seen even with the three Crew Members in place...
This was actually my first "in-depth" Sherman-build, which turned me into a WWII US/Allied fan, for good!
[/quote]Sounds like a nice Nichimo build. Those were poorly designed kits to put it mildly. But the only game in town at the time. As I recall, some of the early Dragon M4's used the Italeri lower hulls and a lot of parts.
My only Nichimo M4A1 that was finished, was part Italeri, part Tamiya and part Nichimo. It was made for the Italian theater, with M3 suspension. It went missing many years ago. For some reason I have very little memory from that time of my life. I suspect the concussion from getting rear ended and bashing my head on the back window of my truck.
Removed by original poster on 09/25/16 - 19:25:37 (GMT).

vettejack
Joined: November 23, 2012
KitMaker: 1,277 posts
Armorama: 1,254 posts

Posted: Sunday, September 25, 2016 - 12:23 AM UTC
Quoted Text
Quoted Text
You know,it's funny that you brought up the old NICHIMO 1/35 M4A1 Upper Hull-
About 137 years ago, I converted a TAMIYA M4 (#35190, I believe), into an Early Production M4A1, using the old and moldy NICHIMO M4A1 "Small Hatch" Upper Hull. I "updated" the NICHIMO Upper Hull to Mid-Production standards, as many earlier M4A1s were, shortly before the Normandy Invasion; I did this by adding the extra "welded-on" armor plates on the right and left Upper Hull sides, (two "add-on" plates on the right side, and one on the left), and by adding "Cheek Armor" to the right front quarter of the Turret. The earlier 3-piece Transmission Case was used in lieu of the Mid and Late-production single-piece Transmission Case- Not all earlier -A1s received the "ballistically-better" single-piece Transmission Case. I also used the newer "full-width" M34A1 Main Gun Mantlet, as supplied in the TAMIYA M4 kit, as a part of the "update", plus the "square" Air Cleaners that I scrounged from an old ITALERI Late M4A1(76mm)W kit. I remember reading somewhere that DRAGON used this old ITALERI M4A1 kit, (supposedly with ITALERI's permission), to form the basis of their old M4A1(76)W "Operation Cobra" kit- I DON'T know if this story is true, BTW, but the parts are VERY similar, if compared side by side. I also used the Early-production Sprockets from the TAMIYA M4 kit, plus the 5 open-spoked "welded/manufactured" Road Wheels & 6 open-spoked Rear Idlers, the Return Rollers, and Bogie Assemblies, from the same TAMIYA M4 kit. I used the Track Skids from the ABER M4/M4A1 PE set, along with a lot of the other PE bits and pieces out of that particular detail/update set. I also chose to mount an air-cooled M1919 .30cal, with .30cal. Ammo already fed into the receiver "just in case", in lieu of an M2 ".50". I mounted this .30 on a .50-type pedestal, to the rear of the Commander's "Split-Hatch" Cupola. I used the AFV CLUB T51 Rubber Block Tracks, with Standard End Connectors. I used stowage and M1 Helmets from various sources, and I gave this particular Tank a bit more weathering than I usually do- It was ROUGH in Normandy, and being cognizant of that fact, I also added a Culin Hedgerow Device to the nose.
To top this project off, I added a Commander figure, half-sitting in his open Split Hatches, plus the Driver and his Assistant Driver in the two opened Drivers' Hatches, which I detailed with a few scratch-built details, such as Locking and Grab Handles, some of the pertinent ABER PE parts, my own "home-made" Hatch counter-balance Springs, and resin Periscopes by VERLINDEN. Some interior details were also added, i.e, those that could be seen even with the three Crew Members in place...
This was actually my first "in-depth" Sherman-build, which turned me into a WWII US/Allied fan, for good!
Sounds like a nice Nichimo build. Those were poorly designed kits to put it mildly. But the only game in town at the time. As I recall, some of the early Dragon M4's used the Italeri lower hulls and a lot of parts.
My only Nichimo M4A1 that was finished, was part Italeri, part Tamiya and part Nichimo. It was made for the Italian theater, with M3 suspension. It went missing many years ago. For some reason I have very little memory from that time of my life. I suspect the concussion from getting rear ended and bashing my head on the back window of my truck.[/quote]
I suspect your memory would be affected by a hunting accident 137 years ago, or did u really mean 37 years ago that would be contributed to good drugs and lots of alcohol (or in what order u wish it to be)??

ALBOWIE

Joined: February 28, 2006
KitMaker: 1,605 posts
Armorama: 1,565 posts

Posted: Sunday, September 25, 2016 - 05:02 AM UTC
Quoted Text
Hi Gordon,
IIRC kit #6048 was the grand-daddy of DML Shermans!
The First DML Sherman was the Firefly (#6031 in 95 then reappearing a #6121 in 99) and their first Western Allies WW2 AFV kit. It was followed by the M4A4 (#6035 - 1995/6). # 6048 appeared in about 96 from memory and went on to achieve a near legendary status as did their 9000 series Composite Firefly. They were dropped from production quite early and became a much sought after kit and continous demand saw a re release in the 2000's followed by a second production run to meet demand. It was this demand that saw the genesis of DML's Sherman interest and many appeared each year there after in the catalogues.
Al

junglejim
Joined: February 18, 2003
KitMaker: 1,728 posts
Armorama: 1,629 posts

Posted: Sunday, September 25, 2016 - 05:13 AM UTC
Original Dragon M4A1 with some simple upgrades (Sand skirt strips, applique armour, RHPS (Panda) tracks, Tasca tools). Didn't mess with hull sides or hoods. Works for me!
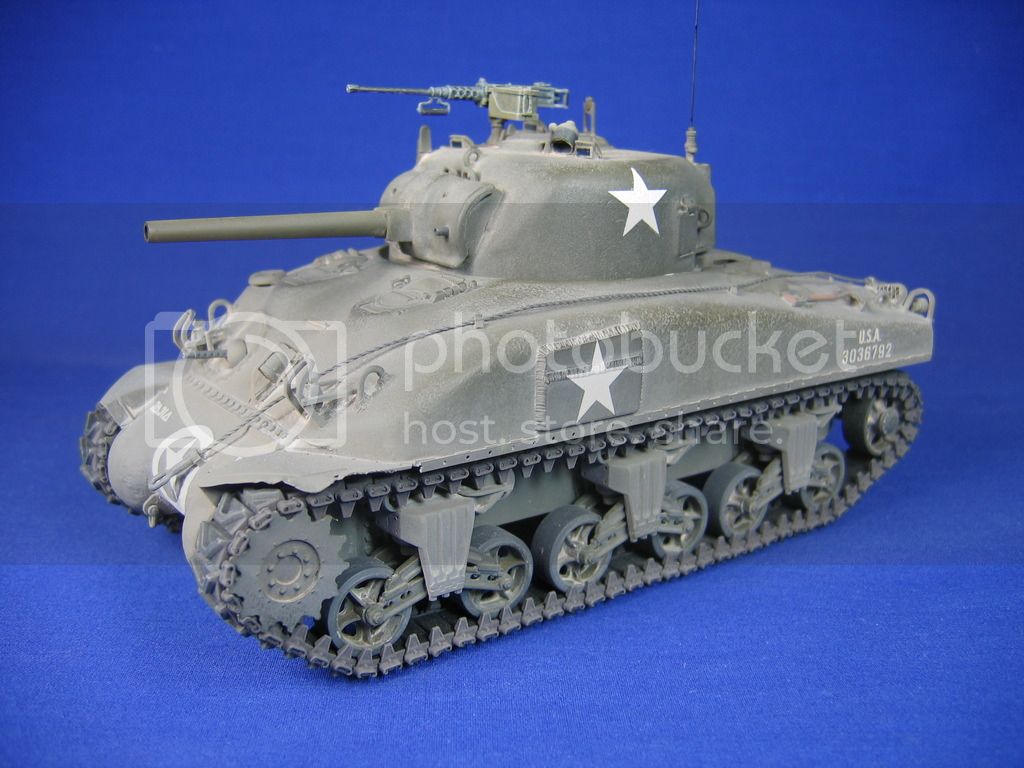
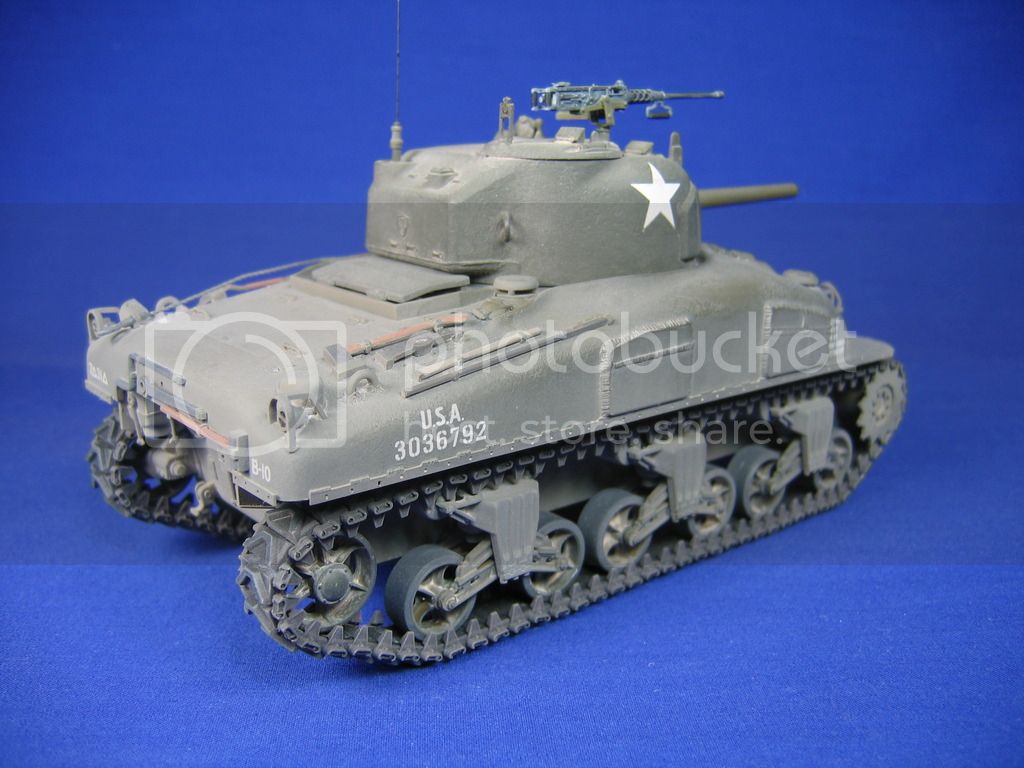
Jim
Jim
M4A1Sherman
Joined: May 02, 2013
KitMaker: 4,403 posts
Armorama: 4,078 posts
Posted: Sunday, September 25, 2016 - 05:34 AM UTC
Quoted Text
Quoted TextQuoted Text
You know,it's funny that you brought up the old NICHIMO 1/35 M4A1 Upper Hull-
About 137 years ago, I converted a TAMIYA M4 (#35190, I believe), into an Early Production M4A1, using the old and moldy NICHIMO M4A1 "Small Hatch" Upper Hull. I "updated" the NICHIMO Upper Hull to Mid-Production standards, as many earlier M4A1s were, shortly before the Normandy Invasion; I did this by adding the extra "welded-on" armor plates on the right and left Upper Hull sides, (two "add-on" plates on the right side, and one on the left), and by adding "Cheek Armor" to the right front quarter of the Turret. The earlier 3-piece Transmission Case was used in lieu of the Mid and Late-production single-piece Transmission Case- Not all earlier -A1s received the "ballistically-better" single-piece Transmission Case. I also used the newer "full-width" M34A1 Main Gun Mantlet, as supplied in the TAMIYA M4 kit, as a part of the "update", plus the "square" Air Cleaners that I scrounged from an old ITALERI Late M4A1(76mm)W kit. I remember reading somewhere that DRAGON used this old ITALERI M4A1 kit, (supposedly with ITALERI's permission), to form the basis of their old M4A1(76)W "Operation Cobra" kit- I DON'T know if this story is true, BTW, but the parts are VERY similar, if compared side by side. I also used the Early-production Sprockets from the TAMIYA M4 kit, plus the 5 open-spoked "welded/manufactured" Road Wheels & 6 open-spoked Rear Idlers, the Return Rollers, and Bogie Assemblies, from the same TAMIYA M4 kit. I used the Track Skids from the ABER M4/M4A1 PE set, along with a lot of the other PE bits and pieces out of that particular detail/update set. I also chose to mount an air-cooled M1919 .30cal, with .30cal. Ammo already fed into the receiver "just in case", in lieu of an M2 ".50". I mounted this .30 on a .50-type pedestal, to the rear of the Commander's "Split-Hatch" Cupola. I used the AFV CLUB T51 Rubber Block Tracks, with Standard End Connectors. I used stowage and M1 Helmets from various sources, and I gave this particular Tank a bit more weathering than I usually do- It was ROUGH in Normandy, and being cognizant of that fact, I also added a Culin Hedgerow Device to the nose.
To top this project off, I added a Commander figure, half-sitting in his open Split Hatches, plus the Driver and his Assistant Driver in the two opened Drivers' Hatches, which I detailed with a few scratch-built details, such as Locking and Grab Handles, some of the pertinent ABER PE parts, my own "home-made" Hatch counter-balance Springs, and resin Periscopes by VERLINDEN. Some interior details were also added, i.e, those that could be seen even with the three Crew Members in place...
This was actually my first "in-depth" Sherman-build, which turned me into a WWII US/Allied fan, for good!
Sounds like a nice Nichimo build. Those were poorly designed kits to put it mildly. But the only game in town at the time. As I recall, some of the early Dragon M4's used the Italeri lower hulls and a lot of parts.
My only Nichimo M4A1 that was finished, was part Italeri, part Tamiya and part Nichimo. It was made for the Italian theater, with M3 suspension. It went missing many years ago. For some reason I have very little memory from that time of my life. I suspect the concussion from getting rear ended and bashing my head on the back window of my truck.
I suspect your memory would be affected by a hunting accident 137 years ago, or did u really mean 37 years ago that would be contributed to good drugs and lots of alcohol (or in what order u wish it to be)??
[/quote]
Hi, John!
No, I was joking about the "137 years ago", mainly poking fun at myself, since I started building models waaaay back in 1958, which makes me an old fogey, are far as some of you younger guys are concerned!
BTW, I don't hunt, and never did- You can take the boy out of the City, but you can't take the "City" out of the boy, I guess...
Thanks for the compliments!
Actually, the "NICHIMO-build" was more of a TAMIYA M4 conversion with only the NICHIMO Early M4A1 Upper Hull being used as a "donor" part. I only used the various parts of the TAMIYA M4 that I had mentioned in my previous post, with the other components coming the sources that I had also mentioned.
Also, I learned the hard way that the TAMIYA Earlier-style "manufactured" Sprockets didn't fit the AFV CLUB T51 Track set, so I "fudged", by trimming the Sprocket Teeth to fit the Tracks- I managed to carry off that bit of "skullduggery" quite well, in that the "plastic surgery" is barely noticeable on the completed model, in that I left enough material on the Sprockets so that the very tips of the Sprocket Teeth are still there to poke through the gaps in the Track Shoes, as they do on the real thing.
I also used a combination of ARCHER's 1/35 WWII US Vehicle Dry Transfers, and EDUARD's US 1/35 WWII US Vehicle Stencils in order to create the markings on this project. Since I chose to model this M4A1 as a vehicle that is representative of an M4A1 in the middle of the Normandy Campaign, I used the quite prominent White National Stars on the Glacis, both Upper Hull sides, and on the sides and top of the Turret. Yes, I know these stick out like a sore thumb, but it should be remembered that many US Tankers had not yet been "initiated" to the practice of German Anti-tank units and German Tankers using these prominent Stars as "aiming references"... (GULP!)

I also added a TANK WORKSHOP Heavy Bearing Dished Road Wheel in the "lead position" of the left Front Bogie assembly, just for "interest", representing a field-replacement, or a replacement carried out while still in the UK, before debarking for the invasion front. I forgot to mention that I also added the two extra "armor" plates in front of the Drivers' Hoods. My Tank Commander is an old WARRIORS figure, and I'm REEEALLY saddened hat WARRIORS is no longer in business- IMO, WARRIORS crafted some of the BEST resin GI figures ever made! My Driver is an older resin VERLINDEN figure, and my Assistant Driver is basically a TAMIYA "bust", with a WARRIORS US Tanker Head with Rawlins Tanker's Helmet, without Goggles...
I had a lot fun with this project, anyway...
My very next 1/35 project was the TAMIYA CCKW353 kit, which I spent probably 2 months to complete. I built it as a representative vehicle of "The Red Ball Express". I used ABER PE to detail it, and I also converted the TAMIYA Driver with a "cut-down HORNET African-American Head, and an M1 helmet from the old "tried-but-true" DRAGON US WWII Tankers figure set. The BIGGEST "project within a project" was getting the HELLER canvas "Cargo Bed Tarp" to fit the TAMIYA Cargo Bed- That's something that I DON'T want to undertake ever again!
Thankfully, there are now resin aftermarket CCKW353 Cargo Bed Tarps- They're pretty expensive for what they are, but the cost is infinitely more palatable for me, in lieu of filing, fitting, filing, sanding and fitting OVER and OVER, BOTH the HELLER Tarp and the TAMIYA Cargo Bed's wooden "stake-body" parts, just to facilitate a proper fit!!!
M4A1Sherman
Joined: May 02, 2013
KitMaker: 4,403 posts
Armorama: 4,078 posts
Posted: Sunday, September 25, 2016 - 05:47 AM UTC
Quoted Text
Original Dragon M4A1 with some simple upgrades (Sand skirt strips, applique armour, RHPS (Panda) tracks, Tasca tools). Didn't mess with hull sides or hoods. Works for me!
Jim
Hi, Jim!
Your M4A1 looks A LOT like my TAMIYA/NICHIMO conversion, except for the .50cal, since I chose to mount the .30 on my vehicle instead, and of course, the Serial Number!
I had to do a "double-take", because both of our Shermans look as if they even might have been used in the same Platoon!!! Even your relatively restrained weathering is consistent with my build- It's uncanny! I built mine about 20 years ago; how long ago did you build yours?
VERY NICE JOB!!!
Too bad I don't have a digital camera, we could have compared notes! For the rest of you guys, in case you were wondering about what my US WWII stuff looks like, Jim's GREAT M4A1 is a very good representation of my own style of building...
m4sherman
Joined: January 18, 2006
KitMaker: 1,866 posts
Armorama: 1,808 posts
Posted: Sunday, September 25, 2016 - 10:04 AM UTC
Quoted Text
Quoted TextHi Gordon,
IIRC kit #6048 was the grand-daddy of DML Shermans!
The First DML Sherman was the Firefly (#6031 in 95 then reappearing a #6121 in 99) and their first Western Allies WW2 AFV kit. It was followed by the M4A4 (#6035 - 1995/6). # 6048 appeared in about 96 from memory and went on to achieve a near legendary status as did their 9000 series Composite Firefly. They were dropped from production quite early and became a much sought after kit and continous demand saw a re release in the 2000's followed by a second production run to meet demand. It was this demand that saw the genesis of DML's Sherman interest and many appeared each year there after in the catalogues.
Al
I got one of those M4A4's when it came out to see if the interiors we had would fit. No, but I found some of the pieces of that kit in a parts box with some old masters. Dragons tiny turret opening was the main issue.
m4sherman
Joined: January 18, 2006
KitMaker: 1,866 posts
Armorama: 1,808 posts
Posted: Sunday, September 25, 2016 - 10:11 AM UTC
Quoted Text
Original Dragon M4A1 with some simple upgrades (Sand skirt strips, applique armour, RHPS (Panda) tracks, Tasca tools). Didn't mess with hull sides or hoods. Works for me!
Jim
Looks good. I also built one back when it came out, but I'm not sure where it got to. The hull is a little wide, but you really can't tell on the built up model.
Now the old Nichimo was so wide the sides would have covered 'E8 tracks! I think I might have put the Nichimo front on the Italeri M4A1 come to think on it.
M4A1Sherman
Joined: May 02, 2013
KitMaker: 4,403 posts
Armorama: 4,078 posts
Posted: Sunday, September 25, 2016 - 11:09 AM UTC
Quoted Text
Quoted TextTom,
When I made the original M4A1 hull for Tank Workshop (actually it was for Panzer Concepts) there was no DML/Dradon M4A1. I based it off the Nichimo M4A1 kit that was available at the time. Not sure what has been done to that master over the last 15 years or so, but the DML might have been a better option! I did rework it when the "new" Tamiya M4 came out if I remember correctly. Amazing how time has flown by.
I also suggest getting a Taska/Asuka M4A1 hull. They are cheap from the online sprues shop.
Hi Randall,
Nichimo, eh? Wow! Time has surely flown! Any idea how it compares dimensionally to the DML and Asuka offerings? I still see the TWS hulls at shows here in the UK - one trader has a ton of TWS stock.
What with the really GREAT ASUKA Sherman parts being available to create nearly any Sherman Hull, I'd stay away from the old NICHIMO kit altogether. I only used the NICHIMO Early M4A1 Upper Hull, because NOTHING else was available at the time in order to build an early-type CAST-hulled Sherman...

M_Wittmann

Joined: August 25, 2005
KitMaker: 42 posts
Armorama: 41 posts

Posted: Friday, October 14, 2016 - 04:53 PM UTC
Quoted Text
Asuka 35026-HH sells for 400 Japanese Yen + postage
http://tasca-shop.ocnk.net/product/280
You may want to add more sprues to get the turret and hull parts.
/ Robin
Hi Robin.
I ordered from them three weeks ago, and I still haven't received anything other the payment confirmation from PayPal. I sent an email to the virtual shop and still no answer. Did you, or any of the other users have the same experience? Should I wait for the 45 days to pass and then I ask PayPal a refund or wait for the parcel to arrive?
Asuka (or Tasca) didn't send any message about my order's status.
This is very annoying.
Thanks.
 |

WEB HOSTING BY


Copyright ©2021 Armorama and Kitmaker Network, a subsidiary of Silver Star Enterprises
All Rights Reserved. Please read our Conditions of Use and Privacy Policy.
All Rights Reserved. Please read our Conditions of Use and Privacy Policy.