_GOTOBOTTOM
Яusso-Soviэt Forum
Russian or Soviet vehicles/armor modeling forum.
T-55 Enigma Iraqi Army 90´s
PatriotaModels
Visit this Community
Bayern, Germany
Joined: October 25, 2011
KitMaker: 126 posts
Armorama: 116 posts
Posted: Thursday, September 28, 2017 - 07:36 PM UTC
This is one of my current projects. I´ve started to build up the model in december 2016 using Tamiya´s T-55 Enigma kit and improving it with home made details using thin aluminum foil and wire for the fuel piping. As you can see the mantlet/canvas was modified for a slightly elevated gun. The main gun is a RB-Model product.


Johnathan123
Visit this Community
United States
Joined: December 15, 2016
KitMaker: 50 posts
Armorama: 50 posts
Posted: Friday, September 29, 2017 - 04:53 PM UTC
I have this kit in the stash and have love it and the T-55 since seeing them all over the place in the first Gulf War. How did you build the fuel line connectors? My eyesight even with a magnifying glass is not that good. Your model is great by the way.
PatriotaModels
Visit this Community
Bayern, Germany
Joined: October 25, 2011
KitMaker: 126 posts
Armorama: 116 posts
Posted: Friday, September 29, 2017 - 10:43 PM UTC

Quoted Text

I have this kit in the stash and have love it and the T-55 since seeing them all over the place in the first Gulf War. How did you build the fuel line connectors? My eyesight even with a magnifying glass is not that good. Your model is great by the way.


Some years ago I´ve been lucky to buy a cheap set of Mig´s T-55 fuel line set including small connectors made of resin. It was a bargain on Ebay. On the other hand you can use simple brass wire and some round styrene from your spare parts box or from sprues. The only thing you´ll have to do is to heat up the sprue plastic and stretch it to the diameter you need. Very simple technique. I´v used the discribed method on my Yugoslav T-55 BTU project, which will be presented very soon here on Armorama.

But let´s go back to the Enigma. New pictures with sand color and scratches.


PatriotaModels
Visit this Community
Bayern, Germany
Joined: October 25, 2011
KitMaker: 126 posts
Armorama: 116 posts
Posted: Sunday, October 27, 2019 - 06:08 AM UTC
Here´s a "recent" update of my Iraqi Enigma before placing it in small desert highway dio ...


PatriotaModels
Visit this Community
Bayern, Germany
Joined: October 25, 2011
KitMaker: 126 posts
Armorama: 116 posts
Posted: Sunday, October 27, 2019 - 06:09 AM UTC


bison126
Visit this Community
Correze, France
Joined: June 10, 2004
KitMaker: 5,329 posts
Armorama: 5,204 posts
Posted: Monday, October 28, 2019 - 05:14 AM UTC
It looks very nice Nenad. However you should give more sagging effect to your tracks. If you used the kit tracks you can glue them on top of the roadwheels.

I'm eager to see your diorama.

Olivier
TopSmith
Visit this Community
Washington, United States
Joined: August 09, 2002
KitMaker: 1,742 posts
Armorama: 1,658 posts
Posted: Friday, November 08, 2019 - 01:42 PM UTC
In the past, I used the old telephone wire for fuel lines. I stripped off the insulation except for where I wanted the fuel line connections and formed the wire to the correct shape. The final product looked very good.
mika14
Visit this Community
Singapore / 新加坡
Joined: January 23, 2016
KitMaker: 85 posts
Armorama: 17 posts
Posted: Thursday, December 05, 2019 - 04:45 AM UTC
Hi,

Nice weathering u have there...
how do u do the chipping? how do u know which area of the tank to do chipping? By looking at reference pictures?
18Bravo
Visit this Community
Colorado, United States
Joined: January 20, 2005
KitMaker: 7,219 posts
Armorama: 6,097 posts
Posted: Thursday, December 05, 2019 - 10:56 AM UTC

Quoted Text

... How did you build the fuel line connectors? My eyesight even with a magnifying glass is not that good...


While I usually prefer to scratch items like myself, my own vision is starting to become suspect as well. Legend Productions makes a very nice set of fuel lines designed for the Tamiya kit.
mogdude
Visit this Community
United States
Joined: June 18, 2012
KitMaker: 459 posts
Armorama: 195 posts
Posted: Thursday, December 05, 2019 - 12:05 PM UTC
I to would like to know what method was used for the chipping very nice model by the way
MLD
Visit this Community
Vermont, United States
Joined: July 21, 2002
KitMaker: 3,569 posts
Armorama: 2,070 posts
Posted: Thursday, December 05, 2019 - 01:14 PM UTC
Your build looks great! It's got me started on mine, and like good AMS, I just can't leave well enough alone.

I got distracted by this gate guard photo thinking it had an entrenching blade, but it's just a shadow. The second photo shows better. Looks like they were braces for the glacis blocks.


adding insult to injury some have two braces, some three, some none..

I started on the commanders hatch and added some Eduard and Skif interior bits.
PatriotaModels
Visit this Community
Bayern, Germany
Joined: October 25, 2011
KitMaker: 126 posts
Armorama: 116 posts
Posted: Saturday, December 14, 2019 - 09:50 PM UTC
Hi fellas, I want to apologize for replying so late to some of posted questions.

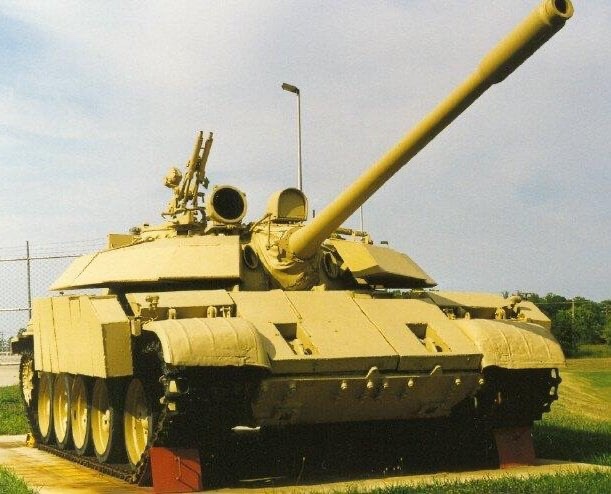
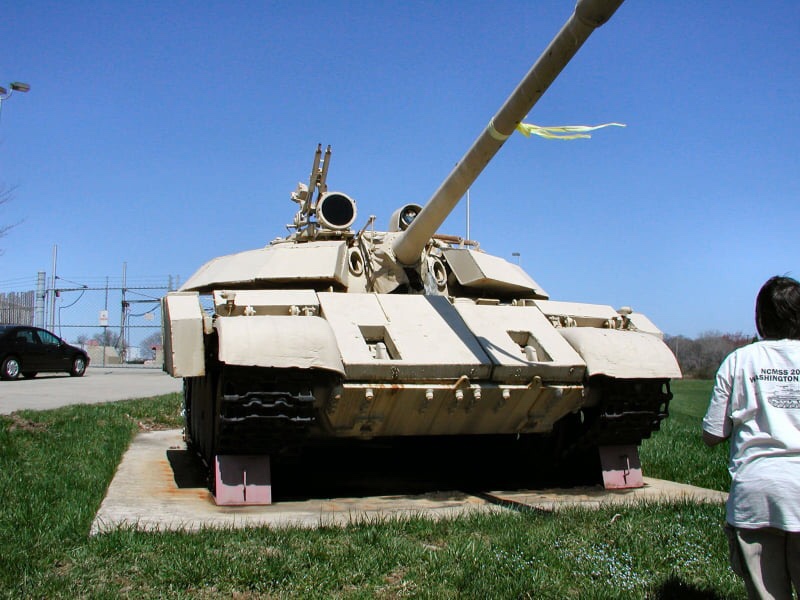
For chipping I used two different methods and two different paints. First of all I mixed a darker steel paint + a slightly greyish steel colour from Revell Aqua Color range. Then I took a smaller brush and marked/painted all edges that could be or are/were in contact with the crew (footsteps or similar) or influenced by the dry desert environment. After that, a piece of simple cleaning sponge was used to apply very tiny chipping marks, using the same dark colour. For both techniques I used the dark steel colour. Then, I took a new and fresh piece of cleaning sponge to apply the slightly greyish steel colour, as I did in the 2nd step. For the finish I used rust pigments.

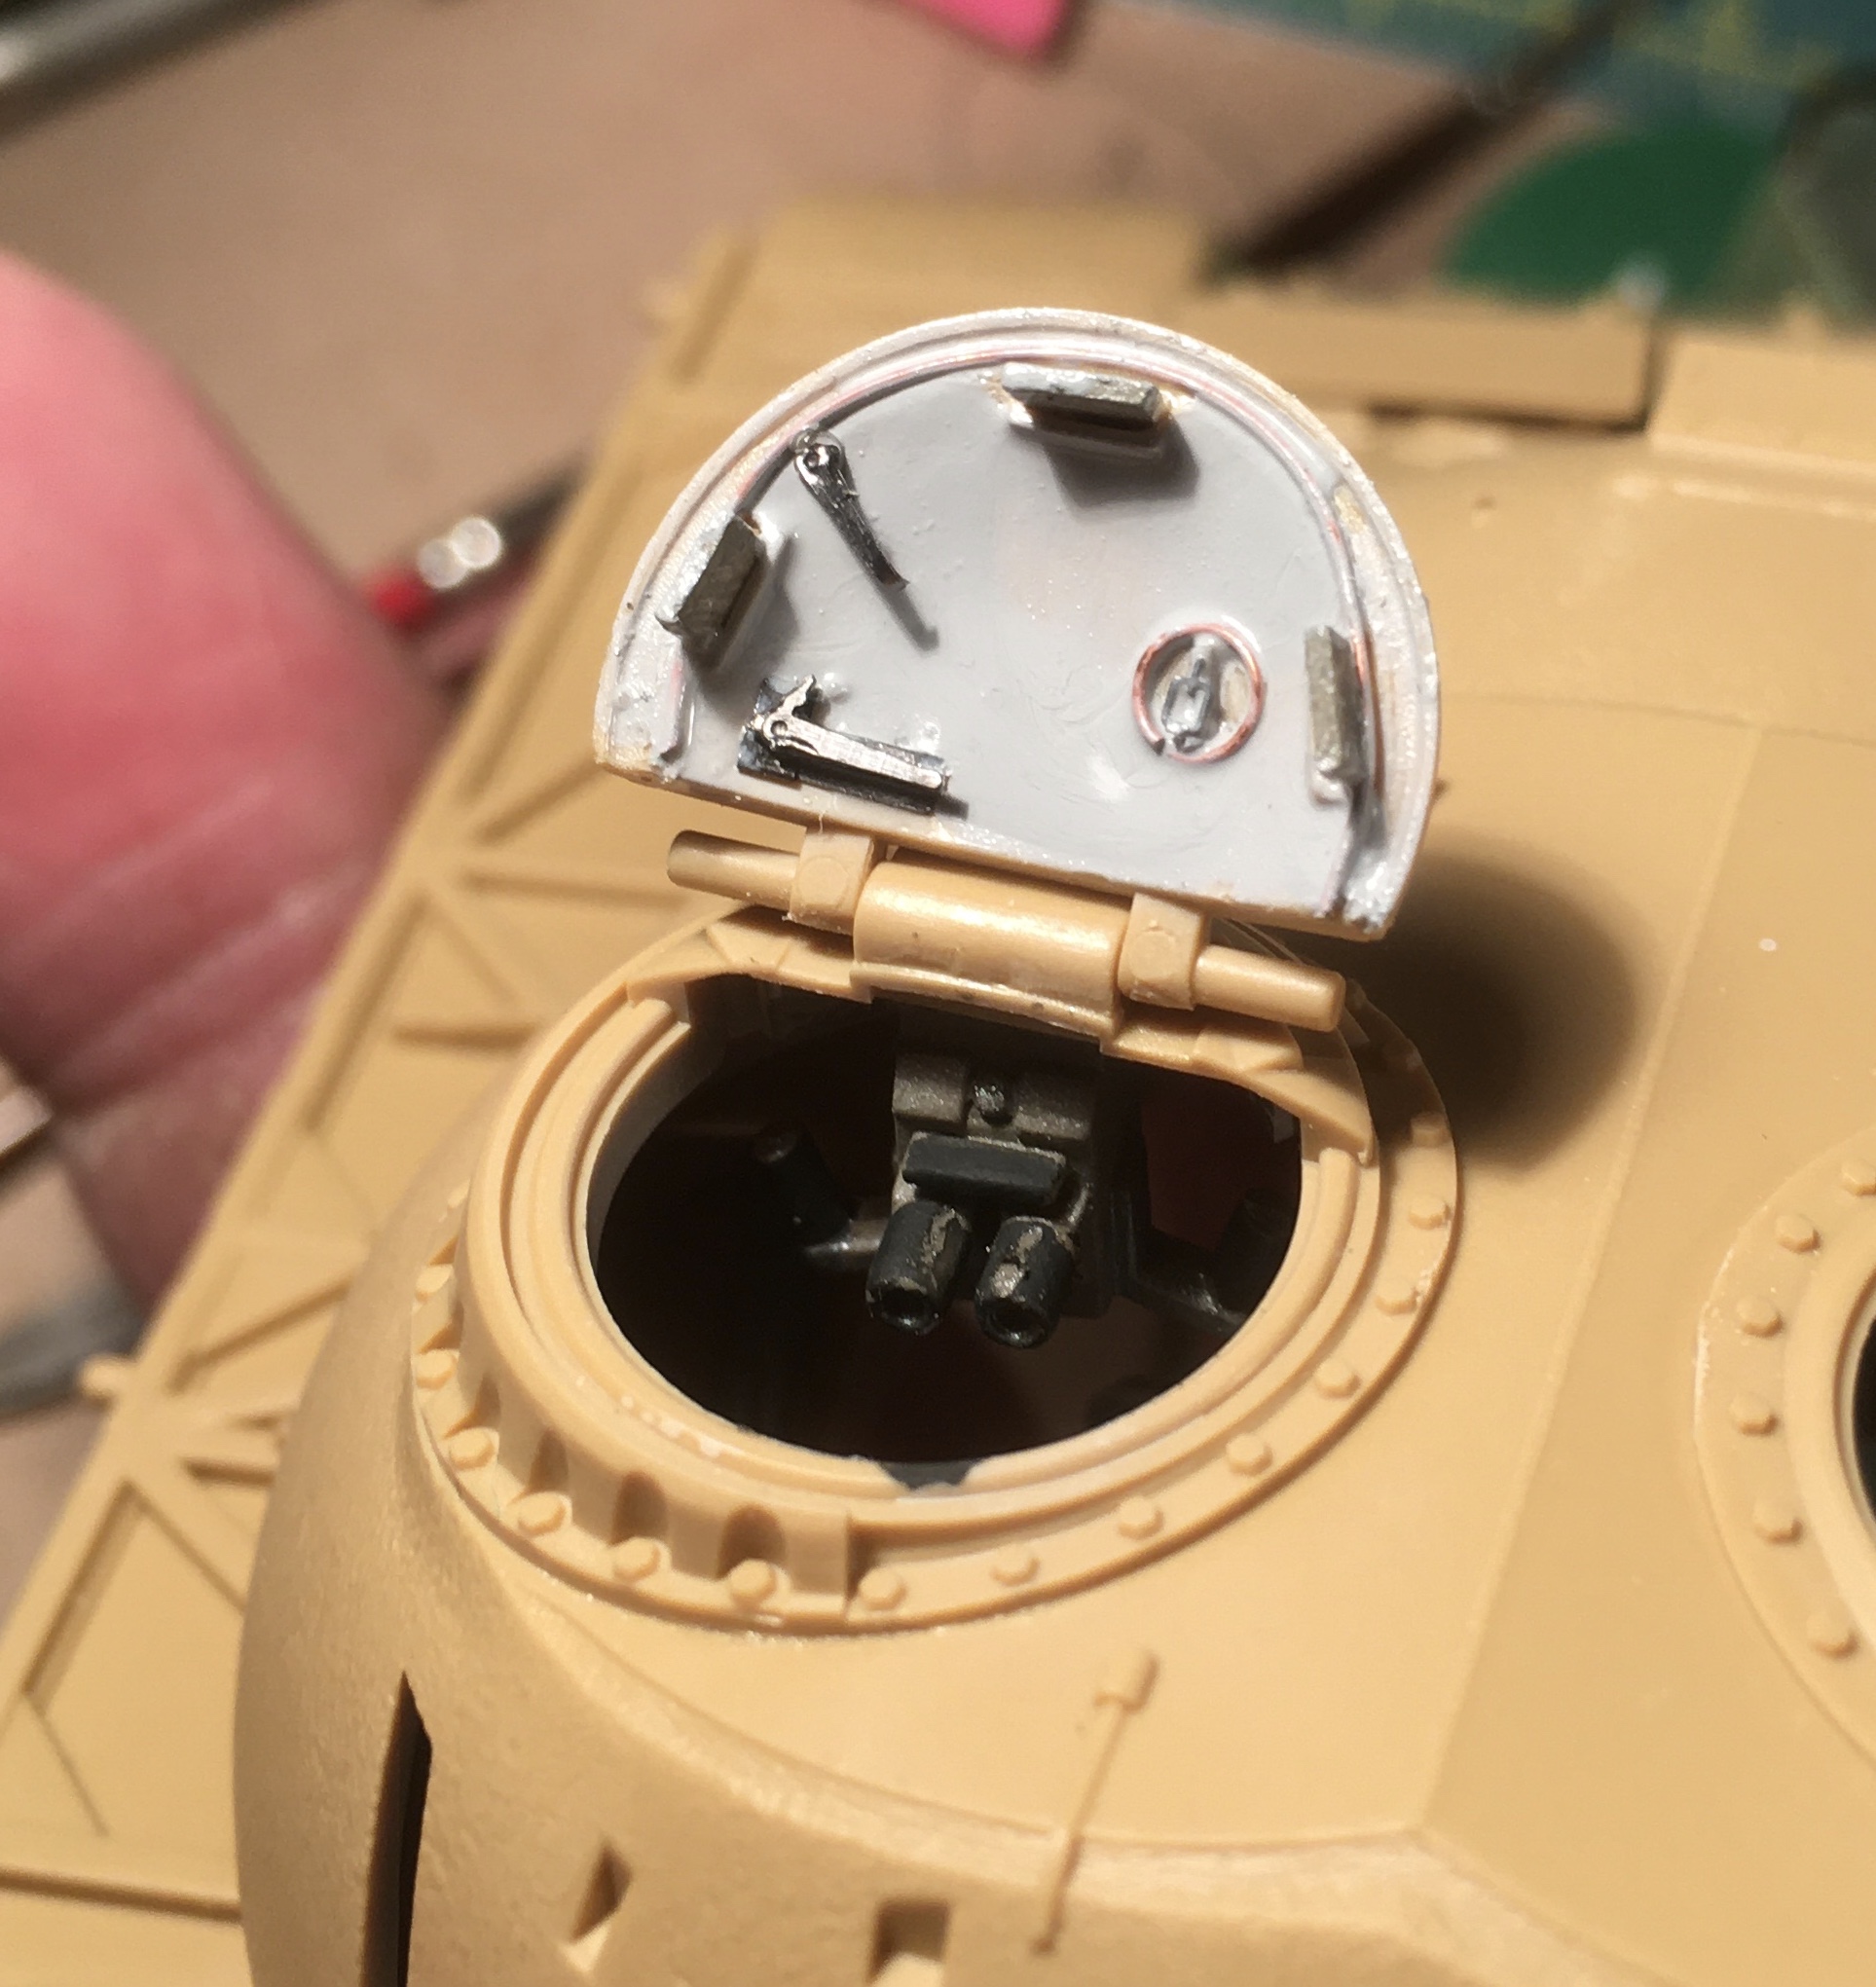
Fuel lines were made easily by using 0.4mm brass wire and small parts of isolation from an old unused cable (Hi-fi or similar). You just have to peel of the isolation carefully from the old cable and cut it into short pieces. Automatically you have a connector with a hole. Now all you have to do is put the wire through and you're done. Fix it with superglue.
 _GOTOTOP