Quebec, Canada
Joined: January 23, 2009
KitMaker: 89 posts
Armorama: 74 posts
Posted: Friday, June 01, 2018 - 10:54 AM UTC
I can safely say I have a handful of select kits that I want to complete. The others? Well they are there just in case.
After reading reviews of the Meng 2A4 I knew I had to get one for myself and complete it as a Canadian Army subject. The M versions of the 2A4 and 2A6 seem to get all the attention so mine would have to be a bit different[self proclaimed lifelong non-conformist].

Bringing it up to a Canadian version requires some additions and looking of the list. Few of these addons were nothing more than simple scratchbuilding. Getting late on a Friday so I will put up some images of progress tomorrow.
Alberta, Canada
Joined: January 19, 2005
KitMaker: 4,085 posts
Armorama: 3,917 posts
Posted: Friday, June 01, 2018 - 11:13 AM UTC
Looking forward to seeing your build Craig!
"We're not the public service of Canada, we're not just another department. We are the Canadian Forces, and our job is to be able to kill people."
July 2005- General R.J. Hillier (Retired), Former Chief of the Defence Staff
Quebec, Canada
Joined: January 23, 2009
KitMaker: 89 posts
Armorama: 74 posts
Posted: Saturday, June 02, 2018 - 12:39 AM UTC
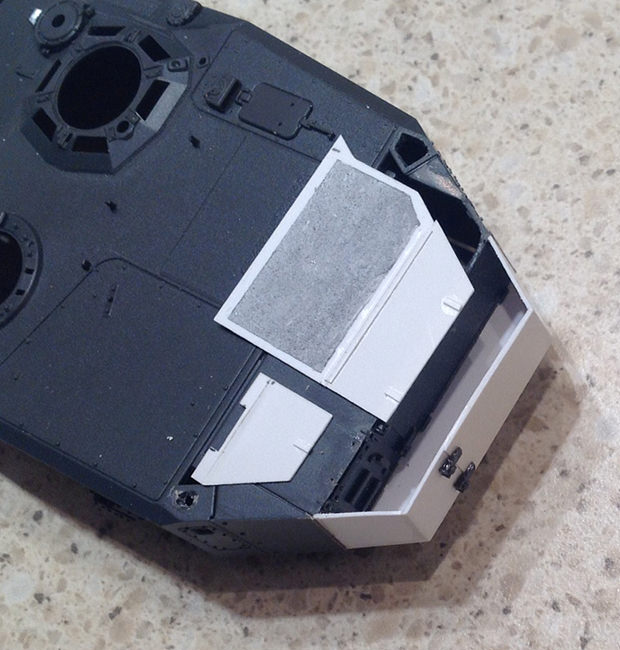
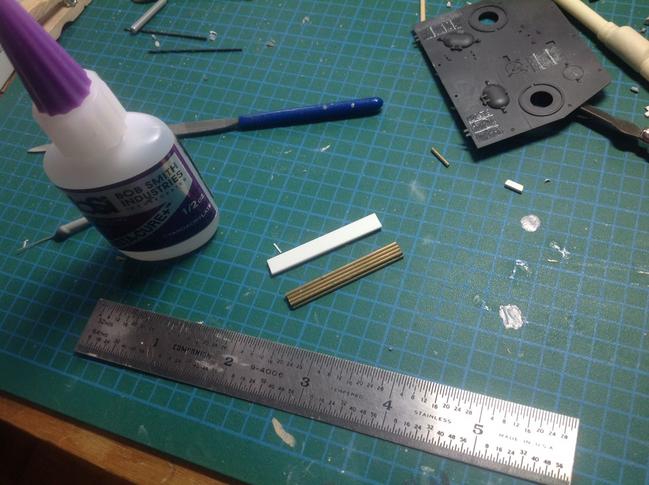
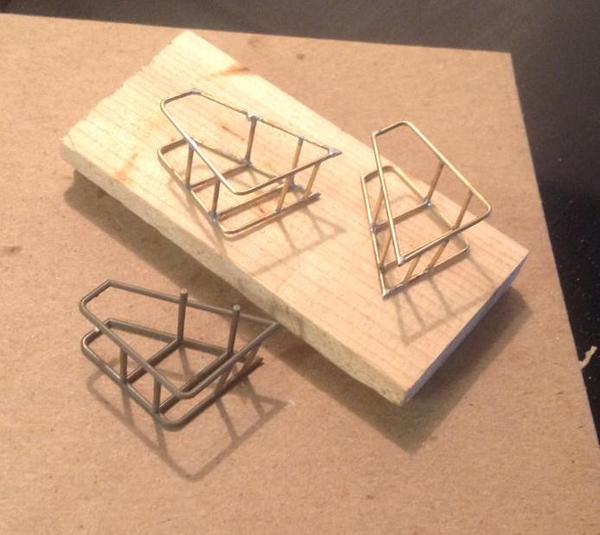
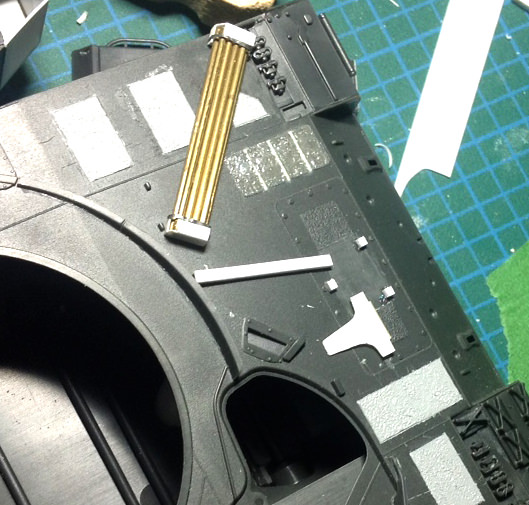
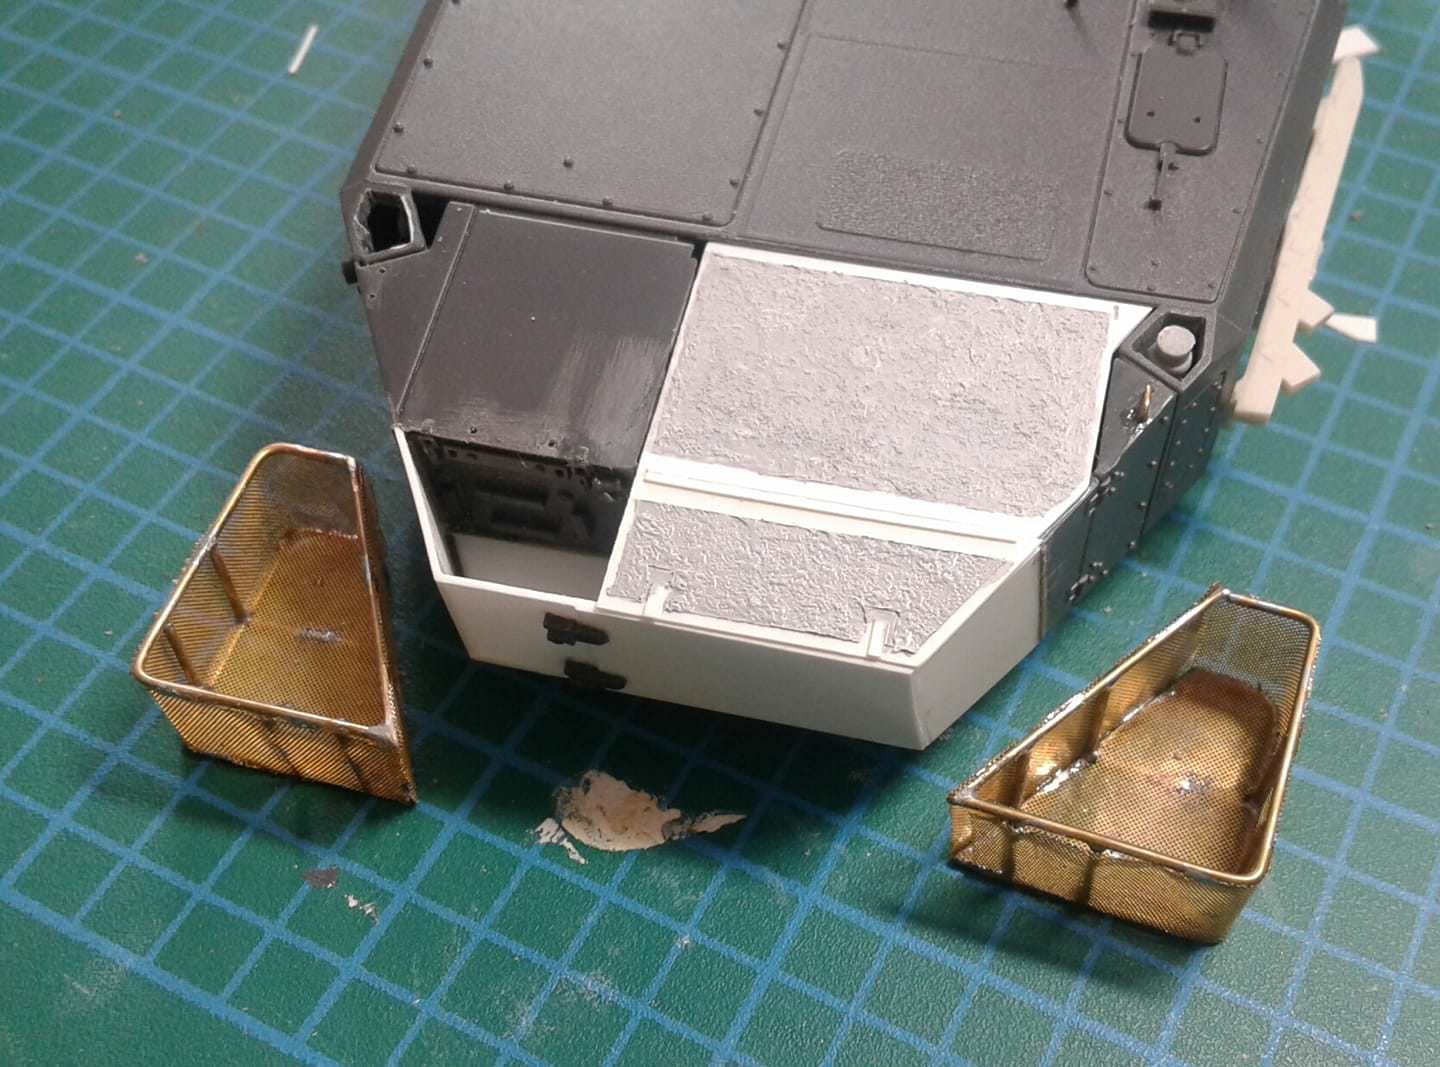
The past week started with biggest change to the kit. Adding a stowage bin and turret stowage baskets to them. Using the Tamiya 2A6 kit parts as my blueprints, the bin would be plastic card while brass K&S .032" rod for the baskets.
A couple of details were used off the kit rear panel(two different versions are provided).
The Tamiya turret baskets would work as a direct addon but I do find constructing a part from scratch very rewarding. While my soldering skills were originally taught many years ago in a short course while in the military, I never had to use them there.
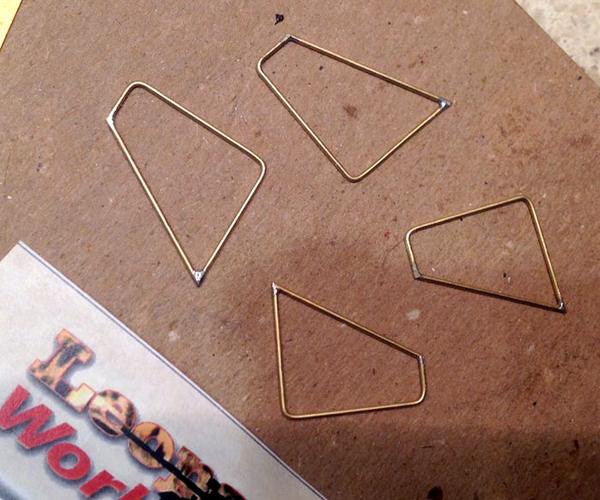
First attempt at the upper and lower frames were satisfactory. Angles are the same for top and bottom just the top is slightly longer to adjust for the slope of the rear of the turret.
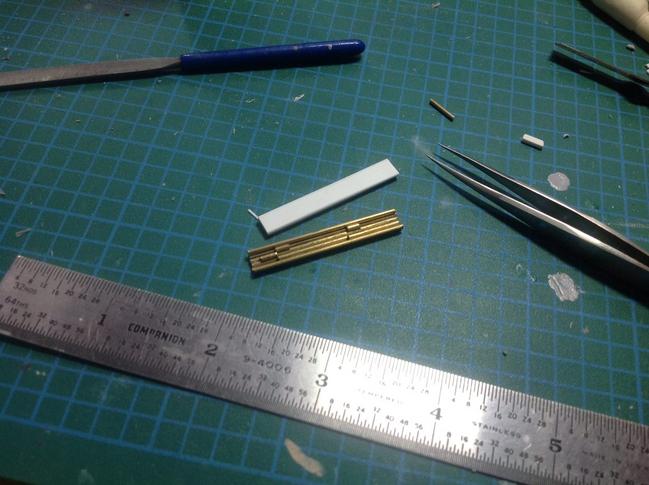
Some shimming stock wood was used as a form to make sure distant between upper and lower frames was constant. Two pieces of shimming stock adjusting then glued to around 10mm thickness, again measurements taken from the Tamiya basket.
Pennsylvania, United States
Joined: April 09, 2015
KitMaker: 1,063 posts
Armorama: 1,000 posts
Posted: Saturday, June 02, 2018 - 02:08 AM UTC
Impressive work thus far. Very clean sodering. Wish I could master it as well as you. I have tried several times but just can't seem to get the knack of it.
"No plan survives contact with the enemy." Helmuth von Moltke the Elder
Quebec, Canada
Joined: January 23, 2009
KitMaker: 89 posts
Armorama: 74 posts
Posted: Sunday, June 03, 2018 - 05:59 AM UTC
Quoted Text
I have tried several times but just can't seem to get the knack of it.
Use the FLUX Luke. Temperature setting on the variable adjust seems to help. I use the gel flux to help it flow.
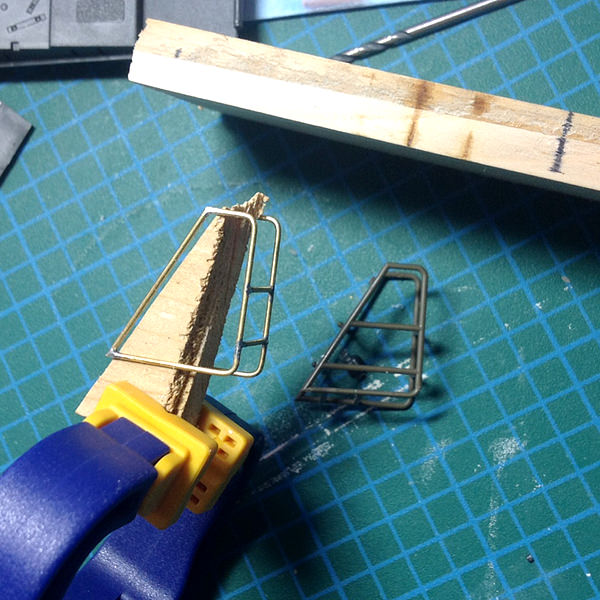
More work on the one of the baskets. Started on the opposite side unit but I almost ended up making a duplicate. Concentrate!!!
The upper and lower turret did not go together well and resulting in having to sand the left and right sides of the lower section so it would not stress the seam sections of the upper.
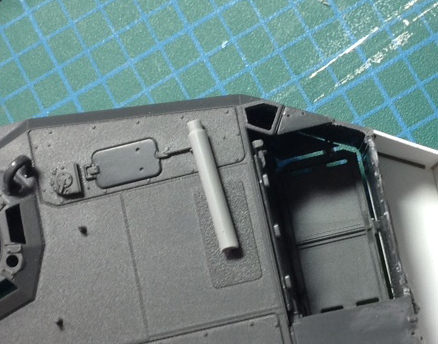
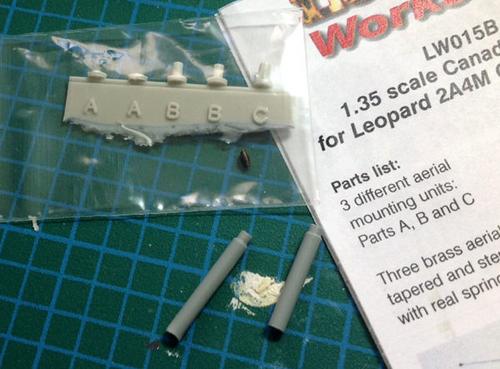
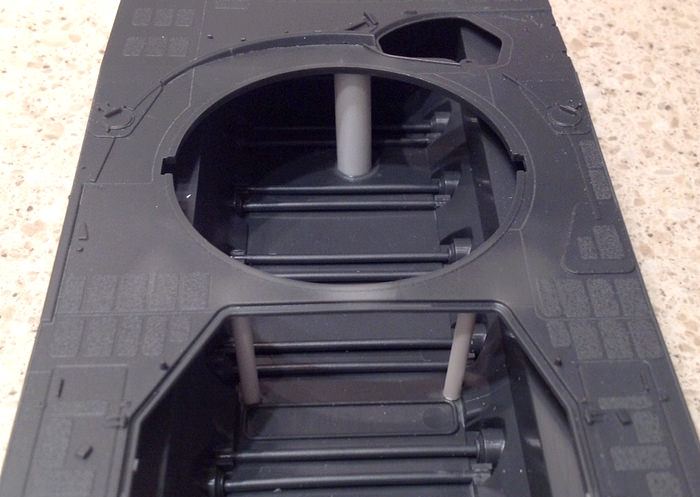
The antenna mounting holes are not represented well, so careful drilling and filing and making support posts for each side out of sprue which I tapered where it slightly protrudes from the turret top. Leoparclub antenna's required for correct version, base "B".
British Columbia, Canada
Joined: March 05, 2009
KitMaker: 394 posts
Armorama: 380 posts
Posted: Sunday, June 03, 2018 - 04:25 PM UTC
Very nice Craig
up to your usual high standards
Quebec, Canada
Joined: January 23, 2009
KitMaker: 89 posts
Armorama: 74 posts
Posted: Saturday, June 16, 2018 - 04:45 AM UTC
Hello Dylan, glad you are looking in.
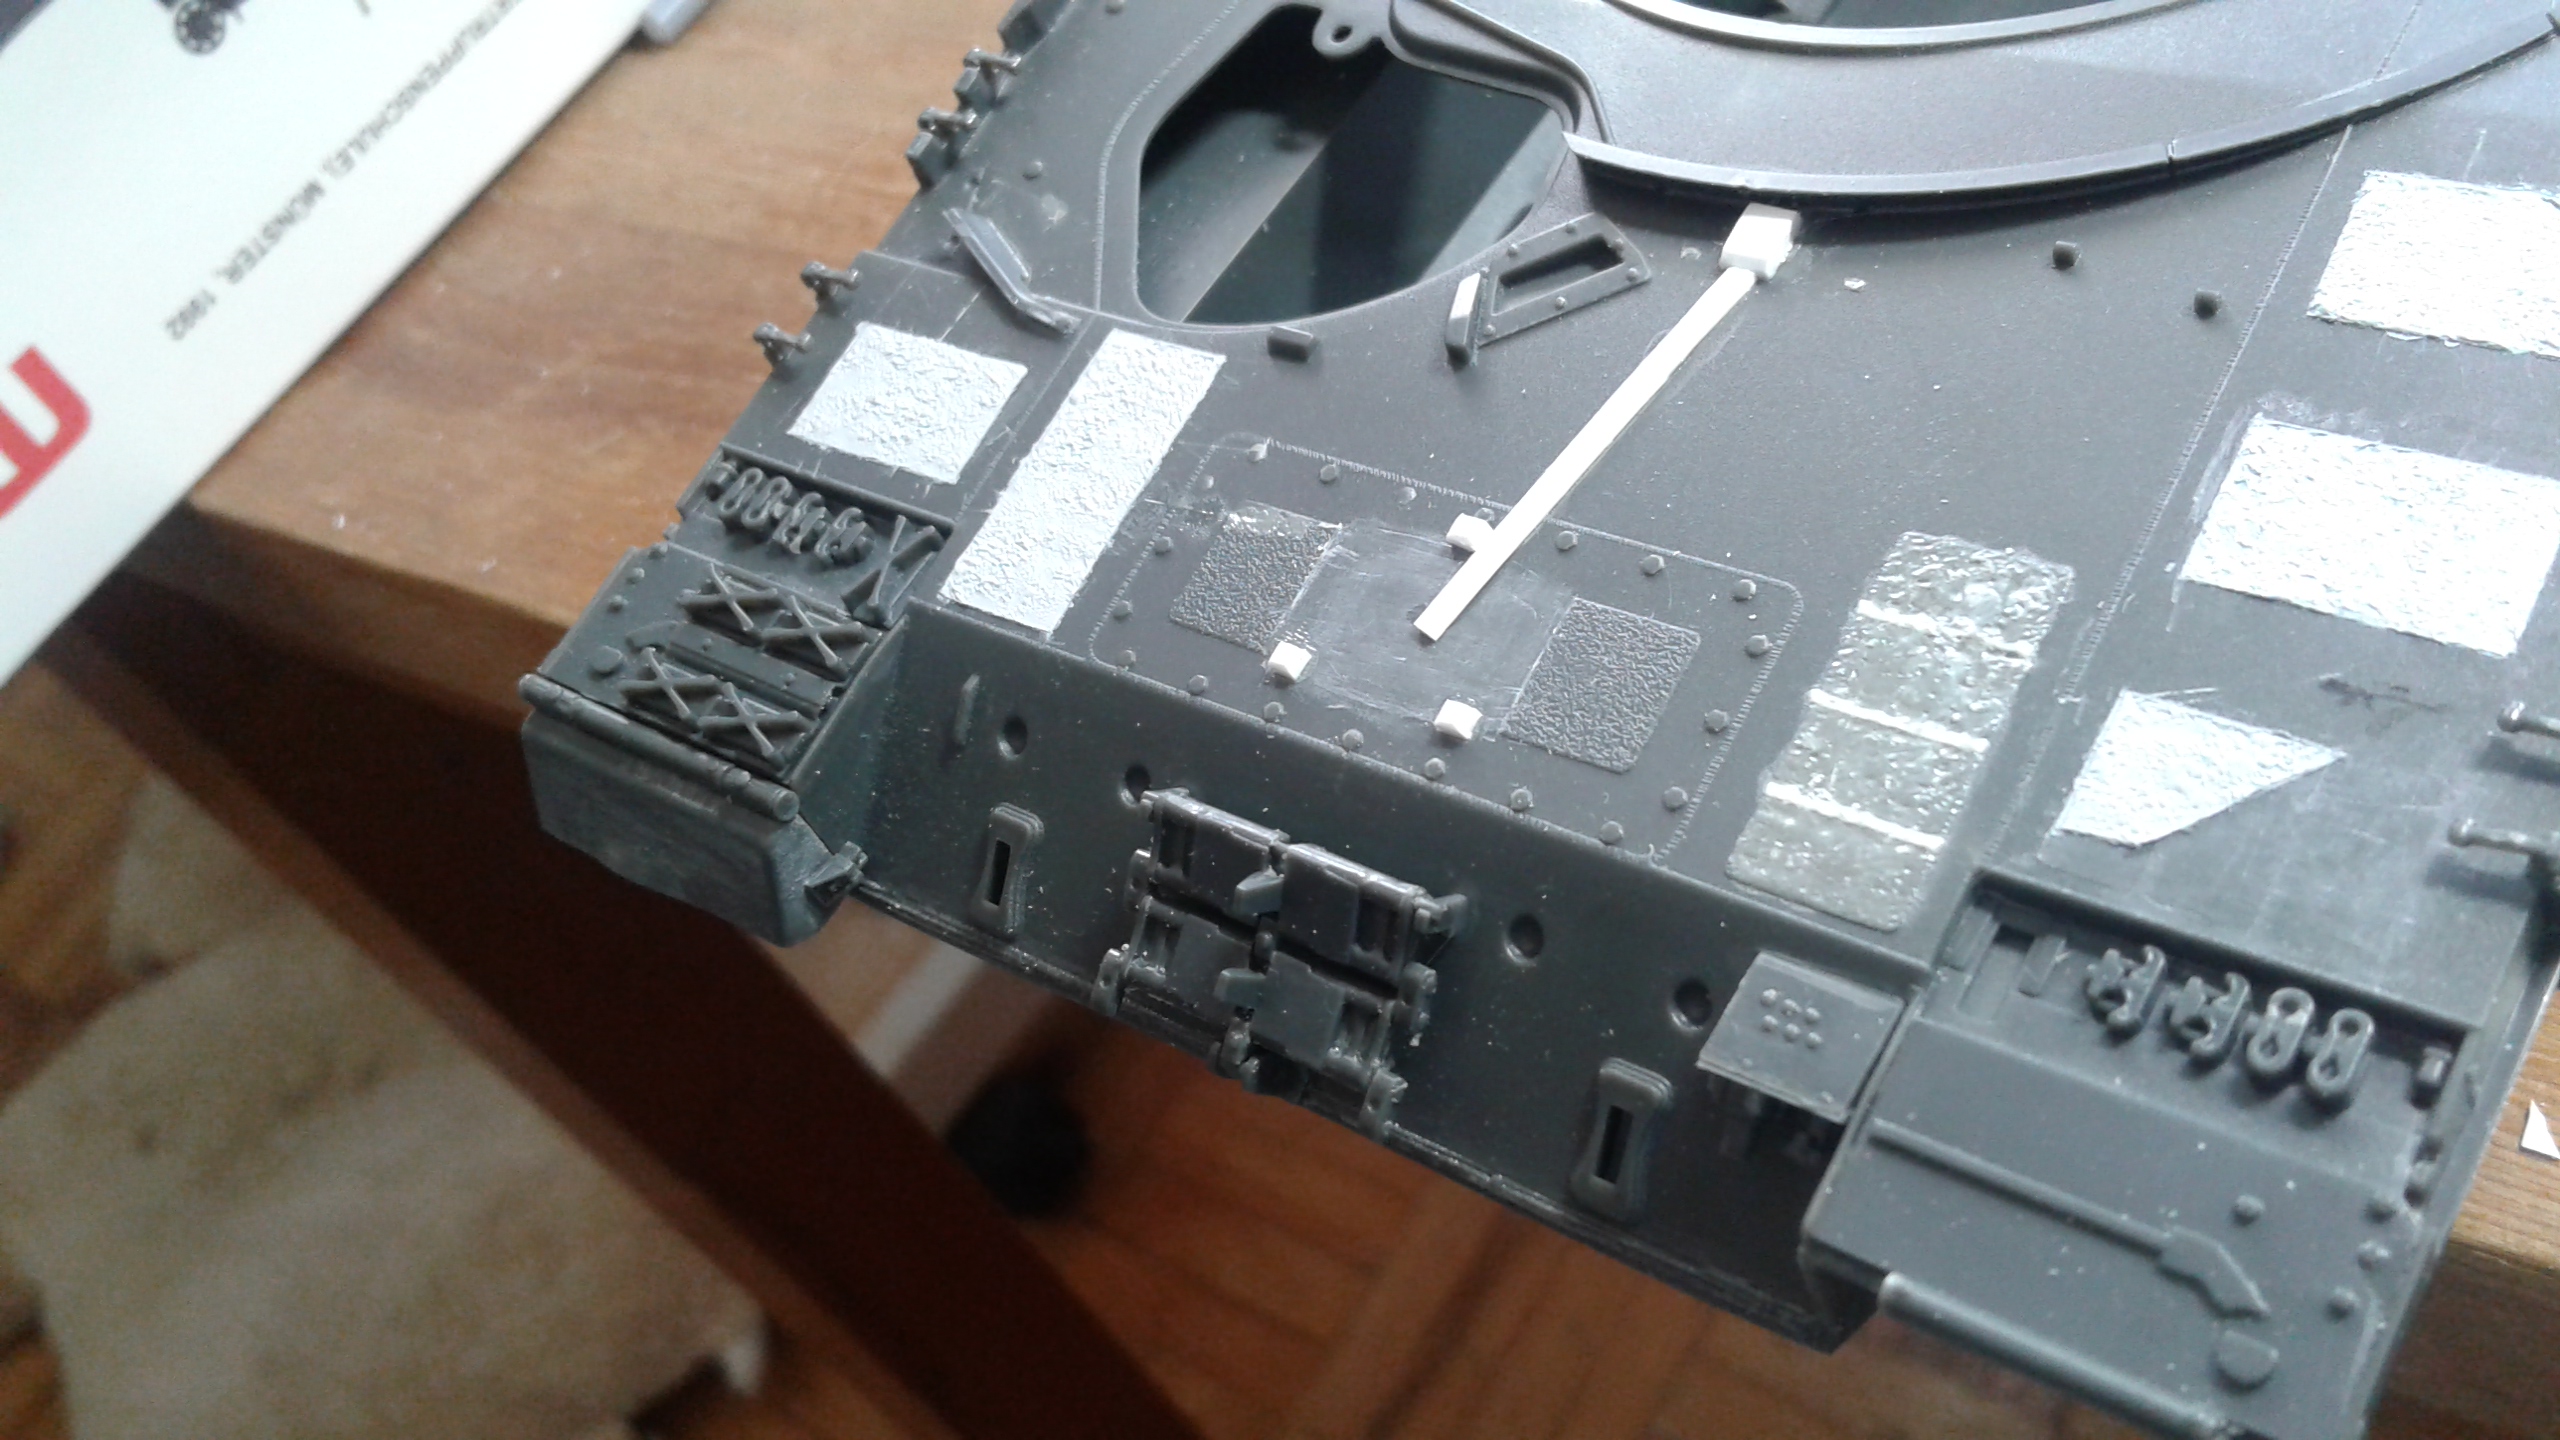
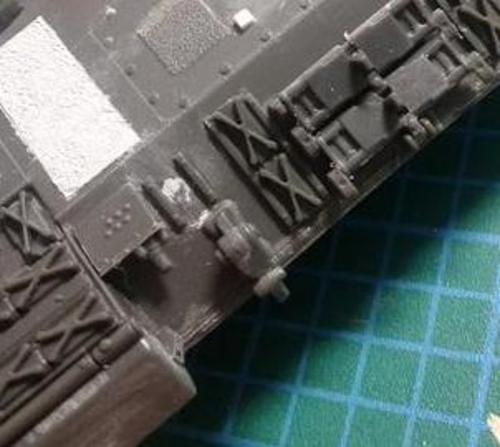
More work and progress taking shape. The mandatory supports for the upper hull section from some tube styrene that I was wondering if I would ever use, did the trick. One forward and two aft of the turret opening.
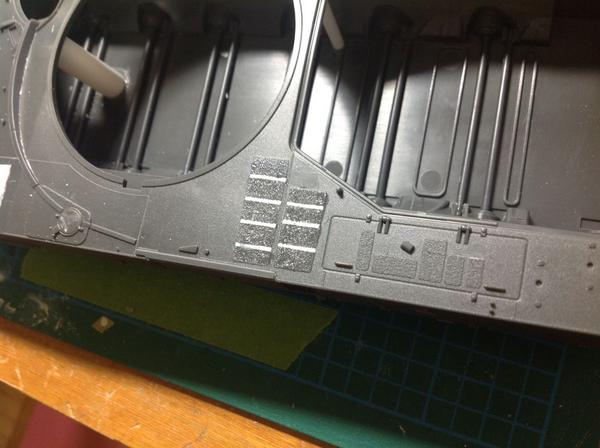
Numerous antislip sections had to be modified. Most involved making multiple sections into singular. First I tried scrapping most of the sections and masking then applying Tamiya Surface Primer. Stippling with a stiff art brush. Very time consuming.
From there I tried using small strips of thin sytrene in the narrow openings and using lacquer thinner to soften the entire area and taking a stiff brush brush and stippling on the softened areas. This method proved much faster and working carefully the white pieces show no lines where they were added. Very pleased with the effect and speed of modification.
Thank you for having a look.
Minnesota, United States
Joined: July 20, 2004
KitMaker: 1,513 posts
Armorama: 1,449 posts
Posted: Saturday, June 16, 2018 - 04:57 AM UTC
this is looking like a fun build.
Dan
Looking to meet other MN Armor modellers. I live in Buffalo.
Alberta, Canada
Joined: July 20, 2006
KitMaker: 706 posts
Armorama: 665 posts
Posted: Saturday, June 16, 2018 - 06:26 AM UTC
Great work so far, keep us updated......
Anthony

AMPS # 2734 , IPMS EDMONTON
Win The Firefight, Protect Your Brothers, Leave No One Behind.
Survivor of 7 rotations, last 3 in the sandbox.
"Gone toe to toe with the Taliban, and won."
Quebec, Canada
Joined: January 23, 2009
KitMaker: 89 posts
Armorama: 74 posts
Posted: Saturday, June 23, 2018 - 03:22 AM UTC
Thank you for the views and words of encouragement.
Those anti slip sections on the hull and turret are time consuming to modify but almost finished with them. They will need a coat of primer to see if they need more work.
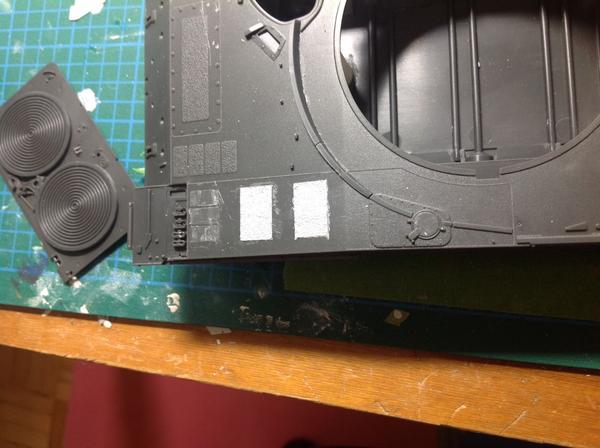
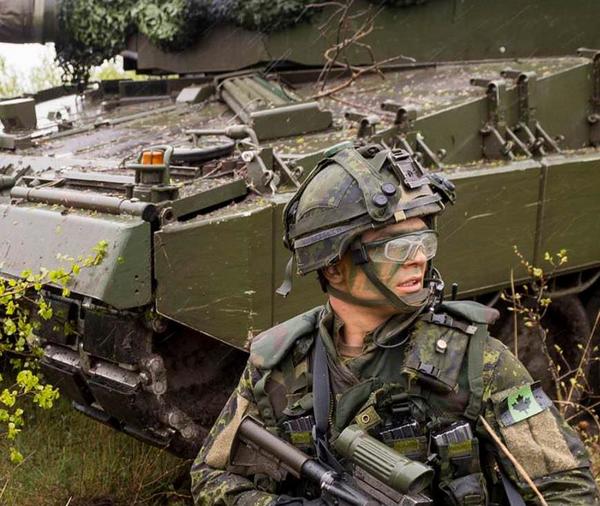
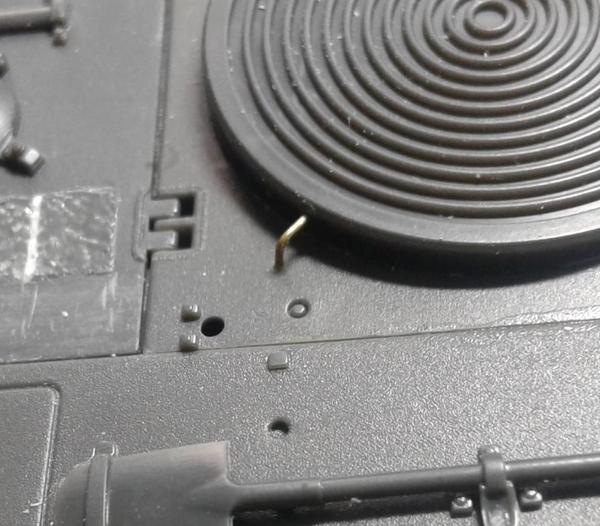
Next the cam net pole brackets. In this DND edited image you can see them on the hull with the poles in place just above the soldiers head.
I used plastic card for the size requirements and brass tube for the poles. Being the frugal individual I am, the poles out of view were not added, just smaller pieces to keep things in place during assembly. I will use plastic card for the brackets themselves.
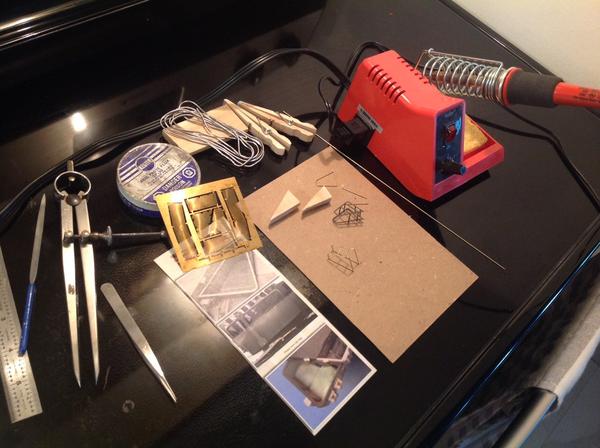
Tools I purchased 40 years ago for my work still using in projects today. Machinist dividers and a six in rule get used constantly.
Quebec, Canada
Joined: January 23, 2009
KitMaker: 89 posts
Armorama: 74 posts
Posted: Sunday, July 01, 2018 - 08:08 AM UTC
Small progress with a heat wave taking hold our part of the country.
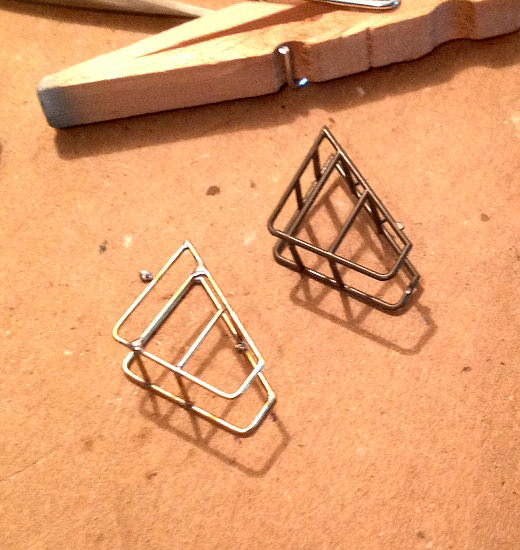
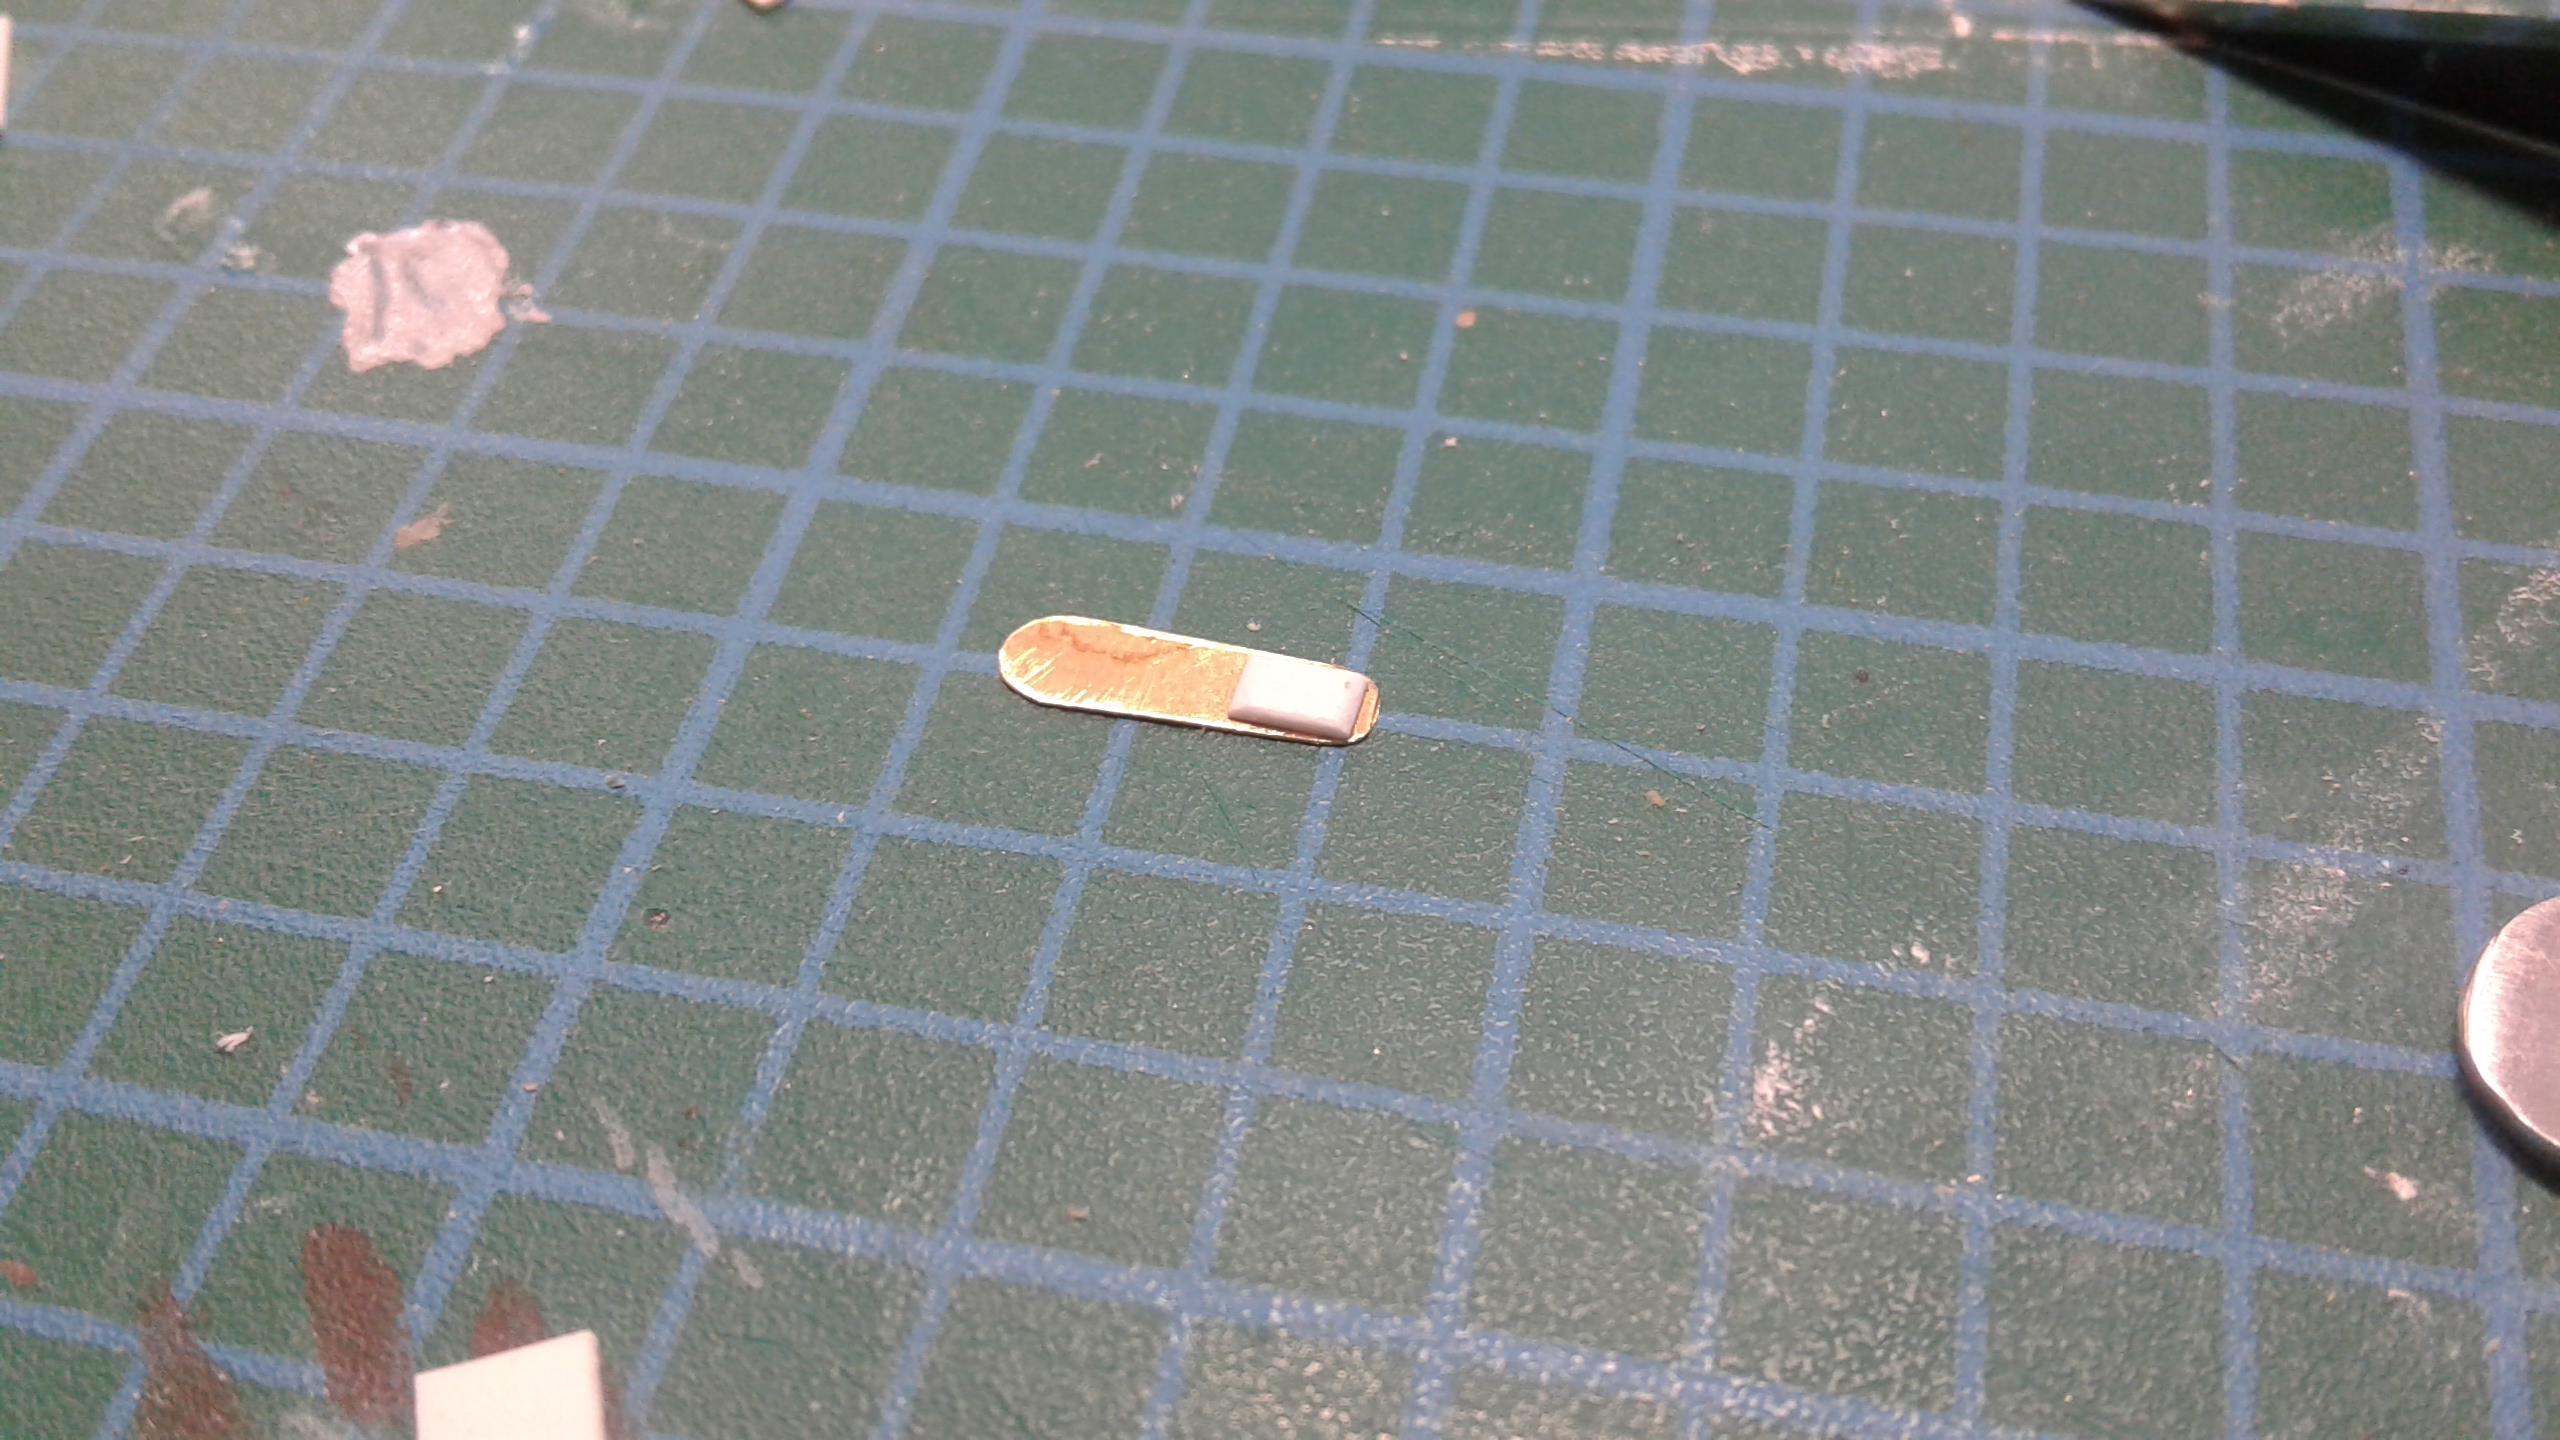
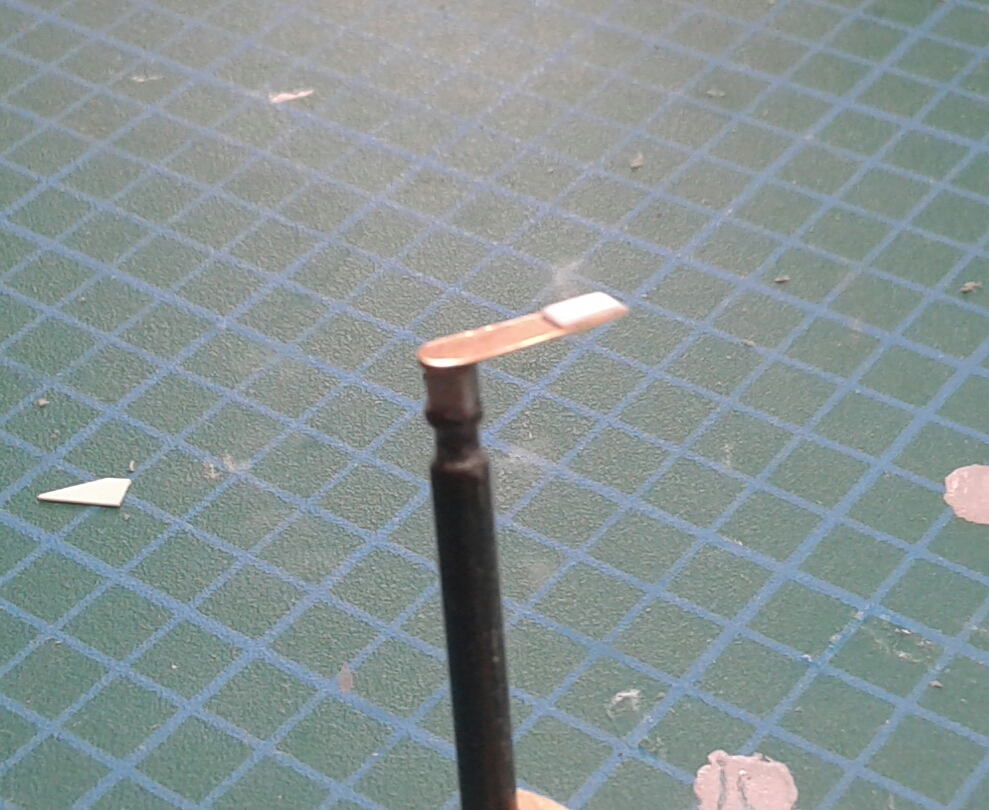
Turret baskets 90% complete, just the mesh and some foil straps to add. Soldering needs some final filing. I like soldering over gluing for the added strength of the bond.
Cam net poles and brackets prior to final attachment, most of the anti skid panels also completed mods.
Enjoy the holidays everyone, updates depending on the weather.
Alberta, Canada
Joined: January 19, 2005
KitMaker: 4,085 posts
Armorama: 3,917 posts
Posted: Monday, July 02, 2018 - 11:24 AM UTC
"We're not the public service of Canada, we're not just another department. We are the Canadian Forces, and our job is to be able to kill people."
July 2005- General R.J. Hillier (Retired), Former Chief of the Defence Staff
Germany
Joined: December 06, 2009
KitMaker: 57 posts
Armorama: 56 posts
Posted: Tuesday, July 03, 2018 - 08:56 PM UTC
Hi Craig, good looking model and great soldering efforts. Do you have some more reference photos of the net pole brackets? They look pretty convincing. Keep us updated and have fun with that model.
Stephan
Washington, United States
Joined: October 13, 2007
KitMaker: 212 posts
Armorama: 208 posts
Posted: Tuesday, July 03, 2018 - 11:14 PM UTC
Craig, that's really nice clean work on your turret baskets.

Terry
Quebec, Canada
Joined: January 23, 2009
KitMaker: 89 posts
Armorama: 74 posts
Posted: Wednesday, July 04, 2018 - 03:41 AM UTC
Quoted Text
Do you have some more reference photos of the net pole brackets?
Stephan
Thank you Jason, Stephan and Terry. The photos used were with a document Anthony Sewards sent to me in an email. He posted previously on this thread and laid out the necessary changes for this kit. Exact dimensions I had to guesstimate and used 1/32" brass rod for the poles and turret baskets. The Leopard Club mesh for the baskets looks good and will post a pic when all installed.
One of my passions is 1/43 white metal F1 cars and enjoyed Akihiro Kamimura and his superior work. His beautiful models started me with soldering.
Alberta, Canada
Joined: July 20, 2006
KitMaker: 706 posts
Armorama: 665 posts
Posted: Wednesday, July 04, 2018 - 06:23 AM UTC
Craig
Great work on the hull and the attachments, hopefully the list of corrections is a help for you to get the kit right.
If anyone needs reference / photos of the cam net pole holder, or other material on the Canadian Leopards, send me a message and will help you out.
Cheers
Anthony
Author Canadian Leopard Series DVD reference sets.
AMPS # 2734 , IPMS EDMONTON
Win The Firefight, Protect Your Brothers, Leave No One Behind.
Survivor of 7 rotations, last 3 in the sandbox.
"Gone toe to toe with the Taliban, and won."
Germany
Joined: December 06, 2009
KitMaker: 57 posts
Armorama: 56 posts
Posted: Thursday, July 05, 2018 - 01:56 AM UTC
Hi Craig, I got that CD, too. Yes they are great reference. Please make sure that the Leopard will have the correct riding height. Michael from LeopardClub mentioned in other threads that the MENG Leopard is somehow a "low rider" due to it's movable suspension. If you do not adjust, too much of the wheels is hidden underneath the side skirt armour.
I like the way how you make the anti-skid-patterns. Was already planning to use the hull of an old Italeri Leopard, because they have that requested pattern with the big patches.
Keep us updated on your nice build.
Stephan
Quebec, Canada
Joined: January 23, 2009
KitMaker: 89 posts
Armorama: 74 posts
Posted: Thursday, July 05, 2018 - 02:45 AM UTC
Yes Anthony your reference was perfect. I did see the mention of the "lowrider" problem of the Meng kit and will fix it when the time comes, it is too bad for such an oversight of theirs.
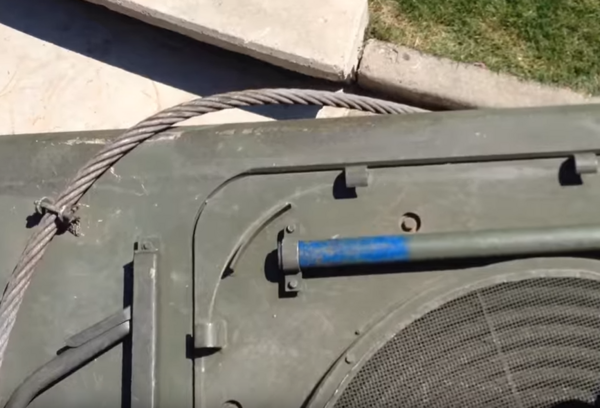
Also a help was this Youtube video I found. At the 2:50 mark starts a walkaround of a 2A4 CAN and I will use this vehicles registration number for the subject. The marker lights on the front do not have the extra protection added yet.
https://www.youtube.com/watch?v=8DqTMaYfheIMr Richard Briggs posted a number of shots on a Facebook group page of some Leopards at a display at CFB Borden. Of interest to me is the detail on the sideskirt enhanced by the late day lighting. I have assumed he wouldn't have minded I post one of them here.
Thinking about how to replicate this effect.
The heat and humidity is coming to an end here, looking forward to a normal summer.
Germany
Joined: December 06, 2009
KitMaker: 57 posts
Armorama: 56 posts
Posted: Thursday, July 05, 2018 - 04:50 AM UTC
Hi Craig, both, MENG and TAKOM replicate this structure on their Leopard 1 skirts, but far too overdone and too accurately aligned. Have no clue how to make it.
Alberta, Canada
Joined: January 19, 2005
KitMaker: 4,085 posts
Armorama: 3,917 posts
Posted: Thursday, July 05, 2018 - 07:20 AM UTC
Craig,
Good idea to pick a specific vehicle to model. The 2A4 CANs have had several mods since they were delivered.
1. The addition of the front turn signal guards. The original 2A4 CANs did not have the guards. It took about a year for this to occur according to the tanks I have photographed (images can be found in detail on my Armour Piercing Photography Canadian Leopard 2A4 CAN Reference DVD).
2. The removal of the glacis plate mounted spare tracks to accommodate the new dozer blade, rollers, and mine plow. This has occurred over the past year.
3. The addition of the lower front hull mounts to attach the implements. This has occurred over the past year.
4. The modification and reinforcement of the rear drivers camera protective guard. This has occurred over the past year.
5. Some 2A4 CANs in Gagetown have a add-on stowage box to the turret roof behind the loaders hatch.
Keep up the terrific work!
"We're not the public service of Canada, we're not just another department. We are the Canadian Forces, and our job is to be able to kill people."
July 2005- General R.J. Hillier (Retired), Former Chief of the Defence Staff
Quebec, Canada
Joined: January 23, 2009
KitMaker: 89 posts
Armorama: 74 posts
Posted: Tuesday, July 17, 2018 - 02:04 AM UTC
Enjoying the wealth of information from others on this topic. Working a different shift the last few weeks and throughout the summer which will slow progress.
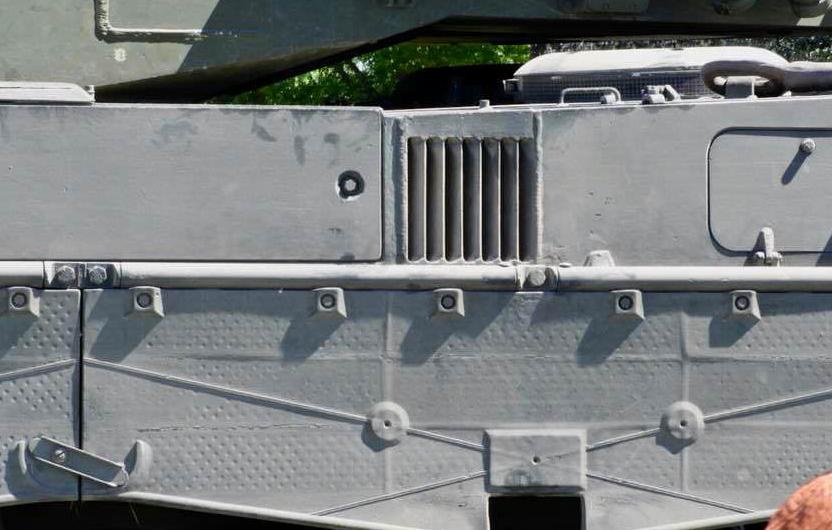
The Meng kit is really nice but some details seams undersize to me like the rear towing pintle, weld seems and bolt heads.
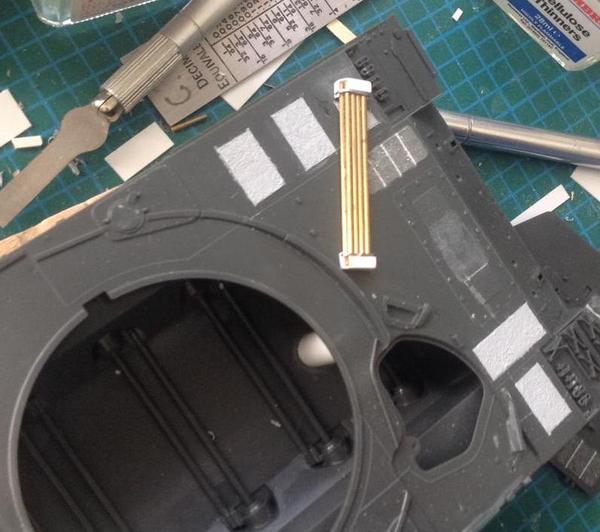
The tank telephone box added, with a flattened aluminum rod used for the panel access handle.
To show my point of the undersize tow pintle, here is a link to a rear view of a 2A4 on Primeportal
http://data3.primeportal.net/tanks/ulrich_wrede/leopard_2a4/images/leopard_2a4_14_of_18.jpgThe start of work on the forward driver's camera mounting.
Thanks again for looking and kind words and assistance.
Quebec, Canada
Joined: January 23, 2009
KitMaker: 89 posts
Armorama: 74 posts
Posted: Thursday, July 19, 2018 - 10:51 AM UTC
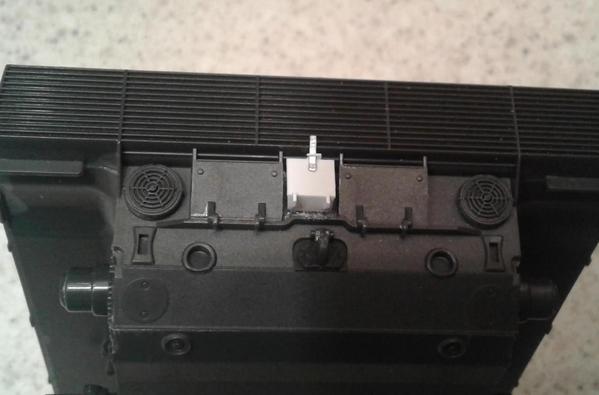
Some movement forward. I will not dwell on the instruction sequence of this kit, most goes together without a problem. One note was the forward upper and lower hull lateral joint, as previously mentioned many of the weld seams are understated. This image shows the addition of stretched sprue lacquered in place as well as the front drivers camera mount, vehicle 85-72344 has the later mounting. The front left fender will be left off as many photos show these sometimes removed.
Left and right antenna mounting differ and requires a piece of brass added to sculpted sprue for the left side
The LeopardWorkshop basket meshing are very fragile, and really look good, but easily damaged. Fortunately there are photos of these dinged so the damage does not look too out of place.
I am taking my time in deciding the order to install some of the components to prevent accidental damage.
Here is a link talking about the various solders and their use, which might make a difference for your work.
https://www.youtube.com/watch?v=V1aONINVkSEThanks to everyone.
Alberta, Canada
Joined: January 19, 2005
KitMaker: 4,085 posts
Armorama: 3,917 posts
Posted: Thursday, July 19, 2018 - 12:43 PM UTC
"We're not the public service of Canada, we're not just another department. We are the Canadian Forces, and our job is to be able to kill people."
July 2005- General R.J. Hillier (Retired), Former Chief of the Defence Staff
Germany
Joined: December 06, 2009
KitMaker: 57 posts
Armorama: 56 posts
Posted: Friday, July 20, 2018 - 03:03 AM UTC
Hi Craig, I really like what you are building. Great attention to details. Cannot wait to see that Leopard finished.
Have fun!
Quebec, Canada
Joined: January 23, 2009
KitMaker: 89 posts
Armorama: 74 posts
Posted: Sunday, July 29, 2018 - 11:01 AM UTC
The heat and humidity shows no signs of relenting here. Using a magnifying visor for most of my work becomes too uncomfortable so I am not getting as much done as I would have liked.
Jason and Stephan, thank you for the words of encouragement.
Final work on the front end with a couple of grousers removed from one assembly just to give it a look of in the field rather than on the parade square.
A tie down ring of sorts was added seen on this and other vehicles, no idea what it is used for.
Rear facing camera mountings started. The camera heads themselves are a challenge to sculpt with 3 attempts so far and only one usable. The camera setup on the Hobbyboss kit being my reference.

A screen grab from the Youtube link in a earlier post shows the end of the wrench handle painted blue on this vehicle. Can anyone offer a reason for this? And of course it will show up on the finished kit.
Like the Tortoise, slowly but surely.


