

Hello all,
I was wondering how one is meant to attach part MA5 (photo-etched part) in DML kit 6386. For those who do not have this kit, part MA5 is what looks like a rain guard above the front right hatch.
Anyone have ideas whether it's attached to the plate itself above the hatch or somehow to the hatch opening?
Armor/AFV
For discussions on tanks, artillery, jeeps, etc.
For discussions on tanks, artillery, jeeps, etc.
Hosted by Darren Baker, Mario Matijasic
Dragon Nashorn Build Question

KruppCake

Joined: July 13, 2015
KitMaker: 401 posts
Armorama: 387 posts
Posted: Tuesday, September 11, 2018 - 12:19 PM UTC

oldbean

Joined: July 05, 2004
KitMaker: 769 posts
Armorama: 461 posts
Posted: Wednesday, September 12, 2018 - 01:31 AM UTC
If you take a look at Nashorn pictures, most of them don't have the rain guard around the radio operators hatch. You could leave it off and still be accurate.
Jesse
Jesse
KruppCake
Joined: July 13, 2015
KitMaker: 401 posts
Armorama: 387 posts
Posted: Wednesday, September 12, 2018 - 02:12 AM UTC
Quoted Text
If you take a look at Nashorn pictures, most of them don't have the rain guard around the radio operators hatch. You could leave it off and still be accurate.
Jesse
You are correct in that most of the reference shots show the guard missing. If I cant get this sorted out that may be the best option.
oldbean
Joined: July 05, 2004
KitMaker: 769 posts
Armorama: 461 posts
Posted: Wednesday, September 12, 2018 - 02:58 AM UTC
The part from Dragon is very stiff and if you try to anneal it, it melts away! Best to either replace it with sheet plastic or not use it at all.
Jesse
Jesse
KruppCake
Joined: July 13, 2015
KitMaker: 401 posts
Armorama: 387 posts
Posted: Wednesday, September 12, 2018 - 03:02 AM UTC
Quoted Text
The part from Dragon is very stiff and if you try to anneal it, it melts away! Best to either replace it with sheet plastic or not use it at all.
Jesse
Would you happen to know where the part goes? Is it just attached to the glacis plate above the hatch?

firstcircle


Joined: November 19, 2008
KitMaker: 2,249 posts
Armorama: 2,007 posts
Posted: Wednesday, September 12, 2018 - 03:08 AM UTC
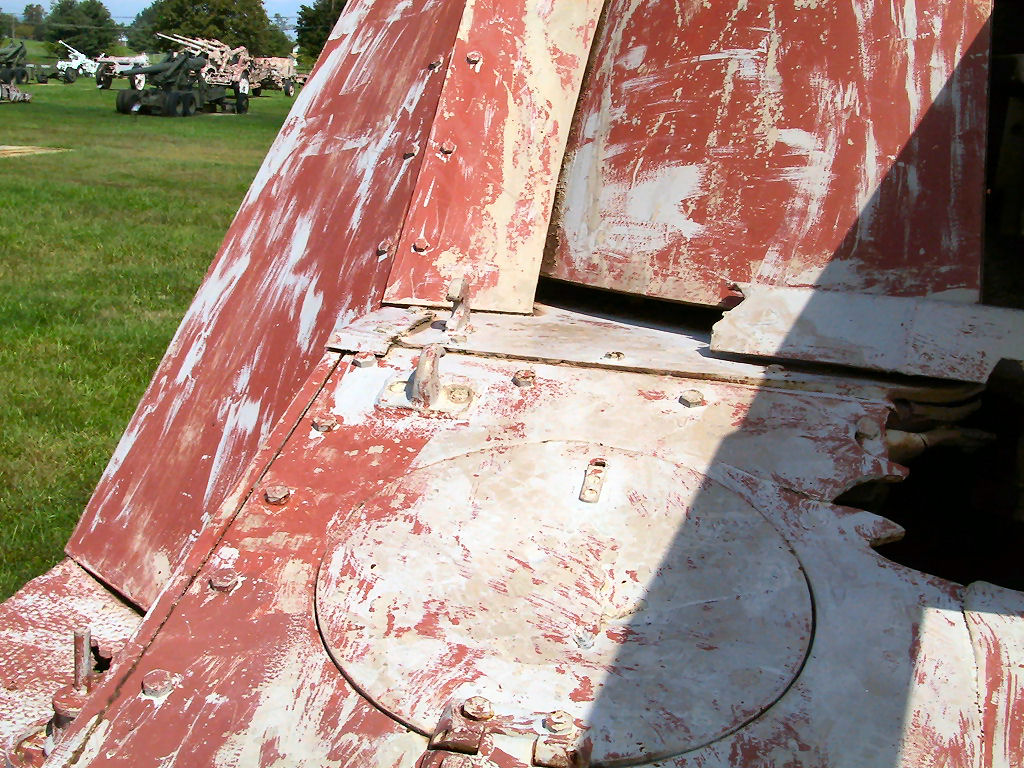
Hi, looking at the instructions I would say that it is meant to attach to the plate, so that it surrounds the opening. Presumably the intention was that it stops water dripping off the sloping plate through the hatch when it is opened; if it was attached to the hatch itself, it wouldn't do that. The vertical blue arrow seems to confirm that in that it is pointing to the plate, not the hatch.
It's one of my least favourite things - a piece of PE that attaches edge on with nothing to locate it. Like sticking a piece of paper edge on to another piece.
Personally I'd ignore it unless you get it fixed on right first time.
This photo makes it look like it was never there as there's no trace of it, although there is a big hole in the deck not too far away which might have ripped it away...
KruppCake
Joined: July 13, 2015
KitMaker: 401 posts
Armorama: 387 posts
Posted: Wednesday, September 12, 2018 - 03:20 AM UTC
Quoted Text
Hi, looking at the instructions I would say that it is meant to attach to the plate, so that it surrounds the opening. Presumably the intention was that it stops water dripping off the sloping plate through the hatch when it is opened; if it was attached to the hatch itself, it wouldn't do that. The vertical blue arrow seems to confirm that in that it is pointing to the plate, not the hatch.
It's one of my least favourite things - a piece of PE that attaches edge on with nothing to locate it. Like sticking a piece of paper edge on to another piece.
Personally I'd ignore it unless you get it fixed on right first time.
This photo makes it look like it was never there as there's no trace of it, although there is a big hole in the deck not too far away which might have ripped it away...
Thank you, thats good enough for me. My modelling skill is decent, but not to the point where I can confidently stick the PE on edge to the styrene, since thats the case. Itll be staying off.
 |

WEB HOSTING BY


Copyright ©2021 Armorama and Kitmaker Network, a subsidiary of Silver Star Enterprises
All Rights Reserved. Please read our Conditions of Use and Privacy Policy.
All Rights Reserved. Please read our Conditions of Use and Privacy Policy.