_GOTOBOTTOM
Armor/AFV: Softskins
Softskins group discussions.
Hosted by Darren Baker
Renault AG1 "Taxi de la Marne" 1914
TAFFY3
Visit this Community
New York, United States
Joined: January 21, 2008
KitMaker: 2,531 posts
Armorama: 859 posts
Posted: Wednesday, September 12, 2018 - 03:25 AM UTC
This will be a build/review of ICM's new Renault "Taxi de la Marne"(1914) in 1/35th scale. A little background, the Renault AG1 was built between 1905 & 1910. It came equipped with a 'taximeter' which calculated automatically how much a passenger had to pay. It was popular and used in London as well as Paris. The cars fame came when the entire fleet of Paris taxis, about 600, were requisitioned to transport French troops to the Front in September of 1914 for the 1st Battle of the Marne. While their effect on the outcome of the battle may have been negligible, they became immortalized, and given the name "Taxi de la Marne". They were driven right off the streets of Paris and must have made a colorful sight on their way to the Front. The cars were driven by their civilian 'cabbies', who earned about 150 francs. A fare is a fare after all.

The kit comes packed in a colorful and sturdy box.


The parts are packed in a plastic bag, with no damage visible.


This bag also includes a smaller bag containing the clear parts and vinyl tires.


There is also a small decal sheet containing license plates and a couple of decals for the taximeter.


On first inspection, the parts look cleanly molded with no visible flash. Some of the parts are quite delicate and may be difficult to remove from the sprue without damaging them. The instruction booklet is molded on glossy paper and looks well laid out. There is a nicely detailed engine which would be visible if the hood is not cemented into place. It might benefit from a little wiring.


After scanning the instructions, I think I might be able to build the car in sub-assemblies. Chassis, fenders, body, to facilitate painting. The next installment will deal with the actual build. Al
Kevlar06
Visit this Community
Washington, United States
Joined: March 15, 2009
KitMaker: 3,670 posts
Armorama: 2,052 posts
Posted: Wednesday, September 12, 2018 - 05:00 AM UTC
I’ve been waiting for this one to show up at any LHS— but no luck so far. So I’ll be following your review with interest. By chance, will you be pairing this with ICMs 1914 French Infantry? And does this kit come with a civilian driver figure?
VR, Russ
TAFFY3
Visit this Community
New York, United States
Joined: January 21, 2008
KitMaker: 2,531 posts
Armorama: 859 posts
Posted: Wednesday, September 12, 2018 - 05:10 AM UTC

Quoted Text

I’ve been waiting for this one to show up at any LHS— but no luck so far. So I’ll be following your review with interest. By chance, will you be pairing this with ICMs 1914 French Infantry? And does this kit come with a civilian driver figure?
VR, Russ


Hello, Russ. No, it doesn't come with a driver figure. Miniart makes some passengers for their Tram kit that might provide a driver. I've looked at that Infantry set and considered if they might be worked into a scene with the taxi. Haven't come to a decision yet. Be nice if ICM released a set of figures to go with this kit specifically. Al
Kevlar06
Visit this Community
Washington, United States
Joined: March 15, 2009
KitMaker: 3,670 posts
Armorama: 2,052 posts
Posted: Wednesday, September 12, 2018 - 07:47 AM UTC

Quoted Text


Quoted Text

I’ve been waiting for this one to show up at any LHS— but no luck so far. So I’ll be following your review with interest. By chance, will you be pairing this with ICMs 1914 French Infantry? And does this kit come with a civilian driver figure?
VR, Russ


Hello, Russ. No, it doesn't come with a driver figure. Miniart makes some passengers for their Tram kit that might provide a driver. I've looked at that Infantry set and considered if they might be worked into a scene with the taxi. Haven't come to a decision yet. Be nice if ICM released a set of figures to go with this kit specifically. Al


We can hope. I bought the Pyro Paris Taxi (labeled Reanalt Taxi) in 1/32 scale a few years back (like 30 years ago) for just such a purpose. When the ICM 1/35th 1914 Infantry figures came out, I bought those since French 1914 figures were difficult to find. My intent was to build a diorama for the "Miracle of the Marne". But as things go, ICM released this kit in 1/35 scale-- so I hope they did so with the intent of pairing thier 1/35 figures with this kit. It would certainly be colorful, since the Taxi is red and the French Infantry are in thier pre-war blue uniforms. A definite throwback to the previous century which would never be seen again in military history. I hope ICM is reading this.
VR, Russ
Frenchy
Visit this Community
Rhone, France
Joined: December 02, 2002
KitMaker: 12,719 posts
Armorama: 12,507 posts
Posted: Wednesday, September 12, 2018 - 08:04 AM UTC
Hi Al

Here's a updated version of post I've already posted on ML that may (or may not...) be useful for your project :

According to the text, this restored genuine "Taxi de la Marne" has been accurately repainted in 2005 :


http://www.musee-armee.fr/collections/base-de-donnees-des-collections/objet/taxi-de-la-marne.html

Here's how it looked before the 2005 restoration. It belonged to the "Compagnie Française des Automobiles de Place" (later known as "G7").


It's been on display ar the Army Museum in Paris since 1922


Talking about the color, green appears to be a valid option :


According to this article, the Renault taxis built before 1912 were usually painted red (and had a right-hand drive), those built after 1912 were green (and had a left-hand drive)...The pictured taxi above belonged to the "Compagnie Générale des Voitures de Paris"

https://www.histoire-image.org/fr/etudes/taxis-marne

This other one is not a 100% genuine "Taxi de la Marne" but it should be a very close match, accurately restored to look like one (....except for the drive - or the color ) :

https://www.artcurial.com/fr/lot-c1910-renault-ag1-taxi-de-la-marne-no-reserve-3279-310

HTH

H.P.


Kevlar06
Visit this Community
Washington, United States
Joined: March 15, 2009
KitMaker: 3,670 posts
Armorama: 2,052 posts
Posted: Wednesday, September 12, 2018 - 08:15 AM UTC
Frenchy comes through again! Thanks for the photos! I will make good use of them. I know Shep Paine did a diorama of "the Miracle on the Marne" several years ago using the old Pyro kit, in a sort of "whimsical" manner with the Taxi "flying down the road and the infantrymen hanging on for dear life-- but darned if I can find it anywhere. I think he used Historex figures as I recall. This ICM kit will make it much easier to do.
VR, Russ
TAFFY3
Visit this Community
New York, United States
Joined: January 21, 2008
KitMaker: 2,531 posts
Armorama: 859 posts
Posted: Wednesday, September 12, 2018 - 09:15 AM UTC
Thanks, Henri. For the pictures and the info. Al
RobinNilsson
Staff MemberTOS Moderator
KITMAKER NETWORK
Visit this Community
Stockholm, Sweden
Joined: November 29, 2006
KitMaker: 6,693 posts
Armorama: 5,562 posts
Posted: Wednesday, September 12, 2018 - 09:32 AM UTC


Seems as if right hand drive would be OK, I guess that those produced with r-h drive survived long enough (even if they had been used in Paris traffic for some years)

There is even a monument!


/ Robin
Frenchy
Visit this Community
Rhone, France
Joined: December 02, 2002
KitMaker: 12,719 posts
Armorama: 12,507 posts
Posted: Wednesday, September 12, 2018 - 08:43 PM UTC

Quoted Text

I guess that those produced with r-h drive survived long enough (even if they had been used in Paris traffic for some years)


In fact most (if not all) the period pics I've seen show right-hand drive AG1's...


Here's a left-hand drive/green AG1 :


Full size

Genuine "Taxi de la Marne" AG1's are very rare, as the taxi companies that owned them could not resell them on the second-hand market without removing the bodywork first...Most of them were thus converted into delivery vans.

H.P.
TAFFY3
Visit this Community
New York, United States
Joined: January 21, 2008
KitMaker: 2,531 posts
Armorama: 859 posts
Posted: Saturday, September 15, 2018 - 05:17 AM UTC
Finally got a chance to actually start building and to update this post. Had a 'Cat'-tastrophe to deal with. While trying to corral one of my cats for a visit to the Vet, one of my models took a major hit and I was trying to repair the damage. Thankfully, I was successful in that endeavor. Now, onto the taxi. Step one concerns the assembly of the chassis, which consists of the two side rails and two cross members (Parts A2, A50, A42, & A12).


Be careful to keep everything square. Also, the rear cross member (A12) has a notch not visible in the diagram. It belongs on the bottom when placing the part. I also added the front axle (A41) to help strengthen the assembly. I skipped Step two, which would have you attach the chassis to the fenders. I want to be able to paint the chassis & fenders separately. So, while waiting for the chassis to set, I went on to Step three. This concerns assembling the body. It would have you cement the two sides (Parts B3 & B4) to the floor (A20). It looked like a recipe for disaster to me, so I deviated a bit. I attached the right side (B3) to the floor, then added Part A37 (From Step 24) to help support and align the side.


Then I added the rear body panel (A35) as per Step four, before finally adding the left side of the body (B4).


I found the fit of all of these parts to be very good, but watch out for some mold lines on the edge of the floor (A20). I then went on to add the driver's floor (A38) and the front panel for his seat (A18). I found that one side of A18 has a small raised edge, don't sand it off. It goes on top when placing A18 into position, and it fits into the bottom of A17, the base for the driver's seat.


This left me with a very sturdy assembly. Well, that's as far as I've gotten so far. No major issues, with the exception of planning assembly around the rather involved paint scheme. A few mold lines to watch out for, but nothing
horrendous. Thanks for looking. All comments and questions are welcomed. Al
HermannB
Visit this Community
Bayern, Germany
Joined: October 14, 2008
KitMaker: 4,099 posts
Armorama: 4,067 posts
Posted: Saturday, September 15, 2018 - 05:52 AM UTC
Maybe a company will make some "mounted" infantry. Would wear the early war blue-red uniform or the later "Bleu Horizont" uniforms.
Frenchy
Visit this Community
Rhone, France
Joined: December 02, 2002
KitMaker: 12,719 posts
Armorama: 12,507 posts
Posted: Saturday, September 15, 2018 - 06:19 AM UTC

Quoted Text

Maybe a company will make some "mounted" infantry. Would wear the early war blue-red uniform or the later "Bleu Horizont" uniforms.


I guess the blue & red uniform is the only option as the taxis were sent back to Paris and return to their daily routine for the rest of the War...


Keep on the good work Al

H.P.
TAFFY3
Visit this Community
New York, United States
Joined: January 21, 2008
KitMaker: 2,531 posts
Armorama: 859 posts
Posted: Monday, September 17, 2018 - 12:21 AM UTC
Thanks for the photos, Henri. ICM also has/had a set of French Infantry from the Franco-Prussian war. But I don't know if they could be adapted, or modified, for WW1.


Definitely not an expert on French uniforms, so maybe someone can weigh in on their suitability. Al
RobinNilsson
Staff MemberTOS Moderator
KITMAKER NETWORK
Visit this Community
Stockholm, Sweden
Joined: November 29, 2006
KitMaker: 6,693 posts
Armorama: 5,562 posts
Posted: Monday, September 17, 2018 - 12:40 AM UTC
http://unacitaistres.unblog.fr/2013/02/14/le-poilu-daout-1914-lentree-en-guerre/


1 - Képi modèle 1884
2 - Cravate
3 - Havresac
4 - Brelage en cuir noir
5 - Capote modèle 1877 (de caporal-chef)
6 - Bidon d’un litre modèle 1877
7 - Ceinturon modèle 1845
8 - Cartouchière modèle 1905
9 - Musette modèle 1892
10 - Pantalon rouge garance modèle 1887
11 - Jambière modèle 1913
12 - Baïonnette modèle 1886
13 - Brodequin modèle 1912
14 - Fusil Lebel modèle 1886 modifié 1893

See also:
http://www.lesfrancaisaverdun-1916.fr/uniforme1024.htm


/ Robin
TAFFY3
Visit this Community
New York, United States
Joined: January 21, 2008
KitMaker: 2,531 posts
Armorama: 859 posts
Posted: Monday, September 17, 2018 - 01:33 AM UTC
Time for another update, more work on the body done.


The body is now ready for paint, I think. It's been a long time since I've painted a car body with gloss paints. Definitely feeling a little intimidated by the prospect.

As mentioned previously, I wanted to assemble the chassis as a sub-assembly. Unfortunately, I ran into a snag in Step Six. There are two parts (A44 & A45) that are the engine bearers. One end of each attaches to the chassis cross member (A42), the other end of each attaches to the fender assembly. I wasn't sure I could find a way around this, but fortunately, I did. I jumped ahead to Steps 29 thru 32, which concern mounting the rear leaf springs (A3 & A51). The instructions show you adding the springs after the body, chassis, and fenders are all assembled. I figured I could do it differently. Luckily, because of the positive alignment off all the parts, I could. The springs have tabs that fit into notches in the chassis. There is also a pin on each spring that fits into a hole on the side of the body. I removed these pins as being unnecessary, and cemented the springs to the chassis, and then added the rear axle.


Then I went back to Steps 16 & 17, the assembly and mounting of the transmission. I did this because those two engine bearers attach to the transmission as well as the chassis cross member. And the transmission attaches to the chassis rails and the cross member.


And, Lo and Behold! When I test fit the chassis to the fenders, those two engine bearers aligned perfectly with their mounting points!


Thank you ICM, for a well engineered assembly. Which made my life easier, at least as concerns this build. One note, there are two rods that protrude from the transmission. They fit into holes on the inside of the chassis. Test fit before cementing, I had to trim a tiny bit off of one of them for a better fit. You'll also notice a few knock-out pin marks on the underside of the running boards that will need to be filled. The first that I've run into. Thanks again for looking. Al
Kevlar06
Visit this Community
Washington, United States
Joined: March 15, 2009
KitMaker: 3,670 posts
Armorama: 2,052 posts
Posted: Monday, September 17, 2018 - 03:18 AM UTC
Actually, in response to the questions about compatible figures, ICM already makes a set of 1914 WWI Infantry figures that are perfect for this Taxi that were already reviewed here on Armorama:

https://armorama.kitmaker.net/review/11015

With some modification of the poses, these figures are in the correct uniforms for same 1914 period and will go well with the Taxi. They also come with a selection of individual equipment.
VR, Russ
RobinNilsson
Staff MemberTOS Moderator
KITMAKER NETWORK
Visit this Community
Stockholm, Sweden
Joined: November 29, 2006
KitMaker: 6,693 posts
Armorama: 5,562 posts
Posted: Monday, September 17, 2018 - 03:25 AM UTC

Quoted Text

Actually, in response to the questions about compatible figures, ICM already makes a set of 1914 WWI Infantry figures that are perfect for this Taxi that were already reviewed here on Armorama:

https://armorama.kitmaker.net/review/11015

With some modification of the poses, these figures are in the correct uniforms for same 1914 period and will go well with the Taxi. They also come with a selection of individual equipment.
VR, Russ


There is even a pointing officer with a moustache in that set
/ Robin
TAFFY3
Visit this Community
New York, United States
Joined: January 21, 2008
KitMaker: 2,531 posts
Armorama: 859 posts
Posted: Sunday, September 23, 2018 - 04:06 AM UTC
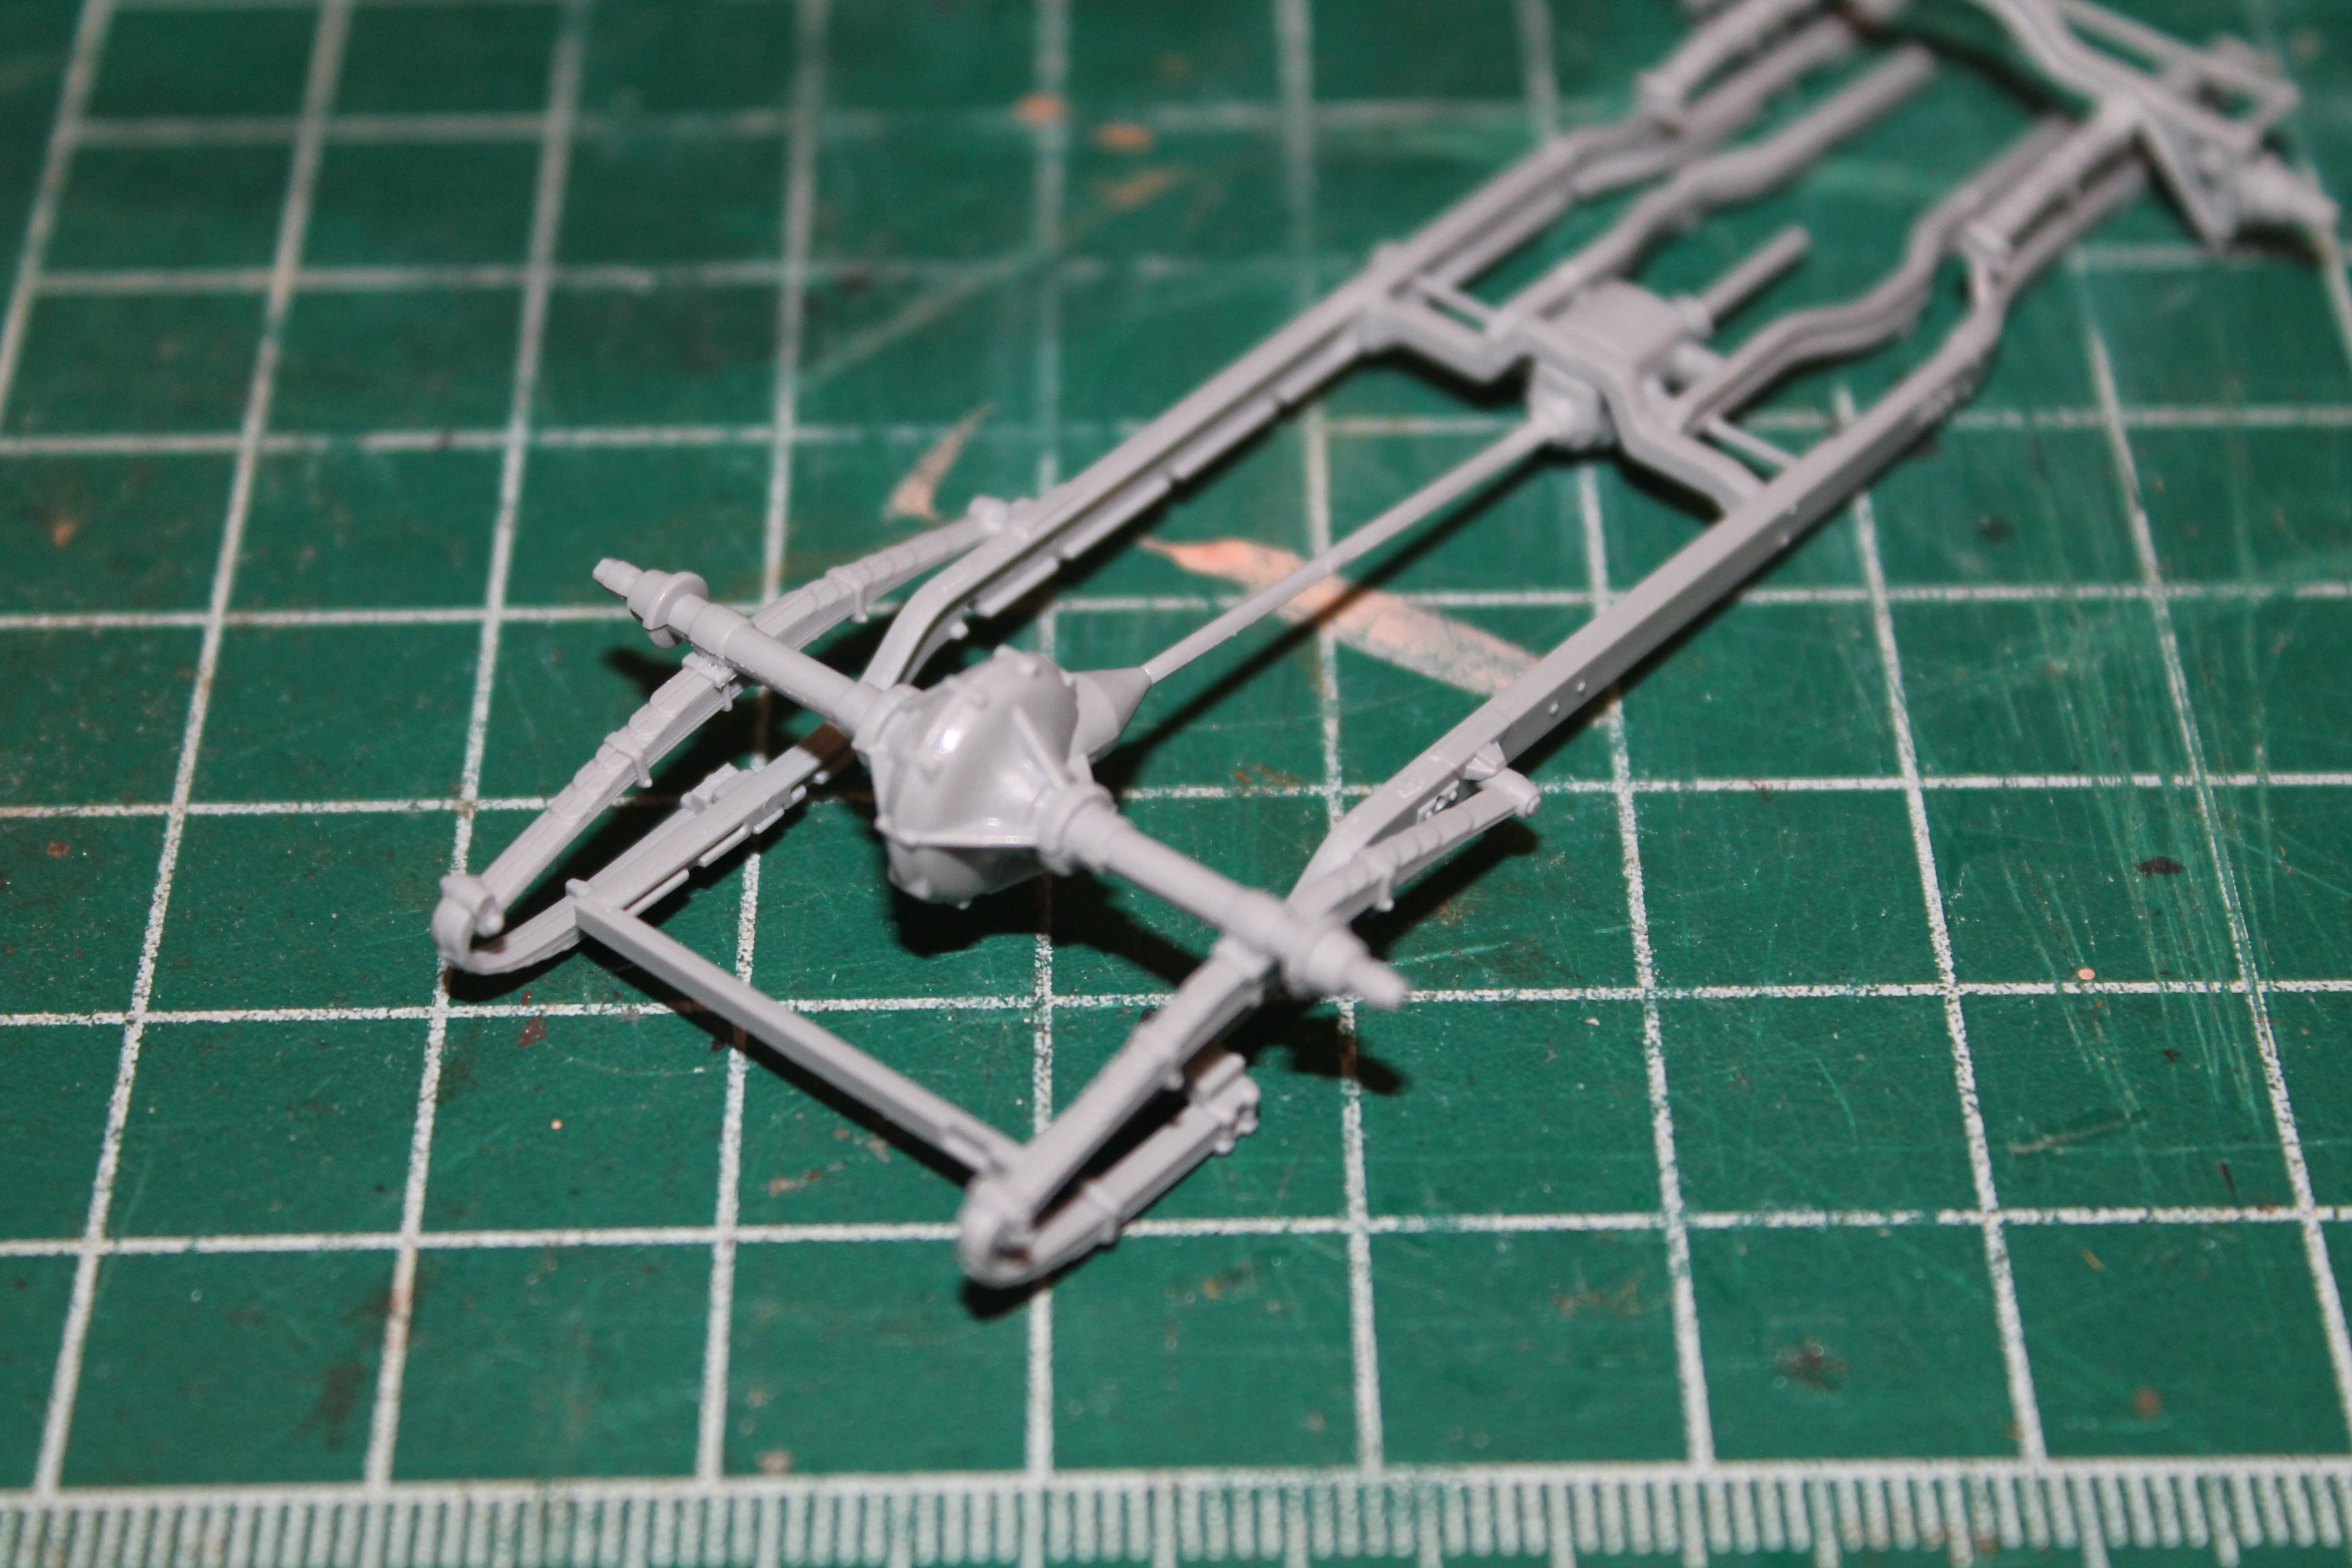
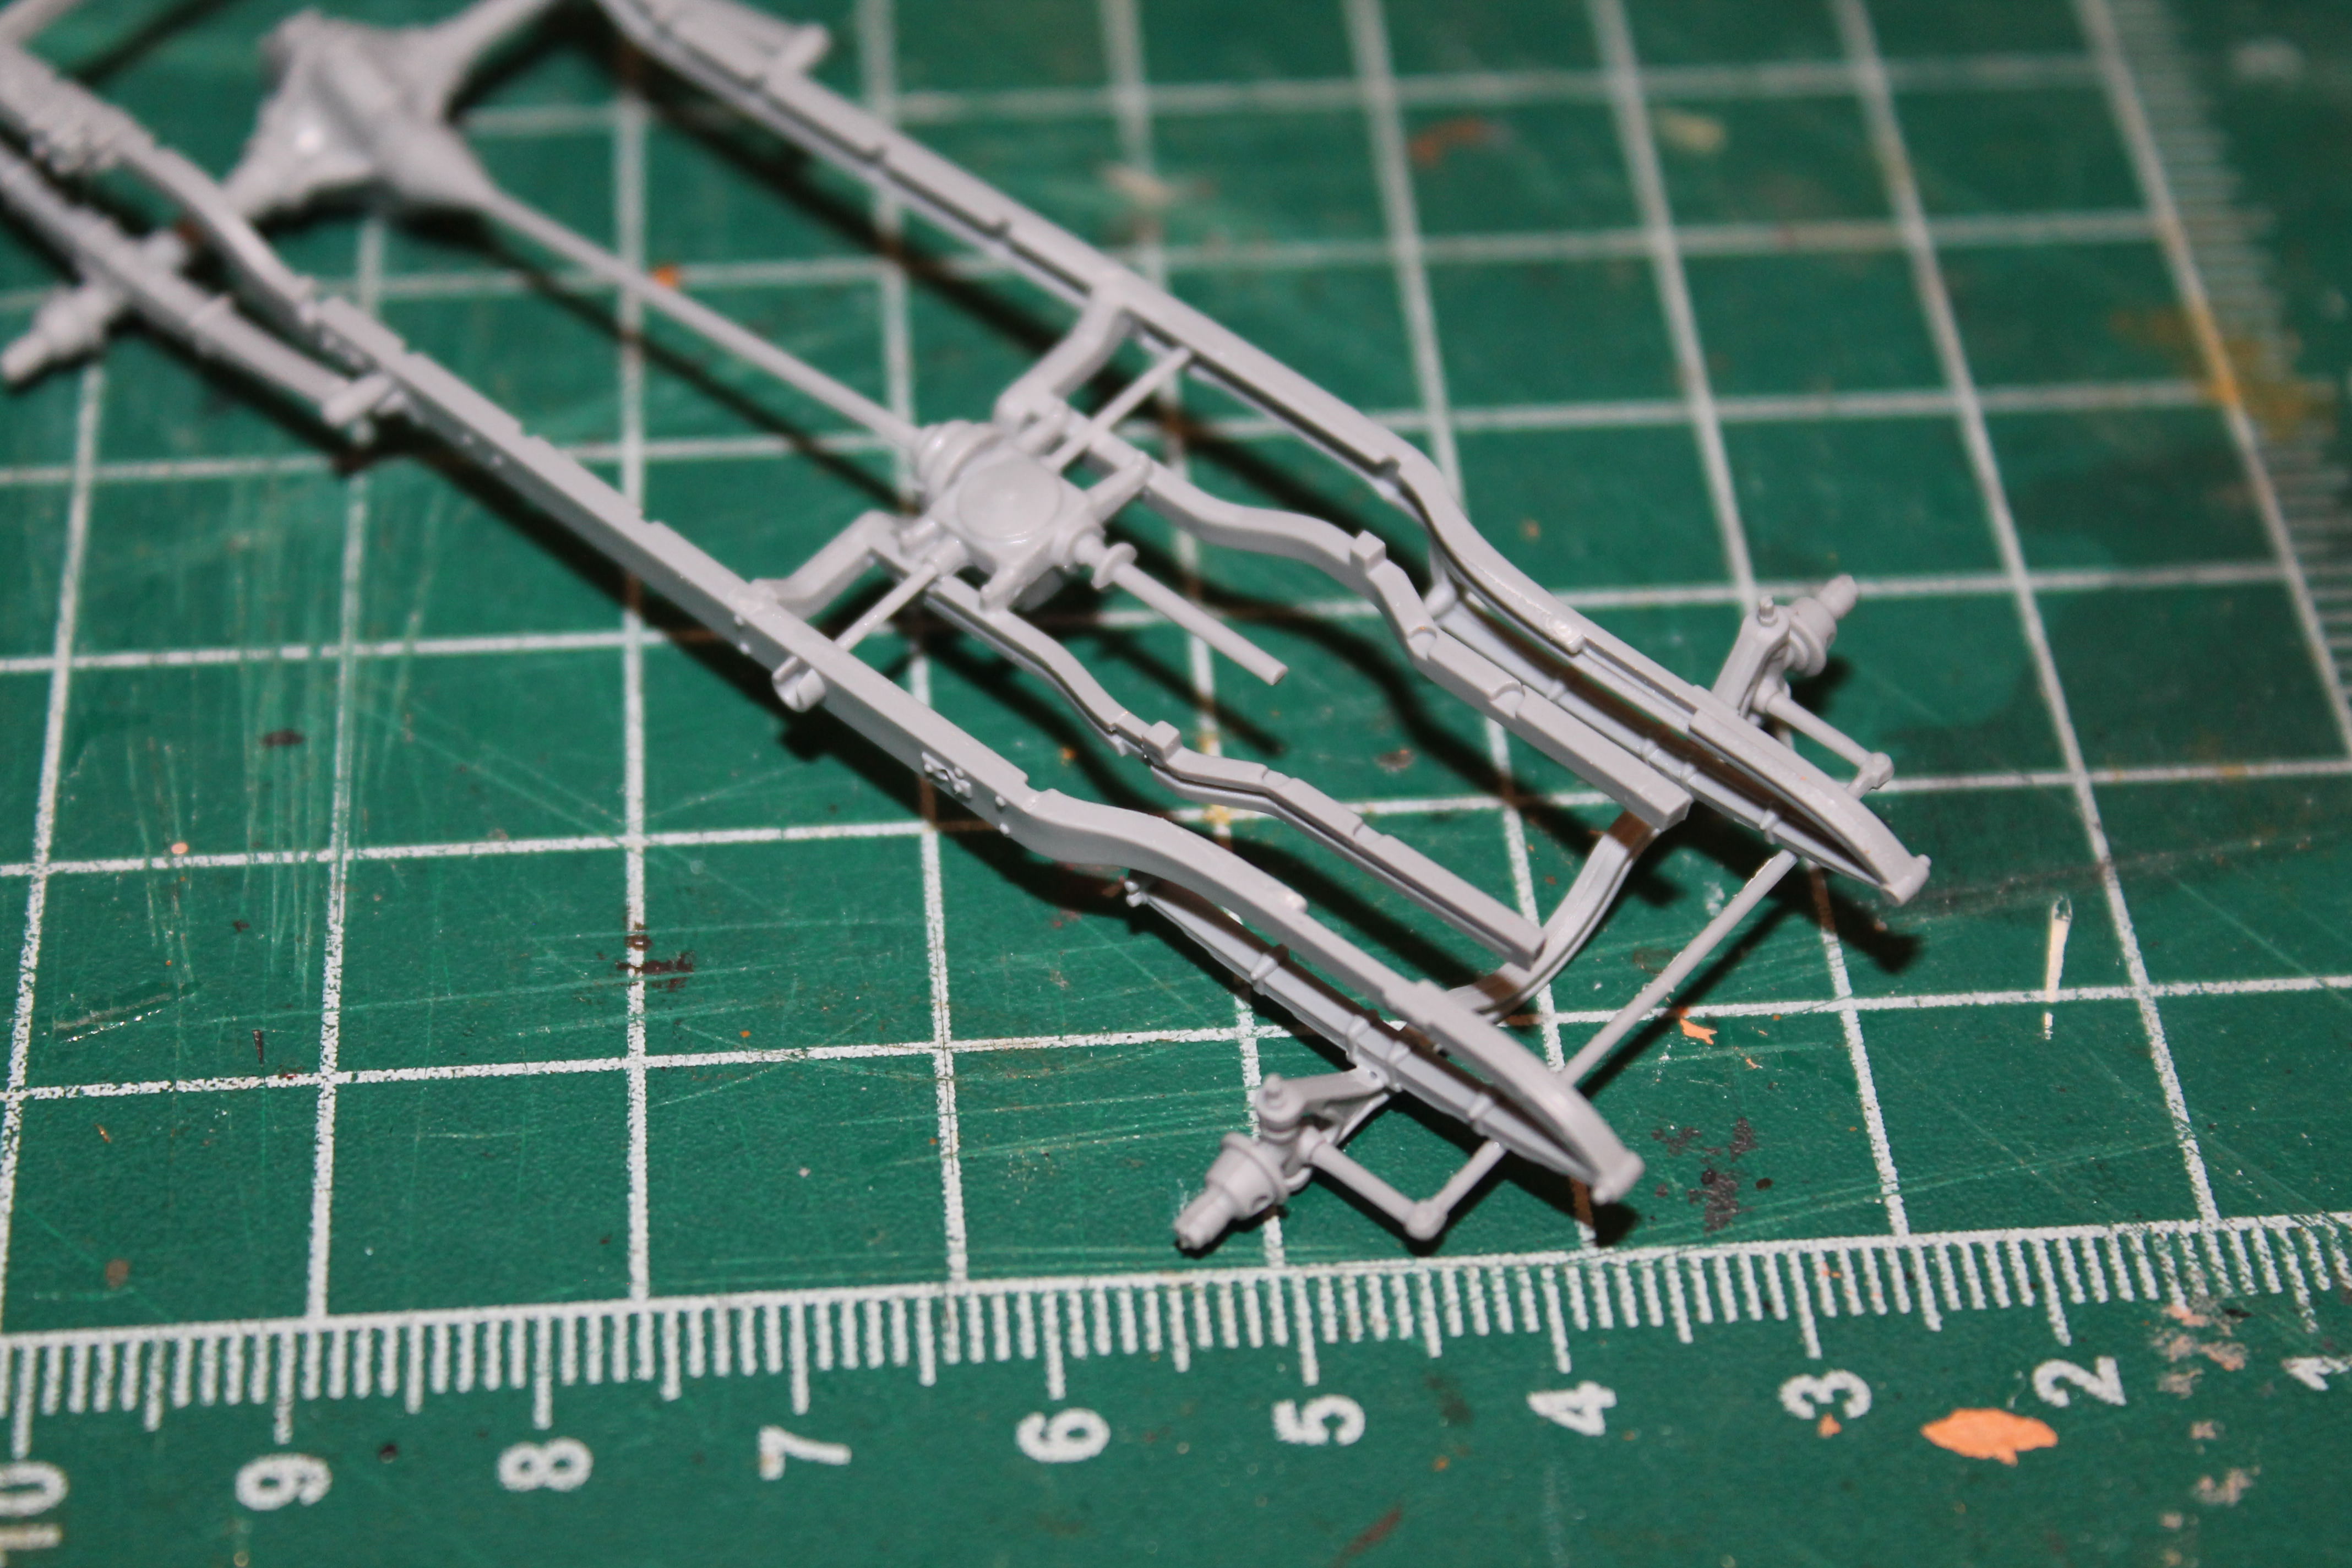
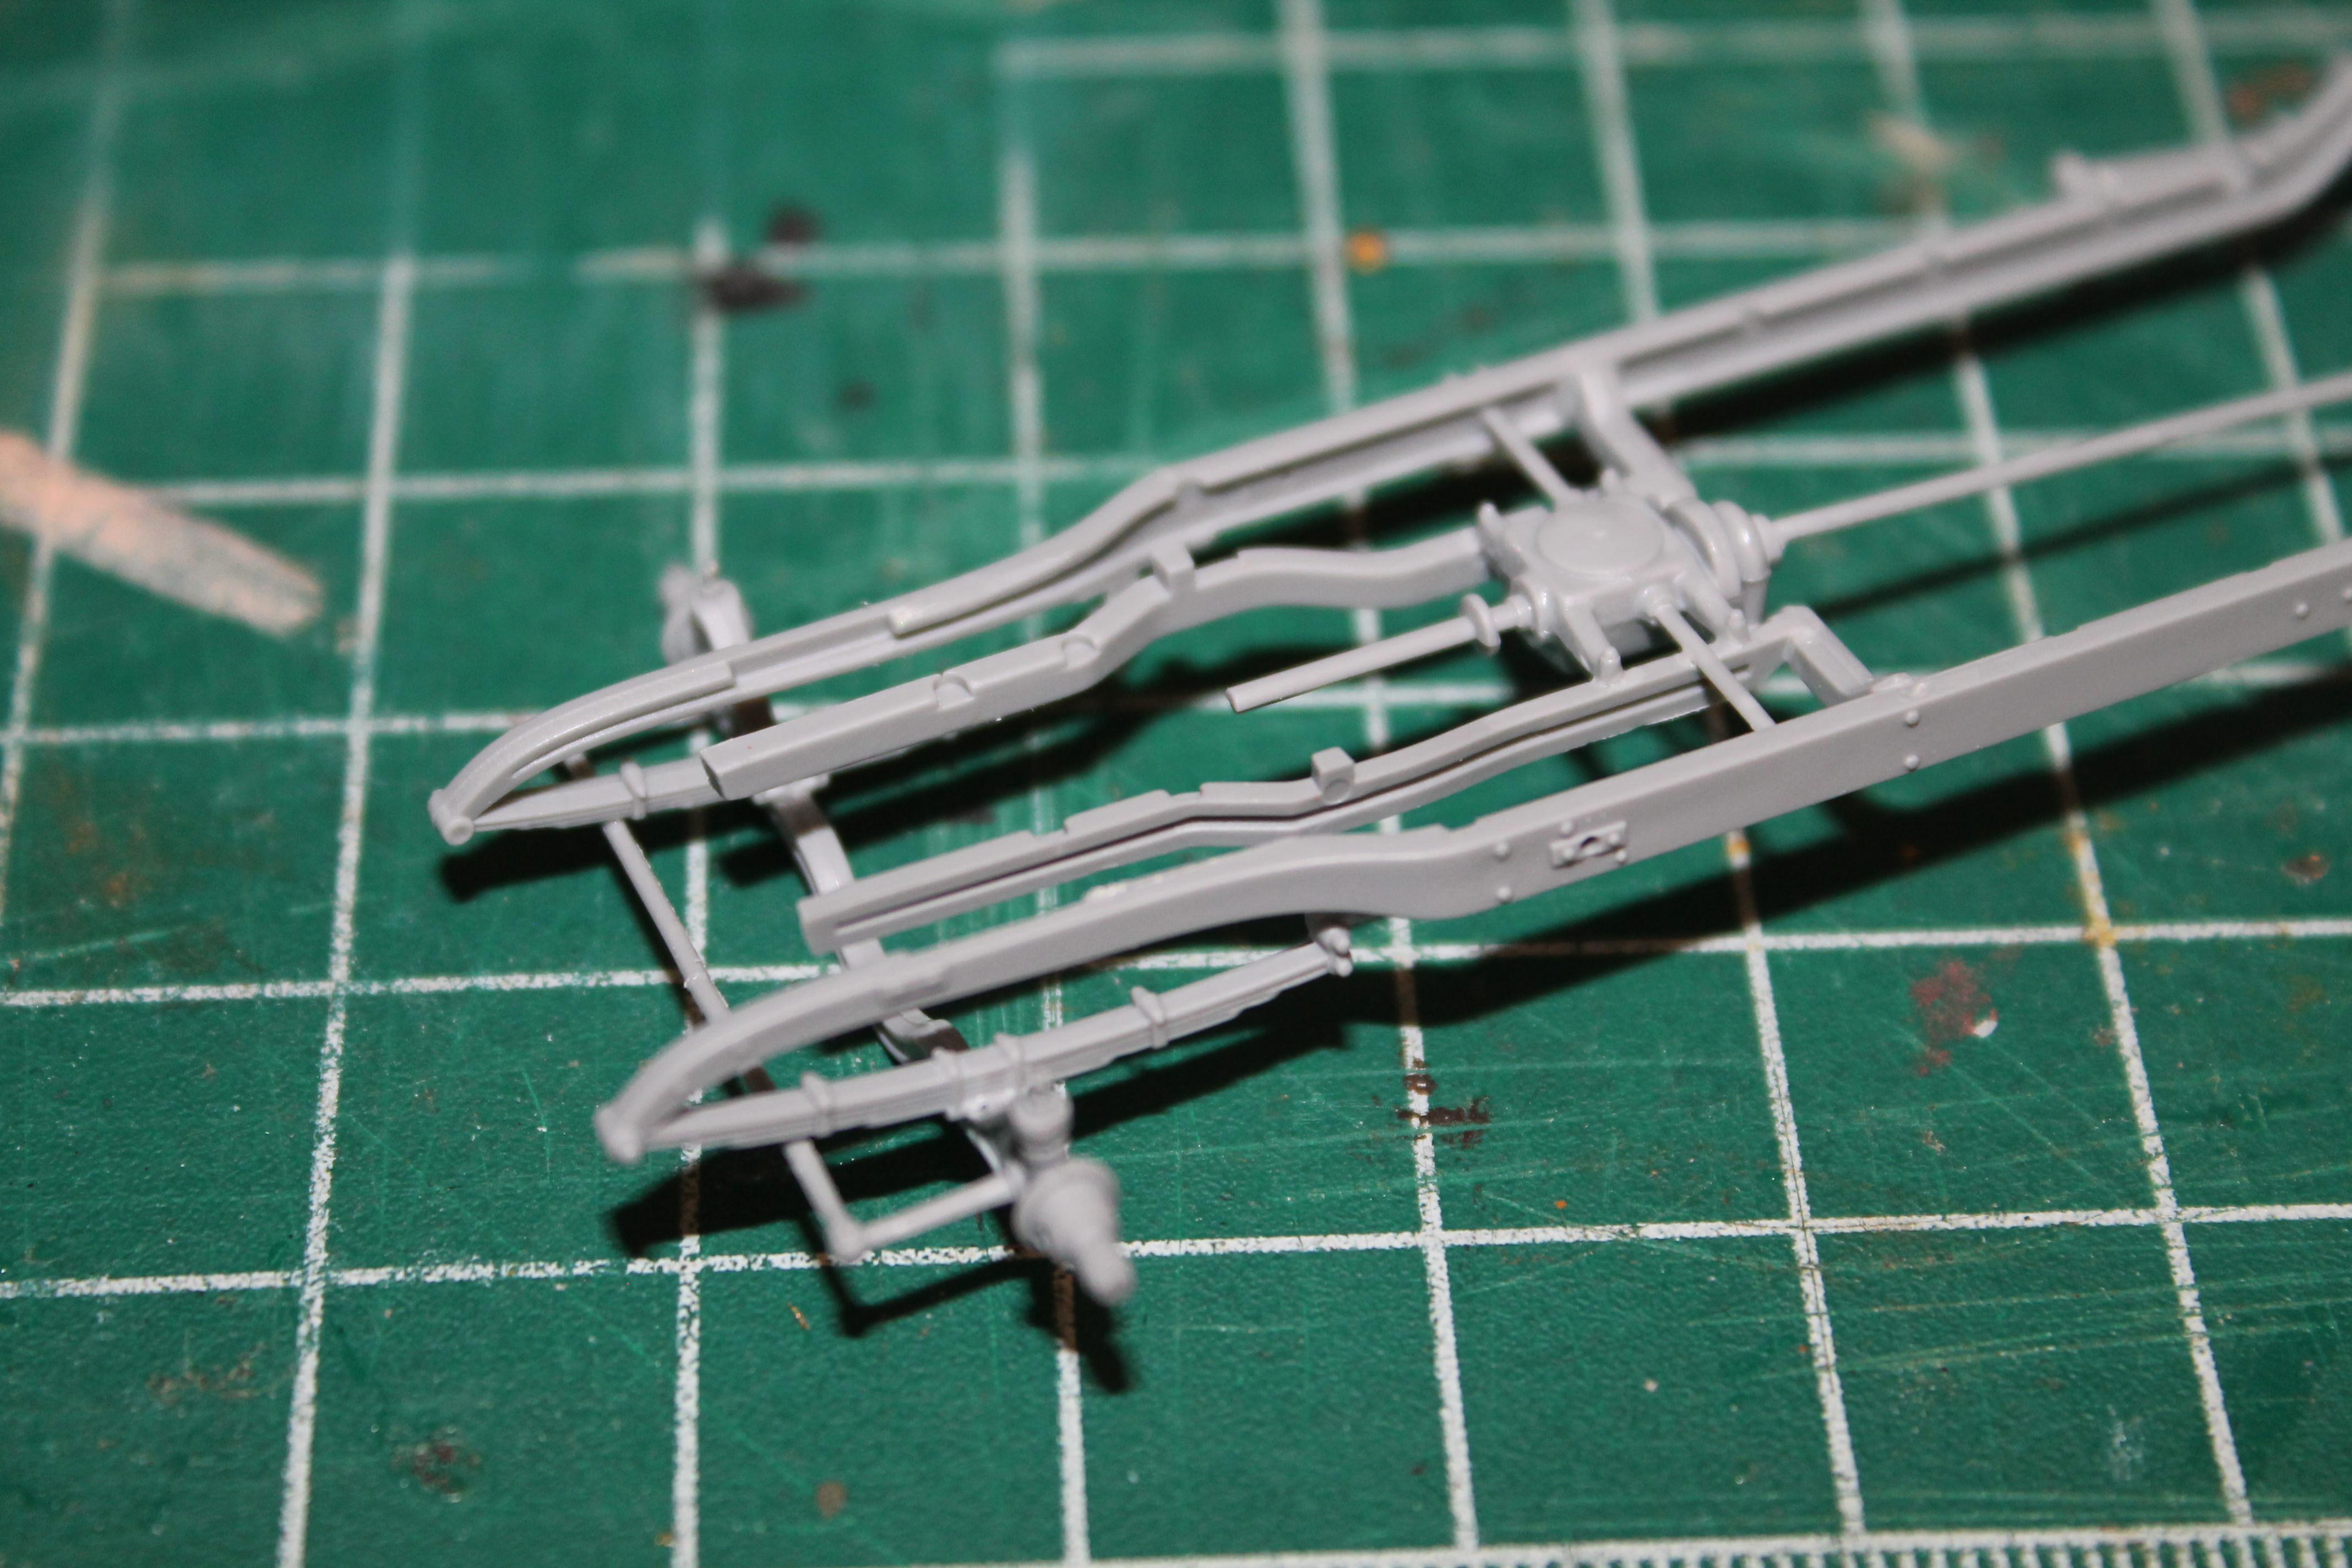
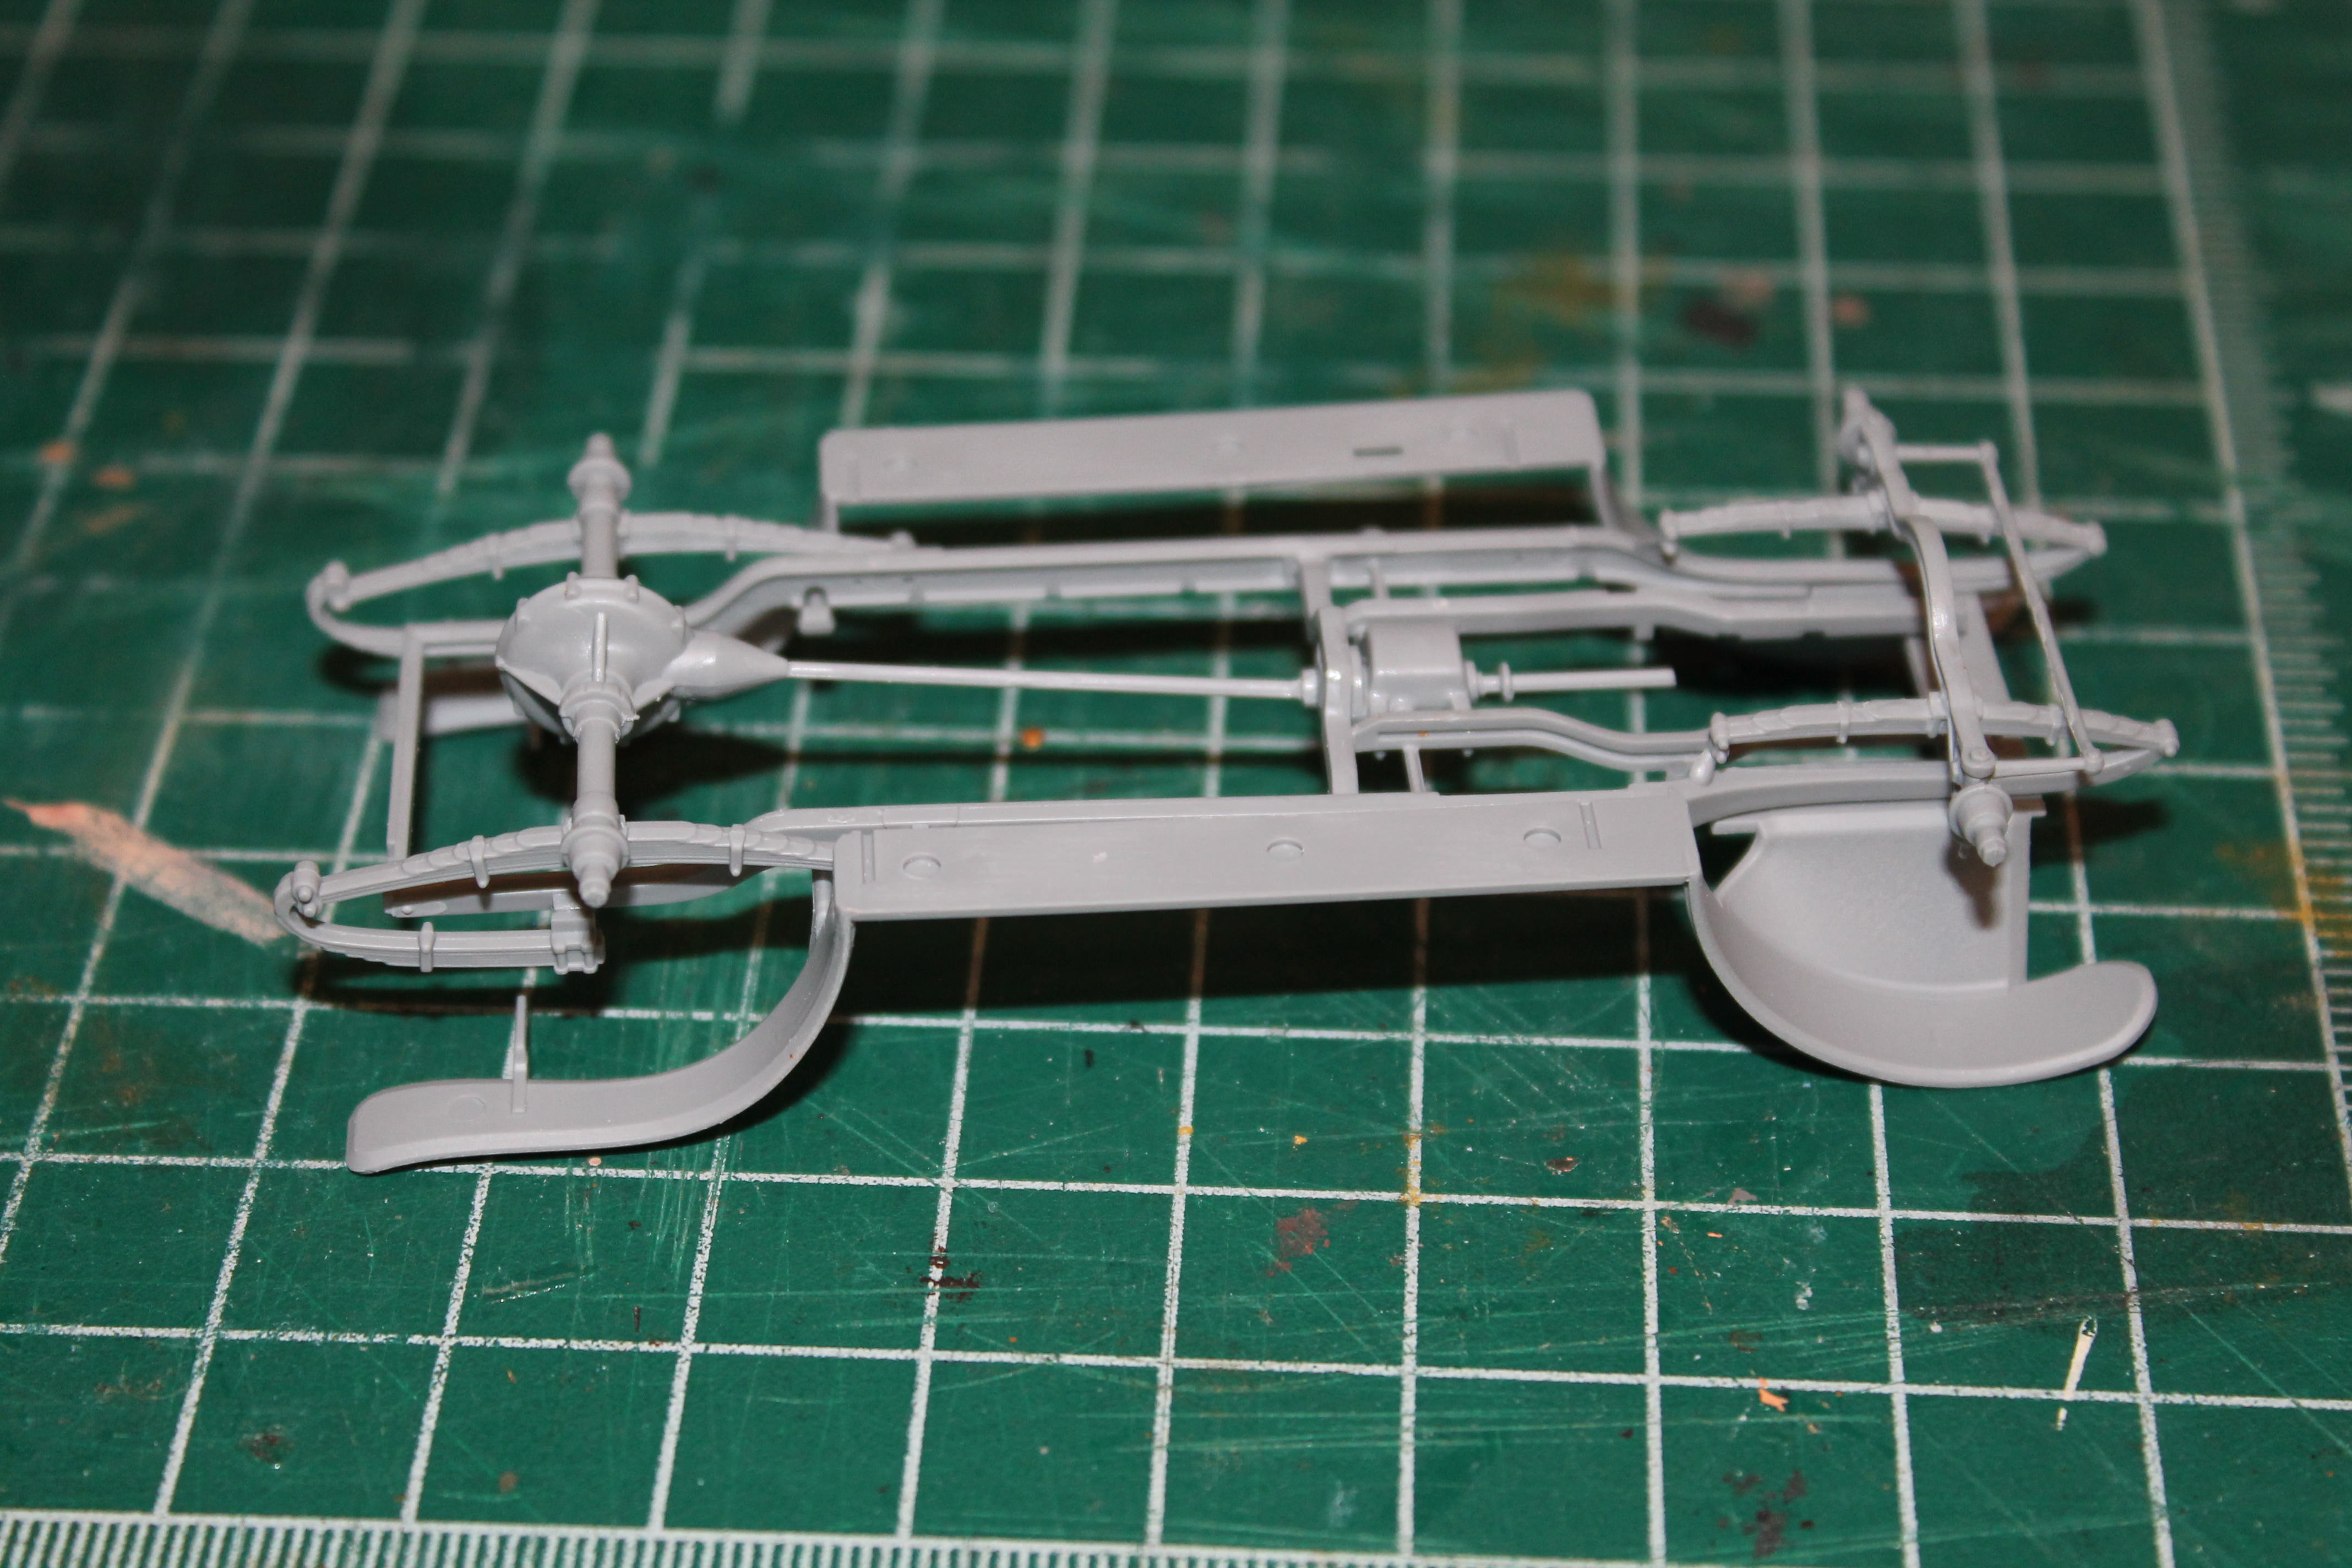
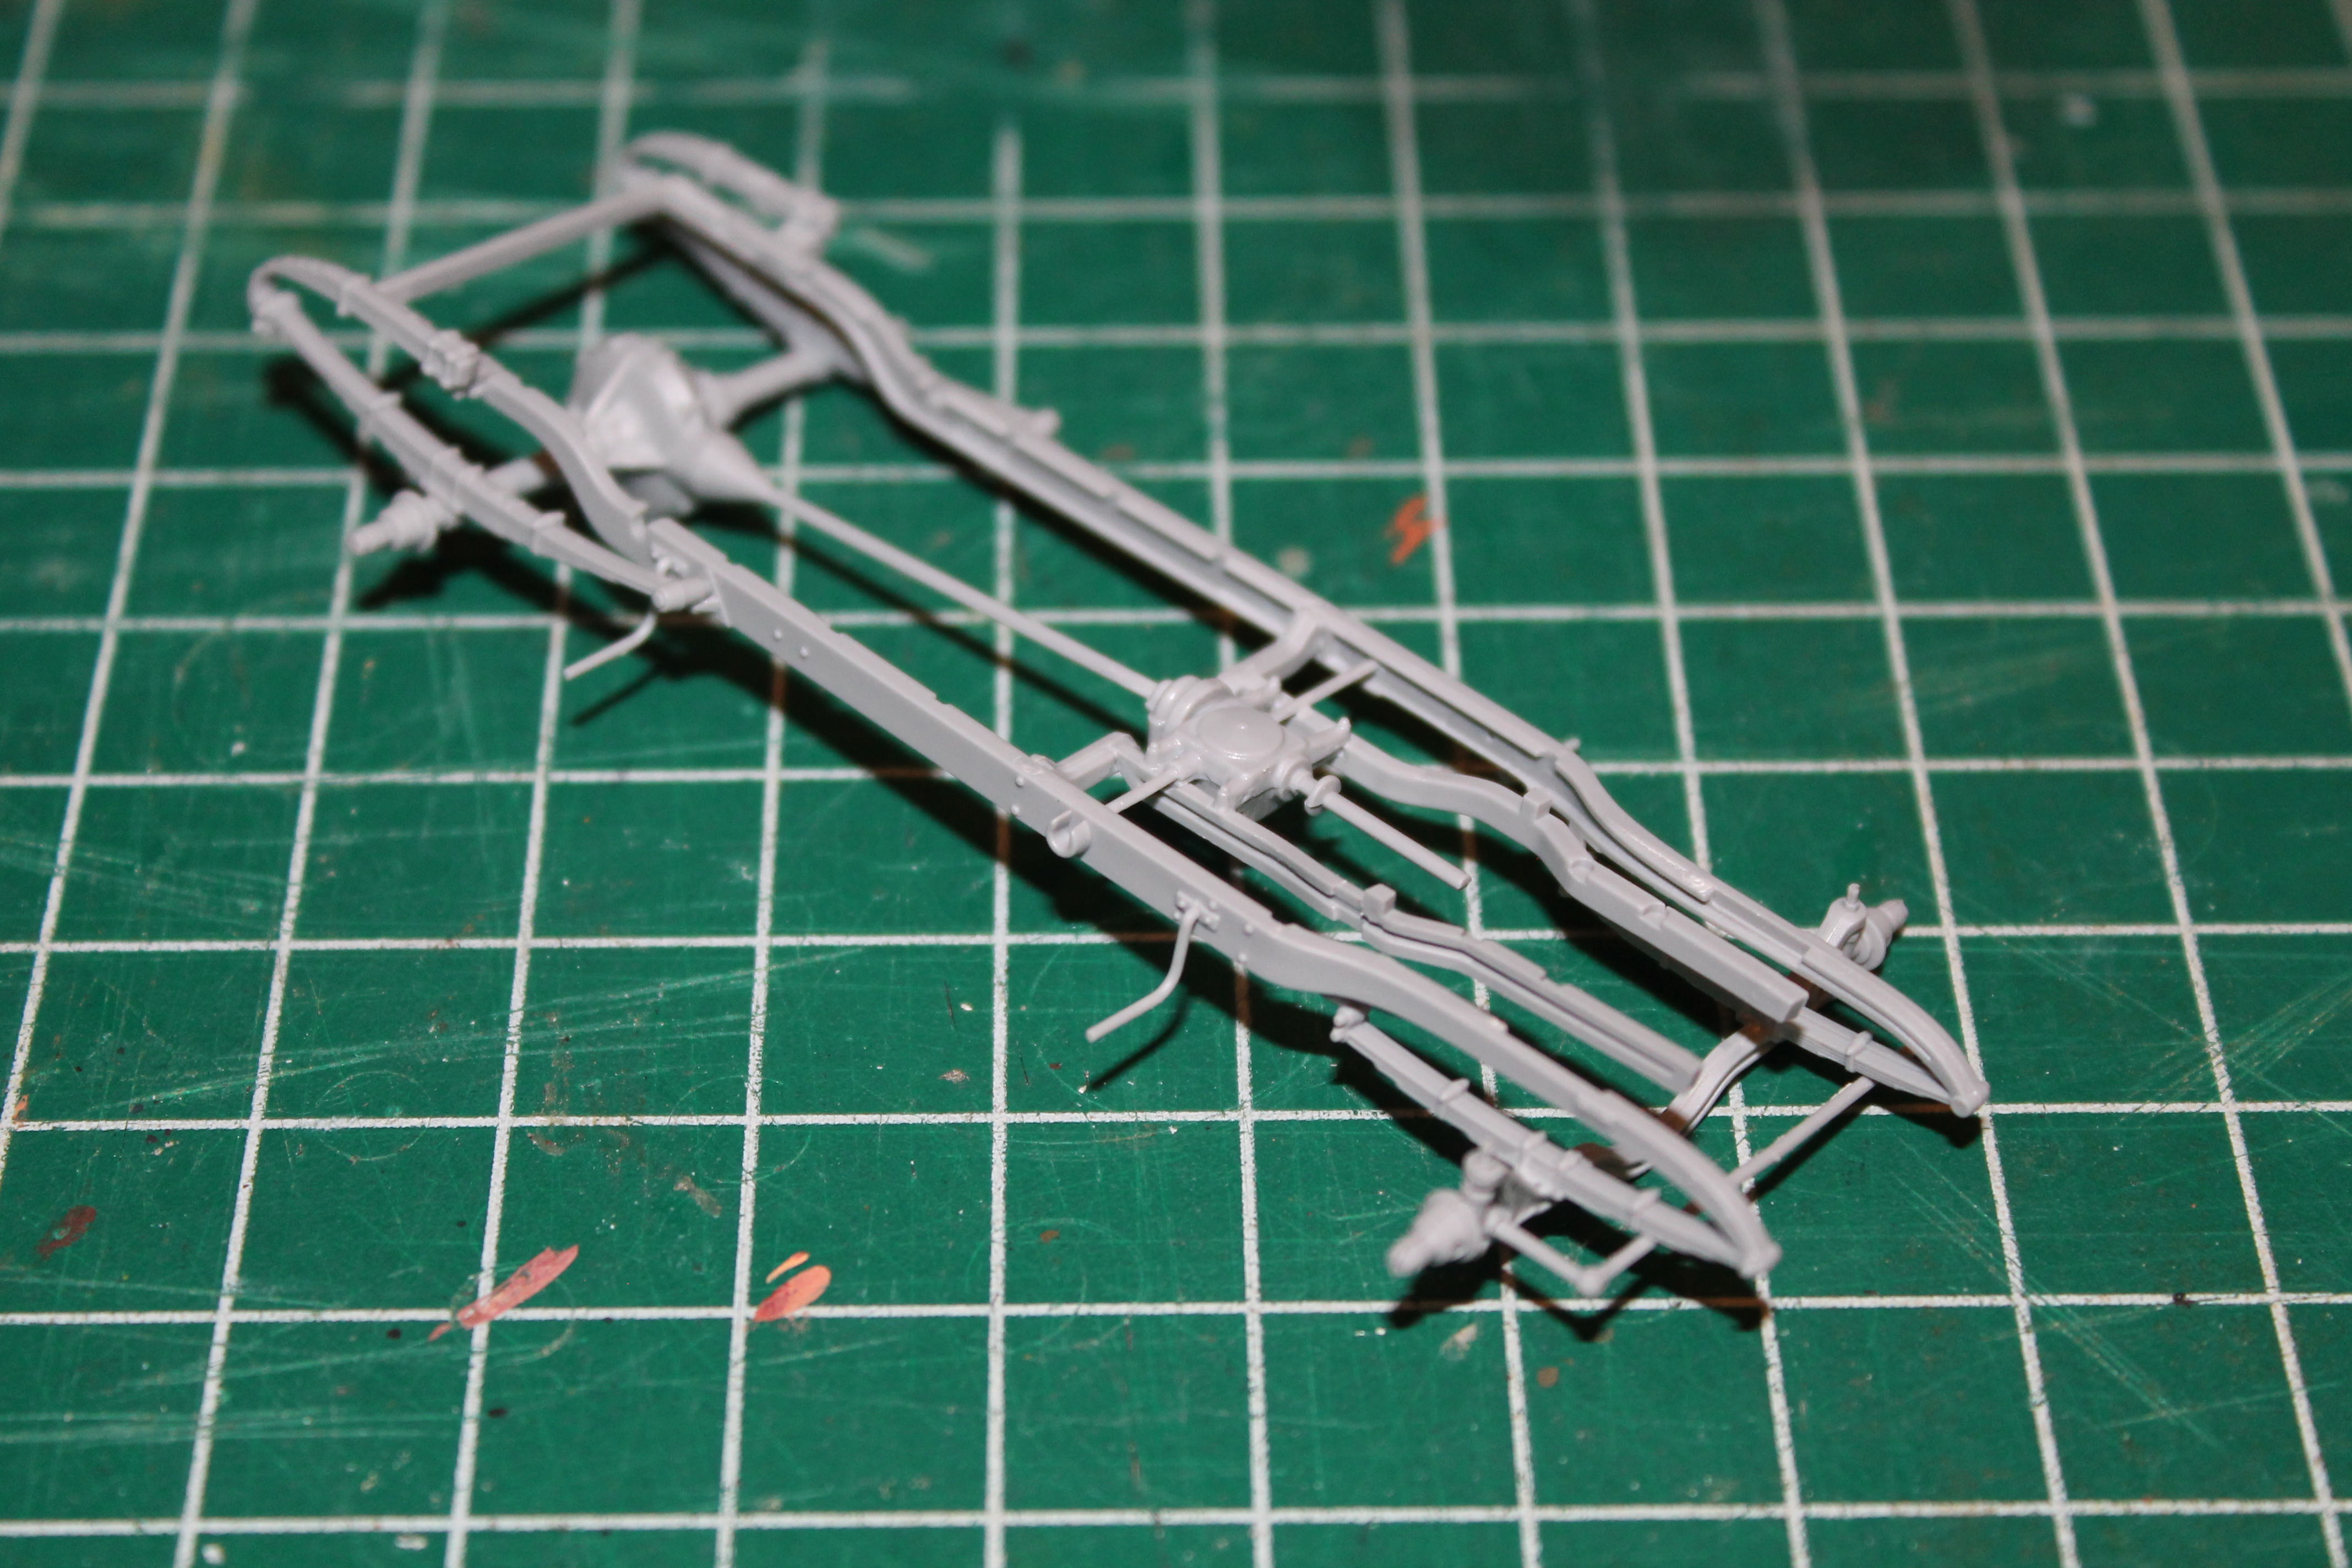
Sorry it has been so long since the last update. Have finally been able to get some more assembly work done. As usual, I have been skipping around the order of steps in the instruction sheet. I went to Step 9 and cemented part A33 into place. I did this to facilitate painting. I determined by test fitting that the chassis could be slid into place with A33 already attached.


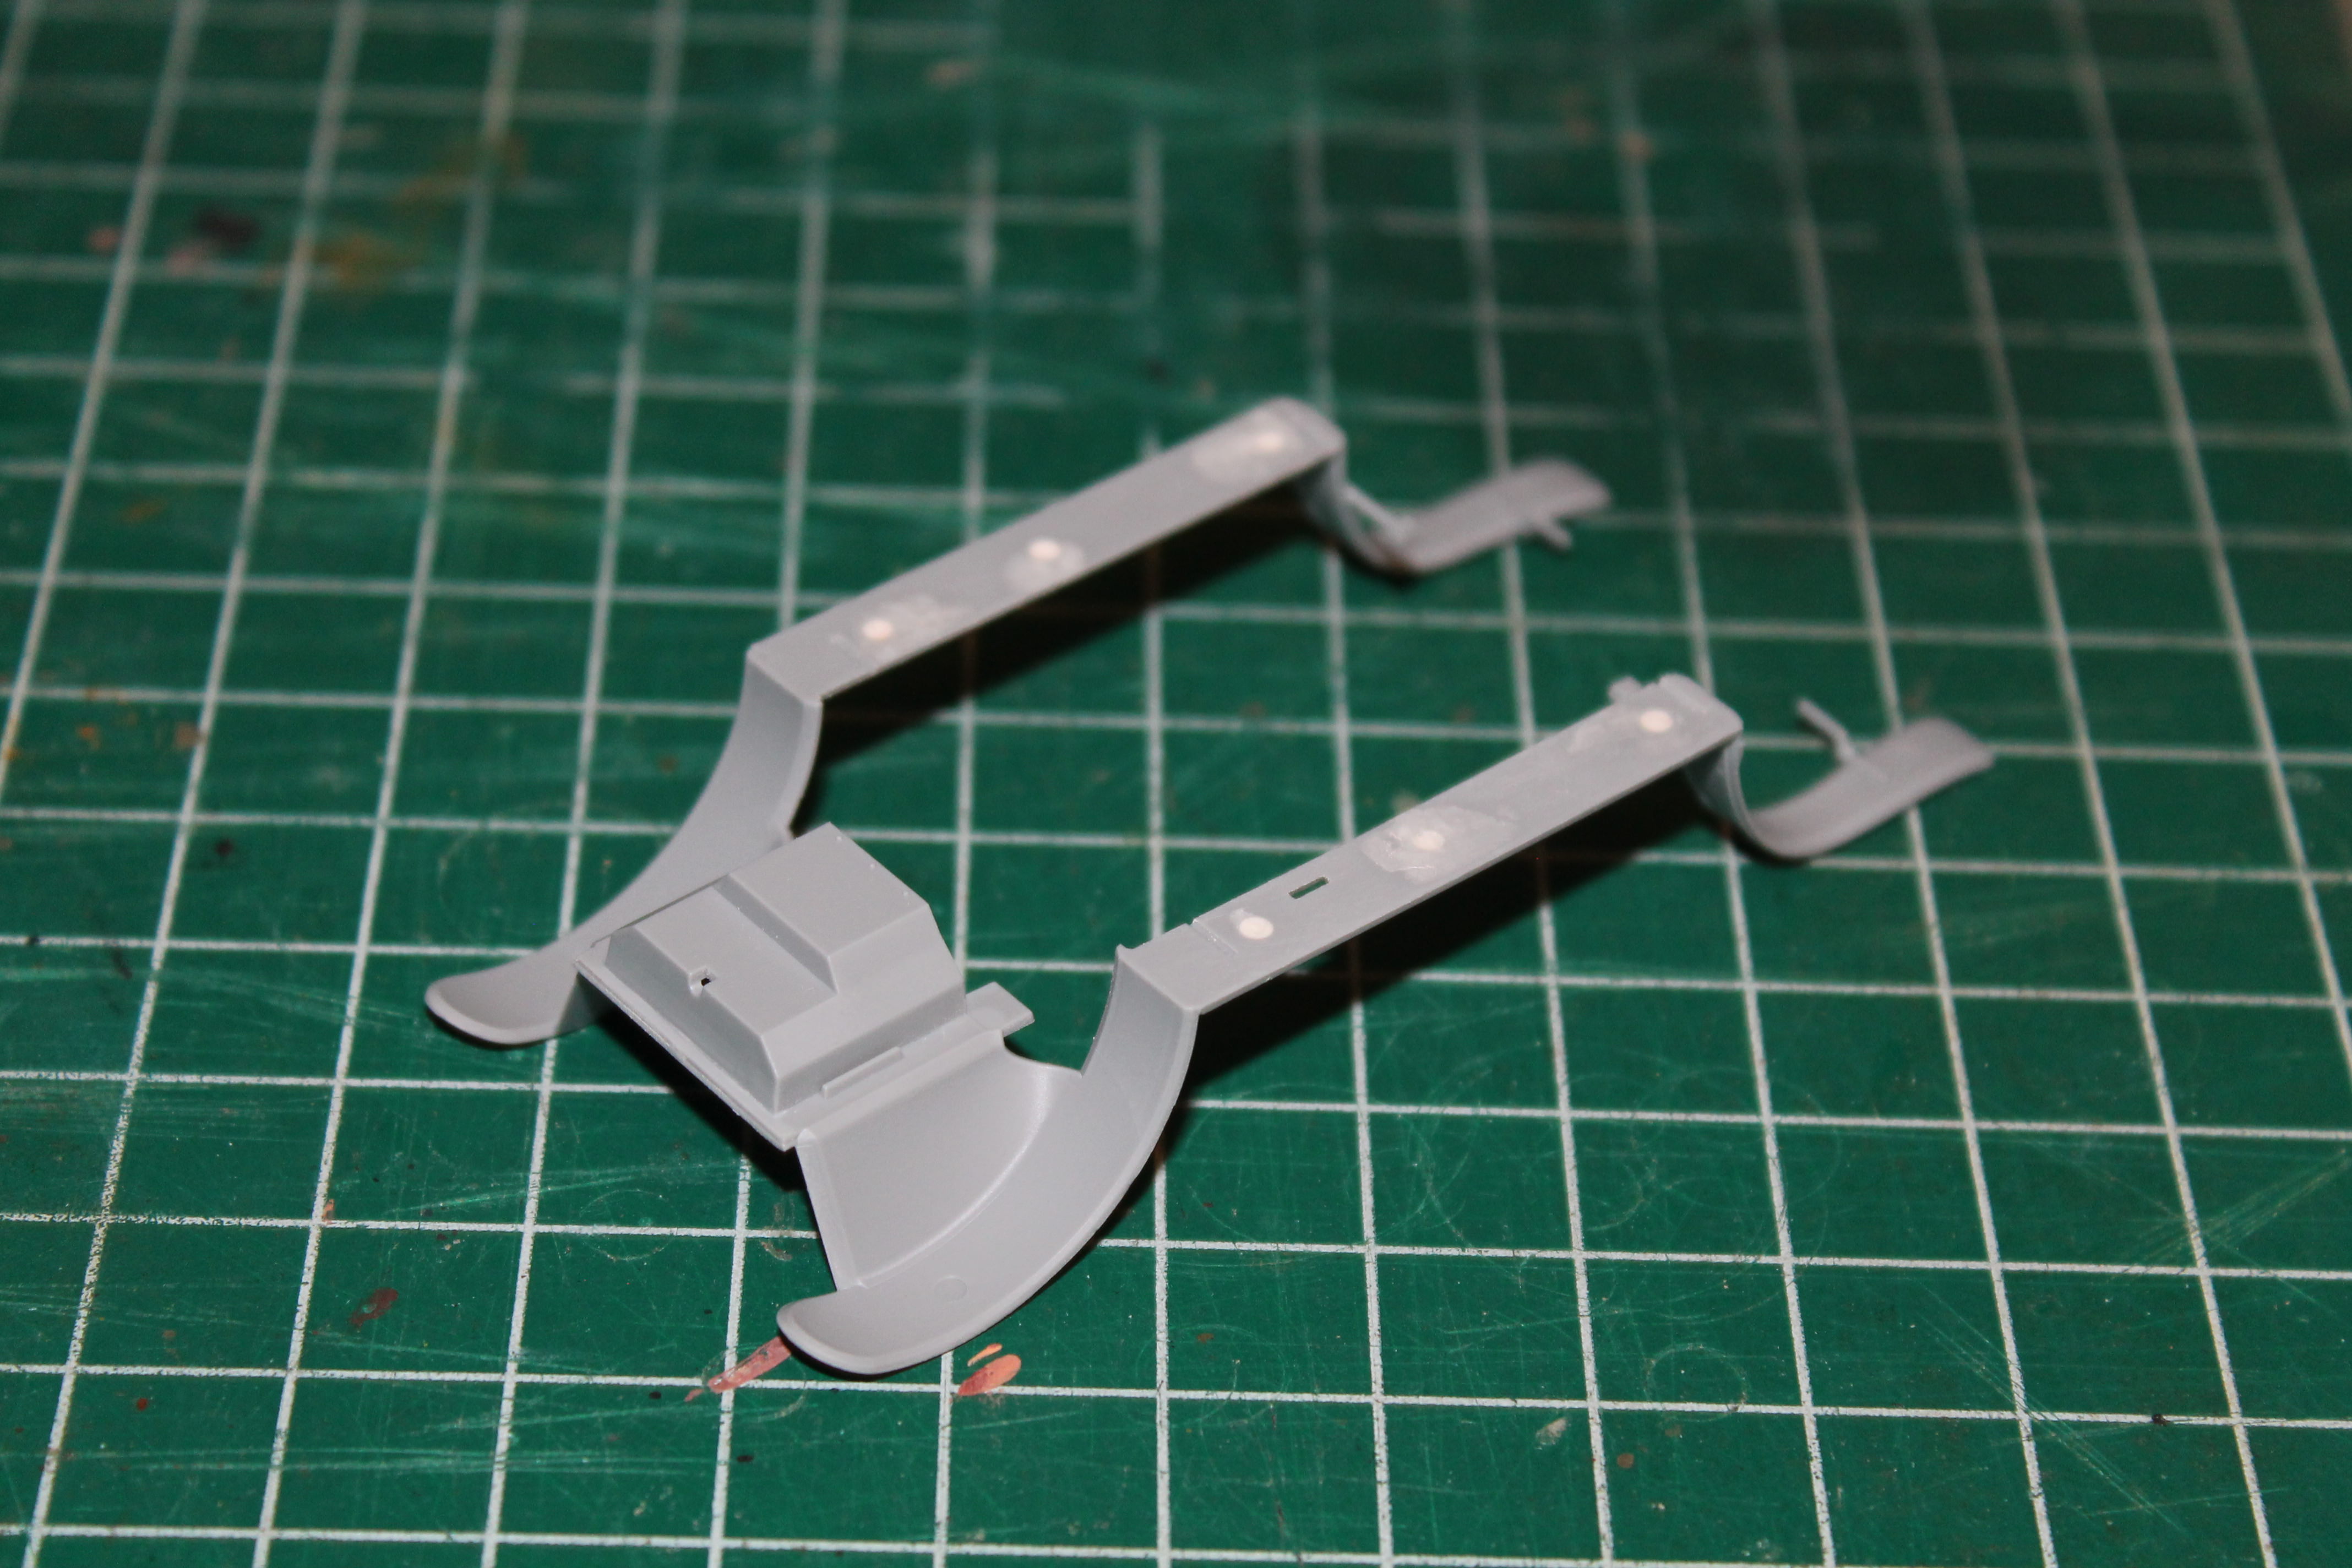
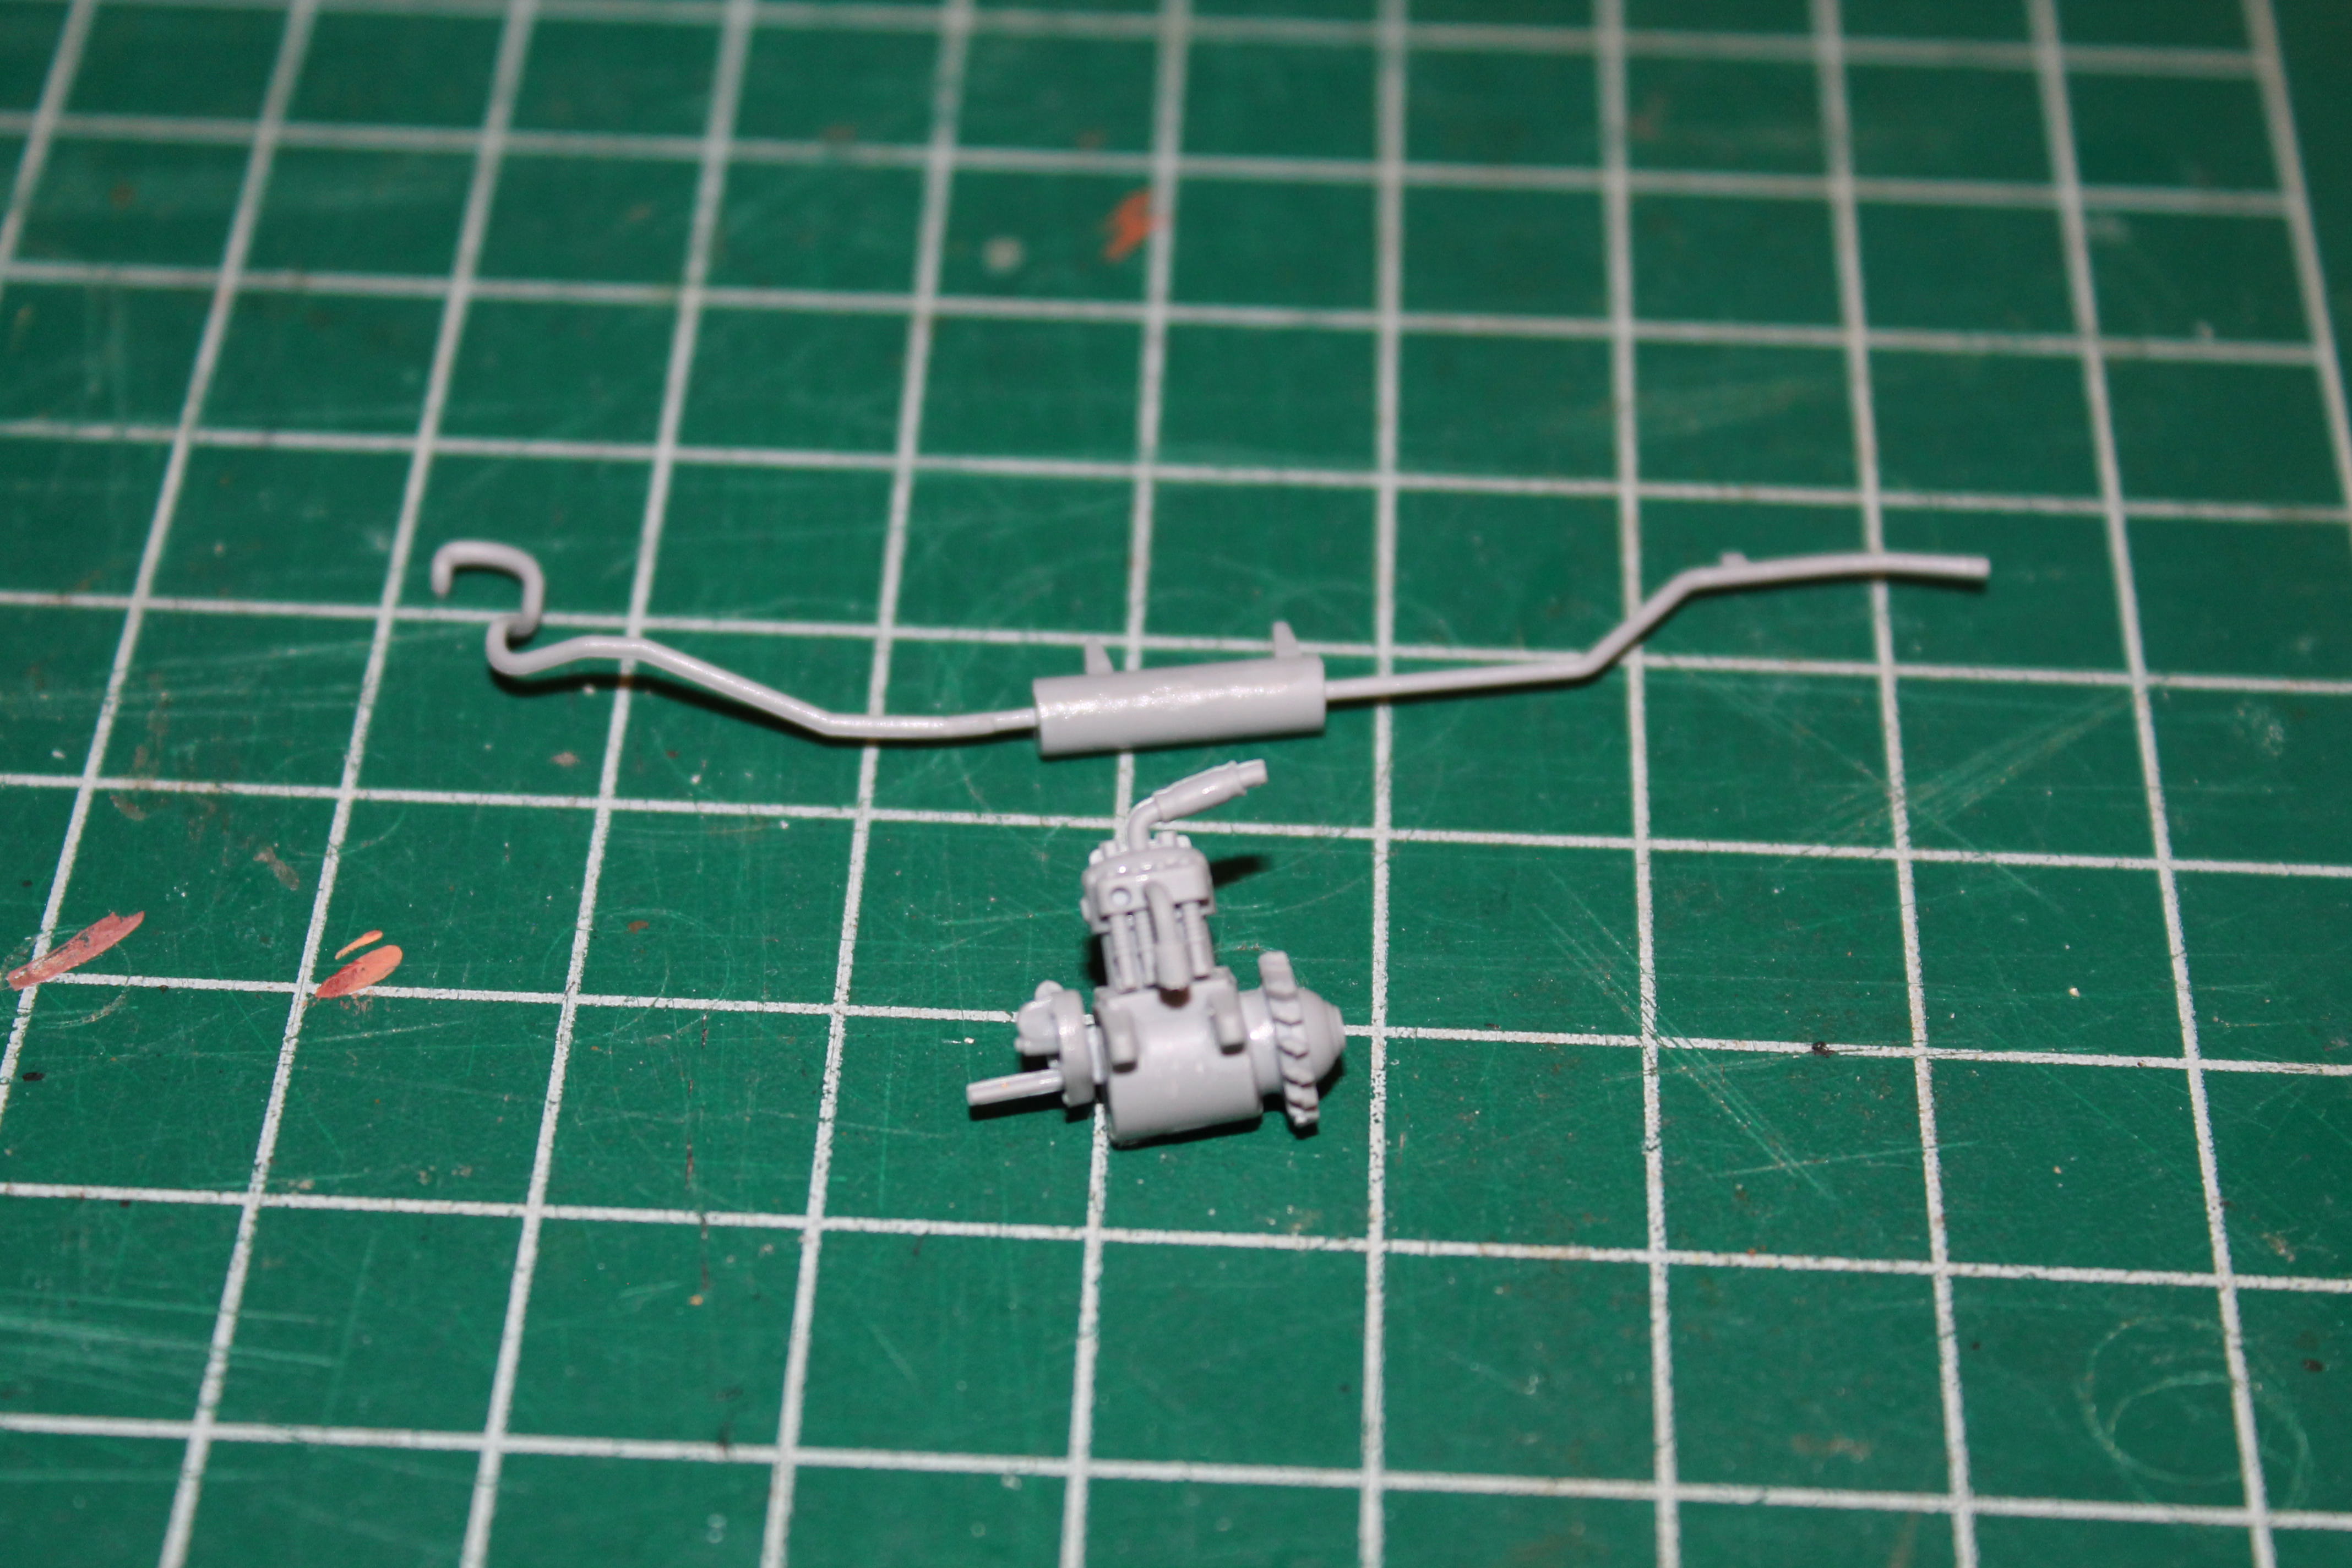
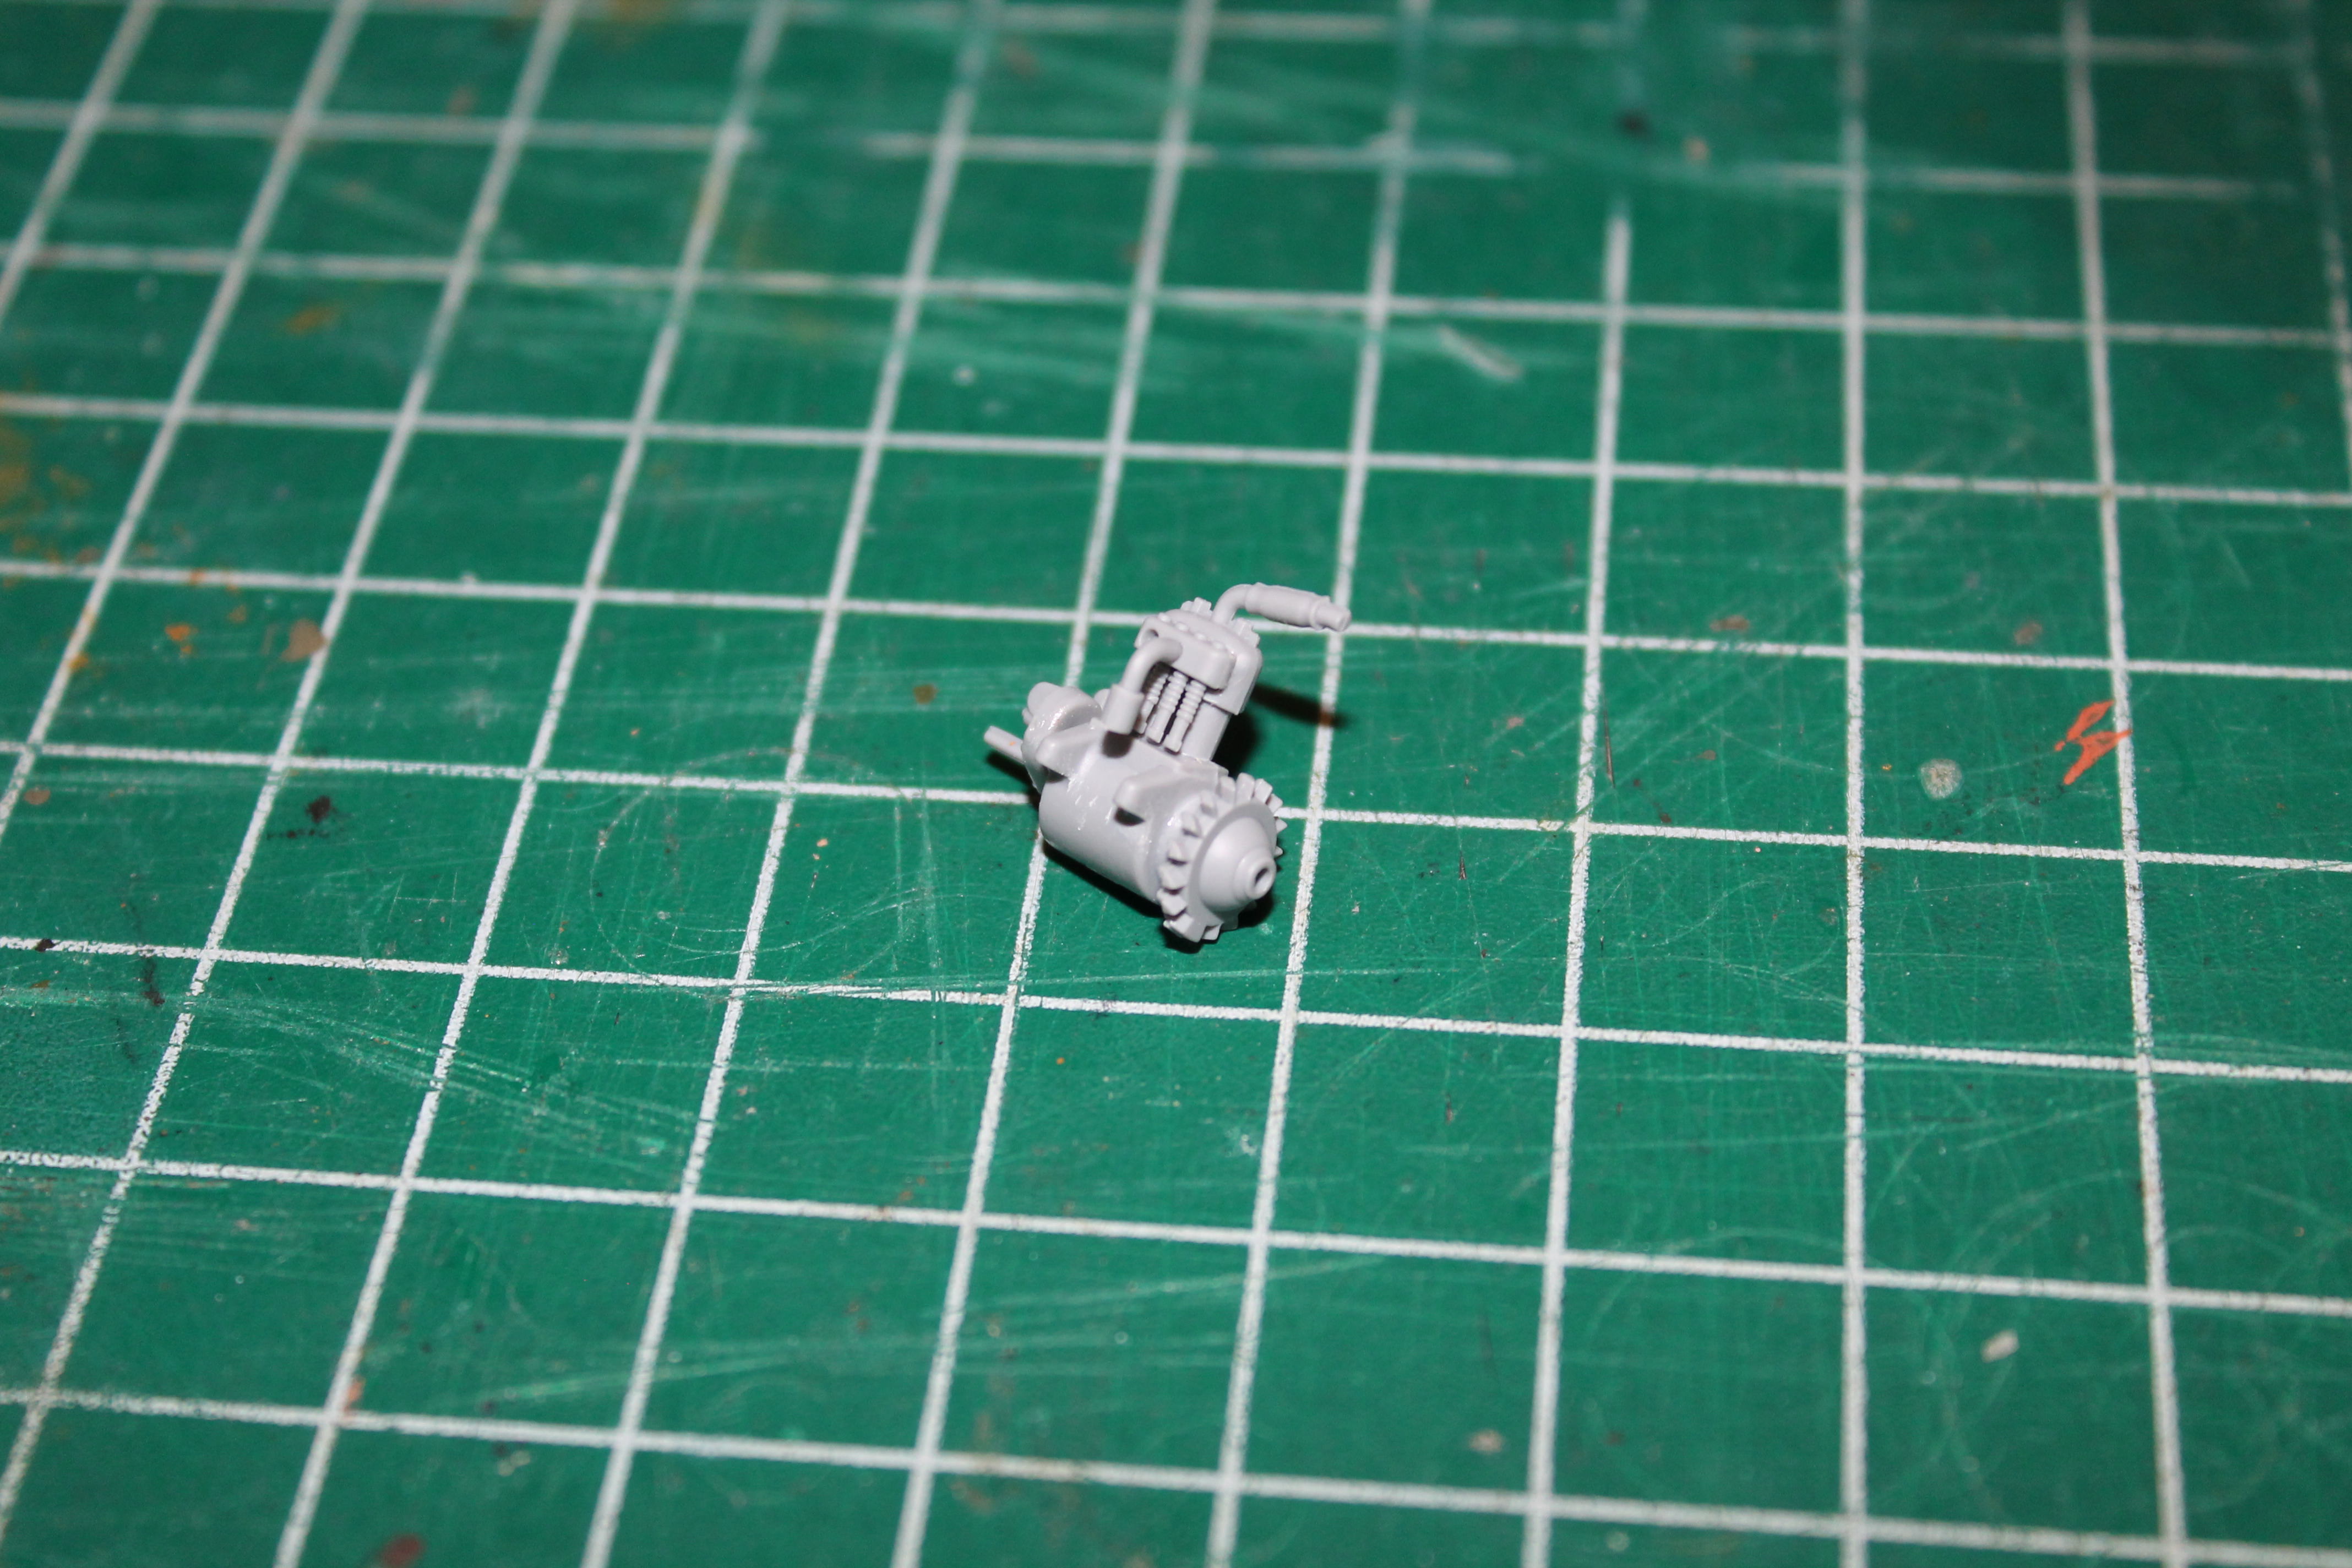
Apparently, Renault took the rough roads of the time into consideration when designing the AG1. The engine and transmission are completely protected underneath the frame. Part A36 is added in Step 41 to cover the transmission. As mentioned, the kit has a complete engine, but little will be visible from below. In the photo you can also see the injection pin marks that had to be filled.

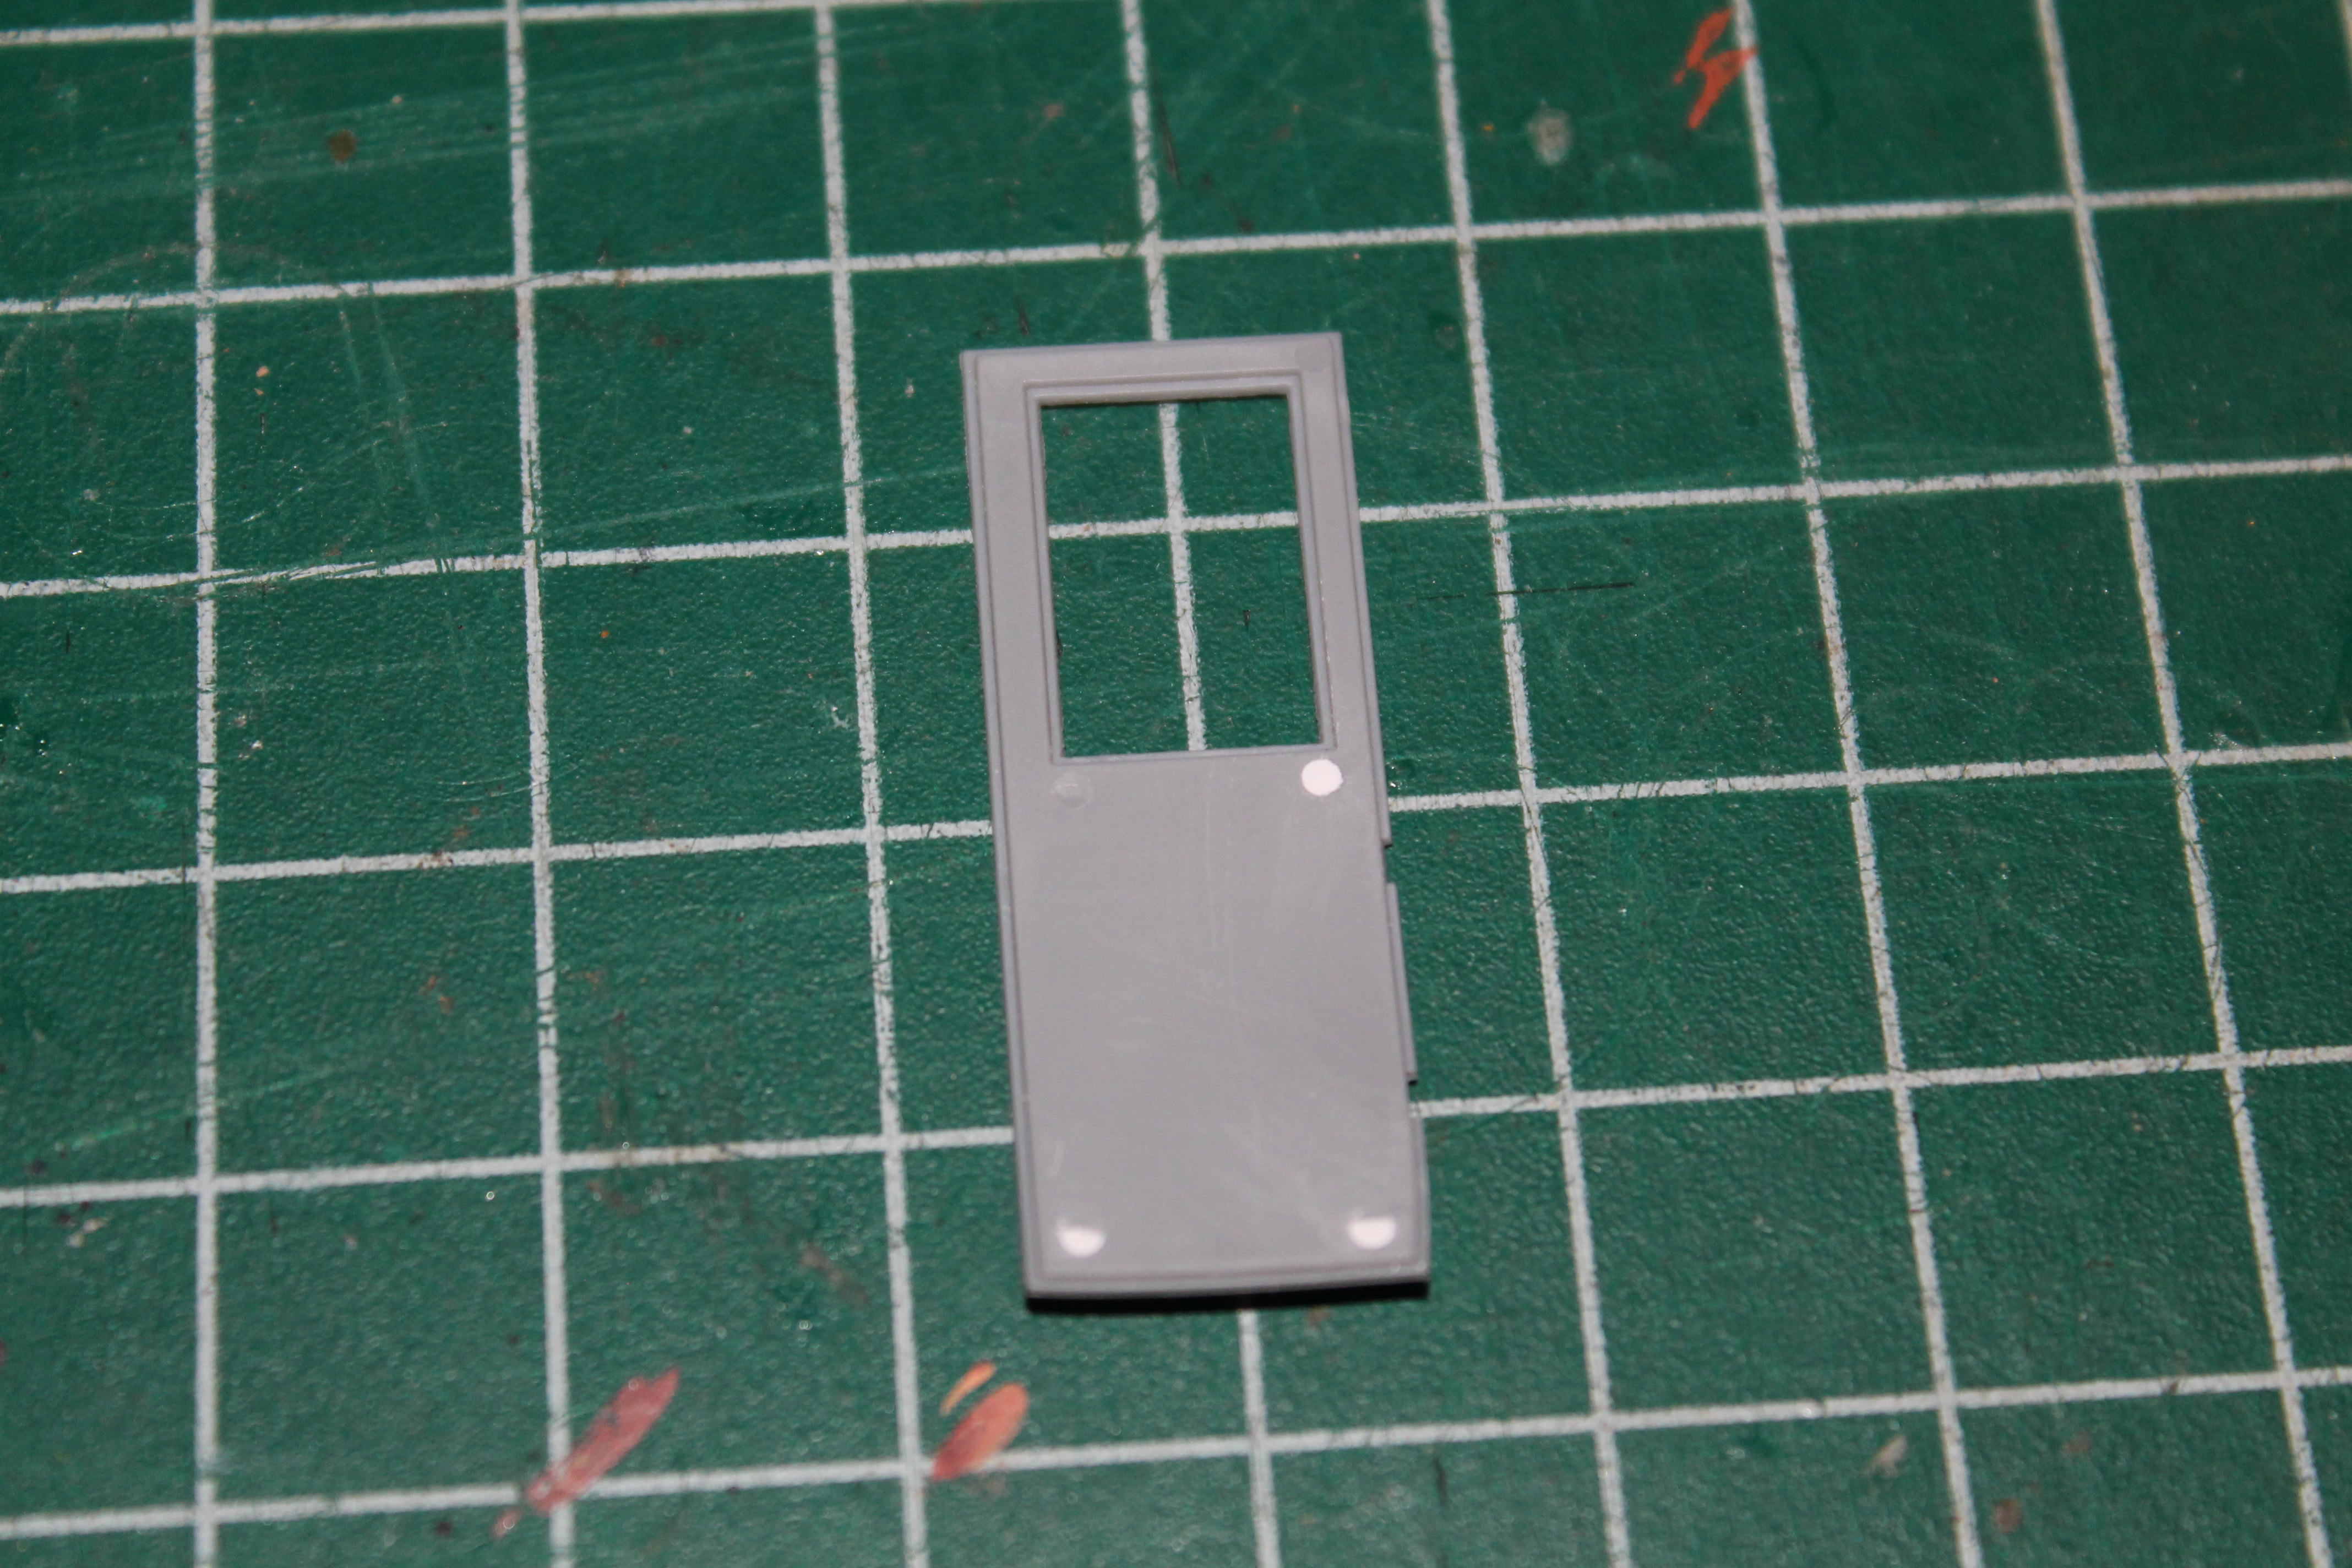
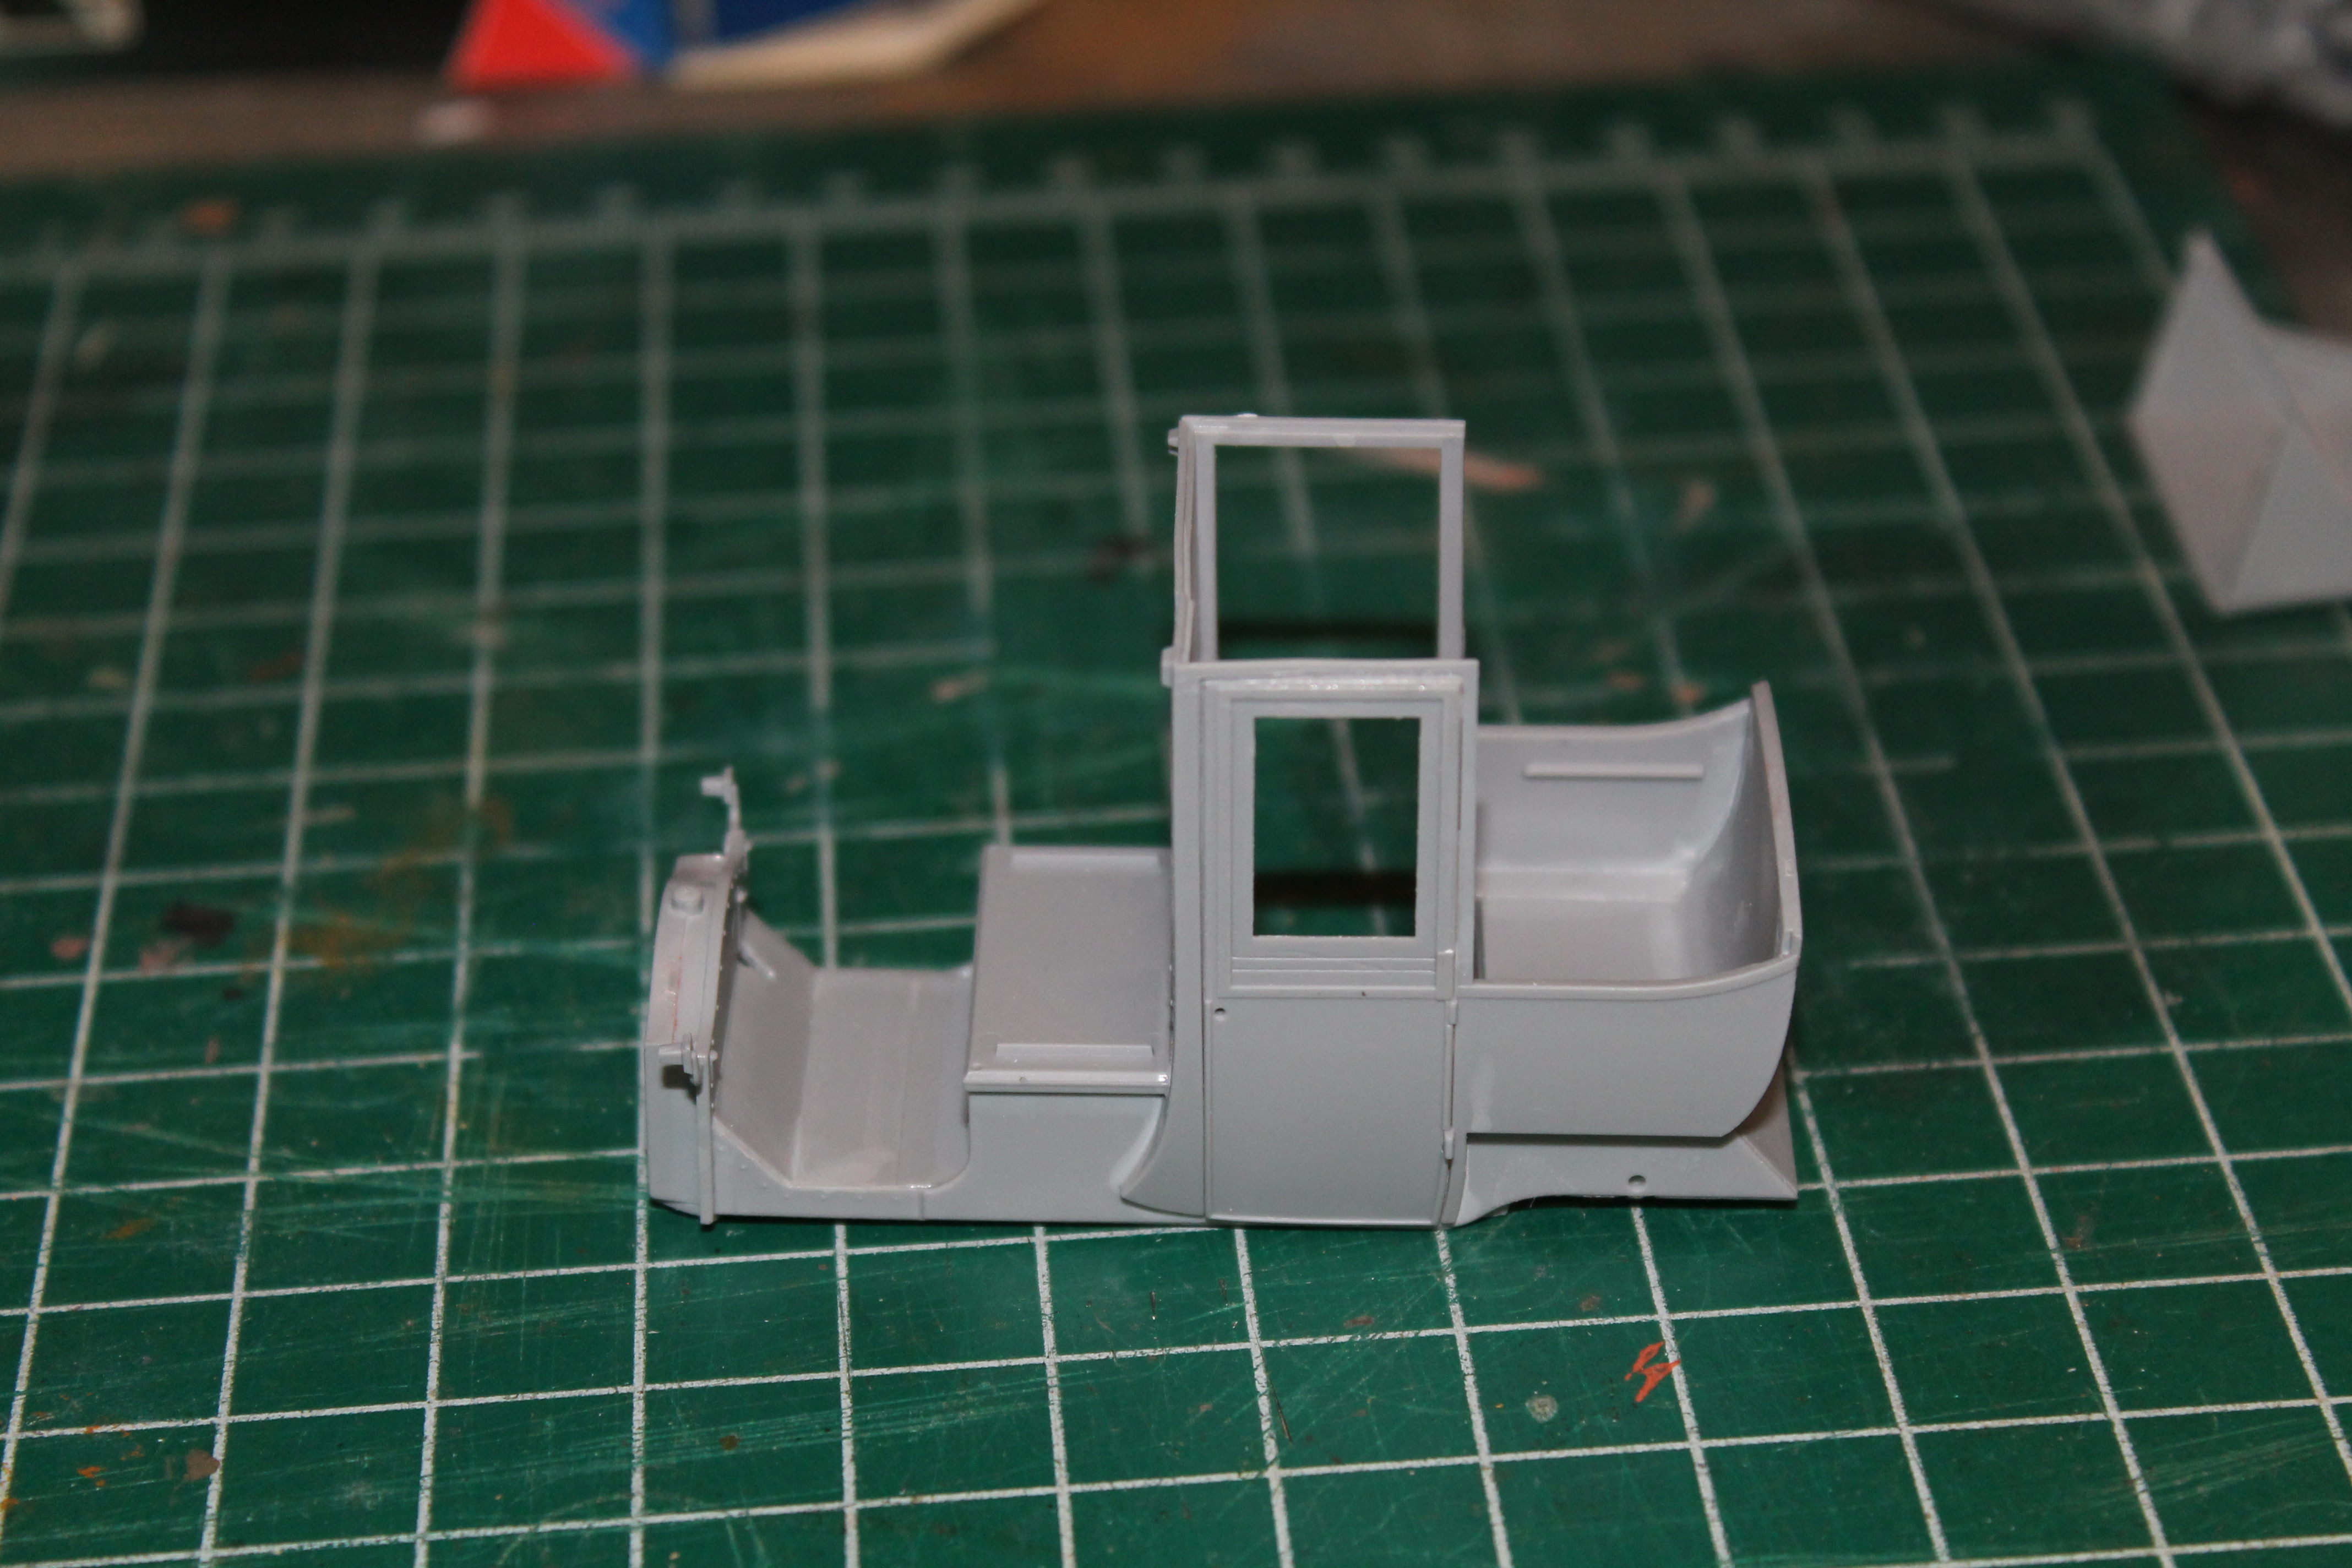
Next, I went on to add one door to the body assembly. Leaving one door free to be assembled in the open position. Again there were some shallow pin marks to be dealt with on both doors.


In the instruction sheet, the roof is assembled by first cementing the two sides (parts B9 & B10) to the rear body, and then adding the back and top sections (B8 & B11). I assembled the whole roof as one unit.


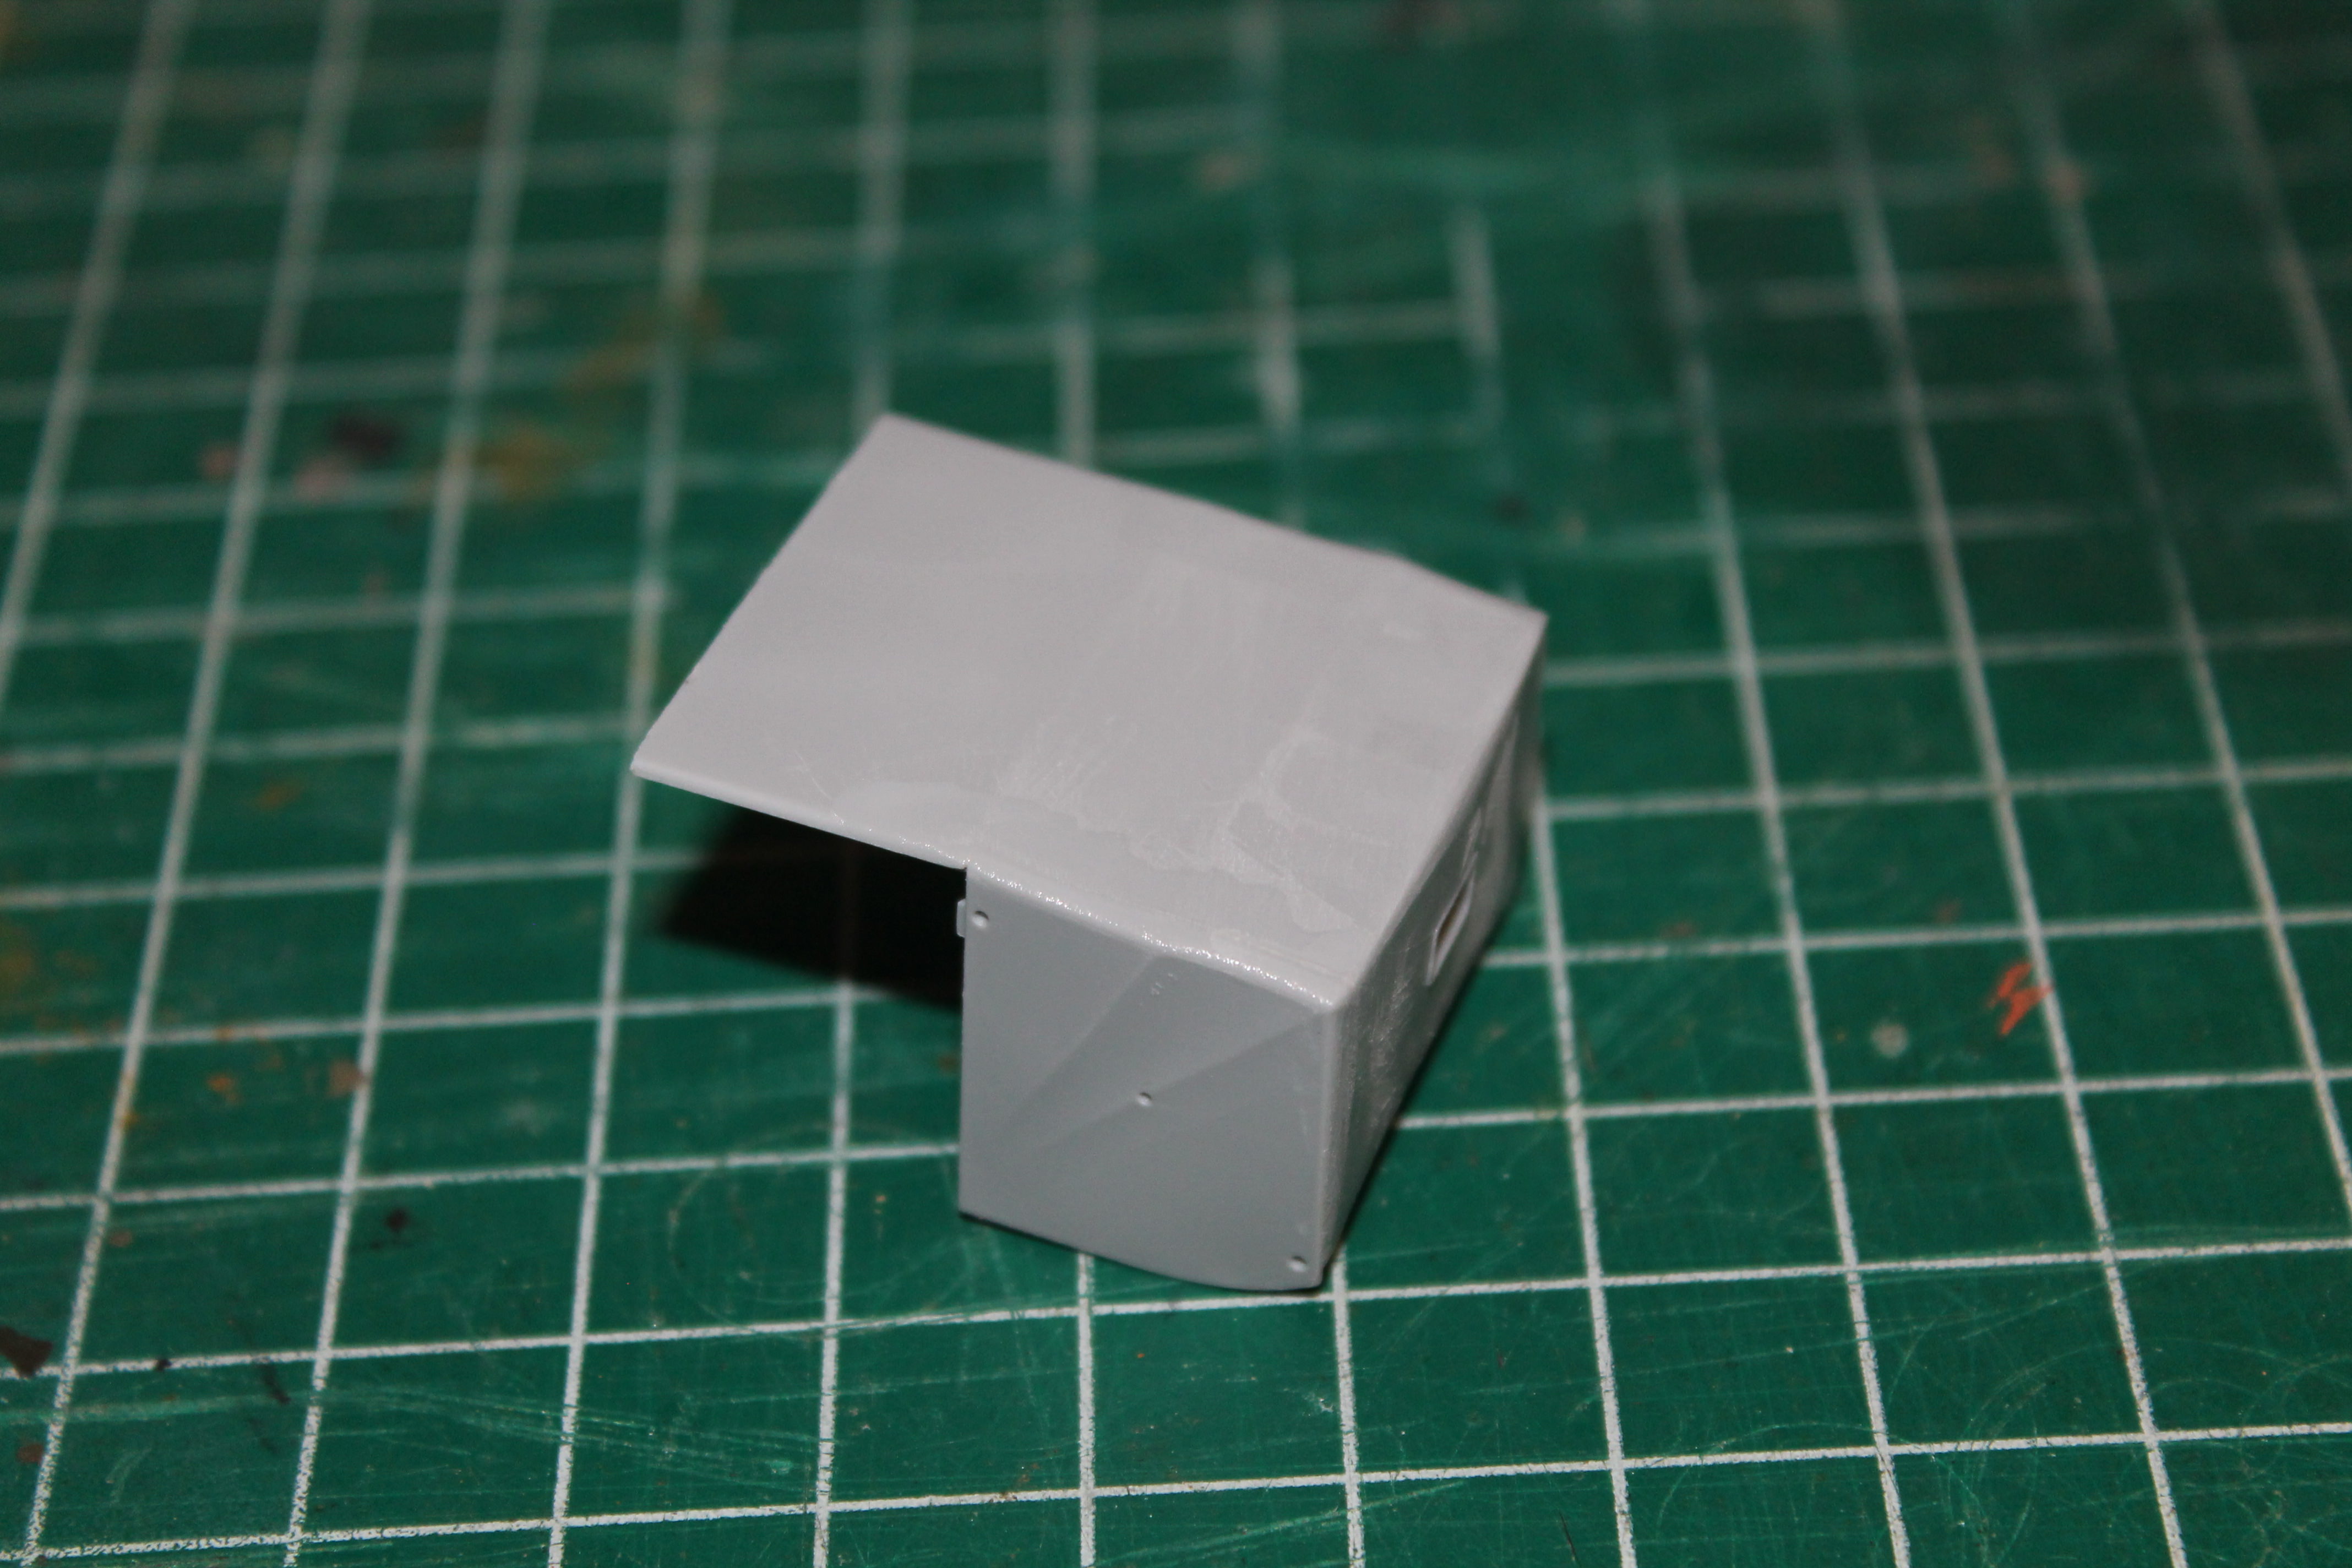
The roof temporarily fixed into place.


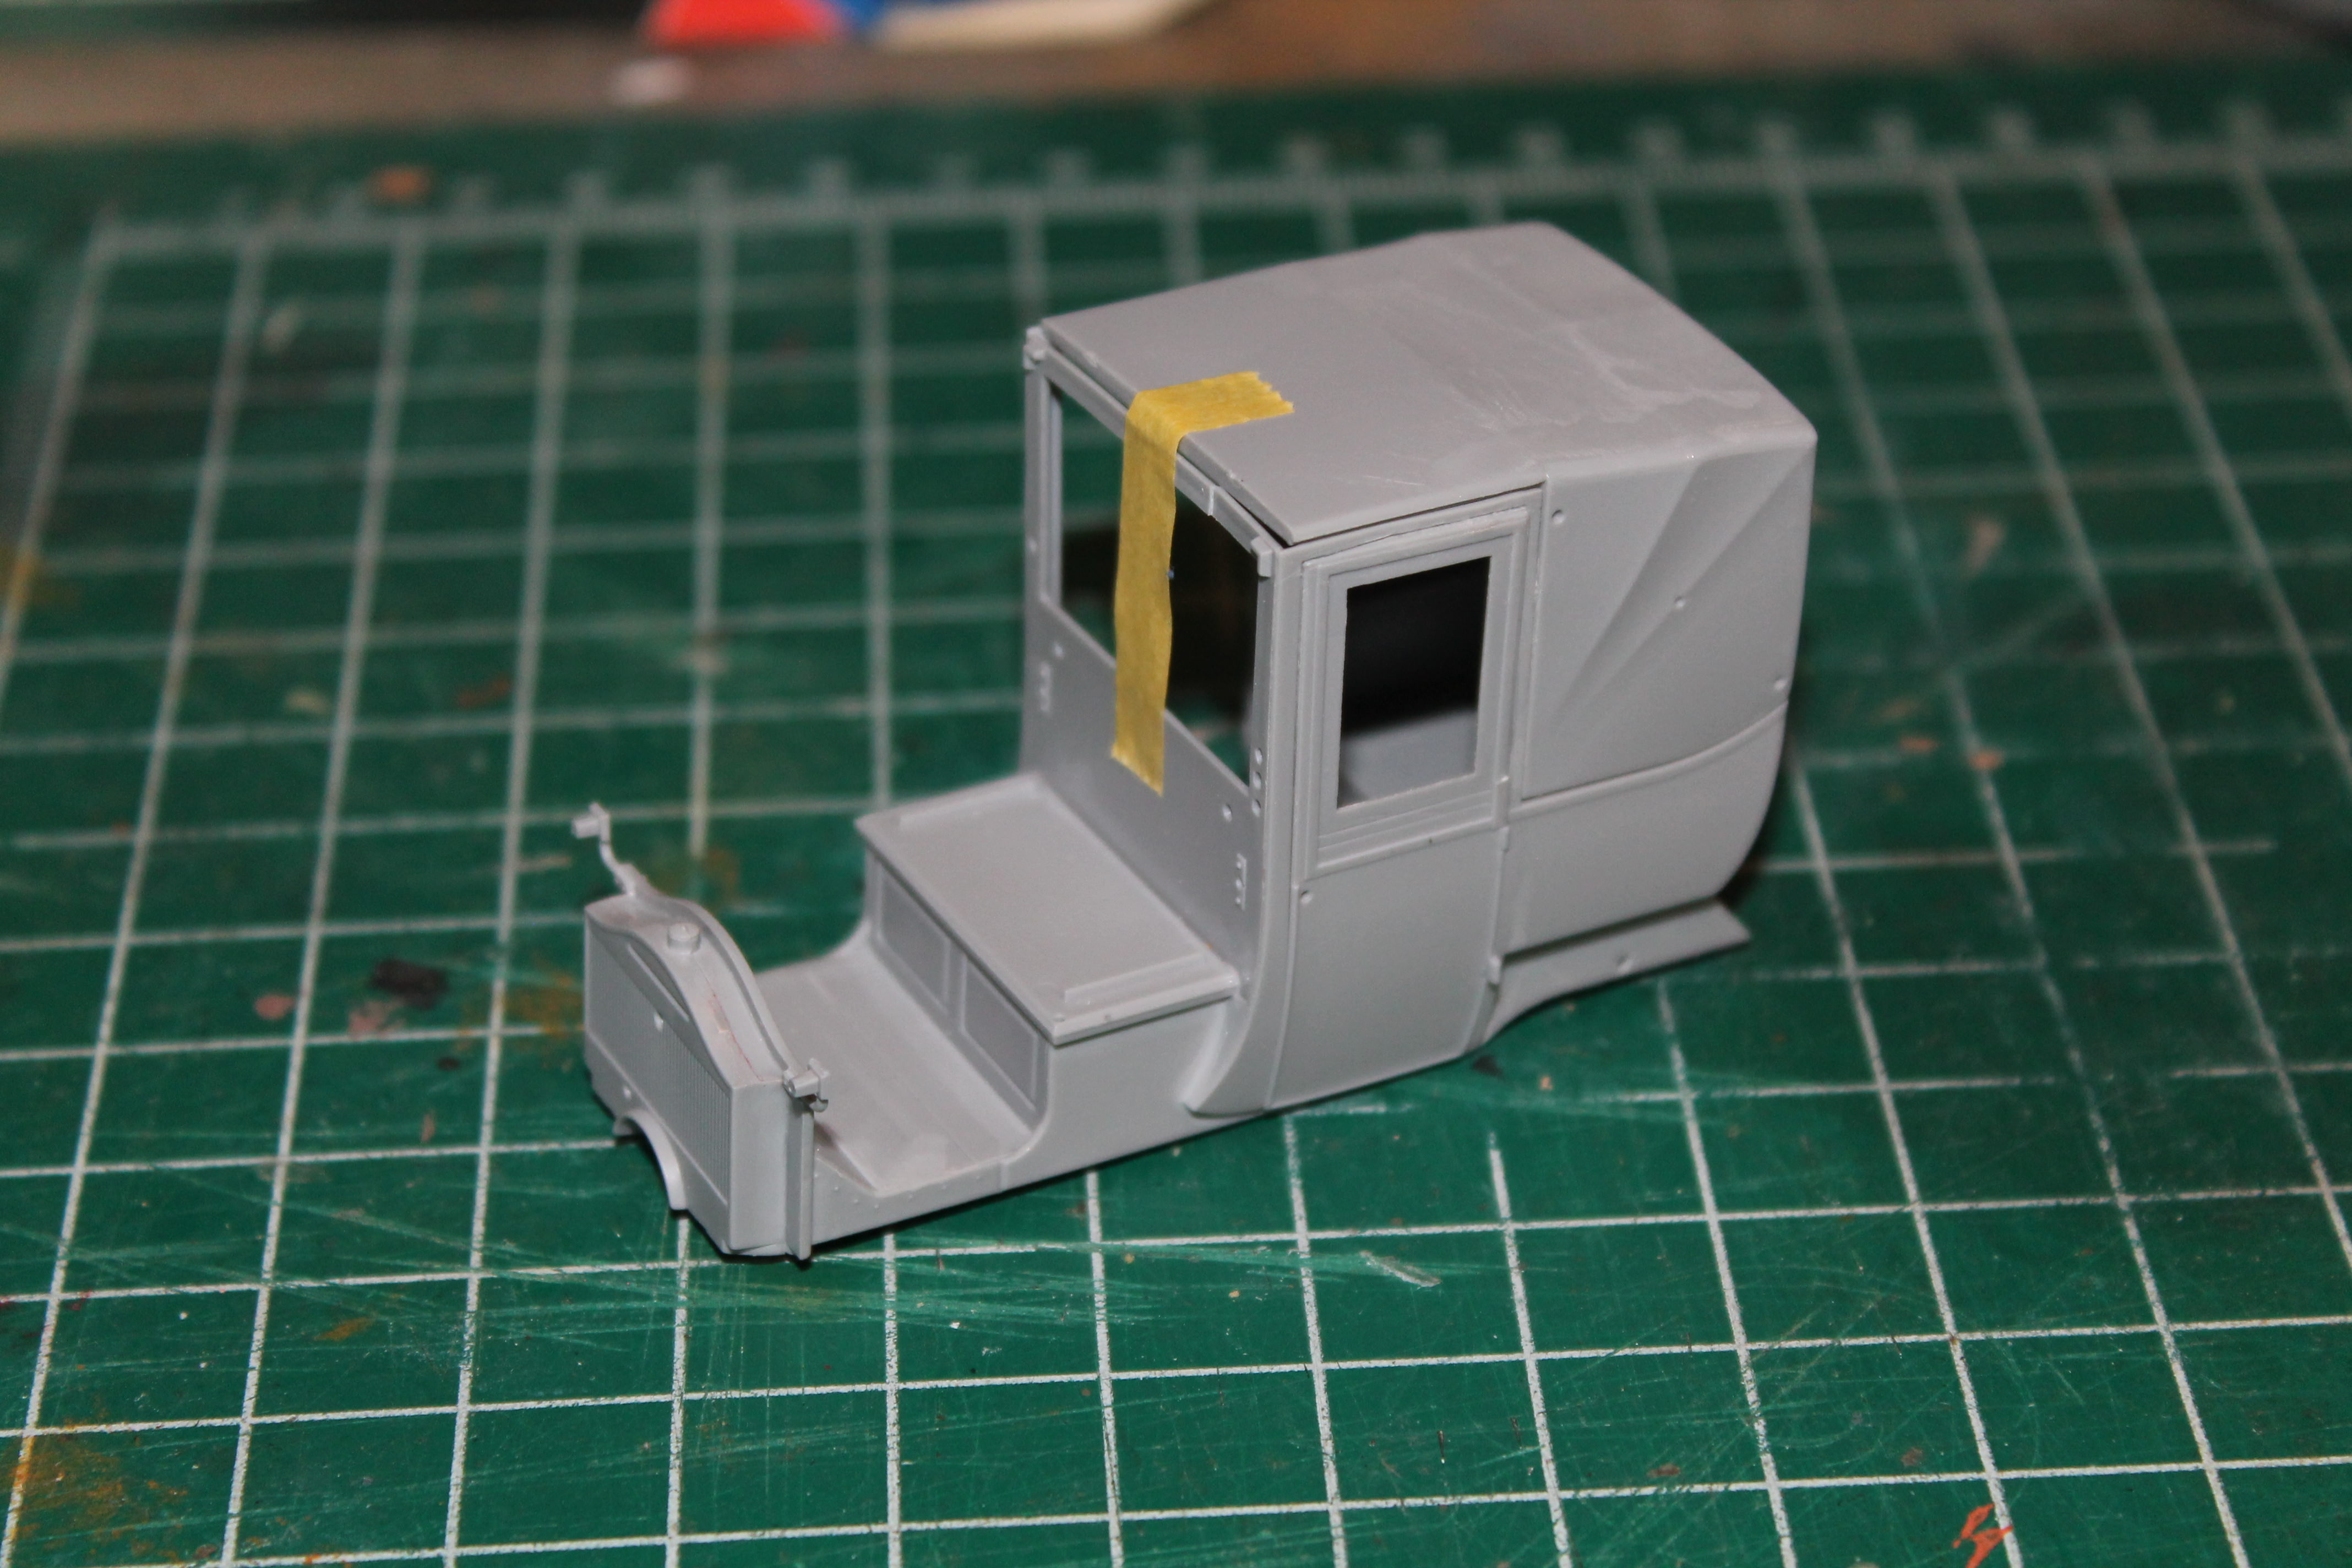
As you can see the fit is excellent, as it has been with all parts so far. It might have been nice if ICM had included the option for building the model with a folded roof as well. Although, I don't know how often, if ever, Paris taxis went about with the top down.

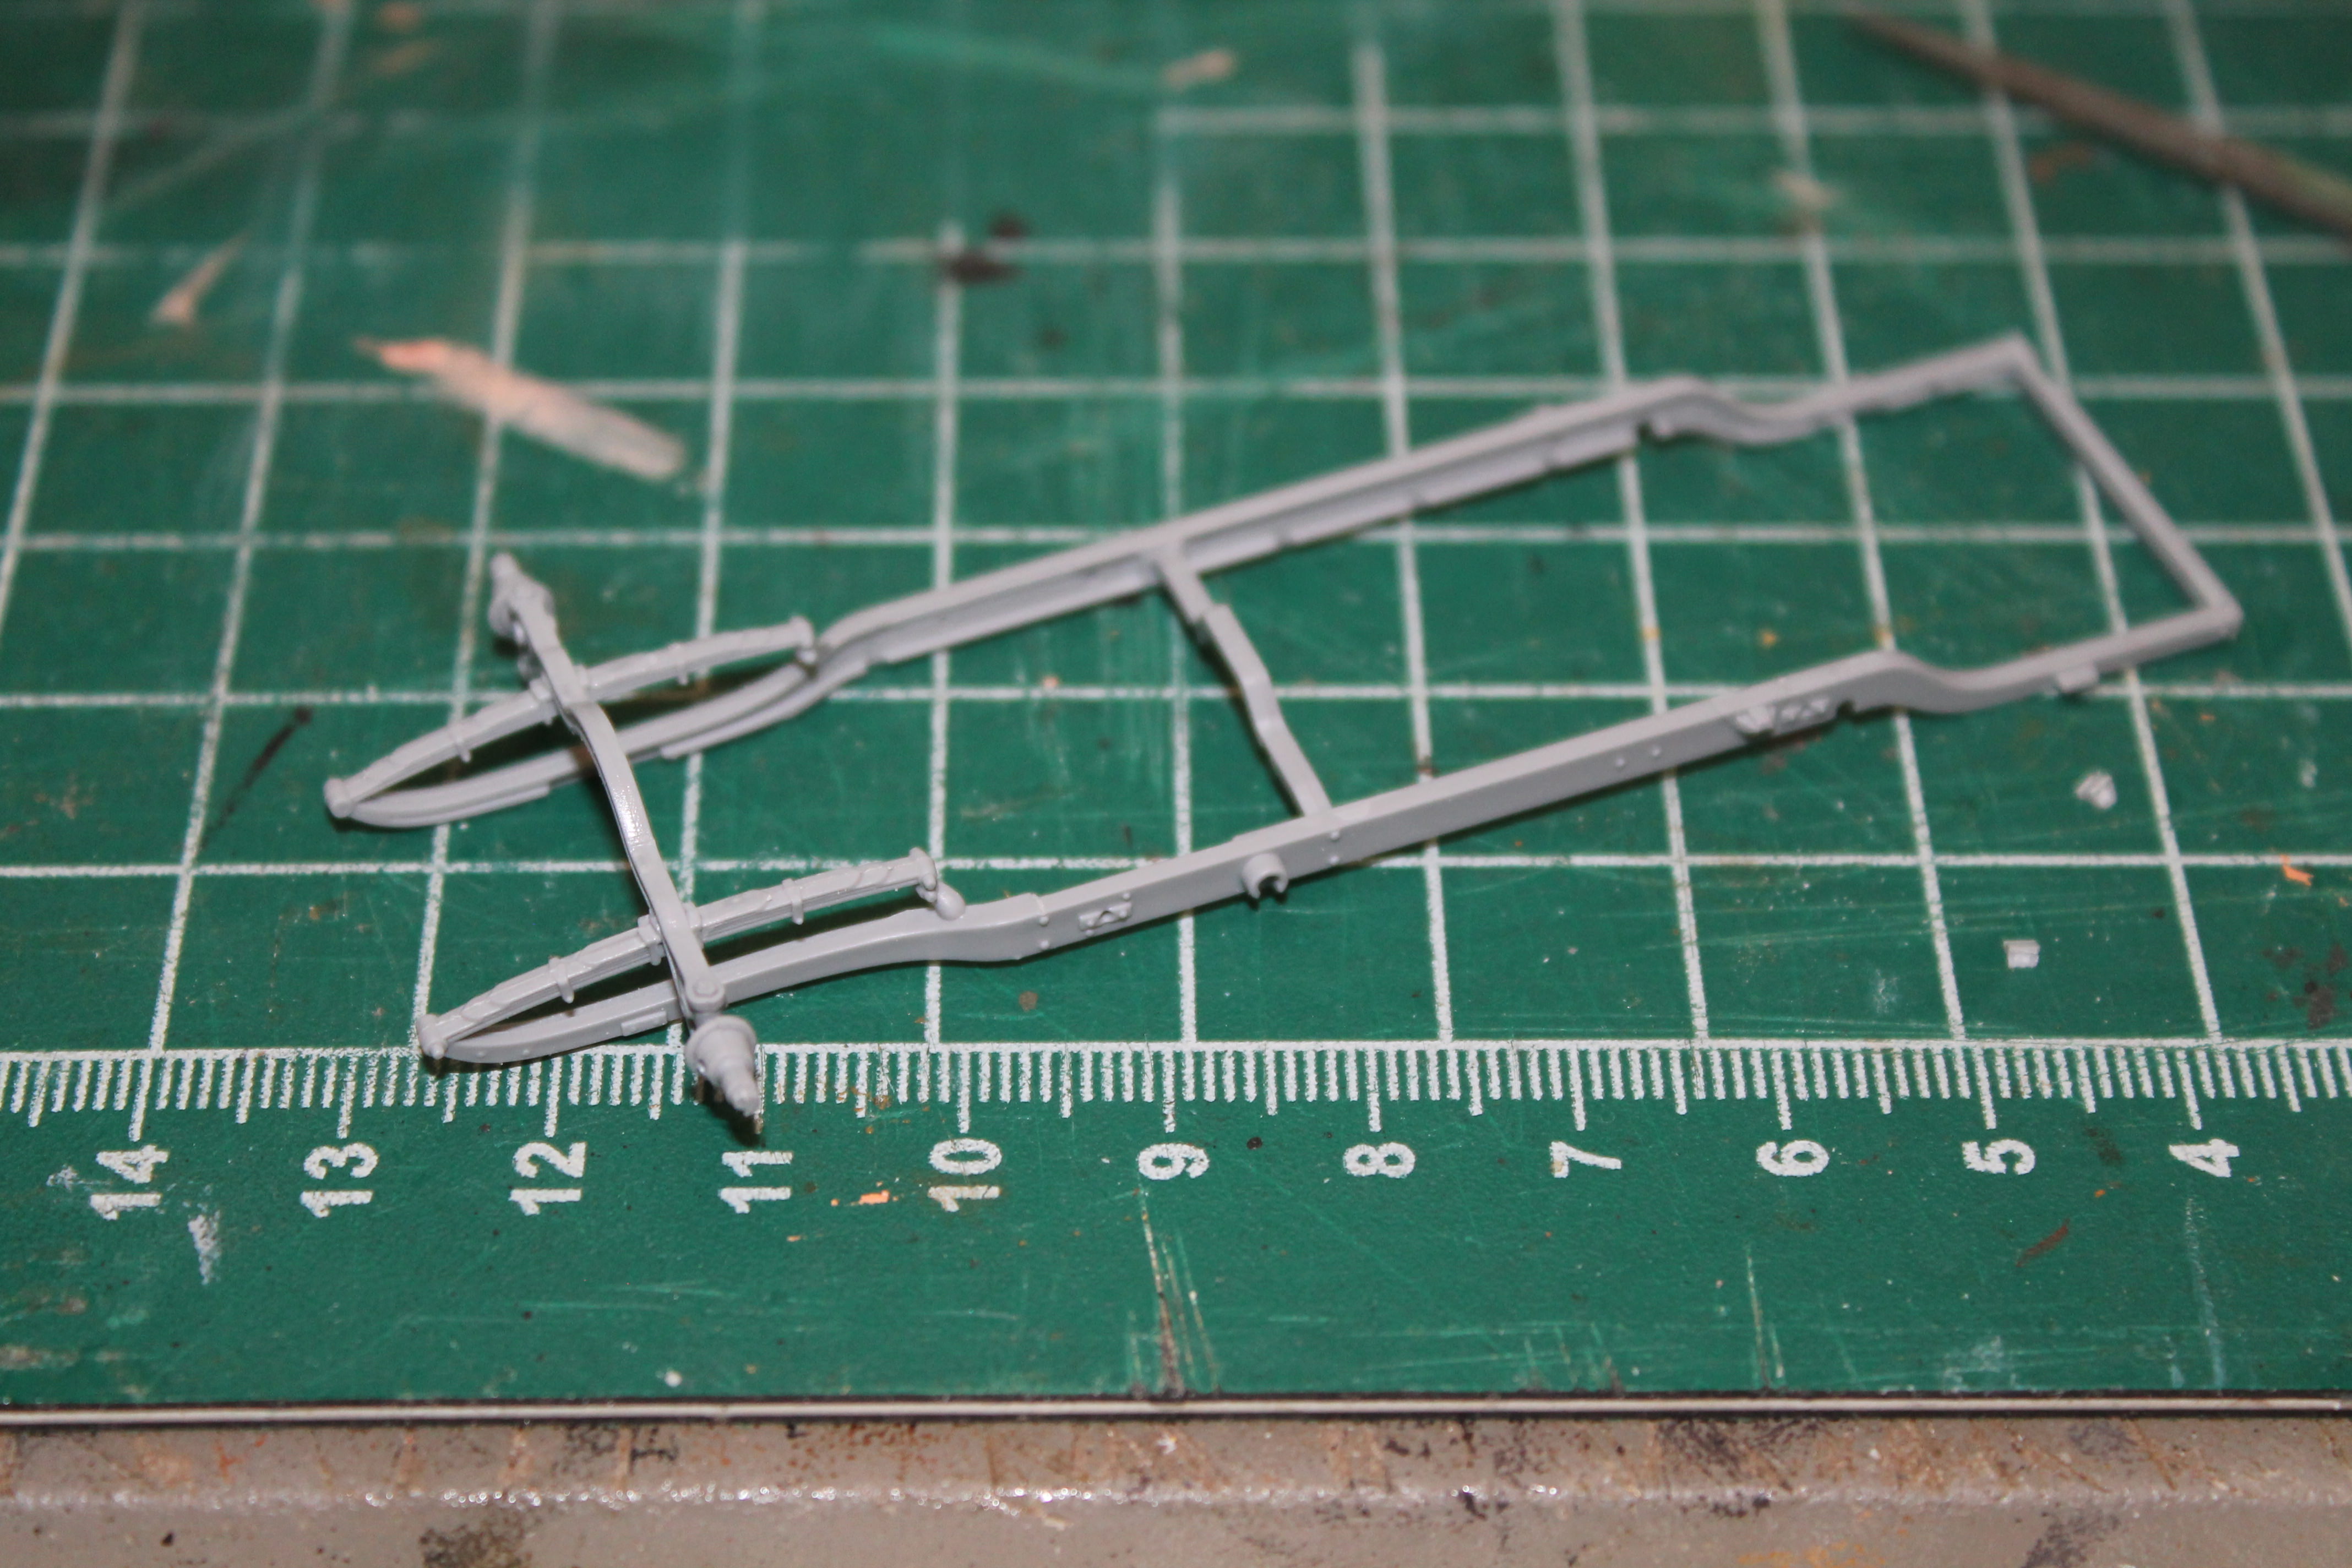
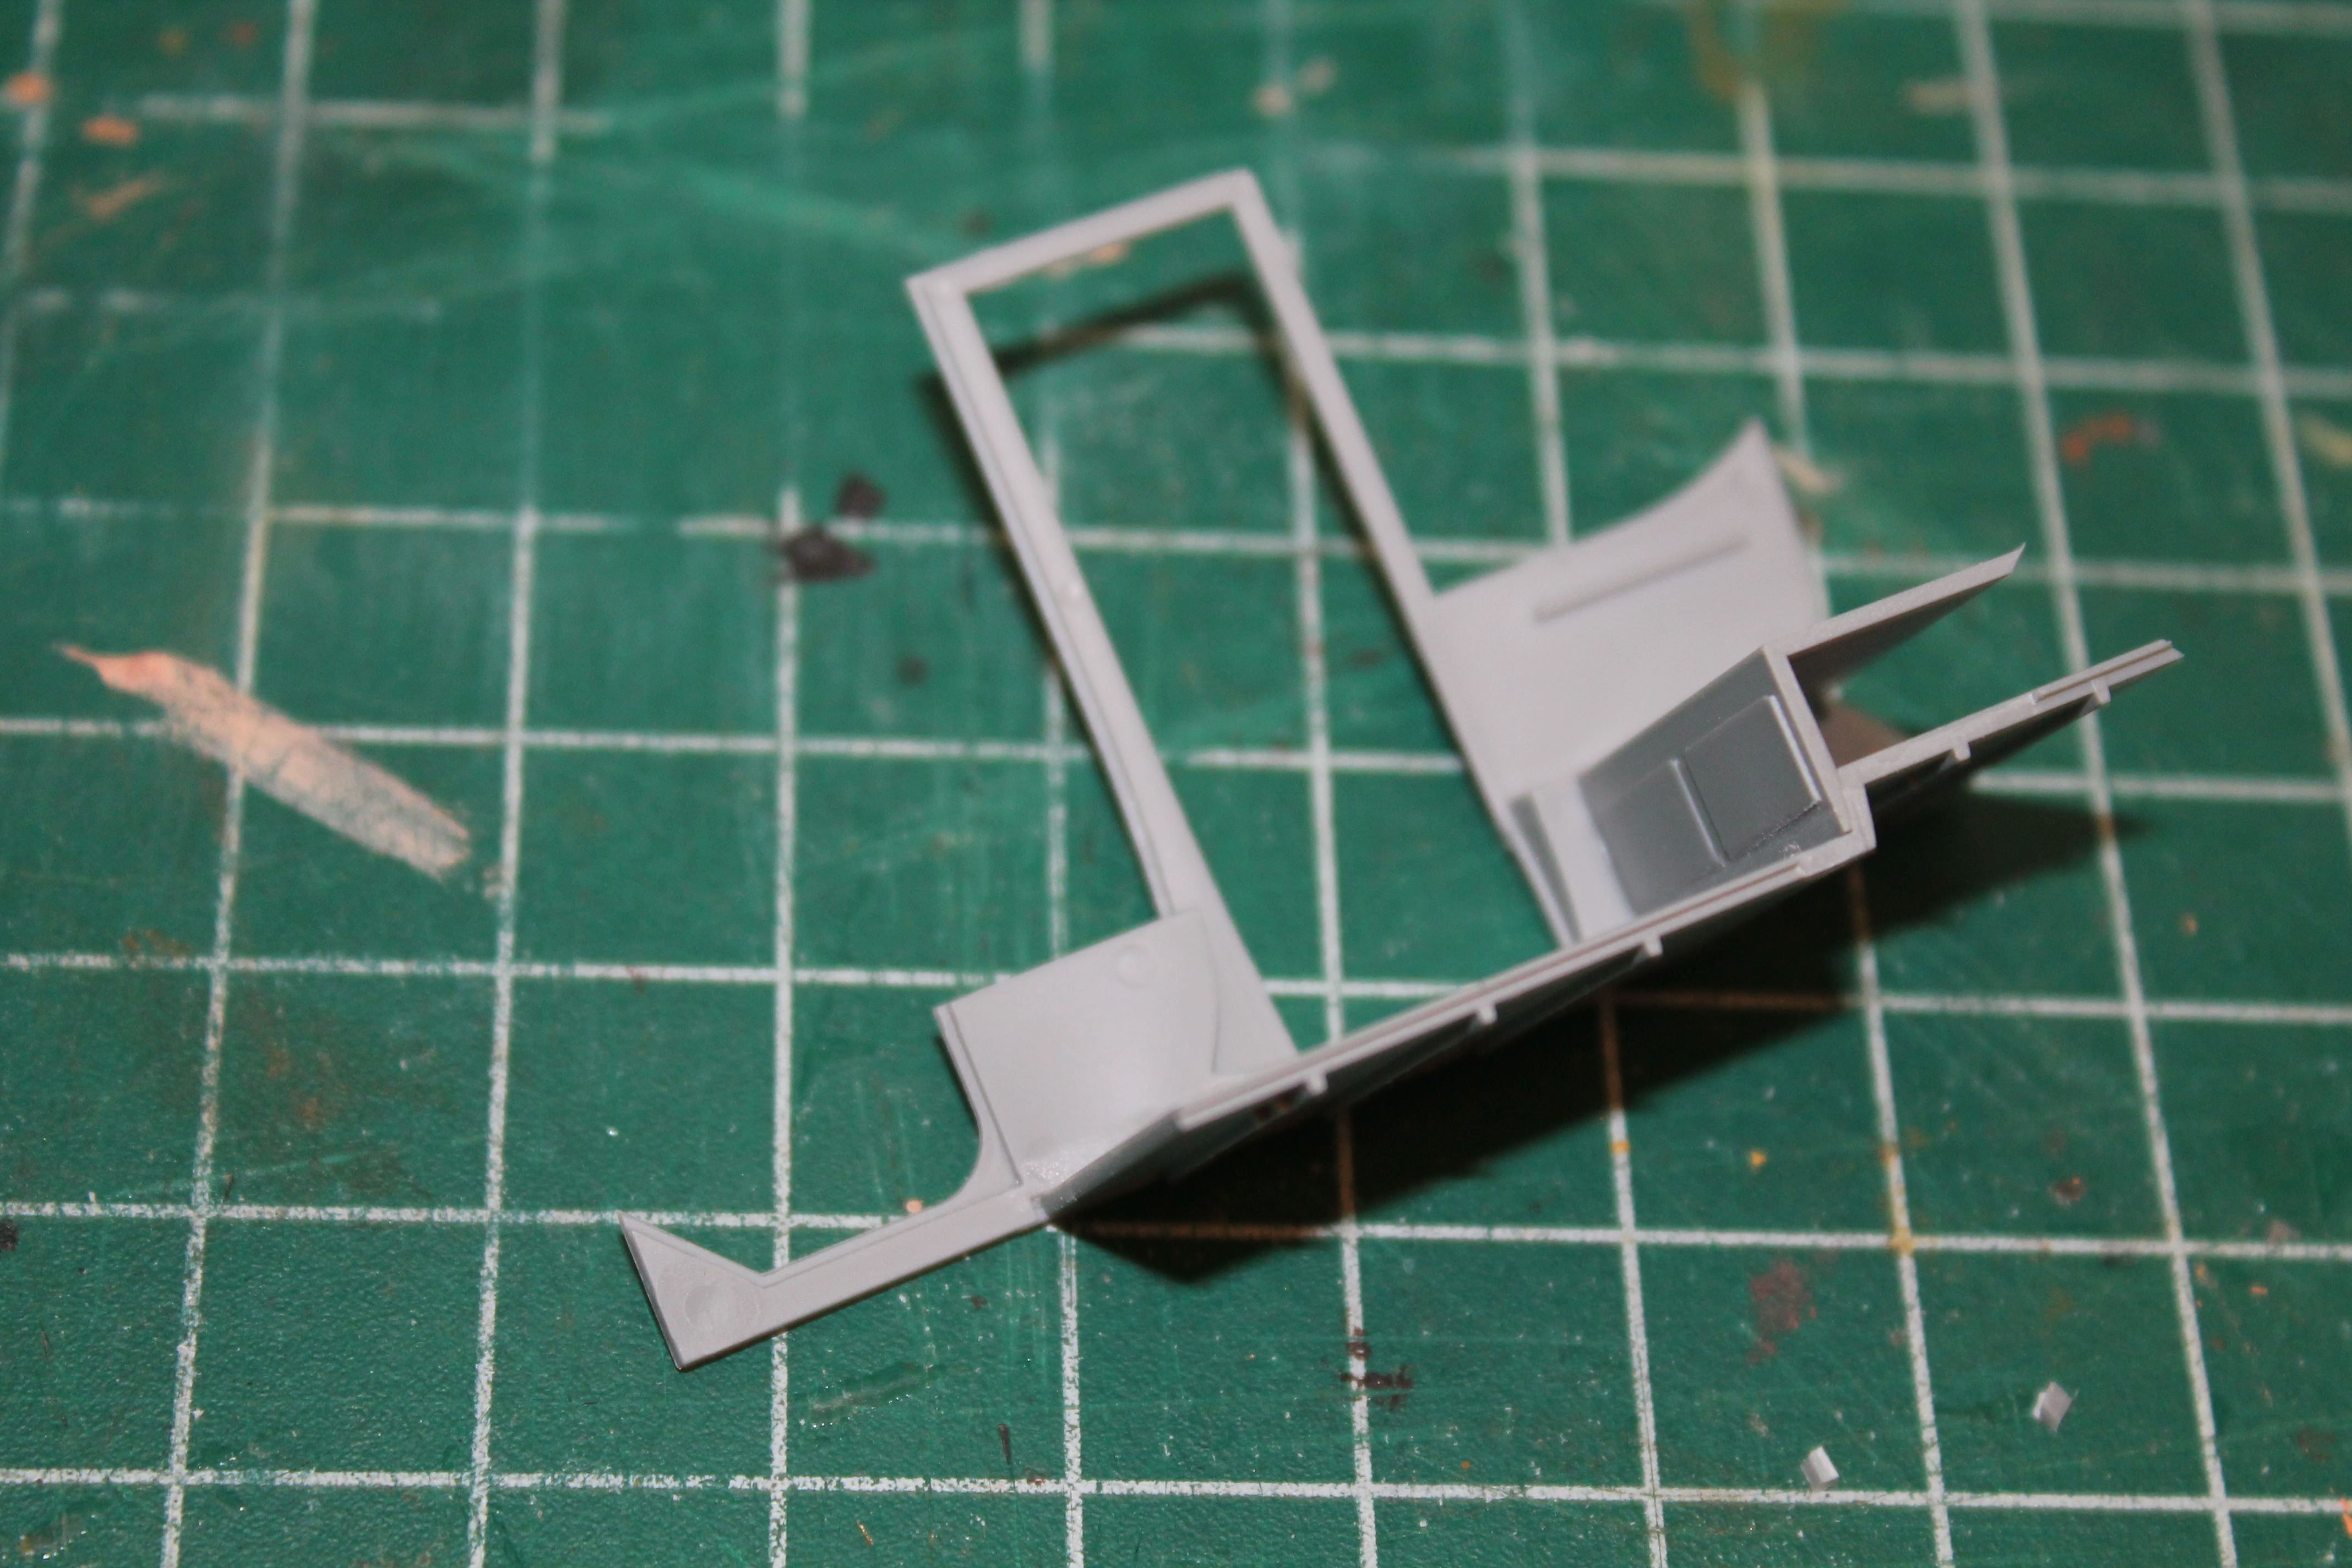
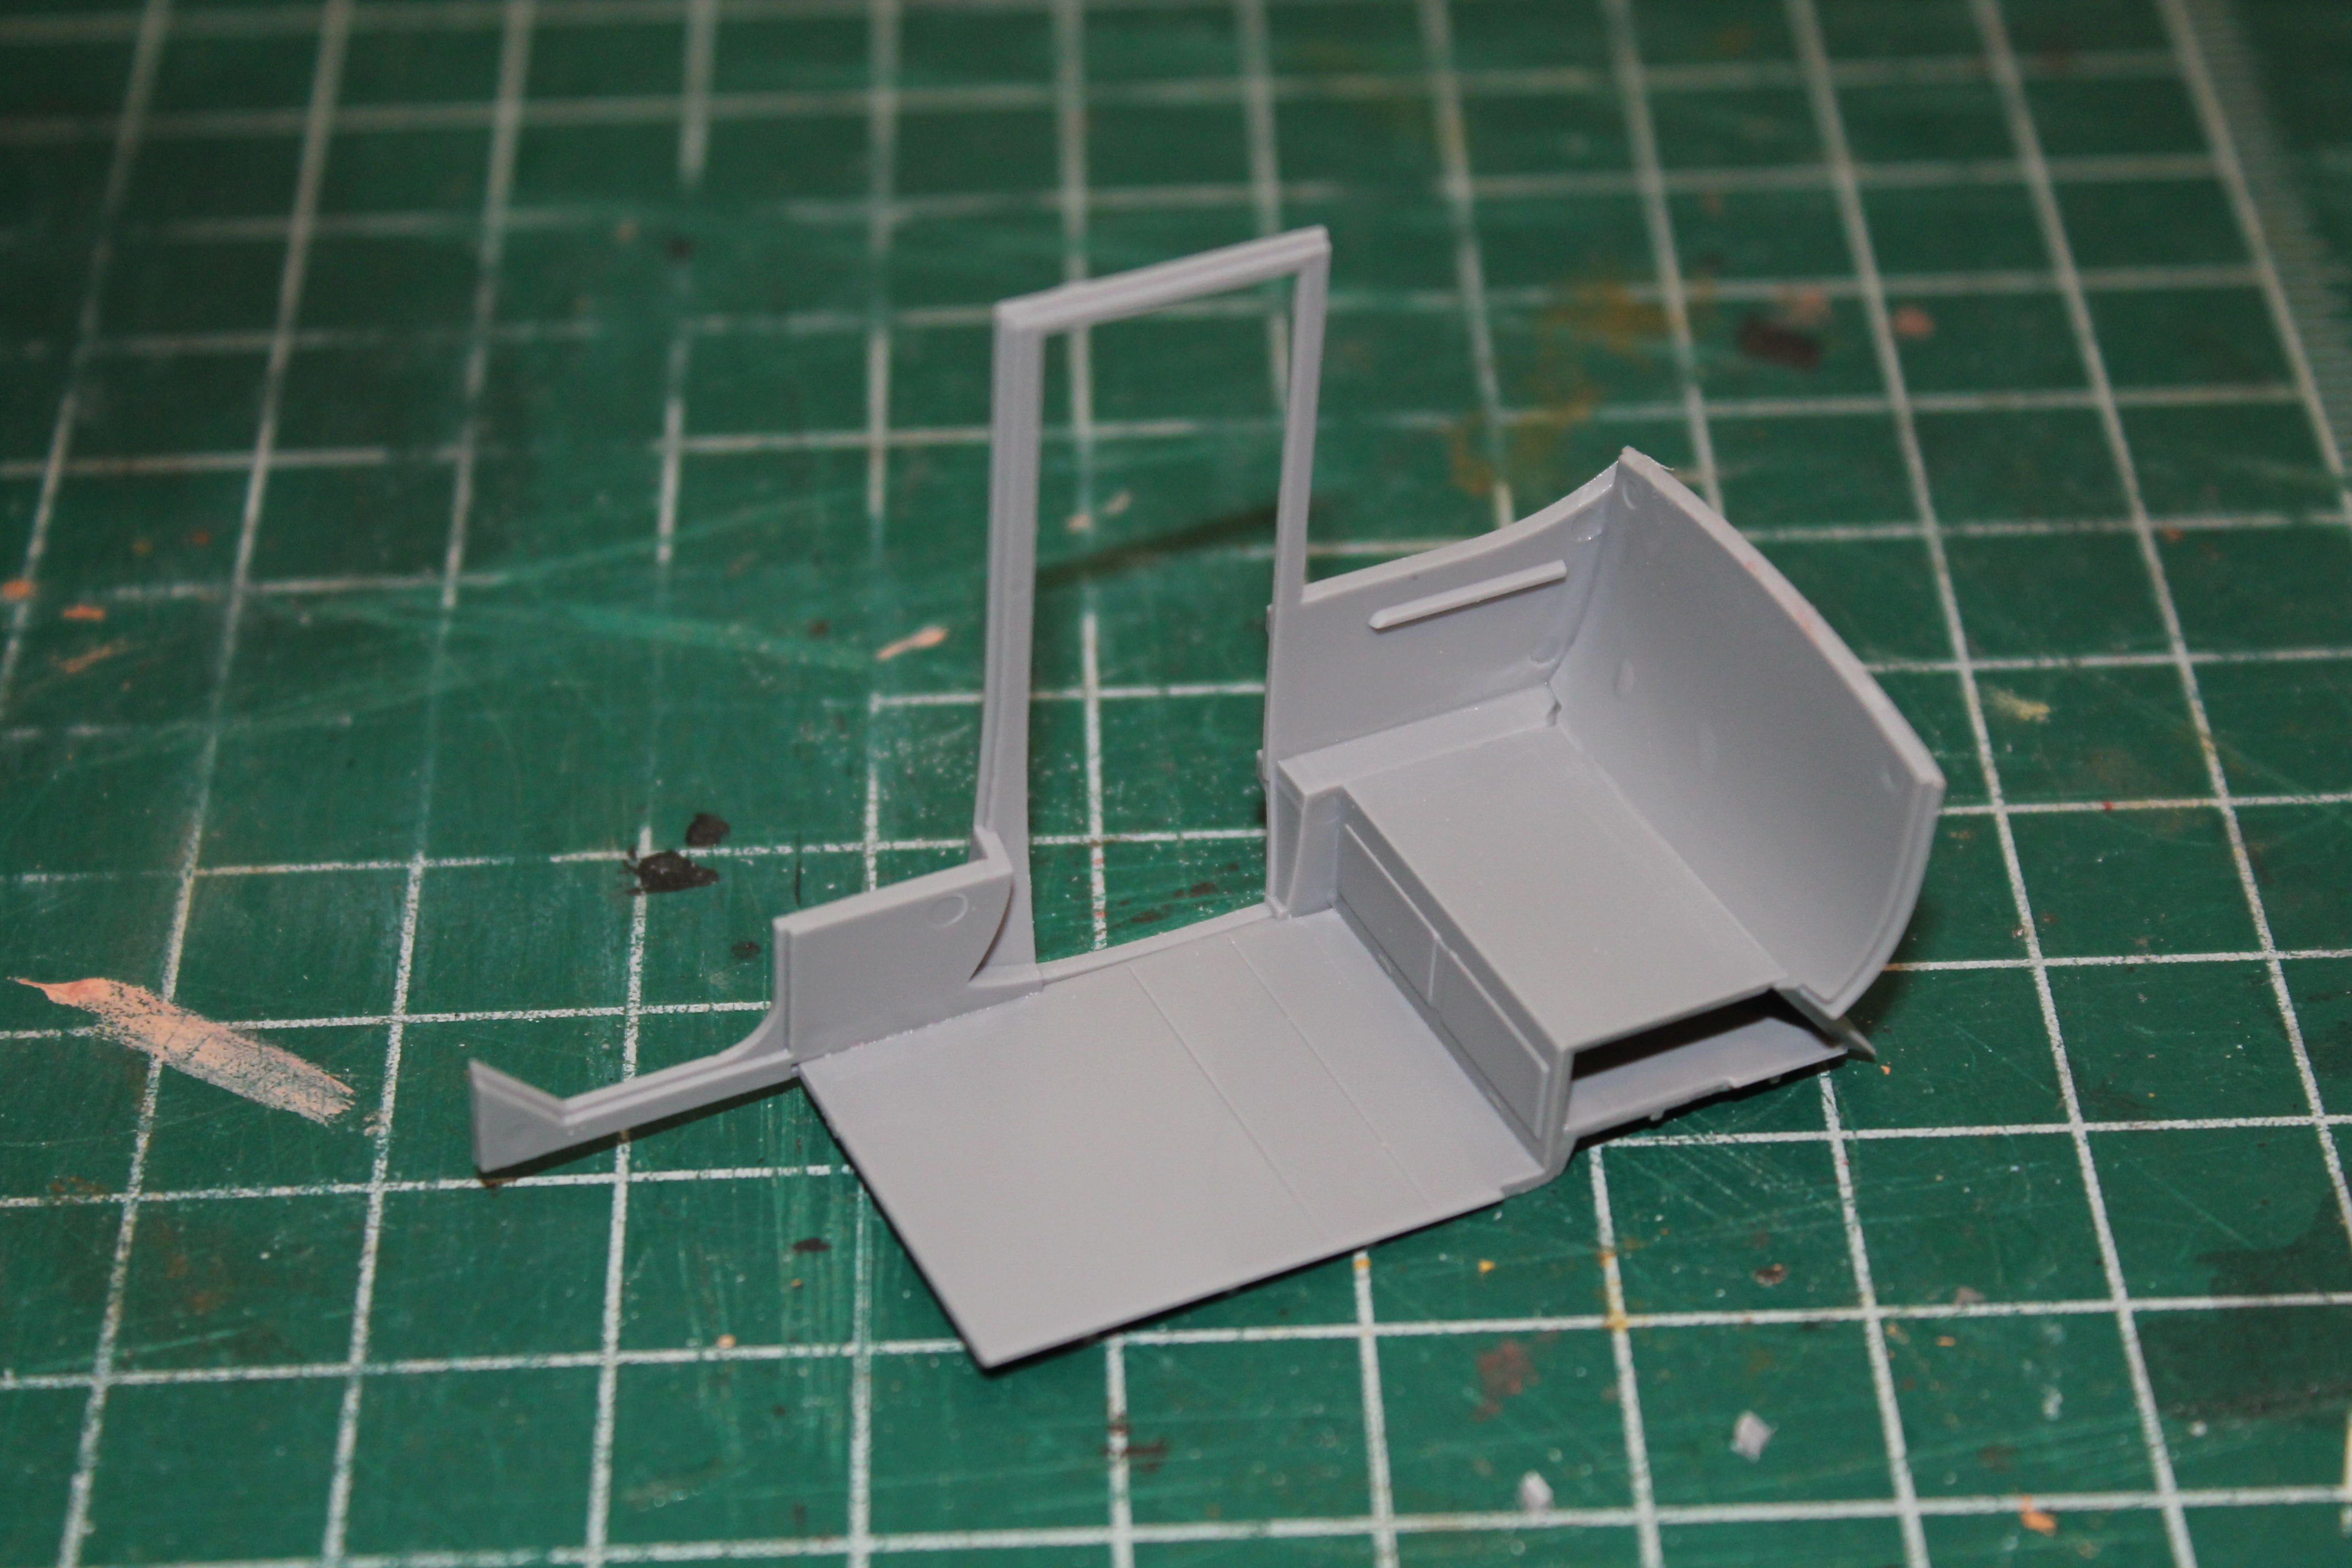
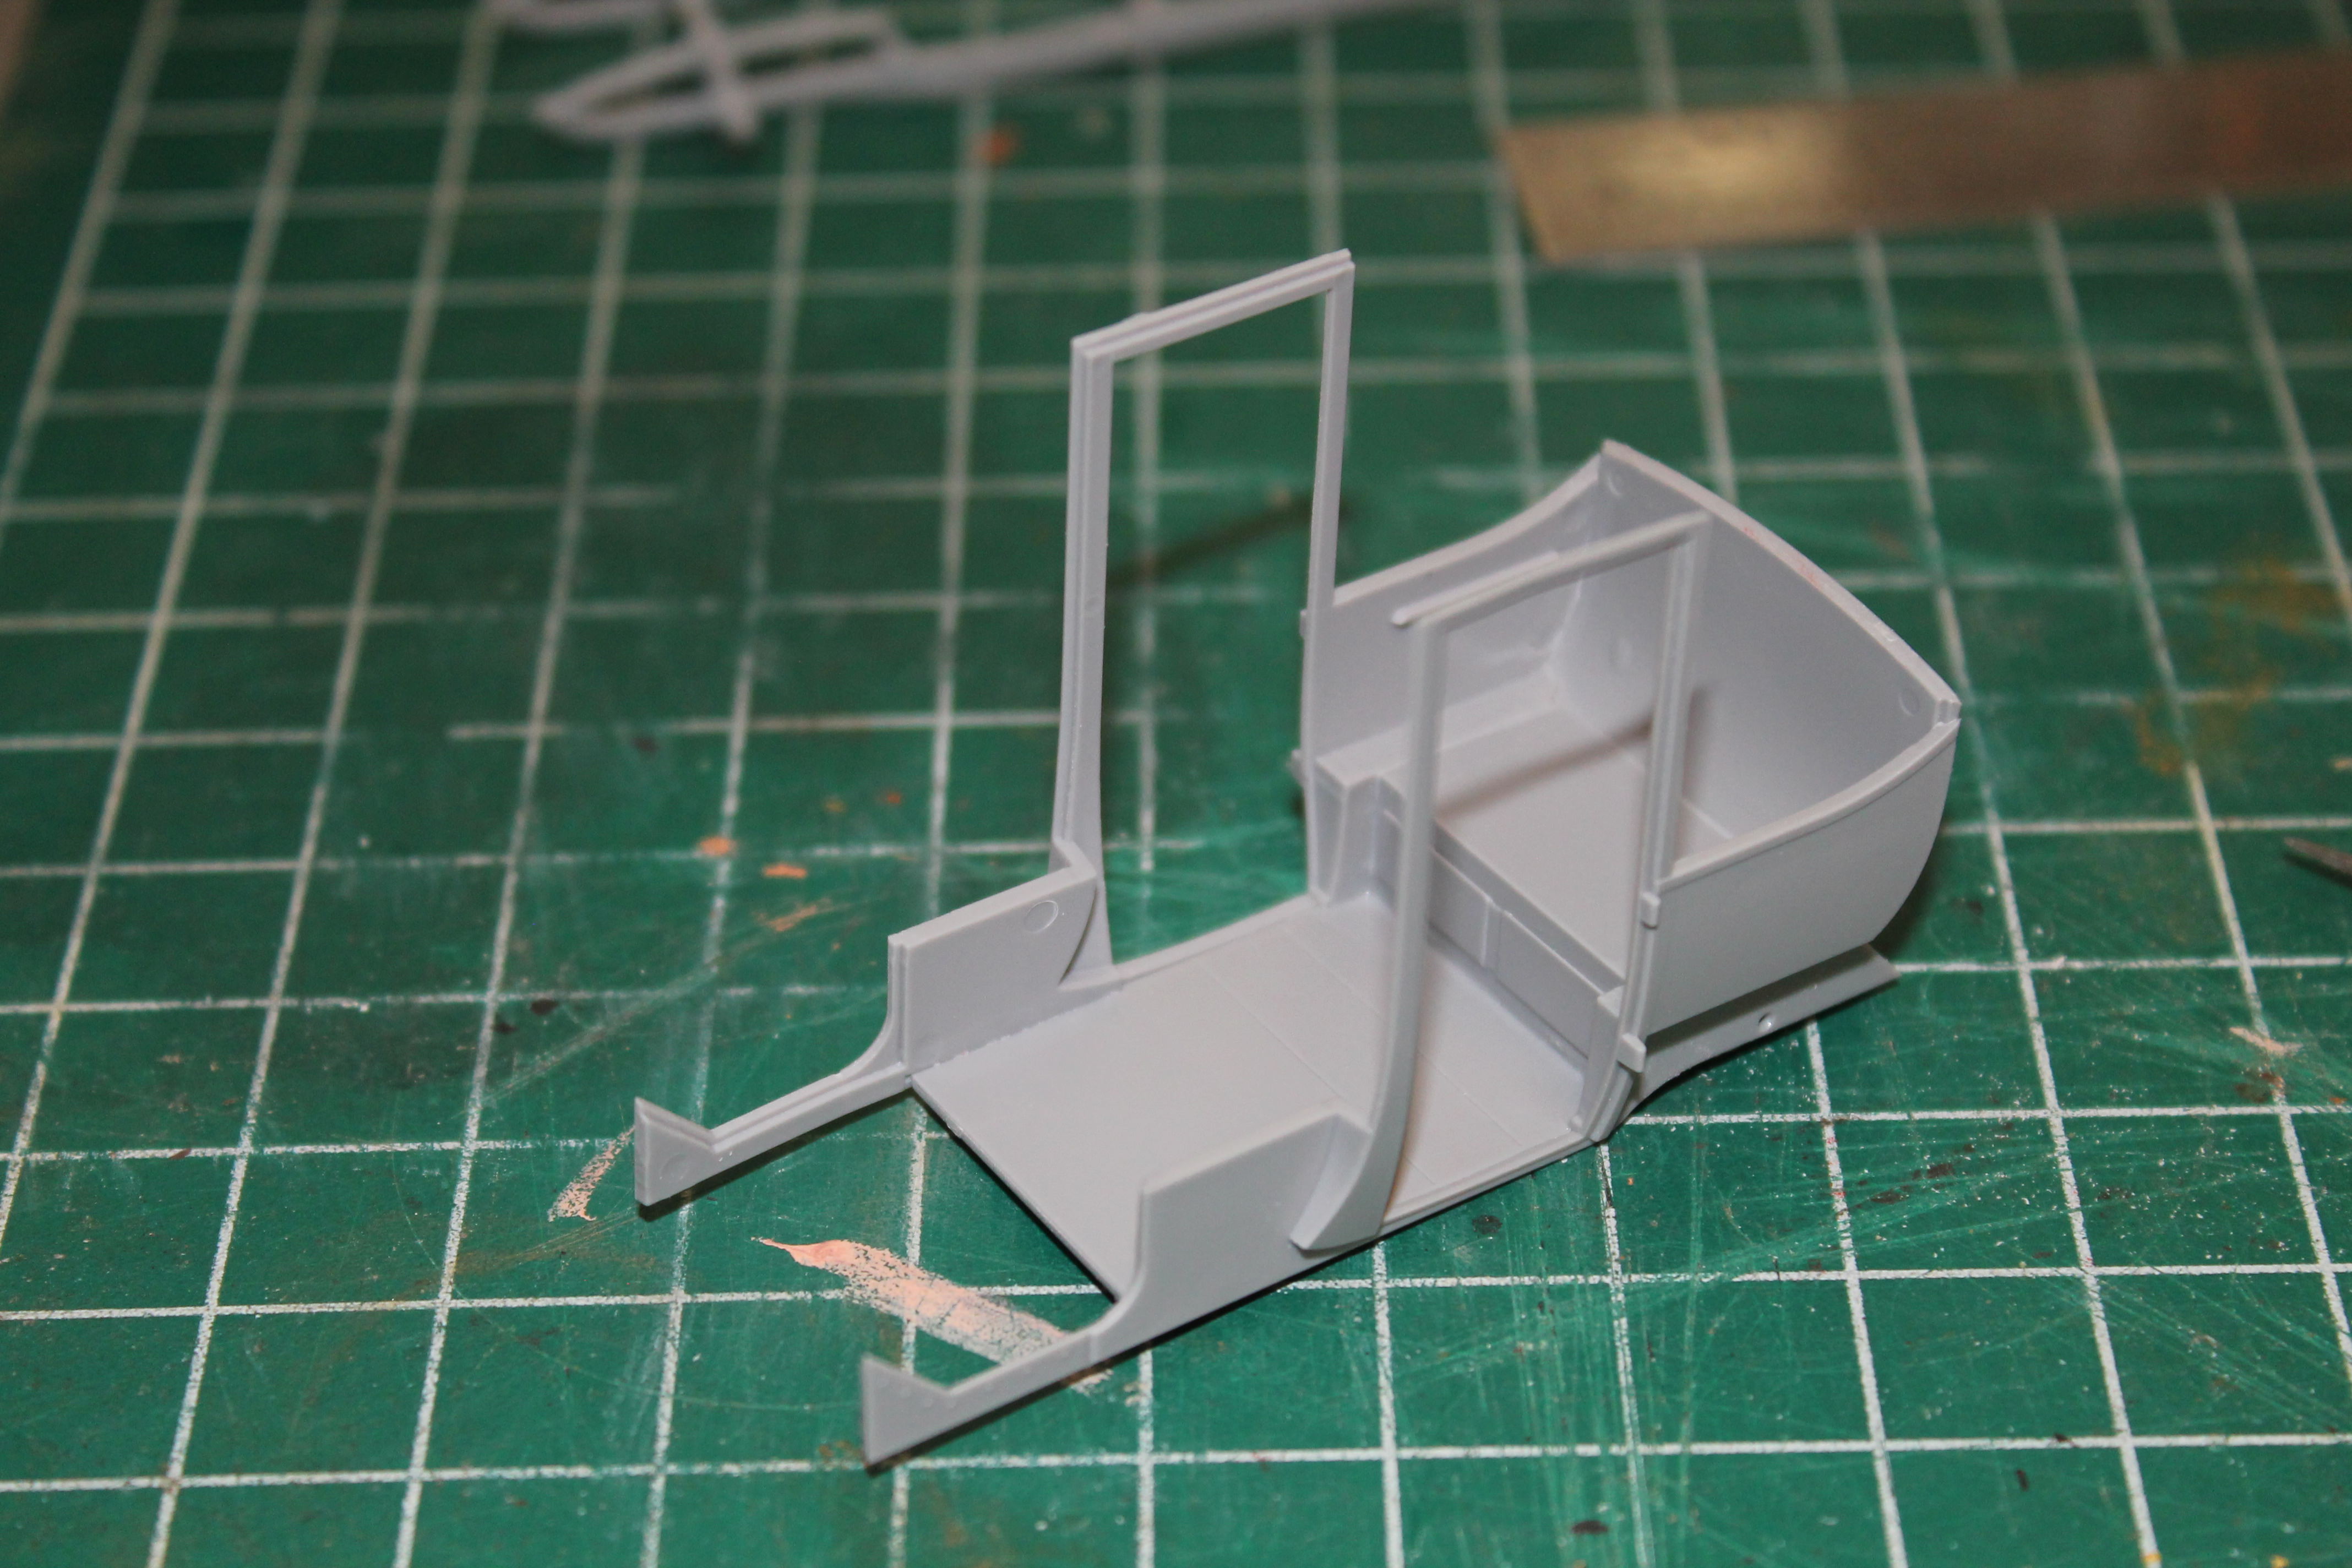
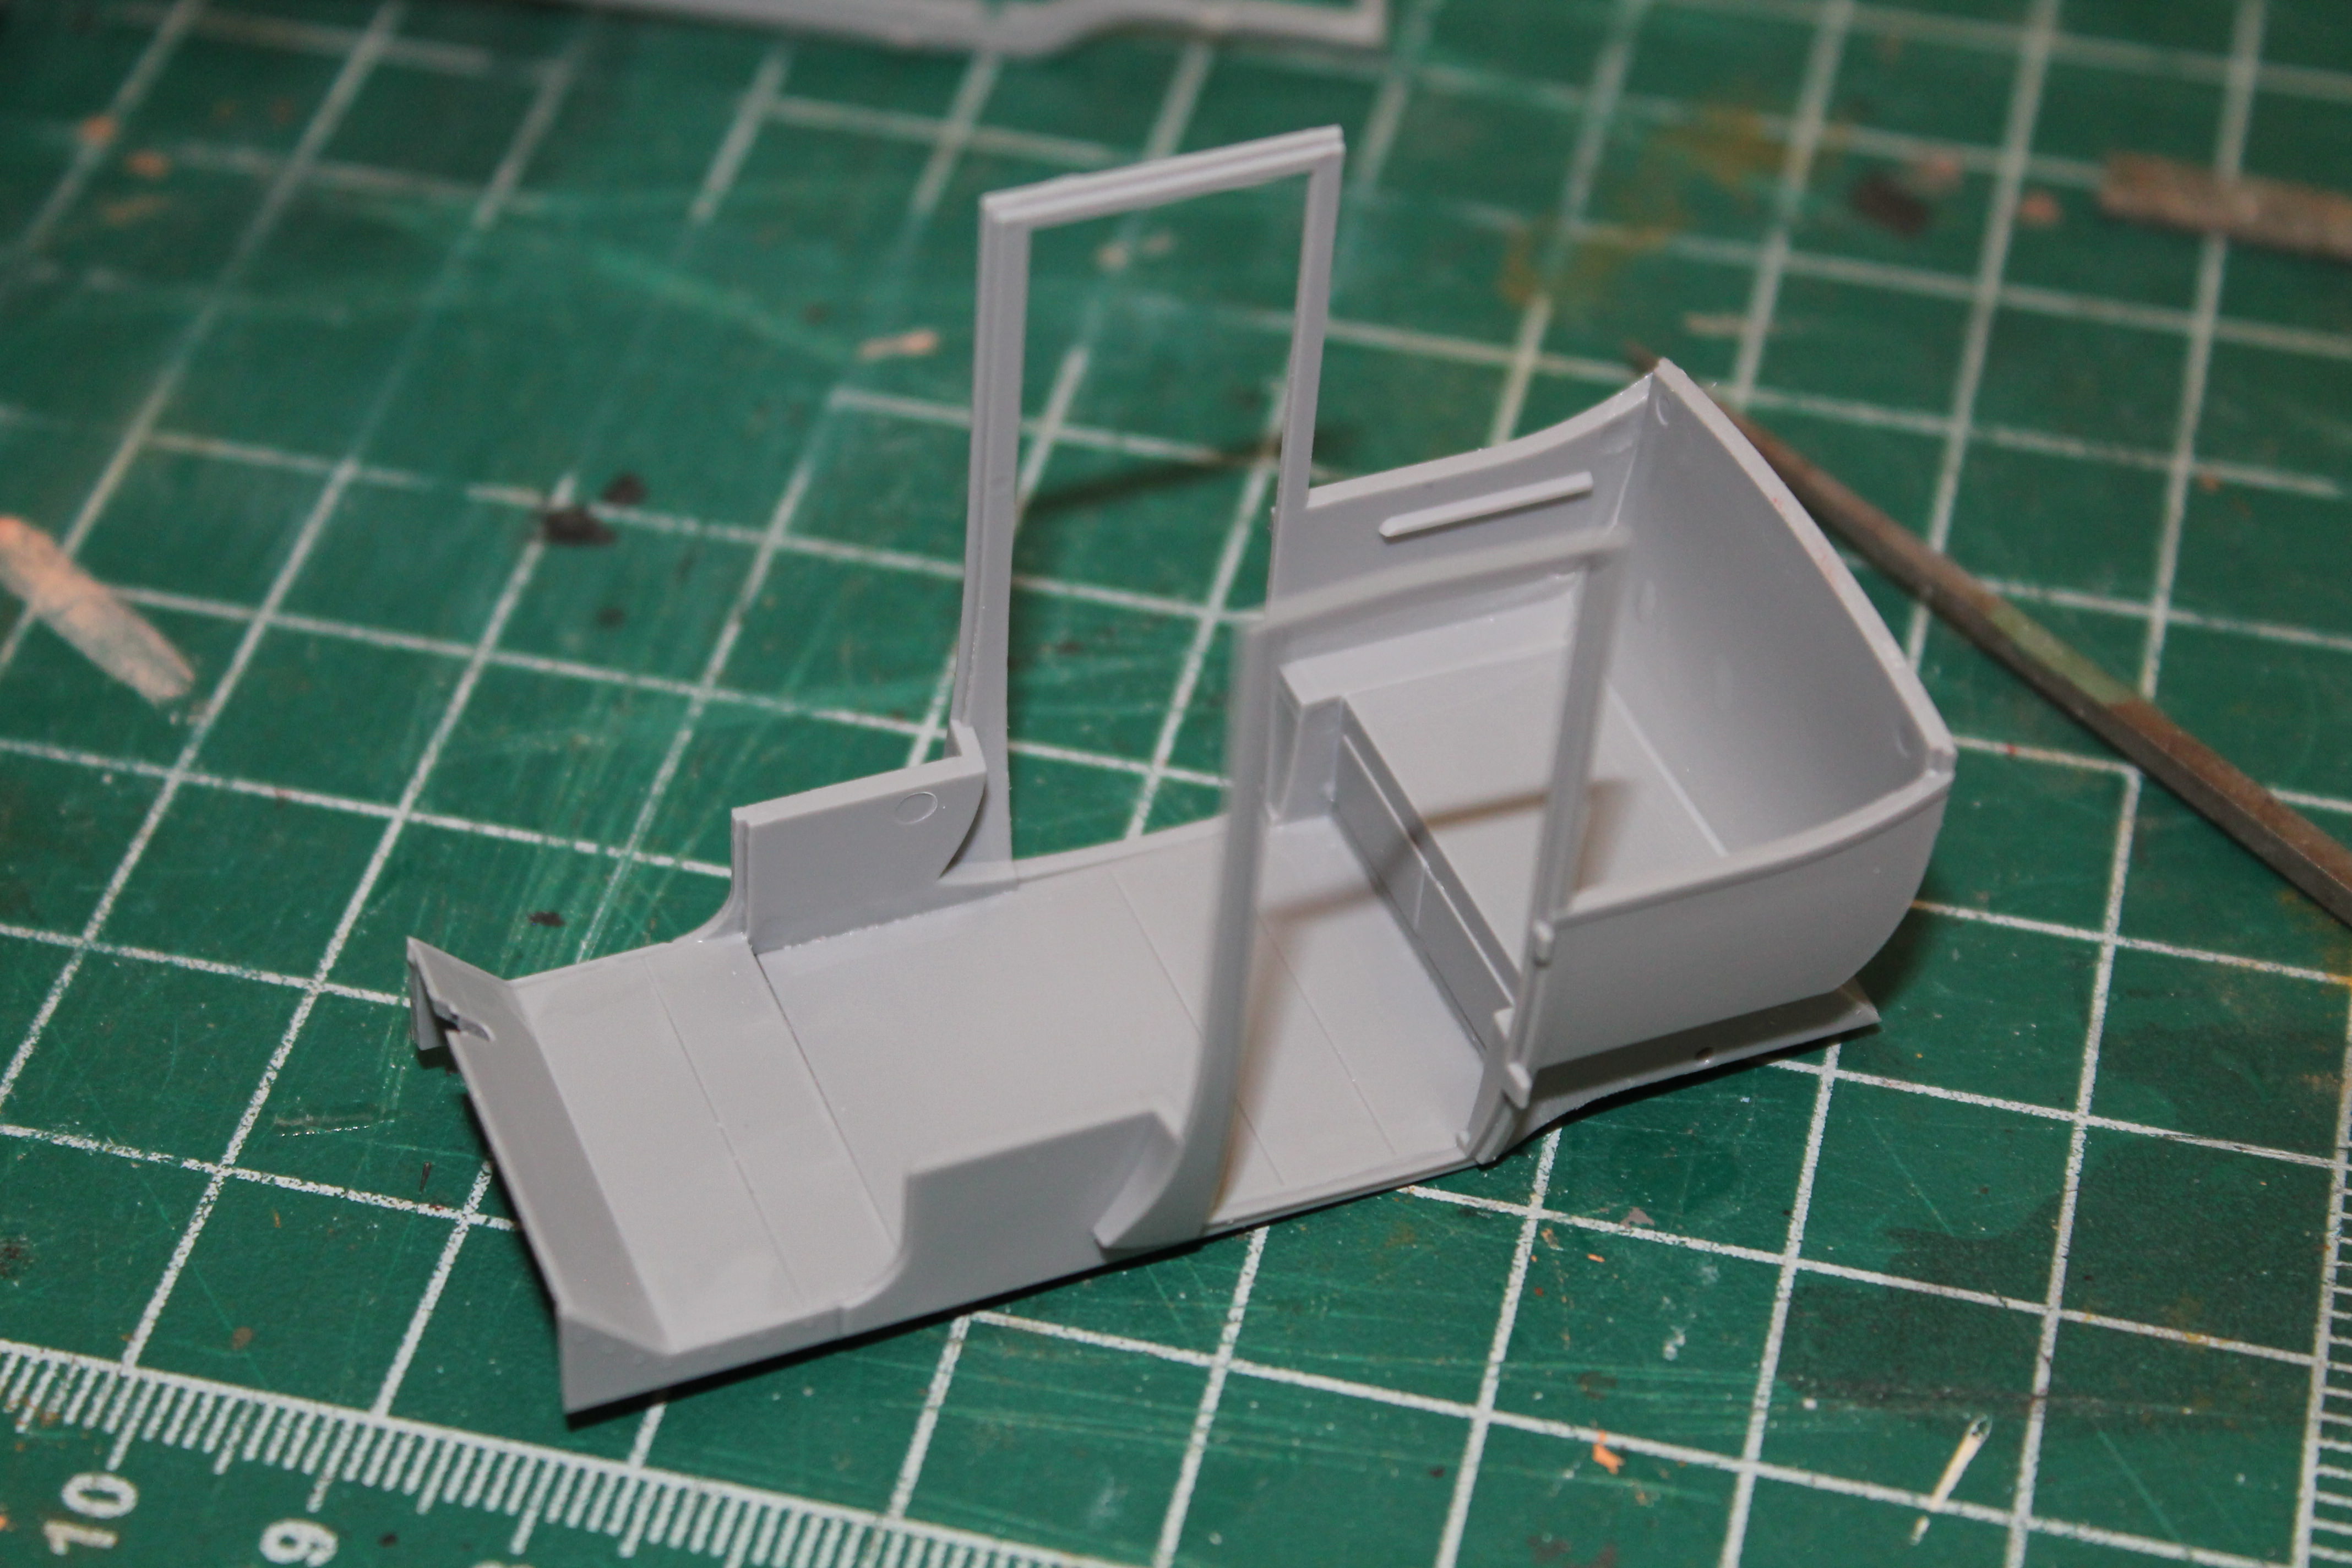
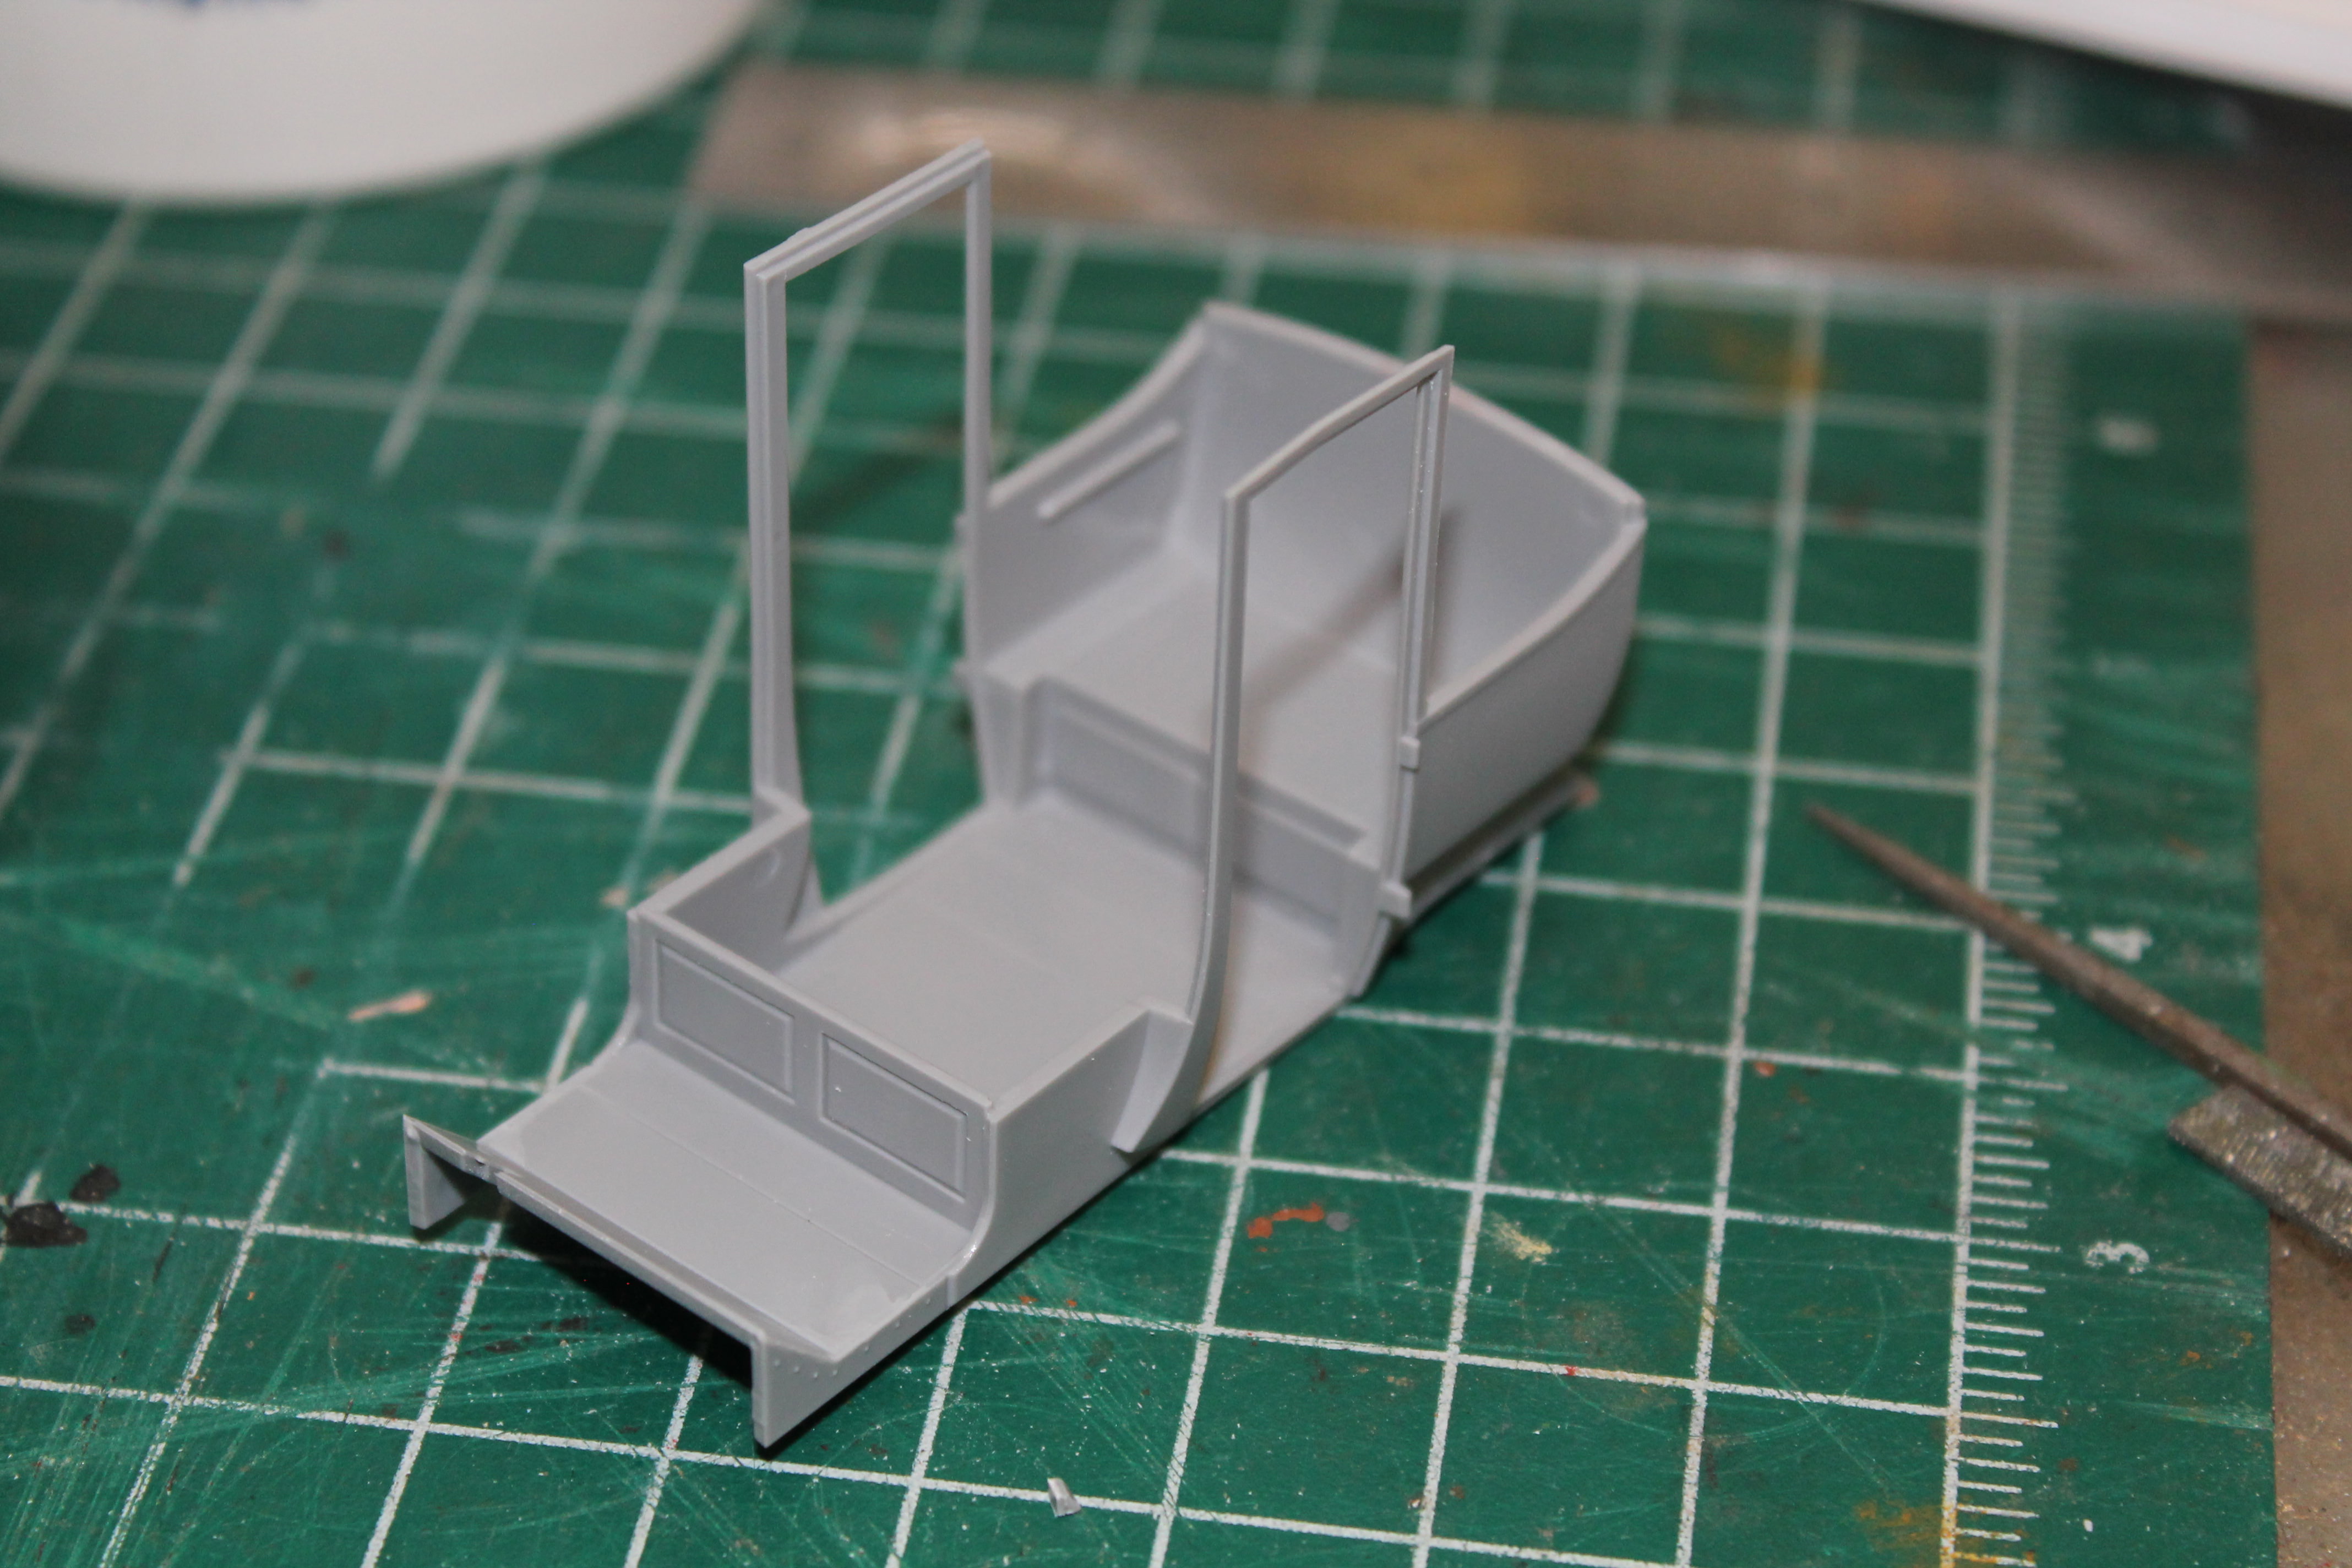
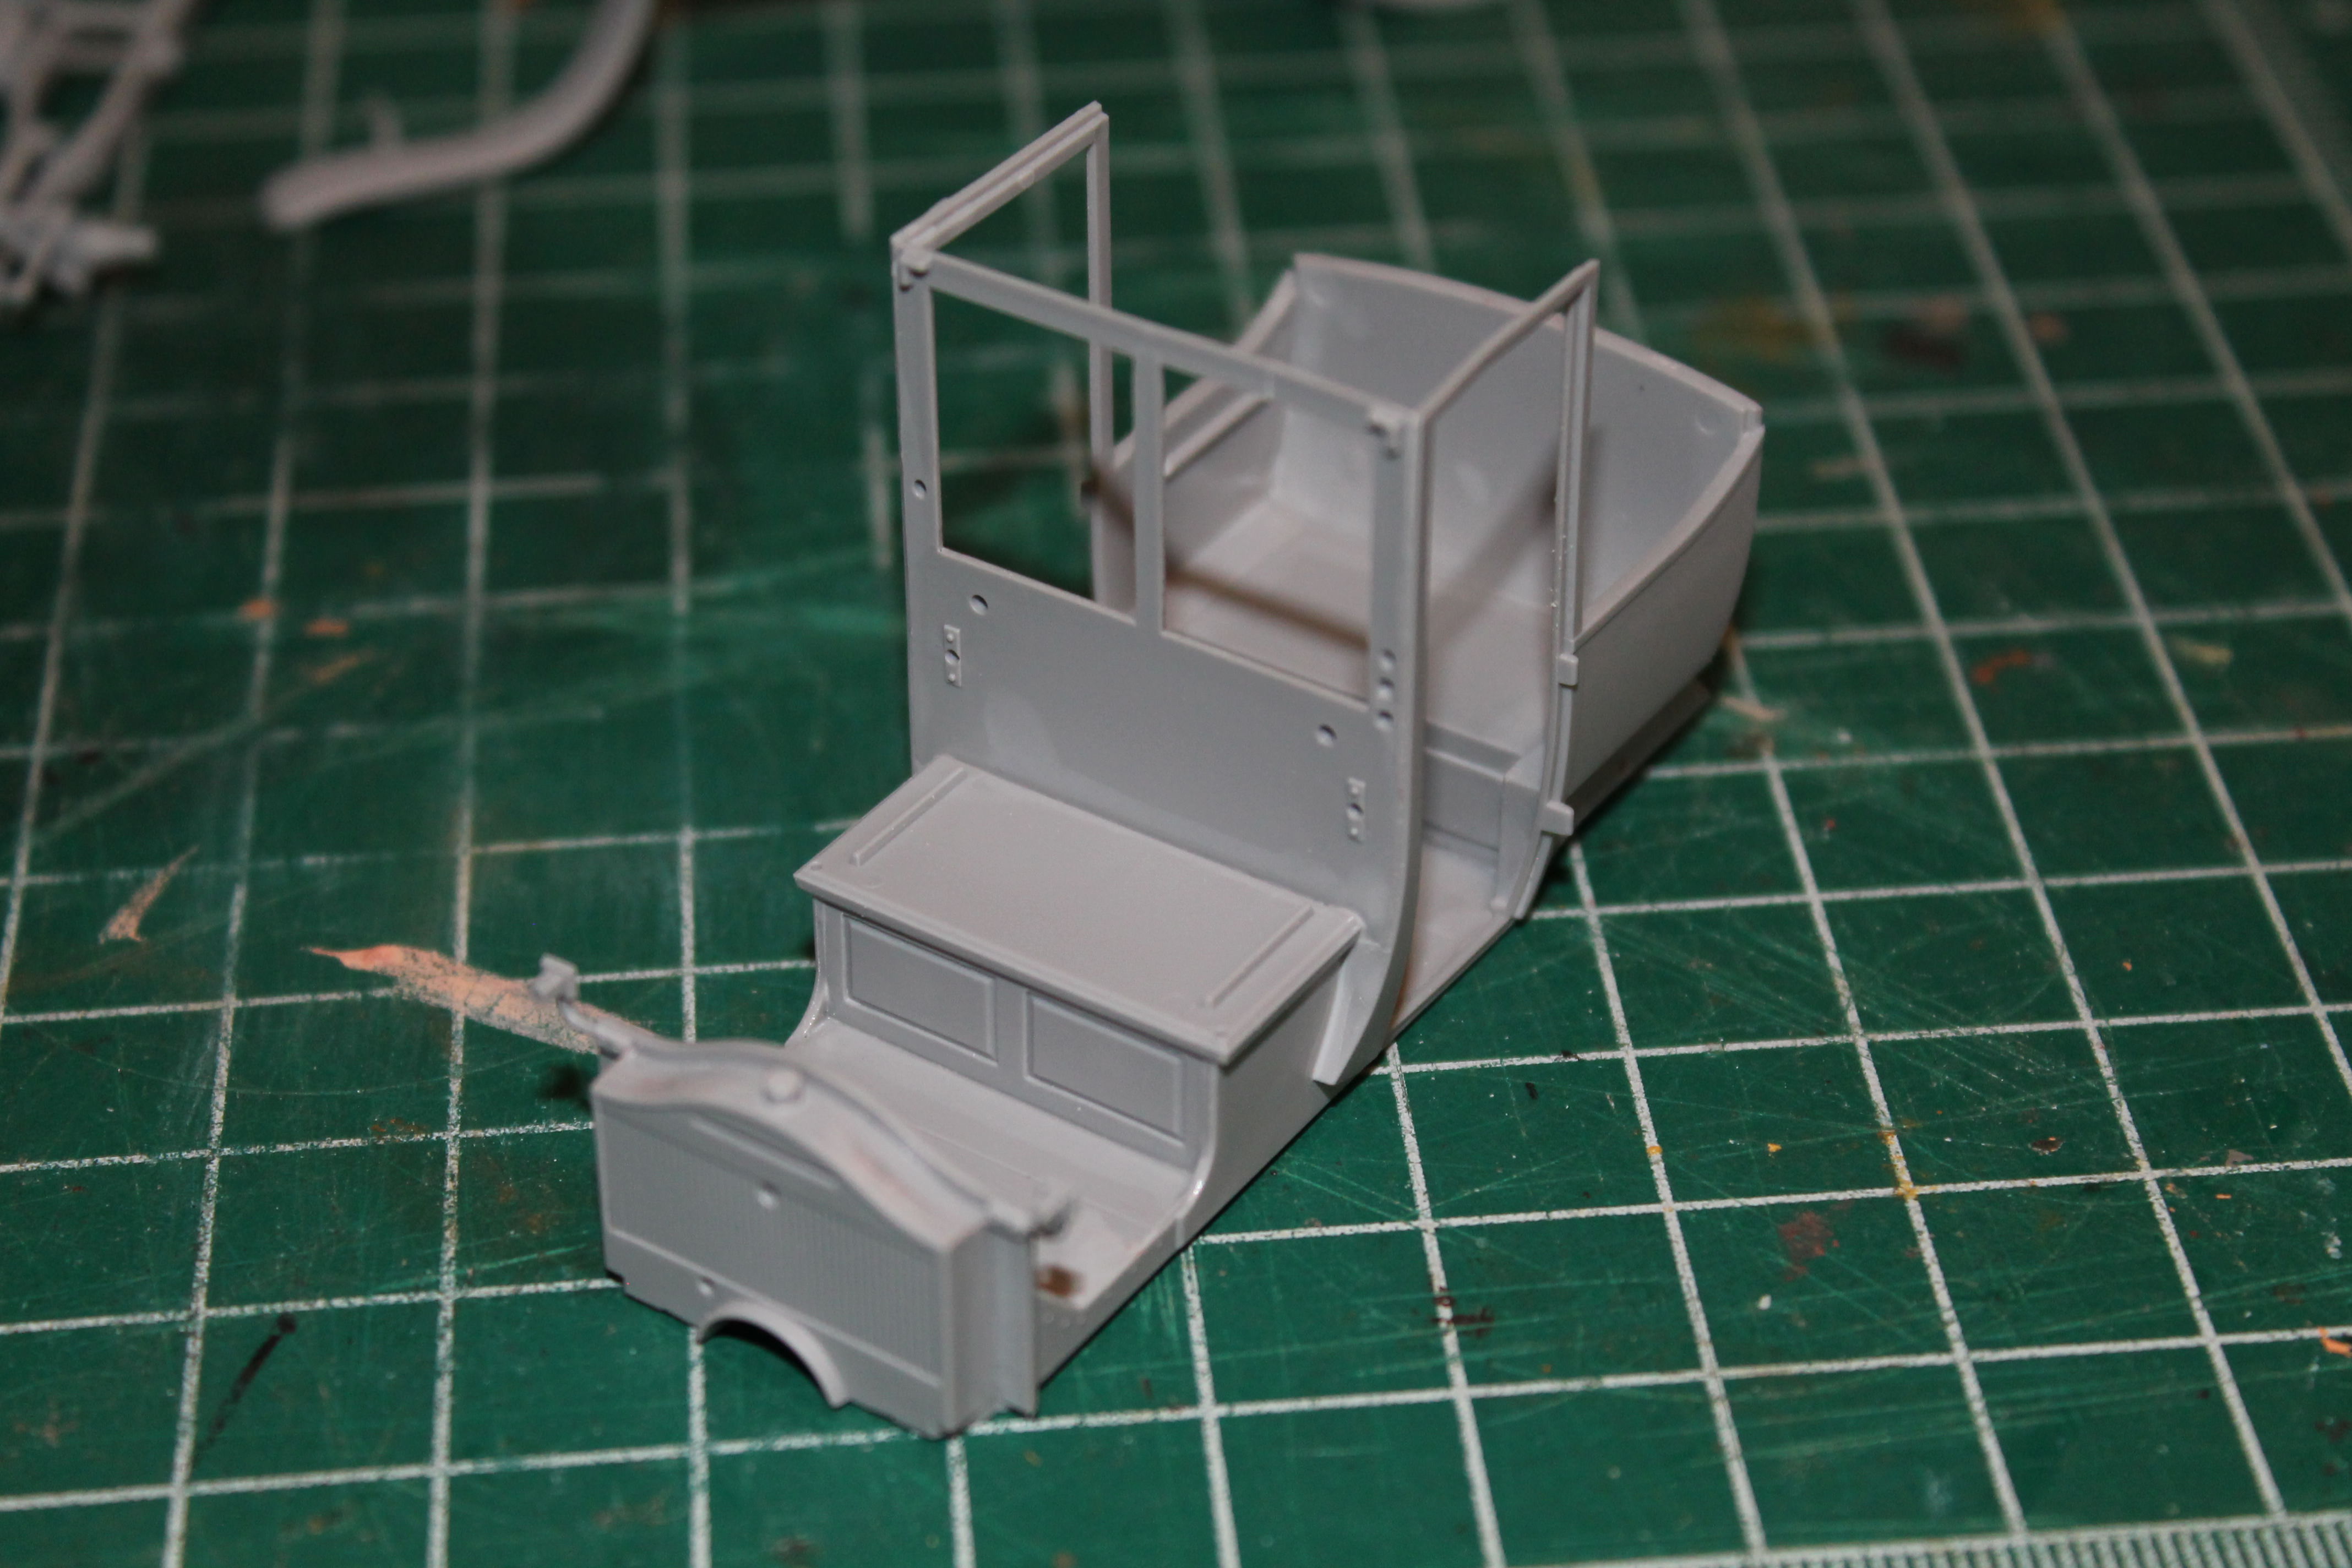
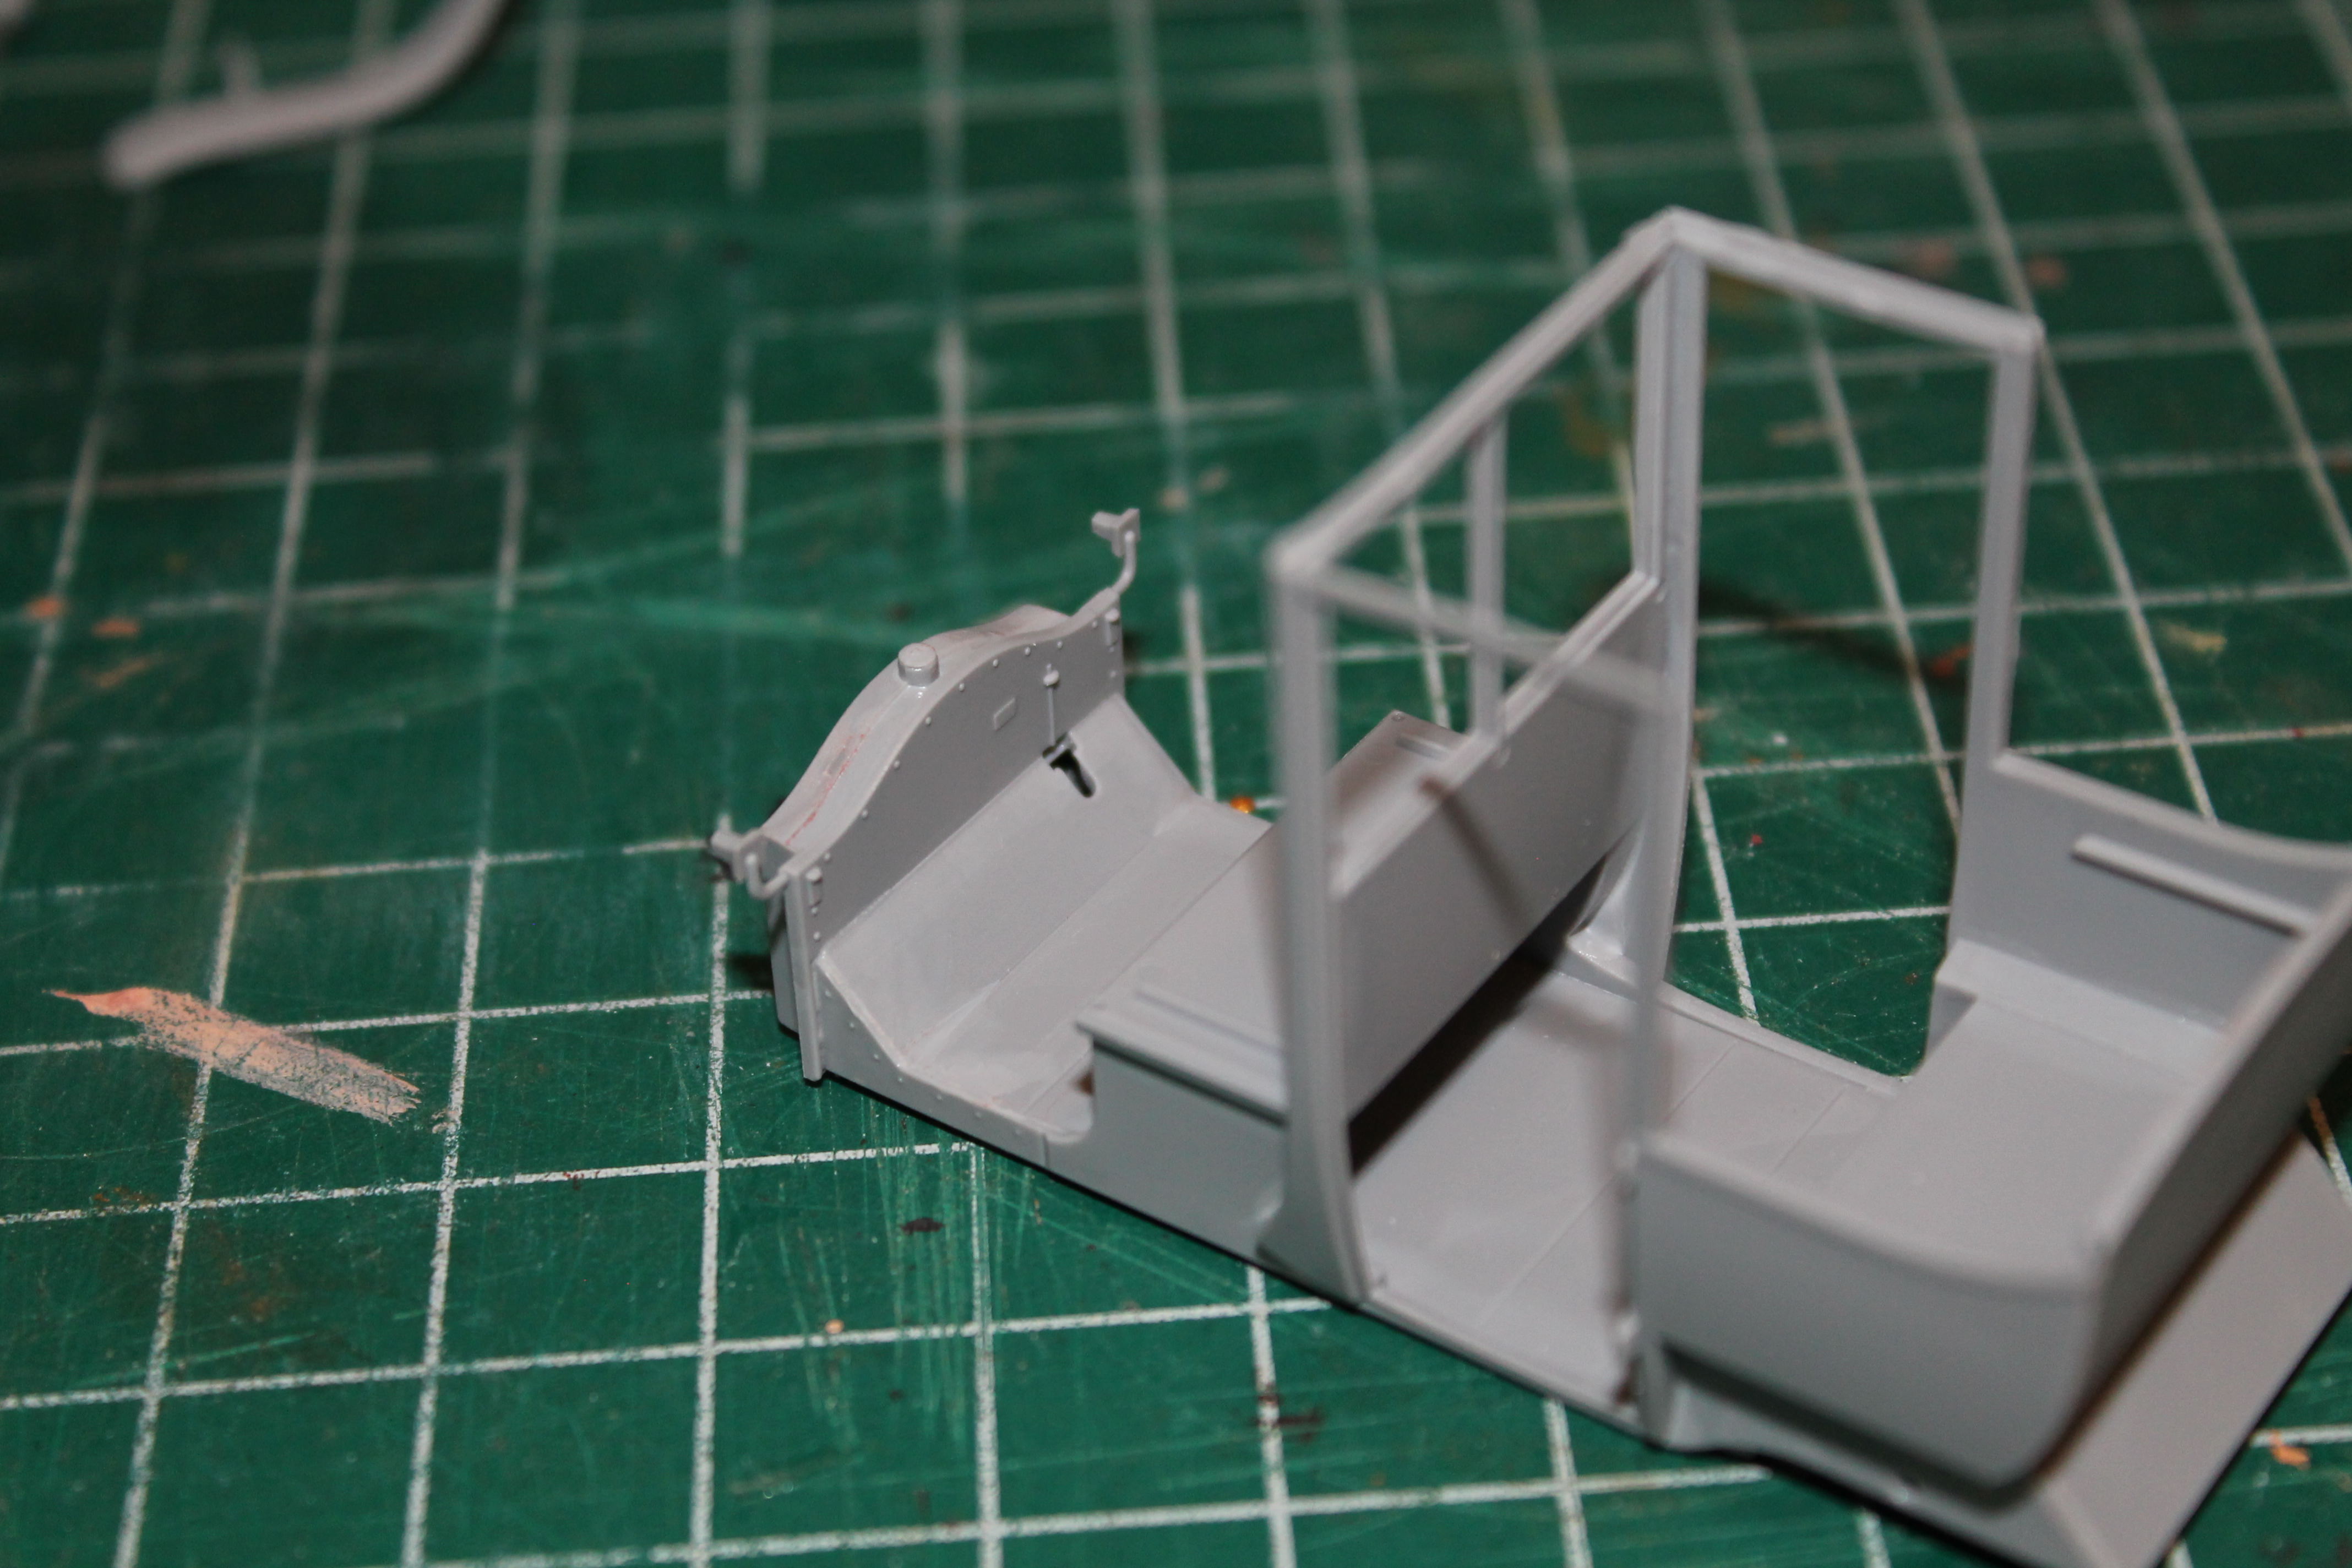
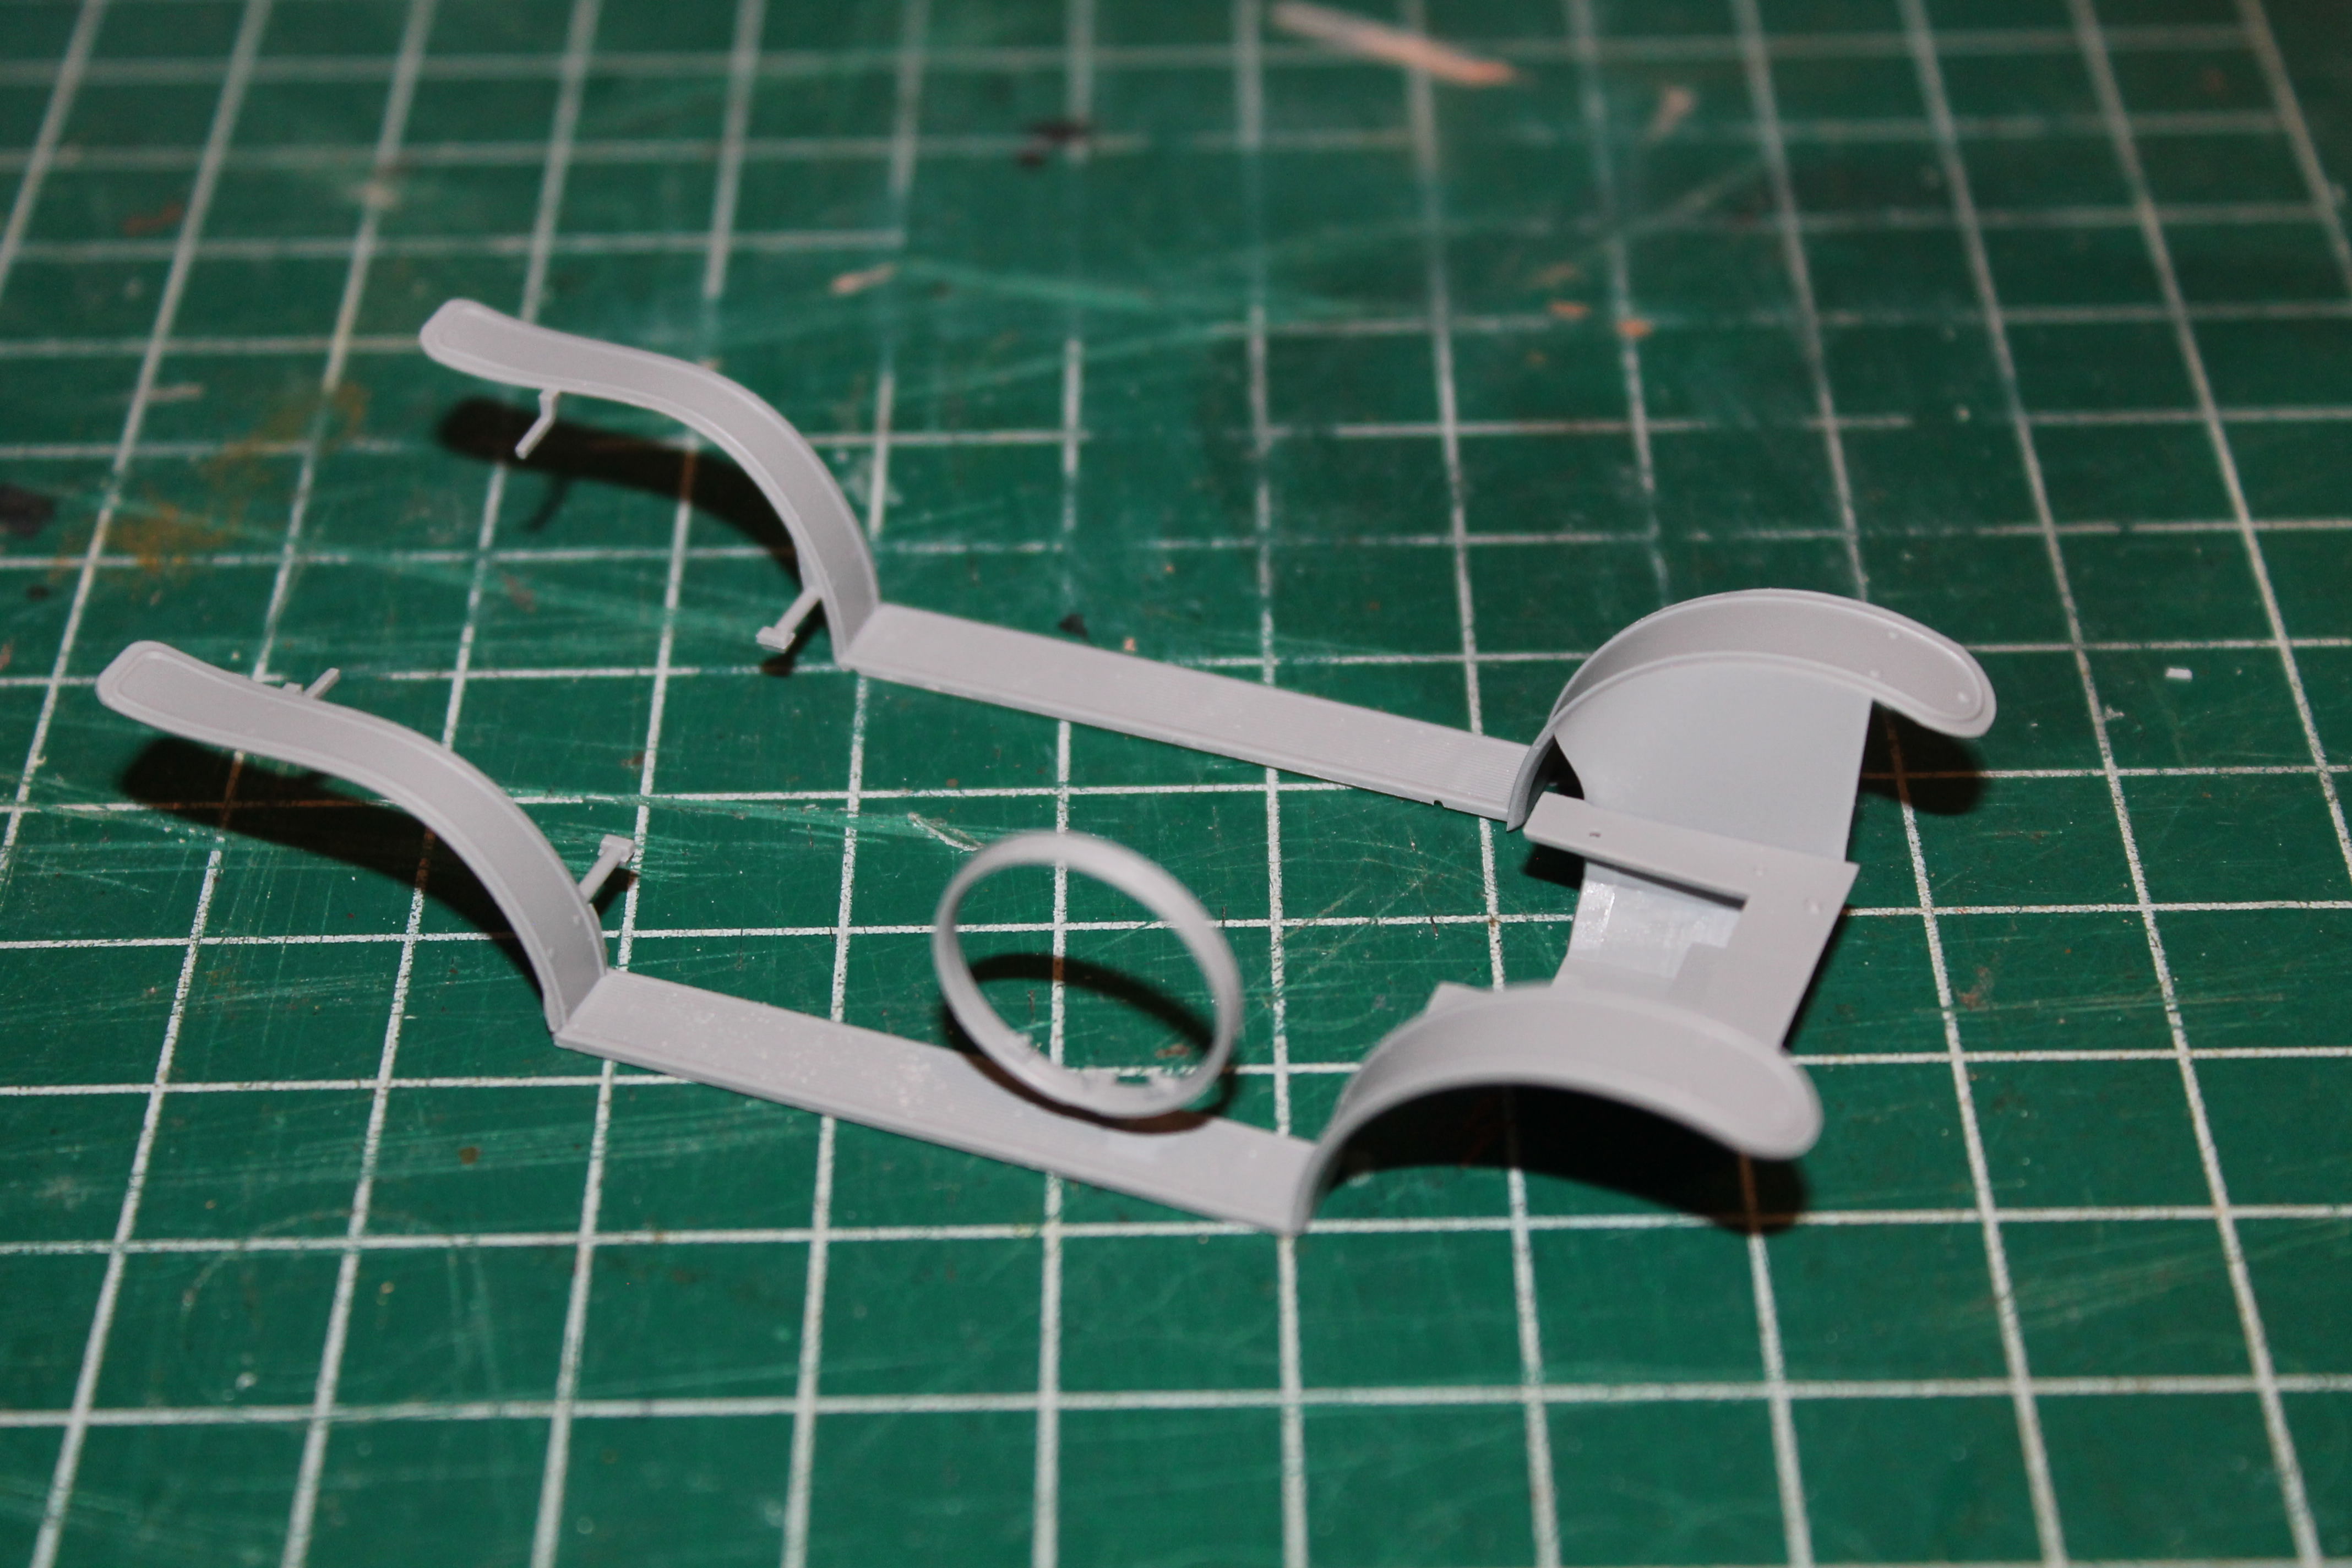
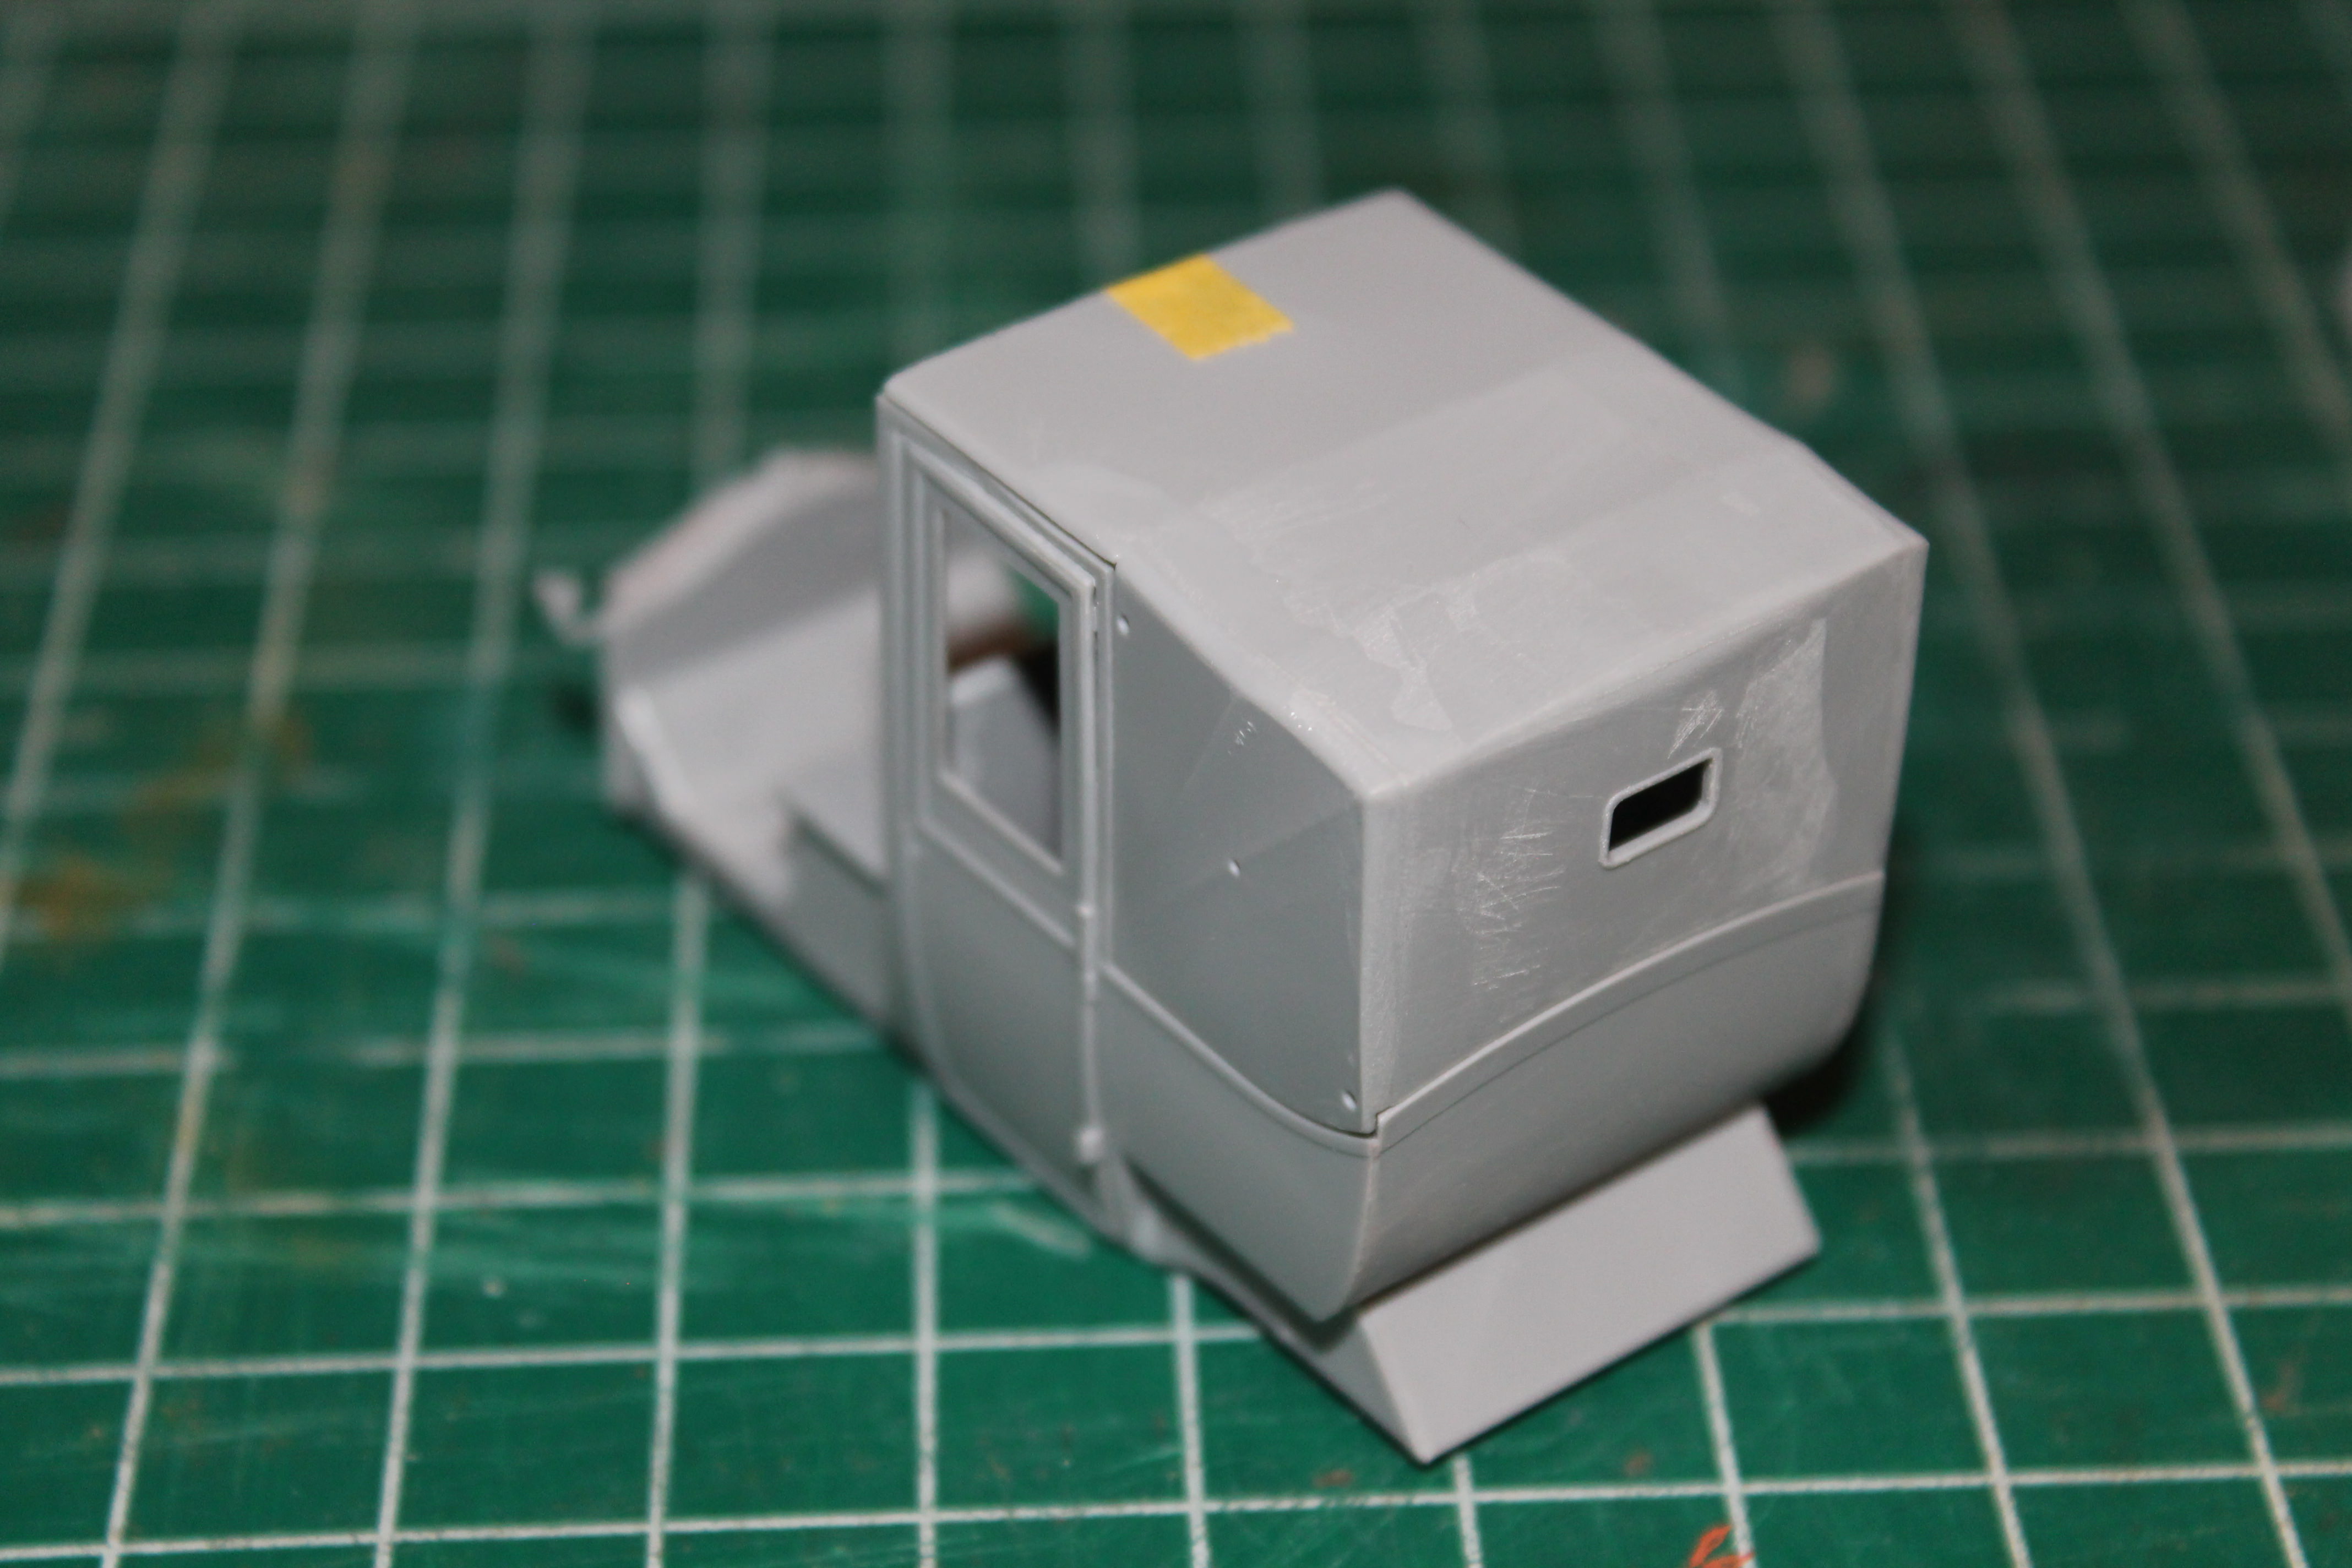
I then went on to the driver's roof, again deviating from the instructions. In Step 48, you're supposed to attach one of the roof supports (B5) to the body, at an angle. In Step 51, you attach the other support (B2) to the roof (B7). Then join the two together in the next step. I thought it better to assemble all three pieces together as one sub-assembly. I wasn't sure from looking at the drawing, exactly how B2 was supposed to fit. Turns out the front edge gets cemented to the roof, with the sides parallel to the roof's edge. The sides are left free floating, with a bit of a gap between them and the roof. The other support (B5) has a pin that fits into a hole in the roof and it butts up against the ends of B2.


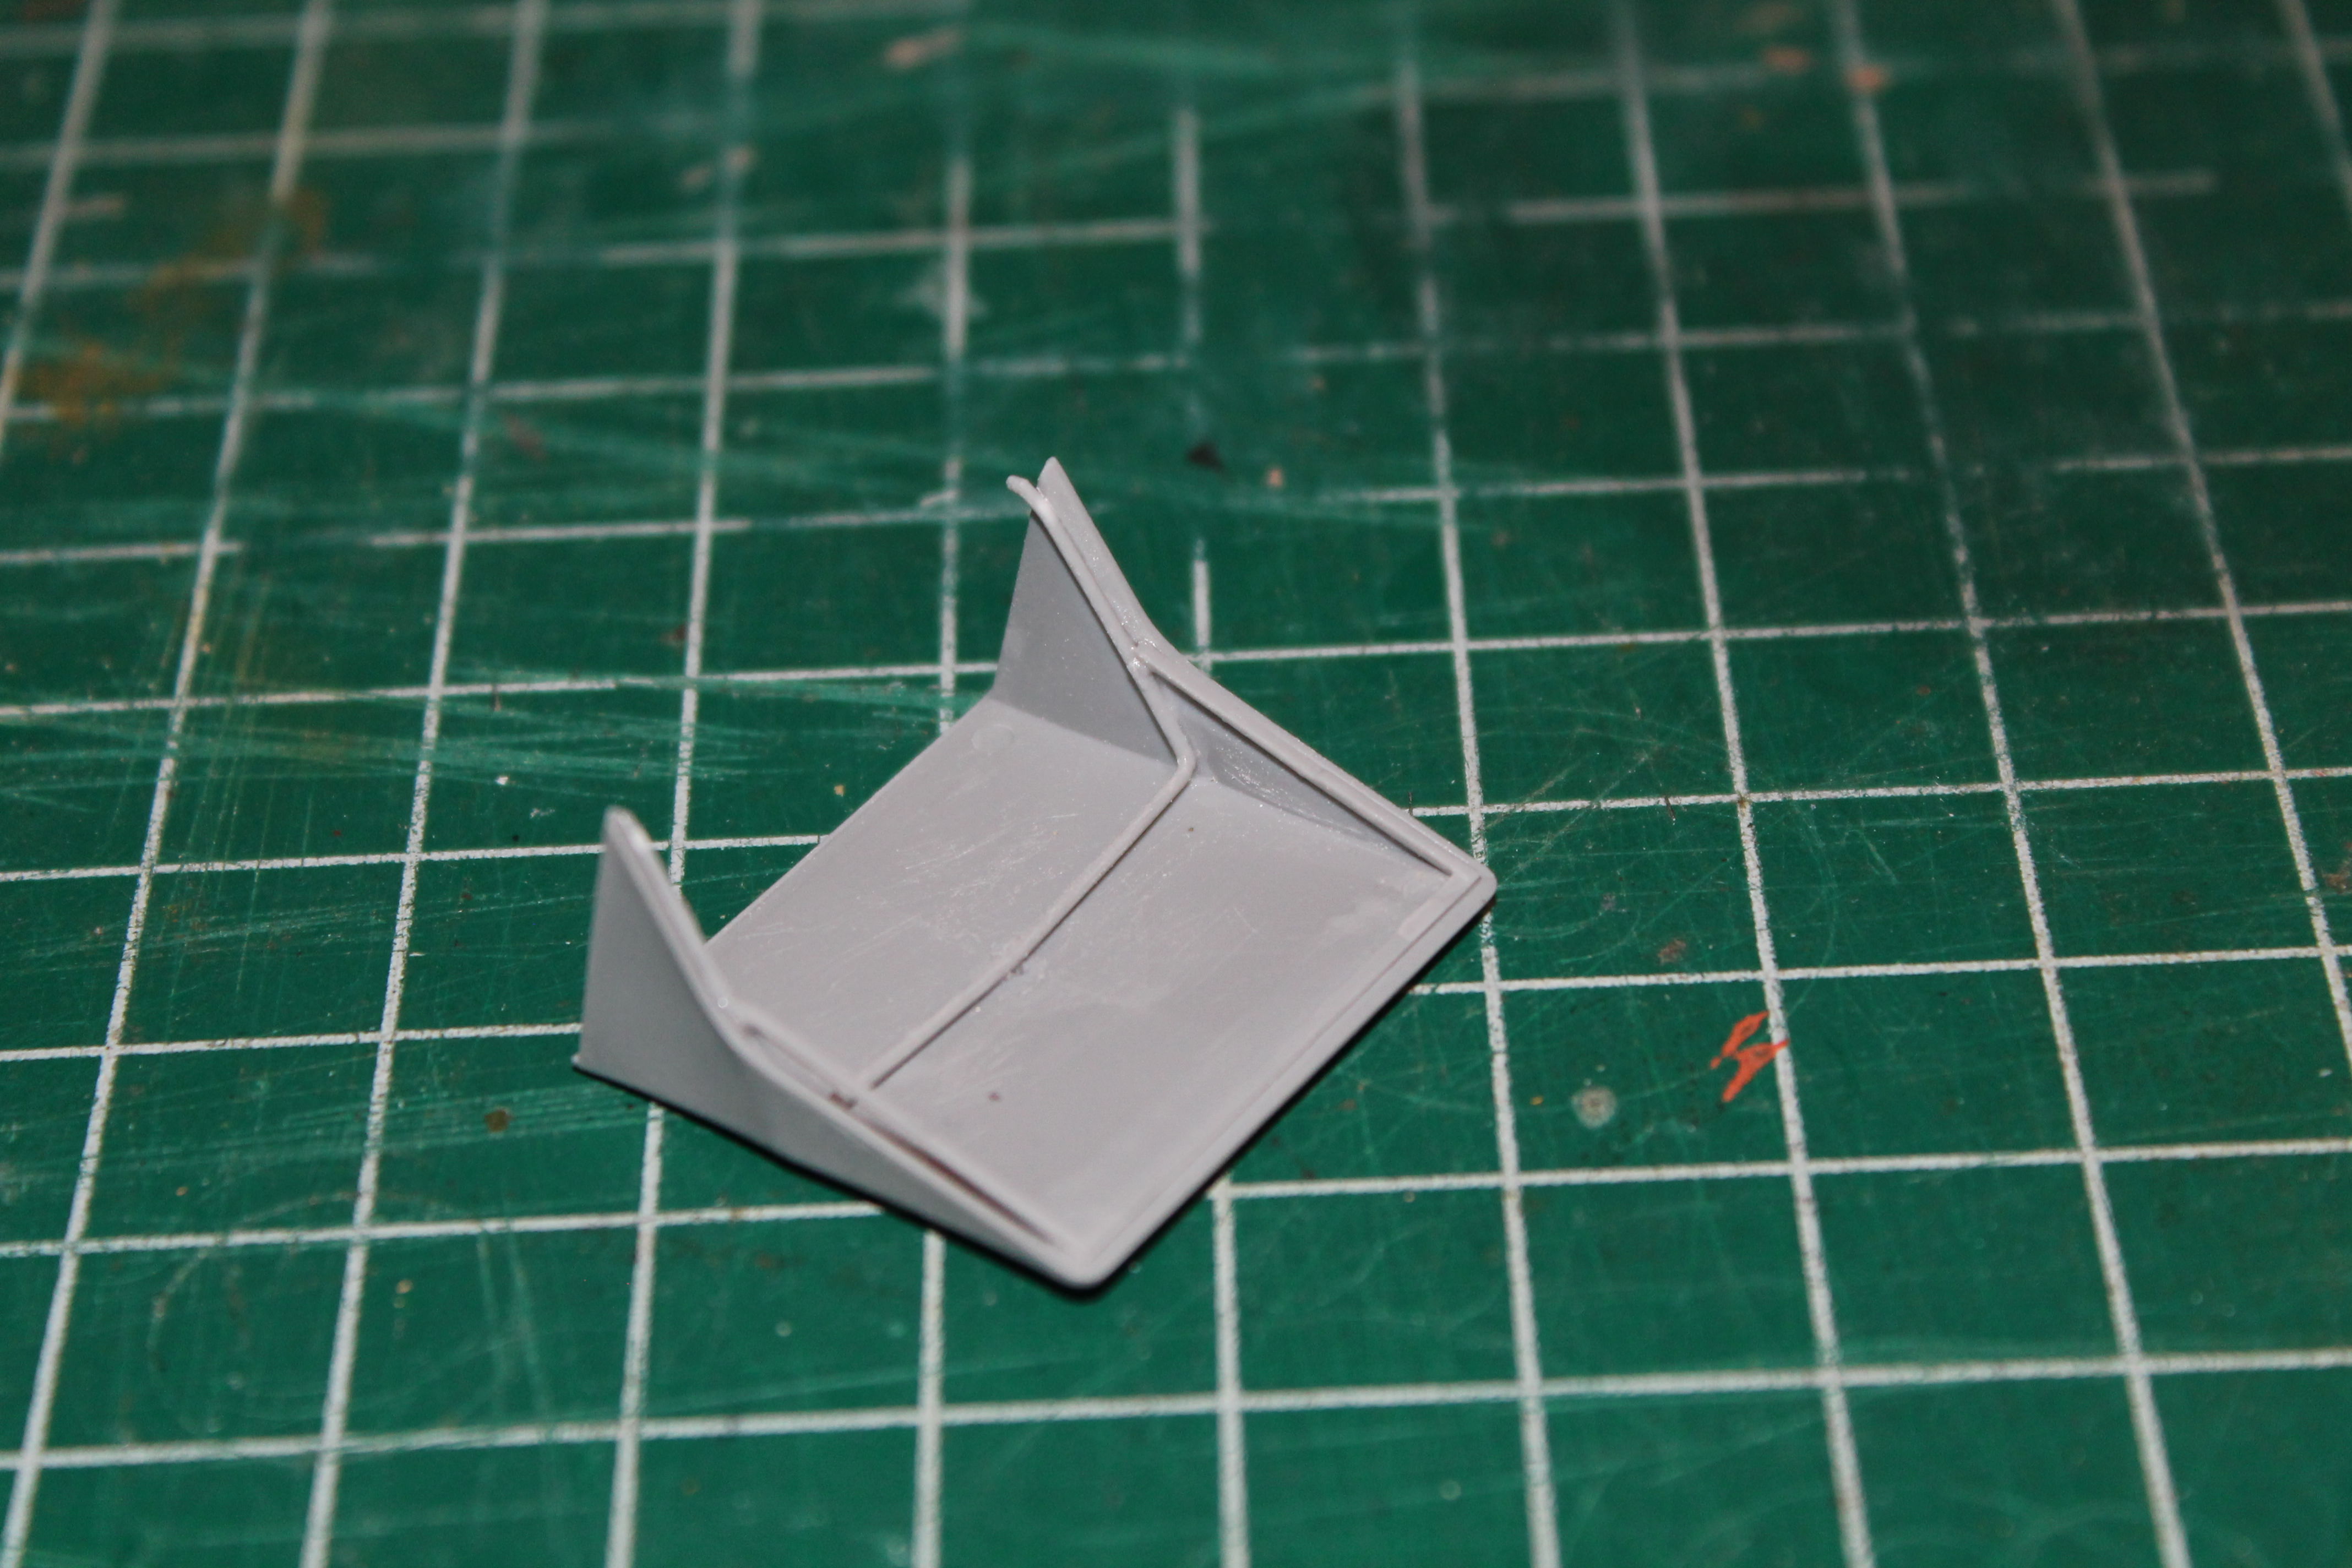
I test fitted this assembly and it lines up perfectly. I feel doing it this way made it much easier to line everything up, and lessened the chance of making a mistake. Also note, the supports are quite fragile and care must be used in removing them from the sprue. I used a sharp chisel-type Xacto blade to separate them from the sprue with no problem. But then broke one trying to clean up any burrs. I found it easier to clean the parts up after assembling them together, rather than separately. Well, that's all for now. A few more sub-assemblies, then it's off to the paint shop. Al
dioman13
Visit this Community
Indiana, United States
Joined: August 19, 2007
KitMaker: 2,184 posts
Armorama: 1,468 posts
Posted: Sunday, September 23, 2018 - 06:09 AM UTC
Looking good Al. The set of 1914 figures. Would go good with it. 3 soldiers rushing to get into formation while the officer a bit away urges them on in haste.
Kevlar06
Visit this Community
Washington, United States
Joined: March 15, 2009
KitMaker: 3,670 posts
Armorama: 2,052 posts
Posted: Sunday, September 23, 2018 - 06:18 AM UTC

Quoted Text

Looking good Al. The set of 1914 figures. Would go good with it. 3 soldiers rushing to get into formation while the officer a bit away urges them on in haste.


I believe Shep Paine created a diorama many years ago with the the old 1/32 Pyro kit, and some 54mm Historex figures, with the Taxi "flying" down a rutted dirt road, practically airborne, with the figures comically hanging on for dear life. I've scoured the net trying to find that photo, but have come up empty handed. This kit and the ICM figures would be a great place to start a diorama like that!
VR, Russ
TAFFY3
Visit this Community
New York, United States
Joined: January 21, 2008
KitMaker: 2,531 posts
Armorama: 859 posts
Posted: Tuesday, September 25, 2018 - 07:20 AM UTC
Managed to squeeze in some more build time. First, the engine.


The exhaust pipe is two pieces (Parts A39 & A14). The instructions want you to attach the front half of the exhaust pipe (A39) to the manifold in Step 14. But there is no positive alignment. The other half (A14) gets attached to the underside of the body, with no chance of being positioned wrong. The two halves of the pipe are supposed to be mated later in Step 34. This seemed to be a bad way of doing things with too much chance of a problem. So, I decided to join the two pieces together, with the entire exhaust placed into position as one unit. I felt this lessened the chance of a screw up. Being a glutton for punishment, I drilled out the tailpipe. I started with a #80 bit and worked up to a #75 bit. At the rear of engine is a flywheel (A11). The hole in this flywheel needs to be drilled deeper to be able to accept the driveshaft from the transmission. Speaking of the flywheel, there are a bunch of blades arranged around the rim, for cooling I guess. The sprue attachment point completely fills the gap between two of the blades. It would be hard to remove without also removing the blades. As I mentioned, the engine will be completely hidden when viewed from below. So I mounted the flywheel with that blemish to the bottom where it won't be visible, rather than try to remove it.


I then added the running board supports (Parts D5) to the sides of the chassis. They are quite delicate and care must be used when removing them from the sprue.


Next, the spare tire mount. I ran into my first fit issue here. The tab on the mount does not fit into the corresponding slot on the running board/fender. It needs to be thinned down.


I finished up by attaching what I assume are the brakes (D2) to the rear wheels (D4). There are pins arrayed around the rim of D2 that line up with slightly bulged areas on the wheel's spokes.


As you can probably tell the rear wheel is the one on the right in the photos. Well, that's all I have for now. Thanks for looking. Al
TAFFY3
Visit this Community
New York, United States
Joined: January 21, 2008
KitMaker: 2,531 posts
Armorama: 859 posts
Posted: Monday, October 01, 2018 - 09:23 PM UTC
Just seen elsewhere on this site, a new set of figures from ICM. Exciting news for builders of the Taxi, or for me at least.


The driver figure in particular is welcome. Civilian period figures are non-existent. Thank you, ICM Al
Das_Abteilung
Visit this Community
United Kingdom
Joined: August 31, 2010
KitMaker: 365 posts
Armorama: 351 posts
Posted: Tuesday, October 02, 2018 - 09:05 AM UTC
Is there a goof here with the tyre colour? Shouldn't period tyres still be grey? They look grey in a couple of the period photos: the old museum photo and the one with the uniformed driver.

Carbon Black replaced Zinc Oxide as a filler/binder in the rubber to increase its life (up to 100x!) during WW1 as the use of motor vehicles burgeoned. BF Goodrich started using it in the US before WW1 (supplied by the company we now now as Crayola!) but it didn't cross the Atlantic until probably 1915. Early British armoured cars such as RR and Lanchester still had grey tyres in 1914-15.

The new figure set is a bit strange. A driver, but "in action" Poilus. This seems like it should be 2 sets: driver plus passengers and "in action".
Kevlar06
Visit this Community
Washington, United States
Joined: March 15, 2009
KitMaker: 3,670 posts
Armorama: 2,052 posts
Posted: Tuesday, October 02, 2018 - 12:19 PM UTC

Quoted Text

...The new figure set is a bit strange. A driver, but "in action" Poilus. This seems like it should be 2 sets: driver plus passengers and "in action".


The figures are not really "in action" figures, take a look here:

http://armorama.com/news/30082

VR, Russ
TAFFY3
Visit this Community
New York, United States
Joined: January 21, 2008
KitMaker: 2,531 posts
Armorama: 859 posts
Posted: Tuesday, October 02, 2018 - 12:53 PM UTC
(Quoted) The figures are not really "in action" figures:

I realize that they're not "in action", like the other set. But they're specifically meant to accompany the taxi. Two are riding on the roof and one on the right running board. The driver alone is reason enough for me to buy a set. I wish ICM had included just one more figure, to be seated in the back seat. Al
 _GOTOTOP