_GOTOBOTTOM
Armor/AFV
For discussions on tanks, artillery, jeeps, etc.
Tamiya Panther Ausf A
griffontech
Visit this Community
Canada
Joined: November 21, 2007
KitMaker: 237 posts
Armorama: 231 posts
Posted: Sunday, January 27, 2019 - 10:37 AM UTC
I was just about to start painting my two M4A3E8 Shermans when I spotted my almost completed Panther. I thought since I was about to spark up the compressor and spray booth I would finish off this easy build. The model is primed with white rattle can automotive primer except for 3 road wheels that received red primer. The white can gave out...
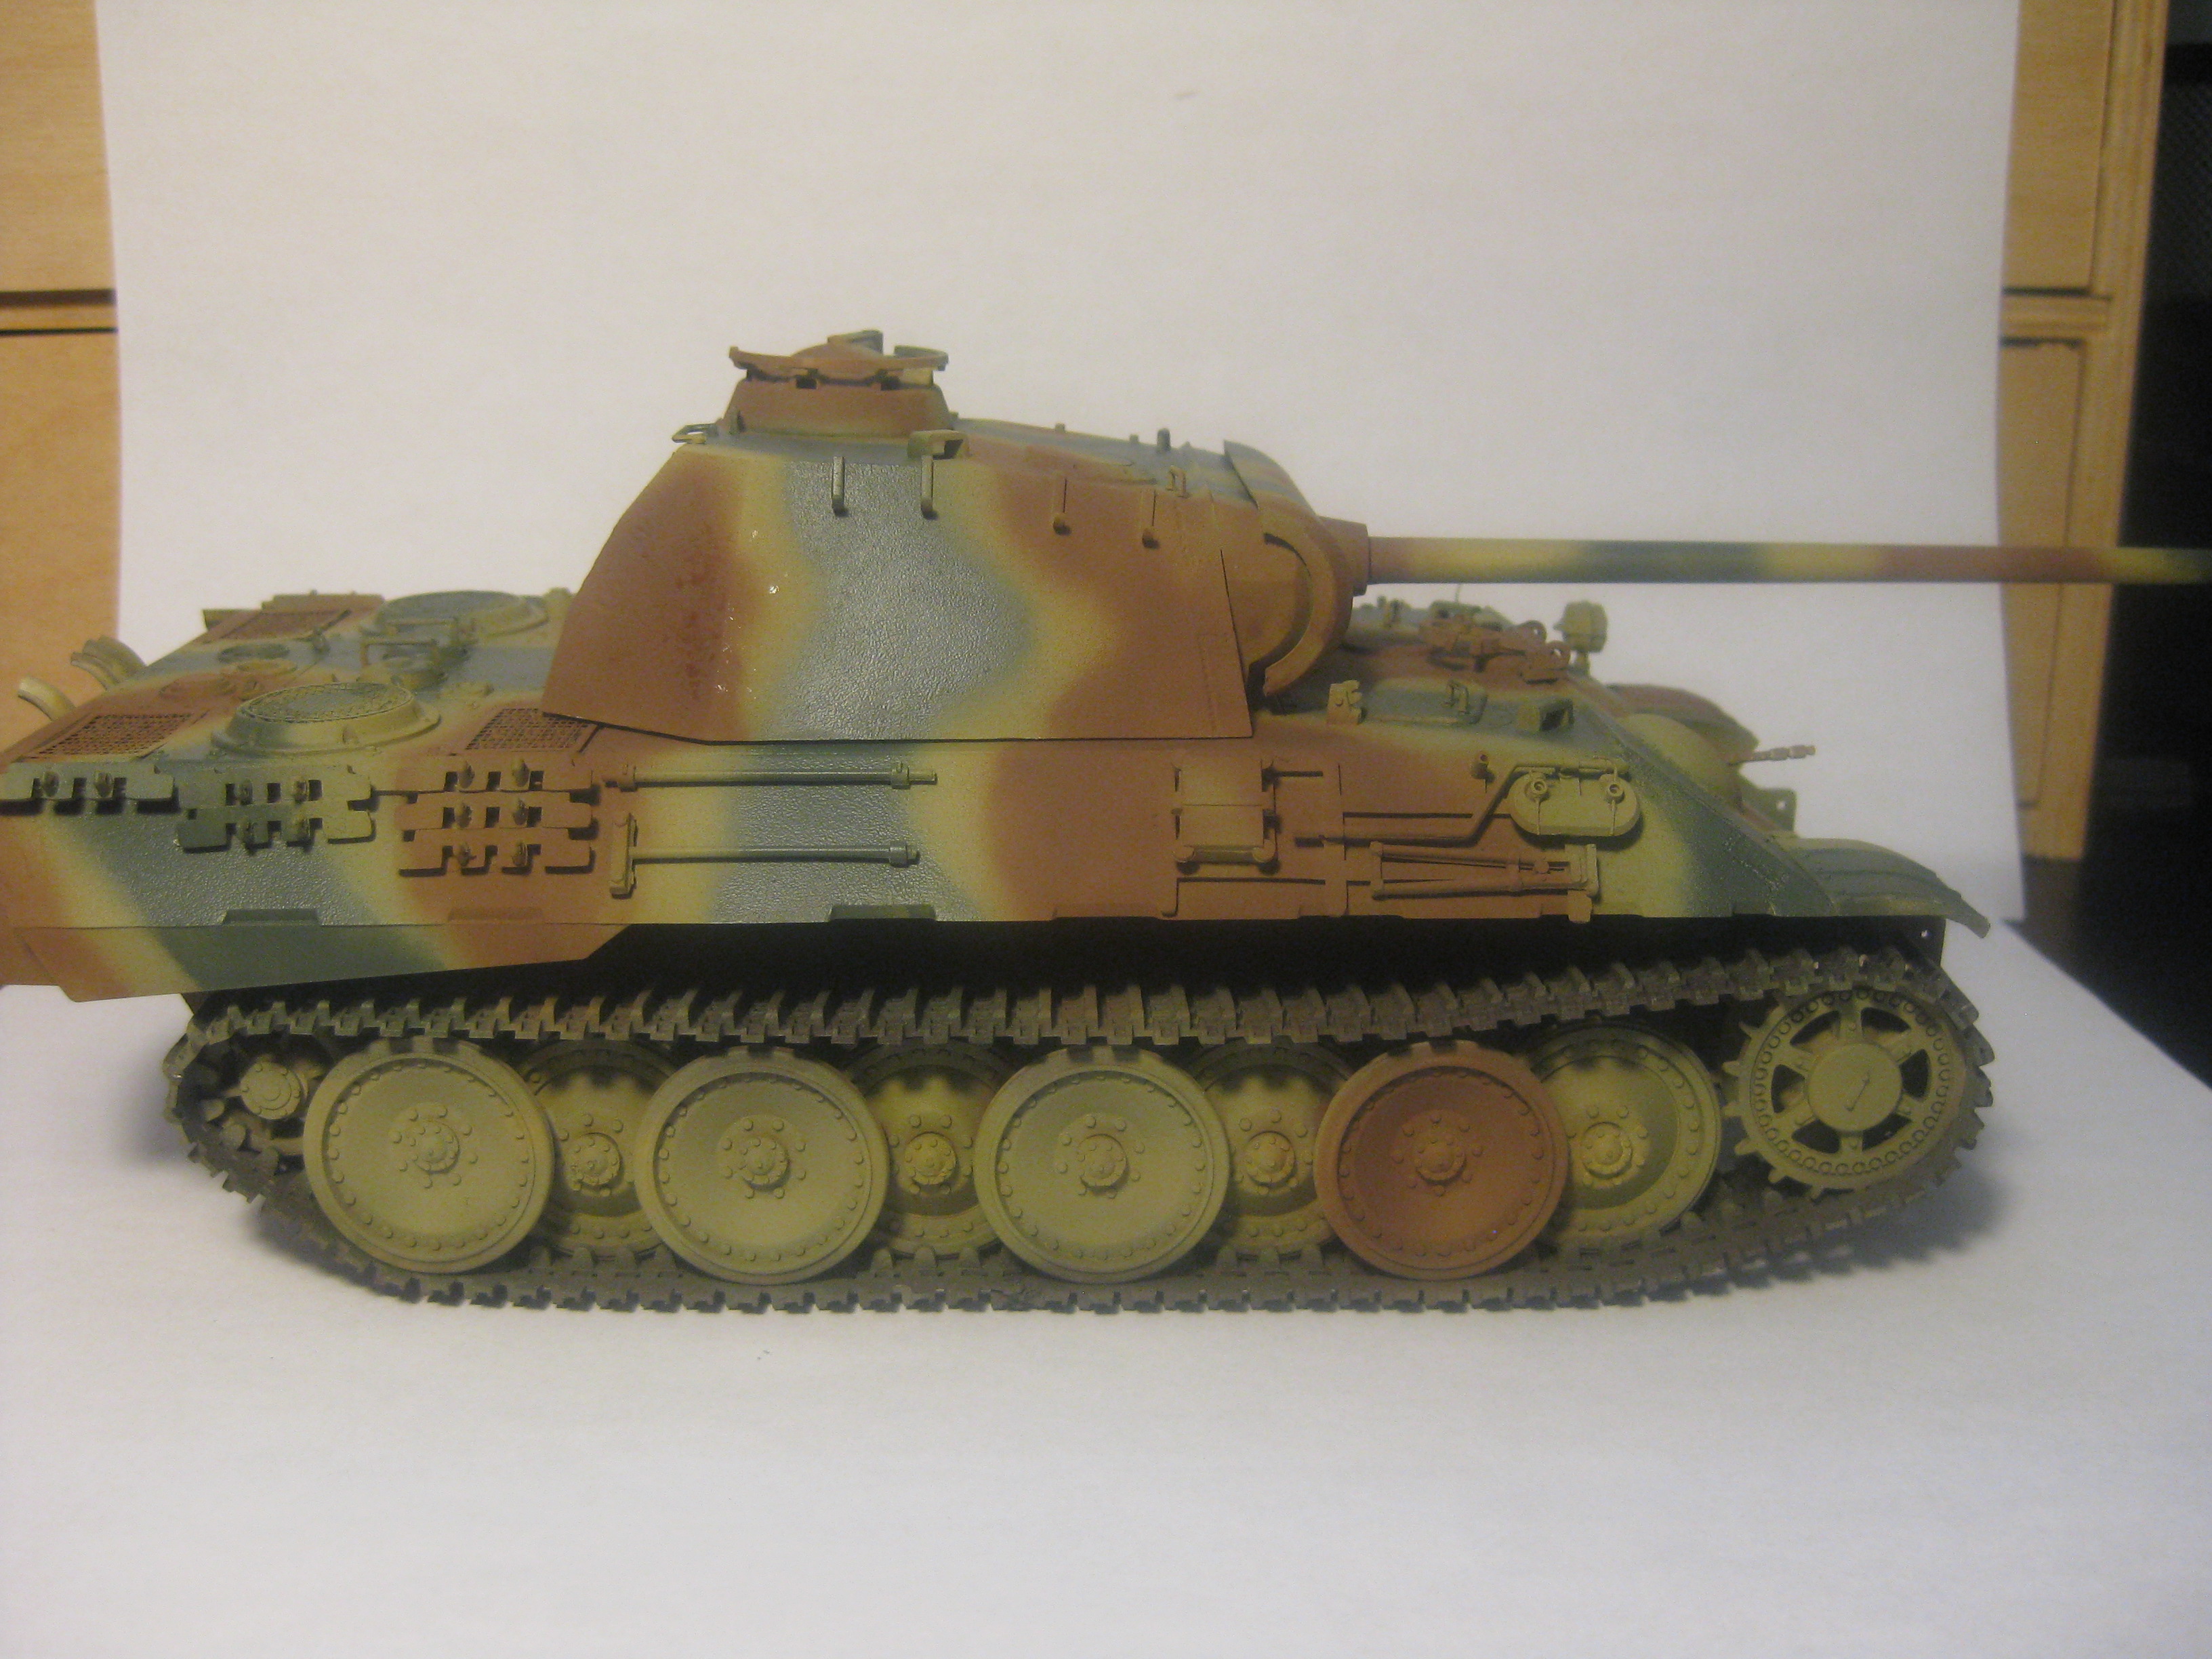
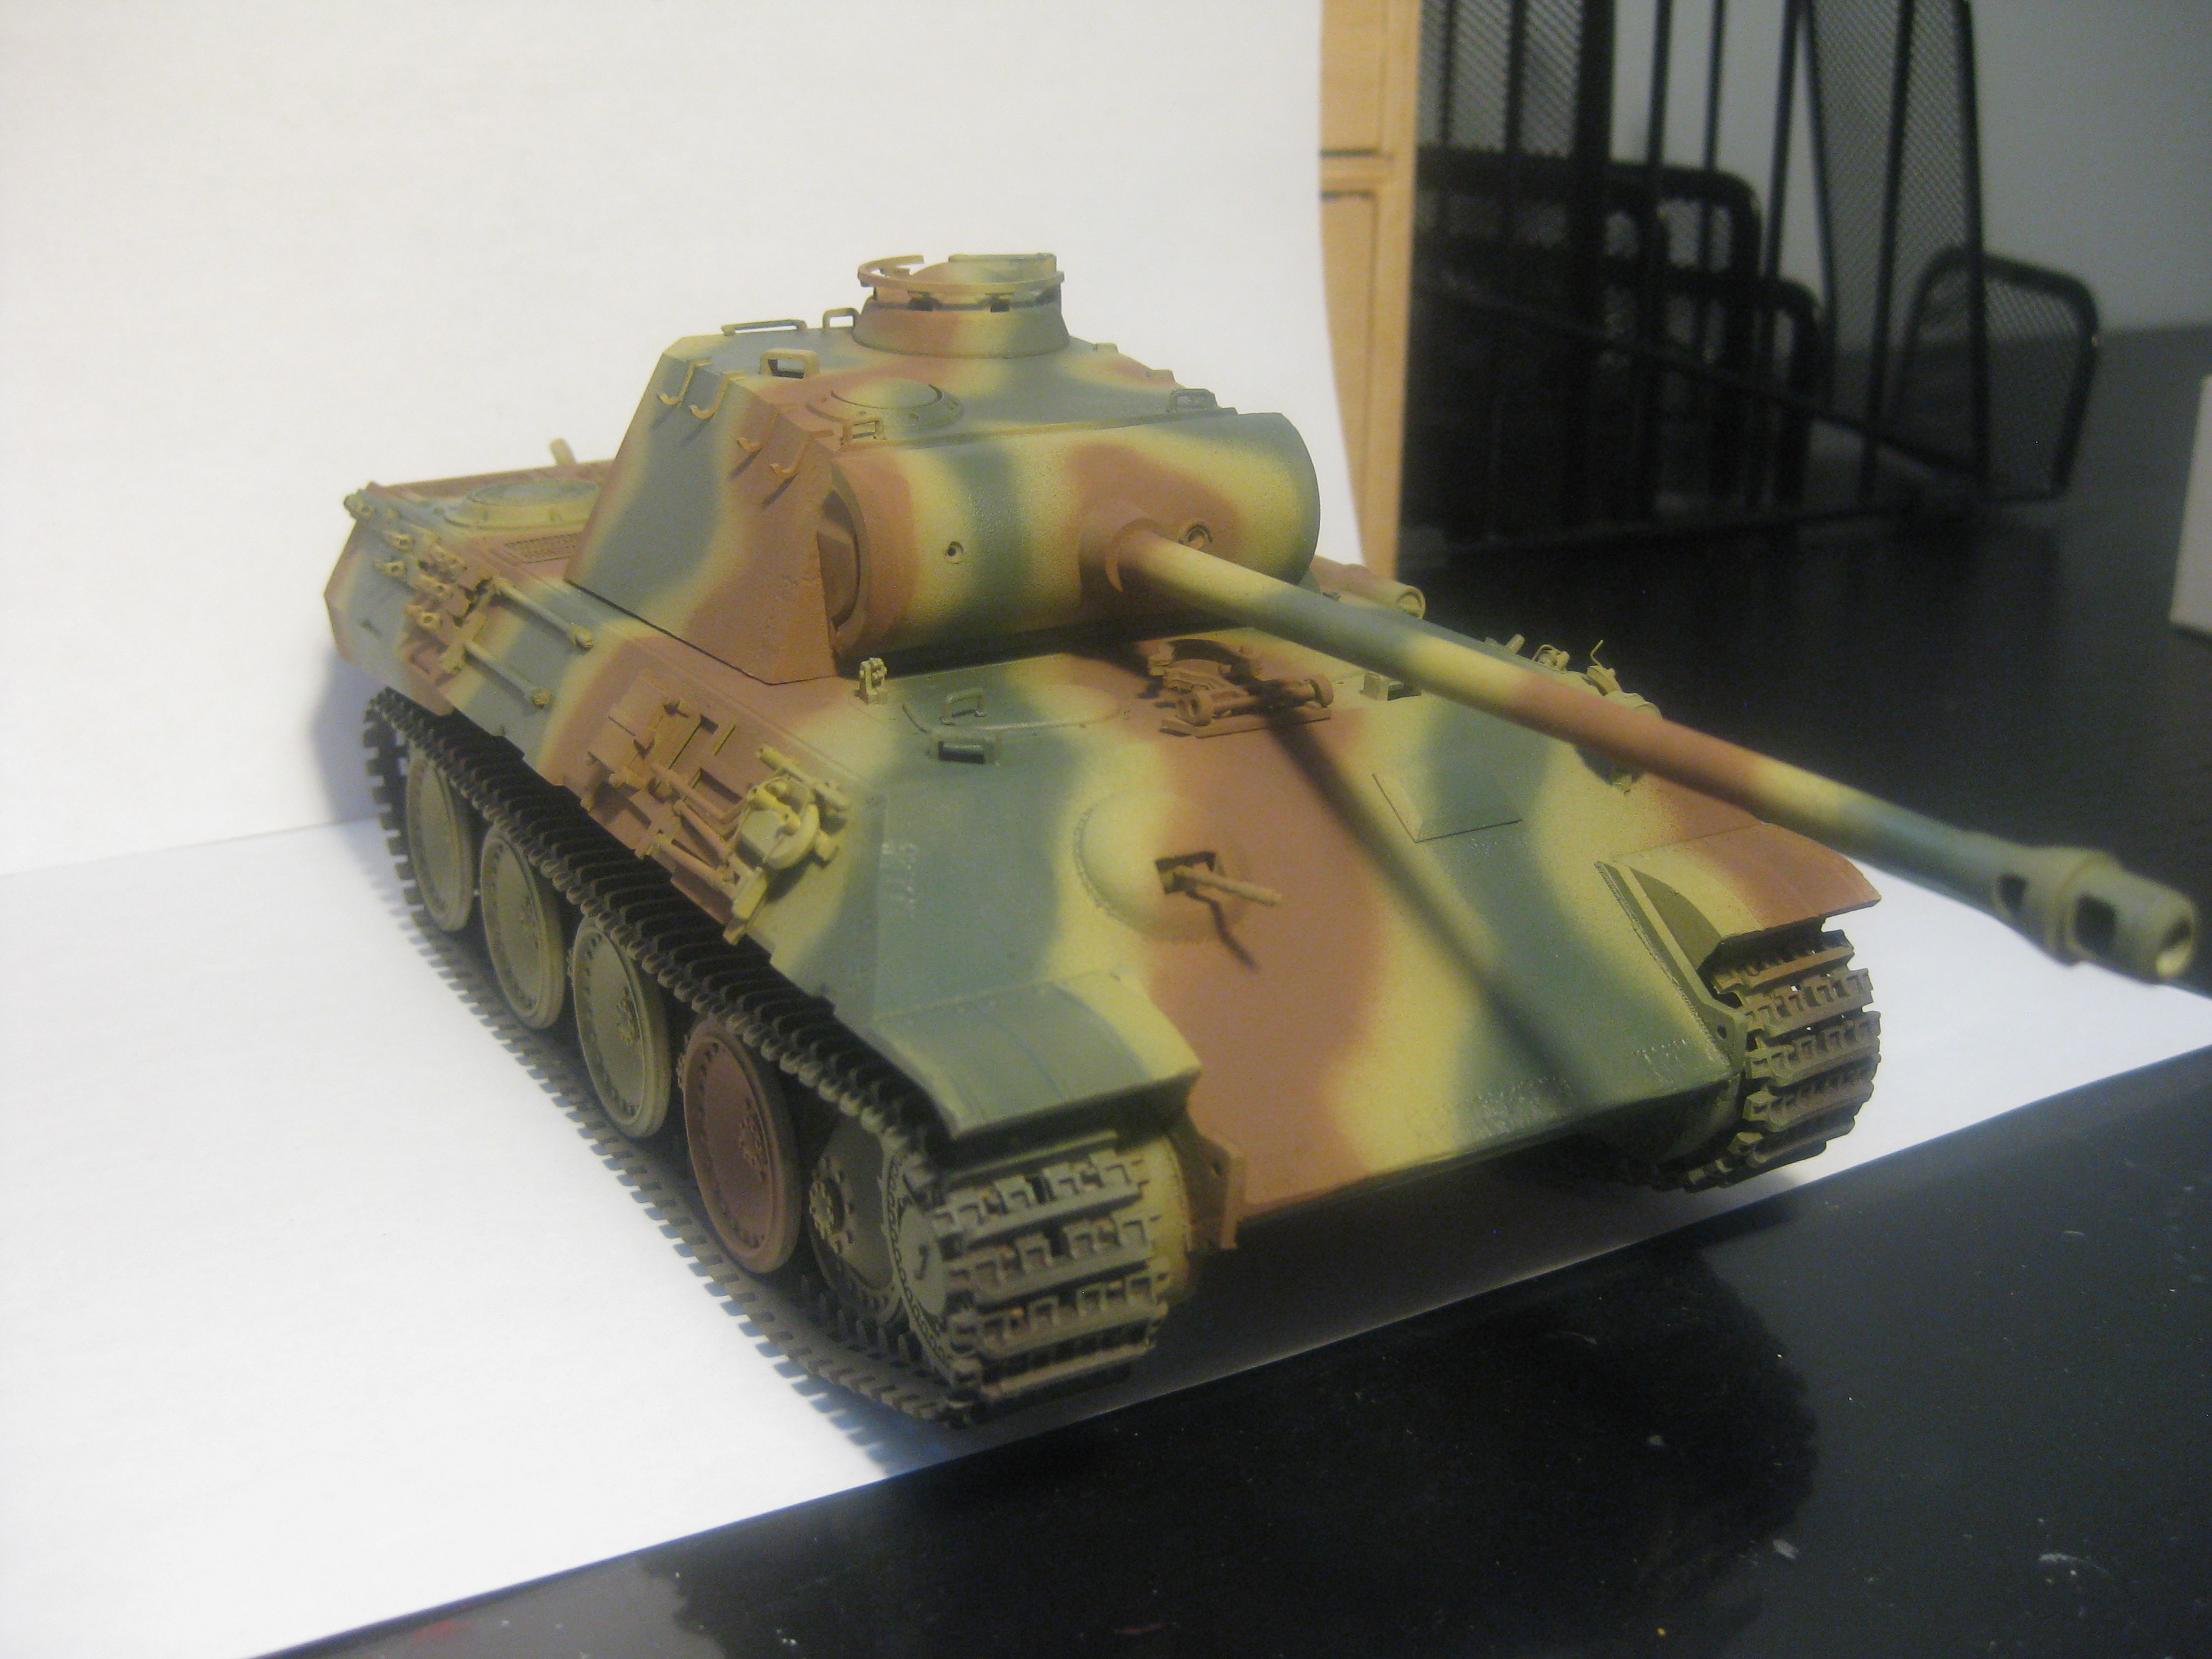
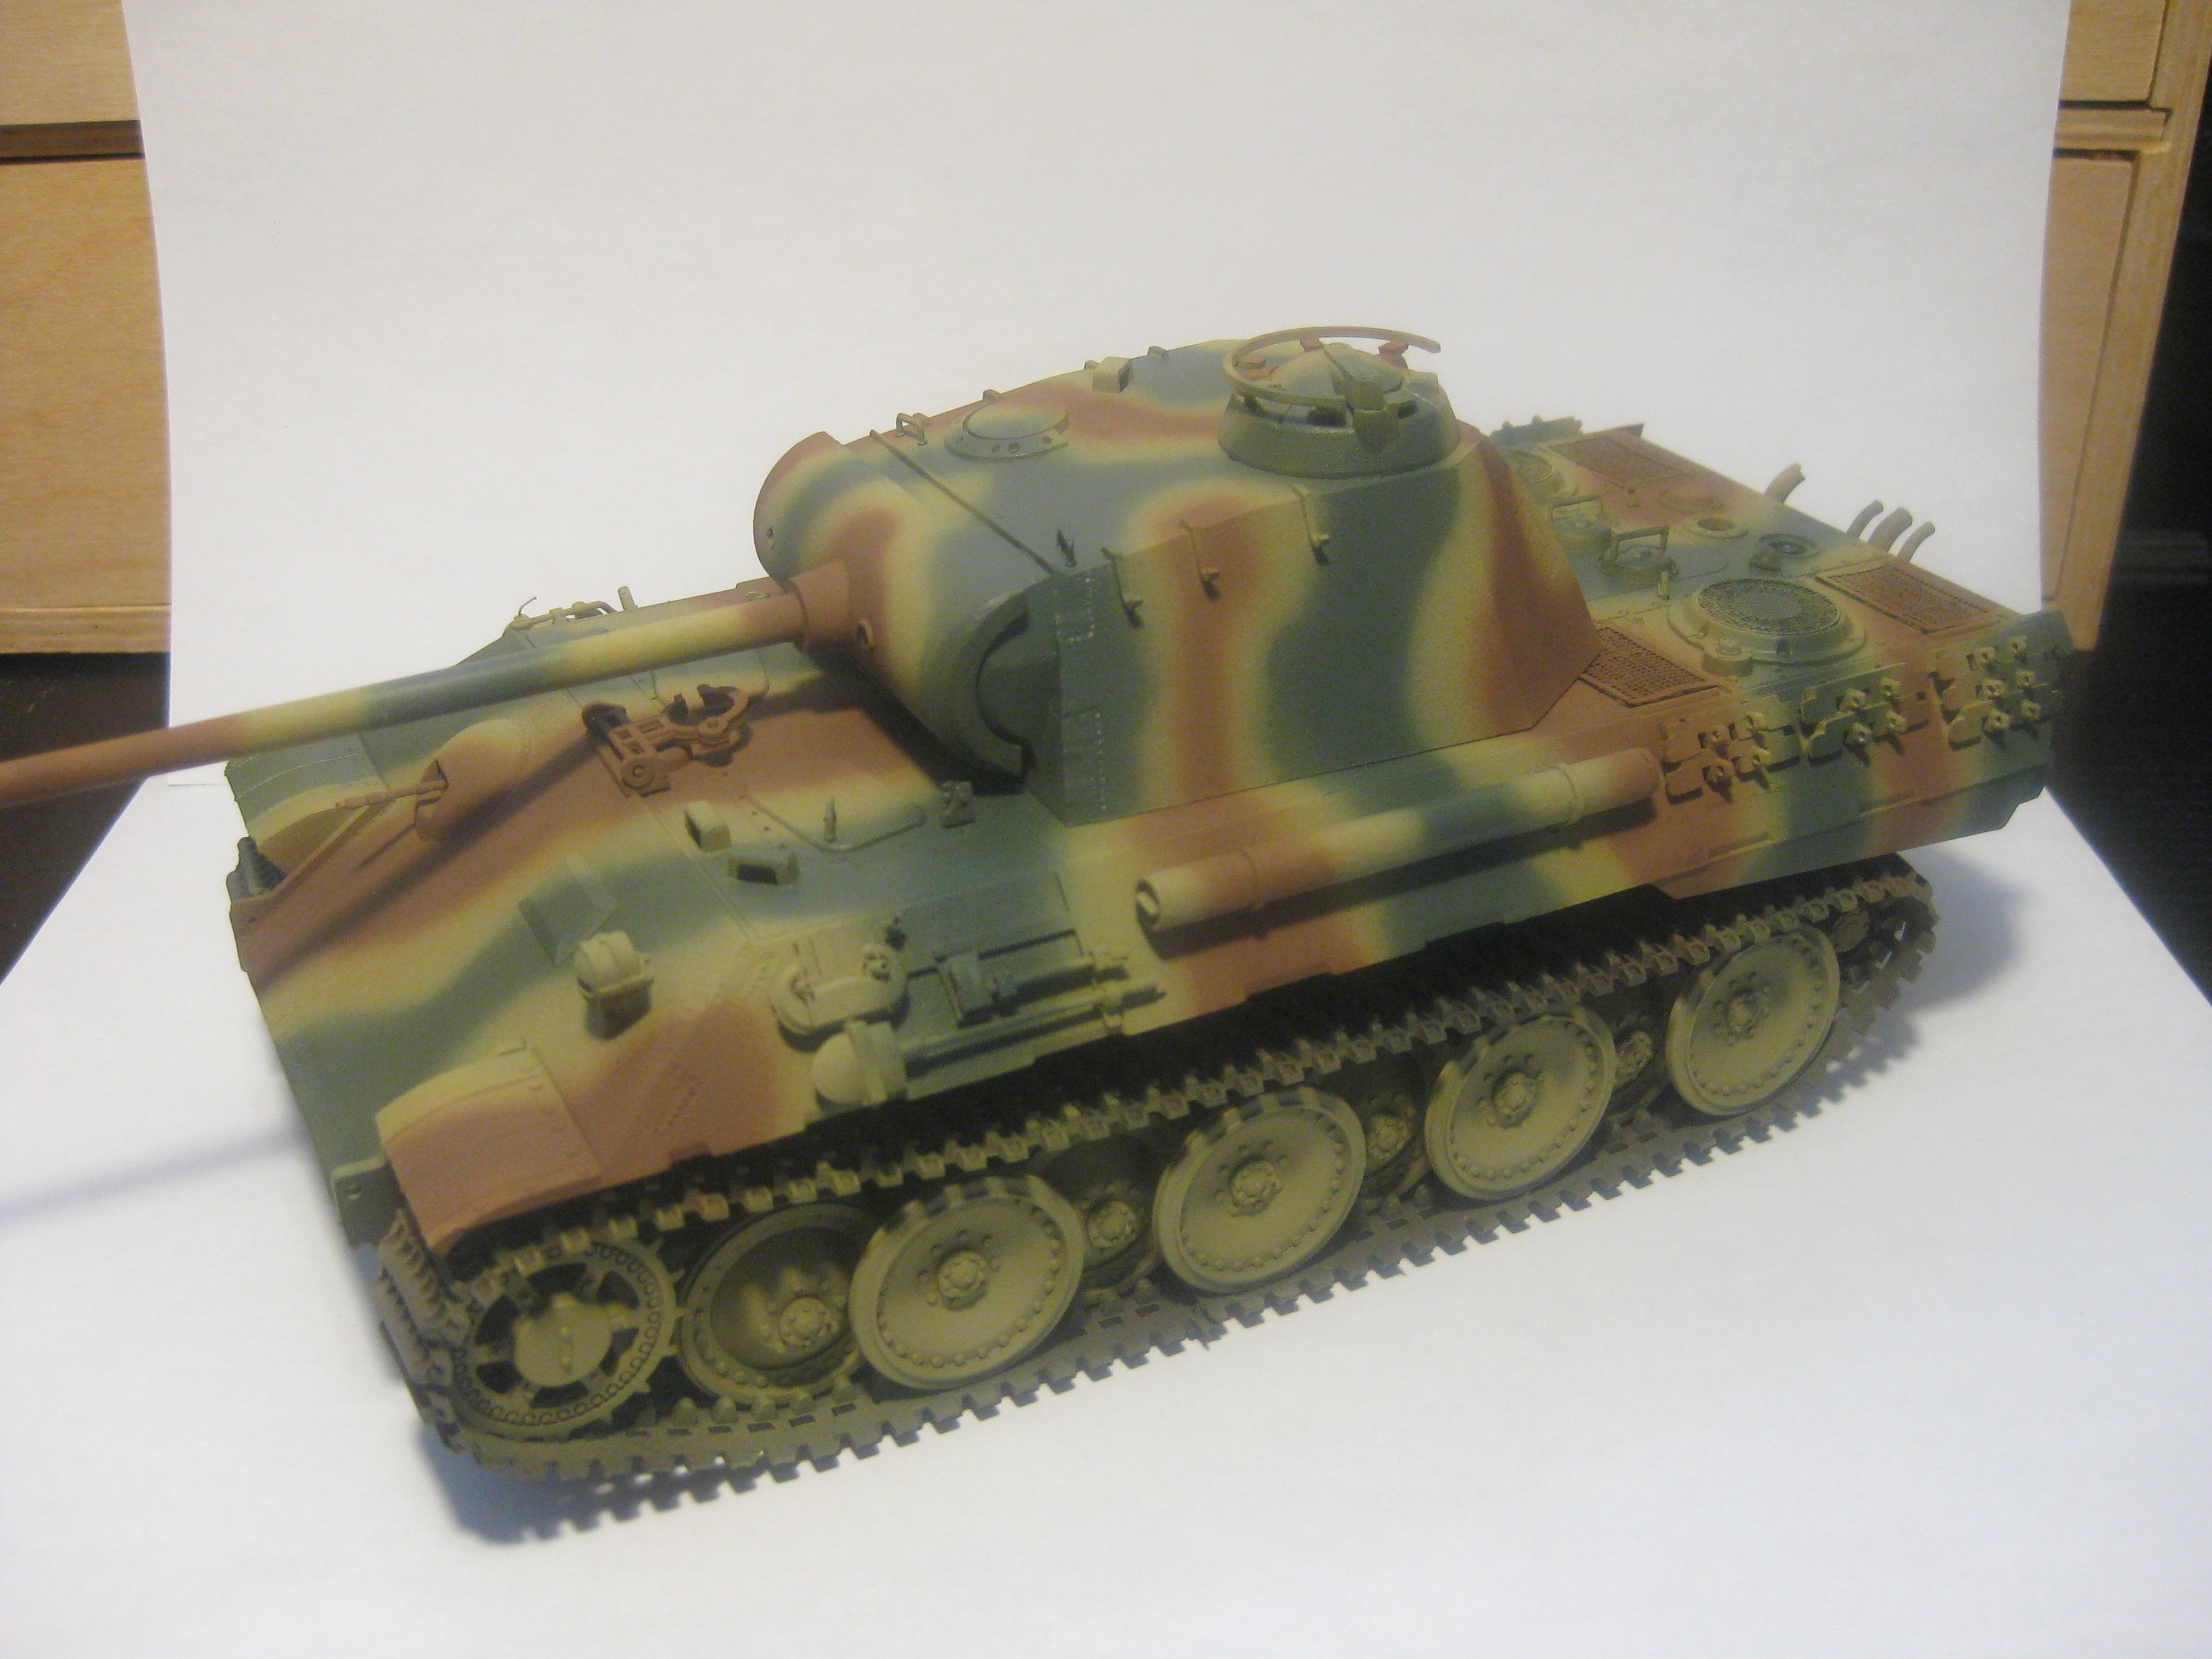
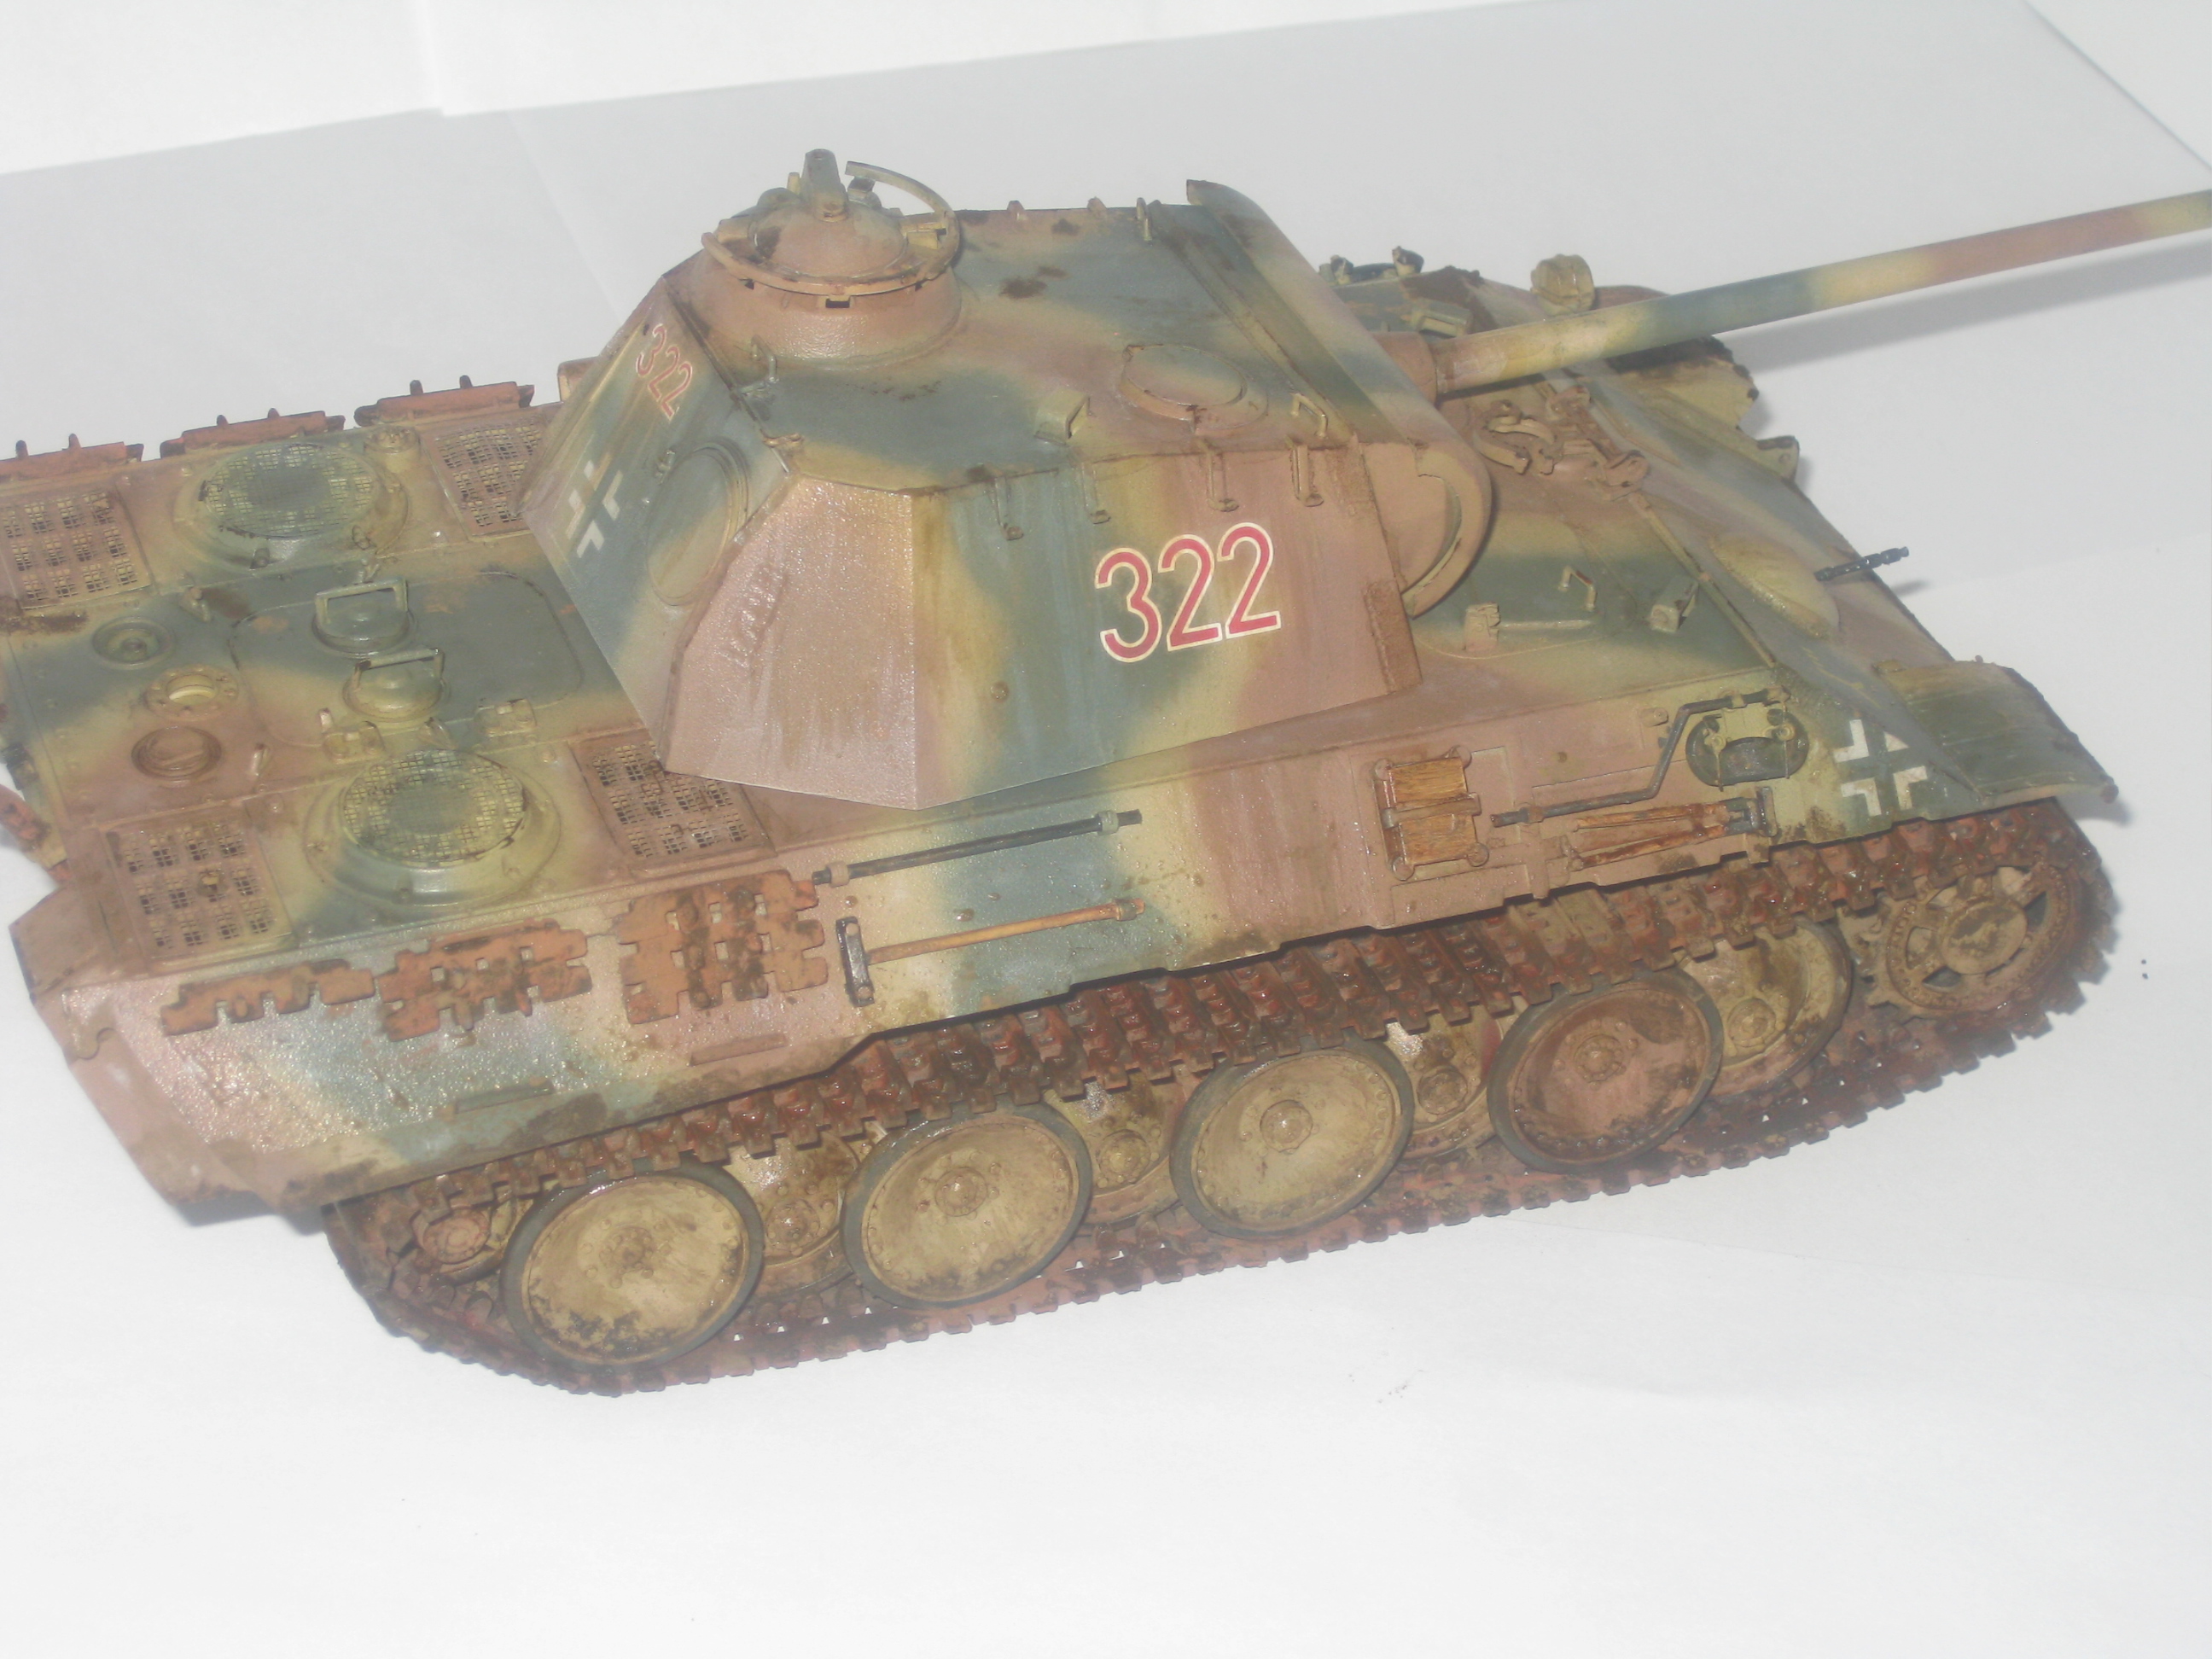
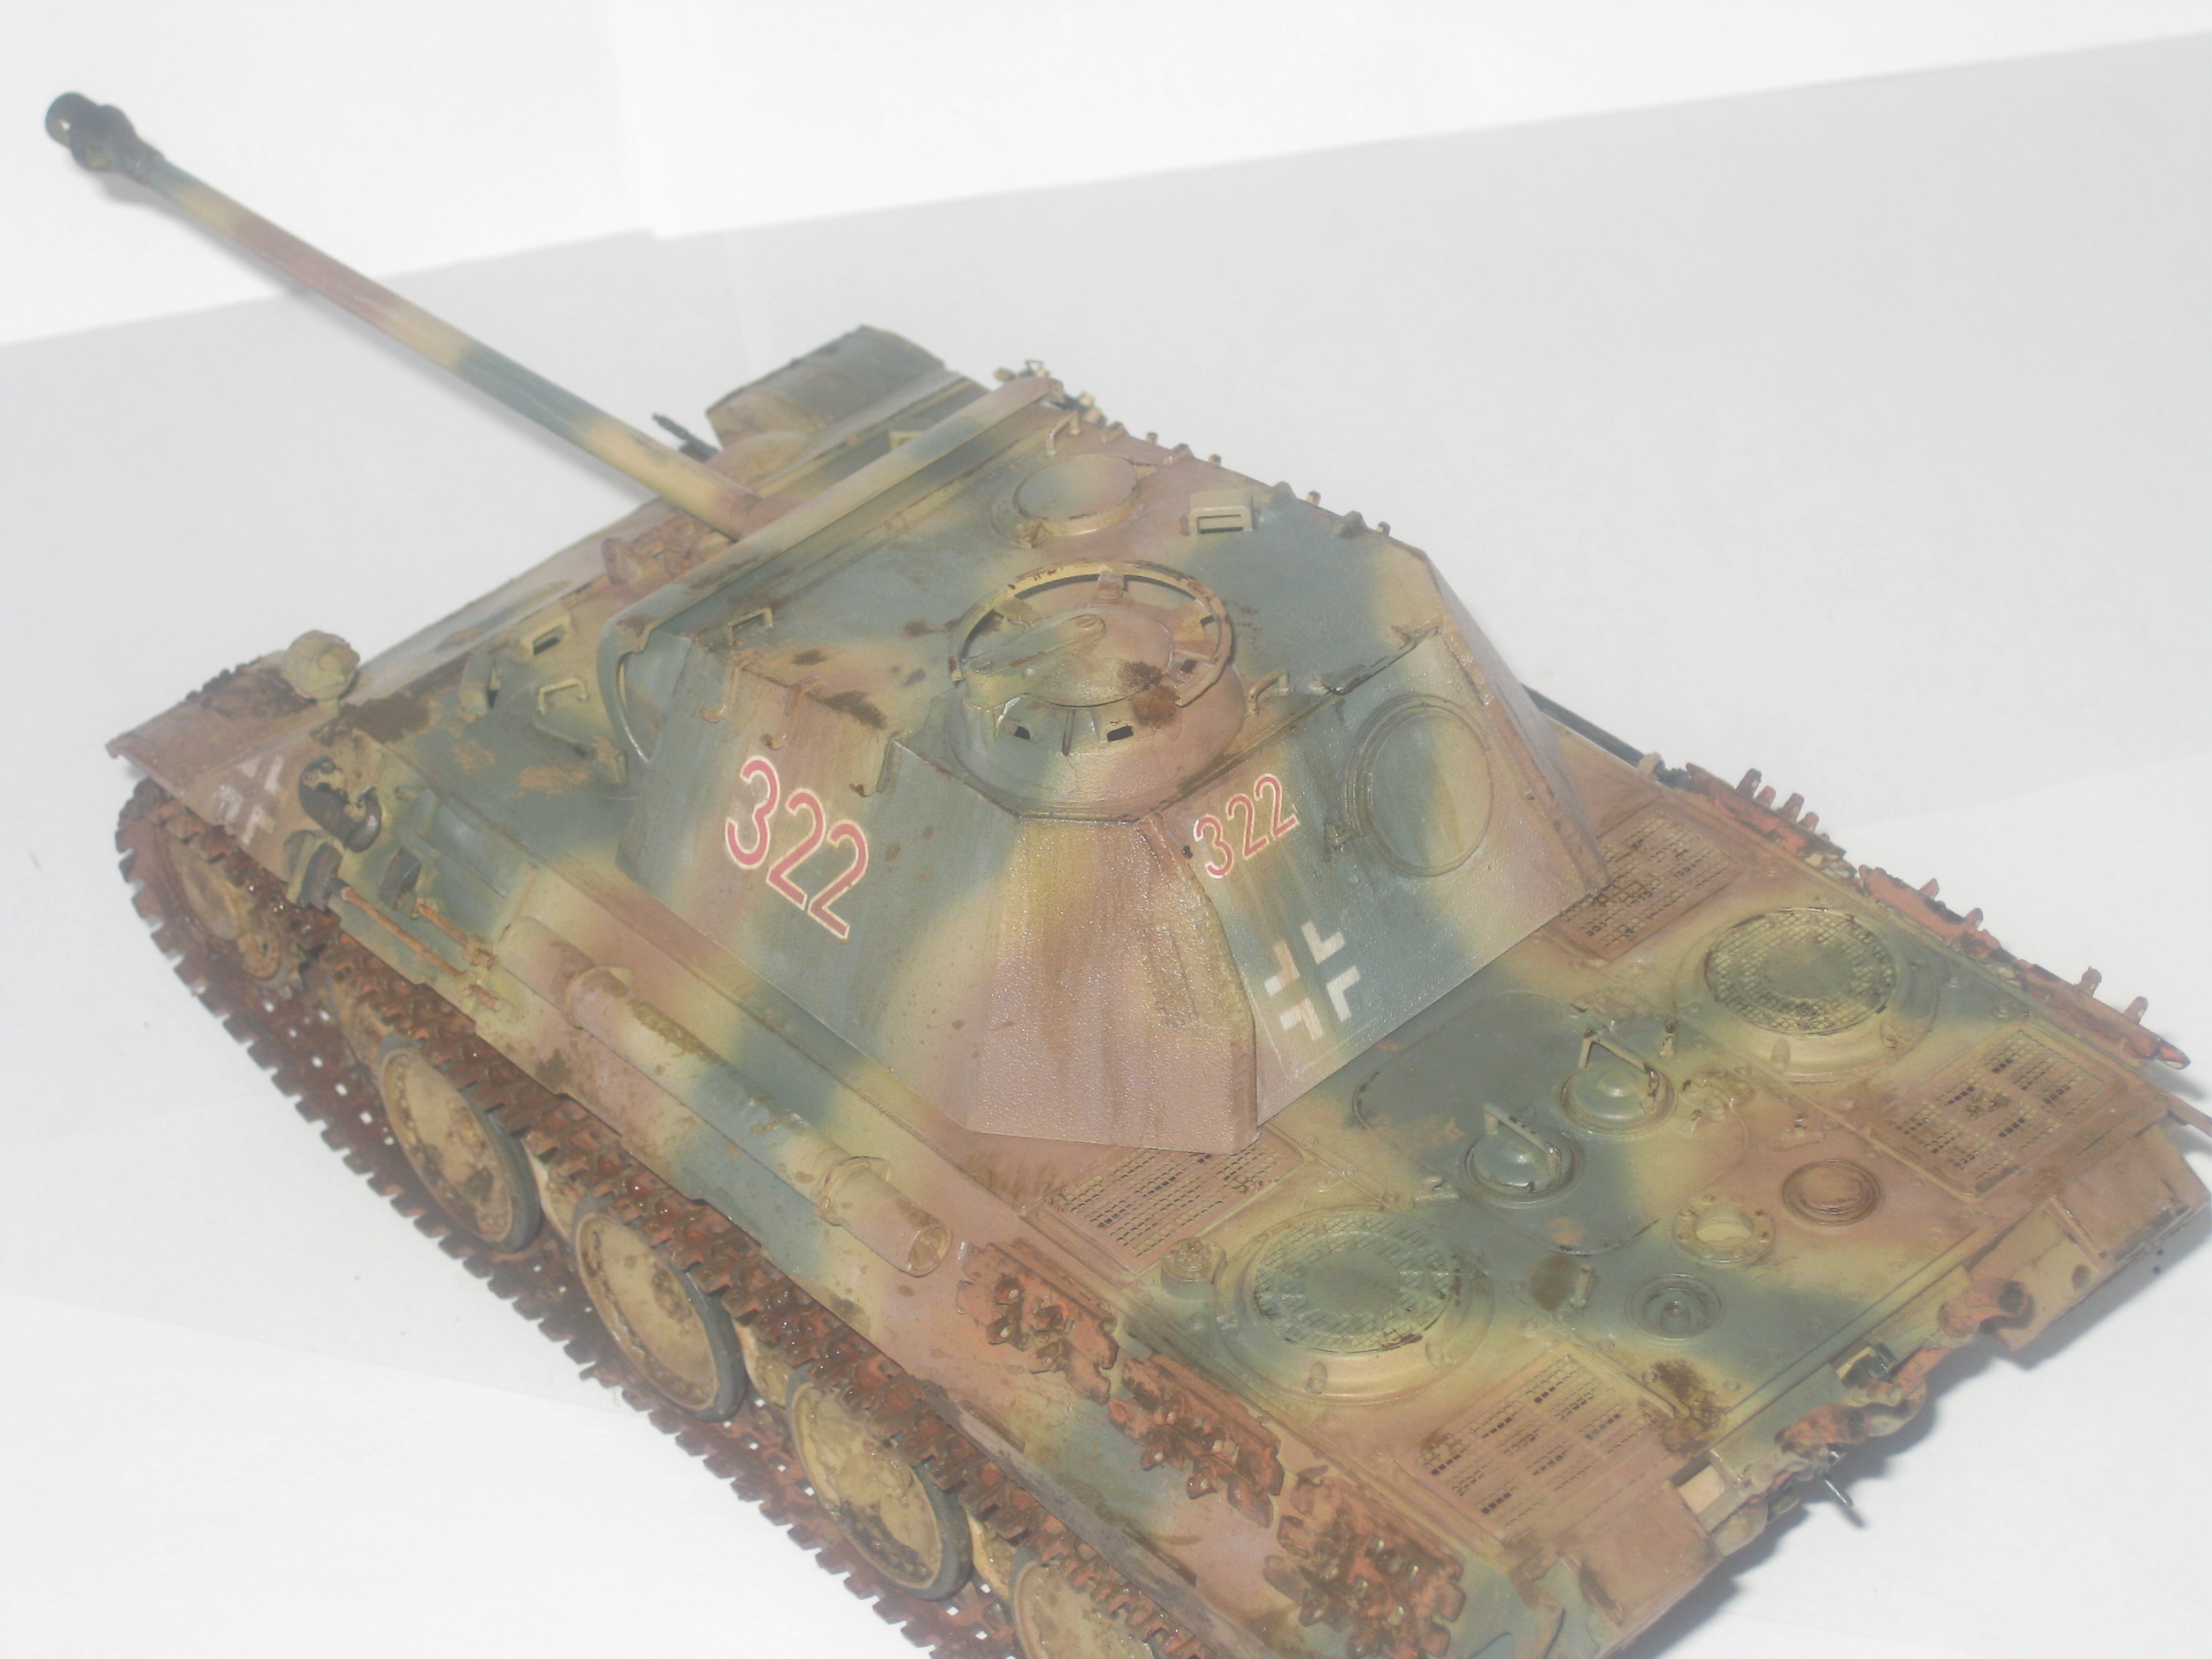
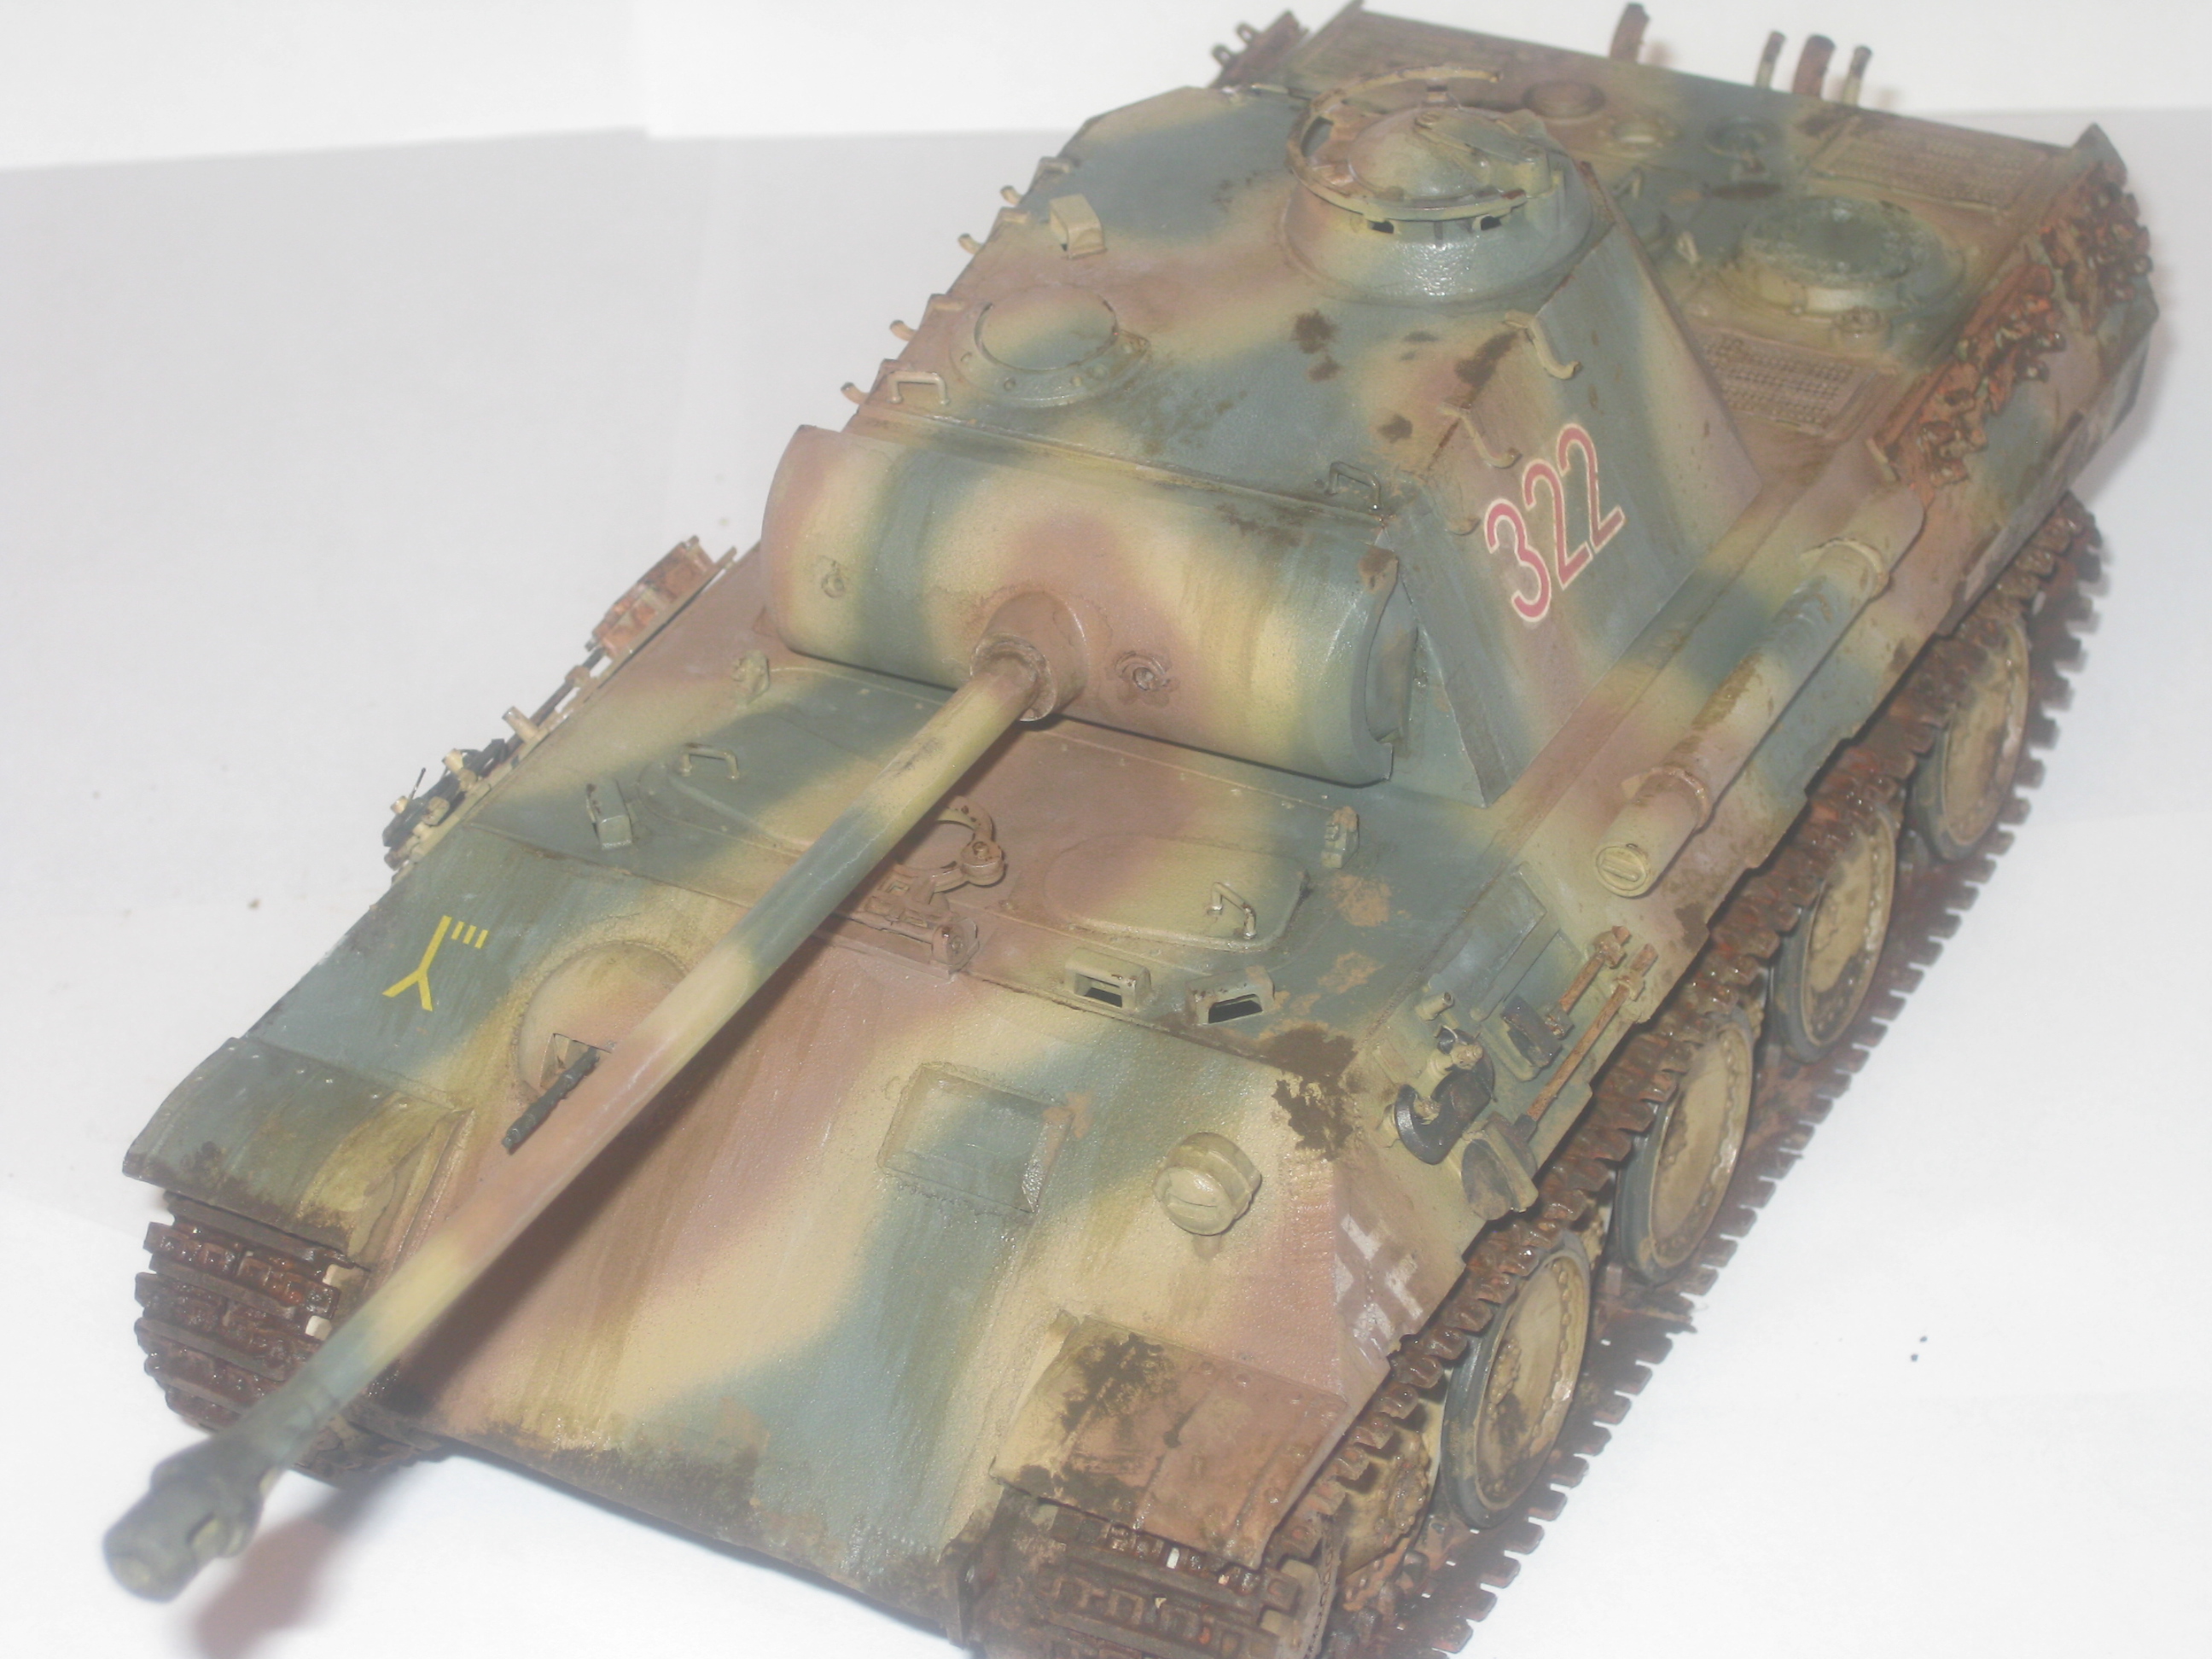
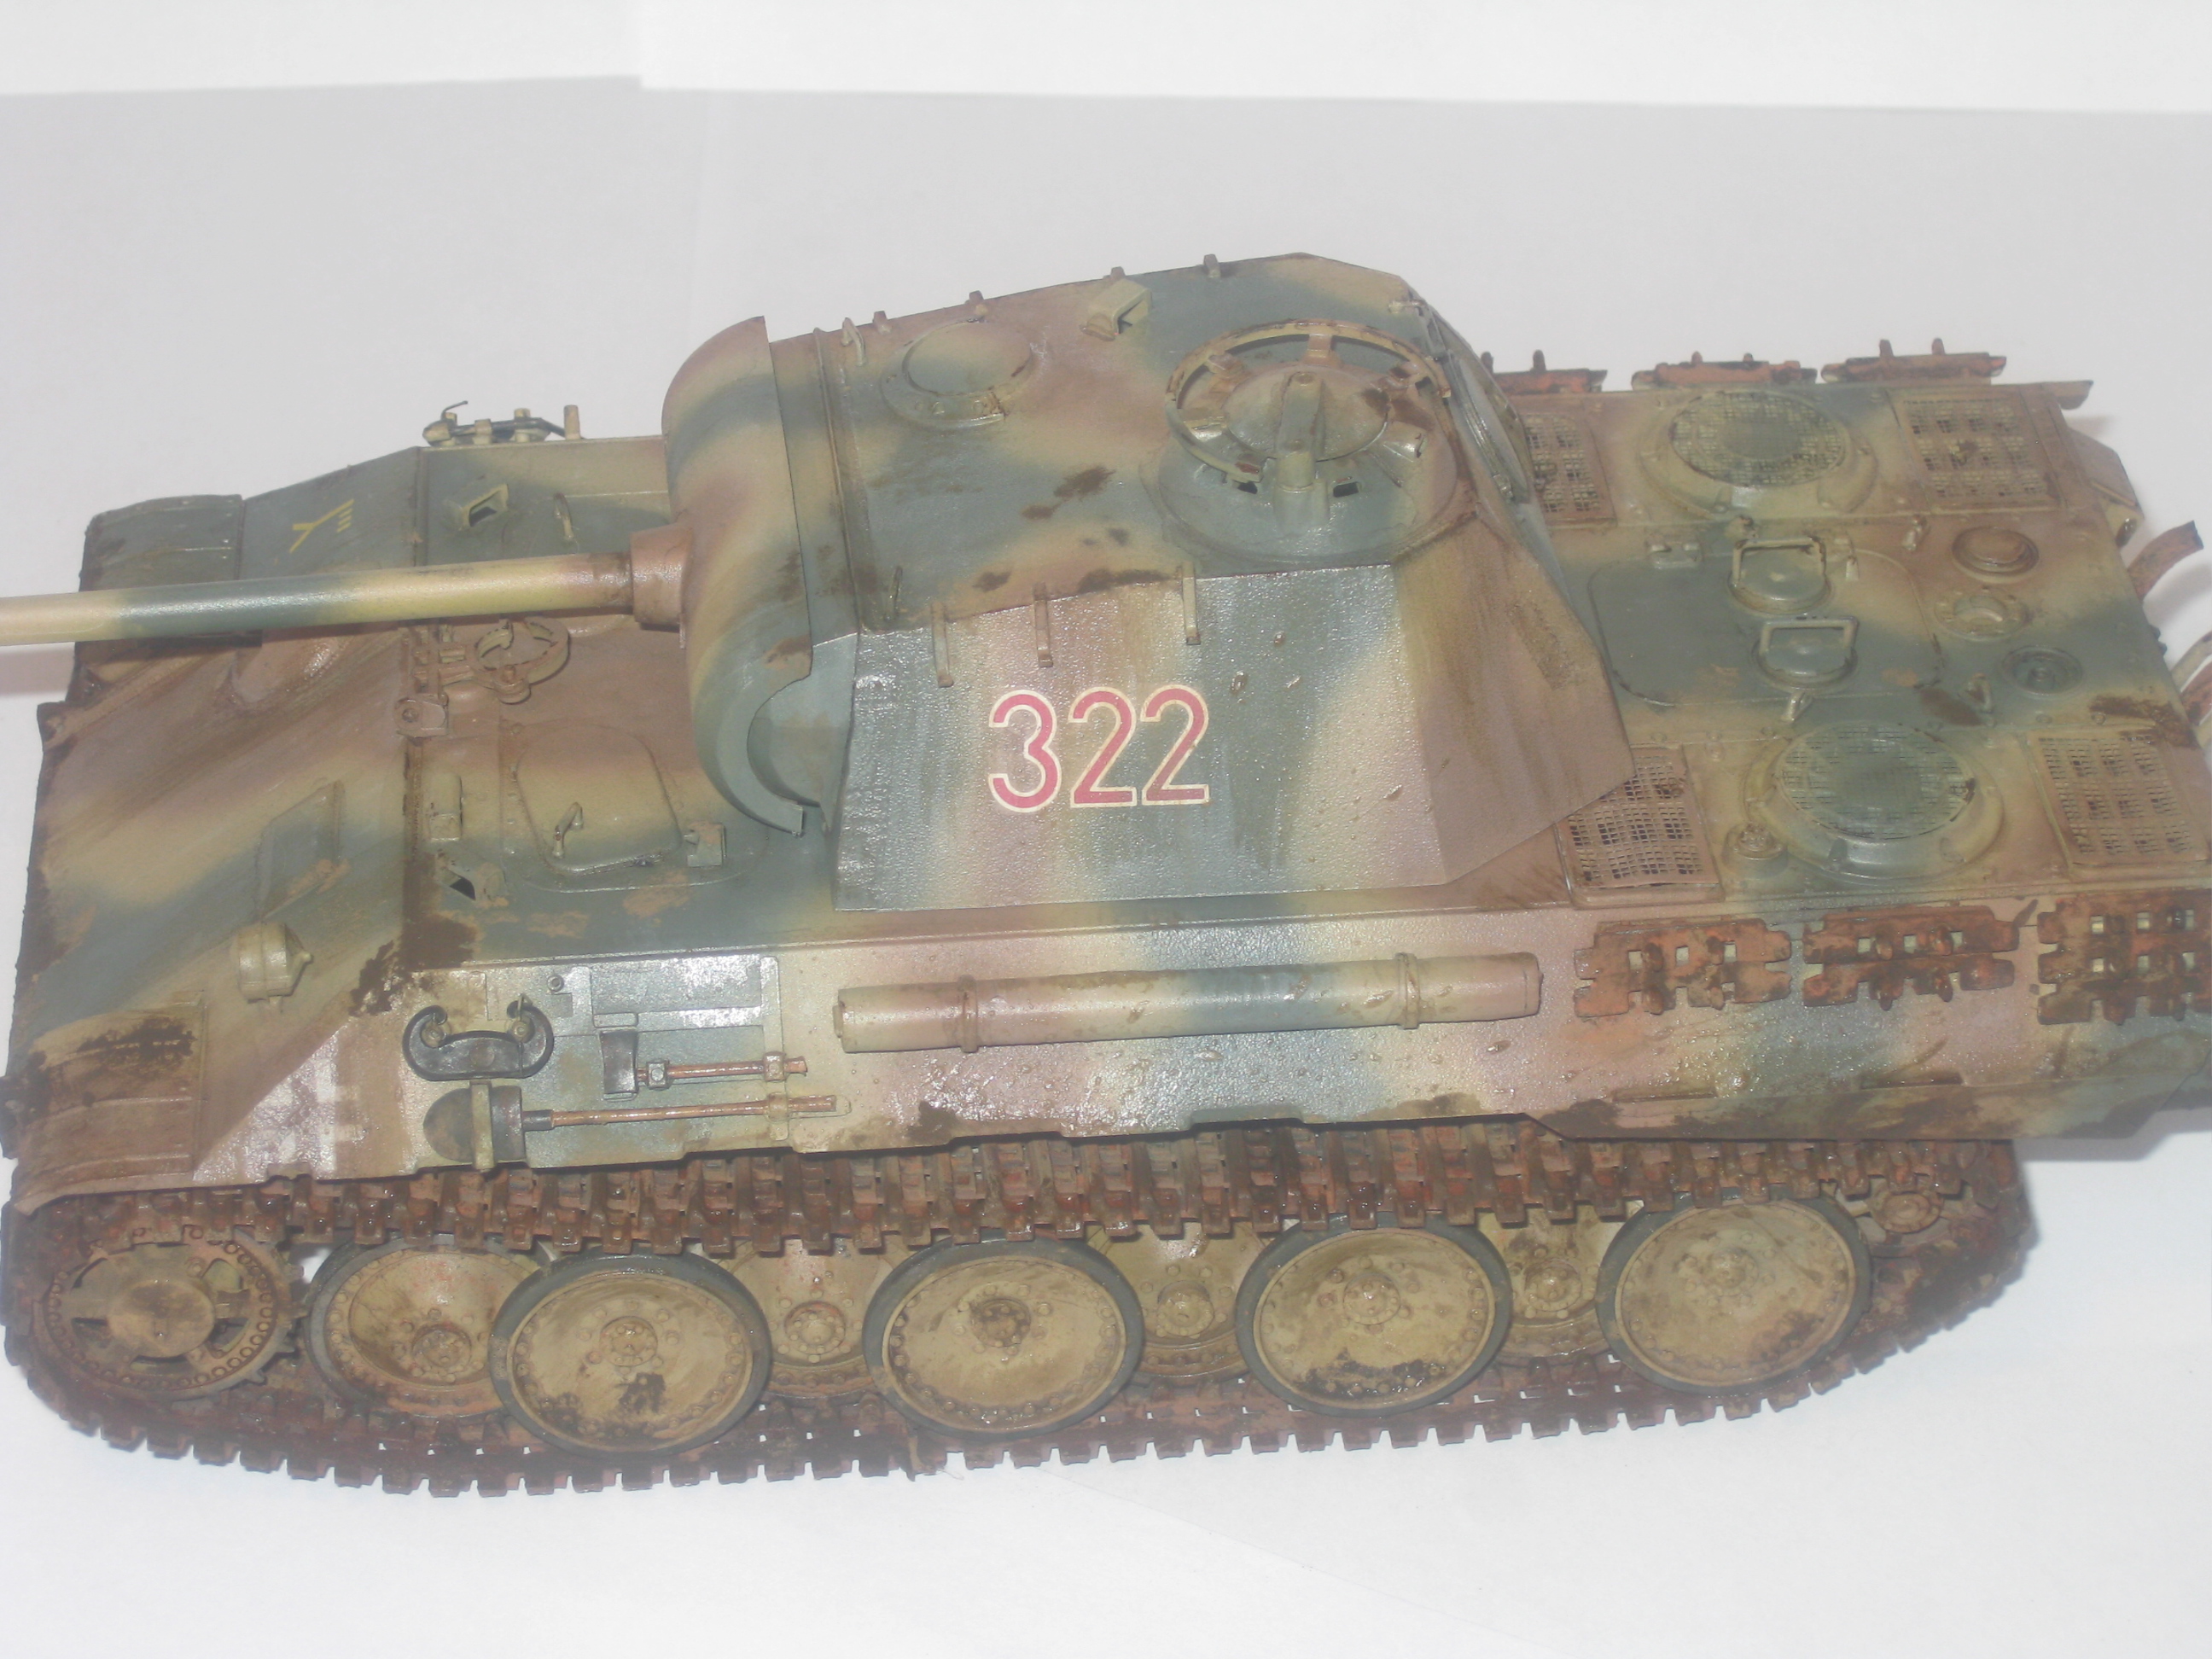
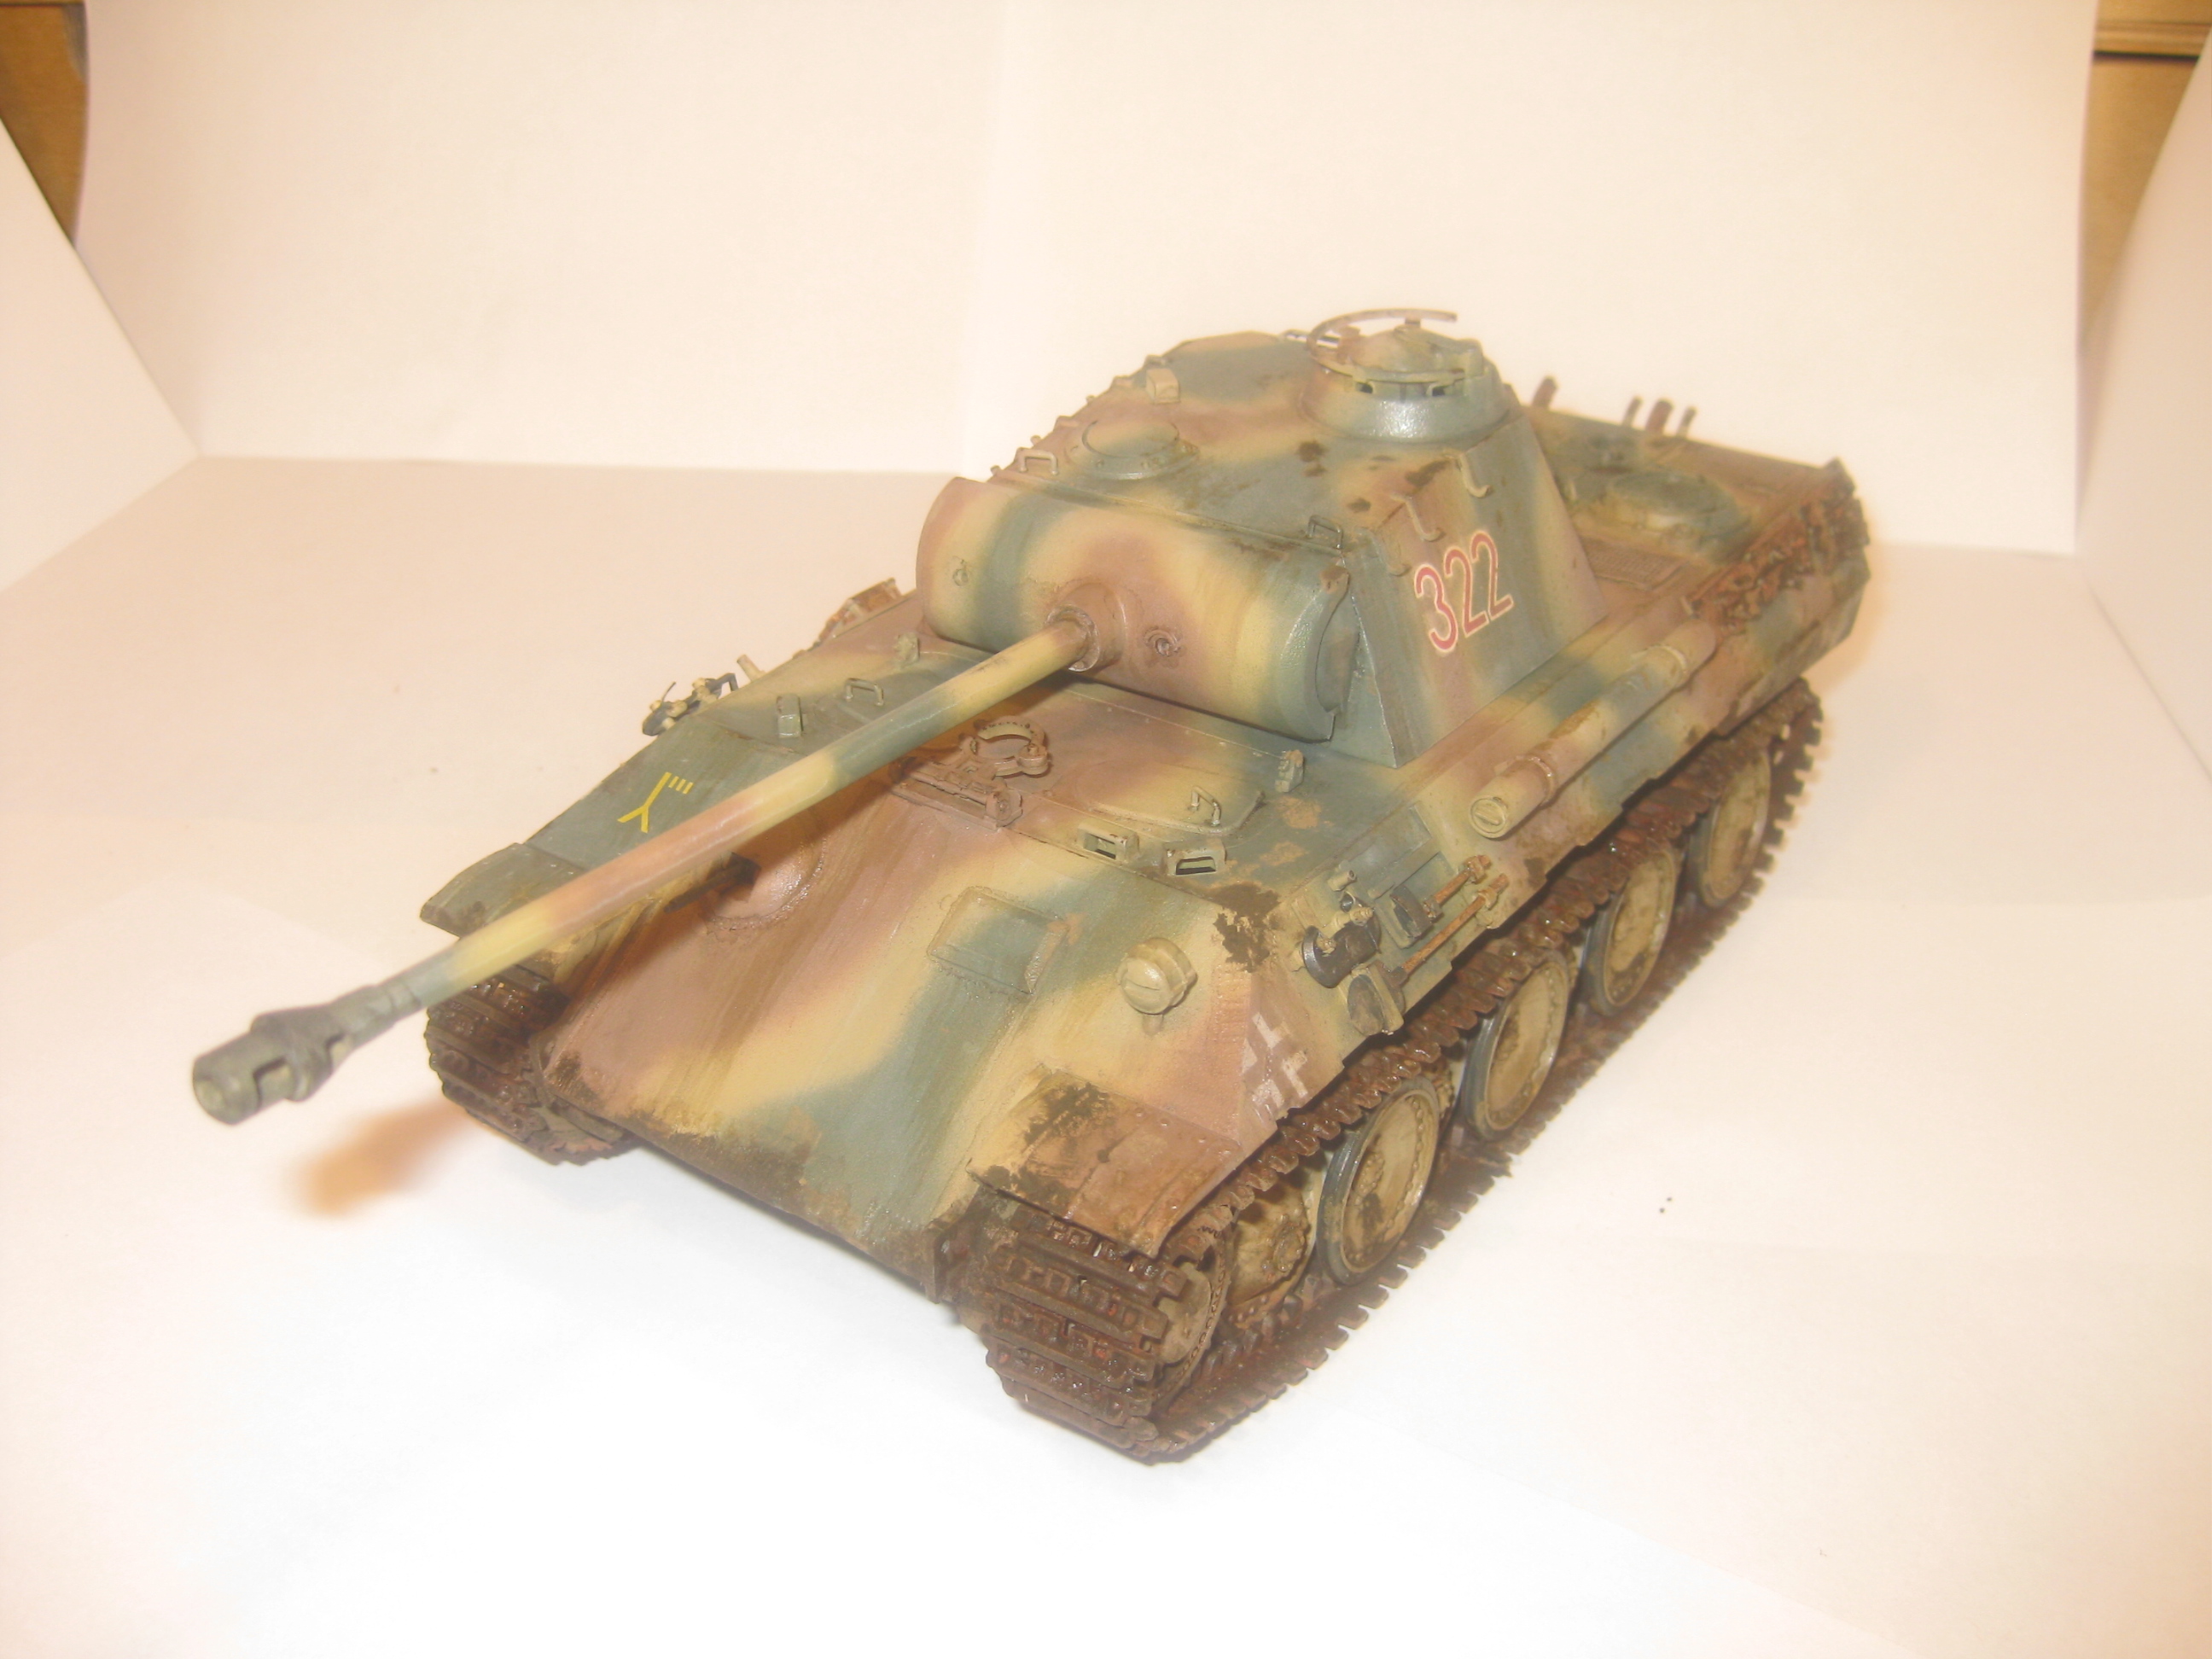
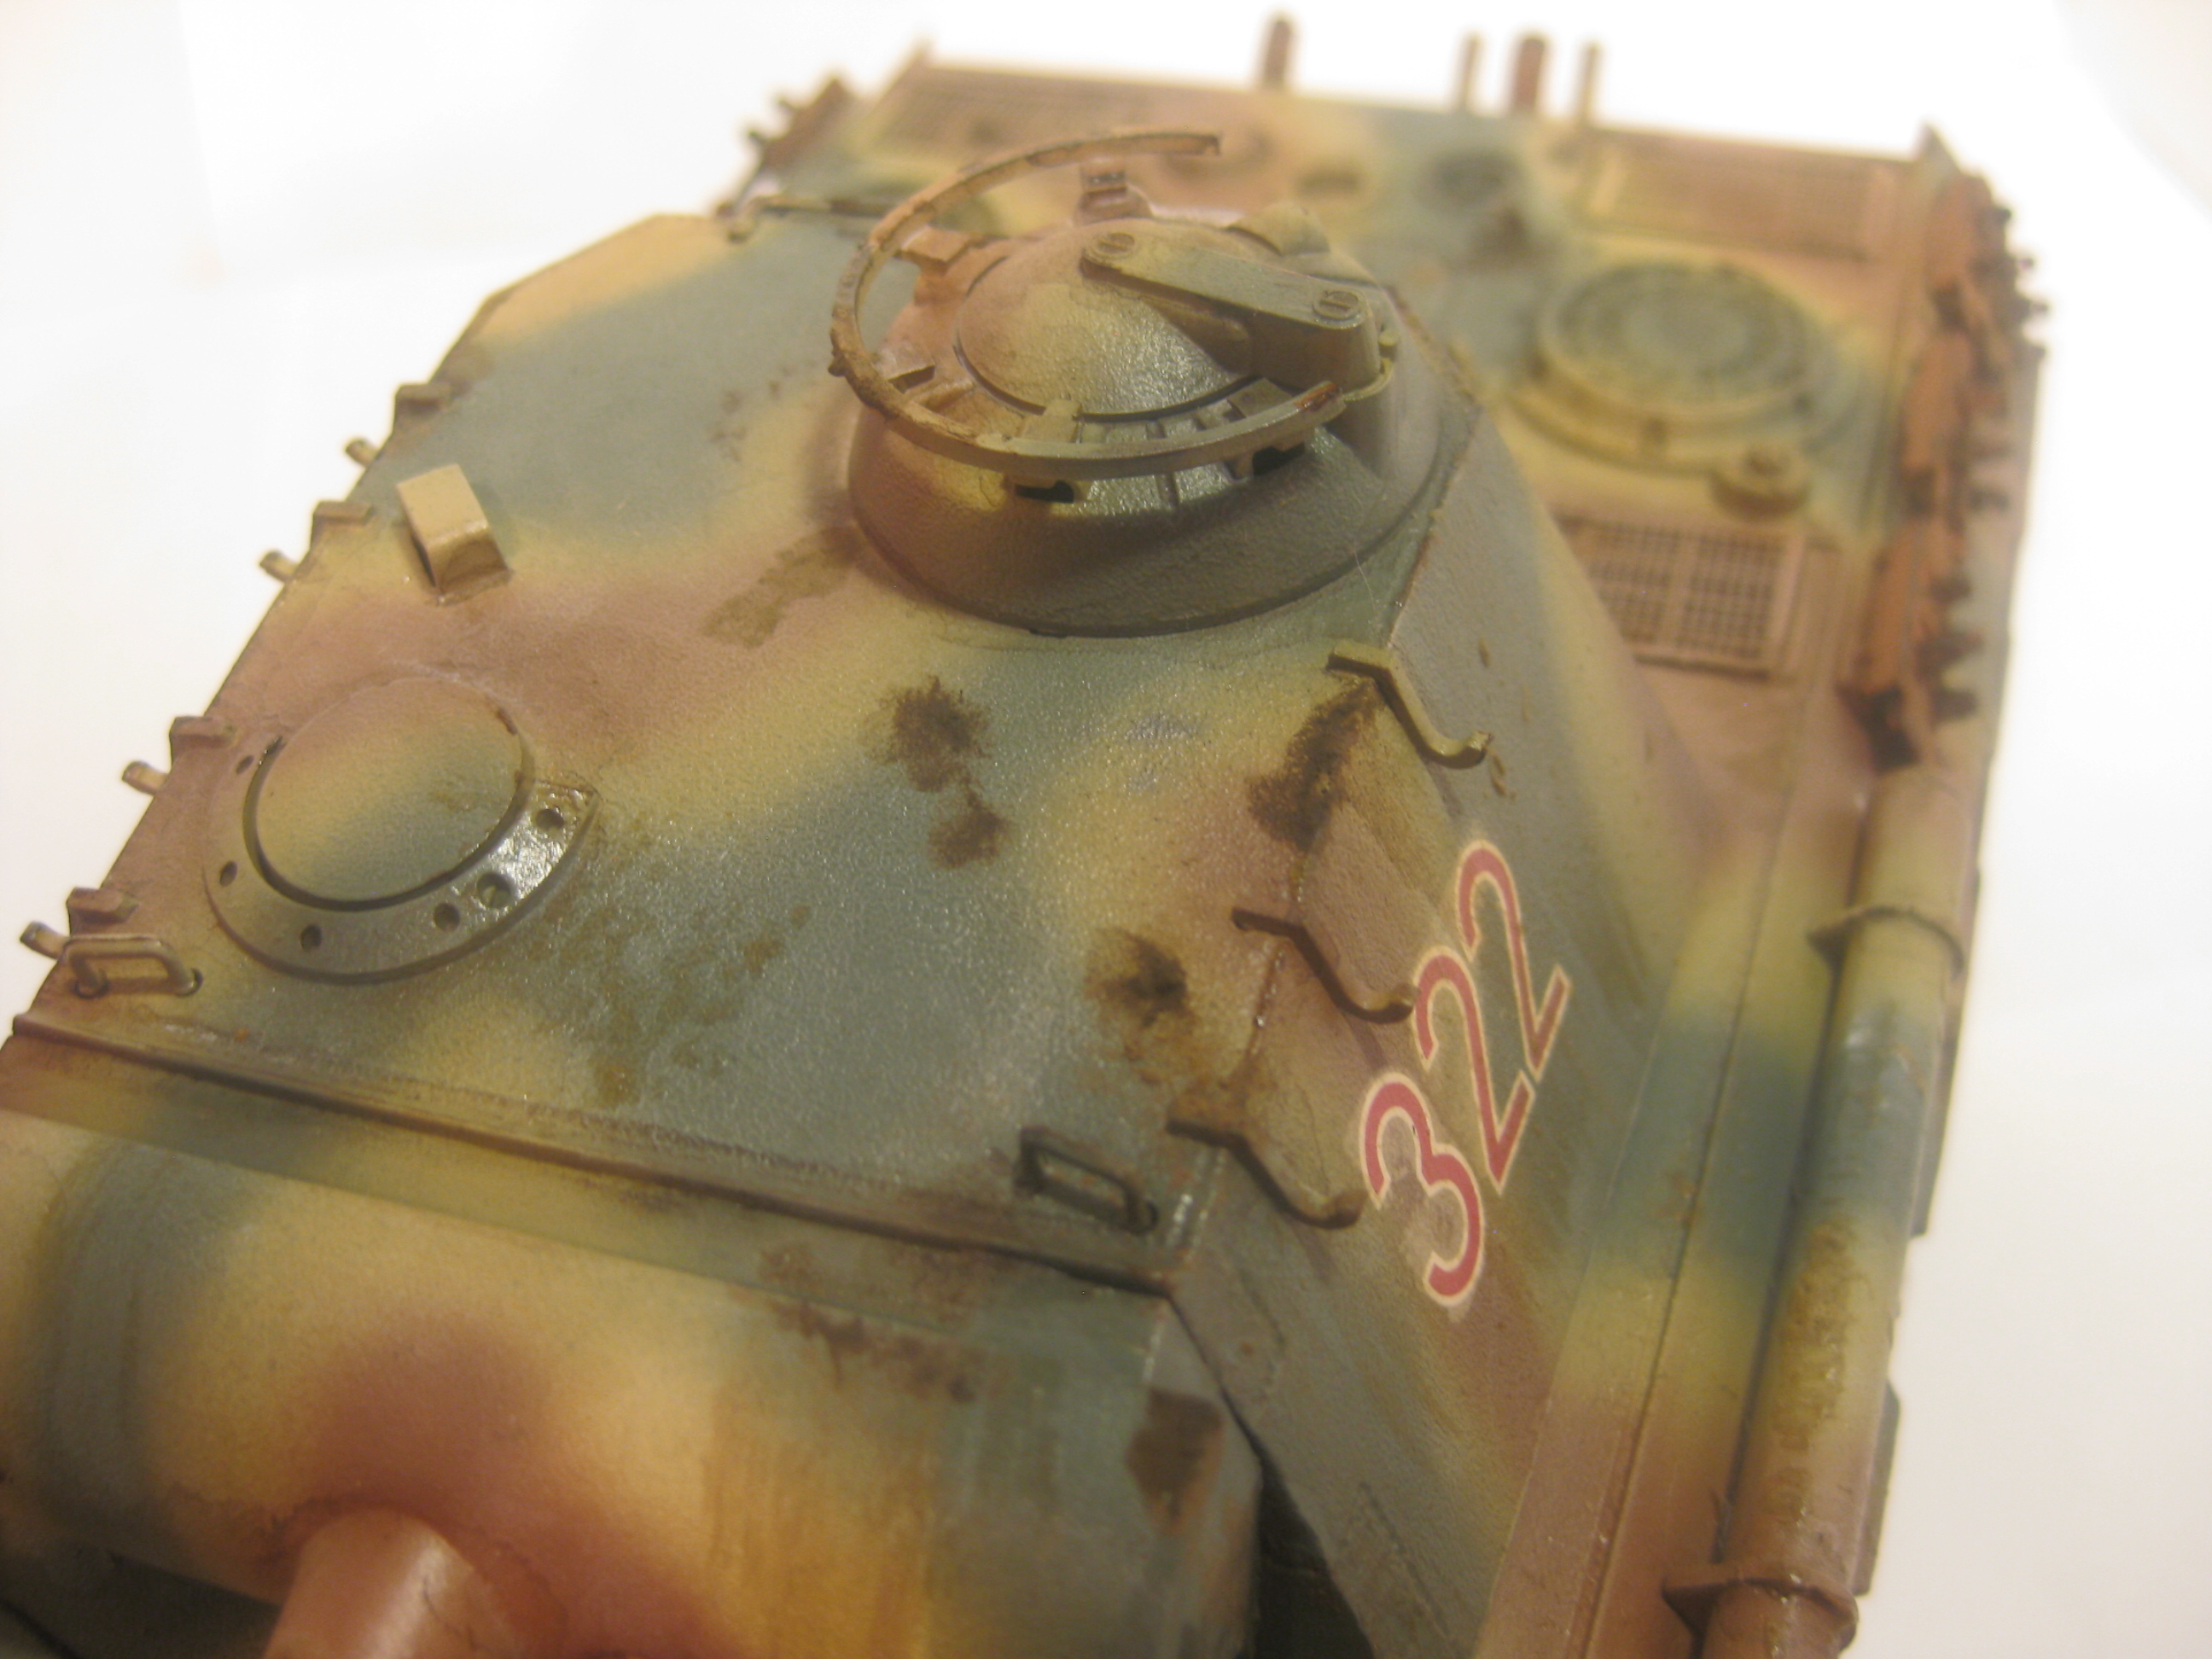
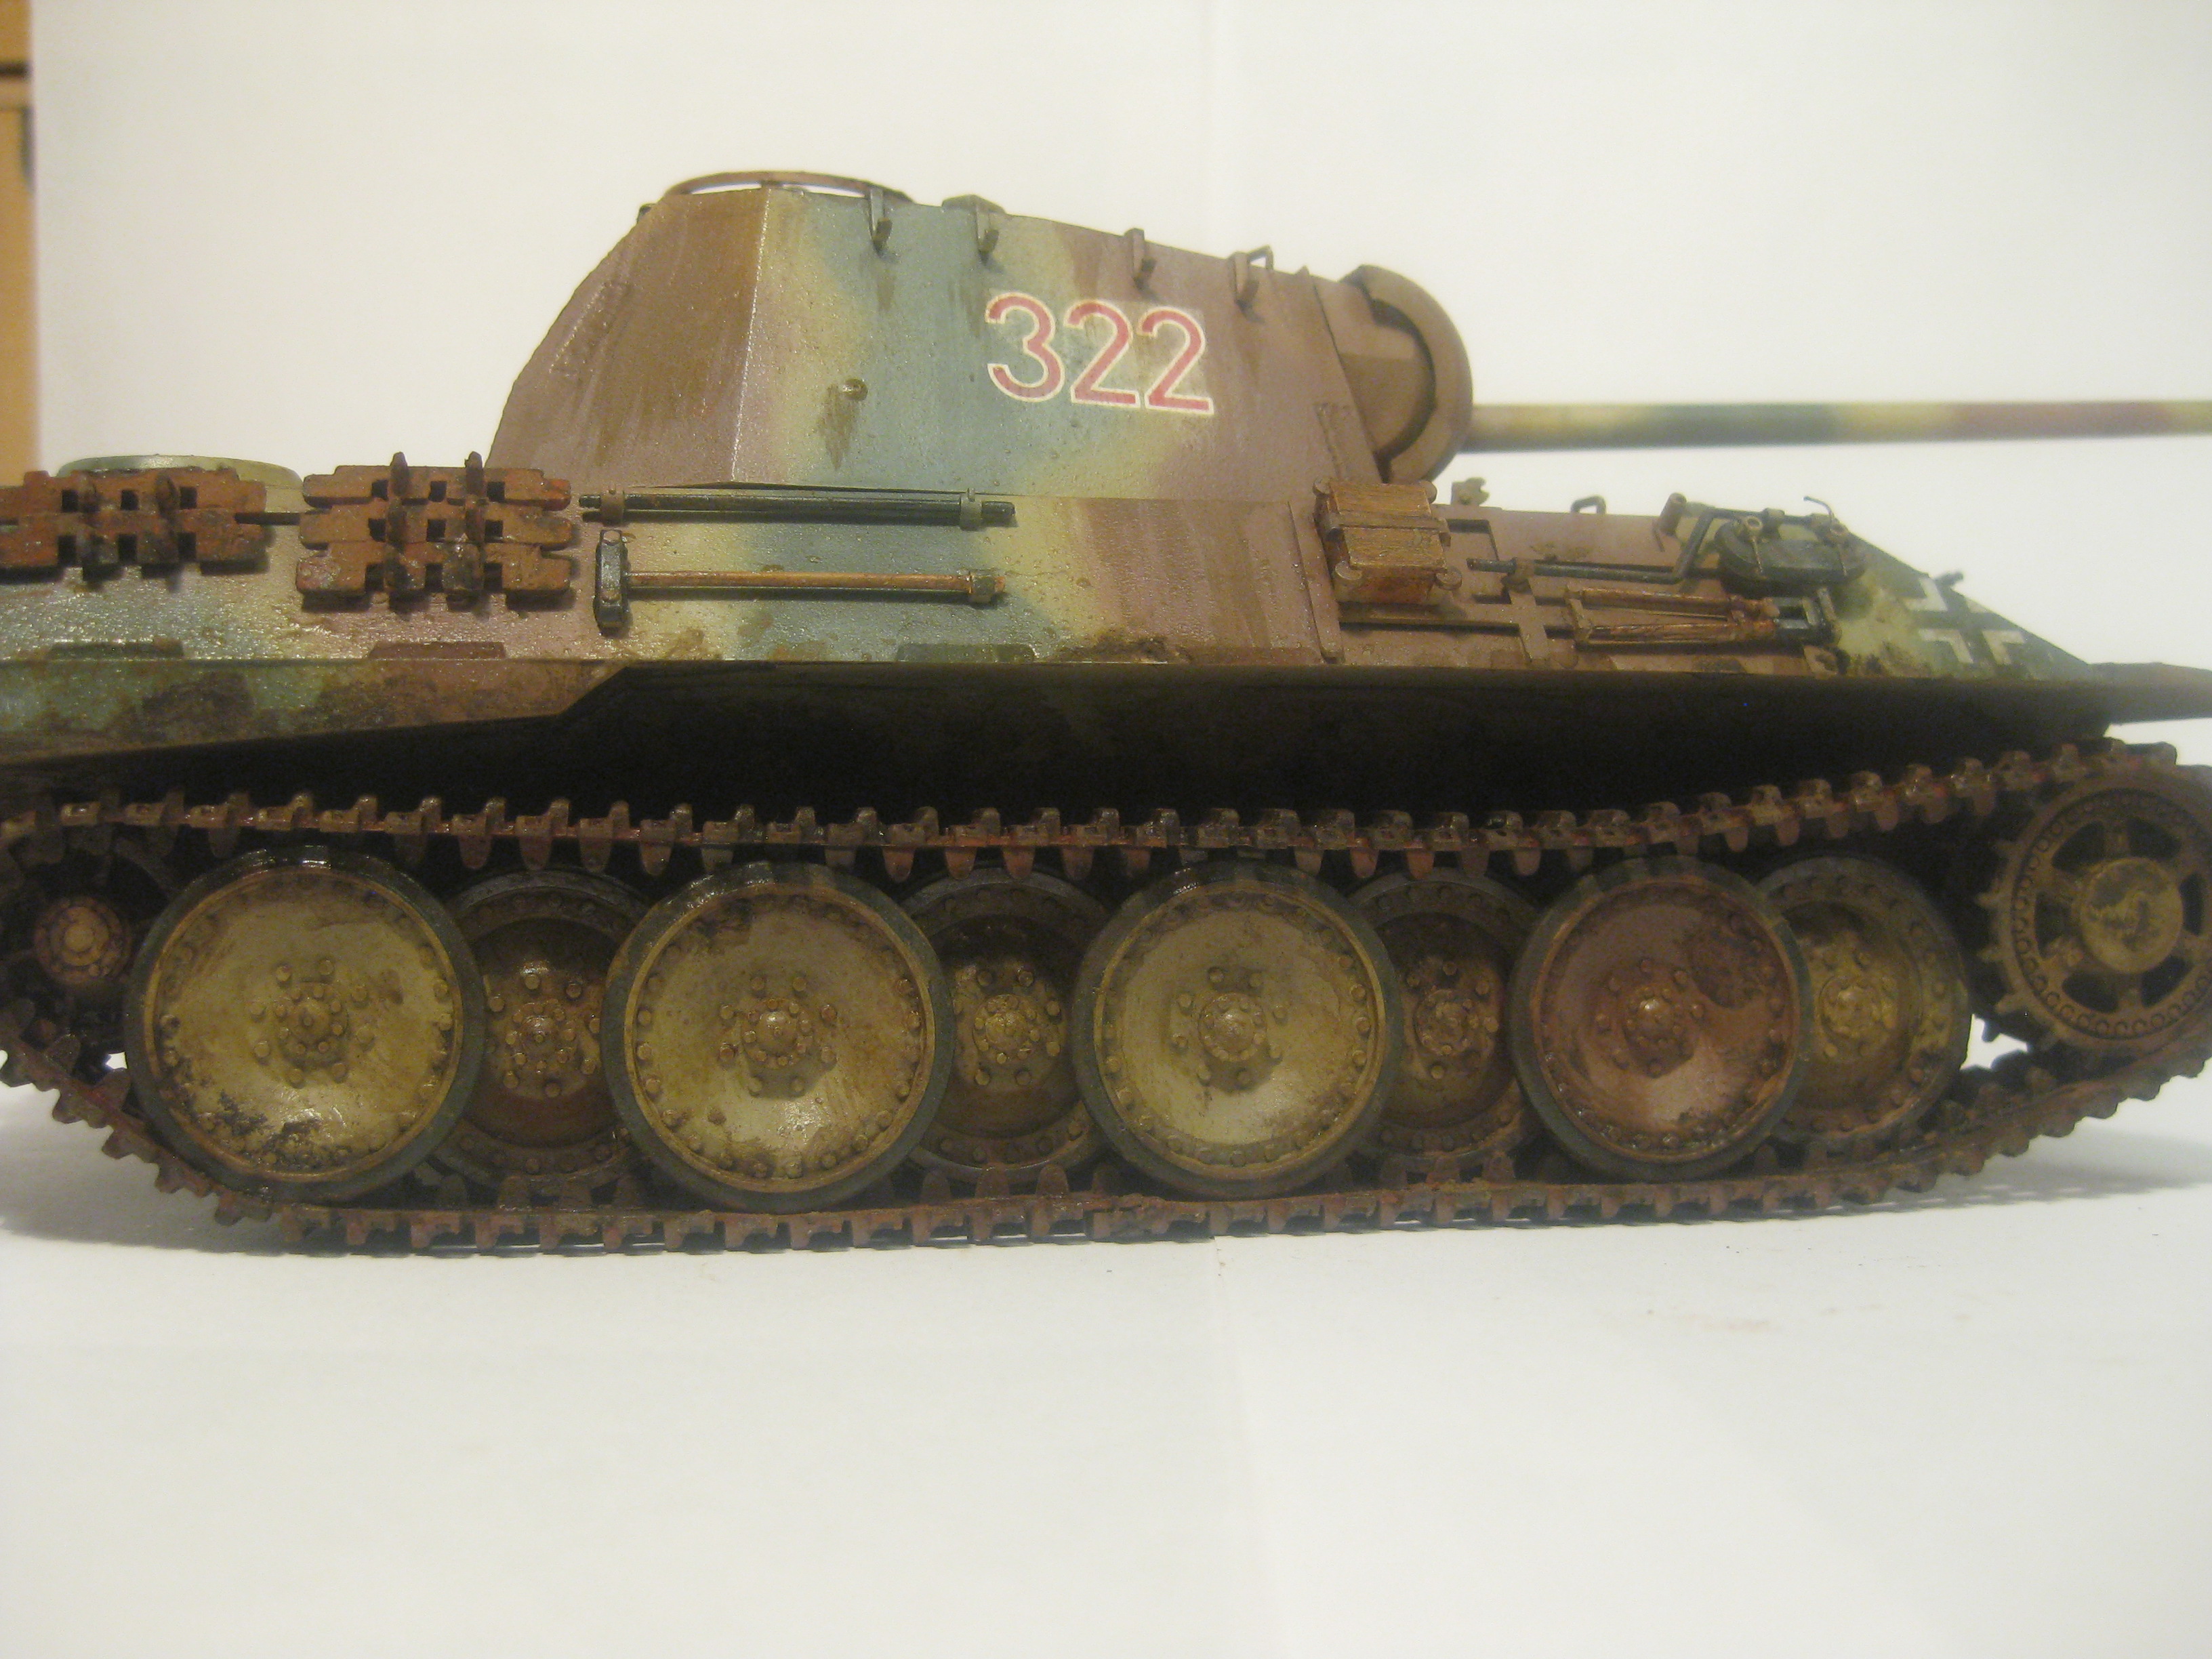
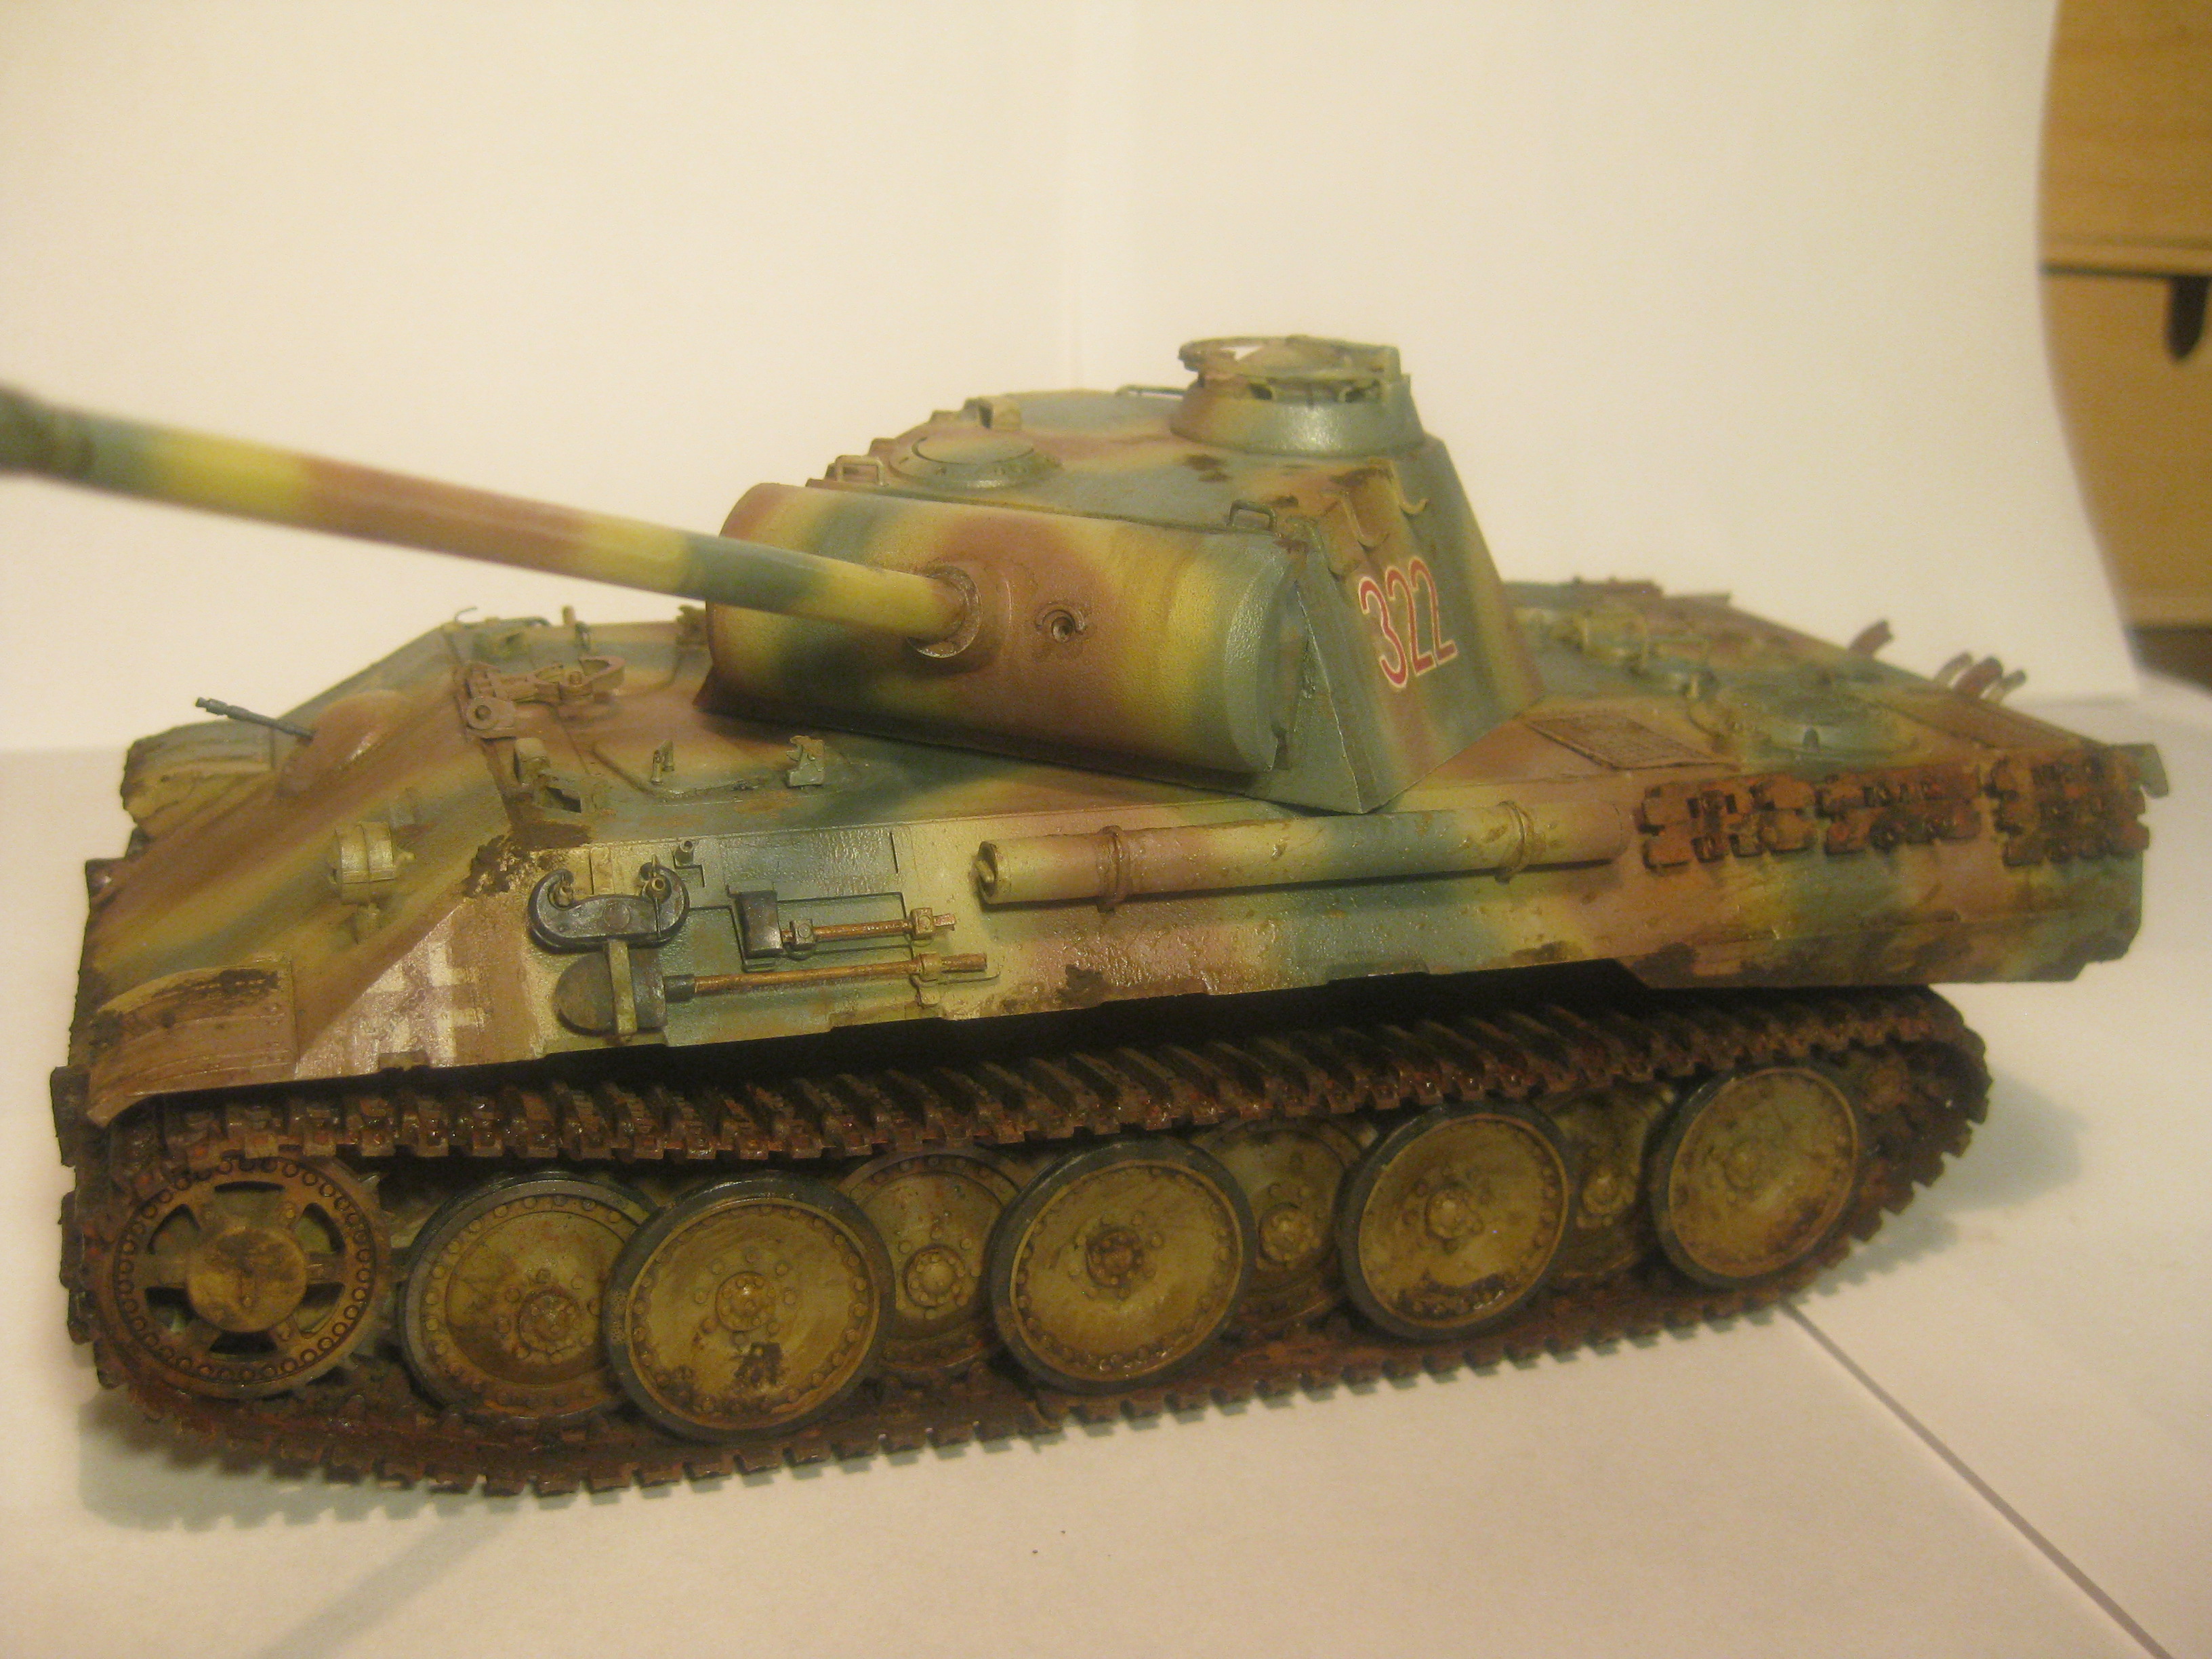
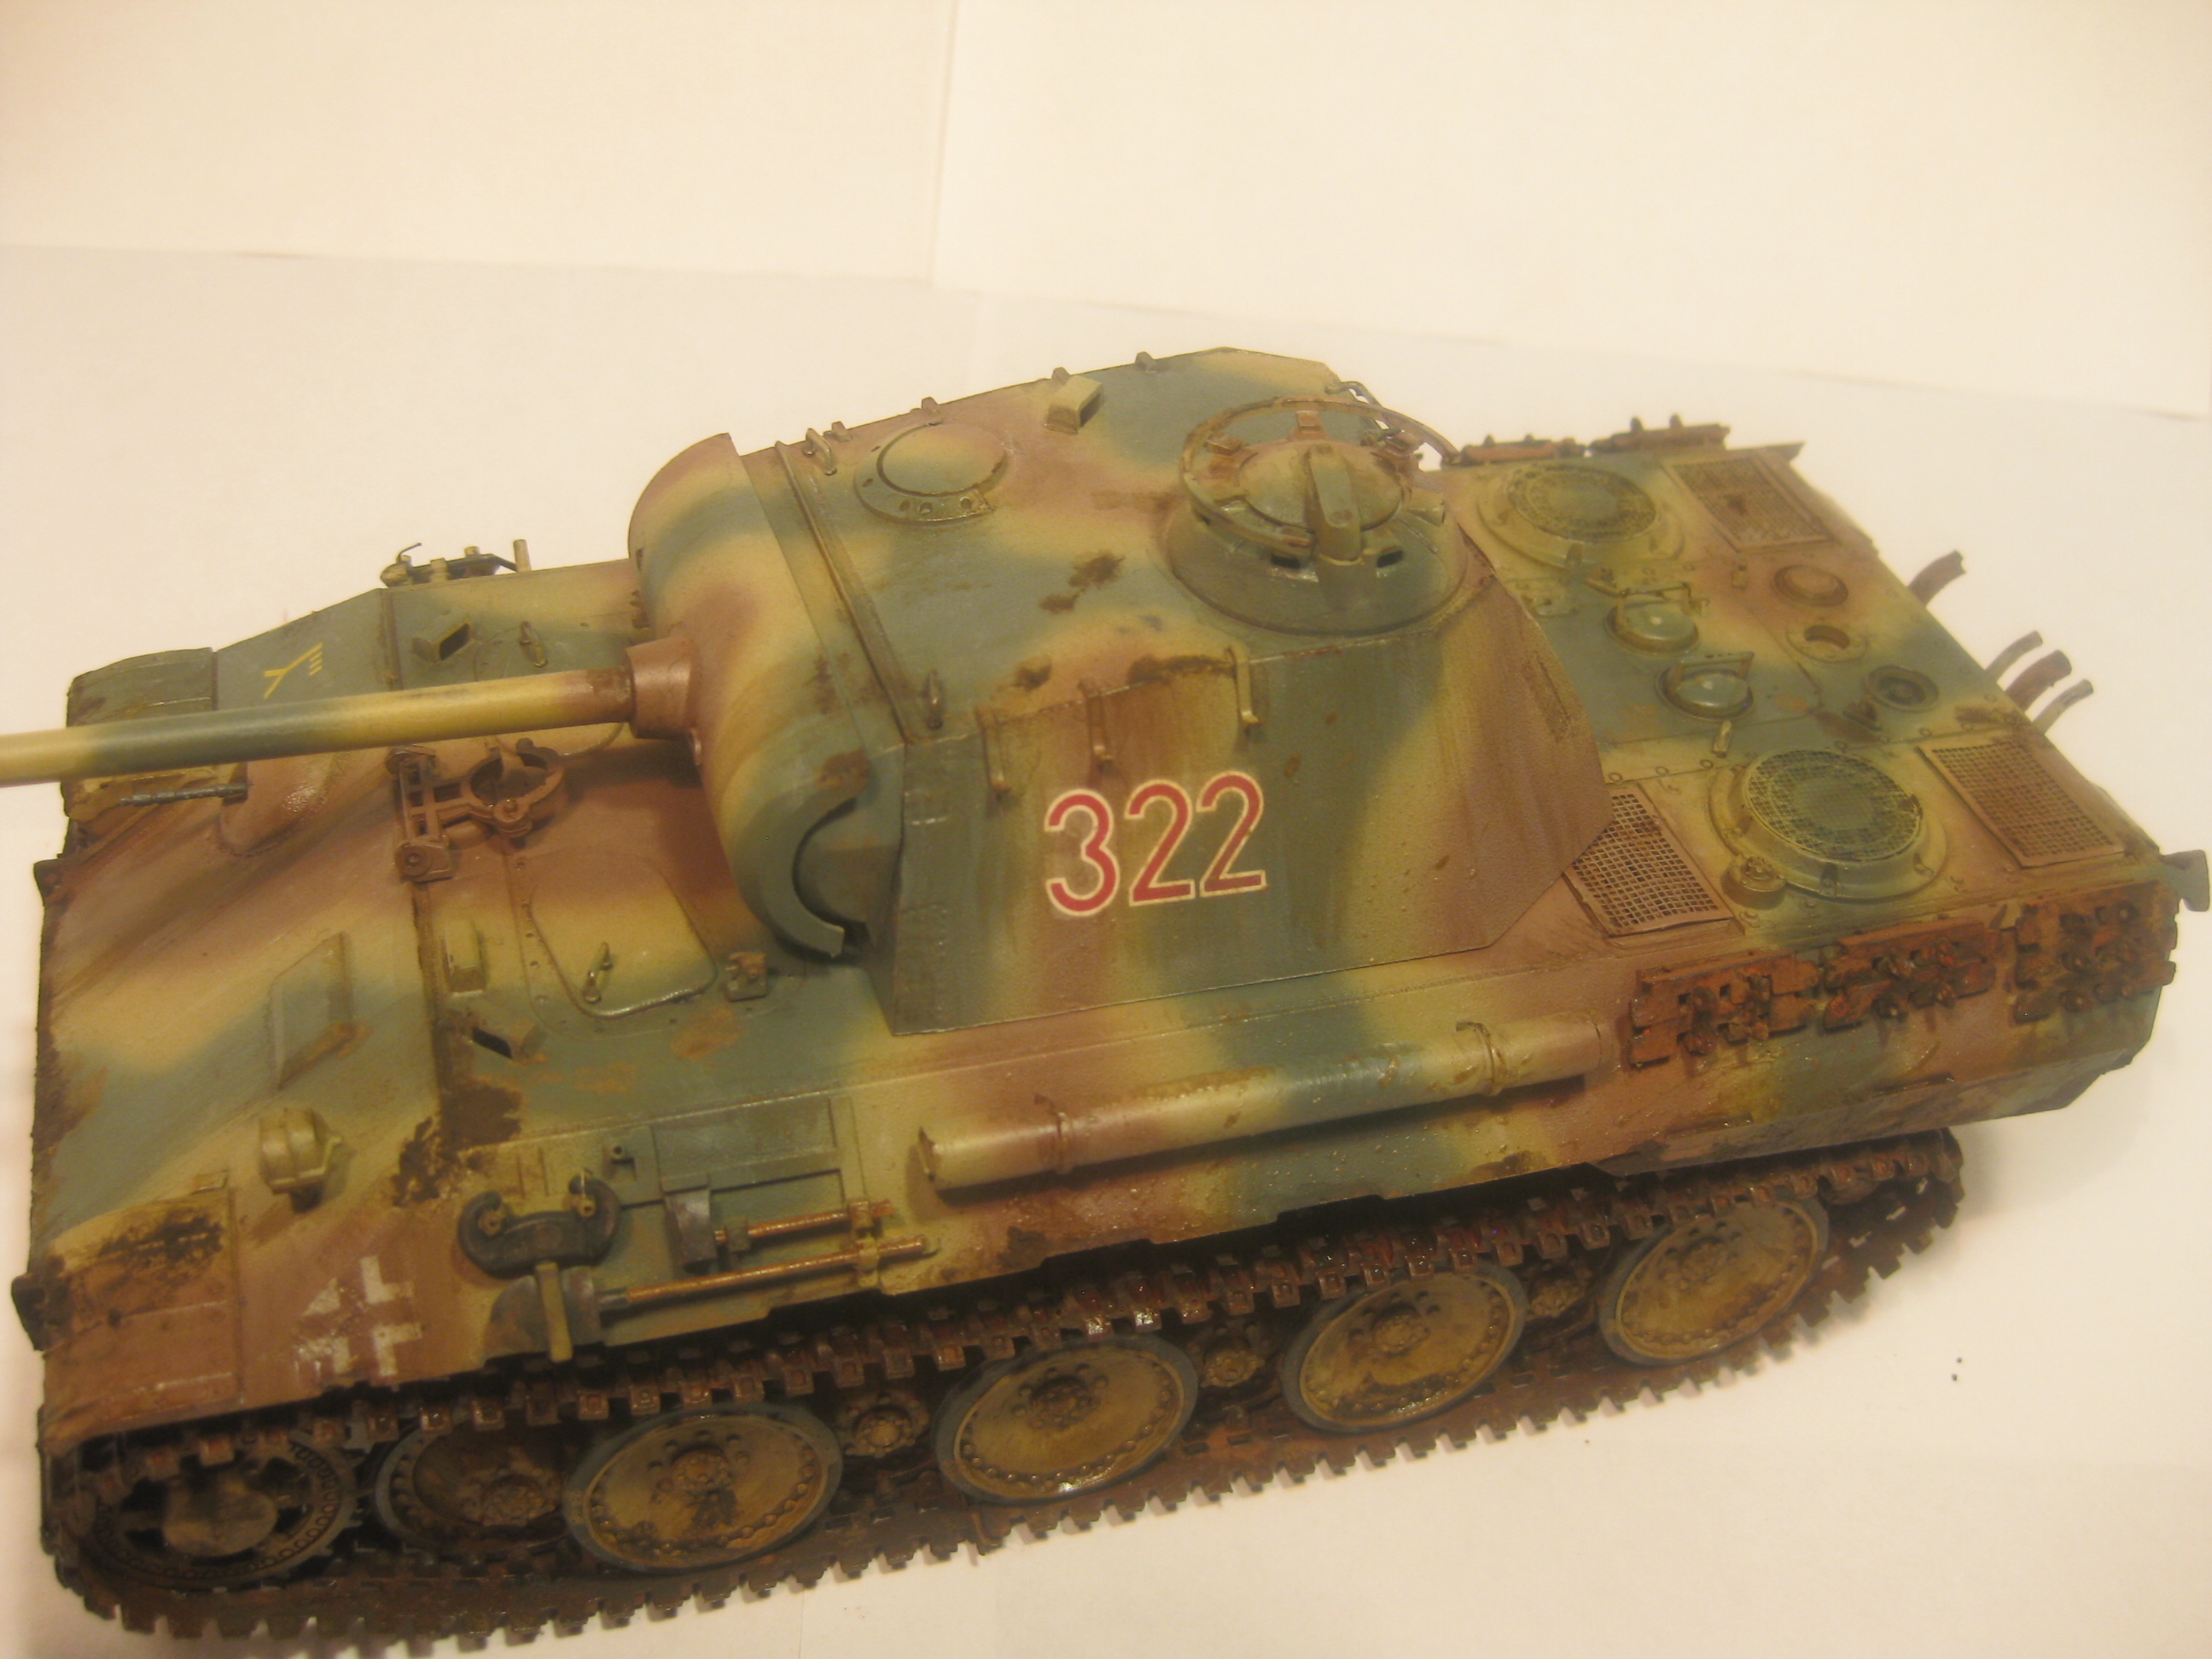
Yes, this is a very old kit, but I added some simple upgrades to minimize the toy like nature:
1) Enclosed open lower sponsons
2) drilled out spare track link guide horns
3) Built up the final drive housing (Not sure if this is what they are actually called?). I made a rounded bulk head by the drive sprocket, detailed the portion of this that is by the lower glacis by adding cut out grooves and bolts
4) Added weld beads with stretched sprue to the upper and lower glacis / side armour joints
5) drilled out the tow shackle and tow wire mounting posts on side armour
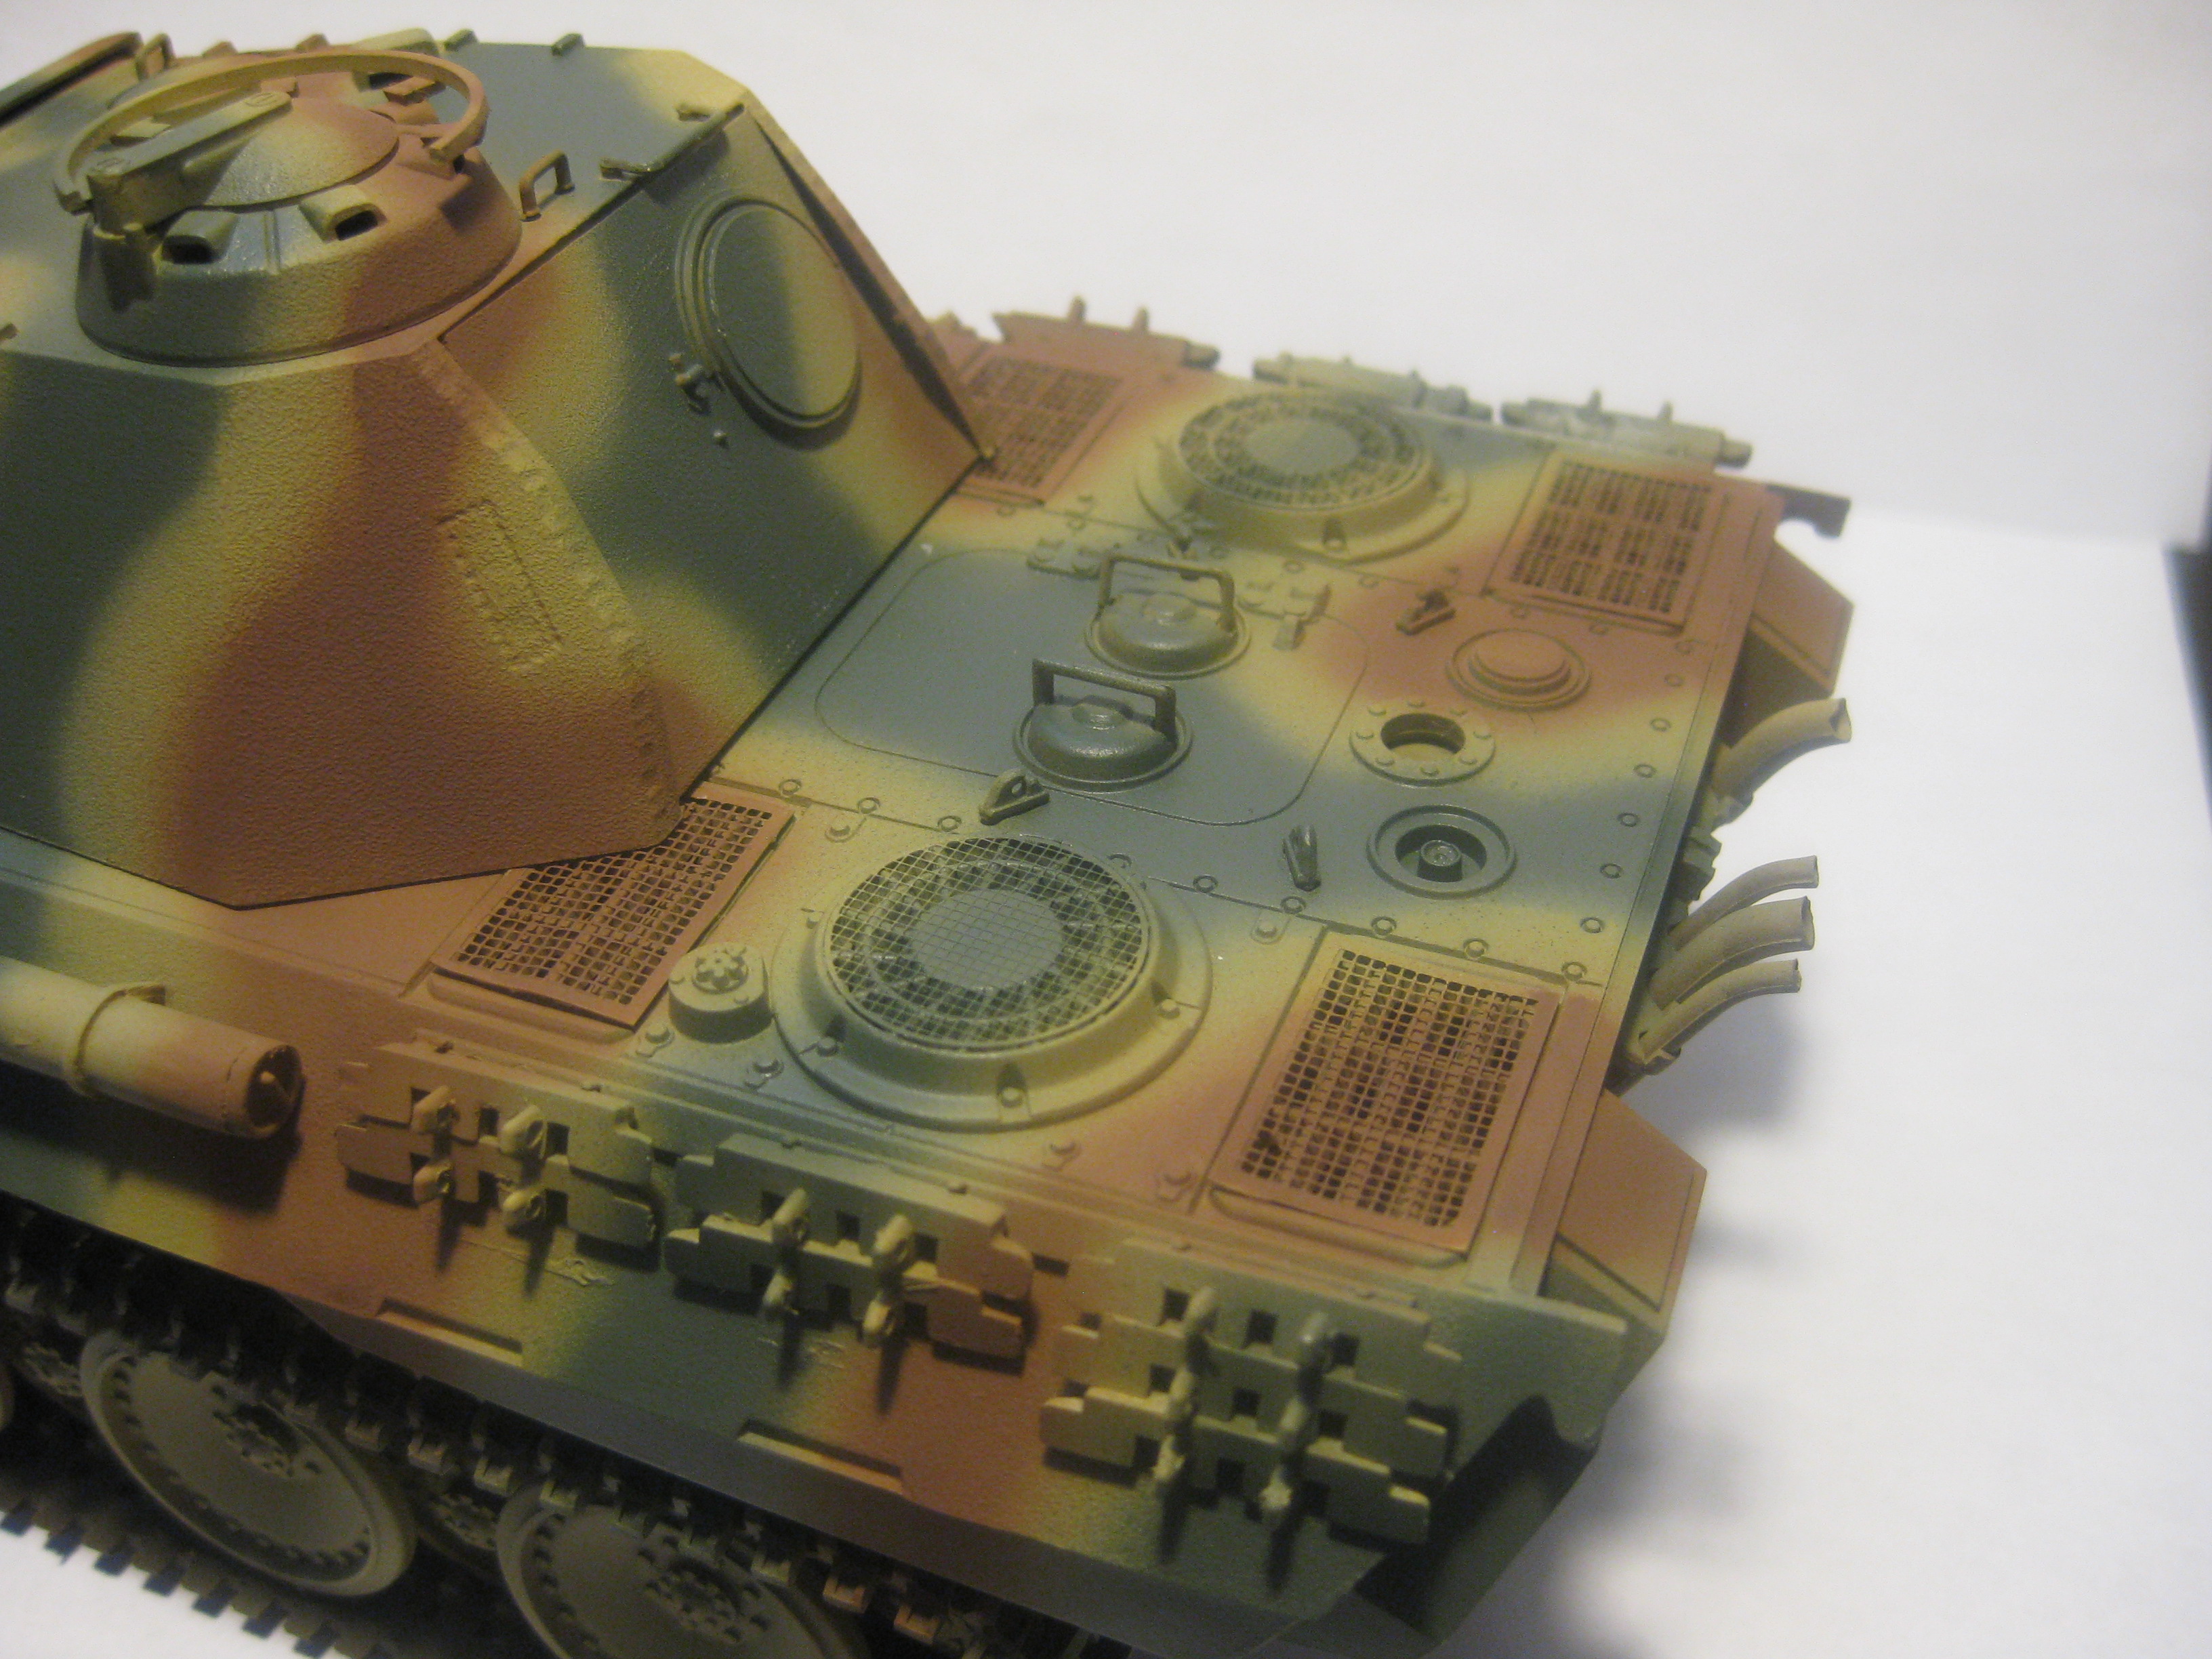
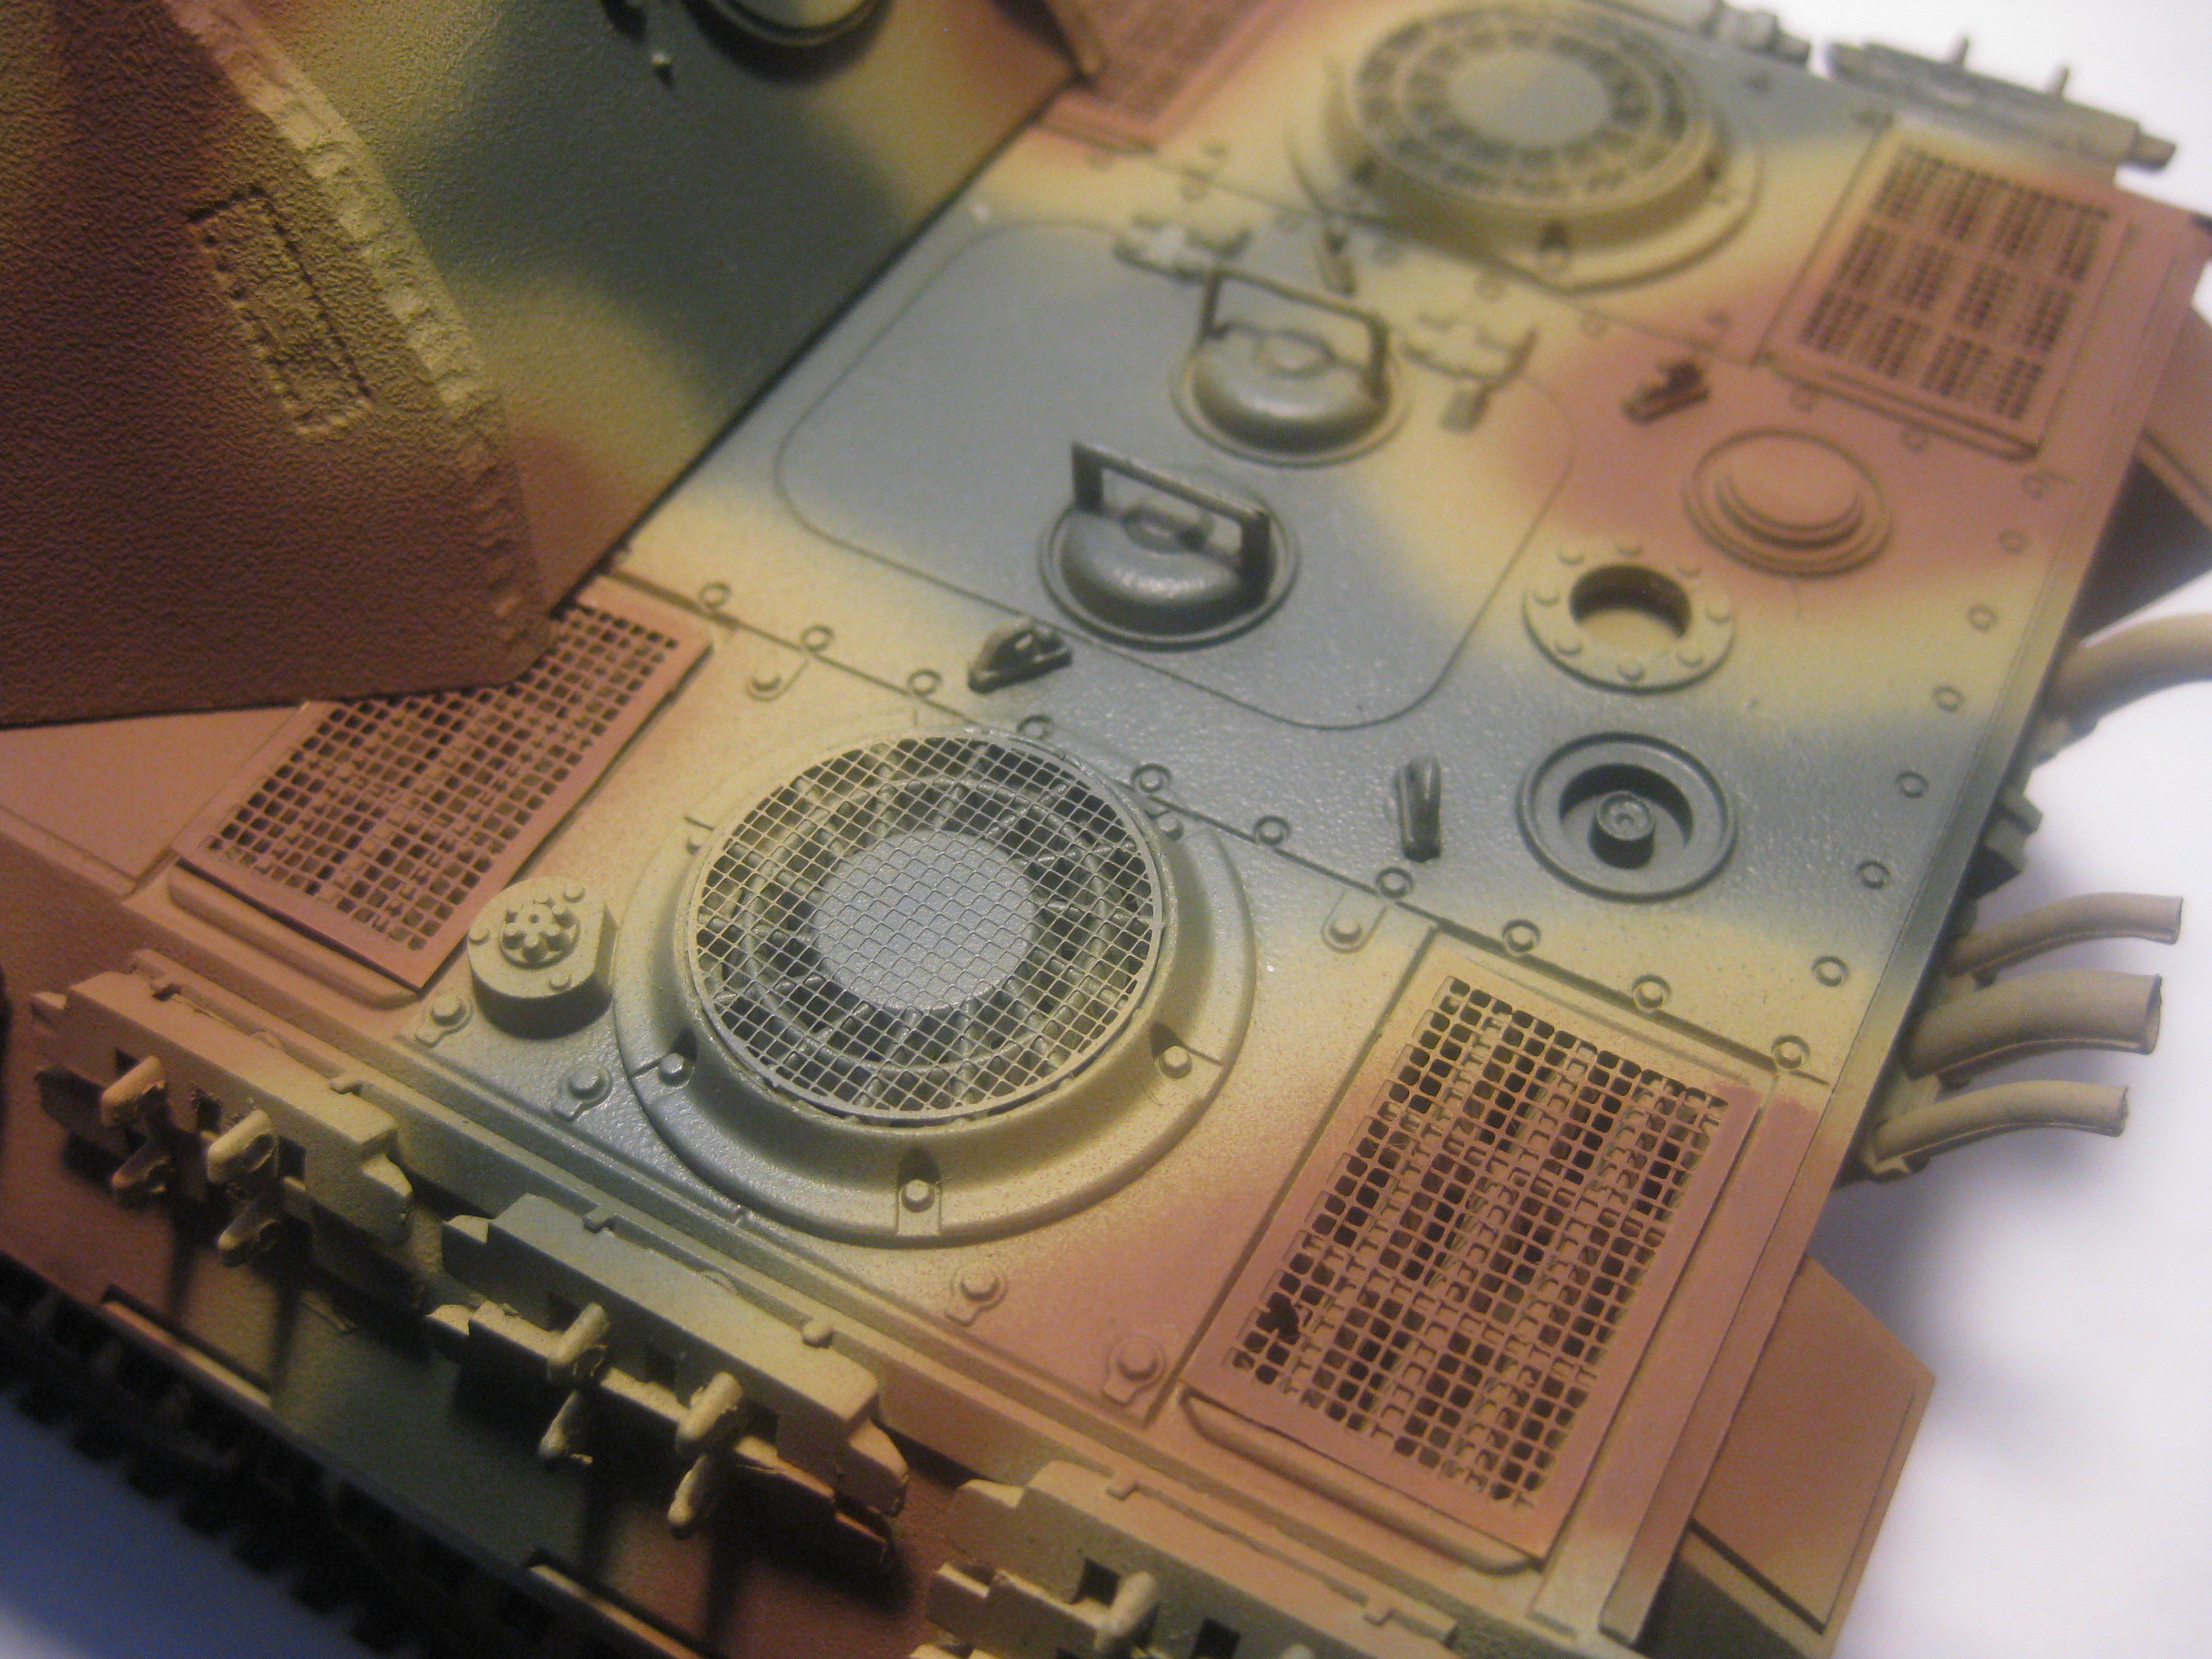
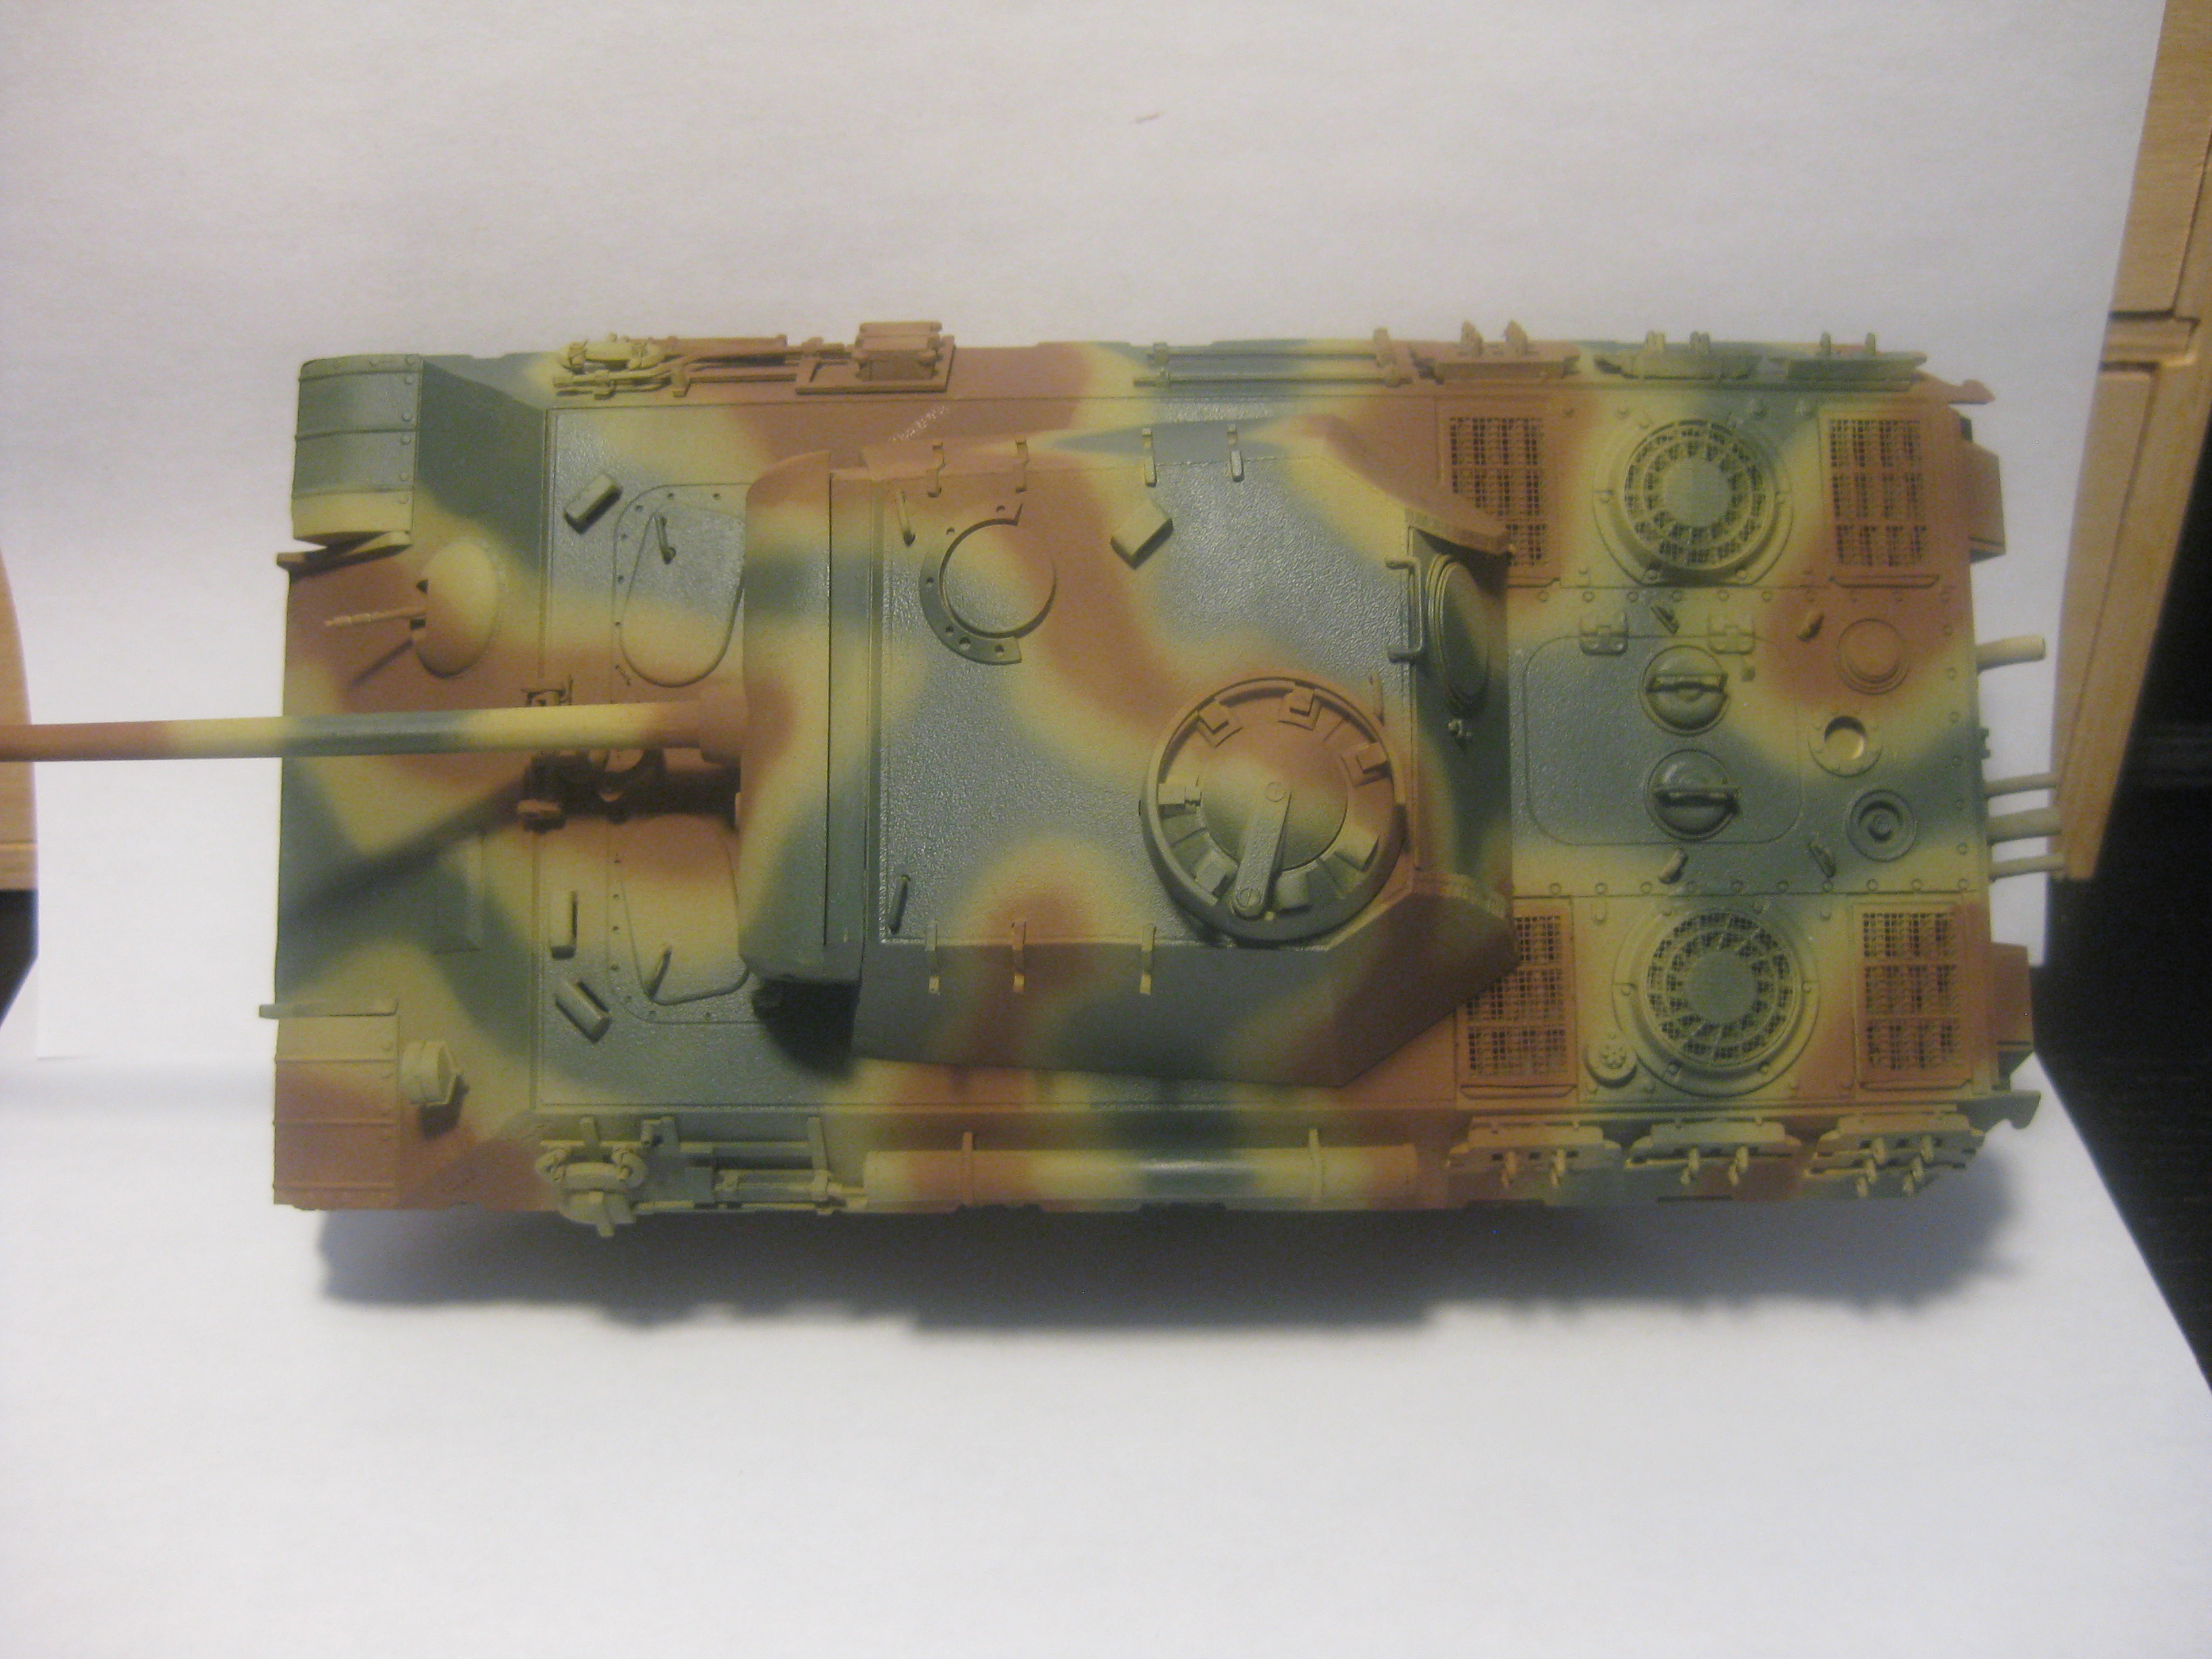
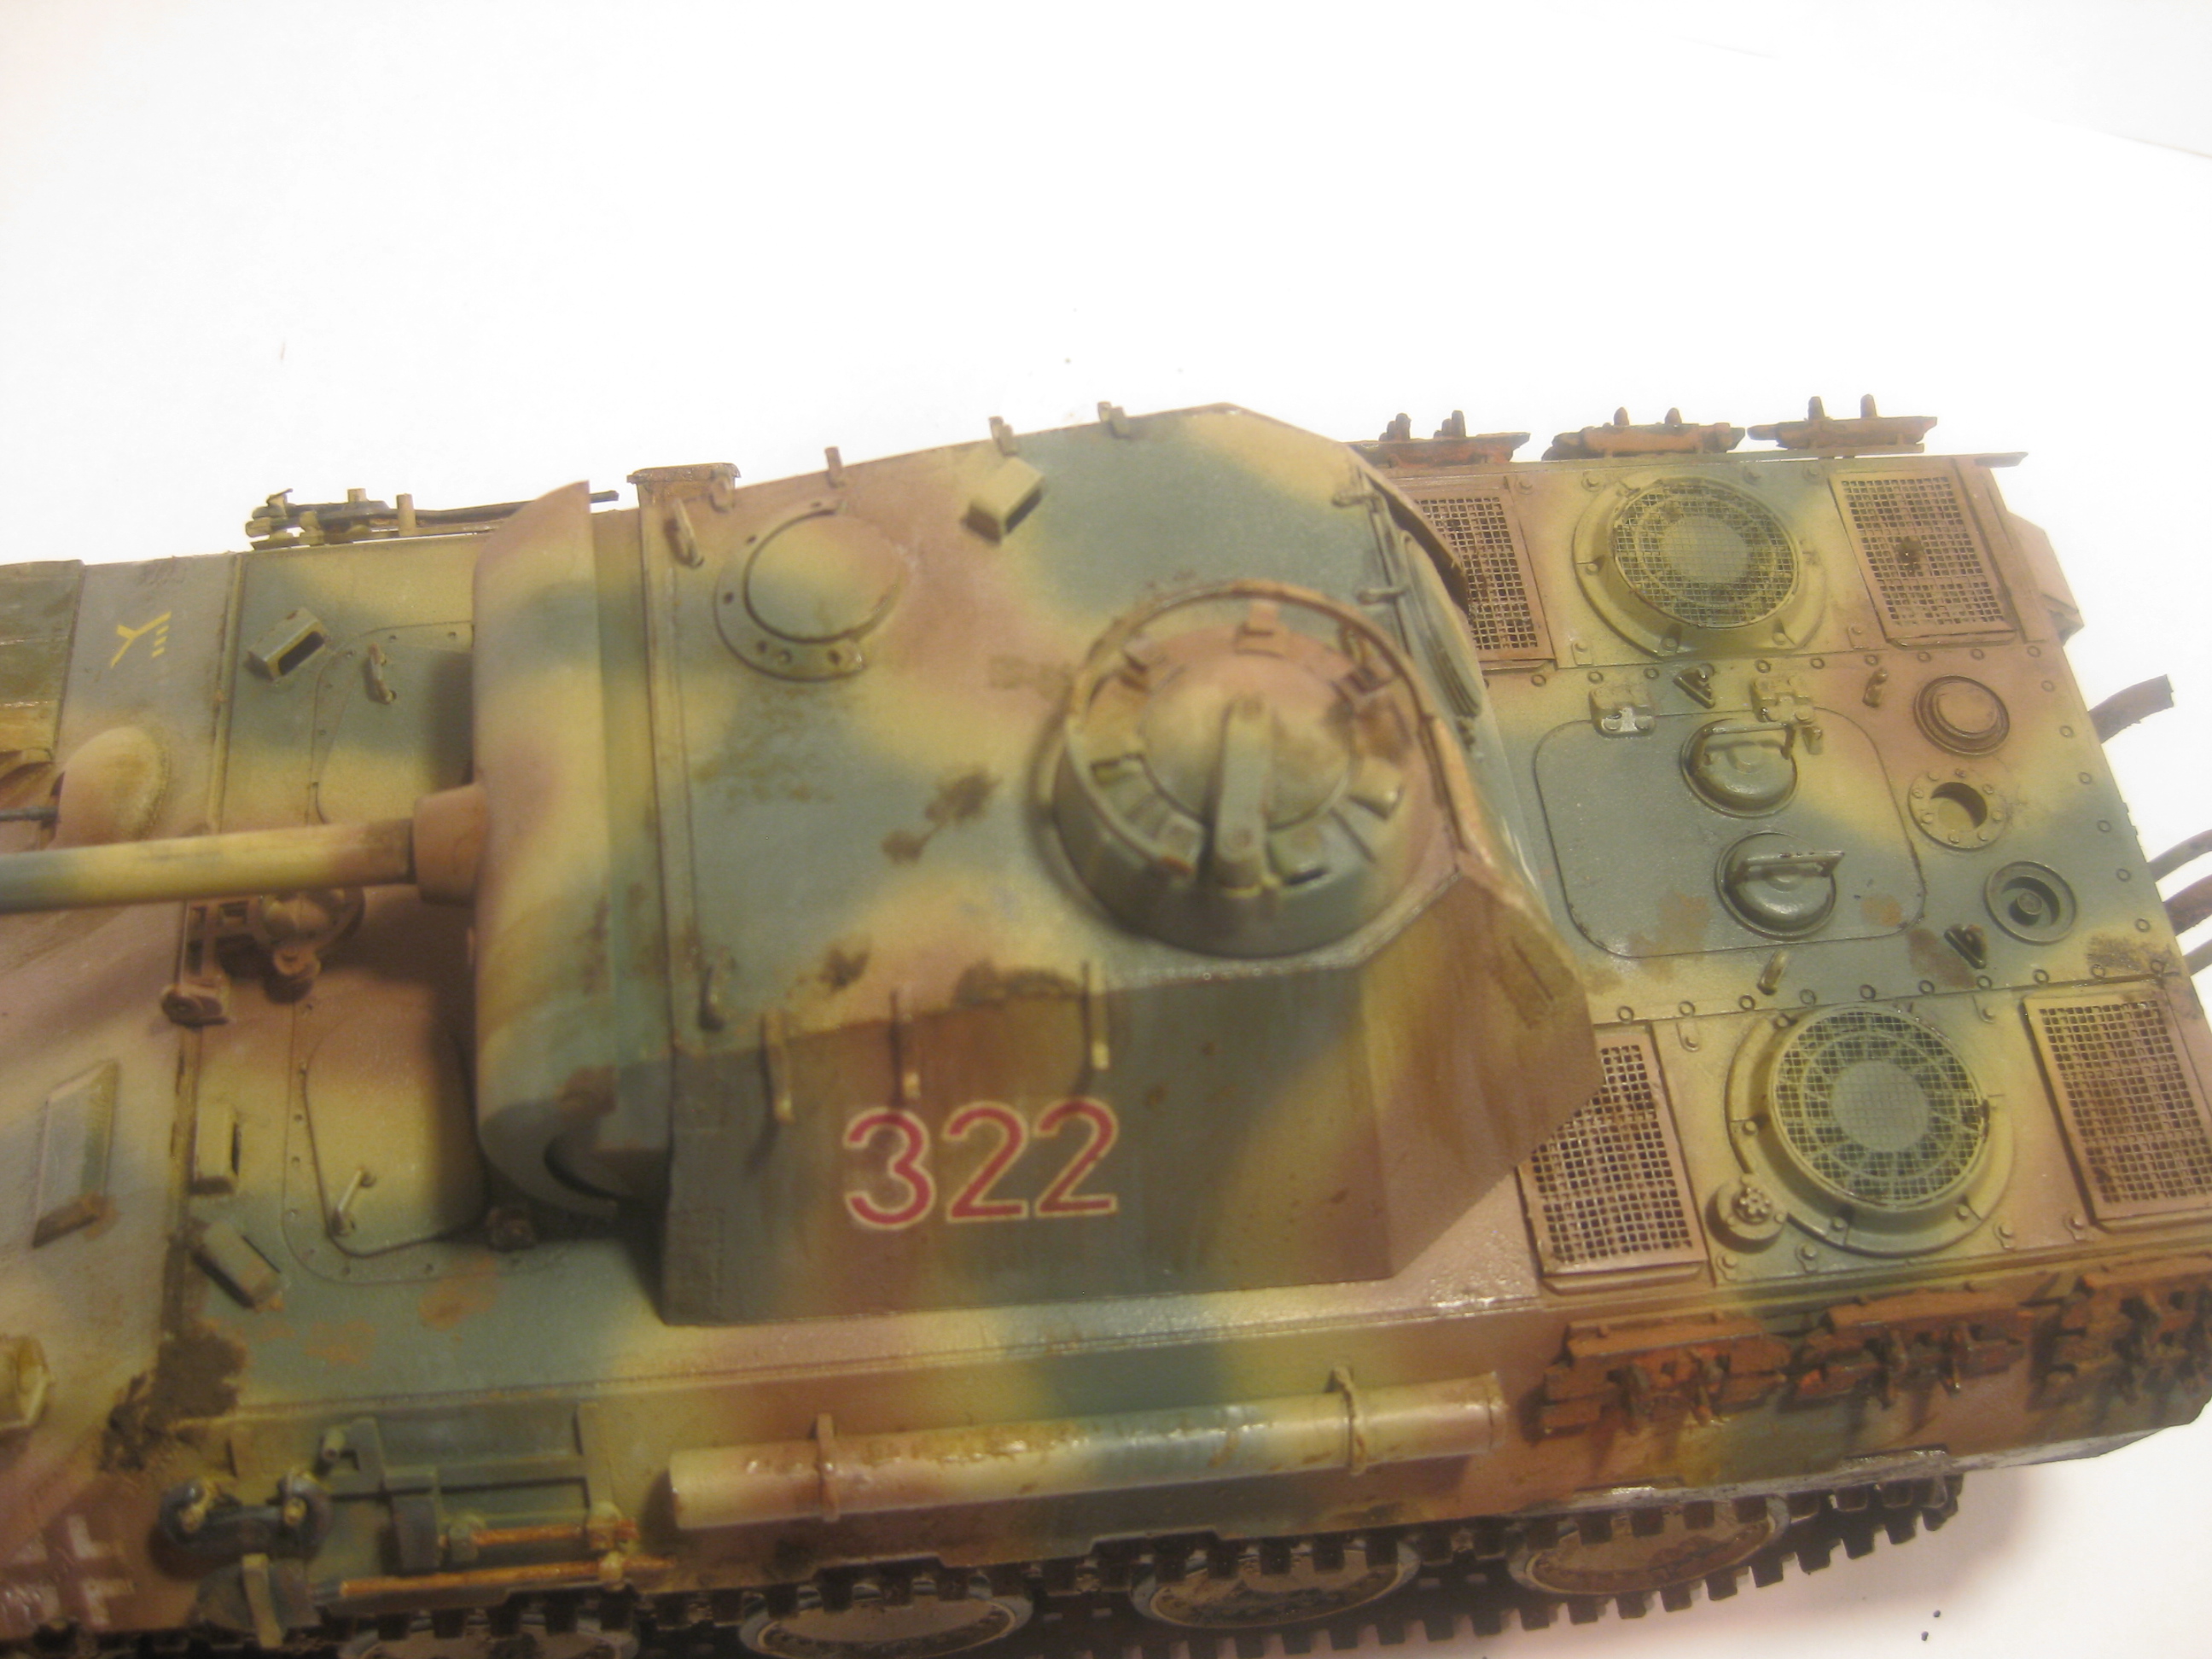
6) the engine deck intakes / fans will recieve screens after I do an initial base coat. Once the base coat is done I will also add card stock to the inside of the engine deck to blank out the open compartment
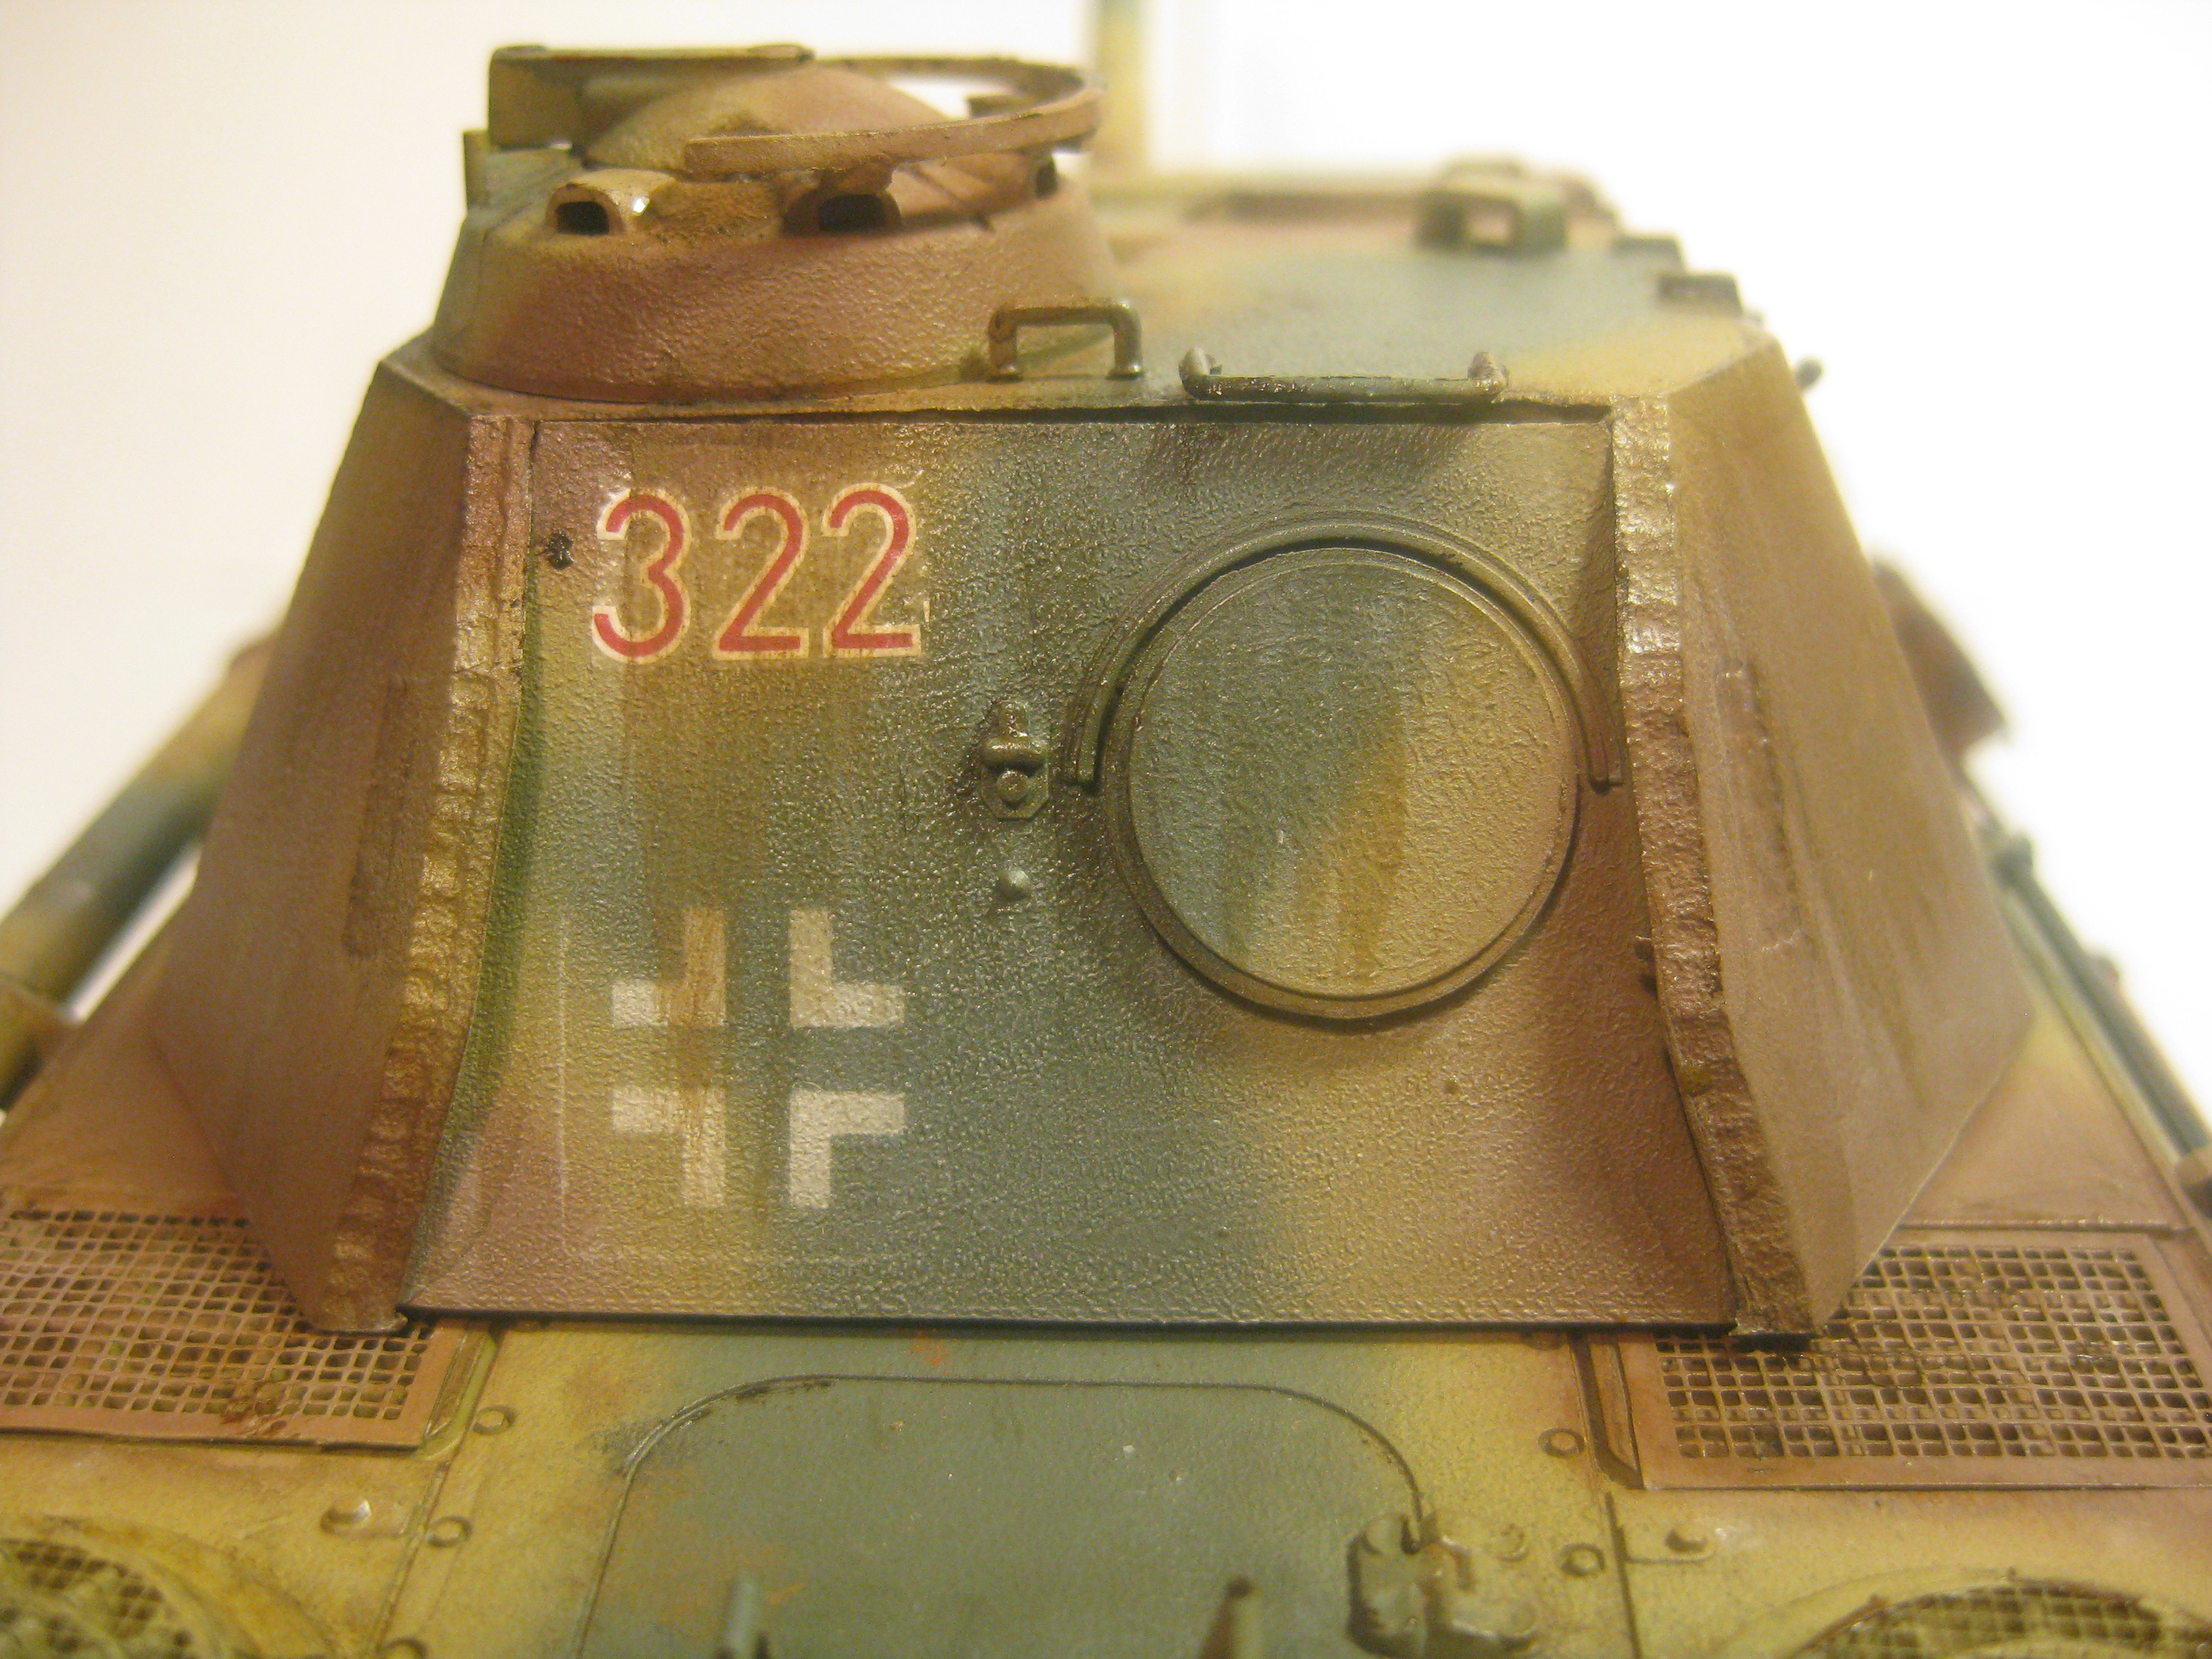
7) built up the lower part of the front tow pintles (the parts that are on the lower glacis) to match ref photos
8) drilled small bolt holes into the plate that is above bow gunner and driver
9) drilled out the exhausts
10) added sag to the tracks by tying them down with sewing thread
11) closed the opening by the idler wheels on both sides.

/image.file" BORDER="0">

" BORDER="0">
" BORDER="0">
" BORDER="0">
Armorsmith
Visit this Community
Pennsylvania, United States
Joined: April 09, 2015
KitMaker: 1,063 posts
Armorama: 1,000 posts
Posted: Sunday, January 27, 2019 - 11:41 AM UTC
Some of my most satisfying builds have been of older kits and seeing what I can do to dress them up a bit just as you have done. Once painted and weathered they can turn out quite nicely.
Bodeen
#026
Visit this Community
Pennsylvania, United States
Joined: June 08, 2002
KitMaker: 1,744 posts
Armorama: 1,359 posts
Posted: Sunday, January 27, 2019 - 04:16 PM UTC
Well done...and with these kits you don't need to be a millionaire to afford the initial kit. Really nice work.
billflorig
Visit this Community
Hawaii, United States
Joined: January 20, 2015
KitMaker: 152 posts
Armorama: 146 posts
Posted: Sunday, January 27, 2019 - 04:37 PM UTC
Thanks for the inspiration! My grandmother bought me that kit in the early ‘80s! I’m going to dig it out and see how well I can “update” it! Cheers
griffontech
Visit this Community
Canada
Joined: November 21, 2007
KitMaker: 237 posts
Armorama: 231 posts
Posted: Monday, January 28, 2019 - 07:26 AM UTC
Thanks all.
I have a few other kits of this vintage in various stages.
Their Pz II is another classic, and I have one almost finished with maybe 3 more in the boxes.

Planning on pre-shading and adding dunkelgelb base coat tonight.
griffontech
Visit this Community
Canada
Joined: November 21, 2007
KitMaker: 237 posts
Armorama: 231 posts
Posted: Sunday, February 03, 2019 - 09:35 AM UTC
Finally got the cat in the paint booth:

I painted one wheel in Red Brown for colour variation on the bottom half. Maybe replaced from another tank in the field?


Decided to use spare Tiger 1 screens on the engine deck. Not exact match to a Panther, but after some trimming it is good enough for this old girl.


The tracks are currently being painted, and decals are being added. I'll probably spray the Balkenkreuz's with a photo etch stencil I have but never used.
Armorsmith
Visit this Community
Pennsylvania, United States
Joined: April 09, 2015
KitMaker: 1,063 posts
Armorama: 1,000 posts
Posted: Sunday, February 03, 2019 - 09:46 AM UTC
Like the camouflage pattern. Shaping up nicely.
griffontech
Visit this Community
Canada
Joined: November 21, 2007
KitMaker: 237 posts
Armorama: 231 posts
Posted: Wednesday, February 13, 2019 - 01:52 PM UTC
Well, I'm calling this one done.
I'm not 100% satisfied with the weathering. I was originally going to keep it simple (light dust, accent panels, etc), but I wanted to practice using some mud weathering products by Valejo.
What better way to try them than on this cheap Panther?

Overall this was a thoroughly enjoyable build where I got to practice painting and building techniques with minor scratch-building on a $15 dollar kit that will help me with the $80 kits in the stash. I have a few more older Tamiya kits in the stash from the 70's to early 90's era, and with a little TLC and simple scratch building they can turn out really nice.

Please excuse the photo quality. I'm using a simple point and shoot and trying to take pics with different light settings.


greg86z28
Visit this Community
Wisconsin, United States
Joined: February 03, 2015
KitMaker: 14 posts
Armorama: 8 posts
Posted: Thursday, February 14, 2019 - 09:52 AM UTC
Looks great.

Quick question. It looks like you attached the wheels and all the small pieces first, then painted the camo scheme and lastly painted the individual items (shovel, black rim on wheels, etc). How do you paint the inside of those items like the wheels or shovel?

Not sure if the way I'm phrasing that makes sense or not.
griffontech
Visit this Community
Canada
Joined: November 21, 2007
KitMaker: 237 posts
Armorama: 231 posts
Posted: Thursday, February 14, 2019 - 02:25 PM UTC
I did exactly that, and it was my first time doing it.

And this simple answer to your question is: YOU DON'T!

You just get very close and detailed with your airbrush.

I did use a small thin round brush to poke some black paint between the model and an item like the shovel, but it is not as detailed as the front.
This model was the test bed for a bunch of techniques, like painting the model while it was completely assembled, including the tracks.

If someone got within a 1/2 " of the tank and looked hard, they may see tiny unpainted areas of the tools and between the road wheels, but if they did that I'd smack them.

Do yourself a favour and go to this website:
http://sbsarmormodels.yolasite.com/

I closely followed his techniques for the first time on this model, and they are simple and very effective.

I never have and never will take my models to a competition, but
the easy tutorials on Glenn's website allow me to have darn good ones for the display shelf.

I'll be using his techniques for the two M4A3E8's I'm doing as well.

DO what I did, get a cheap Tamiya kit and practice.
 _GOTOTOP