_GOTOBOTTOM
Armor/AFV: Allied - WWII
Armor and ground forces of the Allied forces during World War II.
Hosted by Darren Baker
Polish Jeep, 1st Parachute Brigade, Holland
jldurand
Visit this Community
Quebec, Canada
Joined: July 06, 2013
KitMaker: 225 posts
Armorama: 215 posts
Posted: Sunday, June 09, 2019 - 01:48 PM UTC
Jeep Willys - 1st Polish Independant Parachute Brigade, Rifle Battalion - Holland 1944 - SK MODEL 1/35

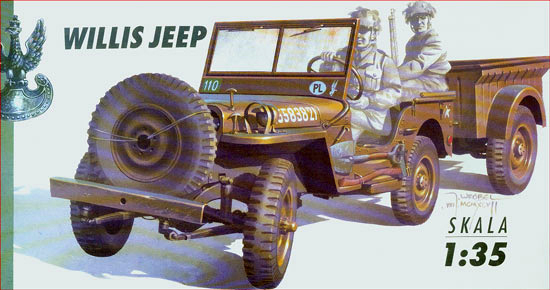
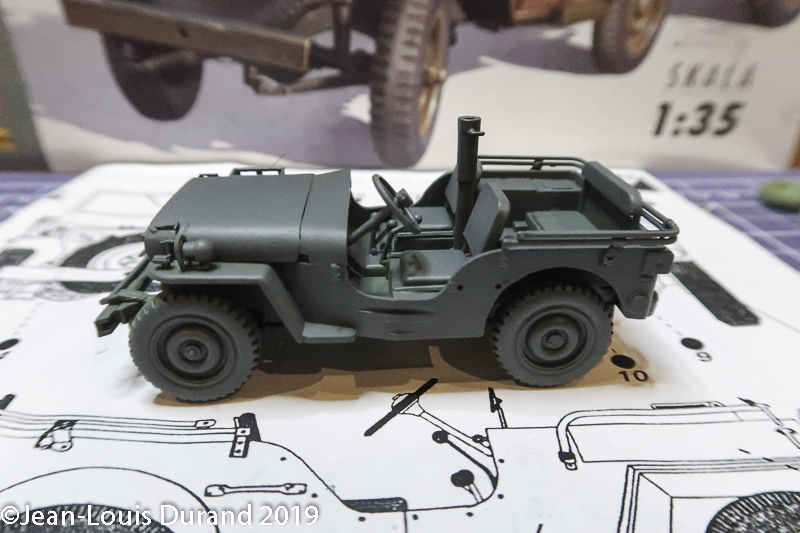
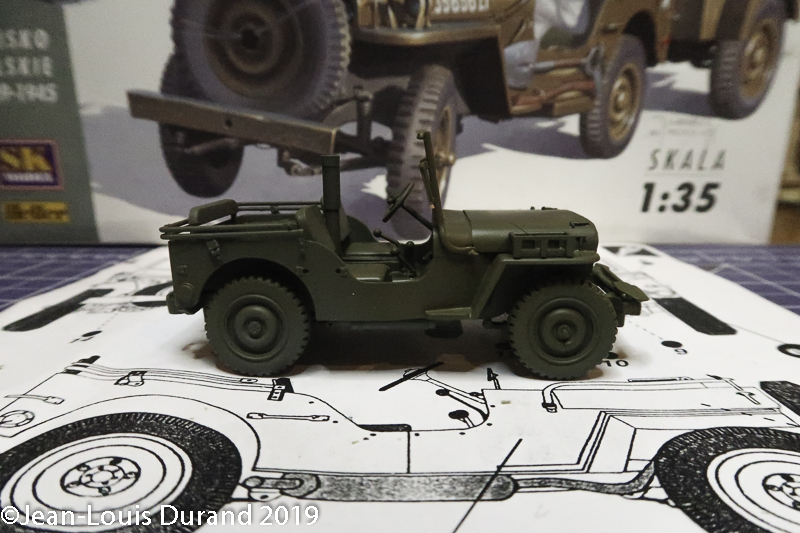
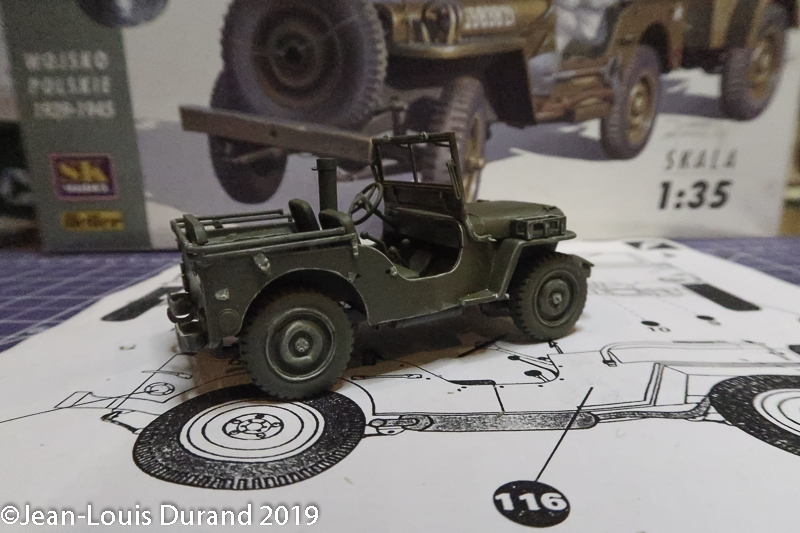
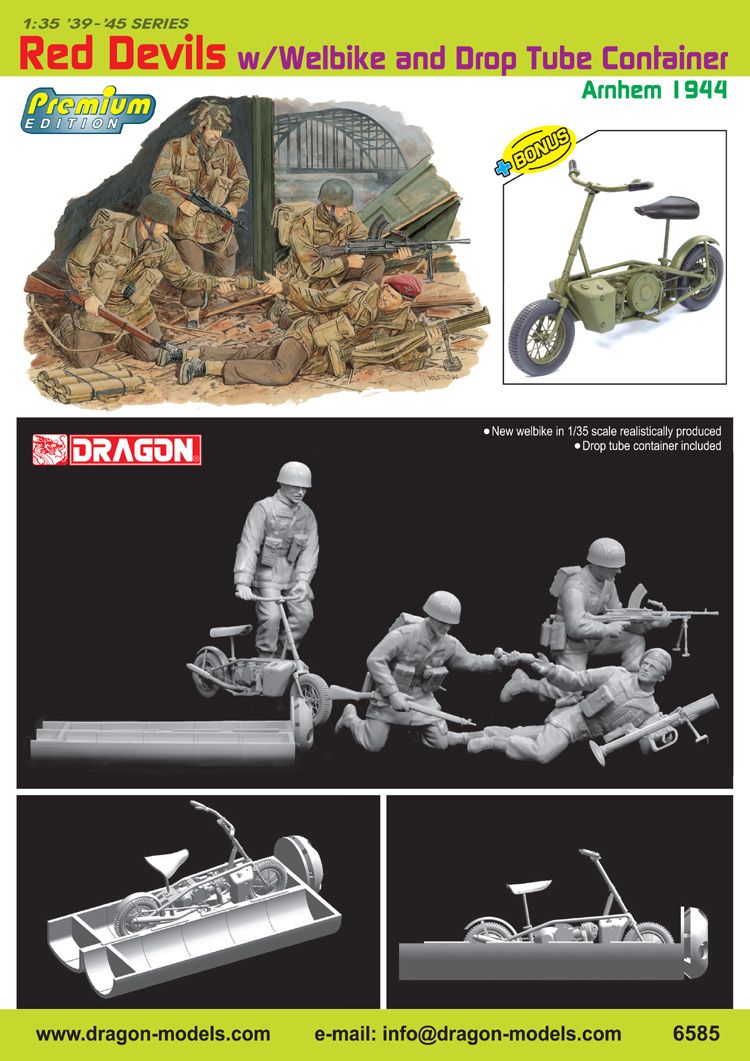
Bought that kit for 5,30 Euros on the polish website Jadar (Heller mold in a SK Model box, with Intech decals).
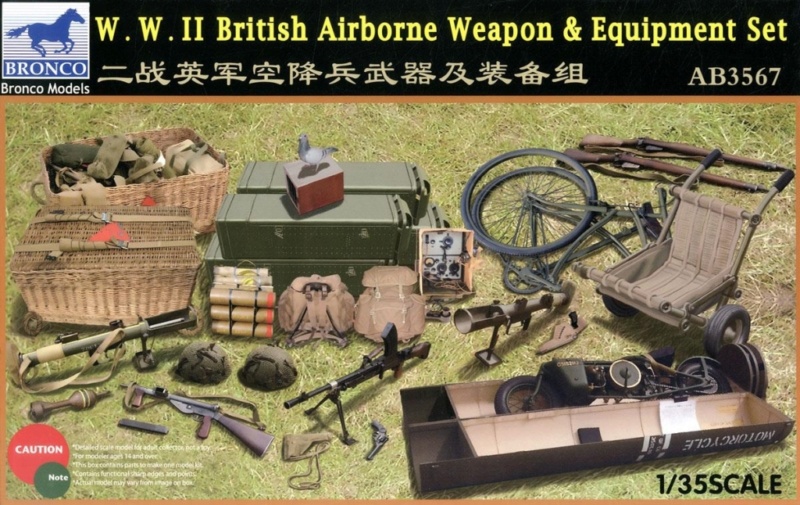
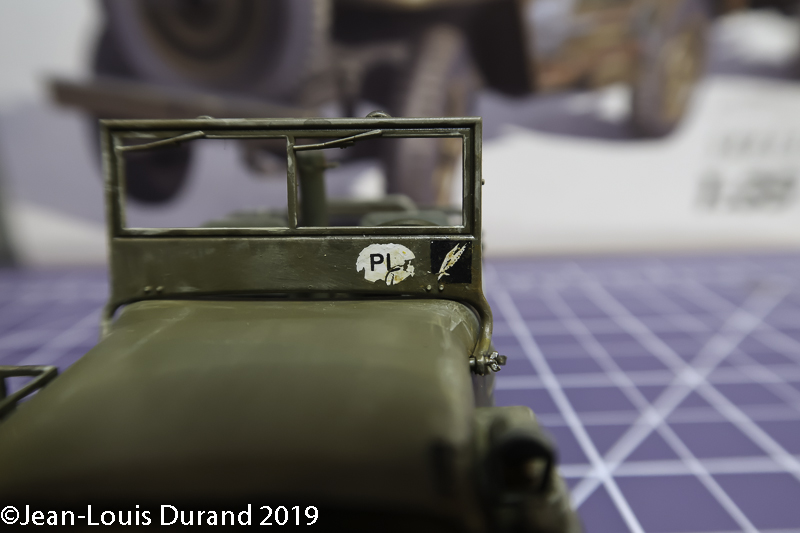
I place the scene in Holland in September 1944. I abandoned my initial idea to use the Black Dog set which contains only American material. I will instead use British para material from Bronco.
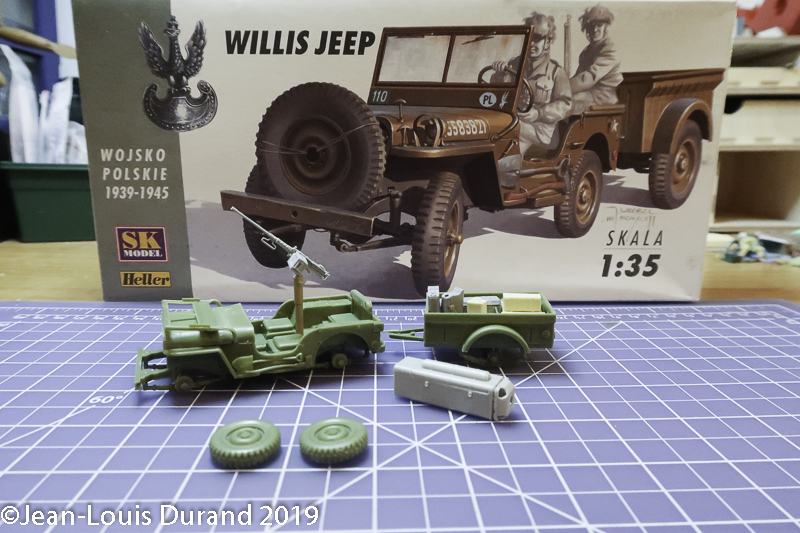
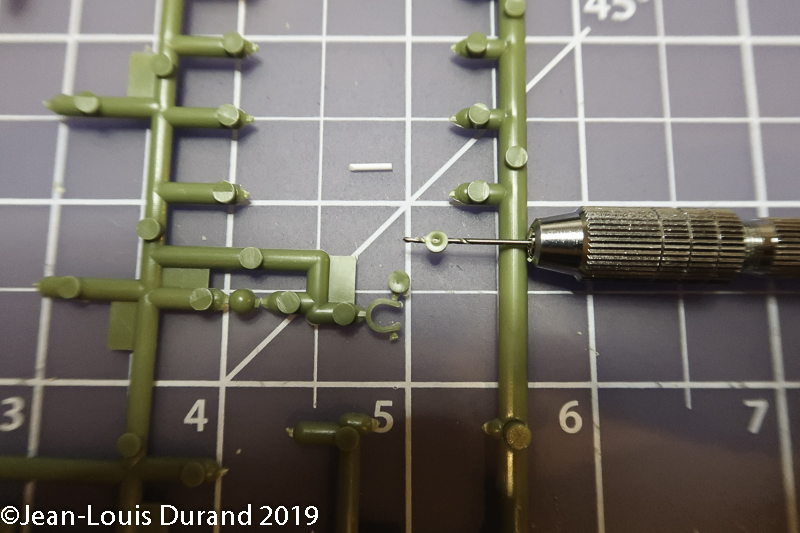
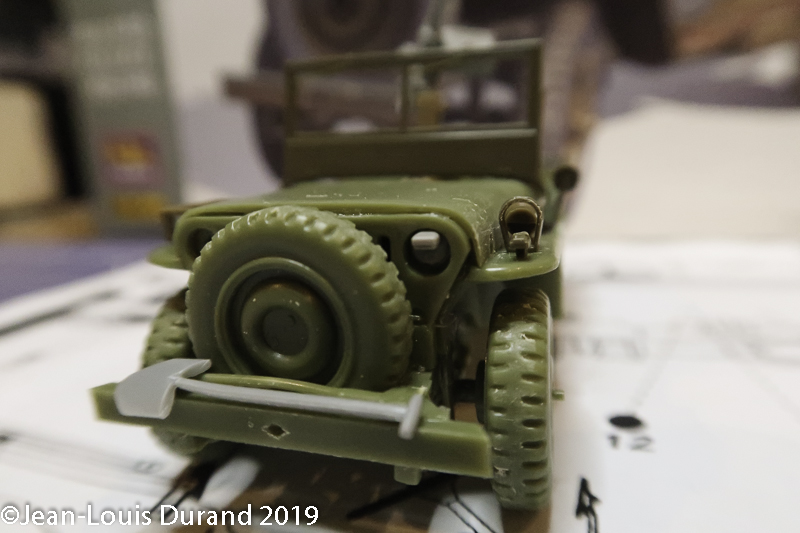
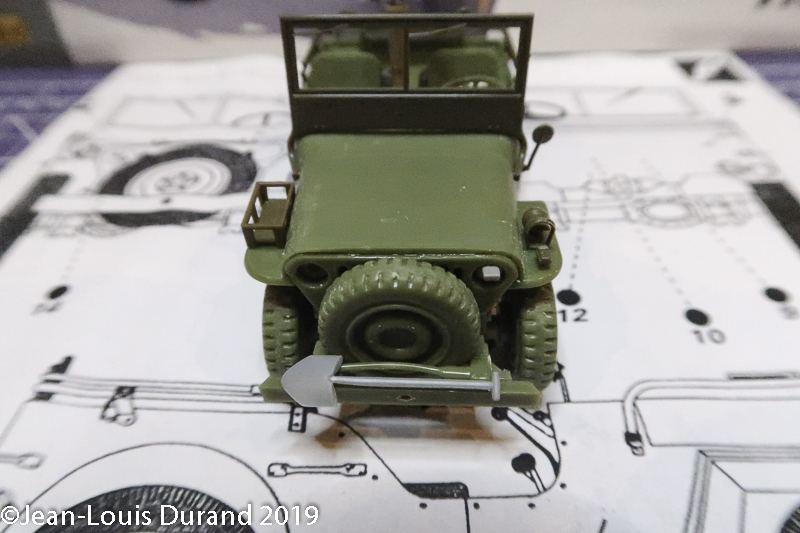
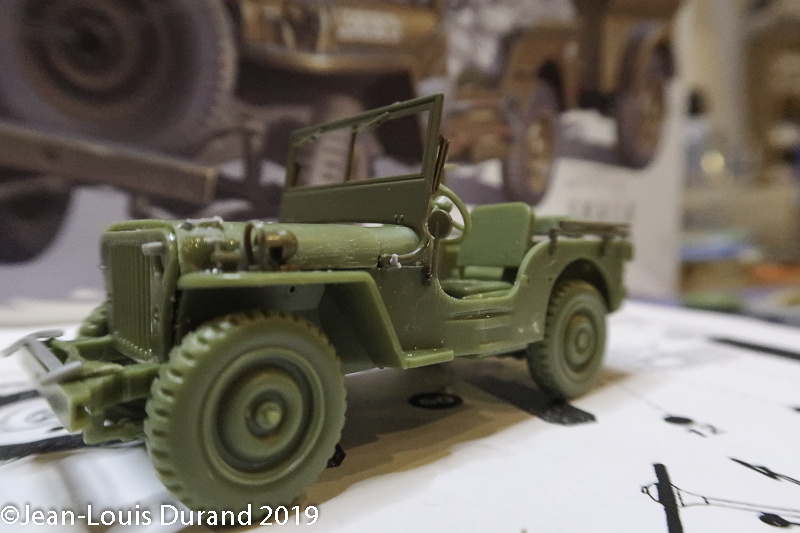
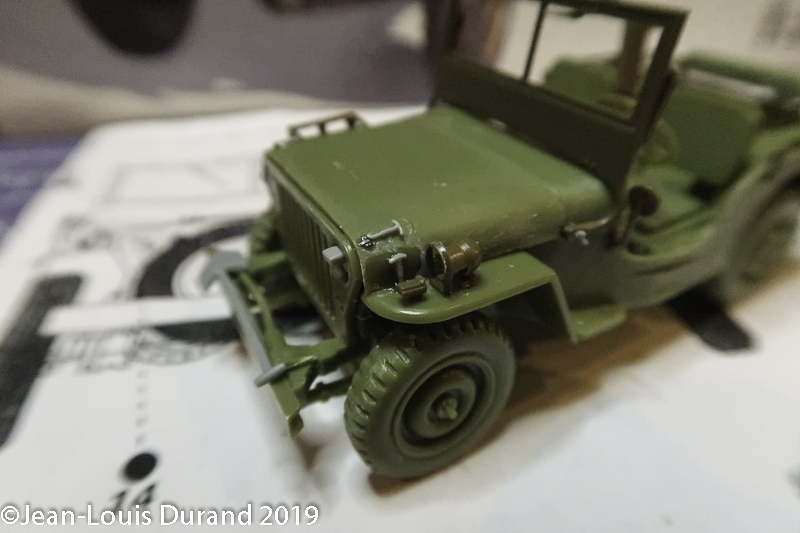
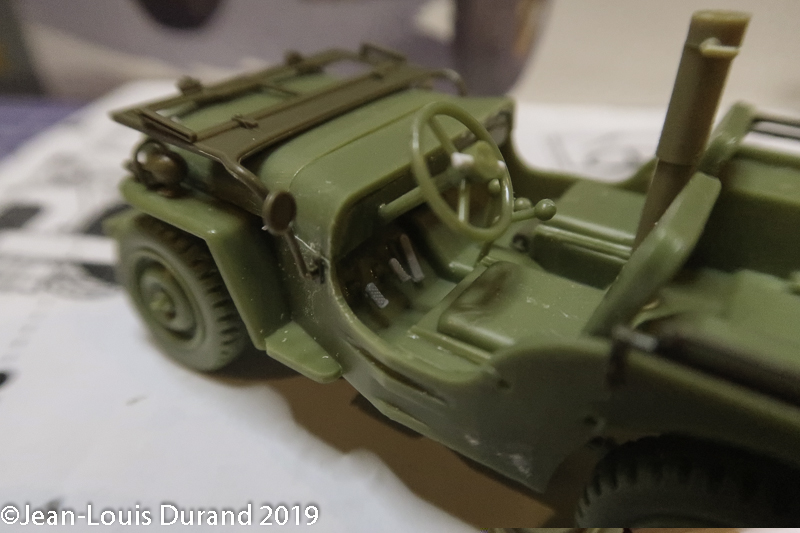
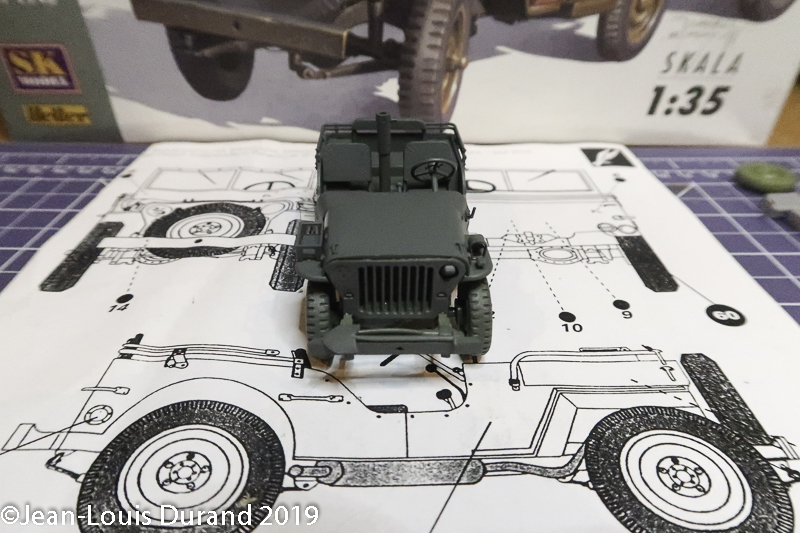
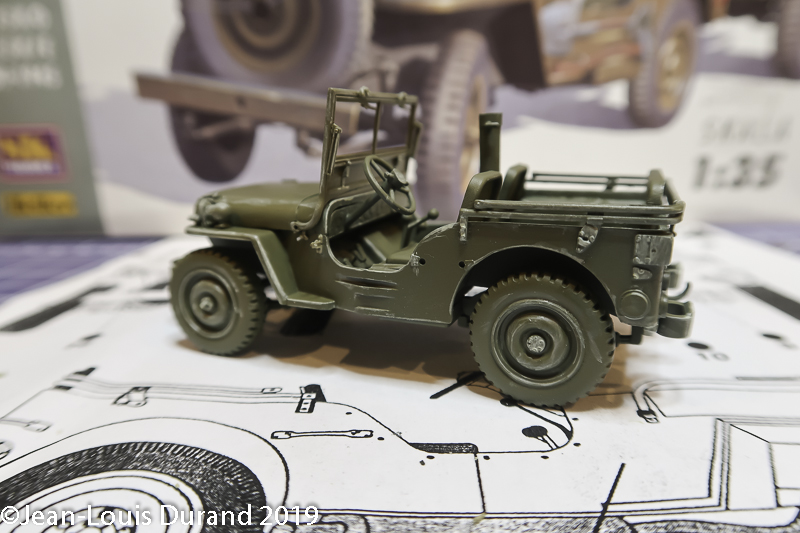
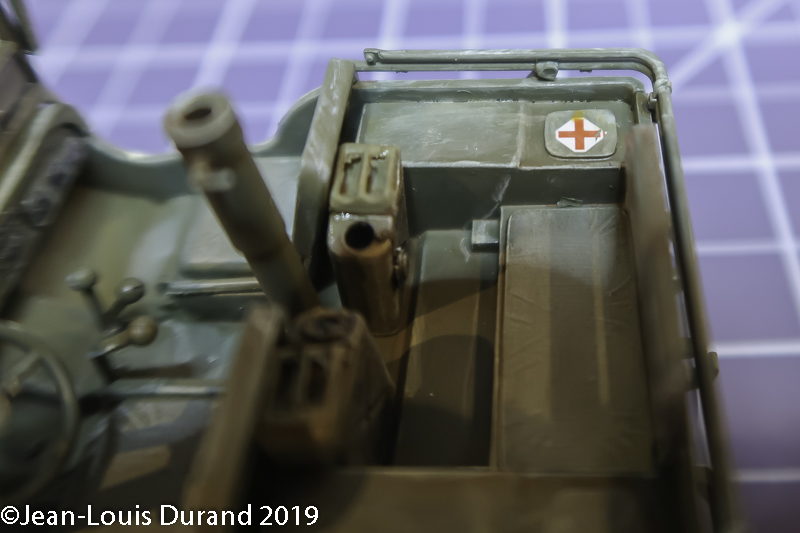
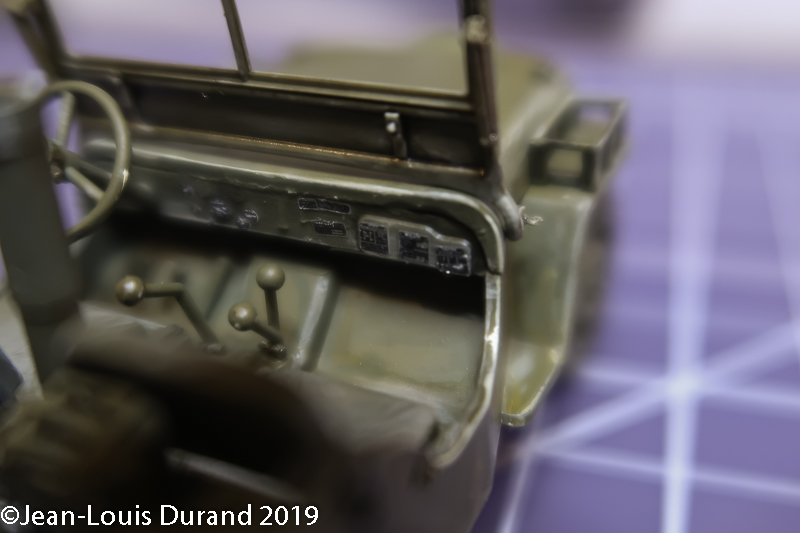
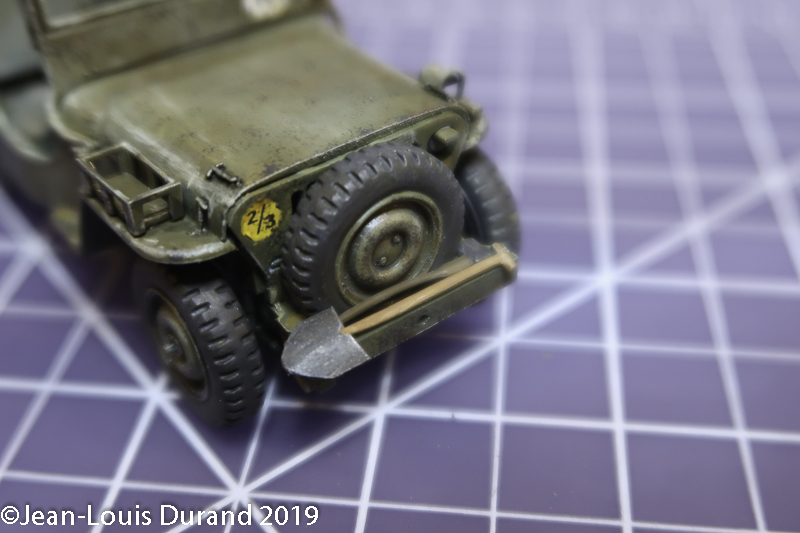
Express build with some adjustment problems. I sanded the bottom of the dashboard, removed parts of the engine, played a little with the instructions sheet...
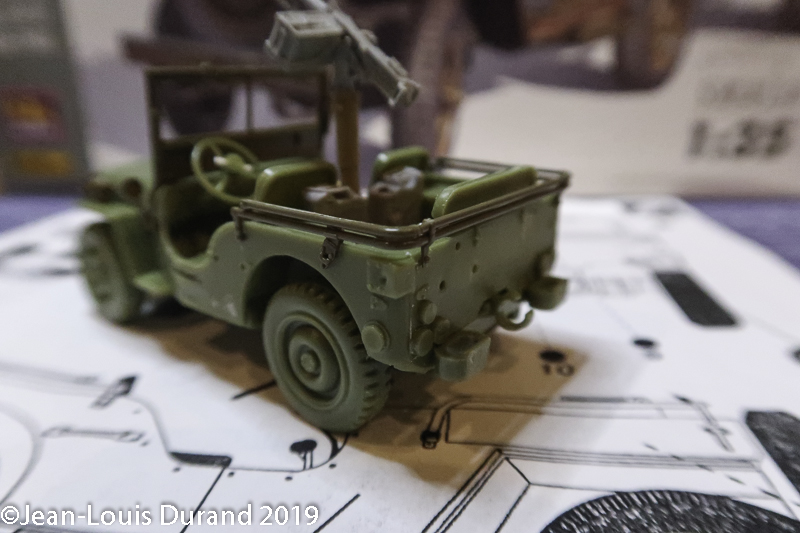
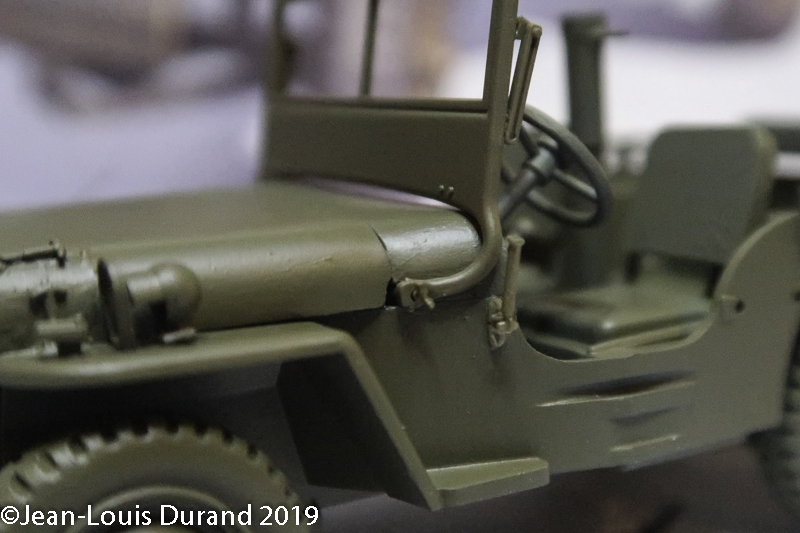
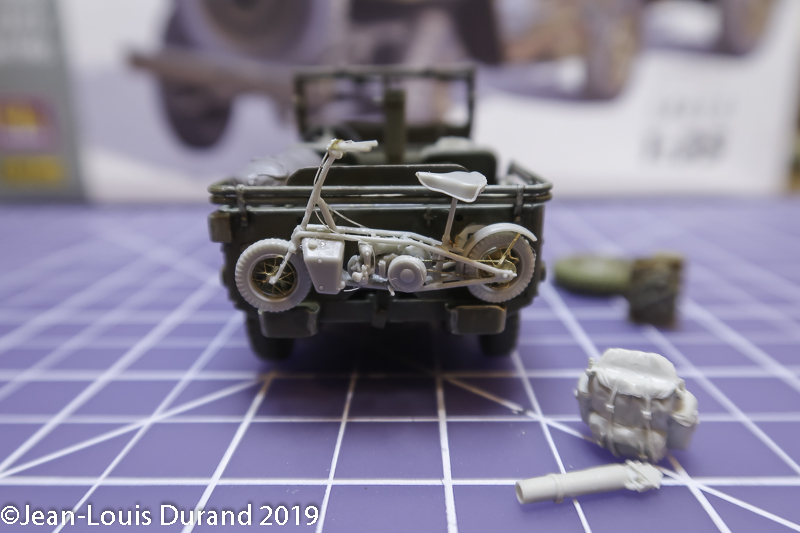
The Heller model reproducing a Hotchkiss M206 rather than a Willys Jeep, I did not use some parts: jerrycan stand, rectangular mirror, windshield wiper motor.
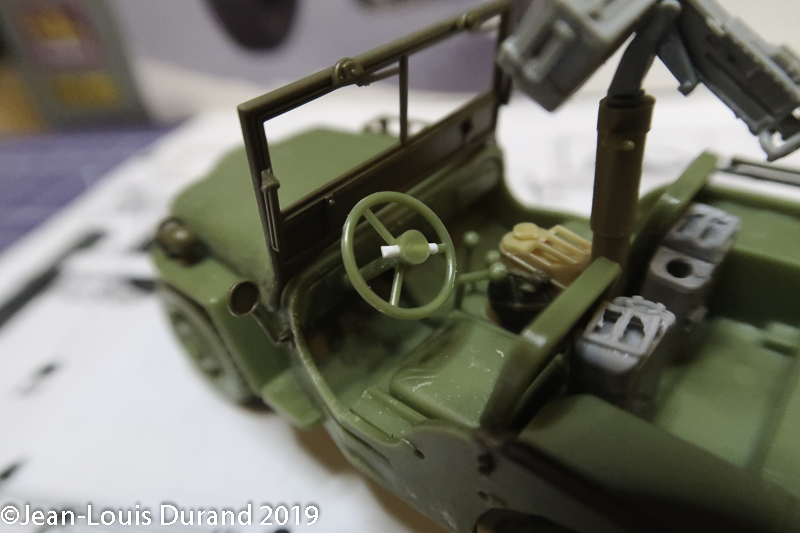
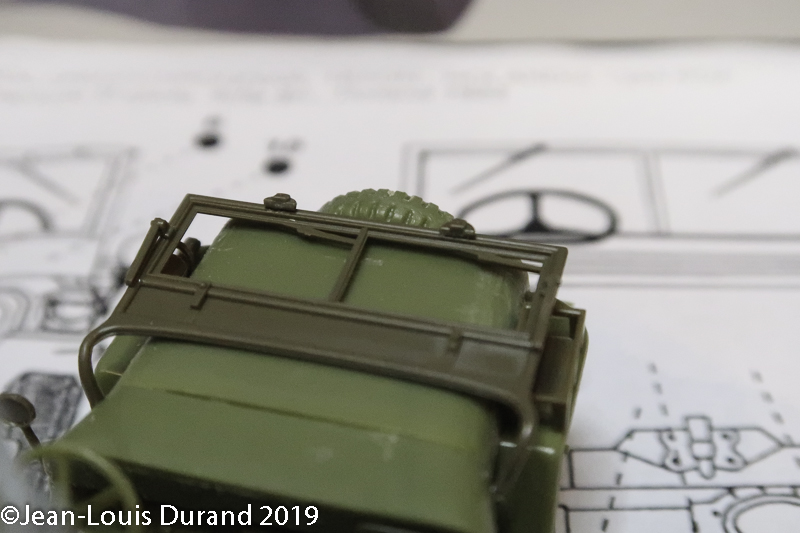
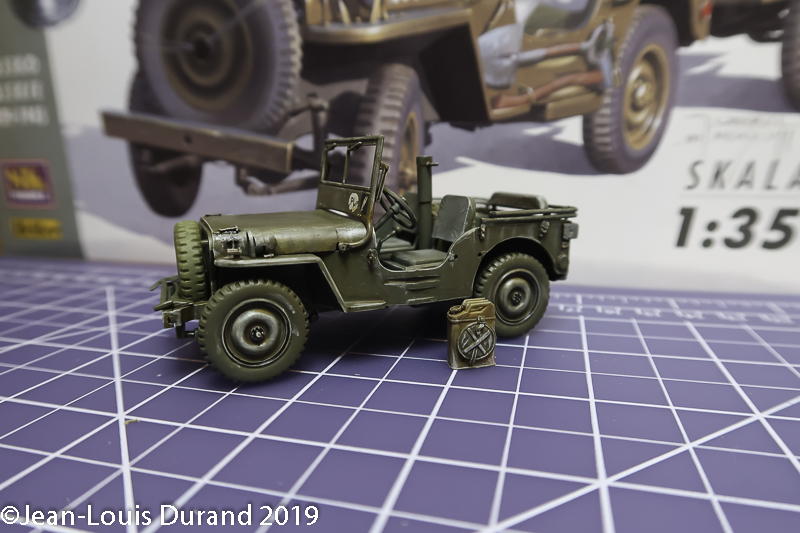
I intend to make a protective cover for the windshield in Milliput.
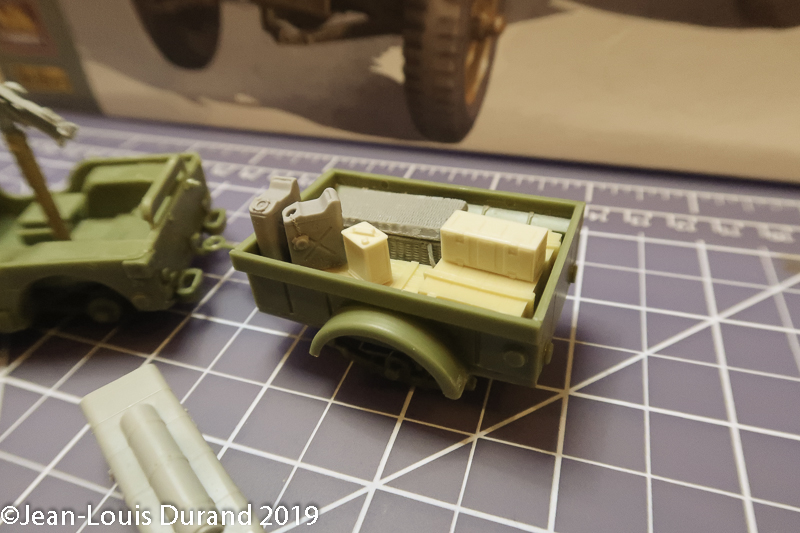
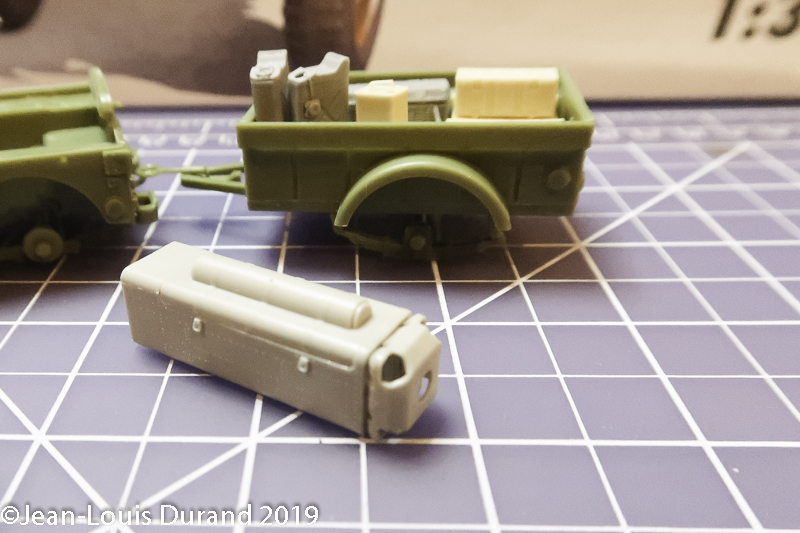
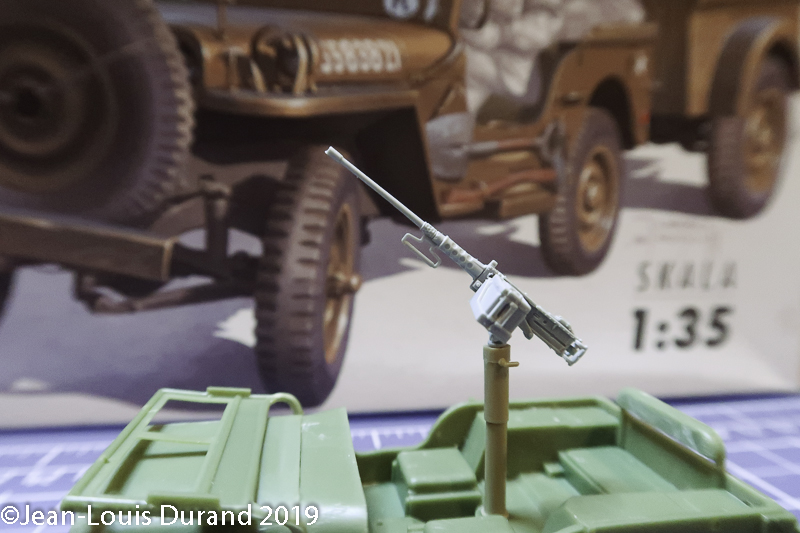
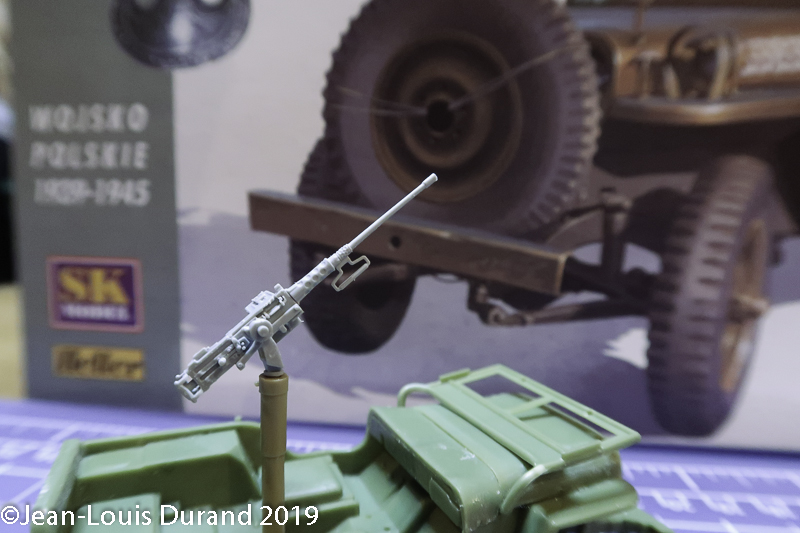
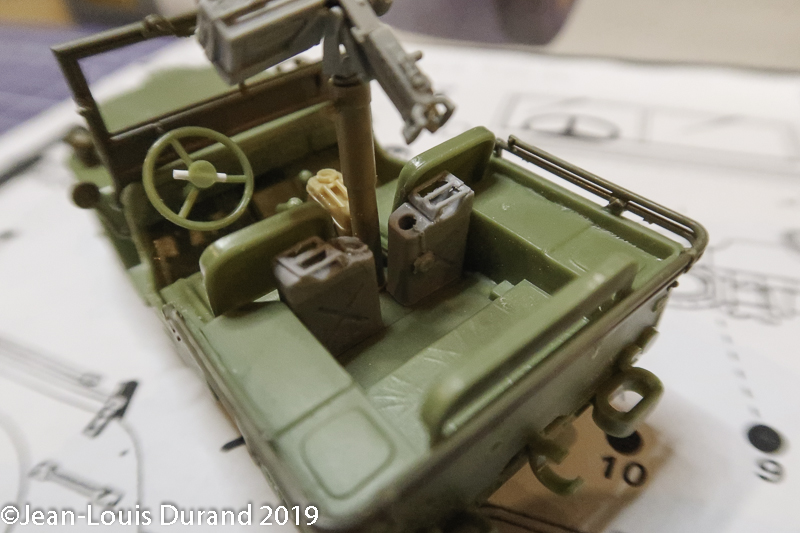
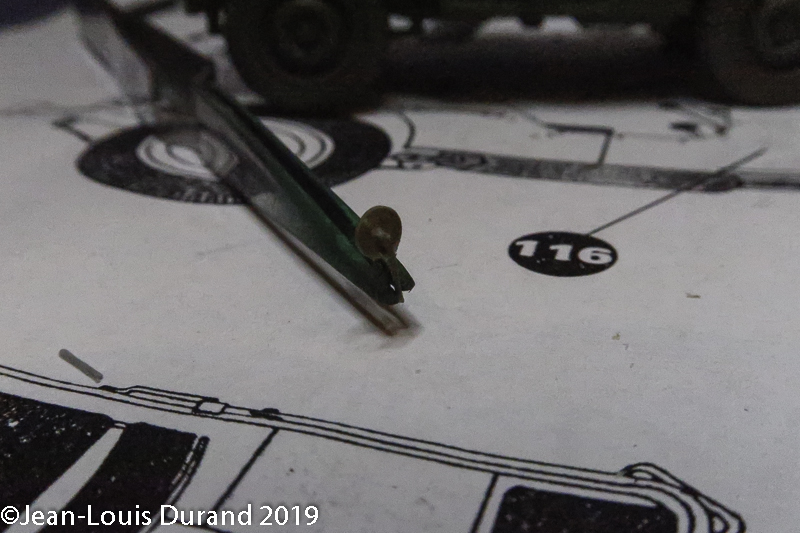
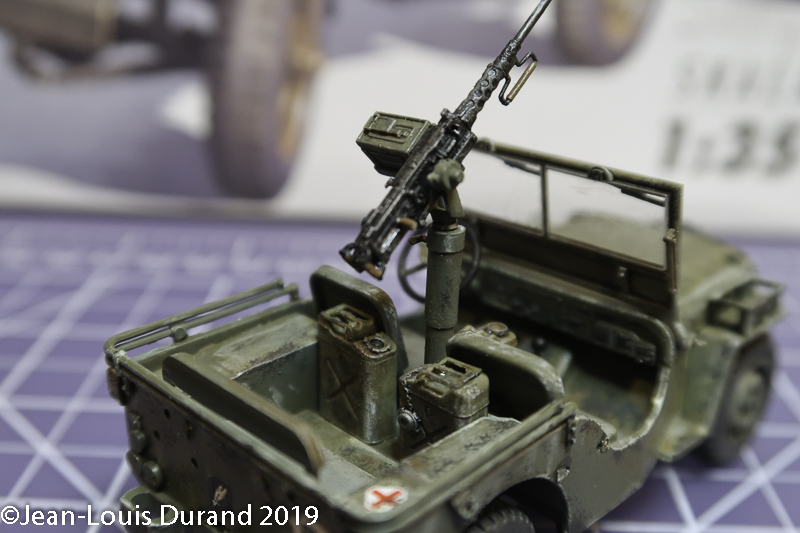
I retrieved a Chervrolet LRDG Tamiya Lewis machine gun mount, a .50mm Browning (12.7mm) from a Dragon Jeep and started filling the trailer with a Bronco wicker box, Verlinden crates, Ultracast cans and a B167 MkI steel ammunition box Ultracast also.


Barrovian
Visit this Community
United Kingdom
Joined: July 16, 2014
KitMaker: 21 posts
Armorama: 7 posts
Posted: Sunday, June 09, 2019 - 07:52 PM UTC
I was going to say that the Airborne Jeep wasn't fitted with a pedestal mount .50 cal until I came across this site

https://www.paradata.org.uk/article/airborne-jeep

Scroll through the pictures; there are 2 with the pedestal mount. Different model of .50 cal though.
BootsDMS
Visit this Community
England - South West, United Kingdom
Joined: February 08, 2012
KitMaker: 978 posts
Armorama: 965 posts
Posted: Sunday, June 09, 2019 - 11:36 PM UTC
Jean-Louis,

I have a feeling that as the Poles were kitted out by the British, the trailer shown - being US - would not be appropriate.

I believe Bronco produce a British "Airborne" trailer but I suspect that probably defeats the exercise in making the model you have (!)

Brian
Removed by original poster on 06/10/19 - 12:25:40 (GMT).
jldurand
Visit this Community
Quebec, Canada
Joined: July 06, 2013
KitMaker: 225 posts
Armorama: 215 posts
Posted: Monday, June 10, 2019 - 12:26 AM UTC

Quoted Text

I was going to say that the Airborne Jeep wasn't fitted with a pedestal mount .50 cal until I came across this site

https://www.paradata.org.uk/article/airborne-jeep

Scroll through the pictures; there are 2 with the pedestal mount. Different model of .50 cal though.


Thank you for this interesting link.
jldurand
Visit this Community
Quebec, Canada
Joined: July 06, 2013
KitMaker: 225 posts
Armorama: 215 posts
Posted: Monday, June 10, 2019 - 12:28 AM UTC

Quoted Text

Jean-Louis,

I have a feeling that as the Poles were kitted out by the British, the trailer shown - being US - would not be appropriate.

I believe Bronco produce a British "Airborne" trailer but I suspect that probably defeats the exercise in making the model you have (!)

Brian


Hi Brian,
you are right. The US trailer seems to be inapropriate. I will try to find one.
jldurand
Visit this Community
Quebec, Canada
Joined: July 06, 2013
KitMaker: 225 posts
Armorama: 215 posts
Posted: Monday, June 10, 2019 - 05:02 PM UTC
To make this Jeep look more like an airborne Jeep, I made the following changes:
- I modified the steering wheel with a piece of bunch pierced in the middle and a rod. The steering wheels of these vehicles were removable
- I changed the Heller windshield for a Tamiya one from the spare box
- changed Heller rectangular mirror for a round one (Tamiya)
- the arches of the tarpaulin are replaced by Tamiya arches, much more detailed
- the rear jerrycan support is removed, as well as the spare wheel support
- Two Tiger Model Design jerrycans (in resin) are placed behind the driver's and front passenger's seat. One of them is open, its cap hanging at the end of a chain
- a jerrycan and a soft jerrycan are placed between the two front seats
- on the left front fender, a blackout light + a small driving light
- the left front headlight is replaced by a Dragon blackout light
- an Italeri basket is placed on the right front fender
- the spare wheel is placed in front of the radiator (which frequently caused the engine to overheat)
- the tools moved on the front bumper. I took the opportunity to replace the american shovel by a more "british" one
- personal interpretation: I placed a fire extinguisher on the ground in front of the right front seat


Next step: final sanding and base coat...
18Bravo
Visit this Community
Colorado, United States
Joined: January 20, 2005
KitMaker: 7,219 posts
Armorama: 6,097 posts
Posted: Monday, June 10, 2019 - 06:02 PM UTC
Interesting. I don't think I've ever seen anyone model the gas cap hanging down like that. That's cool. A suggestion if I may: I'd thin out those oval shaped bumpers in the rear. A few minutes with a sharp no. 11 blade and a round file would do the trick.
jldurand
Visit this Community
Quebec, Canada
Joined: July 06, 2013
KitMaker: 225 posts
Armorama: 215 posts
Posted: Tuesday, June 11, 2019 - 03:34 AM UTC

Quoted Text

Interesting. I don't think I've ever seen anyone model the gas cap hanging down like that. That's cool. A suggestion if I may: I'd thin out those oval shaped bumpers in the rear. A few minutes with a sharp no. 11 blade and a round file would do the trick.


Tiger Model Design has some interesting stuff, including those jerrycans.

For the rear bumpers, you are right, they are way too thick. I will have a look at the PE sets I have in my stash. Thank you for telling me.
simonking
Visit this Community
England - East Midlands, United Kingdom
Joined: March 02, 2011
KitMaker: 128 posts
Armorama: 124 posts
Posted: Tuesday, June 11, 2019 - 04:26 AM UTC
I wouldn’t bother thinning the rear bumperettes . They were removed anyway and an A-frame fitted in its place.

Somebody’s got a nerve to sell that mould as an airborne jeep though........
jldurand
Visit this Community
Quebec, Canada
Joined: July 06, 2013
KitMaker: 225 posts
Armorama: 215 posts
Posted: Tuesday, June 11, 2019 - 04:38 PM UTC
I totally forgot to remove the bumpers before starting to paint...

Before priming, I added some details from a Tiger Model Design resin set:

- hood and windshield fasteners
- the butterfly screws to lock the windshield
- the accelerator, the brake pedal and the clutch pedal


iguanac
Visit this Community
Belgrade, Serbia & Montenegro
Joined: September 06, 2007
KitMaker: 145 posts
Armorama: 131 posts
Posted: Thursday, June 13, 2019 - 01:23 AM UTC
Interesting piece you are working on. Should you perhaps shorten front bumper? I saw it on few pics from the above link?
Best regards,
Marko
panamadan
Visit this Community
Minnesota, United States
Joined: July 20, 2004
KitMaker: 1,513 posts
Armorama: 1,449 posts
Posted: Thursday, June 13, 2019 - 02:13 AM UTC
Always love to see a Jeep build.
Makes me want to build my Jeep kits that are on the shelf.
Dan
jldurand
Visit this Community
Quebec, Canada
Joined: July 06, 2013
KitMaker: 225 posts
Armorama: 215 posts
Posted: Thursday, June 13, 2019 - 03:53 PM UTC

Quoted Text

Interesting piece you are working on. Should you perhaps shorten front bumper? I saw it on few pics from the above link?
Best regards,
Marko


Done !!! Thank you for suggesting.
jldurand
Visit this Community
Quebec, Canada
Joined: July 06, 2013
KitMaker: 225 posts
Armorama: 215 posts
Posted: Thursday, June 13, 2019 - 03:54 PM UTC

Quoted Text

Always love to see a Jeep build.
Makes me want to build my Jeep kits that are on the shelf.
Dan


Hi Dan ! Go, go, go !!! Do not let your Jeeps on the shelf
jldurand
Visit this Community
Quebec, Canada
Joined: July 06, 2013
KitMaker: 225 posts
Armorama: 215 posts
Posted: Thursday, June 13, 2019 - 03:56 PM UTC
Well, a layer of green, after replacing the lost Tamiya mirror by a resin one from Tiger Model Design. This one is in two parts: support and mirror. I will glue the mirror last.
I also shortened the bumper, as I saw on Airborne Jeeps documents and as suggested by other modellers.


jldurand
Visit this Community
Quebec, Canada
Joined: July 06, 2013
KitMaker: 225 posts
Armorama: 215 posts
Posted: Sunday, June 16, 2019 - 03:23 PM UTC
I broke the mirror for the second time. It will remain as it is...
A light green highlights drybrush and a layer of satin varnish. Next step: weathering.


southpier
Visit this Community
Alberta, Canada
Joined: December 11, 2009
KitMaker: 546 posts
Armorama: 316 posts
Posted: Sunday, June 16, 2019 - 08:17 PM UTC
no need to see where you've been: Move Forward!

this model is looking great.
jldurand
Visit this Community
Quebec, Canada
Joined: July 06, 2013
KitMaker: 225 posts
Armorama: 215 posts
Posted: Monday, June 17, 2019 - 01:52 AM UTC

Quoted Text

no need to see where you've been: Move Forward!

this model is looking great.


Thank you !
jldurand
Visit this Community
Quebec, Canada
Joined: July 06, 2013
KitMaker: 225 posts
Armorama: 215 posts
Posted: Wednesday, June 19, 2019 - 02:23 AM UTC
Photos of the shredded SK Models decals, very very fragile... Archer decals (dry transfers) for the manufacturer's plates and the dials are really nice but not easy at all to put in place ... The "red cross" decal is from a Passion Models set (# P35D-001 "WWII US Army budget and insignia").
Starting to paint the Jerry Cans and some weathering with ochre yellow and pale green oils.


jldurand
Visit this Community
Quebec, Canada
Joined: July 06, 2013
KitMaker: 225 posts
Armorama: 215 posts
Posted: Wednesday, June 19, 2019 - 03:32 PM UTC
Little by little ... Five minutes here, five minutes there ... I progress slowly, but I move on. Difficult to find time for everything, but at least I have the satisfaction of progressing.
So, tonight: painting the steering wheel and the gear levers, painting the wipers, with Humbrol 33 matt black.

I started to select some accessories that will come to complete the Jeep: a mini-bike from this Dragon box (#6585),


a bag and a tarpaulin from Value Gear and three Bergen backpacks from Résicast (set #35.5661).


That's what it will look like...

southpier
Visit this Community
Alberta, Canada
Joined: December 11, 2009
KitMaker: 546 posts
Armorama: 316 posts
Posted: Wednesday, June 19, 2019 - 10:50 PM UTC
very nice. I've never seen that idea (bike on the bumperettes) before. must not forget to leave room for the driver!
jldurand
Visit this Community
Quebec, Canada
Joined: July 06, 2013
KitMaker: 225 posts
Armorama: 215 posts
Posted: Thursday, June 20, 2019 - 01:06 AM UTC

Quoted Text

very nice. I've never seen that idea (bike on the bumperettes) before. must not forget to leave room for the driver!


That's my personnal style. I think I saw that somewher on internet when I was looking for some documentation.
jldurand
Visit this Community
Quebec, Canada
Joined: July 06, 2013
KitMaker: 225 posts
Armorama: 215 posts
Posted: Sunday, June 23, 2019 - 03:44 PM UTC
End of the painting of the Jeep, the machine gun and the tools (I painted the woods of two different colors). I still have the accessories to finish and to put in place.
Unfortunately for the trailer, I have not found one yet. I will try to find one in September, after I move from Canada.


 _GOTOTOP