

I just received my sample of the RFM M551A1/TTS 2 in 1 kit. I dont have a Tamiya M551 Sheridan to compare it with, but Ive seen that kit in the box, and theres are a lot more parts in the RFM kit box, as expected. I see a tiny bit of flash on a very few parts, but nothing major easily dealt with a sanding stick. There are a few minor (as in not very deep) ejector pin marks on the inside surface of the tracks mine are nowhere near as deep as the Moxingfans kit photos show, and may be handled easily with a sanding stick or small smear of Mr. Surfacer Ill figure that out as I start to build the kit. So far, everything else looks great! This kit can definitely be built as a 70s M551A1, or the later 80s TTS version, or perhaps even backdated to a late M551. Decals are only included for the TTS version though. The detail level is excellent, and there are many options for open panels, hatches, and a partial (very partial) interior for both A1 and TTS versions. Some BII is included (shell rammer, track tool, and other items, and even the Infantry phone for the positionable phone box cover!
The instructions look a bit confusing due to the way they're laid out. You definitely need to read through them at least twice to understand differences in the A1 and TTS versions. The A1 sequence is highlighted in green print, while the TTS version is in normal black ink. Unfortunately, if you're a strict build by the numerical step builder, youll accidentally build the turret sides under the gunners ballistic sight aperture for the TTS version (part E5) way before you would have gotten to the A1 version (part D39) so again, review the instructions carefully. In addition, theyre a little confusing when you add the Coax MG, which has two different MGs pictured. Be aware the M73 (part B69) has a perforated barrel cover and is only found on the A1 version the later M240 (part B56) is found only on late TTS Sheridans (the M73 was a notoriously bad MG and was rapidly replaced on TTS vehicles). I see a couple of minor things which may need correction, as the AUX receiver antenna base insulator looks incorrect for a 70s version AN/VRC422/524 set up (Parts E33 vs parts D62), but it may be correct for a late 90s digital set up, Im not an expert in that area. Photo etch is included for the engine grills and the cargo rack, as well as many other smaller details like thumbscrews and tie downs. Theres a strip of 86 bolt heads molded into the long axis of the two C sprues according to the instructions youll use a few of them, but that will leave a lot left over for other projects a nice touch. Markings are provided for two 82nd Airborne Sheridans both TTS vehicles, one looks like its an Operation Desert Storm vehicle, the other a Just Cause vehicle? No information is provided in the instructions for either, and no history is provided.
My first impression is this is an excellent kit, full of detail and options (theres also a ridiculous spring for 152mm recoil simulation includedI dont know why manufacturers feel the need to include this option). Overall, it looks like its going to be a fun but very detailed build. Its definitely not for beginners though, with a ton of small (downright tiny) parts, and the instructions with 55 steps which will require your undivided attention to get the versions correct. RFM has color coded specific areas of the instructions to help in understanding, and has included an errata sheet clarifying the part numbers used for the track assembly. I can highly recommend this kit if you want an accurately detailed M551A1 or TTS Sheridan. Mine will be marked as my track in the 11th ACR FOX 36 from September 77 to September 78 but Ill have to dig out some number decals or find aftermarket ones. As time allows, I'll try to get a kit review going, but I'm already working on another review, so we'll see. I'd like to get a build review going too-- but that'll be down the road.
VR, Russ
Armor/AFV
For discussions on tanks, artillery, jeeps, etc.
For discussions on tanks, artillery, jeeps, etc.
Hosted by Darren Baker, Mario Matijasic
RFM Sheridan-- First Look

Kevlar06


Joined: March 15, 2009
KitMaker: 3,670 posts
Armorama: 2,052 posts
Posted: Wednesday, September 18, 2019 - 09:21 AM UTC

iam2brb
Joined: December 31, 2016
KitMaker: 136 posts
Armorama: 95 posts
Posted: Wednesday, September 18, 2019 - 10:06 AM UTC
Hey thanks for this! I am keen to get my mitts on this but cannot buy until next month!
Kevlar06
Joined: March 15, 2009
KitMaker: 3,670 posts
Armorama: 2,052 posts
Posted: Wednesday, September 18, 2019 - 11:55 AM UTC
As I look through the kit and instructions, I'm noticing more things:
1) The drivers compartment has a complete seat, clear periscopes, IR and Thermal driving scopes (depending on which version you build) periscope wipers (a little simplified), and the washer reservoir. However there's no steering bar, linkage or gear shift controls.
2) The loader position has a seat, as does the commander's position,but there's no gunners seat. The commander's position has the LRF sight, but there are no controls for the LRF ranging device, which has a set of prominent handles which hang down below the lip of the coupula, to assist the commander when rotating the coupula, or to just hang onto when the gun is fired-(-believe me, you want to hang onto something-- I had the bruises to prove it).
3) There is a complete gun and breech assembly, including the Coax MG (including the ridiculous "simulated" recoil device-- which is cleverly hidden inside the breech end. But there's none of the prominent electronics boxes on the loaders side of the hull which contained the missile electronics and CBSS system. Nor is there the ammo chutes or belts for the coax, but you wouldn't see this anyway from the outside. The breech can be posed open or closed. But-- the breech block on the real thing is a split screw type, commonly seen on Artillery breeches, and the kit doesn't have that detail, so if you pose it open it won't look entirely accurate. There is a "lans and groove" PE insert for the muzzle end, which is a nice touch, since the real thing was visible when the barrel plug was removed. The mantlet and gun detain is very nice. My only complaint here is the abscence of the split screw detail on the breech block, and the fact that the guard on the right side of the gun is a solid piece, the real thing was a mesh screen.
4) There are over 60 parts in the commander's .50 cal. and coupula assembly alone! It's incredibly detailed, and the vision block assembly is crystal clear. It will easily become the focal point of the vehicle, and is more detailed than any other kit of the Sheridan by far. (We called this part the "Commander's Teacup" in my Squadron, but it went by other names in other places).
I think the level of detail is exceptional, but it's likely not much of the interior will be seen through the open hatches anyway. It's still way more detail than offered in any other Sheridan kit. My first impression with this kit is RFM may intend to release a version with a complete interior, or offer a more complete interior as they've done with a few of their other kits. (Don't hold me to that though). This kit will build into an impressive model with the partial interior that's included. I have a set of Verlinden tank crew members in NBC gear waiting to board this kit, so I'm not to worried about it anyway!
VR, Russ
brekinapez
Joined: July 26, 2013
KitMaker: 2,272 posts
Armorama: 1,860 posts
Posted: Wednesday, September 18, 2019 - 12:03 PM UTC
Hey, Russ:
Here's a link to a French fan site of the Battlefield 1942 Vietnam War modification, Eve Of Destruction.
http://www.bataillon-resistance.com/forumbf2/viewtopic.php?f=4&t=447&start=80
The post is a series of screenshots of the vehicles/aircraft included in the game as of it's last iteration back in 2012, I think. My friends and I played the crap out of the mod until Battlefield 2 came out and servers started drying up.
Even though they list the M551 as included in game, they didn't post a pic that I could find.
Found a pic on Google:
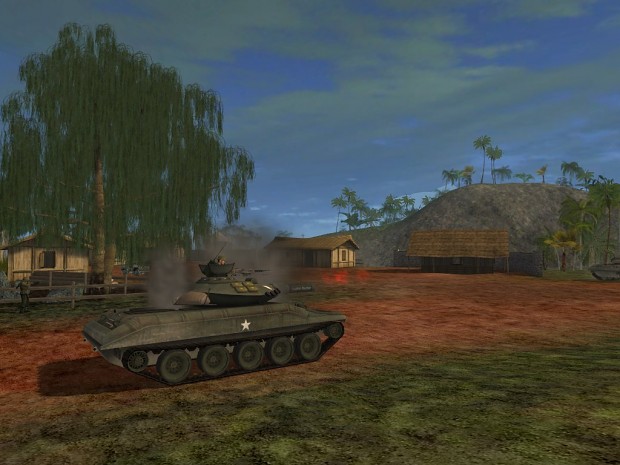
The skin was probably a work in progress as it seems to be missing some of the details seen on the kit and RL vehicle. All I remember is the thing was ridiculously agile, especially in hilly areas, and I was able to zip up above the guns of the Vietnamese team's armor and they were to heavy to climb the sides of the ravines up after me. Fish in a barrel all day long until somebody would finally decide to go airborne and come gunning for me. Under the jungle canopy I could avoid direct hits but I would succumb gradually to damage as the repair areas were totally exposed. Or an AT squad would come after me on foot.
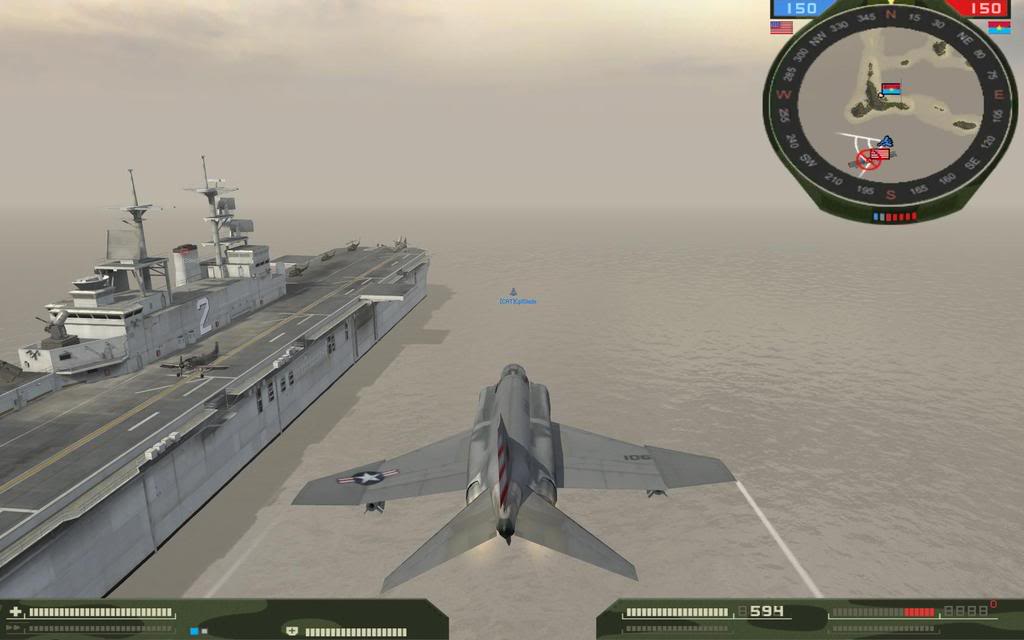
Oh, this is me virtually flying an F4:
Here's a link to a French fan site of the Battlefield 1942 Vietnam War modification, Eve Of Destruction.
http://www.bataillon-resistance.com/forumbf2/viewtopic.php?f=4&t=447&start=80
The post is a series of screenshots of the vehicles/aircraft included in the game as of it's last iteration back in 2012, I think. My friends and I played the crap out of the mod until Battlefield 2 came out and servers started drying up.
Even though they list the M551 as included in game, they didn't post a pic that I could find.
Found a pic on Google:
The skin was probably a work in progress as it seems to be missing some of the details seen on the kit and RL vehicle. All I remember is the thing was ridiculously agile, especially in hilly areas, and I was able to zip up above the guns of the Vietnamese team's armor and they were to heavy to climb the sides of the ravines up after me. Fish in a barrel all day long until somebody would finally decide to go airborne and come gunning for me. Under the jungle canopy I could avoid direct hits but I would succumb gradually to damage as the repair areas were totally exposed. Or an AT squad would come after me on foot.
Oh, this is me virtually flying an F4:
Kevlar06
Joined: March 15, 2009
KitMaker: 3,670 posts
Armorama: 2,052 posts
Posted: Wednesday, September 18, 2019 - 12:14 PM UTC
Shell,,
That looks like an interesting game. I took French in HS, but have forgotten most of what I learned. How did the M551 perform in the game? For us, it was a maintenance nightmare. But, it was the "funnest" vehicle I ever rode on. My crew and I took ours down a 15 degree slope in Germany and through a forest of 20-30 foot pines doing about 30 mph once. I didn't think we were going to be able stop when we hit bottom. When we did get it stopped, there were 2 or 3 places in the outer aluminum skin that had been punctured by fir branches, and the wood was still sticking out! We patched them with lids from #10 coffee cans and rivet guns, which was a standard repair. I've been asked to write a set of "Sheridan stories" for Kitmaker, which I might do if anyone is interested. But I'm sure others have some great stories too-- it was an "interesting" vehicle for sure.
VR, Russ

TopSmith
Joined: August 09, 2002
KitMaker: 1,742 posts
Armorama: 1,658 posts

Posted: Wednesday, September 18, 2019 - 02:20 PM UTC
If this is noticeably better than the Tamiya offering, is it backdateable to Vietnam?

panamadan
Joined: July 20, 2004
KitMaker: 1,513 posts
Armorama: 1,449 posts
Posted: Wednesday, September 18, 2019 - 02:39 PM UTC
Thanks Russ.
I hope that you do a build up here.
Dan
I hope that you do a build up here.
Dan

knewton

Joined: June 19, 2013
KitMaker: 1,217 posts
Armorama: 1,092 posts
Posted: Wednesday, September 18, 2019 - 05:18 PM UTC
Russ, thank you for the initial impression as it bodes well for the M-ATV next! Please post images of any build if / when you can.
Kevlar06
Joined: March 15, 2009
KitMaker: 3,670 posts
Armorama: 2,052 posts
Posted: Wednesday, September 18, 2019 - 05:24 PM UTC
Quoted Text
If this is noticeably better than the Tamiya offering, is it backdateable to Vietnam?
Greg,
I can't tell you that it's noticeably "better" than the Tamiya kit--I haven't started building it yet, but it's definitely more detailed. It's likely harder to build than the Tamiya kit because of the added detail. So it depends on what you're after. In my opinion, if you leave off the LRF, and make some small cosmetic changes (an old style fuel can holder is one thing that will be required), you could backdate it and build a late model M551 appropriate for 1969-72 Vietnam service. There might be a few other minor cosmetic changes in stowage (arrangement of footmans loops and surface bolts) that might need to be changed too. There are some things I see in the instructions that indicate that RFM might have big plans for this kit in the future-- since you have to drill out several flashed over openings in the hull and turret to add some of the TTS detail-- and perhaps a full interior is coming? Or maybe a European based Sheridan, or even a backdated M551? We might just have to wait to find out.
One important detail I've noticed on this kit putting the Tamiya kit to shame is the beautifully detailed three piece "surfboard" at the front of the track. The Tamiya kit has it molded in one piece, while RFM has molded it exactly as the original in three parts. And that, along with the separate rubberized covers and deep compartments along the top of the hull, tell me they may be planning a version with the flotation screen deployed. If not, it wouldn't be too hard to create a deployed flotation screen. Not saying they will, but they've gone to great lengths to make it possible. Also, the Infantry phone at the rear can be positioned open-- with a separate phone and PE holder-- begging for a diorama of an Infantryman or dismounted trooper communicaating with the crew. It's details like that that put it "over the top" when comparing to the Tamiya kit. However, it remains to be seen how well it'll all fit together.
VR, Russ
Kevlar06
Joined: March 15, 2009
KitMaker: 3,670 posts
Armorama: 2,052 posts
Posted: Wednesday, September 18, 2019 - 05:31 PM UTC
Quoted Text
Thanks Russ.
I hope that you do a build up here.
Dan
Dan, I'm a hopeless Luddite (actually I'd give the Luddites a good name compared to my electronic talent) when it comes to posting photos here. But hopefully I'll be able to do a kit review and eventually I hope to do a build article with Carlos Martin's help. It's just getting the time to do it. I have several other projects underway right now. But I'm itching to get started!
VR, Russ

Tankrider
Joined: October 07, 2002
KitMaker: 1,280 posts
Armorama: 1,208 posts
Posted: Thursday, September 19, 2019 - 02:49 AM UTC
Quoted Text
If this is noticeably better than the Tamiya offering, is it backdateable to Vietnam?
In a word, yes... From my looking at the parts in the obvious changes (to me) are listed below:
1. Follow the M551A1 (green) instructions as mentioned above.
2. Leave off the LRF parts that are attached to the commander's cupola/chicken armor shields, add a front shield.
3. Add a bustle rack (per references of the vehicle that you are going to build) as the kit one is a post Vietnam version seen on later Sheridans.
I know that I probably omitted something but I will relook the RFM and Tamiya kits when I get home and edit as needed.
John
Kevlar06
Joined: March 15, 2009
KitMaker: 3,670 posts
Armorama: 2,052 posts
Posted: Thursday, September 19, 2019 - 03:24 AM UTC
John is correct, the bustle rack is of the later 80's standard production rack that was added to vehicles in the 82nd Airborne after rebuild. The parts could be modified into an original rack found on the first production models in '66 (using only part of the PE screens-- and the original used fabric netting), or modified into the "crew designed" add-on racks in Vietnam, although most of those were quite individual and differed between tracks . My only concern with the bustle rack is it's round stock in the kit where the original was bent up channel. As for the chicken plate, you wouldn't necessarily need an ACAV shield since not all VN Sheridans had them-- it just depends on what you want to model--this is where photos of the real thing are handy.
VR, Russ
VR, Russ
Kevlar06
Joined: March 15, 2009
KitMaker: 3,670 posts
Armorama: 2,052 posts
Posted: Thursday, September 19, 2019 - 06:51 AM UTC
As I dig deeper into the instructions and the kit, I'm noticing little things which may not be readily apparent when deciding wether or not to build a late M551, M551A1, or a very late M551A1/TTS vehicle. I just noticed the kit has an AN/VSS3A searchlight, which wasn't available for Vietnam M551s. Those tracks used the earlier AN/VSS3, which can be distinguished by its "cut off" corners at the top. The VSS3 was widely available well into the 70s (I had one on my track for a time), but the VSS3 was replaced by the VSS3A, which went into production in 1970. Some of the tracks in my Squadron received the VSS3A by the late 70s. They weren't much use when the TTS sights were added post 1980, so many of them were removed, but occasionally, you'd find a track with one.
I'll also correct my earlier comment about the LRF ranging box/readout control found on the left side of the commander's coupula-- it's in the kit as part E22. I haven't seen any evidence of the handles on either side of the commander's LRF sight, that helped rotate the coupula, but, there are two parts on the sprues which don't appear anywhere in the instructions (E25 & E26) that might be these handles-- and they're right next to the commander's LRF sight (part E24). They might be an omission in the instructions. I'm amazed at the level of detail in this kit, but you'd better have a good sprue cutter, a pair of magnifying glasses, and a fine pointed set of tweezers-- some of those parts are tiny!
VR, Russ
Kevlar06
Joined: March 15, 2009
KitMaker: 3,670 posts
Armorama: 2,052 posts
Posted: Thursday, September 19, 2019 - 07:08 AM UTC
Per my notes above, here's the manual for the VSS3 IR Searchlight:
https://www.liberatedmanuals.com/TM-11-5855-217-12.pdf
And here's the manual for the VSS3A IR searchlight:
https://www.liberatedmanuals.com/TM-11-5855-217-12-1.pdf
Both manuals are dated 1970, which doesn't mean much, as the manuals were updated periodically, which is designated by a cover letter. I think both manuals have a 1981 update letter. But you can see the differences in the searchlight. To build a Vietnam M551 (with a searchlight), you'd need a VSS3 type. You could rob Tamiya's kit, or, perhaps there's an aftermarket kit out there, or just leave off the searchlight entirely as there are many photos of Vietnam tracks without them--more without than with I think). There's also a canvas weather cover for the searchlight-- we seldom operated the track without it, as the searchlight lens was prone to damage, and the searchlight was expensive to replace-- you'd better have a good excuse for doing so.
VR, Russ
basco

Joined: September 24, 2006
KitMaker: 161 posts
Armorama: 121 posts
Posted: Thursday, September 19, 2019 - 07:26 AM UTC
Quoted Text
If this is noticeably better than the Tamiya offering, is it backdateable to Vietnam?
well, I can only say the Tamiya kit is absolutely great fun to build and the level of how the parts fit is simply fantastic. So if you want to go for a straight forward, easy and quick to build, yet still great looking Sheridan in 1:35, the Tamiya is outstanding.
Kevlar06
Joined: March 15, 2009
KitMaker: 3,670 posts
Armorama: 2,052 posts
Posted: Thursday, September 19, 2019 - 07:33 AM UTC
Quoted Text
Quoted TextIf this is noticeably better than the Tamiya offering, is it backdateable to Vietnam?
well, I can only say the Tamiya kit is absolutely great fun to build and the level of how the parts fit is simply fantastic. So if you want to go for a straight forward, easy and quick to build, yet still great looking Sheridan in 1:35, the Tamiya is outstanding.
I agree, unfortunately, the Tamiya kit only represents a mid-late Vietnam era M551, so if you want a later version, you'll need the RFM kit. And if you want really exceptional detail, and a partial interior, the RFM kit has it. The Tamiya kit is going to be a much faster build than the RFM kit for sure, just because of the parts count-- I've been counting the parts in the RFM kit, and it has 665 parts, and a further 86 nut castings on the C sprues (you won't use them all). Not to say you'll use all these parts, but it'll give you an idea of the difference in the two kits.
VR, Russ
trickymissfit
Joined: October 03, 2007
KitMaker: 1,388 posts
Armorama: 1,357 posts
KitMaker: 1,388 posts
Armorama: 1,357 posts
Posted: Thursday, September 19, 2019 - 07:41 AM UTC
Quoted Text
dJohn is correct, the bustle rack is of the later 80's standard production rack that was added to vehicles in the 82nd Airborne after rebuild. The parts could be modified into an original rack found on the first production models in '66 (using only part of the PE screens-- and the original used fabric netting), or modified into the "crew designed" add-on racks in Vietnam, although most of those were quite individual and differed between tracks . My only concern with the bustle rack is it's round stock in the kit where the original was bent up channel. As for the chicken plate, you wouldn't necessarily need an ACAV shield since not all VN Sheridans had them-- it just depends on what you want to model--this is where photos of the real thing are handy.
VR, Russ
In Vietnam, I saw one or two with new racks made from round tubing. As you say most were from chanel iron many were from bent and welded angle iron. Some were even welded to stubs left from the OEM rack.
Gary
trickymissfit
Joined: October 03, 2007
KitMaker: 1,388 posts
Armorama: 1,357 posts
KitMaker: 1,388 posts
Armorama: 1,357 posts
Posted: Thursday, September 19, 2019 - 07:50 AM UTC
Sheridan's got everything external bent up slot! I've seen more than one Sheridan without a searchlight! Just mounts!
Did RFM supply the applique armor kit as separate parts? Also, no one has spoken about the drivers hatch externally. How does it look? Lights?
Gary
Did RFM supply the applique armor kit as separate parts? Also, no one has spoken about the drivers hatch externally. How does it look? Lights?
Gary
U-mark
Joined: January 04, 2017
KitMaker: 128 posts
Armorama: 89 posts
Posted: Thursday, September 19, 2019 - 08:39 AM UTC
Russ, talk about timing, I just got mine in the mail this afternoon. Thanks for the review. I know RFM instructions can be a little sketchy and your observations will help me a lot. I'll have to admit I'm impressed with what I see. My Cold War/Modern collection keeps growing. Thanks Again, Mark

165thspc

#521
Joined: April 13, 2011
KitMaker: 9,465 posts
Armorama: 8,695 posts
Posted: Thursday, September 19, 2019 - 08:43 AM UTC
I believe David Doyle Publications has just produced a new pub covering the Sheridan.


Frenchy

Joined: December 02, 2002
KitMaker: 12,719 posts
Armorama: 12,507 posts
Posted: Thursday, September 19, 2019 - 08:53 AM UTC
Quoted Text
Did RFM supply the applique armor kit as separate parts? Also, no one has spoken about the drivers hatch externally. How does it look? Lights?
You can find the instructions here :
https://www.scalemates.com/fr/products/img/7/5/6/1170756-70-instructions.pdf
The applique armor kit parts are separate BTW

H.P.
Kevlar06
Joined: March 15, 2009
KitMaker: 3,670 posts
Armorama: 2,052 posts
Posted: Thursday, September 19, 2019 - 09:07 AM UTC
Quoted Text
I believe David Doyle Publications has just produced a new pub covering the Sheridan.
Yep-- I reviewed Doyle's latest book on the Sheridan for Armorama here, and Michael-- they spelled your name wrong! (which I mentioned in the review). David told me it's a spell check error (I understand-- happens to me here all the time!). Here's the review-- the book is well worth the money:
https://armorama.kitmaker.net/review/14712
It will make a great resource for photos and interior shots. Sadly, it doesn't contain many photos of MERDC Sheridans, like mine was, but there are some!
VR, Russ
Kevlar06
Joined: March 15, 2009
KitMaker: 3,670 posts
Armorama: 2,052 posts
Posted: Thursday, September 19, 2019 - 09:17 AM UTC
Quoted Text
Sheridan's got everything external bent up slot! I've seen more than one Sheridan without a searchlight! Just mounts!
Did RFM supply the applique armor kit as separate parts? Also, no one has spoken about the drivers hatch externally. How does it look? Lights?
Gary
Appliqué armor is separate, so I guess you could build a very early Vietnam era M551 just by leaving it off, but you'd need a different 152mm barrel with the large bore evacuator, or the barrel with the ring (I believe Voyager does both). I'm a bit puzzled by the belly armor appliqué that comes in the kit, as it covers up the drivers escape hatch. They might have done that in Vietnam when they added the appliqué kits, but I seem to remember the driver's escape hatch being accessible from the outside-- at least I recall seeing one or two dropped along a road in Germany someplace (free beer for the crew that recovers another crew's belly hatch!). But I might be wrong about that-- maybe I'm thinking of M60A1s in our tank company. We routinely left one or two drain plugs out (nicely molded at the rear of the hull in the kit) to let excess water drain from the hull before it froze in the winter. The drivers hatch is exceptionally detailed with clear vision blocks, wipers, M551A1 IR drivers scope or TTS drivers scope, and even part B14, which is the reservoir for the wiper fluid. Lights are little gems-- even the marker lights (turn indicators and "cat eye" markers) have three parts-- a clear inner lens, with an outer casing and then a separate cover.
VR, Russ
Kevlar06
Joined: March 15, 2009
KitMaker: 3,670 posts
Armorama: 2,052 posts
Posted: Thursday, September 19, 2019 - 09:28 AM UTC
Quoted Text
Quoted TextDid RFM supply the applique armor kit as separate parts? Also, no one has spoken about the drivers hatch externally. How does it look? Lights?
You can find the instructions here :
https://www.scalemates.com/fr/products/img/7/5/6/1170756-70-instructions.pdf
The applique armor kit parts are separate BTW
H.P.
Thanks Frenchy! Actually, Moxingfans has a much clearer review of the sprues and instructions over at the AMPS site. You can find it here. I'm really torn now about writing an in-box review of the kit, since the Moxingfans photos are much clearer than I could ever produce:
http://www.moxingfans.com/test/RFM/2019/0911/6472.html
They also have a build review up, but it's straight out of the box without paint, and I think they've made some errors, combining features of both the A1 and the TTS. Here's the "build" review:
http://www.moxing.net/2019/0914/10018.html
VR, Russ
basco
Joined: September 24, 2006
KitMaker: 161 posts
Armorama: 121 posts
Posted: Thursday, September 19, 2019 - 05:36 PM UTC
Quoted Text
I agree, unfortunately, the Tamiya kit only represents a mid-late Vietnam era M551, so if you want a later version, you'll need the RFM kit. And if you want really exceptional detail, and a partial interior, the RFM kit has it. The Tamiya kit is going to be a much faster build than the RFM kit for sure, just because of the parts count-- I've been counting the parts in the RFM kit, and it has 665 parts, and a further 86 nut castings on the C sprues (you won't use them all). Not to say you'll use all these parts, but it'll give you an idea of the difference in the two kits.
VR, Russ
that sure is the big difference. I must say, some of the kits outthere are really overdone, but that's just me, not using PE anymore. I am currently building AFV Clubs M42 Duster (late) and often i scratch me old head thinking "holy, was this really necessary to break this and that down in so many parts". But as I said, it's just me. I came to enjoy building straight forward kits more and more. having said that: I'm sure gonna buy the Rye Field M551 (just because I love this tank).
 |

WEB HOSTING BY


Copyright ©2021 Armorama and Kitmaker Network, a subsidiary of Silver Star Enterprises
All Rights Reserved. Please read our Conditions of Use and Privacy Policy.
All Rights Reserved. Please read our Conditions of Use and Privacy Policy.