I'll Be Back - Meng Terminator
Queensland, Australia
Joined: May 16, 2010
KitMaker: 232 posts
Armorama: 218 posts
Posted: Sunday, January 05, 2020 - 10:24 PM UTC
After 2 moves in 8 months across states in Australia i need something to get the mojo going again. My "a taste of home" diorama has been put on the back burner till i can get back into painting figures.
Santa bought me the Meng BMPT terminator and the Tiger model BMPT-72
I'm going to start with the Meng one.
on opening the box there are a multitude of sprues, a clear fret, a small photoetched fret (with a wheel mask thrown in for good measure), a sprue of poly caps and fittings for the tracks and a wierd fret of a rubber like material for some of the parts that can be glued with normal styrene glue. workable plastic tracks are included
more to follow......

Ashore, it's wine, women and song, aboard it's rum, bum and baccy
Namabiiru
 Associate Editor
#399
Rhode Island, United States
Joined: March 05, 2014
KitMaker: 2,888 posts
Armorama: 1,920 posts
Posted: Monday, January 06, 2020 - 12:25 AM UTC
Colin,
I'm in the middle of the same build right now. It's a wonderful kit (although I really have to question Meng's decision to make some parts out of vinyl). Would love to compare notes with you as you go along, because I've found a few challenges I haven't quite decided how I'm going to solve.
Do you plan to add any AM like Aber's barrel set? I'm adding SKP lenses, but I think that's about it.

Louisiana, United States
Joined: March 06, 2010
KitMaker: 3,128 posts
Armorama: 2,959 posts
Posted: Monday, January 06, 2020 - 04:35 AM UTC
Mark;
The Meng gun barrels are OK, but after seeing the metal ones in the Tiger Model Terminator kit... I think I'll be adding an AM metal barrel set to the Meng build. In about every other way, both kits are very cool and look extremely well done for the most part. A few tiny detail tweaks here and there will make both of these kits into pretty grand builds, without much AM stuff needed, IMHO.
I've not seen the Trumpeter kits of these Terminators, but expect that they, too, would be pretty nice, and also that they, too, would benefit most from adding metal barrels over most other AM bits. The gun barrels are slim and complexly-shaped and challenge even good slide-molding... So money spent on metal items for these seems like a good deal (specially as I don't like the fuss of trying to get plastic gun barrels smooth and seam-free and still "perfectly" round!

).
Let's see them built, guys!

Bob
Minnesota, United States
Joined: July 20, 2004
KitMaker: 1,513 posts
Armorama: 1,449 posts
Posted: Monday, January 06, 2020 - 04:57 AM UTC
Remember that the Tiger and Meng kits are different versions of this vehicle.
I have the Trumpeter version and it is much more detailed and partie than the other two.
Looking to meet other MN Armor modellers. I live in Buffalo.
Namabiiru
Associate Editor #399
Rhode Island, United States
Joined: March 05, 2014
KitMaker: 2,888 posts
Armorama: 1,920 posts
Posted: Monday, January 06, 2020 - 06:32 AM UTC
@Bob: I've thought long and hard about replacing the barrels, but having already mounted the grenade launchers I kind of feel like I'm past the point of no return--we'll see if that changes once I get the cannon barrels off the sprue (Learn from my mistake, Colin!). Truth be told, I picked this up at my favorite second-hand kit store during my last pilgrimage to Tokyo, and adding too much expensive AM felt like it would lessen my scavenger hunt victory.

@Dan: The Trumpeter kit must be something truly special; I'm not a rivet counter and I don't generally preface my builds with a lot of research, so I can't speak to the accuracy of this kit, but it's got all the detail I could ever want. I did replace the molded chains on the side skirts with some chain meant for model ships, but I haven't found much else that I thought I could significantly improve upon.
Queensland, Australia
Joined: May 16, 2010
KitMaker: 232 posts
Armorama: 218 posts
Posted: Monday, January 06, 2020 - 03:01 PM UTC
Thanks guys, I'll be posting a few build pics later on today.
@Mark it will be an oob build, no extra parts apart from replacing a few grab handles with wire that I sliced, mainly because they are so thin off the sprue. I also agree about the vinyl parts, and also why they made a load of "workable" parts on the model. A lot of detail that also cant be seen on the final build like under the turret etc.
@Bob, I have an old seam picker from my mom's sewing kit, like a round bladed scalpel. I find this ideal for seam scraping any number of round items without getting the oval shape I normally end up with flat blades. It's also sharp enough to slice off the sprue attachment points on these things.
But yes, given the delicacy of these parts it was a challenge
Ashore, it's wine, women and song, aboard it's rum, bum and baccy
Queensland, Australia
Joined: May 16, 2010
KitMaker: 232 posts
Armorama: 218 posts
Posted: Monday, January 06, 2020 - 09:01 PM UTC
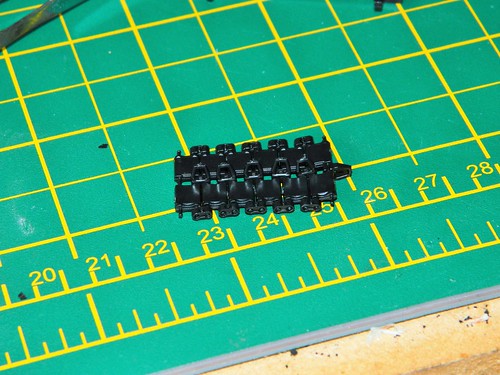
First up the track components. Each link made up of 4 parts, each track 81 links lol
these are the component parts
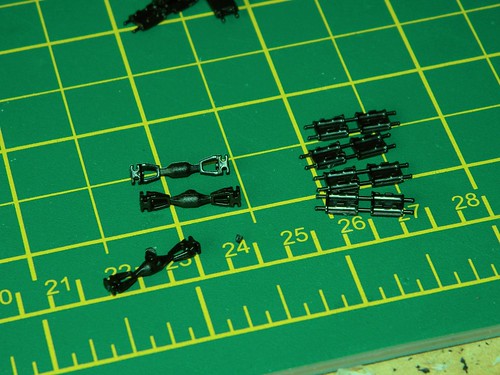
Make up 2 runs of 6
then separate them

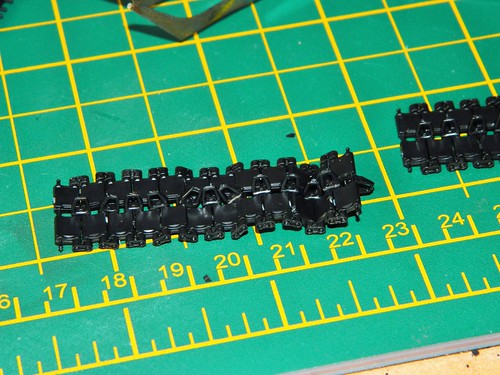
These are provided to connect the track connectors (the connectors are vinyl, i suppose to make themm flexible to aid fitting)
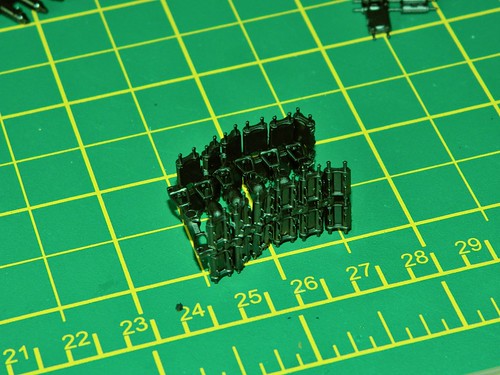
a set of 6 made up
and 2 sets joined
and finally, 2 track runs made up
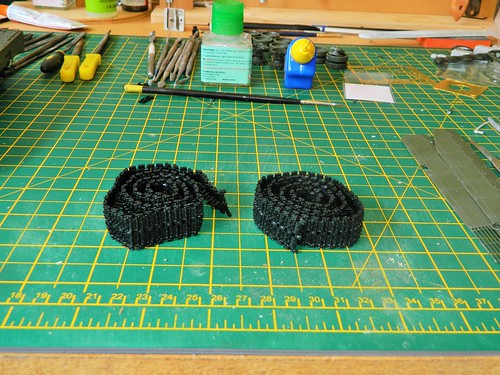
to be honest, these were fairly easy to make up, if laborious. And although they may not have the weight of Fruil they look fairly effective...
more to come.....
Ashore, it's wine, women and song, aboard it's rum, bum and baccy
Queensland, Australia
Joined: May 16, 2010
KitMaker: 232 posts
Armorama: 218 posts
Posted: Monday, January 06, 2020 - 09:05 PM UTC
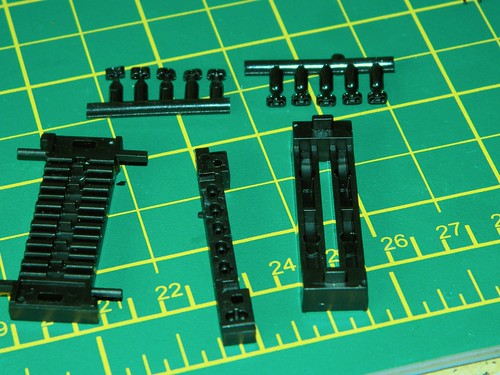
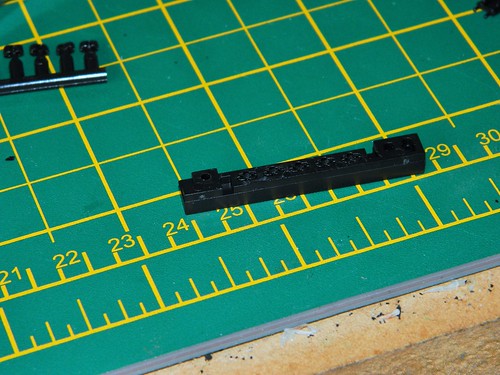
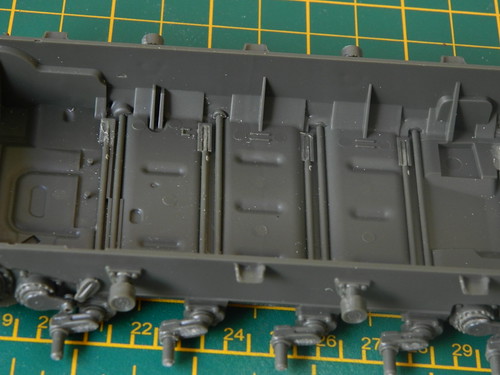
Suspension and bottom tub built up
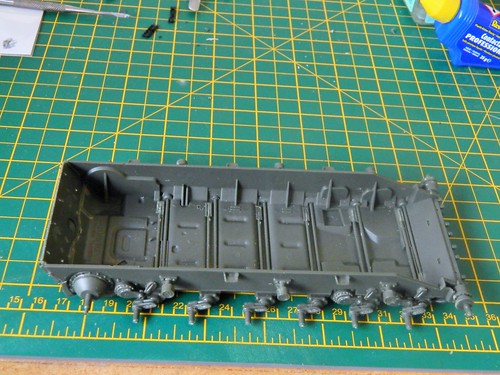
Although fragile, the torsion bars are workable
Ashore, it's wine, women and song, aboard it's rum, bum and baccy
Louisiana, United States
Joined: March 06, 2010
KitMaker: 3,128 posts
Armorama: 2,959 posts
Posted: Tuesday, January 07, 2020 - 03:59 AM UTC
Quoted Text
Remember that the Tiger and Meng kits are different versions of this vehicle.
I have the Trumpeter version and it is much more detailed and partie than the other two.
Having one Meng version (the original incarnation w the mine-roller set), and one Tiger version (revised hull and turret and w the metal barrels), I figure that the one I "need" to add is that Trumpeter kit w the first-version hull and the revised Ataka turret...
And I love Trumpie's "Big Russian" kits...
The main guns are the same for all these BMPT, so a nice set of metal barrels would be a plus for any kit which lacks such, IMO.
And I'm sure that any of these kits will build up to be a grand OOTB thing, but I figure that I won't resist tweaking details on each... Gotta know my own nature by now!
Bob
Queensland, Australia
Joined: May 16, 2010
KitMaker: 232 posts
Armorama: 218 posts
Posted: Tuesday, January 07, 2020 - 10:17 PM UTC
the body builds up nicely. some very (very) fine parts on there and some nice photoetch grills included in the kit, although the small one at the front of the rear plate it hidden by the turret
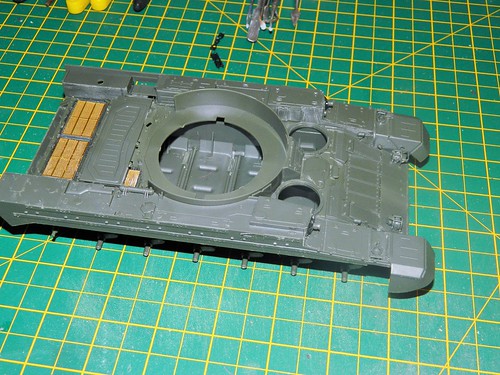
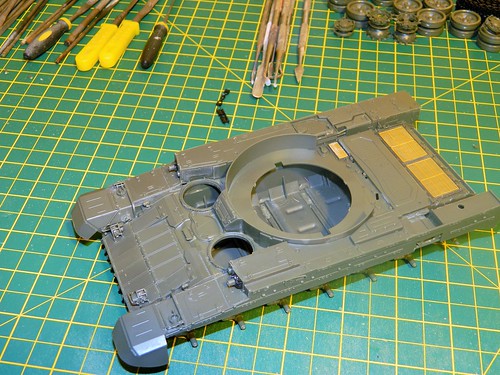
The rear plate done. i soaked the supplied string in white glue to get it to hold shape. note the rear armour around the turret is in the wrong position. the left hand side should be behind the fixed portion and not in front of it (i didnt notice this till trying to fit the turret, which it didnt)

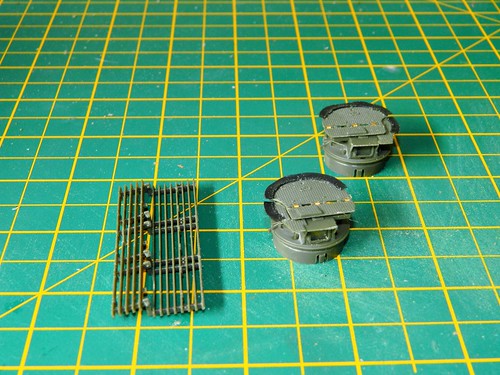
the grenade launcher controller cupolas and the rear bar armour. the cupolas again have photoetch and moving parts?
the bar armour will be left off to ease painting
onto the turret......
Ashore, it's wine, women and song, aboard it's rum, bum and baccy
Queensland, Australia
Joined: May 16, 2010
KitMaker: 232 posts
Armorama: 218 posts
Posted: Tuesday, January 07, 2020 - 10:31 PM UTC
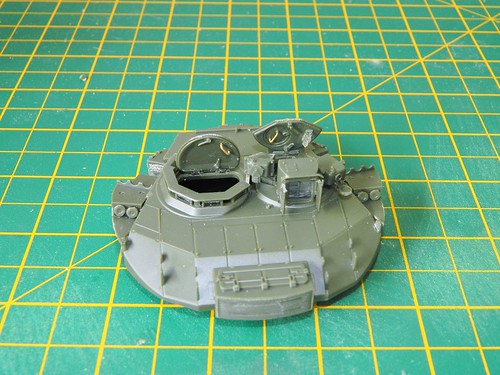
The turret started. the hatches are moveable, with adequate detail on the inside. also included are clear parts for the optics. again Meng have overcomplicated parts for the smoke launchers, making them difficult to clean up
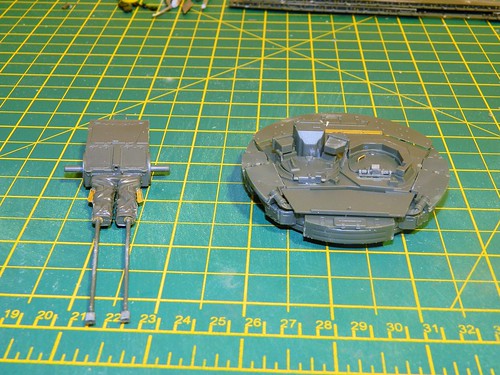
The turret and the weapons section with the infamous plastic barrels. i havent looked at the Tiger kit yet to compare but they are ok. I think the 2 brass pieces either side of the guns are marked up the wrong way in the instructions as i couldnt get them to fit that way, but were ok when reversed
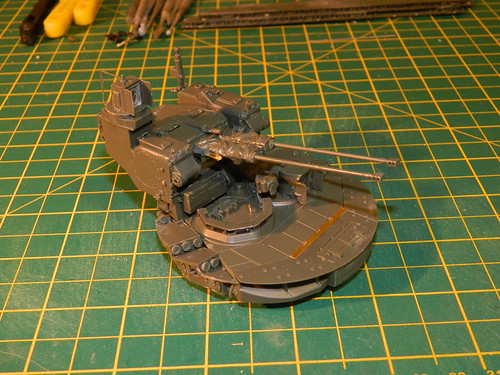
Turret assembly all built up minus the missile launchers. A nice fit, fairly easy to build but with enough detail

the rear. the shell ejection chute is moveable
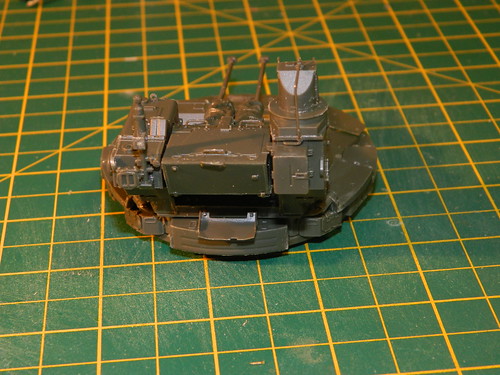
last part is the missile tubes. then onto painting
Ashore, it's wine, women and song, aboard it's rum, bum and baccy
Rio de Janeiro, Brazil
Joined: June 16, 2010
KitMaker: 69 posts
Armorama: 57 posts
Posted: Wednesday, January 08, 2020 - 02:30 PM UTC
Hi deerstalker!
Great choice by this kit!
I'm recently finished the Meng one for a friend, and have one in my stash (with another one from Zvezda for the same friend).
The Zvezda kit is far back away from other manufacturers, it's less expensive? Yes. But I'm think he doesn't worth to buy with another better options on the market. In a side by side comparisson, the diferences are hughe.
The Trumpeter one has great details too, but I choiced the Meng one by his features (workable suspension/tracks, the mineplow, mirrors, etc...).
The only drawback in the Meng kit IMHO, are the terrible strings for tow cables (serious Meng.... metal cables plese), and the details being a bit shallow, not so raised. If you look the handles, screws, etc of the Trumpeter and even Zvezda kits, you will notice they stand out more. But, with a great kit like this, this it's a minor thing.
I builded OOB; I liked the kit barrels, not warped, fine seam line; the tracks are more laborer to do than hard (a surprise with all those parts); I high recomend this kit.
What paint scheme do you choosed?
Queensland, Australia
Joined: May 16, 2010
KitMaker: 232 posts
Armorama: 218 posts
Posted: Wednesday, January 08, 2020 - 08:54 PM UTC
Quoted Text
I builded OOB; I liked the kit barrels, not warped, fine seam line; the tracks are more laborer to do than hard (a surprise with all those parts); I high recomend this kit.
What paint scheme do you choosed?
Yeah, kit barrels were fine for plastic and the trackswere just time consuming, not difficult.
not sure of what colour scheme yet, maybe the 2013 display one, angular sand camo
Ashore, it's wine, women and song, aboard it's rum, bum and baccy
Namabiiru
Associate Editor #399
Rhode Island, United States
Joined: March 05, 2014
KitMaker: 2,888 posts
Armorama: 1,920 posts
Posted: Thursday, January 09, 2020 - 12:28 AM UTC
Personally, I found the tracks to be rather satisfying to build once I got the knack of it. My biggest frustration with the tracks was the number of mis-formed poly connectors. A lot of them had flash, which is notoriously difficult to remove from poly parts--especially ones that small.
Queensland, Australia
Joined: May 16, 2010
KitMaker: 232 posts
Armorama: 218 posts
Posted: Thursday, January 09, 2020 - 11:35 PM UTC
Quoted Text
Personally, I found the tracks to be rather satisfying to build once I got the knack of it. My biggest frustration with the tracks was the number of mis-formed poly connectors. A lot of them had flash, which is notoriously difficult to remove from poly parts--especially ones that small.
was that the centre ones or the outside ones. i must have been lucky, i didnt have flash on either
Ashore, it's wine, women and song, aboard it's rum, bum and baccy
Namabiiru
Associate Editor #399
Rhode Island, United States
Joined: March 05, 2014
KitMaker: 2,888 posts
Armorama: 1,920 posts
Posted: Friday, January 10, 2020 - 12:29 AM UTC
The poly caps with two holes that went on the outside. On just about every sprue there were 10 or so that were in really bad shape. I think my kit may have been an older run and the dies were getting worn.
Queensland, Australia
Joined: May 16, 2010
KitMaker: 232 posts
Armorama: 218 posts
Posted: Saturday, January 11, 2020 - 09:12 PM UTC
Just had a look at the remainder of mine (there were plenty of spares) and they all look pretty good. i guess you got a bad batch
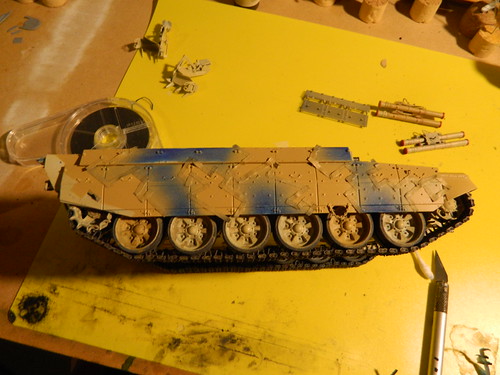
all components now primed and the first coat of sand ivory down. I'm doing the Russian arms expo 2013 scheme
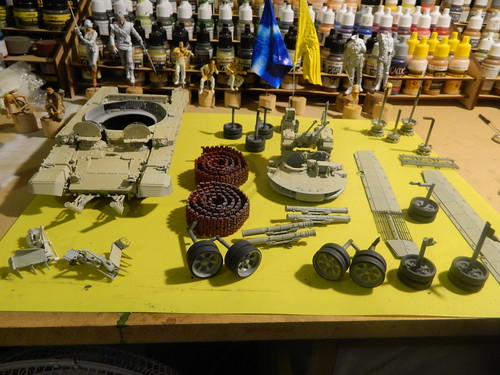
i used the brass wheel mask supplied in the kit, the first time i've used one. Outer rubber tyres coated in revell rubber then the ivory colur sprayed in the centre. nice and simple.
the KMT-8 mine clearing system was again well detailed but easy to build. Again some very fine pieces here make clean up difficult
Ashore, it's wine, women and song, aboard it's rum, bum and baccy
Namabiiru
Associate Editor #399
Rhode Island, United States
Joined: March 05, 2014
KitMaker: 2,888 posts
Armorama: 1,920 posts
Posted: Sunday, January 12, 2020 - 01:29 AM UTC
Colin,
You've blown past my progress! How are you dealing with the numerous vision blocks, etc.? Mask before painting?
BTW, did I miss something? The instructions seem to show 4 x part M31
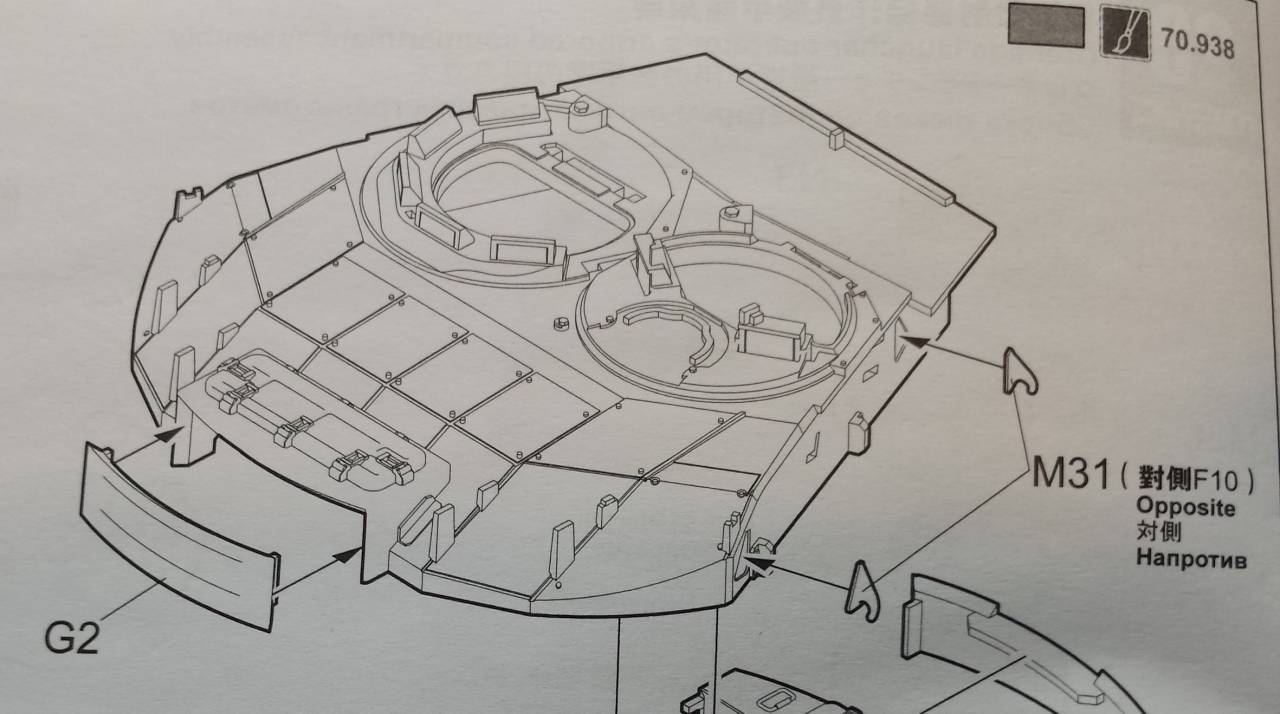
but I can only find one on each of the two M sprues. Did you run into this?
Namabiiru
Associate Editor #399
Rhode Island, United States
Joined: March 05, 2014
KitMaker: 2,888 posts
Armorama: 1,920 posts
Posted: Sunday, January 12, 2020 - 03:14 AM UTC
Belay my last. I surmise from the Chinese subtitles that the other two hooks are actually on the F sprues...
Rio de Janeiro, Brazil
Joined: June 16, 2010
KitMaker: 69 posts
Armorama: 57 posts
Posted: Sunday, January 12, 2020 - 07:09 AM UTC
Quoted Text
all components now primed and the first coat of sand ivory down. I'm doing the Russian arms expo 2013 scheme
Colin... I recommend you to spray inside the wall protections on the turret ring.
Depending how the direction you pose the turret, unpainted surfaces can be seeing.
Quoted Text
Colin,
... How are you dealing with the numerous vision blocks, etc.? Mask before painting?
As you can put they from below, leave it until the model is painted. So you haven't to mask nothing.
Louisiana, United States
Joined: March 06, 2010
KitMaker: 3,128 posts
Armorama: 2,959 posts
Posted: Sunday, January 12, 2020 - 08:32 AM UTC
It is likely true that the clear vision-block pieces can be inserted into their positions from below after all painting is done... This appears to be the case in many kits.
But I strongly suggest 2 things: 1) Do a test-fit from below before you paint... To be sure that you will be able to reach in and fit these blocks easily - you don't want to have to wrestle and struggle getting them in after you have painted up the kit.
And 2) Plug up the topside openings to keep the paint out while painting the build - a small wad of tissue works. This will keep paint from getting into those locations and possibly fouling what had been a good fit when you tested before painting.
I learned the hard way about both 1 and 2 above with my Panda Kurganets-25 IFV kit. While I thought that I could easily reach in and insert the clear vision blocks for the driver's station through the rather large turret opening, I found in testing that it was not easy to actually locate the small hole inside the hull by feel - it was tough to get the parts correctly oriented without seeing what the big ol' fingers were working with! After some twisting around and colorful language, I did get the blocks to fit... So I went ahead and painted the hull, and went to put those blocks in. I could find the hole, but now it was paint-fouled. So I needed to do some cutting and scraping to get the blocks to actually fit. Point: #1 fitting practice is crucial - specially if it requires a bit of contortion to get things lined up. And #2 is critical to avoid adding complication later on.
Just, of course, a suggestion for process!
Cheers! Bob
Queensland, Australia
Joined: May 16, 2010
KitMaker: 232 posts
Armorama: 218 posts
Posted: Sunday, January 12, 2020 - 10:17 PM UTC
Quoted Text
Colin... I recommend you to spray inside the wall protections on the turret ring.
Depending how the direction you pose the turret, unpainted surfaces can be seeing.
As you can put they from below, leave it until the model is painted. So you haven't to mask nothing.
thanks for the heads up. i was trying to minimise paint in the area as the fit is very tight.
as for the vision blocks i'm going to be painting those anyway. since theres nothing behind them i'll attempt to paint as if there were
Ashore, it's wine, women and song, aboard it's rum, bum and baccy
Queensland, Australia
Joined: May 16, 2010
KitMaker: 232 posts
Armorama: 218 posts
Posted: Sunday, January 12, 2020 - 10:19 PM UTC
Quoted Text
Belay my last. I surmise from the Chinese subtitles that the other two hooks are actually on the F sprues...
theres a fair bit of that on this kit. you may notice the smoke grenade caps are the wrong ones, i missed the part on the instructions where they are on a different sprue
Ashore, it's wine, women and song, aboard it's rum, bum and baccy
Queensland, Australia
Joined: May 16, 2010
KitMaker: 232 posts
Armorama: 218 posts
Posted: Saturday, February 15, 2020 - 10:53 PM UTC
I've been travelling around Oz as part of work so took a break.
back now and work begins on the camo
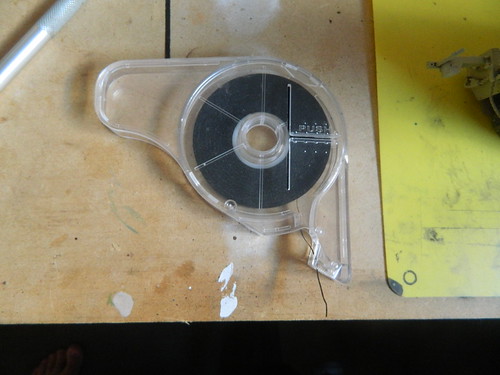
This thin masking tape i found in the local officeworks is pretty good, low tack, and cheap
initial outline

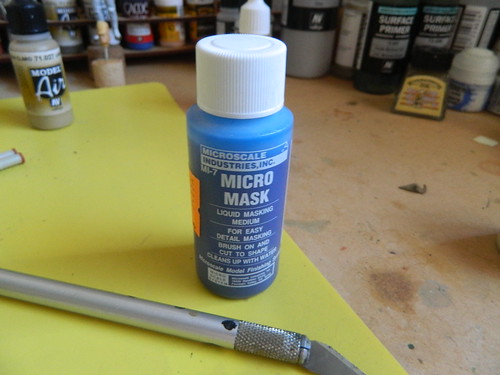
filled in the gaps with this. i did find that if i left this too thin it dries solid and sticks to the paintwork
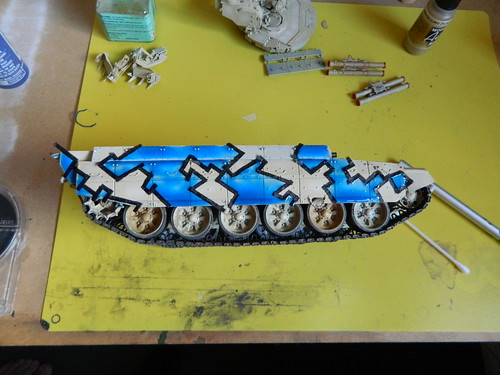
sprayed the medium brown
give it a few minutes to dry and peel off.....
et voila

one thing i did find a pain with the kit is the side armour attachment points. they're very small for a big piece of plastic and i have to be very careful handling them
Ashore, it's wine, women and song, aboard it's rum, bum and baccy
varanusk
Managing Editor Santa Cruz de Tenerife, Spain / España
Joined: July 04, 2013
KitMaker: 1,288 posts
Armorama: 942 posts
Posted: Saturday, February 15, 2020 - 11:34 PM UTC
Good job, looks great. Have to build one myself someday...


